```
Example:
```bash
npx hardhat verify 0x3972c87769886C4f1Ff3a8b52bc57738E82192D5 MockNFT Mock ipfs://QmQ2RFEmZaMds8bRjZCTJxo4DusvcBdLTS6XuDbhp5BZjY 100 --network fuji
```
You can also verify contracts programmatically via script. Example:
```ts title="verify.ts"
import console from "console"
const hre = require("hardhat")
// Define the NFT
const name = "MockNFT"
const symbol = "Mock"
const _metadataUri = "ipfs://QmQ2RFEmZaMds8bRjZCTJxo4DusvcBdLTS6XuDbhp5BZjY"
const _maxTokens = "100"
async function main() {
await hre.run("verify:verify", {
address: "0x3972c87769886C4f1Ff3a8b52bc57738E82192D5",
constructorArguments: [name, symbol, _metadataUri, _maxTokens],
})
}
main()
.then(() => process.exit(0))
.catch((error) => {
console.error(error)
process.exit(1)
})
```
First create your script, then execute it via hardhat by running the following:
```bash
npx hardhat run scripts/verify.ts --network fuji
```
Verifying via terminal will not allow you to pass an array as an argument, however, you can do this when verifying via script by including the array in your *Constructor Arguments*. Example:
```ts
import console from "console"
const hre = require("hardhat")
// Define the NFT
const name = "MockNFT"
const symbol = "Mock"
const _metadataUri =
"ipfs://QmQn2jepp3jZ3tVxoCisMMF8kSi8c5uPKYxd71xGWG38hV/Example"
const _royaltyRecipient = "0xcd3b766ccdd6ae721141f452c550ca635964ce71"
const _royaltyValue = "50000000000000000"
const _custodians = [
"0x8626f6940e2eb28930efb4cef49b2d1f2c9c1199",
"0xf39fd6e51aad88f6f4ce6ab8827279cfffb92266",
"0xdd2fd4581271e230360230f9337d5c0430bf44c0",
]
const _saleLength = "172800"
const _claimAddress = "0xcd3b766ccdd6ae721141f452c550ca635964ce71"
async function main() {
await hre.run("verify:verify", {
address: "0x08bf160B8e56899723f2E6F9780535241F145470",
constructorArguments: [
name,
symbol,
_metadataUri,
_royaltyRecipient,
_royaltyValue,
_custodians,
_saleLength,
_claimAddress,
],
})
}
main()
.then(() => process.exit(0))
.catch((error) => {
console.error(error)
process.exit(1)
})
```
# Using Snowtrace
URL: /docs/dapps/verify-contract/snowtrace
Learn how to verify a contract on the Avalanche C-chain using Snowtrace.
The C-Chain Explorer supports verifying smart contracts, allowing users to review it. The Mainnet C-Chain Explorer is [here](https://snowtrace.io/) and the Fuji Testnet Explorer is [here.](https://testnet.snowtrace.io/)
If you have issues, contact us on [Discord](https://chat.avalabs.org/).
## Steps
Navigate to the *Contract* tab at the Explorer page for your contract's address.

Click *Verify & Publish* to enter the smart contract verification page.
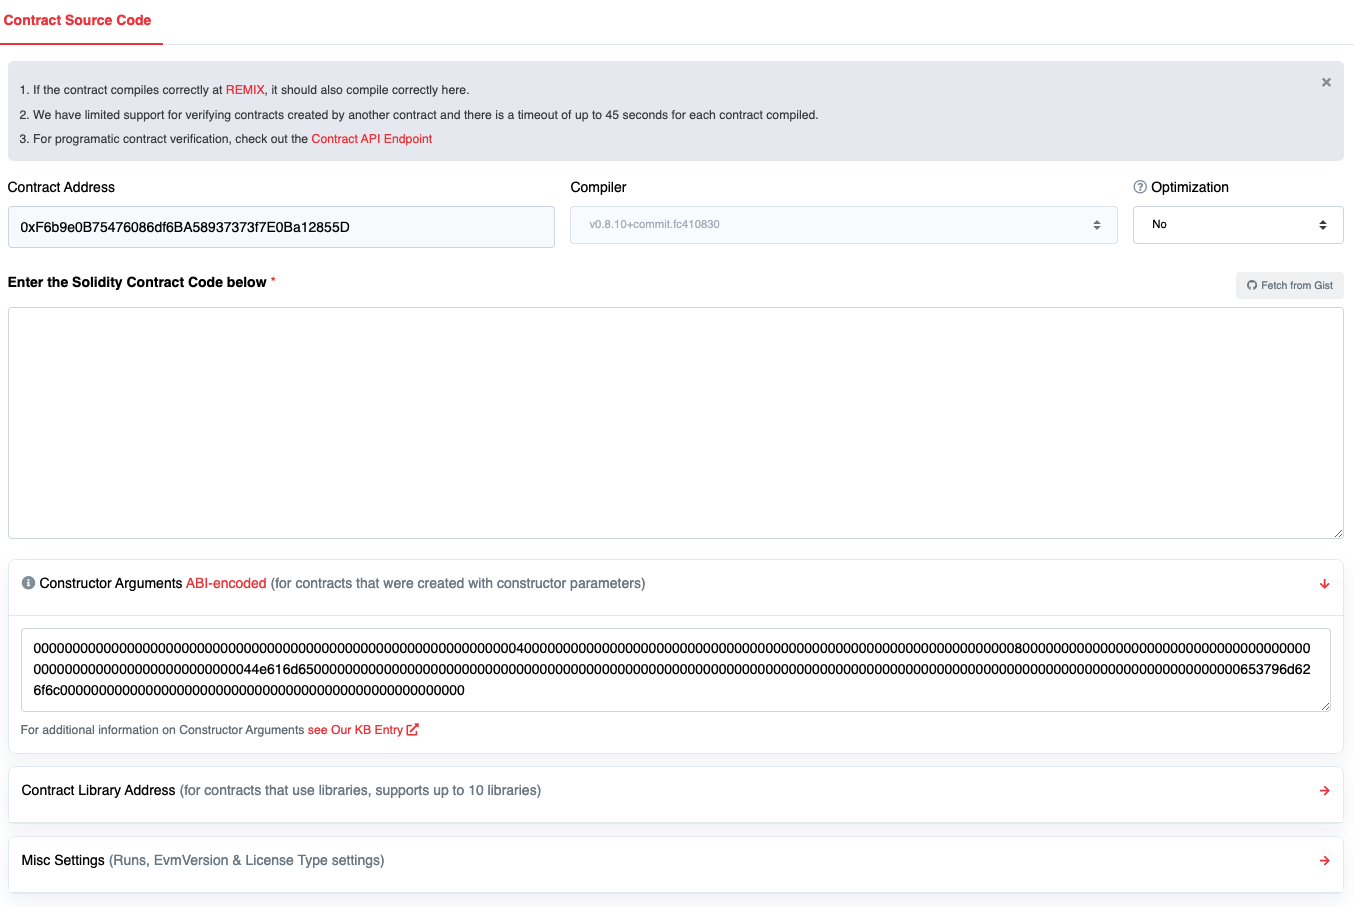
[Libraries](https://docs.soliditylang.org/en/v0.8.4/contracts.html?highlight=libraries#libraries) can be provided. If they are, they must be deployed, independently verified and in the *Add Contract Libraries* section.

The C-Chain Explorer can fetch constructor arguments automatically for simple smart contracts. More complicated contracts might require you to pass in special constructor arguments. Smart contracts with complicated constructors [may have validation issues](/docs/dapps/verify-contract/snowtrace#caveats). You can try this [online ABI encoder](https://abi.hashex.org/).
## Requirements
* **IMPORTANT** Contracts should be verified on Testnet before being deployed to Mainnet to ensure there are no issues.
* Contracts must be flattened. Includes will not work.
* Contracts should be compile-able in [Remix](https://remix.ethereum.org/). A flattened contract with `pragma experimental ABIEncoderV2` (as an example) can create unusual binary and/or constructor blobs. This might cause validation issues.
* The C-Chain Explorer **only** validates [solc JavaScript](https://github.com/ethereum/solc-bin) and only supports [Solidity](https://docs.soliditylang.org/) contracts.
## Libraries
The compile bytecode will identify if there are external libraries. If you released with Remix, you will also see multiple transactions created.
```
{
"linkReferences": {
"contracts/Storage.sol": {
"MathUtils": [
{
"length": 20,
"start": 3203
}
...
]
}
},
"object": "....",
...
}
```
This requires you to add external libraries in order to verify the code.
A library can have dependent libraries. To verify a library, the hierarchy of dependencies will need to be provided to the C-Chain Explorer. Verification may fail if you provide more than the library plus any dependencies (that is you might need to prune the Solidity code to exclude anything but the necessary classes).
You can also see references in the byte code in the form `__$75f20d36....$__`. The keccak256 hash is generated from the library name.
Example [online converter](https://emn178.github.io/online-tools/keccak_256.html): `contracts/Storage.sol:MathUtils` => `75f20d361629befd780a5bd3159f017ee0f8283bdb6da80805f83e829337fd12`
## Examples
* [SwapFlashLoan](https://testnet.snowtrace.io/address/0x12DF75Fed4DEd309477C94cE491c67460727C0E8/contract/43113/code)
SwapFlashLoan uses `swaputils` and `mathutils`:
* [SwapUtils](https://testnet.snowtrace.io/address/0x6703e4660E104Af1cD70095e2FeC337dcE034dc1/contract/43113/code)
SwapUtils requires mathutils:
* [MathUtils](https://testnet.snowtrace.io/address/0xbA21C84E4e593CB1c6Fe6FCba340fa7795476966/contract/43113/code)
## Caveats
### SPDX License Required
An SPDX must be provided.
```solidity
// SPDX-License-Identifier: ...
```
### `keccak256` Strings Processed
The C-Chain Explorer interprets all keccak256(...) strings, even those in comments. This can cause issues with constructor arguments.
```solidity
/// keccak256("1");
keccak256("2");
```
This could cause automatic constructor verification failures. If you receive errors about constructor arguments they can be provided in ABI hex encoded form on the contract verification page.
### Solidity Constructors
Constructors and inherited constructors can cause problems verifying the constructor arguments. Example:
```solidity
abstract contract Parent {
constructor () {
address msgSender = ...;
emit Something(address(0), msgSender);
}
}
contract Main is Parent {
constructor (
string memory _name,
address deposit,
uint fee
) {
...
}
}
```
If you receive errors about constructor arguments, they can be provided in ABI hex encoded form on the contract verification page.
# Fuji Testnet
URL: /docs/quick-start/networks/fuji-testnet
Learn about the official Testnet for the Avalanche ecosystem.
Fuji's infrastructure imitates Avalanche Mainnet. It's comprised of a [Primary Network](/docs/quick-start/primary-network) formed by instances of X, P, and C-Chain, as well as many test Avalanche L1s.
## When to Use Fuji
Fuji provides users with a platform to simulate the conditions found in the Mainnet environment. It enables developers to deploy demo Smart Contracts, allowing them to test and refine their applications before deploying them on the [Primary Network](/docs/quick-start/primary-network).
Users interested in experimenting with Avalanche can receive free testnet AVAX, allowing them to explore the platform without any risk. These testnet tokens have no value in the real world and are only meant for experimentation purposes within the Fuji test network.
To receive testnet tokens, users can request funds from the [Avalanche Faucet](/docs/dapps/smart-contract-dev/get-test-funds). If there's already an AVAX balance greater than zero on Mainnet, paste the C-Chain address there, and request test tokens. Otherwise, please request a faucet coupon on [Guild](https://guild.xyz/avalanche). Admins and mods on the official [Discord](https://discord.com/invite/RwXY7P6) can provide testnet AVAX if developers are unable to obtain it from the other two options.
## Add Avalanche C-Chain Testnet to Wallet
* **Network Name**: Avalanche Fuji C-Chain
* **RPC URL**: [https://api.avax-test.network/ext/bc/C/rpc](https://api.avax-test.network/ext/bc/C/rpc)
* **WebSocket URL**: wss\://api.avax-test.network/ext/bc/C/ws
* **ChainID**: `43113`
* **Symbol**: `AVAX`
* **Explorer**: [https://subnets-test.avax.network/c-chain](https://subnets-test.avax.network/c-chain)
Head over to explorer linked above and select "Add Avalanche C-Chain to Wallet" under "Chain Info" to automatically add the network.
## Additional Details
* Fuji Testnet has its own dedicated [block explorer](https://subnets-test.avax.network/).
* The Public API endpoint for Fuji is not the same as Mainnet. More info is available in the [Public API Server](/docs/tooling/rpc-providers) documentation.
* You can run a Fuji validator node by staking only **1 Fuji AVAX**.
# Avalanche Mainnet
URL: /docs/quick-start/networks/mainnet
Learn about the Avalanche Mainnet.
The Avalanche Mainnet refers to the main network of the Avalanche blockchain where real transactions and smart contract executions occur. It is the final and production-ready version of the blockchain where users can interact with the network and transact with real world assets.
A *network of networks*, Avalanche Mainnet includes the [Primary Network](/docs/quick-start/primary-network) formed by the X, P, and C-Chain, as well as all in-production [Avalanche L1s](/docs/quick-start/avalanche-l1s).
These Avalanche L1s are independent blockchain sub-networks that can be tailored to specific application use cases, use their own consensus mechanisms, define their own token economics, and be run by different [virtual machines](/docs/quick-start/virtual-machines).
## Add Avalanche C-Chain Mainnet to Wallet
* **Network Name**: Avalanche Mainnet C-Chain
* **RPC URL**: [https://api.avax.network/ext/bc/C/rpc](https://api.avax.network/ext/bc/C/rpc)
* **WebSocket URL**: wss\://api.avax.network/ext/bc/C/ws
* **ChainID**: `43114`
* **Symbol**: `AVAX`
* **Explorer**: [https://subnets.avax.network/c-chain](https://subnets.avax.network/c-chain)
Head over to explorer linked above and select "Add Avalanche C-Chain to Wallet" under "Chain Info" to automatically add the network.
# C-Chain Configurations
URL: /docs/nodes/chain-configs/c-chain
This page describes the configuration options available for the C-Chain.
In order to specify a config for the C-Chain, a JSON config file should be placed at `{chain-config-dir}/C/config.json`. This file does not exist by default.
For example if `chain-config-dir` has the default value which is `$HOME/.avalanchego/configs/chains`, then `config.json` should be placed at `$HOME/.avalanchego/configs/chains/C/config.json`.
The C-Chain config is printed out in the log when a node starts. Default values for each config flag are specified below.
Default values are overridden only if specified in the given config file. It is recommended to only provide values which are different from the default, as that makes the config more resilient to future default changes. Otherwise, if defaults change, your node will remain with the old values, which might adversely affect your node operation.
## Gas Configuration
### `gas-target`
*Integer*
The target gas per second that this node will attempt to use when creating blocks. If this config is not specified, the node will default to use the parent block's target gas per second. Defaults to using the parent block's target.
## State Sync
### `state-sync-enabled`
*Boolean*
Set to `true` to start the chain with state sync enabled. The peer will download chain state from peers up to a recent block near tip, then proceed with normal bootstrapping.
Defaults to perform state sync if starting a new node from scratch. However, if running with an existing database it will default to false and not perform state sync on subsequent runs.
Please note that if you need historical data, state sync isn't the right option. However, it is sufficient if you are just running a validator.
### `state-sync-skip-resume`
*Boolean*
If set to `true`, the chain will not resume a previously started state sync operation that did not complete. Normally, the chain should be able to resume state syncing without any issue. Defaults to `false`.
### `state-sync-min-blocks`
*Integer*
Minimum number of blocks the chain should be ahead of the local node to prefer state syncing over bootstrapping. If the node's database is already close to the chain's tip, bootstrapping is more efficient. Defaults to `300000`.
### `state-sync-ids`
*String*
Comma separated list of node IDs (prefixed with `NodeID-`) to fetch state sync data from. An example setting of this field would be `--state-sync-ids="NodeID-7Xhw2mDxuDS44j42TCB6U5579esbSt3Lg,NodeID-MFrZFVCXPv5iCn6M9K6XduxGTYp891xXZ"`. If not specified (or empty), peers are selected at random. Defaults to empty string (`""`).
### `state-sync-server-trie-cache`
*Integer*
Size of trie cache used for providing state sync data to peers in MBs. Should be a multiple of `64`. Defaults to `64`.
### `state-sync-commit-interval`
*Integer*
Specifies the commit interval at which to persist EVM and atomic tries during state sync. Defaults to `16384`.
### `state-sync-request-size`
*Integer*
The number of key/values to ask peers for per state sync request. Defaults to `1024`.
## Continuous Profiling
### `continuous-profiler-dir`
*String*
Enables the continuous profiler (captures a CPU/Memory/Lock profile at a specified interval). Defaults to `""`. If a non-empty string is provided, it enables the continuous profiler and specifies the directory to place the profiles in.
### `continuous-profiler-frequency`
*Duration*
Specifies the frequency to run the continuous profiler. Defaults `900000000000` nano seconds which is 15 minutes.
### `continuous-profiler-max-files`
*Integer*
Specifies the maximum number of profiles to keep before removing the oldest. Defaults to `5`.
## Enabling Avalanche Specific APIs
### `admin-api-enabled`
*Boolean*
Enables the Admin API. Defaults to `false`.
### `admin-api-dir`
*String*
Specifies the directory for the Admin API to use to store CPU/Mem/Lock Profiles. Defaults to `""`.
### `warp-api-enabled`
*Boolean*
Enables the Warp API. Defaults to `false`.
### Enabling EVM APIs
### `eth-apis` (\[]string)
Use the `eth-apis` field to specify the exact set of below services to enable on your node. If this field is not set, then the default list will be: `["eth","eth-filter","net","web3","internal-eth","internal-blockchain","internal-transaction"]`.
The names used in this configuration flag have been updated in Coreth `v0.8.14`. The previous names containing `public-` and `private-` are deprecated. While the current version continues to accept deprecated values, they may not be supported in future updates and updating to the new values is recommended.
The mapping of deprecated values and their updated equivalent follows:
| Deprecated | Use instead |
| -------------------------------- | -------------------- |
| public-eth | eth |
| public-eth-filter | eth-filter |
| private-admin | admin |
| private-debug | debug |
| public-debug | debug |
| internal-public-eth | internal-eth |
| internal-public-blockchain | internal-blockchain |
| internal-public-transaction-pool | internal-transaction |
| internal-public-tx-pool | internal-tx-pool |
| internal-public-debug | internal-debug |
| internal-private-debug | internal-debug |
| internal-public-account | internal-account |
| internal-private-personal | internal-personal |
If you populate this field, it will override the defaults so you must include every service you wish to enable.
### `eth`
The API name `public-eth` is deprecated as of v1.7.15, and the APIs previously under this name have been migrated to `eth`.
Adds the following RPC calls to the `eth_*` namespace. Defaults to `true`.
`eth_coinbase` `eth_etherbase`
### `eth-filter`
The API name `public-eth-filter` is deprecated as of v1.7.15, and the APIs previously under this name have been migrated to `eth-filter`.
Enables the public filter API for the `eth_*` namespace. Defaults to `true`.
Adds the following RPC calls (see [here](https://eth.wiki/json-rpc/API) for complete documentation):
* `eth_newPendingTransactionFilter`
* `eth_newPendingTransactions`
* `eth_newAcceptedTransactions`
* `eth_newBlockFilter`
* `eth_newHeads`
* `eth_logs`
* `eth_newFilter`
* `eth_getLogs`
* `eth_uninstallFilter`
* `eth_getFilterLogs`
* `eth_getFilterChanges`
### `admin`
The API name `private-admin` is deprecated as of v1.7.15, and the APIs previously under this name have been migrated to `admin`.
Adds the following RPC calls to the `admin_*` namespace. Defaults to `false`.
* `admin_importChain`
* `admin_exportChain`
### `debug`
The API names `private-debug` and `public-debug` are deprecated as of v1.7.15, and the APIs previously under these names have been migrated to `debug`.
Adds the following RPC calls to the `debug_*` namespace. Defaults to `false`.
* `debug_dumpBlock`
* `debug_accountRange`
* `debug_preimage`
* `debug_getBadBlocks`
* `debug_storageRangeAt`
* `debug_getModifiedAccountsByNumber`
* `debug_getModifiedAccountsByHash`
* `debug_getAccessibleState`
### `net`
Adds the following RPC calls to the `net_*` namespace. Defaults to `true`.
* `net_listening`
* `net_peerCount`
* `net_version`
Note: Coreth is a virtual machine and does not have direct access to the networking layer, so `net_listening` always returns true and `net_peerCount` always returns 0. For accurate metrics on the network layer, users should use the AvalancheGo APIs.
### `debug-tracer`
Adds the following RPC calls to the `debug_*` namespace. Defaults to `false`.
* `debug_traceChain`
* `debug_traceBlockByNumber`
* `debug_traceBlockByHash`
* `debug_traceBlock`
* `debug_traceBadBlock`
* `debug_intermediateRoots`
* `debug_traceTransaction`
* `debug_traceCall`
### `web3`
Adds the following RPC calls to the `web3_*` namespace. Defaults to `true`.
* `web3_clientVersion`
* `web3_sha3`
### `internal-eth`
The API name `internal-public-eth` is deprecated as of v1.7.15, and the APIs previously under this name have been migrated to `internal-eth`.
Adds the following RPC calls to the `eth_*` namespace. Defaults to `true`.
* `eth_gasPrice`
* `eth_baseFee`
* `eth_maxPriorityFeePerGas`
* `eth_feeHistory`
### `internal-blockchain`
The API name `internal-public-blockchain` is deprecated as of v1.7.15, and the APIs previously under this name have been migrated to `internal-blockchain`.
Adds the following RPC calls to the `eth_*` namespace. Defaults to `true`.
* `eth_chainId`
* `eth_blockNumber`
* `eth_getBalance`
* `eth_getProof`
* `eth_getHeaderByNumber`
* `eth_getHeaderByHash`
* `eth_getBlockByNumber`
* `eth_getBlockByHash`
* `eth_getUncleBlockByNumberAndIndex`
* `eth_getUncleBlockByBlockHashAndIndex`
* `eth_getUncleCountByBlockNumber`
* `eth_getUncleCountByBlockHash`
* `eth_getCode`
* `eth_getStorageAt`
* `eth_call`
* `eth_estimateGas`
* `eth_createAccessList`
### `internal-transaction`
The API name `internal-public-transaction-pool` is deprecated as of v1.7.15, and the APIs previously under this name have been migrated to `internal-transaction`.
Adds the following RPC calls to the `eth_*` namespace. Defaults to `true`.
* `eth_getBlockTransactionCountByNumber`
* `eth_getBlockTransactionCountByHash`
* `eth_getTransactionByBlockNumberAndIndex`
* `eth_getTransactionByBlockHashAndIndex`
* `eth_getRawTransactionByBlockNumberAndIndex`
* `eth_getRawTransactionByBlockHashAndIndex`
* `eth_getTransactionCount`
* `eth_getTransactionByHash`
* `eth_getRawTransactionByHash`
* `eth_getTransactionReceipt`
* `eth_sendTransaction`
* `eth_fillTransaction`
* `eth_sendRawTransaction`
* `eth_sign`
* `eth_signTransaction`
* `eth_pendingTransactions`
* `eth_resend`
### `internal-tx-pool`
The API name `internal-public-tx-pool` is deprecated as of v1.7.15, and the APIs previously under this name have been migrated to `internal-tx-pool`.
Adds the following RPC calls to the `txpool_*` namespace. Defaults to `false`.
* `txpool_content`
* `txpool_contentFrom`
* `txpool_status`
* `txpool_inspect`
### `internal-debug`
The API names `internal-private-debug` and `internal-public-debug` are deprecated as of v1.7.15, and the APIs previously under these names have been migrated to `internal-debug`.
Adds the following RPC calls to the `debug_*` namespace. Defaults to `false`.
* `debug_getHeaderRlp`
* `debug_getBlockRlp`
* `debug_printBlock`
* `debug_chaindbProperty`
* `debug_chaindbCompact`
### `debug-handler`
Adds the following RPC calls to the `debug_*` namespace. Defaults to `false`.
* `debug_verbosity`
* `debug_vmodule`
* `debug_backtraceAt`
* `debug_memStats`
* `debug_gcStats`
* `debug_blockProfile`
* `debug_setBlockProfileRate`
* `debug_writeBlockProfile`
* `debug_mutexProfile`
* `debug_setMutexProfileFraction`
* `debug_writeMutexProfile`
* `debug_writeMemProfile`
* `debug_stacks`
* `debug_freeOSMemory`
* `debug_setGCPercent`
### `internal-account`
The API name `internal-public-account` is deprecated as of v1.7.15, and the APIs previously under this name have been migrated to `internal-account`.
Adds the following RPC calls to the `eth_*` namespace. Defaults to `true`.
* `eth_accounts`
### `internal-personal`
The API name `internal-private-personal` is deprecated as of v1.7.15, and the APIs previously under this name have been migrated to `internal-personal`.
Adds the following RPC calls to the `personal_*` namespace. Defaults to `false`.
* `personal_listAccounts`
* `personal_listWallets`
* `personal_openWallet`
* `personal_deriveAccount`
* `personal_newAccount`
* `personal_importRawKey`
* `personal_unlockAccount`
* `personal_lockAccount`
* `personal_sendTransaction`
* `personal_signTransaction`
* `personal_sign`
* `personal_ecRecover`
* `personal_signAndSendTransaction`
* `personal_initializeWallet`
* `personal_unpair`
## API Configuration
### `rpc-gas-cap`
*Integer*
The maximum gas to be consumed by an RPC Call (used in `eth_estimateGas` and `eth_call`). Defaults to `50,000,000`.
### `rpc-tx-fee-cap`
*Integer*
Global transaction fee (price \* `gaslimit`) cap (measured in AVAX) for send-transaction variants. Defaults to `100`.
### `api-max-duration`
*Duration*
Maximum API call duration. If API calls exceed this duration, they will time out. Defaults to `0` (no maximum).
### `api-max-blocks-per-request`
*Integer*
Maximum number of blocks to serve per `getLogs` request. Defaults to `0` (no maximum).
### `ws-cpu-refill-rate`
*Duration*
The refill rate specifies the maximum amount of CPU time to allot a single connection per second. Defaults to no maximum (`0`).
### `ws-cpu-max-stored`
*Duration*
Specifies the maximum amount of CPU time that can be stored for a single WS connection. Defaults to no maximum (`0`).
### `allow-unfinalized-queries`
Allows queries for unfinalized (not yet accepted) blocks/transactions. Defaults to `false`.
### `accepted-cache-size`
*Integer*
Specifies the depth to keep accepted headers and accepted logs in the cache. This is particularly useful to improve the performance of `eth_getLogs` for recent logs. Defaults to `32`.
### `http-body-limit`
*Integer*
Maximum size in bytes for HTTP request bodies. Defaults to `0` (no limit).
## Transaction Pool
### `local-txs-enabled`
*Boolean*
Enables local transaction handling (prioritizes transactions submitted through this node). Defaults to `false`.
### `allow-unprotected-txs`
*Boolean*
If `true`, the APIs will allow transactions that are not replay protected (EIP-155) to be issued through this node. Defaults to `false`.
### `allow-unprotected-tx-hashes`
*\[]TxHash*
Specifies an array of transaction hashes that should be allowed to bypass replay protection. This flag is intended for node operators that want to explicitly allow specific transactions to be issued through their API. Defaults to an empty list.
### `price-options-slow-fee-percentage`
*Integer*
Percentage to apply for slow fee estimation. Defaults to `95`.
### `price-options-fast-fee-percentage`
*Integer*
Percentage to apply for fast fee estimation. Defaults to `105`.
### `price-options-max-tip`
*Integer*
Maximum tip in wei for fee estimation. Defaults to `20000000000` (20 Gwei).
#### `push-gossip-percent-stake`
*Float*
Percentage of the total stake to send transactions received over the RPC. Defaults to 0.9.
### `push-gossip-num-validators`
*Integer*
Number of validators to initially send transactions received over the RPC. Defaults to 100.
### `push-gossip-num-peers`
*Integer*
Number of peers to initially send transactions received over the RPC. Defaults to 0.
### `push-regossip-num-validators`
*Integer*
Number of validators to periodically send transactions received over the RPC. Defaults to 10.
### `push-regossip-num-peers`
*Integer*
Number of peers to periodically send transactions received over the RPC. Defaults to 0.
### `push-gossip-frequency`
*Duration*
Frequency to send transactions received over the RPC to peers. Defaults to `100000000` nano seconds which is 100 milliseconds.
### `pull-gossip-frequency`
*Duration*
Frequency to request transactions from peers. Defaults to `1000000000` nano seconds which is 1 second.
### `regossip-frequency`
*Duration*
Amount of time that should elapse before we attempt to re-gossip a transaction that was already gossiped once. Defaults to `30000000000` nano seconds which is 30 seconds.
### `tx-pool-price-limit`
*Integer*
Minimum gas price to enforce for acceptance into the pool. Defaults to 1 wei.
### `tx-pool-price-bump`
*Integer*
Minimum price bump percentage to replace an already existing transaction (nonce). Defaults to 10%.
### `tx-pool-account-slots`
*Integer*
Number of executable transaction slots guaranteed per account. Defaults to 16.
### `tx-pool-global-slots`
*Integer*
Maximum number of executable transaction slots for all accounts. Defaults to 5120.
### `tx-pool-account-queue`
*Integer*
Maximum number of non-executable transaction slots permitted per account. Defaults to 64.
### `tx-pool-global-queue`
*Integer*
Maximum number of non-executable transaction slots for all accounts. Defaults to 1024.
### `tx-pool-lifetime`
*Duration*
Maximum duration a non-executable transaction will be allowed in the poll. Defaults to `600000000000` nano seconds which is 10 minutes.
## Metrics
### `metrics-expensive-enabled`
*Boolean*
Enables expensive metrics. Defaults to `true`.
## Snapshots
### `snapshot-wait`
*Boolean*
If `true`, waits for snapshot generation to complete before starting. Defaults to `false`.
### `snapshot-verification-enabled`
*Boolean*
If `true`, verifies the complete snapshot after it has been generated. Defaults to `false`.
## Logging
### `log-level`
*String*
Defines the log level for the chain. Must be one of `"trace"`, `"debug"`, `"info"`, `"warn"`, `"error"`, `"crit"`. Defaults to `"info"`.
### `log-json-format`
*Boolean*
If `true`, changes logs to JSON format. Defaults to `false`.
## Keystore Settings
### `keystore-directory`
*String*
The directory that contains private keys. Can be given as a relative path. If empty, uses a temporary directory at `coreth-keystore`. Defaults to the empty string (`""`).
### `keystore-external-signer`
*String*
Specifies an external URI for a clef-type signer. Defaults to the empty string (`""` as not enabled).
### `keystore-insecure-unlock-allowed`
*Boolean*
If `true`, allow users to unlock accounts in unsafe HTTP environment. Defaults to `false`.
## Database
### `trie-clean-cache`
*Integer*
Size of cache used for clean trie nodes (in MBs). Should be a multiple of `64`. Defaults to `512`.
### `trie-dirty-cache`
*Integer*
Size of cache used for dirty trie nodes (in MBs). When the dirty nodes exceed this limit, they are written to disk. Defaults to `512`.
### `trie-dirty-commit-target`
*Integer*
Memory limit to target in the dirty cache before performing a commit (in MBs). Defaults to `20`.
### `trie-prefetcher-parallelism`
*Integer*
Max concurrent disk reads trie pre-fetcher should perform at once. Defaults to `16`.
### `snapshot-cache`
*Integer*
Size of the snapshot disk layer clean cache (in MBs). Should be a multiple of `64`. Defaults to `256`.
### `acceptor-queue-limit`
*Integer*
Specifies the maximum number of blocks to queue during block acceptance before blocking on Accept. Defaults to `64`.
### `commit-interval`
*Integer*
Specifies the commit interval at which to persist the merkle trie to disk. Defaults to `4096`.
### `pruning-enabled`
*Boolean*
If `true`, database pruning of obsolete historical data will be enabled. This reduces the amount of data written to disk, but does not delete any state that is written to the disk previously. This flag should be set to `false` for nodes that need access to all data at historical roots. Pruning will be done only for new data. Defaults to `false` in v1.4.9, and `true` in subsequent versions.
If a node is ever run with `pruning-enabled` as `false` (archival mode), setting `pruning-enabled` to `true` will result in a warning and the node will shut down. This is to protect against unintentional misconfigurations of an archival node.
To override this and switch to pruning mode, in addition to `pruning-enabled: true`, `allow-missing-tries` should be set to `true` as well.
### `populate-missing-tries`
*uint64*
If non-nil, sets the starting point for repopulating missing tries to re-generate archival merkle forest.
To restore an archival merkle forest that has been corrupted (missing trie nodes for a section of the blockchain), specify the starting point of the last block on disk, where the full trie was available at that block to re-process blocks from that height onwards and re-generate the archival merkle forest on startup. This flag should be used once to re-generate the archival merkle forest and should be removed from the config after completion. This flag will cause the node to delay starting up while it re-processes old blocks.
### `populate-missing-tries-parallelism`
*Integer*
Number of concurrent readers to use when re-populating missing tries on startup. Defaults to 1024.
### `allow-missing-tries`
*Boolean*
If `true`, allows a node that was once configured as archival to switch to pruning mode. Defaults to `false`.
### `preimages-enabled`
*Boolean*
If `true`, enables preimages. Defaults to `false`.
### `prune-warp-db-enabled`
*Boolean*
If `true`, clears the warp database on startup. Defaults to `false`.
### `offline-pruning-enabled`
*Boolean*
If `true`, offline pruning will run on startup and block until it completes (approximately one hour on Mainnet). This will reduce the size of the database by deleting old trie nodes. **While performing offline pruning, your node will not be able to process blocks and will be considered offline.** While ongoing, the pruning process consumes a small amount of additional disk space (for deletion markers and the bloom filter). For more information see [here.](https://build.avax.network/docs/nodes/maintain/reduce-disk-usage#disk-space-considerations)
Since offline pruning deletes old state data, this should not be run on nodes that need to support archival API requests.
This is meant to be run manually, so after running with this flag once, it must be toggled back to false before running the node again. Therefore, you should run with this flag set to true and then set it to false on the subsequent run.
### `offline-pruning-bloom-filter-size`
*Integer*
This flag sets the size of the bloom filter to use in offline pruning (denominated in MB and defaulting to 512 MB). The bloom filter is kept in memory for efficient checks during pruning and is also written to disk to allow pruning to resume without re-generating the bloom filter.
The active state is added to the bloom filter before iterating the DB to find trie nodes that can be safely deleted, any trie nodes not in the bloom filter are considered safe for deletion. The size of the bloom filter may impact its false positive rate, which can impact the results of offline pruning. This is an advanced parameter that has been tuned to 512 MB and should not be changed without thoughtful consideration.
### `offline-pruning-data-directory`
*String*
This flag must be set when offline pruning is enabled and sets the directory that offline pruning will use to write its bloom filter to disk. This directory should not be changed in between runs until offline pruning has completed.
### `transaction-history`
*Integer*
Number of recent blocks for which to maintain transaction lookup indices in the database. If set to 0, transaction lookup indices will be maintained for all blocks. Defaults to `0`.
### `state-history`
*Integer*
The maximum number of blocks from head whose state histories are reserved for pruning blockchains. Defaults to `32`.
### `historical-proof-query-window`
*Integer*
When running in archive mode only, the number of blocks before the last accepted block to be accepted for proof state queries. Defaults to `43200`.
### `skip-tx-indexing`
*Boolean*
If set to `true`, the node will not index transactions. TxLookupLimit can be still used to control deleting old transaction indices. Defaults to `false`.
### `inspect-database`
*Boolean*
If set to `true`, inspects the database on startup. Defaults to `false`.
## VM Networking
### `max-outbound-active-requests`
*Integer*
Specifies the maximum number of outbound VM2VM requests in flight at once. Defaults to `16`.
## Warp Configuration
### `warp-off-chain-messages`
*Array of Hex Strings*
Encodes off-chain messages (unrelated to any on-chain event ie. block or AddressedCall) that the node should be willing to sign. Note: only supports AddressedCall payloads. Defaults to empty array.
## Miscellaneous
### `skip-upgrade-check`
*Boolean*
If set to `true`, the chain will skip verifying that all expected network upgrades have taken place before the last accepted block on startup. This allows node operators to recover if their node has accepted blocks after a network upgrade with a version of the code prior to the upgrade. Defaults to `false`.
# Chain Specific Configs
URL: /docs/nodes/chain-configs
Some chains allow the node operator to provide a custom configuration. AvalancheGo can read chain configurations from files and pass them to the corresponding chains on initialization.
AvalancheGo looks for these files in the directory specified by `--chain-config-dir` AvalancheGo flag, as documented [here](/docs/nodes/configure/configs-flags#--chain-config-dir-string). If omitted, value defaults to `$HOME/.avalanchego/configs/chains`. This directory can have sub-directories whose names are chain IDs or chain aliases. Each sub-directory contains the configuration for the chain specified in the directory name. Each sub-directory should contain a file named `config`, whose value is passed in when the corresponding chain is initialized (see below for extension). For example, config for the C-Chain should be at: `{chain-config-dir}/C/config.json`.
This also applies to Avalanche L1s, for example, if an Avalanche L1's chain id is `2ebCneCbwthjQ1rYT41nhd7M76Hc6YmosMAQrTFhBq8qeqh6tt`, the config for this chain should be at `{chain-config-dir}/2ebCneCbwthjQ1rYT41nhd7M76Hc6YmosMAQrTFhBq8qeqh6tt/config.json`
}>
By default, none of these directories and/or files exist. You would need to create them manually if needed.
The filename extension that these files should have, and the contents of these files, is VM-dependent. For example, some chains may expect `config.txt` while others expect `config.json`. If multiple files are provided with the same name but different extensions (for example `config.json` and `config.txt`) in the same sub-directory, AvalancheGo will exit with an error.
For a given chain, AvalancheGo will follow the sequence below to look for its config file, where all folder and file names are case sensitive:
1. First it looks for a config sub-directory whose name is the Chain ID.
2. If it isn't found, it looks for a config sub-directory whose name is the chain's primary alias.
3. If it's not found, it looks for a config sub-directory whose name is another alias for the chain
Alternatively, for some setups it might be more convenient to provide config entirely via the command line. For that, you can use AvalancheGo `--chain-config-content` flag, as documented [here](/docs/nodes/configure/configs-flags#--chain-config-content-string).
It is not required to provide these custom configurations. If they are not provided, a VM-specific default config will be used. And the values of these default config are printed when the node starts.
## Avalanche L1 Chain Configs
As mentioned above, if an Avalanche L1's chain id is `2ebCneCbwthjQ1rYT41nhd7M76Hc6YmosMAQrTFhBq8qeqh6tt`, the config for this chain should be at `{chain-config-dir}/2ebCneCbwthjQ1rYT41nhd7M76Hc6YmosMAQrTFhBq8qeqh6tt/config.json`
## FAQs
* When using `getBlockNumber` it will return finalized blocks. To allow for queries for unfinalized (not yet accepted) blocks/transactions use `allow-unfainalized-queries` and set to true (by default it is set to `false`)
* When deactivating offline pruning `(pruning-enabled: false)` from previously enabled state, this will not impact blocks whose state was already pruned. This will return missing trie node errors, as the node can't lookup the state of a historical block if that state was deleted.
# P-Chain
URL: /docs/nodes/chain-configs/p-chain
This page is an overview of the configurations and flags supported by P-Chain.
This document provides details about the configuration options available for the PlatformVM.
## Standard Configurations
In order to specify a configuration for the PlatformVM, you need to define a `Config` struct and its parameters. The default values for these parameters are:
| Option | Type | Default |
| ------------------------------------ | --------------- | ------------------ |
| `network` | `Network` | `DefaultNetwork` |
| `block-cache-size` | `int` | `64 * units.MiB` |
| `tx-cache-size` | `int` | `128 * units.MiB` |
| `transformed-subnet-tx-cache-size` | `int` | `4 * units.MiB` |
| `reward-utxos-cache-size` | `int` | `2048` |
| `chain-cache-size` | `int` | `2048` |
| `chain-db-cache-size` | `int` | `2048` |
| `block-id-cache-size` | `int` | `8192` |
| `fx-owner-cache-size` | `int` | `4 * units.MiB` |
| `subnet-to-l1-conversion-cache-size` | `int` | `4 * units.MiB` |
| `l1-weights-cache-size` | `int` | `16 * units.KiB` |
| `l1-inactive-validators-cache-size` | `int` | `256 * units.KiB` |
| `l1-subnet-id-node-id-cache-size` | `int` | `16 * units.KiB` |
| `checksums-enabled` | `bool` | `false` |
| `mempool-prune-frequency` | `time.Duration` | `30 * time.Minute` |
Default values are overridden only if explicitly specified in the config.
## Network Configuration
The Network configuration defines parameters that control the network's gossip and validator behavior.
### Parameters
| Field | Type | Default | Description |
| -------------------------------------------------- | --------------- | ------------------------- | -------------------------------------------------------------------------------------------------------------------------------- |
| `max-validator-set-staleness` | `time.Duration` | `1 minute` | Maximum age of a validator set used for peer sampling and rate limiting |
| `target-gossip-size` | `int` | `20 * units.KiB` | Target number of bytes to send when pushing transactions or responding to transaction pull requests |
| `push-gossip-percent-stake` | `float64` | `0.9` | Percentage of total stake to target in the initial gossip round. Higher stake nodes are prioritized to minimize network messages |
| `push-gossip-num-validators` | `int` | `100` | Number of validators to push transactions to in the initial gossip round |
| `push-gossip-num-peers` | `int` | `0` | Number of peers to push transactions to in the initial gossip round |
| `push-regossip-num-validators` | `int` | `10` | Number of validators for subsequent gossip rounds after the initial push |
| `push-regossip-num-peers` | `int` | `0` | Number of peers for subsequent gossip rounds after the initial push |
| `push-gossip-discarded-cache-size` | `int` | `16384` | Size of the cache storing recently dropped transaction IDs from mempool to avoid re-pushing |
| `push-gossip-max-regossip-frequency` | `time.Duration` | `30 * time.Second` | Maximum frequency limit for re-gossiping a transaction |
| `push-gossip-frequency` | `time.Duration` | `500 * time.Millisecond` | Frequency of push gossip rounds |
| `pull-gossip-poll-size` | `int` | `1` | Number of validators to sample during pull gossip rounds |
| `pull-gossip-frequency` | `time.Duration` | `1500 * time.Millisecond` | Frequency of pull gossip rounds |
| `pull-gossip-throttling-period` | `time.Duration` | `10 * time.Second` | Time window for throttling pull requests |
| `pull-gossip-throttling-limit` | `int` | `2` | Maximum number of pull queries allowed per validator within the throttling window |
| `expected-bloom-filter-elements` | `int` | `8 * 1024` | Expected number of elements when creating a new bloom filter. Larger values increase filter size |
| `expected-bloom-filter-false-positive-probability` | `float64` | `0.01` | Target probability of false positives after inserting the expected number of elements. Lower values increase filter size |
| `max-bloom-filter-false-positive-probability` | `float64` | `0.05` | Threshold for bloom filter regeneration. Filter is refreshed when false positive probability exceeds this value |
### Details
The configuration is divided into several key areas:
* **Validator Set Management**: Controls how fresh the validator set must be for network operations. The staleness setting ensures the network operates with reasonably current validator information.
* **Gossip Size Controls**: Manages the size of gossip messages to maintain efficient network usage while ensuring reliable transaction propagation.
* **Push Gossip Configuration**: Defines how transactions are initially propagated through the network, with emphasis on reaching high-stake validators first to optimize network coverage.
* **Pull Gossip Configuration**: Controls how nodes request transactions they may have missed, including throttling mechanisms to prevent network overload.
* **Bloom Filter Settings**: Configures the trade-off between memory usage and false positive rates in transaction filtering, with automatic filter regeneration when accuracy degrades.
# Subnet-EVM
URL: /docs/nodes/chain-configs/subnet-evm
Configuration options available in the Subnet EVM codebase.
These are the configuration options available in the Subnet-EVM codebase. To set these values, you need to create a configuration file at `~/.avalanchego/configs/chains//config.json`.
For the AvalancheGo node configuration options, see the [AvalancheGo Configuration](/docs/nodes/configure/avalanche-l1-configs) page.
## Airdrop
| Option | Type | Description | Default |
| --------- | -------- | ------------------------- | ------- |
| `airdrop` | `string` | Path to the airdrop file. | |
## Subnet EVM APIs
| Option | Type | Description | Default |
| ------------------------ | -------- | ----------------------------------------------------- | ------- |
| `snowman-api-enabled` | `bool` | Enables the Snowman API. | `false` |
| `admin-api-enabled` | `bool` | Enables the Admin API. | `false` |
| `admin-api-dir` | `string` | Directory for the performance profiling in Admin API. | |
| `warp-api-enabled` | `bool` | Enables the Warp API. | `false` |
| `validators-api-enabled` | `bool` | Enables the Validators API. | `true` |
## Enabled Ethereum APIs
| Option | Type | Description | Default |
| ---------- | ---------- | ---------------------------------------------------------------------------------- | --------------------------------------------------------------------------------------------------------------- |
| `eth-apis` | `[]string` | A list of Ethereum APIs to enable. If none is specified, the default list is used. | `"eth"`, `"eth-filter"`, `"net"`, `"web3"`, `"internal-eth"`, `"internal-blockchain"`, `"internal-transaction"` |
## Continuous Profiler
| Option | Type | Description | Default |
| ------------------------------- | ---------- | ------------------------------------------------------------------------ | ------------ |
| `continuous-profiler-dir` | `string` | Directory to store profiler data. If set, creates a continuous profiler. | `""` (empty) |
| `continuous-profiler-frequency` | `Duration` | Frequency to run the continuous profiler if enabled. | `15m` |
| `continuous-profiler-max-files` | `int` | Maximum number of profiler files to maintain. | `5` |
## API Gas/Price Caps
| Option | Type | Description | Default |
| ---------------- | --------- | ------------------------------------------------------ | ---------- |
| `rpc-gas-cap` | `uint64` | Maximum gas allowed in a transaction via the API. | `50000000` |
| `rpc-tx-fee-cap` | `float64` | Maximum transaction fee (in AVAX) allowed via the API. | `100.0` |
## Cache Settings
| Option | Type | Description | Default |
| ----------------------------- | ----- | ----------------------------------------------------------------------- | ------- |
| `trie-clean-cache` | `int` | Size of the trie clean cache in MB. | `512` |
| `trie-dirty-cache` | `int` | Size of the trie dirty cache in MB. | `512` |
| `trie-dirty-commit-target` | `int` | Memory limit target in the dirty cache before performing a commit (MB). | `20` |
| `trie-prefetcher-parallelism` | `int` | Max concurrent disk reads the trie prefetcher should perform at once. | `16` |
| `snapshot-cache` | `int` | Size of the snapshot disk layer clean cache in MB. | `256` |
## Ethereum Settings
| Option | Type | Description | Default |
| ------------------------------- | ------ | --------------------------------------------------- | ------- |
| `preimages-enabled` | `bool` | Enables preimage storage. | `false` |
| `snapshot-wait` | `bool` | Waits for snapshot generation before starting node. | `false` |
| `snapshot-verification-enabled` | `bool` | Enables snapshot verification. | `false` |
## Pruning Settings
| Option | Type | Description | Default |
| ------------------------------------ | --------- | ------------------------------------------------------------------ | ------- |
| `pruning-enabled` | `bool` | If enabled, trie roots are only persisted every N blocks. | `true` |
| `accepted-queue-limit` | `int` | Maximum blocks to queue before blocking during acceptance. | `64` |
| `commit-interval` | `uint64` | Commit interval at which to persist EVM and atomic tries. | `4096` |
| `allow-missing-tries` | `bool` | Suppresses warnings for incomplete trie index if enabled. | `false` |
| `populate-missing-tries` | `*uint64` | Starting point for re-populating missing tries; disables if `nil`. | `nil` |
| `populate-missing-tries-parallelism` | `int` | Concurrent readers when re-populating missing tries on startup. | `1024` |
| `prune-warp-db-enabled` | `bool` | Determines if the warpDB should be cleared on startup. | `false` |
## Metric Settings
| Option | Type | Description | Default |
| --------------------------- | ------ | -------------------------------------------------------- | ------- |
| `metrics-expensive-enabled` | `bool` | Enables debug-level metrics that may impact performance. | `true` |
### Transaction Pool Settings
| Option | Type | Description | Default |
| ----------------------- | ---------- | ----------------------------------------------------------------- | -------------------------------------------- |
| `tx-pool-price-limit` | `uint64` | Minimum gas price (in wei) for the transaction pool. | 1 |
| `tx-pool-price-bump` | `uint64` | Minimum price bump percentage to replace an existing transaction. | 10 |
| `tx-pool-account-slots` | `uint64` | Max executable transaction slots per account. | 16 |
| `tx-pool-global-slots` | `uint64` | Max executable transaction slots for all accounts. | From `legacypool.DefaultConfig.GlobalSlots` |
| `tx-pool-account-queue` | `uint64` | Max non-executable transaction slots per account. | From `legacypool.DefaultConfig.AccountQueue` |
| `tx-pool-global-queue` | `uint64` | Max non-executable transaction slots for all accounts. | 1024 |
| `tx-pool-lifetime` | `Duration` | Maximum time a transaction can remain in the pool. | 10 Minutes |
| `local-txs-enabled` | `bool` | Enables local transactions. | `false` |
### API Resource Limiting Settings
| Option | Type | Description | Default |
| ----------------------------- | --------------- | ----------------------------------------------- | ----------------- |
| `api-max-duration` | `Duration` | Maximum API call duration. | `0` (no limit) |
| `ws-cpu-refill-rate` | `Duration` | CPU time refill rate for WebSocket connections. | `0` (no limit) |
| `ws-cpu-max-stored` | `Duration` | Max CPU time stored for WebSocket connections. | `0` (no limit) |
| `api-max-blocks-per-request` | `int64` | Max blocks per `getLogs` request. | `0` (no limit) |
| `allow-unfinalized-queries` | `bool` | Allows queries on unfinalized blocks. | `false` |
| `allow-unprotected-txs` | `bool` | Allows unprotected (non-EIP-155) transactions. | `false` |
| `allow-unprotected-tx-hashes` | `[]common.Hash` | List of unprotected transaction hashes allowed. | Includes EIP-1820 |
## Keystore Settings
| Option | Type | Description | Default |
| ---------------------------------- | -------- | --------------------------------------- | ------------ |
| `keystore-directory` | `string` | Directory for keystore files. | `""` (empty) |
| `keystore-external-signer` | `string` | External signer for keystore. | `""` (empty) |
| `keystore-insecure-unlock-allowed` | `bool` | Allows insecure unlock of the keystore. | `false` |
## Gossip Settings
| Option | Type | Description | Default |
| ------------------------------ | ------------------ | --------------------------------------------- | ------------ |
| `push-gossip-percent-stake` | `float64` | Percentage of stake to target when gossiping. | `0.9` |
| `push-gossip-num-validators` | `int` | Number of validators to gossip to. | `100` |
| `push-gossip-num-peers` | `int` | Number of peers to gossip to. | `0` |
| `push-regossip-num-validators` | `int` | Number of validators to re-gossip to. | `10` |
| `push-regossip-num-peers` | `int` | Number of peers to re-gossip to. | `0` |
| `push-gossip-frequency` | `Duration` | Frequency of gossiping. | `100ms` |
| `pull-gossip-frequency` | `Duration` | Frequency of pulling gossip. | `1s` |
| `regossip-frequency` | `Duration` | Frequency of re-gossiping. | `30s` |
| `priority-regossip-addresses` | `[]common.Address` | Addresses with priority for re-gossiping. | `[]` (empty) |
## Logging
| Option | Type | Description | Default |
| ----------------- | -------- | ----------------------------------- | -------- |
| `log-level` | `string` | Logging level. | `"info"` |
| `log-json-format` | `bool` | If `true`, logs are in JSON format. | `false` |
## Fee Recipient
| Option | Type | Description | Default |
| -------------- | -------- | ------------------------------------------------------------------ | ------------ |
| `feeRecipient` | `string` | Address to receive transaction fees; must be empty if unsupported. | `""` (empty) |
## Offline Pruning Settings
| Option | Type | Description | Default |
| ----------------------------------- | -------- | -------------------------------------------- | ------------ |
| `offline-pruning-enabled` | `bool` | Enables offline pruning. | `false` |
| `offline-pruning-bloom-filter-size` | `uint64` | Bloom filter size for offline pruning in MB. | `512` |
| `offline-pruning-data-directory` | `string` | Data directory for offline pruning. | `""` (empty) |
## VM2VM Network
| Option | Type | Description | Default |
| ------------------------------ | ------- | --------------------------------------- | ------- |
| `max-outbound-active-requests` | `int64` | Max number of outbound active requests. | `16` |
## Sync Settings
| Option | Type | Description | Default |
| ------------------------------ | -------- | -------------------------------------------------------------- | --------------------------- |
| `state-sync-enabled` | `bool` | Enables state synchronization. | `false` |
| `state-sync-skip-resume` | `bool` | Forces state sync to use highest available summary block. | `false` |
| `state-sync-server-trie-cache` | `int` | Cache size for state sync server trie in MB. | `64` |
| `state-sync-ids` | `string` | Node IDs for state sync. | `""` (empty) |
| `state-sync-commit-interval` | `uint64` | Commit interval for state sync. | `16384` (CommitInterval\*4) |
| `state-sync-min-blocks` | `uint64` | Min blocks ahead of local last accepted to perform state sync. | `300000` |
| `state-sync-request-size` | `uint16` | Key/values per request during state sync. | `1024` |
## Database Settings
| Option | Type | Description | Default |
| ------------------------- | ----------------- | ----------------------------------------------------------------- | ----------------- |
| `inspect-database` | `bool` | Inspects the database on startup if enabled. | `false` |
| `skip-upgrade-check` | `bool` | Disables checking that upgrades occur before last accepted block. | `false` |
| `accepted-cache-size` | `int` | Depth to keep in the accepted headers and logs cache. | `32` |
| `transaction-history` | `uint64` | Max blocks from head whose transaction indices are reserved. | `0` (no limit) |
| `tx-lookup-limit` | `uint64` | **Deprecated**, use `transaction-history` instead. | |
| `skip-tx-indexing` | `bool` | Skips indexing transactions; useful for non-indexing nodes. | `false` |
| `warp-off-chain-messages` | `[]hexutil.Bytes` | Encoded off-chain messages to sign. | `[]` (empty list) |
## RPC Settings
| Option | Type | Description | Default |
| ----------------- | -------- | --------------------------------- | ------------- |
| `http-body-limit` | `uint64` | Limit for HTTP request body size. | Not specified |
## Standalone Database Configuration
| Option | Type | Description | Default |
| ------------------------- | -------- | ----------------------------------------------------------------------------------------------------- | ------------ |
| `use-standalone-database` | `*PBool` | Use a standalone database. By default Subnet-EVM uses a standalone database if no block was accepted. | `nil` |
| `database-config` | `string` | Content of the database configuration. | `""` (empty) |
| `database-config-file` | `string` | Path to the database configuration file. | `""` (empty) |
| `database-type` | `string` | Type of database to use. | `"pebbledb"` |
| `database-path` | `string` | Path to the database. | `""` (empty) |
| `database-read-only` | `bool` | Opens the database in read-only mode. | `false` |
***
**Note**: Durations can be specified using time units, e.g., `15m` for 15 minutes, `100ms` for 100 milliseconds.
# X-Chain
URL: /docs/nodes/chain-configs/x-chain
In order to specify a config for the X-Chain, a JSON config file should be
placed at `{chain-config-dir}/X/config.json`.
For example if `chain-config-dir` has the default value which is
`$HOME/.avalanchego/configs/chains`, then `config.json` can be placed at
`$HOME/.avalanchego/configs/chains/X/config.json`.
This allows you to specify a config to be passed into the X-Chain. The default
values for this config are:
```json
{
"index-transactions": false,
"index-allow-incomplete": false,
"checksums-enabled": false
}
```
Default values are overridden only if explicitly specified in the config.
The parameters are as follows:
## Transaction Indexing
### `index-transactions`
*Boolean*
Enables AVM transaction indexing if set to `true`.
When set to `true`, AVM transactions are indexed against the `address` and
`assetID` involved. This data is available via `avm.getAddressTxs`
[API](/docs/api-reference/x-chain/api#avmgetaddresstxs).
If `index-transactions` is set to true, it must always be set to true
for the node's lifetime. If set to `false` after having been set to `true`, the
node will refuse to start unless `index-allow-incomplete` is also set to `true`
(see below).
### `index-allow-incomplete`
*Boolean*
Allows incomplete indices. This config value is ignored if there is no X-Chain indexed data in the DB and
`index-transactions` is set to `false`.
### `checksums-enabled`
*Boolean*
Enables checksums if set to `true`.
# Avalanche L1 Configs
URL: /docs/nodes/configure/avalanche-l1-configs
This page describes the configuration options available for Avalanche L1s.
It is possible to provide parameters for a Subnet. Parameters here apply to all
chains in the specified Subnet.
AvalancheGo looks for files specified with `{subnetID}.json` under
`--subnet-config-dir` as documented
[here](https://build.avax.network/docs/nodes/configure/configs-flags#subnet-configs).
Here is an example of Subnet config file:
```json
{
"validatorOnly": false,
"consensusParameters": {
"k": 25,
"alpha": 18
}
}
```
## Parameters
### Private Subnet
#### `validatorOnly` (bool)
If `true` this node does not expose Subnet blockchain contents to non-validators
via P2P messages. Defaults to `false`.
Avalanche Subnets are public by default. It means that every node can sync and
listen ongoing transactions/blocks in Subnets, even they're not validating the
listened Subnet.
Subnet validators can choose not to publish contents of blockchains via this
configuration. If a node sets `validatorOnly` to true, the node exchanges
messages only with this Subnet's validators. Other peers will not be able to
learn contents of this Subnet from this node.
:::tip
This is a node-specific configuration. Every validator of this Subnet has to use
this configuration in order to create a full private Subnet.
:::
#### `allowedNodes` (string list)
If `validatorOnly=true` this allows explicitly specified NodeIDs to be allowed
to sync the Subnet regardless of validator status. Defaults to be empty.
:::tip
This is a node-specific configuration. Every validator of this Subnet has to use
this configuration in order to properly allow a node in the private Subnet.
:::
### Consensus Parameters
Subnet configs supports loading new consensus parameters. JSON keys are
different from their matching `CLI` keys. These parameters must be grouped under
`consensusParameters` key. The consensus parameters of a Subnet default to the
same values used for the Primary Network, which are given [CLI Snow Parameters](https://build.avax.network/docs/nodes/configure/configs-flags#snow-parameters).
| CLI Key | JSON Key |
| :--------------------------- | :-------------------- |
| --snow-sample-size | k |
| --snow-quorum-size | alpha |
| --snow-commit-threshold | `beta` |
| --snow-concurrent-repolls | concurrentRepolls |
| --snow-optimal-processing | `optimalProcessing` |
| --snow-max-processing | maxOutstandingItems |
| --snow-max-time-processing | maxItemProcessingTime |
| --snow-avalanche-batch-size | `batchSize` |
| --snow-avalanche-num-parents | `parentSize` |
#### `proposerMinBlockDelay` (duration)
The minimum delay performed when building snowman++ blocks. Default is set to 1 second.
As one of the ways to control network congestion, Snowman++ will only build a
block `proposerMinBlockDelay` after the parent block's timestamp. Some
high-performance custom VM may find this too strict. This flag allows tuning the
frequency at which blocks are built.
### Gossip Configs
It's possible to define different Gossip configurations for each Subnet without
changing values for Primary Network. JSON keys of these
parameters are different from their matching `CLI` keys. These parameters
default to the same values used for the Primary Network. For more information
see [CLI Gossip Configs](https://build.avax.network/docs/nodes/configure/configs-flags#gossiping).
| CLI Key | JSON Key |
| :------------------------------------------------------ | :------------------------------------- |
| --consensus-accepted-frontier-gossip-validator-size | gossipAcceptedFrontierValidatorSize |
| --consensus-accepted-frontier-gossip-non-validator-size | gossipAcceptedFrontierNonValidatorSize |
| --consensus-accepted-frontier-gossip-peer-size | gossipAcceptedFrontierPeerSize |
| --consensus-on-accept-gossip-validator-size | gossipOnAcceptValidatorSize |
| --consensus-on-accept-gossip-non-validator-size | gossipOnAcceptNonValidatorSize |
| --consensus-on-accept-gossip-peer-size | gossipOnAcceptPeerSize |
# AvalancheGo Config Flags
URL: /docs/nodes/configure/configs-flags
This page lists all available configuration options for AvalancheGo nodes.
{/* markdownlint-disable MD001 */}
You can specify the configuration of a node with the arguments below.
## APIs
#### `--api-admin-enabled` (boolean)
If set to `true`, this node will expose the Admin API. Defaults to `false`.
See [here](https://build.avax.network/docs/api-reference/admin-api) for more information.
#### `--api-health-enabled` (boolean)
If set to `false`, this node will not expose the Health API. Defaults to `true`. See
[here](https://build.avax.network/docs/api-reference/health-api) for more information.
#### `--index-enabled` (boolean)
If set to `true`, this node will enable the indexer and the Index API will be
available. Defaults to `false`. See
[here](https://build.avax.network/docs/api-reference/index-api) for more information.
#### `--api-info-enabled` (boolean)
If set to `false`, this node will not expose the Info API. Defaults to `true`. See
[here](https://build.avax.network/docs/api-reference/info-api) for more information.
#### `--api-metrics-enabled` (boolean)
If set to `false`, this node will not expose the Metrics API. Defaults to
`true`. See [here](https://build.avax.network/docs/api-reference/metrics-api) for more information.
## Avalanche Community Proposals
#### `--acp-support` (array of integers)
The `--acp-support` flag allows an AvalancheGo node to indicate support for a
set of [Avalanche Community Proposals](https://github.com/avalanche-foundation/ACPs).
#### `--acp-object` (array of integers)
The `--acp-object` flag allows an AvalancheGo node to indicate objection for a
set of [Avalanche Community Proposals](https://github.com/avalanche-foundation/ACPs).
## Bootstrapping
#### `--bootstrap-ancestors-max-containers-sent` (uint)
Max number of containers in an `Ancestors` message sent by this node. Defaults to `2000`.
#### `--bootstrap-ancestors-max-containers-received` (unit)
This node reads at most this many containers from an incoming `Ancestors` message. Defaults to `2000`.
#### `--bootstrap-beacon-connection-timeout` (duration)
Timeout when attempting to connect to bootstrapping beacons. Defaults to `1m`.
#### `--bootstrap-ids` (string)
Bootstrap IDs is a comma-separated list of validator IDs. These IDs will be used
to authenticate bootstrapping peers. An example setting of this field would be
`--bootstrap-ids="NodeID-7Xhw2mDxuDS44j42TCB6U5579esbSt3Lg,NodeID-MFrZFVCXPv5iCn6M9K6XduxGTYp891xXZ"`.
The number of given IDs here must be same with number of given
`--bootstrap-ips`. The default value depends on the network ID.
#### `--bootstrap-ips` (string)
Bootstrap IPs is a comma-separated list of IP:port pairs. These IP Addresses
will be used to bootstrap the current Avalanche state. An example setting of
this field would be `--bootstrap-ips="127.0.0.1:12345,1.2.3.4:5678"`. The number
of given IPs here must be same with number of given `--bootstrap-ids`. The
default value depends on the network ID.
#### `--bootstrap-max-time-get-ancestors` (duration)
Max Time to spend fetching a container and its ancestors when responding to a GetAncestors message.
Defaults to `50ms`.
#### `--bootstrap-retry-enabled` (boolean)
If set to `false`, will not retry bootstrapping if it fails. Defaults to `true`.
#### `--bootstrap-retry-warn-frequency` (uint)
Specifies how many times bootstrap should be retried before warning the operator. Defaults to `50`.
## Chain Configs
Some blockchains allow the node operator to provide custom configurations for
individual blockchains. These custom configurations are broken down into two
categories: network upgrades and optional chain configurations. AvalancheGo
reads in these configurations from the chain configuration directory and passes
them into the VM on initialization.
#### `--chain-config-dir` (string)
Specifies the directory that contains chain configs, as described
[here](https://build.avax.network/docs/nodes/chain-configs). Defaults to `$HOME/.avalanchego/configs/chains`.
If this flag is not provided and the default directory does not exist,
AvalancheGo will not exit since custom configs are optional. However, if the
flag is set, the specified folder must exist, or AvalancheGo will exit with an
error. This flag is ignored if `--chain-config-content` is specified.
:::note
Please replace `chain-config-dir` and `blockchainID` with their actual values.
:::
Network upgrades are passed in from the location:
`chain-config-dir`/`blockchainID`/`upgrade.*`.
Upgrade files are typically json encoded and therefore named `upgrade.json`.
However, the format of the file is VM dependent.
After a blockchain has activated a network upgrade, the same upgrade
configuration must always be passed in to ensure that the network upgrades
activate at the correct time.
The chain configs are passed in from the location
`chain-config-dir`/`blockchainID`/`config.*`.
Upgrade files are typically json encoded and therefore named `upgrade.json`.
However, the format of the file is VM dependent.
This configuration is used by the VM to handle optional configuration flags such
as enabling/disabling APIs, updating log level, etc.
The chain configuration is intended to provide optional configuration parameters
and the VM will use default values if nothing is passed in.
Full reference for all configuration options for some standard chains can be
found in a separate [chain config flags](https://build.avax.network/docs/nodes/chain-configs) document.
Full reference for `subnet-evm` upgrade configuration can be found in a separate
[Customize a Subnet](https://build.avax.network/docs/avalanche-l1s/upgrade/customize-avalanche-l1) document.
#### `--chain-config-content` (string)
As an alternative to `--chain-config-dir`, chains custom configurations can be
loaded altogether from command line via `--chain-config-content` flag. Content
must be base64 encoded.
Example:
```bash
cchainconfig="$(echo -n '{"log-level":"trace"}' | base64)"
chainconfig="$(echo -n "{\"C\":{\"Config\":\"${cchainconfig}\",\"Upgrade\":null}}" | base64)"
avalanchego --chain-config-content "${chainconfig}"
```
#### `--chain-aliases-file` (string)
Path to JSON file that defines aliases for Blockchain IDs. Defaults to
`~/.avalanchego/configs/chains/aliases.json`. This flag is ignored if
`--chain-aliases-file-content` is specified. Example content:
```json
{
"q2aTwKuyzgs8pynF7UXBZCU7DejbZbZ6EUyHr3JQzYgwNPUPi": ["DFK"]
}
```
The above example aliases the Blockchain whose ID is
`"q2aTwKuyzgs8pynF7UXBZCU7DejbZbZ6EUyHr3JQzYgwNPUPi"` to `"DFK"`. Chain
aliases are added after adding primary network aliases and before any changes to
the aliases via the admin API. This means that the first alias included for a
Blockchain on a Subnet will be treated as the `"Primary Alias"` instead of the
full blockchainID. The Primary Alias is used in all metrics and logs.
#### `--chain-aliases-file-content` (string)
As an alternative to `--chain-aliases-file`, it allows specifying base64 encoded
aliases for Blockchains.
#### `--chain-data-dir` (string)
Chain specific data directory. Defaults to `$HOME/.avalanchego/chainData`.
## Config File
#### `--config-file` (string)
Path to a JSON file that specifies this node's configuration. Command line
arguments will override arguments set in the config file. This flag is ignored
if `--config-file-content` is specified.
Example JSON config file:
```json
{
"log-level": "debug"
}
```
:::tip
[Install Script](https://build.avax.network/docs/tooling/avalanche-go-installer) creates the
node config file at `~/.avalanchego/configs/node.json`. No default file is
created if [AvalancheGo is built from source](https://build.avax.network/docs/nodes/run-a-node/from-source), you
would need to create it manually if needed.
:::
#### `--config-file-content` (string)
As an alternative to `--config-file`, it allows specifying base64 encoded config
content.
#### `--config-file-content-type` (string)
Specifies the format of the base64 encoded config content. JSON, TOML, YAML are
among currently supported file format (see
[here](https://github.com/spf13/viper#reading-config-files) for full list). Defaults to `JSON`.
## Data Directory
#### `--data-dir` (string)
Sets the base data directory where default sub-directories will be placed unless otherwise specified.
Defaults to `$HOME/.avalanchego`.
## Database
##### `--db-dir` (string, file path)
Specifies the directory to which the database is persisted. Defaults to `"$HOME/.avalanchego/db"`.
##### `--db-type` (string)
Specifies the type of database to use. Must be one of `leveldb`, `memdb`, or `pebbledb`.
`memdb` is an in-memory, non-persisted database.
:::note
`memdb` stores everything in memory. So if you have a 900 GiB LevelDB instance, then using `memdb`
you’d need 900 GiB of RAM.
`memdb` is useful for fast one-off testing, not for running an actual node (on Fuji or Mainnet).
Also note that `memdb` doesn’t persist after restart. So any time you restart the node it would
start syncing from scratch.
:::
### Database Config
#### `--db-config-file` (string)
Path to the database config file. Ignored if `--config-file-content` is specified.
#### `--db-config-file-content` (string)
As an alternative to `--db-config-file`, it allows specifying base64 encoded database config content.
#### LevelDB Config
A LevelDB config file must be JSON and may have these keys.
Any keys not given will receive the default value.
```go
{
// BlockCacheCapacity defines the capacity of the 'sorted table' block caching.
// Use -1 for zero.
//
// The default value is 12MiB.
"blockCacheCapacity": int,
// BlockSize is the minimum uncompressed size in bytes of each 'sorted table'
// block.
//
// The default value is 4KiB.
"blockSize": int,
// CompactionExpandLimitFactor limits compaction size after expanded.
// This will be multiplied by table size limit at compaction target level.
//
// The default value is 25.
"compactionExpandLimitFactor": int,
// CompactionGPOverlapsFactor limits overlaps in grandparent (Level + 2)
// that a single 'sorted table' generates. This will be multiplied by
// table size limit at grandparent level.
//
// The default value is 10.
"compactionGPOverlapsFactor": int,
// CompactionL0Trigger defines number of 'sorted table' at level-0 that will
// trigger compaction.
//
// The default value is 4.
"compactionL0Trigger": int,
// CompactionSourceLimitFactor limits compaction source size. This doesn't apply to
// level-0.
// This will be multiplied by table size limit at compaction target level.
//
// The default value is 1.
"compactionSourceLimitFactor": int,
// CompactionTableSize limits size of 'sorted table' that compaction generates.
// The limits for each level will be calculated as:
// CompactionTableSize * (CompactionTableSizeMultiplier ^ Level)
// The multiplier for each level can also fine-tuned using CompactionTableSizeMultiplierPerLevel.
//
// The default value is 2MiB.
"compactionTableSize": int,
// CompactionTableSizeMultiplier defines multiplier for CompactionTableSize.
//
// The default value is 1.
"compactionTableSizeMultiplier": float,
// CompactionTableSizeMultiplierPerLevel defines per-level multiplier for
// CompactionTableSize.
// Use zero to skip a level.
//
// The default value is nil.
"compactionTableSizeMultiplierPerLevel": []float,
// CompactionTotalSize limits total size of 'sorted table' for each level.
// The limits for each level will be calculated as:
// CompactionTotalSize * (CompactionTotalSizeMultiplier ^ Level)
// The multiplier for each level can also fine-tuned using
// CompactionTotalSizeMultiplierPerLevel.
//
// The default value is 10MiB.
"compactionTotalSize": int,
// CompactionTotalSizeMultiplier defines multiplier for CompactionTotalSize.
//
// The default value is 10.
"compactionTotalSizeMultiplier": float,
// DisableSeeksCompaction allows disabling 'seeks triggered compaction'.
// The purpose of 'seeks triggered compaction' is to optimize database so
// that 'level seeks' can be minimized, however this might generate many
// small compaction which may not preferable.
//
// The default is true.
"disableSeeksCompaction": bool,
// OpenFilesCacheCapacity defines the capacity of the open files caching.
// Use -1 for zero, this has same effect as specifying NoCacher to OpenFilesCacher.
//
// The default value is 1024.
"openFilesCacheCapacity": int,
// WriteBuffer defines maximum size of a 'memdb' before flushed to
// 'sorted table'. 'memdb' is an in-memory DB backed by an on-disk
// unsorted journal.
//
// LevelDB may held up to two 'memdb' at the same time.
//
// The default value is 6MiB.
"writeBuffer": int,
// FilterBitsPerKey is the number of bits to add to the bloom filter per
// key.
//
// The default value is 10.
"filterBitsPerKey": int,
// MaxManifestFileSize is the maximum size limit of the MANIFEST-****** file.
// When the MANIFEST-****** file grows beyond this size, LevelDB will create
// a new MANIFEST file.
//
// The default value is infinity.
"maxManifestFileSize": int,
// MetricUpdateFrequency is the frequency to poll LevelDB metrics in
// nanoseconds.
// If <= 0, LevelDB metrics aren't polled.
//
// The default value is 10s.
"metricUpdateFrequency": int,
}
```
## File Descriptor Limit
#### `--fd-limit` (int)
Attempts to raise the process file descriptor limit to at least this value and
error if the value is above the system max. Linux default `32768`.
## Genesis
#### `--genesis-file` (string)
Path to a JSON file containing the genesis data to use. Ignored when running
standard networks (Mainnet, Fuji Testnet), or when `--genesis-content` is
specified. If not given, uses default genesis data.
See the documentation for the genesis JSON format [here](https://github.com/ava-labs/avalanchego/blob/master/genesis/README.md) and an example used for the local network genesis [here](https://github.com/ava-labs/avalanchego/blob/master/genesis/genesis_local.json).
#### `--genesis-file-content` (string)
As an alternative to `--genesis-file`, it allows specifying base64 encoded genesis data to use.
## HTTP Server
#### `--http-allowed-hosts` (string)
List of acceptable host names in API requests. Provide the wildcard (`'*'`) to accept
requests from all hosts. API requests where the `Host` field is empty or an IP address
will always be accepted. An API call whose HTTP `Host` field isn't acceptable will
receive a 403 error code. Defaults to `localhost`.
#### `--http-allowed-origins` (string)
Origins to allow on the HTTP port. Defaults to `*` which allows all origins. Example:
`"https://*.avax.network https://*.avax-test.network"`
#### `--http-host` (string)
The address that HTTP APIs listen on. Defaults to `127.0.0.1`. This means that
by default, your node can only handle API calls made from the same machine. To
allow API calls from other machines, use `--http-host=`. You can also enter
domain names as parameter.
#### `--http-idle-timeout` (string)
Maximum duration to wait for the next request when keep-alives are enabled. If
`--http-idle-timeout` is zero, the value of `--http-read-timeout` is used. If both are zero,
there is no timeout.
#### `--http-port` (int)
Each node runs an HTTP server that provides the APIs for interacting with the
node and the Avalanche network. This argument specifies the port that the HTTP
server will listen on. The default value is `9650`.
#### `--http-read-timeout` (string)
Maximum duration for reading the entire request, including the body. A zero or
negative value means there will be no timeout.
#### `--http-read-header-timeout` (string)
Maximum duration to read request headers. The connection’s read deadline is
reset after reading the headers. If `--http-read-header-timeout` is zero, the
value of `--http-read-timeout` is used. If both are zero, there is no timeout.
#### `--http-shutdown-timeout` (duration)
Maximum duration to wait for existing connections to complete during node
shutdown. Defaults to `10s`.
#### `--http-shutdown-wait` (duration)
Duration to wait after receiving SIGTERM or SIGINT before initiating shutdown.
The `/health` endpoint will return unhealthy during this duration (if the Health
API is enabled.) Defaults to `0s`.
#### `--http-tls-cert-file` (string, file path)
This argument specifies the location of the TLS certificate used by the node for
the HTTPS server. This must be specified when `--http-tls-enabled=true`. There
is no default value. This flag is ignored if `--http-tls-cert-file-content` is
specified.
#### `--http-tls-cert-file-content` (string)
As an alternative to `--http-tls-cert-file`, it allows specifying base64 encoded
content of the TLS certificate used by the node for the HTTPS server. Note that
full certificate content, with the leading and trailing header, must be base64
encoded. This must be specified when `--http-tls-enabled=true`.
#### `--http-tls-enabled` (boolean)
If set to `true`, this flag will attempt to upgrade the server to use HTTPS. Defaults to `false`.
#### `--http-tls-key-file` (string, file path)
This argument specifies the location of the TLS private key used by the node for
the HTTPS server. This must be specified when `--http-tls-enabled=true`. There
is no default value. This flag is ignored if `--http-tls-key-file-content` is
specified.
#### `--http-tls-key-file-content` (string)
As an alternative to `--http-tls-key-file`, it allows specifying base64 encoded
content of the TLS private key used by the node for the HTTPS server. Note that
full private key content, with the leading and trailing header, must be base64
encoded. This must be specified when `--http-tls-enabled=true`.
#### `--http-write-timeout` (string)
Maximum duration before timing out writes of the response. It is reset whenever
a new request’s header is read. A zero or negative value means there will be no
timeout.
## Logging
#### `--log-level` (string, `{verbo, debug, trace, info, warn, error, fatal, off}`)
The log level determines which events to log. There are 8 different levels, in
order from highest priority to lowest.
* `off`: No logs have this level of logging. Turns off logging.
* `fatal`: Fatal errors that are not recoverable.
* `error`: Errors that the node encounters, these errors were able to be recovered.
* `warn`: A Warning that might be indicative of a spurious byzantine node, or potential future error.
* `info`: Useful descriptions of node status updates.
* `trace`: Traces container (block, vertex, transaction) job results. Useful for
tracing container IDs and their outcomes.
* `debug`: Debug logging is useful when attempting to understand possible bugs
in the code. More information that would be typically desired for normal usage
will be displayed.
* `verbo`: Tracks extensive amounts of information the node is processing. This
includes message contents and binary dumps of data for extremely low level
protocol analysis.
When specifying a log level note that all logs with the specified priority or
higher will be tracked. Defaults to `info`.
#### `--log-display-level` (string, `{verbo, debug, trace, info, warn, error, fatal, off}`)
The log level determines which events to display to stdout. If left blank,
will default to the value provided to `--log-level`.
#### `--log-format` (string, `{auto, plain, colors, json}`)
The structure of log format. Defaults to `auto` which formats terminal-like
logs, when the output is a terminal. Otherwise, should be one of `{auto, plain, colors, json}`
#### `--log-dir` (string, file path)
Specifies the directory in which system logs are kept. Defaults to `"$HOME/.avalanchego/logs"`.
If you are running the node as a system service (ex. using the installer script) logs will also be
stored in `$HOME/var/log/syslog`.
#### `--log-disable-display-plugin-logs` (boolean)
Disables displaying plugin logs in stdout. Defaults to `false`.
#### `--log-rotater-max-size` (uint)
The maximum file size in megabytes of the log file before it gets rotated. Defaults to `8`.
#### `--log-rotater-max-files` (uint)
The maximum number of old log files to retain. 0 means retain all old log files. Defaults to `7`.
#### `--log-rotater-max-age` (uint)
The maximum number of days to retain old log files based on the timestamp
encoded in their filename. 0 means retain all old log files. Defaults to `0`.
#### `--log-rotater-compress-enabled` (boolean)
Enables the compression of rotated log files through gzip. Defaults to `false`.
## Network ID
#### `--network-id` (string)
The identity of the network the node should connect to. Can be one of:
* `--network-id=mainnet` -> Connect to Mainnet (default).
* `--network-id=fuji` -> Connect to the Fuji test-network.
* `--network-id=testnet` -> Connect to the current test-network. (Right now, this is Fuji.)
* `--network-id=local` -> Connect to a local test-network.
* `--network-id=network-{id}` -> Connect to the network with the given ID.
`id` must be in the range `[0, 2^32)`.
## OpenTelemetry
AvalancheGo supports collecting and exporting [OpenTelemetry](https://opentelemetry.io/) traces.
This might be useful for debugging, performance analysis, or monitoring.
#### `--tracing-endpoint` (string)
The endpoint to export trace data to. Defaults to `localhost:4317` if `--tracing-exporter-type` is set to `grpc` and `localhost:4318` if `--tracing-exporter-type` is set to `http`.
#### `--tracing-exporter-type`(string)
Type of exporter to use for tracing. Options are \[`disabled`,`grpc`,`http`]. Defaults to `disabled`.
#### `--tracing-insecure` (string)
If true, don't use TLS when exporting trace data. Defaults to `true`.
#### `--tracing-sample-rate` (float)
The fraction of traces to sample. If >= 1, always sample. If `<= 0`, never sample.
Defaults to `0.1`.
## Partial Sync Primary Network
#### `--partial-sync-primary-network` (string)
Partial sync enables nodes that are not primary network validators to optionally sync
only the P-chain on the primary network. Nodes that use this option can still track
Subnets. After the Etna upgrade, nodes that use this option can also validate L1s.
This config defaults to `false`.
## Public IP
Validators must know one of their public facing IP addresses so they can enable
other nodes to connect to them.
By default, the node will attempt to perform NAT traversal to get the node's IP
according to its router.
#### `--public-ip` (string)
If this argument is provided, the node assumes this is its public IP.
:::tip
When running a local network it may be easiest to set this value to `127.0.0.1`.
:::
#### `--public-ip-resolution-frequency` (duration)
Frequency at which this node resolves/updates its public IP and renew NAT
mappings, if applicable. Default to 5 minutes.
#### `--public-ip-resolution-service` (string)
When provided, the node will use that service to periodically resolve/update its
public IP. Only acceptable values are `ifconfigCo`, `opendns` or `ifconfigMe`.
## State Syncing
#### `--state-sync-ids` (string)
State sync IDs is a comma-separated list of validator IDs. The specified
validators will be contacted to get and authenticate the starting point (state
summary) for state sync. An example setting of this field would be
`--state-sync-ids="NodeID-7Xhw2mDxuDS44j42TCB6U5579esbSt3Lg,NodeID-MFrZFVCXPv5iCn6M9K6XduxGTYp891xXZ"`.
The number of given IDs here must be same with number of given
`--state-sync-ips`. The default value is empty, which results in all validators
being sampled.
#### `--state-sync-ips` (string)
State sync IPs is a comma-separated list of IP:port pairs. These IP Addresses
will be contacted to get and authenticate the starting point (state summary) for
state sync. An example setting of this field would be
`--state-sync-ips="127.0.0.1:12345,1.2.3.4:5678"`. The number of given IPs here
must be the same with the number of given `--state-sync-ids`.
## Staking
#### `--staking-port` (int)
The port through which the network peers will connect to this node externally.
Having this port accessible from the internet is required for correct node
operation. Defaults to `9651`.
#### `--sybil-protection-enabled` (boolean)
Avalanche uses Proof of Stake (PoS) as sybil resistance to make it prohibitively
expensive to attack the network. If false, sybil resistance is disabled and all
peers will be sampled during consensus. Defaults to `true`. Note that this can
not be disabled on public networks (`Fuji` and `Mainnet`).
Setting this flag to `false` **does not** mean "this node is not a validator."
It means that this node will sample all nodes, not just validators.
**You should not set this flag to false unless you understand what you are doing.**
#### `--sybil-protection-disabled-weight` (uint)
Weight to provide to each peer when staking is disabled. Defaults to `100`.
#### `--staking-tls-cert-file` (string, file path)
Avalanche uses two-way authenticated TLS connections to securely connect nodes.
This argument specifies the location of the TLS certificate used by the node. By
default, the node expects the TLS certificate to be at
`$HOME/.avalanchego/staking/staker.crt`. This flag is ignored if
`--staking-tls-cert-file-content` is specified.
#### `--staking-tls-cert-file-content` (string)
As an alternative to `--staking-tls-cert-file`, it allows specifying base64
encoded content of the TLS certificate used by the node. Note that full
certificate content, with the leading and trailing header, must be base64
encoded.
#### `--staking-tls-key-file` (string, file path)
Avalanche uses two-way authenticated TLS connections to securely connect nodes.
This argument specifies the location of the TLS private key used by the node. By
default, the node expects the TLS private key to be at
`$HOME/.avalanchego/staking/staker.key`. This flag is ignored if
`--staking-tls-key-file-content` is specified.
#### `--staking-tls-key-file-content` (string)
As an alternative to `--staking-tls-key-file`, it allows specifying base64
encoded content of the TLS private key used by the node. Note that full private
key content, with the leading and trailing header, must be base64 encoded.
## Subnets
### Subnet Tracking
#### `--track-subnets` (string)
Comma separated list of Subnet IDs that this node would track if added to.
Defaults to empty (will only validate the Primary Network).
### Subnet Configs
It is possible to provide parameters for Subnets. Parameters here apply to all
chains in the specified Subnets. Parameters must be specified with a
`{subnetID}.json` config file under `--subnet-config-dir`. AvalancheGo loads
configs for Subnets specified in
`--track-subnets` parameter.
Full reference for all configuration options for a Subnet can be found in a
separate [Subnet Configs](https://build.avax.network/docs/nodes/configure/avalanche-l1-configs) document.
#### `--subnet-config-dir` (`string`)
Specifies the directory that contains Subnet configs, as described above.
Defaults to `$HOME/.avalanchego/configs/subnets`. If the flag is set explicitly,
the specified folder must exist, or AvalancheGo will exit with an error. This
flag is ignored if `--subnet-config-content` is specified.
Example: Let's say we have a Subnet with ID
`p4jUwqZsA2LuSftroCd3zb4ytH8W99oXKuKVZdsty7eQ3rXD6`. We can create a config file
under the default `subnet-config-dir` at
`$HOME/.avalanchego/configs/subnets/p4jUwqZsA2LuSftroCd3zb4ytH8W99oXKuKVZdsty7eQ3rXD6.json`.
An example config file is:
```json
{
"validatorOnly": false,
"consensusParameters": {
"k": 25,
"alpha": 18
}
}
```
:::tip
By default, none of these directories and/or files exist. You would need to create them manually if needed.
:::
#### `--subnet-config-content` (string)
As an alternative to `--subnet-config-dir`, it allows specifying base64 encoded parameters for a Subnet.
## Version
#### `--version` (boolean)
If this is `true`, print the version and quit. Defaults to `false`.
## Advanced Options
The following options may affect the correctness of a node. Only power users should change these.
### Gossiping
#### `--consensus-accepted-frontier-gossip-validator-size` (uint)
Number of validators to gossip to when gossiping accepted frontier. Defaults to `0`.
#### `--consensus-accepted-frontier-gossip-non-validator-size` (uint)
Number of non-validators to gossip to when gossiping accepted frontier. Defaults to `0`.
#### `--consensus-accepted-frontier-gossip-peer-size` (uint)
Number of peers to gossip to when gossiping accepted frontier. Defaults to `15`.
#### `--consensus-accepted-frontier-gossip-frequency` (duration)
Time between gossiping accepted frontiers. Defaults to `10s`.
#### `--consensus-on-accept-gossip-validator-size` (uint)
Number of validators to gossip to each accepted container to. Defaults to `0`.
#### `--consensus-on-accept-gossip-non-validator-size` (uint)
Number of non-validators to gossip to each accepted container to. Defaults to `0`.
#### `--consensus-on-accept-gossip-peer-size` (uint)
Number of peers to gossip to each accepted container to. Defaults to `10`.
### Benchlist
#### `--benchlist-duration` (duration)
Maximum amount of time a peer is benchlisted after surpassing
`--benchlist-fail-threshold`. Defaults to `15m`.
#### `--benchlist-fail-threshold` (int)
Number of consecutive failed queries to a node before benching it (assuming all
queries to it will fail). Defaults to `10`.
#### `--benchlist-min-failing-duration` (duration)
Minimum amount of time queries to a peer must be failing before the peer is benched. Defaults to `150s`.
### Consensus Parameters
:::note
Some of these parameters can only be set on a local or private network, not on Fuji Testnet or Mainnet
:::
#### `--consensus-shutdown-timeout` (duration)
Timeout before killing an unresponsive chain. Defaults to `5s`.
#### `--create-asset-tx-fee` (int)
Transaction fee, in nAVAX, for transactions that create new assets. Defaults to
`10000000` nAVAX (.01 AVAX) per transaction. This can only be changed on a local
network.
#### `--min-delegator-stake` (int)
The minimum stake, in nAVAX, that can be delegated to a validator of the Primary Network.
Defaults to `25000000000` (25 AVAX) on Mainnet. Defaults to `5000000` (.005
AVAX) on Test Net. This can only be changed on a local network.
#### `--min-delegation-fee` (int)
The minimum delegation fee that can be charged for delegation on the Primary
Network, multiplied by `10,000` . Must be in the range `[0, 1000000]`. Defaults
to `20000` (2%) on Mainnet. This can only be changed on a local network.
#### `--min-stake-duration` (duration)
Minimum staking duration. The Default on Mainnet is `336h` (two weeks). This can only be changed on
a local network. This applies to both delegation and validation periods.
#### `--min-validator-stake` (int)
The minimum stake, in nAVAX, required to validate the Primary Network. This can
only be changed on a local network.
Defaults to `2000000000000` (2,000 AVAX) on Mainnet. Defaults to `5000000` (.005 AVAX) on Test Net.
#### `--max-stake-duration` (duration)
The maximum staking duration, in hours. Defaults to `8760h` (365 days) on
Mainnet. This can only be changed on a local network.
#### `--max-validator-stake` (int)
The maximum stake, in nAVAX, that can be placed on a validator on the primary
network. Defaults to `3000000000000000` (3,000,000 AVAX) on Mainnet. This
includes stake provided by both the validator and by delegators to the
validator. This can only be changed on a local network.
#### `--stake-minting-period` (duration)
Consumption period of the staking function, in hours. The Default on Mainnet is
`8760h` (365 days). This can only be changed on a local network.
#### `--stake-max-consumption-rate` (uint)
The maximum percentage of the consumption rate for the remaining token supply in
the minting period, which is 1 year on Mainnet. Defaults to `120,000` which is
12% per years. This can only be changed on a local network.
#### `--stake-min-consumption-rate` (uint)
The minimum percentage of the consumption rate for the remaining token supply in
the minting period, which is 1 year on Mainnet. Defaults to `100,000` which is
10% per years. This can only be changed on a local network.
#### `--stake-supply-cap` (uint)
The maximum stake supply, in nAVAX, that can be placed on a validator. Defaults
to `720,000,000,000,000,000` nAVAX. This can only be changed on a local network.
#### `--tx-fee` (int)
The required amount of nAVAX to be burned for a transaction to be valid on the
X-Chain, and for import/export transactions on the P-Chain. This parameter
requires network agreement in its current form. Changing this value from the
default should only be done on private networks or local network. Defaults to
`1,000,000` nAVAX per transaction.
#### `--uptime-requirement` (float)
Fraction of time a validator must be online to receive rewards. Defaults to
`0.8`. This can only be changed on a local network.
#### `--uptime-metric-freq` (duration)
Frequency of renewing this node's average uptime metric. Defaults to `30s`.
#### Snow Parameters
##### `--snow-concurrent-repolls` (int)
Snow consensus requires repolling transactions that are issued during low time
of network usage. This parameter lets one define how aggressive the client will
be in finalizing these pending transactions. This should only be changed after
careful consideration of the tradeoffs of Snow consensus. The value must be at
least `1` and at most `--snow-commit-threshold`. Defaults to `4`.
##### `--snow-sample-size` (int)
Snow consensus defines `k` as the number of validators that are sampled during
each network poll. This parameter lets one define the `k` value used for
consensus. This should only be changed after careful consideration of the
tradeoffs of Snow consensus. The value must be at least `1`. Defaults to `20`.
##### `--snow-quorum-size` (int)
Snow consensus defines `alpha` as the number of validators that must prefer a
transaction during each network poll to increase the confidence in the
transaction. This parameter lets us define the `alpha` value used for consensus.
This should only be changed after careful consideration of the tradeoffs of Snow
consensus. The value must be at greater than `k/2`. Defaults to `15`.
##### `--snow-commit-threshold` (int)
Snow consensus defines `beta` as the number of consecutive polls that a
container must increase its confidence for it to be accepted. This
parameter lets us define the `beta` value used for consensus. This should only
be changed after careful consideration of the tradeoffs of Snow consensus. The
value must be at least `1`. Defaults to `20`.
##### `--snow-optimal-processing` (int)
Optimal number of processing items in consensus. The value must be at least `1`. Defaults to `50`.
##### `--snow-max-processing` (int)
Maximum number of processing items to be considered healthy. Reports unhealthy
if more than this number of items are outstanding. The value must be at least
`1`. Defaults to `1024`.
##### `--snow-max-time-processing` (duration)
Maximum amount of time an item should be processing and still be healthy.
Reports unhealthy if there is an item processing for longer than this duration.
The value must be greater than `0`. Defaults to `2m`.
### ProposerVM Parameters
#### `--proposervm-use-current-height` (bool)
Have the ProposerVM always report the last accepted P-chain block height. Defaults to `false`.
### `--proposervm-min-block-delay` (duration)
The minimum delay to enforce when building a snowman++ block for the primary network
chains and the default minimum delay for subnets. Defaults to `1s`. A non-default
value is only suggested for non-production nodes.
### Continuous Profiling
You can configure your node to continuously run memory/CPU profiles and save the
most recent ones. Continuous memory/CPU profiling is enabled if
`--profile-continuous-enabled` is set.
#### `--profile-continuous-enabled` (boolean)
Whether the app should continuously produce performance profiles. Defaults to the false (not enabled).
#### `--profile-dir` (string)
If profiling enabled, node continuously runs memory/CPU profiles and puts them
at this directory. Defaults to the `$HOME/.avalanchego/profiles/`.
#### `--profile-continuous-freq` (duration)
How often a new CPU/memory profile is created. Defaults to `15m`.
#### `--profile-continuous-max-files` (int)
Maximum number of CPU/memory profiles files to keep. Defaults to 5.
### Health
#### `--health-check-frequency` (duration)
Health check runs with this frequency. Defaults to `30s`.
#### `--health-check-averager-halflife` (duration)
Half life of averagers used in health checks (to measure the rate of message
failures, for example.) Larger value --> less volatile calculation of
averages. Defaults to `10s`.
### Network
#### `--network-allow-private-ips` (bool)
Allows the node to connect peers with private IPs. Defaults to `true`.
#### `--network-compression-type` (string)
The type of compression to use when sending messages to peers. Defaults to `gzip`.
Must be one of \[`gzip`, `zstd`, `none`].
Nodes can handle inbound `gzip` compressed messages but by default send `zstd` compressed messages.
#### `--network-initial-timeout` (duration)
Initial timeout value of the adaptive timeout manager. Defaults to `5s`.
#### `--network-initial-reconnect-delay` (duration)
Initial delay duration must be waited before attempting to reconnect a peer. Defaults to `1s`.
#### `--network-max-reconnect-delay` (duration)
Maximum delay duration must be waited before attempting to reconnect a peer. Defaults to `1h`.
#### `--network-minimum-timeout` (duration)
Minimum timeout value of the adaptive timeout manager. Defaults to `2s`.
#### `--network-maximum-timeout` (duration)
Maximum timeout value of the adaptive timeout manager. Defaults to `10s`.
#### `--network-maximum-inbound-timeout` (duration)
Maximum timeout value of an inbound message. Defines duration within which an
incoming message must be fulfilled. Incoming messages containing deadline higher
than this value will be overridden with this value. Defaults to `10s`.
#### `--network-timeout-halflife` (duration)
Half life used when calculating average network latency. Larger value --> less
volatile network latency calculation. Defaults to `5m`.
#### `--network-timeout-coefficient` (duration)
Requests to peers will time out after \[`network-timeout-coefficient`] \*
\[average request latency]. Defaults to `2`.
#### `--network-read-handshake-timeout` (duration)
Timeout value for reading handshake messages. Defaults to `15s`.
#### `--network-ping-timeout` (duration)
Timeout value for Ping-Pong with a peer. Defaults to `30s`.
#### `--network-ping-frequency` (duration)
Frequency of pinging other peers. Defaults to `22.5s`.
#### `--network-health-min-conn-peers` (uint)
Node will report unhealthy if connected to less than this many peers. Defaults to `1`.
#### `--network-health-max-time-since-msg-received` (duration)
Node will report unhealthy if it hasn't received a message for this amount of time. Defaults to `1m`.
#### `--network-health-max-time-since-msg-sent` (duration)
Network layer returns unhealthy if haven't sent a message for at least this much time. Defaults to `1m`.
#### `--network-health-max-portion-send-queue-full` (float)
Node will report unhealthy if its send queue is more than this portion full.
Must be in \[0,1]. Defaults to `0.9`.
#### `--network-health-max-send-fail-rate` (float)
Node will report unhealthy if more than this portion of message sends fail. Must
be in \[0,1]. Defaults to `0.25`.
#### `--network-health-max-outstanding-request-duration` (duration)
Node reports unhealthy if there has been a request outstanding for this duration. Defaults to `5m`.
#### `--network-max-clock-difference` (duration)
Max allowed clock difference value between this node and peers. Defaults to `1m`.
#### `--network-require-validator-to-connect` (bool)
If true, this node will only maintain a connection with another node if this
node is a validator, the other node is a validator, or the other node is a
beacon.
#### `--network-tcp-proxy-enabled` (bool)
Require all P2P connections to be initiated with a TCP proxy header. Defaults to `false`.
#### `--network-tcp-proxy-read-timeout` (duration)
Maximum duration to wait for a TCP proxy header. Defaults to `3s`.
#### `--network-outbound-connection-timeout` (duration)
Timeout while dialing a peer. Defaults to `30s`.
### Message Rate-Limiting
These flags govern rate-limiting of inbound and outbound messages. For more
information on rate-limiting and the flags below, see package `throttling` in
AvalancheGo.
#### CPU Based
Rate-limiting based on how much CPU usage a peer causes.
##### `--throttler-inbound-cpu-validator-alloc` (float)
Number of CPU allocated for use by validators. Value should be in range (0, total core count].
Defaults to half of the number of CPUs on the machine.
##### `--throttler-inbound-cpu-max-recheck-delay` (duration)
In the CPU rate-limiter, check at least this often whether the node's CPU usage
has fallen to an acceptable level. Defaults to `5s`.
##### `--throttler-inbound-disk-max-recheck-delay` (duration)
In the disk-based network throttler, check at least this often whether the node's disk usage has
fallen to an acceptable level. Defaults to `5s`.
##### `--throttler-inbound-cpu-max-non-validator-usage` (float)
Number of CPUs that if fully utilized, will rate limit all non-validators. Value should be in range
\[0, total core count].
Defaults to %80 of the number of CPUs on the machine.
##### `--throttler-inbound-cpu-max-non-validator-node-usage` (float)
Maximum number of CPUs that a non-validator can utilize. Value should be in range \[0, total core count].
Defaults to the number of CPUs / 8.
##### `--throttler-inbound-disk-validator-alloc` (float)
Maximum number of disk reads/writes per second to allocate for use by validators. Must be > 0.
Defaults to `1000 GiB/s`.
##### `--throttler-inbound-disk-max-non-validator-usage` (float)
Number of disk reads/writes per second that, if fully utilized, will rate limit all non-validators.
Must be >= 0.
Defaults to `1000 GiB/s`.
##### `--throttler-inbound-disk-max-non-validator-node-usage` (float)
Maximum number of disk reads/writes per second that a non-validator can utilize. Must be >= 0.
Defaults to `1000 GiB/s`.
#### Bandwidth Based
Rate-limiting based on the bandwidth a peer uses.
##### `--throttler-inbound-bandwidth-refill-rate` (uint)
Max average inbound bandwidth usage of a peer, in bytes per second. See
interface `throttling.BandwidthThrottler`. Defaults to `512`.
##### `--throttler-inbound-bandwidth-max-burst-size` (uint)
Max inbound bandwidth a node can use at once. See interface
`throttling.BandwidthThrottler`. Defaults to `2 MiB`.
#### Message Size Based
Rate-limiting based on the total size, in bytes, of unprocessed messages.
##### `--throttler-inbound-at-large-alloc-size` (uint)
Size, in bytes, of at-large allocation in the inbound message throttler. Defaults to `6291456` (6 MiB).
##### `--throttler-inbound-validator-alloc-size` (uint)
Size, in bytes, of validator allocation in the inbound message throttler.
Defaults to `33554432` (32 MiB).
##### `--throttler-inbound-node-max-at-large-bytes` (uint)
Maximum number of bytes a node can take from the at-large allocation of the
inbound message throttler. Defaults to `2097152` (2 MiB).
#### Message Based
Rate-limiting based on the number of unprocessed messages.
##### `--throttler-inbound-node-max-processing-msgs` (uint)
Node will stop reading messages from a peer when it is processing this many messages from the peer.
Will resume reading messages from the peer when it is processing less than this many messages.
Defaults to `1024`.
#### Outbound
Rate-limiting for outbound messages.
##### `--throttler-outbound-at-large-alloc-size` (uint)
Size, in bytes, of at-large allocation in the outbound message throttler.
Defaults to `33554432` (32 MiB).
##### `--throttler-outbound-validator-alloc-size` (uint)
Size, in bytes, of validator allocation in the outbound message throttler.
Defaults to `33554432` (32 MiB).
##### `--throttler-outbound-node-max-at-large-bytes` (uint)
Maximum number of bytes a node can take from the at-large allocation of the
outbound message throttler. Defaults to `2097152` (2 MiB).
### Connection Rate-Limiting
#### `--network-inbound-connection-throttling-cooldown` (duration)
Node will upgrade an inbound connection from a given IP at most once within this
duration. Defaults to `10s`. If 0 or negative, will not consider recency of last
upgrade when deciding whether to upgrade.
#### `--network-inbound-connection-throttling-max-conns-per-sec` (uint)
Node will accept at most this many inbound connections per second. Defaults to `512`.
#### `--network-outbound-connection-throttling-rps` (uint)
Node makes at most this many outgoing peer connection attempts per second. Defaults to `50`.
### Peer List Gossiping
Nodes gossip peers to each other so that each node can have an up-to-date peer
list. A node gossips `--network-peer-list-num-validator-ips` validator IPs to
`--network-peer-list-validator-gossip-size` validators,
`--network-peer-list-non-validator-gossip-size` non-validators and
`--network-peer-list-peers-gossip-size` peers every
`--network-peer-list-gossip-frequency`.
#### `--network-peer-list-num-validator-ips` (int)
Number of validator IPs to gossip to other nodes Defaults to `15`.
#### `--network-peer-list-validator-gossip-size` (int)
Number of validators that the node will gossip peer list to. Defaults to `20`.
#### `--network-peer-list-non-validator-gossip-size` (int)
Number of non-validators that the node will gossip peer list to. Defaults to `0`.
#### `--network-peer-list-peers-gossip-size` (int)
Number of total peers (including non-validator or validator) that the node will gossip peer list to
Defaults to `0`.
#### `--network-peer-list-gossip-frequency` (duration)
Frequency to gossip peers to other nodes. Defaults to `1m`.
#### `--network-peer-read-buffer-size` (int)
Size of the buffer that peer messages are read into (there is one buffer per
peer), defaults to `8` KiB (8192 Bytes).
#### `--network-peer-write-buffer-size` (int)
Size of the buffer that peer messages are written into (there is one buffer per
peer), defaults to `8` KiB (8192 Bytes).
### Resource Usage Tracking
#### `--meter-vm-enabled` (bool)
Enable Meter VMs to track VM performance with more granularity. Defaults to `true`.
#### `--system-tracker-frequency` (duration)
Frequency to check the real system usage of tracked processes. More frequent
checks --> usage metrics are more accurate, but more expensive to track.
Defaults to `500ms`.
#### `--system-tracker-processing-halflife` (duration)
Half life to use for the processing requests tracker. Larger half life --> usage
metrics change more slowly. Defaults to `15s`.
#### `--system-tracker-cpu-halflife` (duration)
Half life to use for the CPU tracker. Larger half life --> CPU usage metrics
change more slowly. Defaults to `15s`.
#### `--system-tracker-disk-halflife` (duration)
Half life to use for the disk tracker. Larger half life --> disk usage metrics
change more slowly. Defaults to `1m`.
#### `--system-tracker-disk-required-available-space` (uint)
"Minimum number of available bytes on disk, under which the node will shutdown.
Defaults to `536870912` (512 MiB).
#### `--system-tracker-disk-warning-threshold-available-space` (uint)
Warning threshold for the number of available bytes on disk, under which the
node will be considered unhealthy. Must be >=
`--system-tracker-disk-required-available-space`. Defaults to `1073741824` (1
GiB).
### Plugins
#### `--plugin-dir` (string)
Sets the directory for [VM plugins](https://build.avax.network/docs/virtual-machines). The default value is `$HOME/.avalanchego/plugins`.
### Virtual Machine (VM) Configs
#### `--vm-aliases-file (string)`
Path to JSON file that defines aliases for Virtual Machine IDs. Defaults to
`~/.avalanchego/configs/vms/aliases.json`. This flag is ignored if
`--vm-aliases-file-content` is specified. Example content:
```json
{
"tGas3T58KzdjLHhBDMnH2TvrddhqTji5iZAMZ3RXs2NLpSnhH": [
"timestampvm",
"timerpc"
]
}
```
The above example aliases the VM whose ID is
`"tGas3T58KzdjLHhBDMnH2TvrddhqTji5iZAMZ3RXs2NLpSnhH"` to `"timestampvm"` and
`"timerpc"`.
`--vm-aliases-file-content` (string)
As an alternative to `--vm-aliases-file`, it allows specifying base64 encoded
aliases for Virtual Machine IDs.
### Indexing
#### `--index-allow-incomplete` (boolean)
If true, allow running the node in such a way that could cause an index to miss transactions.
Ignored if index is disabled. Defaults to `false`.
### Router
#### `--router-health-max-drop-rate` (float)
Node reports unhealthy if the router drops more than this portion of messages. Defaults to `1`.
#### `--router-health-max-outstanding-requests` (uint)
Node reports unhealthy if there are more than this many outstanding consensus requests
(Get, PullQuery, etc.) over all chains. Defaults to `1024`.
# Backup and Restore
URL: /docs/nodes/maintain/backup-restore
Once you have your node up and running, it's time to prepare for disaster recovery. Should your machine ever have a catastrophic failure due to either hardware or software issues, or even a case of natural disaster, it's best to be prepared for such a situation by making a backup.
When running, a complete node installation along with the database can grow to be multiple gigabytes in size. Having to back up and restore such a large volume of data can be expensive, complicated and time-consuming. Luckily, there is a better way.
Instead of having to back up and restore everything, we need to back up only what is essential, that is, those files that cannot be reconstructed because they are unique to your node. For AvalancheGo node, unique files are those that identify your node on the network, in other words, files that define your NodeID.
Even if your node is a validator on the network and has multiple delegations on it, you don't need to worry about backing up anything else, because the validation and delegation transactions are also stored on the blockchain and will be restored during bootstrapping, along with the rest of the blockchain data.
The installation itself can be easily recreated by installing the node on a new machine, and all the remaining gigabytes of blockchain data can be easily recreated by the process of bootstrapping, which copies the data over from other network peers. However, if you would like to speed up the process, see the [Database Backup and Restore section](#database)
## NodeID[](#nodeid "Direct link to heading")
If more than one running nodes share the same NodeID, the communications from other nodes in the Avalanche network to this NodeID will be random to one of these nodes. If this NodeID is of a validator, it will dramatically impact the uptime calculation of the validator which will very likely disqualify the validator from receiving the staking rewards. Please make sure only one node with the same NodeID run at one time.
NodeID is a unique identifier that differentiates your node from all the other peers on the network. It's a string formatted like `NodeID-5mb46qkSBj81k9g9e4VFjGGSbaaSLFRzD`. You can look up the technical background of how the NodeID is constructed [here](/docs/api-reference/standards/cryptographic-primitives#tls-addresses). In essence, NodeID is defined by two files:
* `staker.crt`
* `staker.key`
NodePOP is this node's BLS key and proof of possession. Nodes must register a BLS key to act as a validator on the Primary Network. Your node's POP is logged on startup and is accessible over this endpoint.
* `publicKey` is the 48 byte hex representation of the BLS key.
* `proofOfPossession` is the 96 byte hex representation of the BLS signature.
NodePOP is defined by the `signer.key` file.
In the default installation, they can be found in the working directory, specifically in `~/.avalanchego/staking/`. All we need to do to recreate the node on another machine is to run a new installation with those same three files.
If `staker.key` and `staker.crt` are removed from a node, which is restarted afterwards, they will be recreated and a new node ID will be assigned.
If the `signer.key` is regenerated, the node will lose its previous BLS identity, which includes its public key and proof of possession. This change means that the node's former identity on the network will no longer be recognized, affecting its ability to participate in the consensus mechanism as before. Consequently, the node may lose its established reputation and any associated staking rewards.
If you have users defined in the keystore of your node, then you need to back up and restore those as well. [Keystore API](/docs/api-reference/keystore-api) has methods that can be used to export and import user keys. Note that Keystore API is used by developers only and not intended for use in production nodes. If you don't know what a keystore API is and have not used it, you don't need to worry about it.
### Backup[](#backup "Direct link to heading")
To back up your node, we need to store `staker.crt` and `staker.key` files somewhere safe and private, preferably to a different computer, to your private To back up your node, we need to store `staker.crt`, `staker.key` and `signer.key` files somewhere safe and private, preferably to a different computer.
If someone gets a hold of your staker files, they still cannot get to your funds, as they are controlled by the wallet private keys, not by the node. But, they could re-create your node somewhere else, and depending on the circumstances make you lose the staking rewards. So make sure your staker files are secure.
If someone gains access to your `signer.key`, they could potentially sign transactions on behalf of your node, which might disrupt the operations and integrity of your node on the network.
Let's get the files off the machine running the node.
#### From Local Node[](#from-local-node "Direct link to heading")
If you're running the node locally, on your desktop computer, just navigate to where the files are and copy them somewhere safe.
On a default Linux installation, the path to them will be `/home/USERNAME/.avalanchego/staking/`, where `USERNAME` needs to be replaced with the actual username running the node. Select and copy the files from there to a backup location. You don't need to stop the node to do that.
#### From Remote Node Using `scp`[](#from-remote-node-using-scp "Direct link to heading")
`scp` is a 'secure copy' command line program, available built-in on Linux and MacOS computers. There is also a Windows version, `pscp`, as part of the [PuTTY](https://www.chiark.greenend.org.uk/~sgtatham/putty/latest.html) package. If using `pscp`, in the following commands replace each usage of `scp` with `pscp -scp`.
To copy the files from the node, you will need to be able to remotely log into the machine. You can use account password, but the secure and recommended way is to use the SSH keys. The procedure for acquiring and setting up SSH keys is highly dependent on your cloud provider and machine configuration. You can refer to our [Amazon Web Services](/docs/nodes/on-third-party-services/amazon-web-services) and [Microsoft Azure](/docs/nodes/on-third-party-services/microsoft-azure) setup guides for those providers. Other providers will have similar procedures.
When you have means of remote login into the machine, you can copy the files over with the following command:
```bash
scp -r ubuntu@PUBLICIP:/home/ubuntu/.avalanchego/staking ~/avalanche_backup
```
This assumes the username on the machine is `ubuntu`, replace with correct username in both places if it is different. Also, replace `PUBLICIP` with the actual public IP of the machine. If `scp` doesn't automatically use your downloaded SSH key, you can point to it manually:
```bash
scp -i /path/to/the/key.pem -r ubuntu@PUBLICIP:/home/ubuntu/.avalanchego/staking ~/avalanche_backup
```
Once executed, this command will create `avalanche_backup` directory and place those three files in it. You need to store them somewhere safe.
### Restore[](#restore "Direct link to heading")
To restore your node from a backup, we need to do the reverse: restore `staker.key`, `staker.crt` and `signer.key` from the backup to the working directory of the new node.
First, we need to do the usual [installation](/docs/nodes/using-install-script/installing-avalanche-go) of the node. This will create a new NodeID, a new BLS key and a new BLS signature, which we need to replace. When the node is installed correctly, log into the machine where the node is running and stop it:
```bash
sudo systemctl stop avalanchego
```
We're ready to restore the node.
#### To Local Node[](#to-local-node "Direct link to heading")
If you're running the node locally, just copy the `staker.key`, `staker.crt` and `signer.key` files from the backup location into the working directory, which on the default Linux installation will be `/home/USERNAME/.avalanchego/staking/`. Replace `USERNAME` with the actual username used to run the node.
#### To Remote Node Using `scp`[](#to-remote-node-using-scp "Direct link to heading")
Again, the process is just the reverse operation. Using `scp` we need to copy the `staker.key`, `staker.crt` and `signer.key` files from the backup location into the remote working directory. Assuming the backed up files are located in the directory where the above backup procedure placed them:
```bash
scp ~/avalanche_backup/{staker.*,signer.key} ubuntu@PUBLICIP:/home/ubuntu/.avalanchego/staking
```
Or if you need to specify the path to the SSH key:
```bash
scp -i /path/to/the/key.pem ~/avalanche_backup/{staker.*,signer.key} ubuntu@PUBLICIP:/home/ubuntu/.avalanchego/staking
```
And again, replace `ubuntu` with correct username if different, and `PUBLICIP` with the actual public IP of the machine running the node, as well as the path to the SSH key if used.
#### Restart the Node and Verify[](#restart-the-node-and-verify "Direct link to heading")
Once the files have been replaced, log into the machine and start the node using:
```bash
sudo systemctl start avalanchego
```
You can now check that the node is restored with the correct NodeID and NodePOP by issuing the [getNodeID](/docs/api-reference/info-api#infogetnodeid) API call in the same console you ran the previous command:
```bash
curl -X POST --data '{
"jsonrpc":"2.0",
"id" :1,
"method" :"info.getNodeID"
}' -H 'content-type:application/json;' 127.0.0.1:9650/ext/info
```
You should see your original NodeID and NodePOP (BLS key and BLS signature). Restore process is done.
## Database[](#database "Direct link to heading")
Normally, when starting a new node, you can just bootstrap from scratch. However, there are situations when you may prefer to reuse an existing database (ex: preserve keystore records, reduce sync time).
This tutorial will walk you through compressing your node's DB and moving it to another computer using `zip` and `scp`.
### Database Backup[](#database-backup "Direct link to heading")
First, make sure to stop AvalancheGo, run:
```bash
sudo systemctl stop avalanchego
```
You must stop the Avalanche node before you back up the database otherwise data could become corrupted.
Once the node is stopped, you can `zip` the database directory to reduce the size of the backup and speed up the transfer using `scp`:
```bash
zip -r avalanche_db_backup.zip .avalanchego/db
```
*Note: It may take > 30 minutes to zip the node's DB.*
Next, you can transfer the backup to another machine:
```bash
scp -r ubuntu@PUBLICIP:/home/ubuntu/avalanche_db_backup.zip ~/avalanche_db_backup.zip
```
This assumes the username on the machine is `ubuntu`, replace with correct username in both places if it is different. Also, replace `PUBLICIP` with the actual public IP of the machine. If `scp` doesn't automatically use your downloaded SSH key, you can point to it manually:
```bash
scp -i /path/to/the/key.pem -r ubuntu@PUBLICIP:/home/ubuntu/avalanche_db_backup.zip ~/avalanche_db_backup.zip
```
Once executed, this command will create `avalanche_db_backup.zip` directory in you home directory.
### Database Restore[](#database-restore "Direct link to heading")
*This tutorial assumes you have already completed "Database Backup" and have a backup at \~/avalanche\_db\_backup.zip.*
First, we need to do the usual [installation](/docs/nodes/using-install-script/installing-avalanche-go) of the node. When the node is installed correctly, log into the machine where the node is running and stop it:
```bash
sudo systemctl stop avalanchego
```
You must stop the Avalanche node before you restore the database otherwise data could become corrupted.
We're ready to restore the database. First, let's move the DB on the existing node (you can remove this old DB later if the restore was successful):
```bash
mv .avalanchego/db .avalanchego/db-old
```
Next, we'll unzip the backup we moved from another node (this will place the unzipped files in `~/.avalanchego/db` when the command is run in the home directory):
```bash
unzip avalanche_db_backup.zip
```
After the database has been restored on a new node, use this command to start the node:
```bash
sudo systemctl start avalanchego
```
Node should now be running from the database on the new instance. To check that everything is in order and that node is not bootstrapping from scratch (which would indicate a problem), use:
```bash
sudo journalctl -u avalanchego -f
```
The node should be catching up to the network and fetching a small number of blocks before resuming normal operation (all the ones produced from the time when the node was stopped before the backup).
Once the backup has been restored and is working as expected, the zip can be deleted:
```bash
rm avalanche_db_backup.zip
```
### Database Direct Copy[](#database-direct-copy "Direct link to heading")
You may be in a situation where you don't have enough disk space to create the archive containing the whole database, so you cannot complete the backup process as described previously.
In that case, you can still migrate your database to a new computer, by using a different approach: `direct copy`. Instead of creating the archive, moving the archive and unpacking it, we can do all of that on the fly.
To do so, you will need `ssh` access from the destination machine (where you want the database to end up) to the source machine (where the database currently is). Setting up `ssh` is the same as explained for `scp` earlier in the document.
Same as shown previously, you need to stop the node (on both machines):
```bash
sudo systemctl stop avalanchego
```
You must stop the Avalanche node before you back up the database otherwise data could become corrupted.
Then, on the destination machine, change to a directory where you would like to the put the database files, enter the following command:
```bash
ssh -i /path/to/the/key.pem ubuntu@PUBLICIP 'tar czf - .avalanchego/db' | tar xvzf - -C .
```
Make sure to replace the correct path to the key, and correct IP of the source machine. This will compress the database, but instead of writing it to a file it will pipe it over `ssh` directly to destination machine, where it will be decompressed and written to disk. The process can take a long time, make sure it completes before continuing.
After copying is done, all you need to do now is move the database to the correct location on the destination machine. Assuming there is a default AvalancheGo node installation, we remove the old database and replace it with the new one:
```bash
rm -rf ~/.avalanchego/db
mv db ~/.avalanchego/db
```
You can now start the node on the destination machine:
```bash
sudo systemctl start avalanchego
```
Node should now be running from the copied database. To check that everything is in order and that node is not bootstrapping from scratch (which would indicate a problem), use:
```bash
sudo journalctl -u avalanchego -f
```
The node should be catching up to the network and fetching a small number of blocks before resuming normal operation (all the ones produced from the time when the node was stopped before the backup).
## Summary[](#summary "Direct link to heading")
Essential part of securing your node is the backup that enables full and painless restoration of your node. Following this tutorial you can rest easy knowing that should you ever find yourself in a situation where you need to restore your node from scratch, you can easily and quickly do so.
If you have any problems following this tutorial, comments you want to share with us or just want to chat, you can reach us on our [Discord](https://chat.avalabs.org/) server.
# Node Bootstrap
URL: /docs/nodes/maintain/bootstrapping
Node Bootstrap is the process where a node *securely* downloads linear chain blocks to recreate the latest state of the chain locally.
Bootstrap must guarantee that the local state of a node is in sync with the state of other valid nodes. Once bootstrap is completed, a node has the latest state of the chain and can verify new incoming transactions and reach consensus with other nodes, collectively moving forward the chains.
Bootstrapping a node is a multi-step process which requires downloading the chains required by the Primary Network (that is, the C-Chain, P-Chain, and X-Chain), as well as the chains required by any additional Avalanche L1s that the node explicitly tracks.
This document covers the high-level technical details of how bootstrapping works. This document glosses over some specifics, but the [AvalancheGo](https://github.com/ava-labs/avalanchego) codebase is open-source and is available for curious-minded readers to learn more.
## Validators and Where to Find Them[](#validators-and-where-to-find-them "Direct link to heading")
Bootstrapping is all about downloading all previously accepted containers *securely* so a node can have the latest correct state of the chain. A node can't arbitrarily trust any source - a malicious actor could provide malicious blocks, corrupting the bootstrapping node's local state, and making it impossible for the node to correctly validate the network and reach consensus with other correct nodes.
What's the most reliable source of information in the Avalanche ecosystem? It's a *large enough* majority of validators. Therefore, the first step of bootstrapping is finding a sufficient amount of validators to download containers from.
The P-Chain is responsible for all platform-level operations, including staking events that modify an Avalanche L1's validator set. Whenever any chain (aside from the P-Chain itself) bootstraps, it requests an up-to-date validator set for that Avalanche L1 (Primary Network is an Avalanche L1 too). Once the Avalanche L1's current validator set is known, the node can securely download containers from these validators to bootstrap the chain.
There is a caveat here: the validator set must be *up-to-date*. If a bootstrapping node's validator set is stale, the node may incorrectly believe that some nodes are still validators when their validation period has already expired. A node might unknowingly end up requesting blocks from non-validators which respond with malicious blocks that aren't safe to download.
**For this reason, every Avalanche node must fully bootstrap the P-chain first before moving on to the other Primary Network chains and other Avalanche L1s to guarantee that their validator sets are up-to-date**.
What about the P-chain? The P-chain can't ever have an up-to-date validator set before completing its bootstrap. To solve this chicken-and-egg situation the Avalanche Foundation maintains a trusted default set of validators called beacons (but users are free to configure their own). Beacon Node-IDs and IP addresses are listed in the [AvalancheGo codebase](https://github.com/ava-labs/avalanchego/blob/master/genesis/bootstrappers.json). Every node has the beacon list available from the start and can reach out to them as soon as it starts.
Validators are the only sources of truth for a blockchain. Validator availability is so key to the bootstrapping process that **bootstrapping is blocked until the node establishes a sufficient amount of secure connections to validators**. If the node fails to reach a sufficient amount within a given period of time, it shuts down as no operation can be carried out safely.
## Bootstrapping the Blockchain[](#bootstrapping-the-blockchain "Direct link to heading")
Once a node is able to discover and connect to validator and beacon nodes, it's able to start bootstrapping the blockchain by downloading the individual containers.
One common misconception is that Avalanche blockchains are bootstrapped by retrieving containers starting at genesis and working up to the currently accepted frontier.
Instead, containers are downloaded from the accepted frontier downwards to genesis, and then their corresponding state transitions are executed upwards from genesis to the accepted frontier. The accepted frontier is the last accepted block for linear chains.
Why can't nodes simply download blocks in chronological order, starting from genesis upwards? The reason is efficiency: if nodes downloaded containers upwards they would only get a safety guarantee by polling a majority of validators for every single container. That's a lot of network traffic for a single container, and a node would still need to do that for each container in the chain.
Instead, if a node starts by securely retrieving the accepted frontier from a majority of honest nodes and then recursively fetches the parent containers from the accepted frontier down to genesis, it can cheaply check that containers are correct just by verifying their IDs. Each Avalanche container has the IDs of its parents (one block parent for linear chains) and an ID's integrity can be guaranteed cryptographically.
Let's dive deeper into the two bootstrap phases - frontier retrieval and container execution.
### Frontier Retrieval[](#frontier-retrieval "Direct link to heading")
The current frontier is retrieved by requesting them from validator or beacon nodes. Avalanche bootstrap is designed to be robust - it must be able to make progress even in the presence of slow validators or network failures. This process needs to be fault-tolerant to these types of failures, since bootstrapping may take quite some time to complete and network connections can be unreliable.
Bootstrap starts when a node has connected to a sufficient majority of validator stake. A node is able to start bootstrapping when it has connected to at least 75%75\\% of total validator stake.
Seeders are the first set of peers that a node reaches out to when trying to figure out the current frontier. A subset of seeders is randomly sampled from the validator set. Seeders might be slow and provide a stale frontier, be malicious and return malicious container IDs, but they always provide an initial set of candidate frontiers to work with.
Once a node has received the candidate frontiers form its seeders, it polls **every network validator** to vet the candidates frontiers. It sends the list of candidate frontiers it received from the seeders to each validator, asking whether or not they know about these frontiers. Each validator responds returning the subset of known candidates, regardless of how up-to-date or stale the containers are. Each validator returns containers irrespective of their age so that bootstrap works even in the presence of a stale frontier.
Frontier retrieval is completed when at least one of the candidate frontiers is supported by at least 50%50\\% of total validator stake. Multiple candidate frontiers may be supported by a majority of stake, after which point the next phase, container fetching starts.
At any point in these steps a network issue may occur, preventing a node from retrieving or validating frontiers. If this occurs, bootstrap restarts by sampling a new set of seeders and repeating the bootstrapping process, optimistically assuming that the network issue will go away.
### Containers Execution[](#containers-execution "Direct link to heading")
Once a node has at least one valid frontiers, it starts downloading parent containers for each frontier. If it's the first time the node is running, it won't know about any containers and will try fetching all parent containers recursively from the accepted frontier down to genesis (unless [state sync](#state-sync) is enabled). If bootstrap had already run previously, some containers are already available locally and the node will stop as soon as it finds a known one.
A node first just fetches and parses containers. Once the chain is complete, the node executes them in chronological order starting from the earliest downloaded container to the accepted frontier. This allows the node to rebuild the full chain state and to eventually be in sync with the rest of the network.
## When Does Bootstrapping Finish?[](#when-does-bootstrapping-finish "Direct link to heading")
You've seen how [bootstrap works](#bootstrapping-the-blockchain) for a single chain. However, a node must bootstrap the chains in the Primary Network as well as the chains in each Avalanche L1 it tracks. This begs the questions - when are these chains bootstrapped? When is a node done bootstrapping?
The P-chain is always the first to bootstrap before any other chain. Once the P-Chain has finished, all other chains start bootstrapping in parallel, connecting to their own validators independently of one another.
A node completes bootstrapping an Avalanche L1 once all of its corresponding chains have completed bootstrapping. Because the Primary Network is a special case of Avalanche L1 that includes the entire network, this applies to it as well as any other manually tracked Avalanche L1s.
Note that Avalanche L1s bootstrap is independently of one another - so even if one Avalanche L1 has bootstrapped and is validating new transactions and adding new containers, other Avalanche L1s may still be bootstrapping in parallel.
Within a single Avalanche L1 however, an Avalanche L1 isn't done bootstrapping until the last chain completes bootstrapping. It's possible for a single chain to effectively stall a node from finishing the bootstrap for a single Avalanche L1, if it has a sufficiently long history or each operation is complex and time consuming. Even worse, other Avalanche L1 validators are continuously accepting new transactions and adding new containers on top of the previously known frontier, so a node that's slow to bootstrap can continuously fall behind the rest of the network.
Nodes mitigate this by restarting bootstrap for any chains which is blocked waiting for the remaining Avalanche L1 chains to finish bootstrapping. These chains repeat the frontier retrieval and container downloading phases to stay up-to-date with the Avalanche L1's ever moving current frontier until the slowest chain has completed bootstrapping.
Once this is complete, a node is finally ready to validate the network.
## State Sync[](#state-sync "Direct link to heading")
The full node bootstrap process is long, and gets longer and longer over time as more and more containers are accepted. Nodes need to bootstrap a chain by reconstructing the full chain state locally - but downloading and executing each container isn't the only way to do this.
Starting from [AvalancheGo version 1.7.11](https://github.com/ava-labs/avalanchego/releases/tag/v1.7.11), nodes can use state sync to drastically cut down bootstrapping time on the C-Chain. Instead of executing each block, state sync uses cryptographic techniques to download and verify just the state associated with the current frontier. State synced nodes can't serve every C-chain block ever historically accepted, but they can safely retrieve the full C-chain state needed to validate in a much shorter time. State sync will fetch the previous 256 blocks prior to support the previous block hash operation code.
State sync is currently only available for the C-chain. The P-chain and X-chain currently bootstrap by downloading all blocks. Note that irrespective of the bootstrap method used (including state sync), each chain is still blocked on all other chains in its Avalanche L1 completing their bootstrap before continuing into normal operation.
There are no configs to state sync an archival node. If you need all the historical state then you must not use state sync and setup the config of the node for an archival node.
## Conclusions and FAQ[](#conclusions-and-faq "Direct link to heading")
If you got this far, you've hopefully gotten a better idea of what's going on when your node bootstraps. Here's a few frequently asked questions about bootstrapping.
### How Can I Get the ETA for Node Bootstrap?[](#how-can-i-get-the-eta-for-node-bootstrap "Direct link to heading")
Logs provide information about both container downloading and their execution for each chain. Here is an example
```bash
[02-16|17:31:42.950] INFO bootstrap/bootstrapper.go:494 fetching blocks {"numFetchedBlocks": 5000, "numTotalBlocks": 101357, "eta": "2m52s"}
[02-16|17:31:58.110] INFO
bootstrap/bootstrapper.go:494 fetching blocks {"numFetchedBlocks": 10000, "numTotalBlocks": 101357, "eta": "3m40s"}
[02-16|17:32:04.554] INFO
bootstrap/bootstrapper.go:494 fetching blocks {"numFetchedBlocks": 15000, "numTotalBlocks": 101357, "eta": "2m56s"}
...
[02-16|17:36:52.404] INFO
queue/jobs.go:203 executing operations {"numExecuted": 17881, "numToExecute": 101357, "eta": "2m20s"}
[02-16|17:37:22.467] INFO
queue/jobs.go:203 executing operations {"numExecuted": 35009, "numToExecute": 101357, "eta": "1m54s"}
[02-16|17:37:52.468] INFO
queue/jobs.go:203 executing operations {"numExecuted": 52713, "numToExecute": 101357, "eta": "1m23s"}
```
Similar logs are emitted for X and C chains and any chain in explicitly tracked Avalanche L1s.
### Why Chain Bootstrap ETA Keeps On Changing?[](#why-chain-bootstrap-eta-keeps-on-changing "Direct link to heading")
As you saw in the [bootstrap completion section](#when-does-bootstrapping-finish), an Avalanche L1 like the Primary Network completes once all of its chains finish bootstrapping. Some Avalanche L1 chains may have to wait for the slowest to finish. They'll restart bootstrapping in the meantime, to make sure they won't fall back too much with respect to the network accepted frontier.
## What Order Do The Chains Bootstrap?[](#what-order-do-the-chains-bootstrap "Direct link to heading")
The 3 chains will bootstrap in the following order: P-chain, X-chain, C-chain.
### Why Are AvalancheGo APIs Disabled During Bootstrapping?[](#why-are-avalanchego-apis-disabled-during-bootstrapping "Direct link to heading")
AvalancheGo APIs are [explicitly disabled](https://github.com/ava-labs/avalanchego/blob/master/api/server/server.go#L367:L379) during bootstrapping. The reason is that if the node has not fully rebuilt its Avalanche L1s state, it can't provide accurate information. AvalancheGo APIs are activated once bootstrap completes and node transition into its normal operating mode, accepting and validating transactions.
# Enroll in Avalanche Notify
URL: /docs/nodes/maintain/enroll-in-avalanche-notify
To receive email alerts if a validator becomes unresponsive or out-of-date, sign up with the Avalanche Notify tool: [http://notify.avax.network](http://notify.avax.network/).
Avalanche Notify is an active monitoring system that checks a validator's responsiveness each minute.
An email alert is sent if a validator is down for 5 consecutive checks and when a validator recovers (is responsive for 5 checks in a row).
}>
When signing up for email alerts, consider using a new, alias, or auto-forwarding email address to protect your privacy. Otherwise, it will be possible to link your NodeID to your email.
This tool is currently in BETA and validator alerts may erroneously be triggered, not triggered, or delayed. The best way to maximize the likelihood of earning staking rewards is to run redundant monitoring/alerting.
# Monitoring
URL: /docs/nodes/maintain/monitoring
Learn how to monitor an AvalancheGo node.
This tutorial demonstrates how to set up infrastructure to monitor an instance of [AvalancheGo](https://github.com/ava-labs/avalanchego). We will use:
* [Prometheus](https://prometheus.io/) to gather and store data
* [`node_exporter`](https://github.com/prometheus/node_exporter) to get information about the machine,
* AvalancheGo's [Metrics API](/docs/api-reference/metrics-api) to get information about the node
* [Grafana](https://grafana.com/) to visualize data on a dashboard.
* A set of pre-made [Avalanche dashboards](https://github.com/ava-labs/avalanche-monitoring/tree/main/grafana/dashboards)
## Prerequisites:
* A running AvalancheGo node
* Shell access to the machine running the node
* Administrator privileges on the machine
This tutorial assumes you have Ubuntu 20.04 running on your node. Other Linux flavors that use `systemd` for running services and `apt-get` for package management might work but have not been tested. Community member has reported it works on Debian 10, might work on other Debian releases as well.
### Caveat: Security
The system as described here **should not** be opened to the public internet. Neither Prometheus nor Grafana as shown here is hardened against unauthorized access. Make sure that both of them are accessible only over a secured proxy, local network, or VPN. Setting that up is beyond the scope of this tutorial, but exercise caution. Bad security practices could lead to attackers gaining control over your node! It is your responsibility to follow proper security practices.
## Monitoring Installer Script[](#monitoring-installer-script "Direct link to heading")
In order to make node monitoring easier to install, we have made a script that does most of the work for you. To download and run the script, log into the machine the node runs on with a user that has administrator privileges and enter the following command:
```bash
wget -nd -m https://raw.githubusercontent.com/ava-labs/avalanche-monitoring/main/grafana/monitoring-installer.sh ;\
chmod 755 monitoring-installer.sh;
```
This will download the script and make it executable.
Script itself is run multiple times with different arguments, each installing a different tool or part of the environment. To make sure it downloaded and set up correctly, begin by running:
```bash
./monitoring-installer.sh --help
```
It should display:
```bash
Usage: ./monitoring-installer.sh [--1|--2|--3|--4|--5|--help]
Options:
--help Shows this message
--1 Step 1: Installs Prometheus
--2 Step 2: Installs Grafana
--3 Step 3: Installs node_exporter
--4 Step 4: Installs AvalancheGo Grafana dashboards
--5 Step 5: (Optional) Installs additional dashboards
Run without any options, script will download and install latest version of AvalancheGo dashboards.
```
Let's get to it.
## Step 1: Set up Prometheus [](#step-1-set-up-prometheus- "Direct link to heading")
Run the script to execute the first step:
```bash
./monitoring-installer.sh --1
```
It should produce output something like this:
```bash
AvalancheGo monitoring installer
--------------------------------
STEP 1: Installing Prometheus
Checking environment...
Found arm64 architecture...
Prometheus install archive found:
https://github.com/prometheus/prometheus/releases/download/v2.31.0/prometheus-2.31.0.linux-arm64.tar.gz
Attempting to download:
https://github.com/prometheus/prometheus/releases/download/v2.31.0/prometheus-2.31.0.linux-arm64.tar.gz
prometheus.tar.gz 100%[=========================================================================================>] 65.11M 123MB/s in 0.5s
2021-11-05 14:16:11 URL:https://github-releases.githubusercontent.com/6838921/a215b0e7-df1f-402b-9541-a3ec9d431f76?X-Amz-Algorithm=AWS4-HMAC-SHA256&X-Amz-Credential=AKIAIWNJYAX4CSVEH53A%2F20211105%2Fus-east-1%2Fs3%2Faws4_request&X-Amz-Date=20211105T141610Z&X-Amz-Expires=300&X-Amz-Signature=72a8ae4c6b5cea962bb9cad242cb4478082594b484d6a519de58b8241b319d94&X-Amz-SignedHeaders=host&actor_id=0&key_id=0&repo_id=6838921&response-content-disposition=attachment%3B%20filename%3Dprometheus-2.31.0.linux-arm64.tar.gz&response-content-type=application%2Foctet-stream [68274531/68274531] -> "prometheus.tar.gz" [1]
...
```
You may be prompted to confirm additional package installs, do that if asked. Script run should end with instructions on how to check that Prometheus installed correctly. Let's do that, run:
```bash
sudo systemctl status prometheus
```
It should output something like:
```bash
● prometheus.service - Prometheus
Loaded: loaded (/etc/systemd/system/prometheus.service; enabled; vendor preset: enabled)
Active: active (running) since Fri 2021-11-12 11:38:32 UTC; 17min ago
Docs: https://prometheus.io/docs/introduction/overview/
Main PID: 548 (prometheus)
Tasks: 10 (limit: 9300)
Memory: 95.6M
CGroup: /system.slice/prometheus.service
└─548 /usr/local/bin/prometheus --config.file=/etc/prometheus/prometheus.yml --storage.tsdb.path=/var/lib/prometheus --web.console.templates=/etc/prometheus/con>
Nov 12 11:38:33 ip-172-31-36-200 prometheus[548]: ts=2021-11-12T11:38:33.644Z caller=head.go:590 level=info component=tsdb msg="WAL segment loaded" segment=81 maxSegment=84
Nov 12 11:38:33 ip-172-31-36-200 prometheus[548]: ts=2021-11-12T11:38:33.773Z caller=head.go:590 level=info component=tsdb msg="WAL segment loaded" segment=82 maxSegment=84
```
Note the `active (running)` status (press `q` to exit). You can also check Prometheus web interface, available on `http://your-node-host-ip:9090/`
You may need to do `sudo ufw allow 9090/tcp` if the firewall is on, and/or adjust the security settings to allow connections to port 9090 if the node is running on a cloud instance. For AWS, you can look it up [here](/docs/nodes/on-third-party-services/amazon-web-services#create-a-security-group). If on public internet, make sure to only allow your IP to connect!
If everything is OK, let's move on.
## Step 2: Install Grafana [](#step-2-install-grafana- "Direct link to heading")
Run the script to execute the second step:
```bash
./monitoring-installer.sh --2
```
It should produce output something like this:
```bash
AvalancheGo monitoring installer
--------------------------------
STEP 2: Installing Grafana
OK
deb https://packages.grafana.com/oss/deb stable main
Hit:1 http://us-east-2.ec2.ports.ubuntu.com/ubuntu-ports focal InRelease
Get:2 http://us-east-2.ec2.ports.ubuntu.com/ubuntu-ports focal-updates InRelease [114 kB]
Get:3 http://us-east-2.ec2.ports.ubuntu.com/ubuntu-ports focal-backports InRelease [101 kB]
Hit:4 http://ppa.launchpad.net/longsleep/golang-backports/ubuntu focal InRelease
Get:5 http://ports.ubuntu.com/ubuntu-ports focal-security InRelease [114 kB]
Get:6 https://packages.grafana.com/oss/deb stable InRelease [12.1 kB]
...
```
To make sure it's running properly:
```bash
sudo systemctl status grafana-server
```
which should again show Grafana as `active`. Grafana should now be available at `http://your-node-host-ip:3000/` from your browser. Log in with username: admin, password: admin, and you will be prompted to set up a new, secure password. Do that.
You may need to do `sudo ufw allow 3000/tcp` if the firewall is on, and/or adjust the cloud instance settings to allow connections to port 3000. If on public internet, make sure to only allow your IP to connect!
Prometheus and Grafana are now installed, we're ready for the next step.
## Step 3: Set up `node_exporter` [](#step-3-set-up-node_exporter- "Direct link to heading")
In addition to metrics from AvalancheGo, let's set up monitoring of the machine itself, so we can check CPU, memory, network and disk usage and be aware of any anomalies. For that, we will use `node_exporter`, a Prometheus plugin.
Run the script to execute the third step:
```bash
./monitoring-installer.sh --3
```
The output should look something like this:
```bash
AvalancheGo monitoring installer
--------------------------------
STEP 3: Installing node_exporter
Checking environment...
Found arm64 architecture...
Downloading archive...
https://github.com/prometheus/node_exporter/releases/download/v1.2.2/node_exporter-1.2.2.linux-arm64.tar.gz
node_exporter.tar.gz 100%[=========================================================================================>] 7.91M --.-KB/s in 0.1s
2021-11-05 14:57:25 URL:https://github-releases.githubusercontent.com/9524057/6dc22304-a1f5-419b-b296-906f6dd168dc?X-Amz-Algorithm=AWS4-HMAC-SHA256&X-Amz-Credential=AKIAIWNJYAX4CSVEH53A%2F20211105%2Fus-east-1%2Fs3%2Faws4_request&X-Amz-Date=20211105T145725Z&X-Amz-Expires=300&X-Amz-Signature=3890e09e58ea9d4180684d9286c9e791b96b0c411d8f8a494f77e99f260bdcbb&X-Amz-SignedHeaders=host&actor_id=0&key_id=0&repo_id=9524057&response-content-disposition=attachment%3B%20filename%3Dnode_exporter-1.2.2.linux-arm64.tar.gz&response-content-type=application%2Foctet-stream [8296266/8296266] -> "node_exporter.tar.gz" [1]
node_exporter-1.2.2.linux-arm64/LICENSE
```
Again, we check that the service is running correctly:
```bash
sudo systemctl status node_exporter
```
If the service is running, Prometheus, Grafana and `node_exporter` should all work together now. To check, in your browser visit Prometheus web interface on `http://your-node-host-ip:9090/targets`. You should see three targets enabled:
* Prometheus
* AvalancheGo
* `avalanchego-machine`
Make sure that all of them have `State` as `UP`.
If you run your AvalancheGo node with TLS enabled on your API port, you will need to manually edit the `/etc/prometheus/prometheus.yml` file and change the `avalanchego` job to look like this:
```yml
- job_name: "avalanchego"
metrics_path: "/ext/metrics"
scheme: "https"
tls_config:
insecure_skip_verify: true
static_configs:
- targets: ["localhost:9650"]
```
Mind the spacing (leading spaces too)! You will need admin privileges to do that (use `sudo`). Restart Prometheus service afterwards with `sudo systemctl restart prometheus`.
All that's left to do now is to provision the data source and install the actual dashboards that will show us the data.
## Step 4: Dashboards [](#step-4-dashboards- "Direct link to heading")
Run the script to install the dashboards:
```bash
./monitoring-installer.sh --4
```
It will produce output something like this:
```bash
AvalancheGo monitoring installer
--------------------------------
Downloading...
Last-modified header missing -- time-stamps turned off.
2021-11-05 14:57:47 URL:https://raw.githubusercontent.com/ava-labs/avalanche-monitoring/master/grafana/dashboards/c_chain.json [50282/50282] -> "c_chain.json" [1]
FINISHED --2021-11-05 14:57:47--
Total wall clock time: 0.2s
Downloaded: 1 files, 49K in 0s (132 MB/s)
Last-modified header missing -- time-stamps turned off.
...
```
This will download the latest versions of the dashboards from GitHub and provision Grafana to load them, as well as defining Prometheus as a data source. It may take up to 30 seconds for the dashboards to show up. In your browser, go to: `http://your-node-host-ip:3000/dashboards`. You should see 7 Avalanche dashboards:
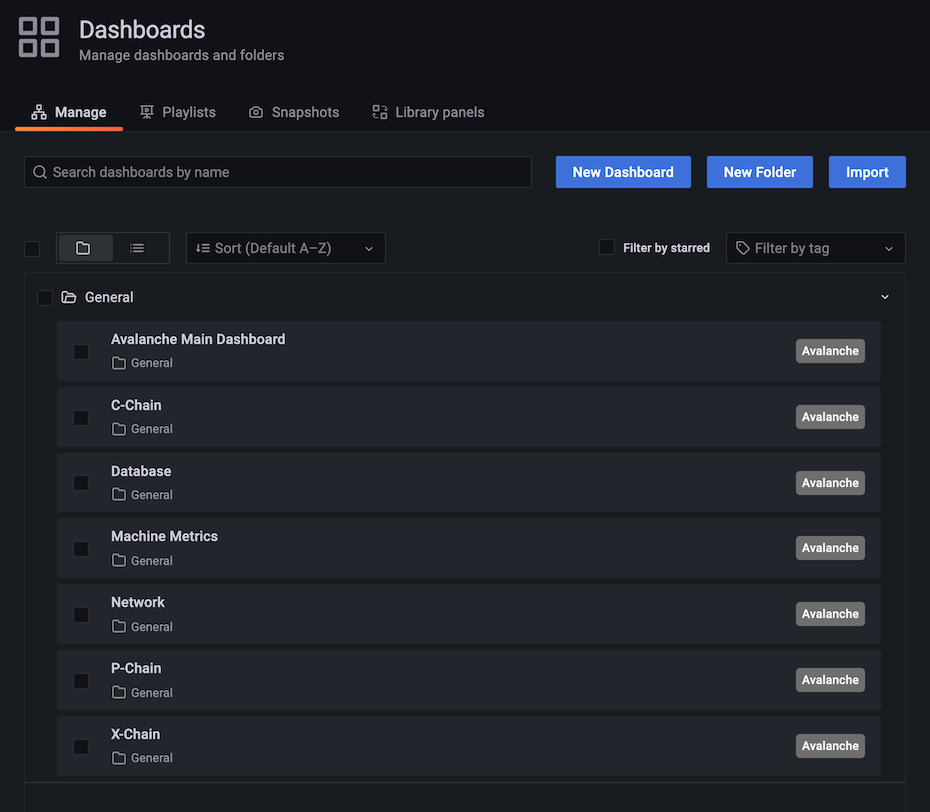
Select 'Avalanche Main Dashboard' by clicking its title. It should load, and look similar to this:
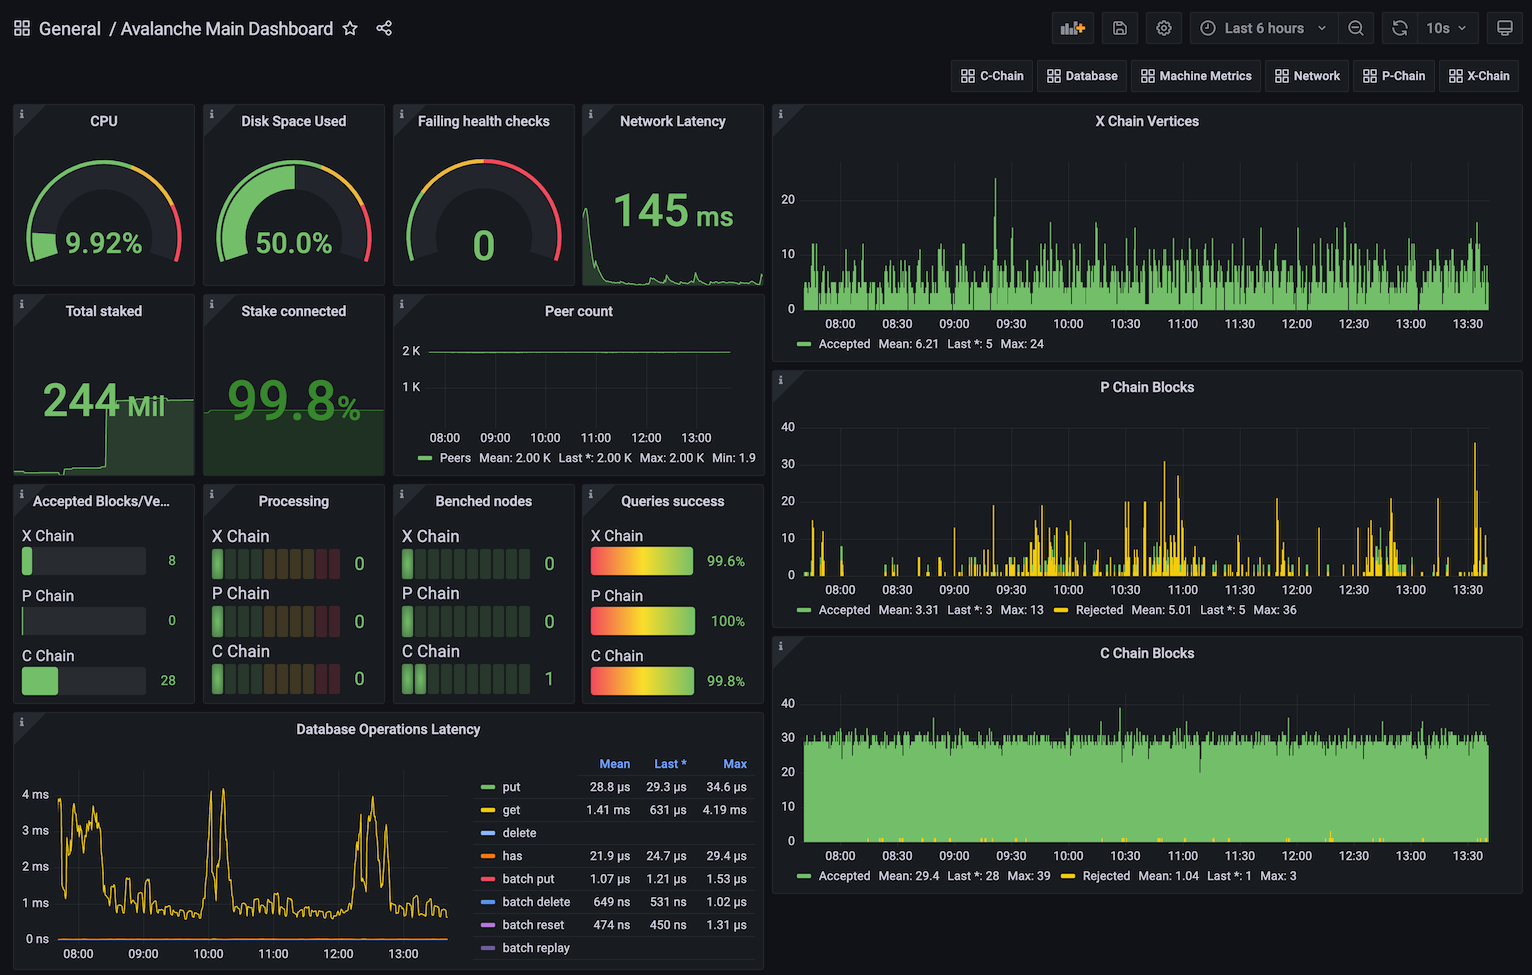
Some graphs may take some time to populate fully, as they need a series of data points in order to render correctly.
You can bookmark the main dashboard as it shows the most important information about the node at a glance. Every dashboard has a link to all the others as the first row, so you can move between them easily.
## Step 5: Additional Dashboards (Optional)[](#step-5-additional-dashboards-optional "Direct link to heading")
Step 4 installs the basic set of dashboards that make sense to have on any node. Step 5 is for installing additional dashboards that may not be useful for every installation.
Currently, there is only one additional dashboard: Avalanche L1s. If your node is running any Avalanche L1s, you may want to add this as well. Do:
```bash
./monitoring-installer.sh --5
```
This will add the Avalanche L1s dashboard. It allows you to monitor operational data for any Avalanche L1 that is synced on the node. There is an Avalanche L1 switcher that allows you to switch between different Avalanche L1s. As there are many Avalanche L1s and not every node will have all of them, by default, it comes populated only with Spaces and WAGMI Avalanche L1s that exist on Fuji testnet:
To configure the dashboard and add any Layer 1s that your node is syncing, you will need to edit the dashboard. Select the `dashboard settings` icon (image of a cog) in the upper right corner of the dashboard display and switch to `Variables` section and select the `subnet` variable. It should look something like this:
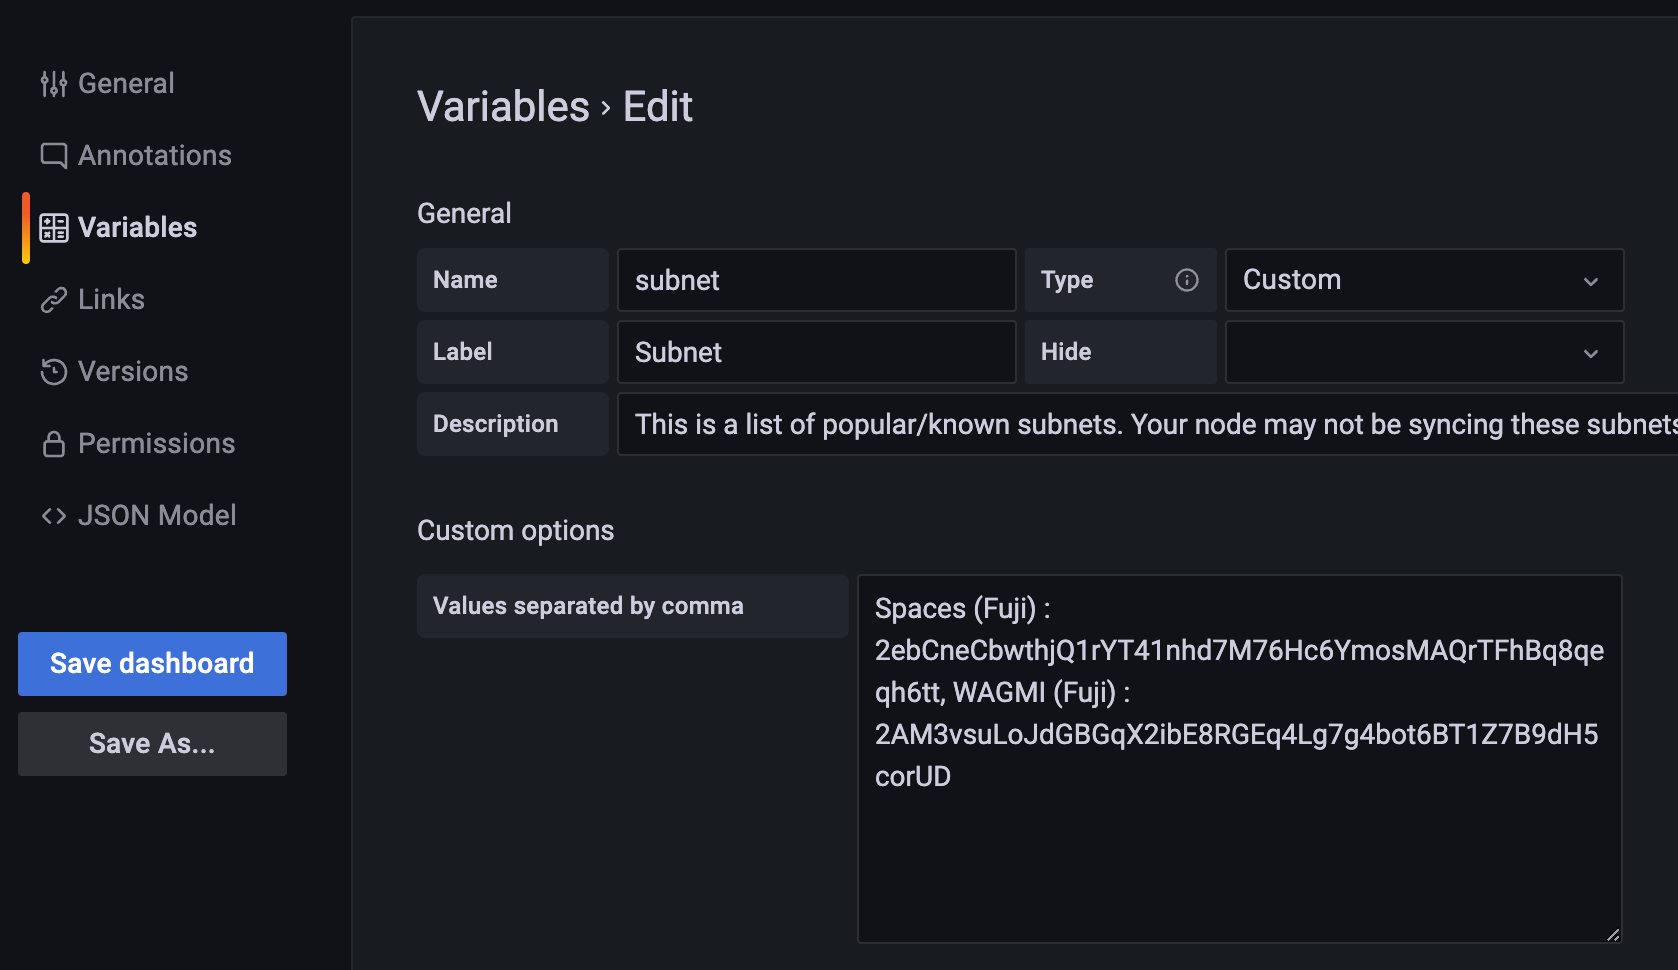
The variable format is:
```bash
Subnet name:
```
and the separator between entries is a comma. Entries for Spaces and WAGMI look like:
```bash
Spaces (Fuji) : 2ebCneCbwthjQ1rYT41nhd7M76Hc6YmosMAQrTFhBq8qeqh6tt, WAGMI (Fuji) : 2AM3vsuLoJdGBGqX2ibE8RGEq4Lg7g4bot6BT1Z7B9dH5corUD
```
After editing the values, press `Update` and then click `Save dashboard` button and confirm. Press the back arrow in the upper left corner to return to the dashboard. New values should now be selectable from the dropdown and data for the selected Avalanche L1 will be shown in the panels.
## Updating[](#updating "Direct link to heading")
Available node metrics are updated constantly, new ones are added and obsolete removed, so it is good a practice to update the dashboards from time to time, especially if you notice any missing data in panels. Updating the dashboards is easy, just run the script with no arguments, and it will refresh the dashboards with the latest available versions. Allow up to 30s for dashboards to update in Grafana.
If you added the optional extra dashboards (step 5), they will be updated as well.
## Summary[](#summary "Direct link to heading")
Using the script to install node monitoring is easy, and it gives you insight into how your node is behaving and what's going on under the hood. Also, pretty graphs!
If you have feedback on this tutorial, problems with the script or following the steps, send us a message on [Discord](https://chat.avalabs.org/).
# Reduce Disk Usage
URL: /docs/nodes/maintain/reduce-disk-usage
Offline Pruning is ported from `go-ethereum` to reduce the amount of disk space taken up by the TrieDB (storage for the Merkle Forest).
Offline pruning creates a bloom filter and adds all trie nodes in the active state to the bloom filter to mark the data as protected. This ensures that any part of the active state will not be removed during offline pruning.
After generating the bloom filter, offline pruning iterates over the database and searches for trie nodes that are safe to be removed from disk.
A bloom filter is a probabilistic data structure that reports whether an item is definitely not in a set or possibly in a set. Therefore, for each key we iterate, we check if it is in the bloom filter. If the key is definitely not in the bloom filter, then it is not in the active state and we can safely delete it. If the key is possibly in the set, then we skip over it to ensure we do not delete any active state.
During iteration, the underlying database (LevelDB) writes deletion markers, causing a temporary increase in disk usage.
After iterating over the database and deleting any old trie nodes that it can, offline pruning then runs compaction to minimize the DB size after the potentially large number of delete operations.
## Finding the C-Chain Config File[](#finding-the-c-chain-config-file "Direct link to heading")
In order to enable offline pruning, you need to update the C-Chain config file to include the parameters `offline-pruning-enabled` and `offline-pruning-data-directory`.
The default location of the C-Chain config file is `~/.avalanchego/configs/chains/C/config.json`. **Please note that by default, this file does not exist. You would need to create it manually.** You can update the directory for chain configs by passing in the directory of your choice via the CLI argument: `chain-config-dir`. See [this](/docs/nodes/configure/configs-flags) for more info. For example, if you start your node with:
```bash
./build/avalanchego --chain-config-dir=/home/ubuntu/chain-configs
```
The chain config directory will be updated to `/home/ubuntu/chain-configs` and the corresponding C-Chain config file will be: `/home/ubuntu/chain-configs/C/config.json`.
## Running Offline Pruning[](#running-offline-pruning "Direct link to heading")
In order to enable offline pruning, update the C-Chain config file to include the following parameters:
```json
{
"offline-pruning-enabled": true,
"offline-pruning-data-directory": "/home/ubuntu/offline-pruning"
}
```
This will set `/home/ubuntu/offline-pruning` as the directory to be used by the offline pruner. Offline pruning will store the bloom filter in this location, so you must ensure that the path exists.
Now that the C-Chain config file has been updated, you can start your node with the command (no CLI arguments are necessary if using the default chain config directory):
Once AvalancheGo starts the C-Chain, you can expect to see update logs from the offline pruner:
```bash
INFO [02-09|00:20:15.625] Iterating state snapshot accounts=297,231 slots=6,669,708 elapsed=16.001s eta=1m29.03s
INFO [02-09|00:20:23.626] Iterating state snapshot accounts=401,907 slots=10,698,094 elapsed=24.001s eta=1m32.522s
INFO [02-09|00:20:31.626] Iterating state snapshot accounts=606,544 slots=13,891,948 elapsed=32.002s eta=1m10.927s
INFO [02-09|00:20:39.626] Iterating state snapshot accounts=760,948 slots=18,025,523 elapsed=40.002s eta=1m2.603s
INFO [02-09|00:20:47.626] Iterating state snapshot accounts=886,583 slots=21,769,199 elapsed=48.002s eta=1m8.834s
INFO [02-09|00:20:55.626] Iterating state snapshot accounts=1,046,295 slots=26,120,100 elapsed=56.002s eta=57.401s
INFO [02-09|00:21:03.626] Iterating state snapshot accounts=1,229,257 slots=30,241,391 elapsed=1m4.002s eta=47.674s
INFO [02-09|00:21:11.626] Iterating state snapshot accounts=1,344,091 slots=34,128,835 elapsed=1m12.002s eta=45.185s
INFO [02-09|00:21:19.626] Iterating state snapshot accounts=1,538,009 slots=37,791,218 elapsed=1m20.002s eta=34.59s
INFO [02-09|00:21:27.627] Iterating state snapshot accounts=1,729,564 slots=41,694,303 elapsed=1m28.002s eta=25.006s
INFO [02-09|00:21:35.627] Iterating state snapshot accounts=1,847,617 slots=45,646,011 elapsed=1m36.003s eta=20.052s
INFO [02-09|00:21:43.627] Iterating state snapshot accounts=1,950,875 slots=48,832,722 elapsed=1m44.003s eta=9.299s
INFO [02-09|00:21:47.342] Iterated snapshot accounts=1,950,875 slots=49,667,870 elapsed=1m47.718s
INFO [02-09|00:21:47.351] Writing state bloom to disk name=/home/ubuntu/offline-pruning/statebloom.0xd6fca36db4b60b34330377040ef6566f6033ed8464731cbb06dc35c8401fa38e.bf.gz
INFO [02-09|00:23:04.421] State bloom filter committed name=/home/ubuntu/offline-pruning/statebloom.0xd6fca36db4b60b34330377040ef6566f6033ed8464731cbb06dc35c8401fa38e.bf.gz
```
The bloom filter should be populated and committed to disk after about 5 minutes. At this point, if the node shuts down, it will resume the offline pruning session when it restarts (note: this operation cannot be cancelled).
In order to ensure that users do not mistakenly leave offline pruning enabled for the long term (which could result in an hour of downtime on each restart), we have added a manual protection which requires that after an offline pruning session, the node must be started with offline pruning disabled at least once before it will start with offline pruning enabled again. Therefore, once the bloom filter has been committed to disk, you should update the C-Chain config file to include the following parameters:
```json
{
"offline-pruning-enabled": false,
"offline-pruning-data-directory": "/home/ubuntu/offline-pruning"
}
```
It is important to keep the same data directory in the config file, so that the node knows where to look for the bloom filter on a restart if offline pruning has not finished.
Now if your node restarts, it will be marked as having correctly disabled offline pruning after the run and be allowed to resume normal operation once offline pruning has finished running.
You will see progress logs throughout the offline pruning run which will indicate the session's progress:
```bash
INFO [02-09|00:31:51.920] Pruning state data nodes=40,116,759 size=10.08GiB elapsed=8m47.499s eta=12m50.961s
INFO [02-09|00:31:59.921] Pruning state data nodes=41,659,059 size=10.47GiB elapsed=8m55.499s eta=12m13.822s
INFO [02-09|00:32:07.921] Pruning state data nodes=41,687,047 size=10.48GiB elapsed=9m3.499s eta=12m23.915s
INFO [02-09|00:32:15.921] Pruning state data nodes=41,715,823 size=10.48GiB elapsed=9m11.499s eta=12m33.965s
INFO [02-09|00:32:23.921] Pruning state data nodes=41,744,167 size=10.49GiB elapsed=9m19.500s eta=12m44.004s
INFO [02-09|00:32:31.921] Pruning state data nodes=41,772,613 size=10.50GiB elapsed=9m27.500s eta=12m54.01s
INFO [02-09|00:32:39.921] Pruning state data nodes=41,801,267 size=10.50GiB elapsed=9m35.500s eta=13m3.992s
INFO [02-09|00:32:47.922] Pruning state data nodes=41,829,714 size=10.51GiB elapsed=9m43.500s eta=13m13.951s
INFO [02-09|00:32:55.922] Pruning state data nodes=41,858,400 size=10.52GiB elapsed=9m51.501s eta=13m23.885s
INFO [02-09|00:33:03.923] Pruning state data nodes=41,887,131 size=10.53GiB elapsed=9m59.501s eta=13m33.79s
INFO [02-09|00:33:11.923] Pruning state data nodes=41,915,583 size=10.53GiB elapsed=10m7.502s eta=13m43.678s
INFO [02-09|00:33:19.924] Pruning state data nodes=41,943,891 size=10.54GiB elapsed=10m15.502s eta=13m53.551s
INFO [02-09|00:33:27.924] Pruning state data nodes=41,972,281 size=10.55GiB elapsed=10m23.502s eta=14m3.389s
INFO [02-09|00:33:35.924] Pruning state data nodes=42,001,414 size=10.55GiB elapsed=10m31.503s eta=14m13.192s
INFO [02-09|00:33:43.925] Pruning state data nodes=42,029,987 size=10.56GiB elapsed=10m39.504s eta=14m22.976s
INFO [02-09|00:33:51.925] Pruning state data nodes=42,777,042 size=10.75GiB elapsed=10m47.504s eta=14m7.245s
INFO [02-09|00:34:00.950] Pruning state data nodes=42,865,413 size=10.77GiB elapsed=10m56.529s eta=14m15.927s
INFO [02-09|00:34:08.956] Pruning state data nodes=42,918,719 size=10.79GiB elapsed=11m4.534s eta=14m24.453s
INFO [02-09|00:34:22.816] Pruning state data nodes=42,952,925 size=10.79GiB elapsed=11m18.394s eta=14m41.243s
INFO [02-09|00:34:30.818] Pruning state data nodes=42,998,715 size=10.81GiB elapsed=11m26.397s eta=14m49.961s
INFO [02-09|00:34:38.828] Pruning state data nodes=43,046,476 size=10.82GiB elapsed=11m34.407s eta=14m58.572s
INFO [02-09|00:34:46.893] Pruning state data nodes=43,107,656 size=10.83GiB elapsed=11m42.472s eta=15m6.729s
INFO [02-09|00:34:55.038] Pruning state data nodes=43,168,834 size=10.85GiB elapsed=11m50.616s eta=15m14.934s
INFO [02-09|00:35:03.039] Pruning state data nodes=43,446,900 size=10.92GiB elapsed=11m58.618s eta=15m14.705s
```
When the node completes, it will emit the following log and resume normal operation:
```bash
INFO [02-09|00:42:16.009] Pruning state data nodes=93,649,812 size=23.53GiB elapsed=19m11.588s eta=1m2.658s
INFO [02-09|00:42:24.009] Pruning state data nodes=95,045,956 size=23.89GiB elapsed=19m19.588s eta=45.149s
INFO [02-09|00:42:32.009] Pruning state data nodes=96,429,410 size=24.23GiB elapsed=19m27.588s eta=28.041s
INFO [02-09|00:42:40.009] Pruning state data nodes=97,811,804 size=24.58GiB elapsed=19m35.588s eta=11.204s
INFO [02-09|00:42:45.359] Pruned state data nodes=98,744,430 size=24.82GiB elapsed=19m40.938s
INFO [02-09|00:42:45.360] Compacting database range=0x00-0x10 elapsed="2.157µs"
INFO [02-09|00:43:12.311] Compacting database range=0x10-0x20 elapsed=26.951s
INFO [02-09|00:43:38.763] Compacting database range=0x20-0x30 elapsed=53.402s
INFO [02-09|00:44:04.847] Compacting database range=0x30-0x40 elapsed=1m19.486s
INFO [02-09|00:44:31.194] Compacting database range=0x40-0x50 elapsed=1m45.834s
INFO [02-09|00:45:31.580] Compacting database range=0x50-0x60 elapsed=2m46.220s
INFO [02-09|00:45:58.465] Compacting database range=0x60-0x70 elapsed=3m13.104s
INFO [02-09|00:51:17.593] Compacting database range=0x70-0x80 elapsed=8m32.233s
INFO [02-09|00:56:19.679] Compacting database range=0x80-0x90 elapsed=13m34.319s
INFO [02-09|00:56:46.011] Compacting database range=0x90-0xa0 elapsed=14m0.651s
INFO [02-09|00:57:12.370] Compacting database range=0xa0-0xb0 elapsed=14m27.010s
INFO [02-09|00:57:38.600] Compacting database range=0xb0-0xc0 elapsed=14m53.239s
INFO [02-09|00:58:06.311] Compacting database range=0xc0-0xd0 elapsed=15m20.951s
INFO [02-09|00:58:35.484] Compacting database range=0xd0-0xe0 elapsed=15m50.123s
INFO [02-09|00:59:05.449] Compacting database range=0xe0-0xf0 elapsed=16m20.089s
INFO [02-09|00:59:34.365] Compacting database range=0xf0- elapsed=16m49.005s
INFO [02-09|00:59:34.367] Database compaction finished elapsed=16m49.006s
INFO [02-09|00:59:34.367] State pruning successful pruned=24.82GiB elapsed=39m34.749s
INFO [02-09|00:59:34.367] Completed offline pruning. Re-initializing blockchain.
INFO [02-09|00:59:34.387] Loaded most recent local header number=10,671,401 hash=b52d0a..7bd166 age=40m29s
INFO [02-09|00:59:34.387] Loaded most recent local full block number=10,671,401 hash=b52d0a..7bd166 age=40m29s
INFO [02-09|00:59:34.387] Initializing snapshots async=true
DEBUG[02-09|00:59:34.390] Reinjecting stale transactions count=0
INFO [02-09|00:59:34.395] Transaction pool price threshold updated price=470,000,000,000
INFO [02-09|00:59:34.396] Transaction pool price threshold updated price=225,000,000,000
INFO [02-09|00:59:34.396] Transaction pool price threshold updated price=0
INFO [02-09|00:59:34.396] lastAccepted = 0xb52d0a1302e4055b487c3a0243106b5e13a915c6e178da9f8491cebf017bd166
INFO [02-09|00:59:34] snow/engine/snowman/transitive.go#67: initializing consensus engine
INFO [02-09|00:59:34] snow/engine/snowman/bootstrap/bootstrapper.go#220: Starting bootstrap...
INFO [02-09|00:59:34] chains/manager.go#246: creating chain:
ID: 2oYMBNV4eNHyqk2fjjV5nVQLDbtmNJzq5s3qs3Lo6ftnC6FByM
VMID:jvYyfQTxGMJLuGWa55kdP2p2zSUYsQ5Raupu4TW34ZAUBAbtq
INFO [02-09|00:59:34.425] Enabled APIs: eth, eth-filter, net, web3, internal-eth, internal-blockchain, internal-transaction, avax
DEBUG[02-09|00:59:34.425] Allowed origin(s) for WS RPC interface [*]
INFO [02-09|00:59:34] api/server/server.go#203: adding route /ext/bc/2q9e4r6Mu3U68nU1fYjgbR6JvwrRx36CohpAX5UQxse55x1Q5/avax
INFO [02-09|00:59:34] api/server/server.go#203: adding route /ext/bc/2q9e4r6Mu3U68nU1fYjgbR6JvwrRx36CohpAX5UQxse55x1Q5/rpc
INFO [02-09|00:59:34] api/server/server.go#203: adding route /ext/bc/2q9e4r6Mu3U68nU1fYjgbR6JvwrRx36CohpAX5UQxse55x1Q5/ws
INFO [02-09|00:59:34] vms/avm/vm.go#437: Fee payments are using Asset with Alias: AVAX, AssetID: FvwEAhmxKfeiG8SnEvq42hc6whRyY3EFYAvebMqDNDGCgxN5Z
INFO [02-09|00:59:34] vms/avm/vm.go#229: address transaction indexing is disabled
INFO [02-09|00:59:34] snow/engine/avalanche/transitive.go#71: initializing consensus engine
INFO [02-09|00:59:34] snow/engine/avalanche/bootstrap/bootstrapper.go#258: Starting bootstrap...
INFO [02-09|00:59:34] api/server/server.go#203: adding route /ext/bc/2oYMBNV4eNHyqk2fjjV5nVQLDbtmNJzq5s3qs3Lo6ftnC6FByM
INFO [02-09|00:59:34] snow/engine/snowman/bootstrap/bootstrapper.go#445: waiting for the remaining chains in this subnet to finish syncing
INFO [02-09|00:59:34] api/server/server.go#203: adding route /ext/bc/2oYMBNV4eNHyqk2fjjV5nVQLDbtmNJzq5s3qs3Lo6ftnC6FByM/wallet
INFO [02-09|00:59:34] api/server/server.go#203: adding route /ext/bc/2oYMBNV4eNHyqk2fjjV5nVQLDbtmNJzq5s3qs3Lo6ftnC6FByM/events
INFO [02-09|00:59:34]
snow/engine/common/bootstrapper.go#235: Bootstrapping started syncing with 1 vertices in the accepted frontier
INFO [02-09|00:59:46] snow/engine/common/bootstrapper.go#235: Bootstrapping started syncing with 2 vertices in the accepted frontier
INFO [02-09|00:59:49] snow/engine/common/bootstrapper.go#235: Bootstrapping started syncing with 1 vertices in the accepted frontier
INFO [02-09|00:59:49] snow/engine/avalanche/bootstrap/bootstrapper.go#473: bootstrapping fetched 55 vertices. Executing transaction state transitions...
INFO [02-09|00:59:49] snow/engine/common/queue/jobs.go#171: executed 55 operations
INFO [02-09|00:59:49] snow/engine/avalanche/bootstrap/bootstrapper.go#484: executing vertex state transitions...
INFO [02-09|00:59:49] snow/engine/common/queue/jobs.go#171: executed 55 operations
INFO [02-09|01:00:07] snow/engine/snowman/bootstrap/bootstrapper.go#406: bootstrapping fetched 1241 blocks. Executing state transitions...
```
At this point, the node will go into bootstrapping and (once bootstrapping completes) resume consensus and operate as normal.
## Disk Space Considerations[](#disk-space-considerations "Direct link to heading")
To ensure the node does not enter an inconsistent state, the bloom filter used for pruning is persisted to `offline-pruning-data-directory` for the duration of the operation. This directory should have `offline-pruning-bloom-filter-size` available in disk space (default 512 MB).
The underlying database (LevelDB) uses deletion markers (tombstones) to identify newly deleted keys. These markers are temporarily persisted to disk until they are removed during a process known as compaction. This will lead to an increase in disk usage during pruning. If your node runs out of disk space during pruning, you may safely restart the pruning operation. This may succeed as restarting the node triggers compaction.
If restarting the pruning operation does not succeed, additional disk space should be provisioned.
# Run Avalanche Node in Background
URL: /docs/nodes/maintain/run-as-background-service
This page demonstrates how to set up a `avalanchego.service` file to enable a manually deployed validator node to run in the background of a server instead of in the terminal directly.
Make sure that AvalancheGo is already installed on your machine.
## Steps[](#steps "Direct link to heading")
### Fuji Testnet Config[](#fuji-testnet-config "Direct link to heading")
Run this command in your terminal to create the `avalanchego.service` file
```bash
sudo nano /etc/systemd/system/avalanchego.service
```
Paste the following configuration into the `avalanchego.service` file
Remember to modify the values of:
* ***user=***
* ***group=***
* ***WorkingDirectory=***
* ***ExecStart=***
For those that you have configured on your Server:
```toml
[Unit]
Description=Avalanche Node service
After=network.target
[Service]
User='YourUserHere'
Group='YourUserHere'
Restart=always
PrivateTmp=true
TimeoutStopSec=60s
TimeoutStartSec=10s
StartLimitInterval=120s
StartLimitBurst=5
WorkingDirectory=/Your/Path/To/avalanchego
ExecStart=/Your/Path/To/avalanchego/./avalanchego \
--network-id=fuji \
--api-metrics-enabled=true
[Install]
WantedBy=multi-user.target
```
Press **Ctrl + X** then **Y** then **Enter** to save and exit.
Now, run:
```bash
sudo systemctl daemon-reload
```
### Mainnet Config[](#mainnet-config "Direct link to heading")
Run this command in your terminal to create the `avalanchego.service` file
```bash
sudo nano /etc/systemd/system/avalanchego.service
```
Paste the following configuration into the `avalanchego.service` file
```toml
[Unit]
Description=Avalanche Node service
After=network.target
[Service]
User='YourUserHere'
Group='YourUserHere'
Restart=always
PrivateTmp=true
TimeoutStopSec=60s
TimeoutStartSec=10s
StartLimitInterval=120s
StartLimitBurst=5
WorkingDirectory=/Your/Path/To/avalanchego
ExecStart=/Your/Path/To/avalanchego/./avalanchego \
--api-metrics-enabled=true
[Install]
WantedBy=multi-user.target
```
Press **Ctrl + X** then **Y** then **Enter** to save and exit.
Now, run:
```bash
sudo systemctl daemon-reload
```
## Start the Node[](#start-the-node "Direct link to heading")
This command makes your node start automatically in case of a reboot, run it:
```bash
sudo systemctl enable avalanchego
```
To start the node, run:
```bash
sudo systemctl start avalanchego
sudo systemctl status avalanchego
```
Output:
```bash
socopower@avalanche-node-01:~$ sudo systemctl status avalanchego
● avalanchego.service - Avalanche Node service
Loaded: loaded (/etc/systemd/system/avalanchego.service; enabled; vendor p>
Active: active (running) since Tue 2023-08-29 23:14:45 UTC; 5h 46min ago
Main PID: 2226 (avalanchego)
Tasks: 27 (limit: 38489)
Memory: 8.7G
CPU: 5h 50min 31.165s
CGroup: /system.slice/avalanchego.service
└─2226 /usr/local/bin/avalanchego/./avalanchego --network-id=fuji
Aug 30 03:02:50 avalanche-node-01 avalanchego[2226]: INFO [08-30|03:02:50.685] >
Aug 30 03:02:51 avalanche-node-01 avalanchego[2226]: INFO [08-30|03:02:51.185] >
Aug 30 03:03:09 avalanche-node-01 avalanchego[2226]: [08-30|03:03:09.380] INFO >
Aug 30 03:03:23 avalanche-node-01 avalanchego[2226]: [08-30|03:03:23.983] INFO >
Aug 30 03:05:15 avalanche-node-01 avalanchego[2226]: [08-30|03:05:15.192] INFO >
Aug 30 03:05:15 avalanche-node-01 avalanchego[2226]: [08-30|03:05:15.237] INFO >
Aug 30 03:05:15 avalanche-node-01 avalanchego[2226]: [08-30|03:05:15.238] INFO >
Aug 30 03:05:19 avalanche-node-01 avalanchego[2226]: [08-30|03:05:19.809] INFO >
Aug 30 03:05:19 avalanche-node-01 avalanchego[2226]: [08-30|03:05:19.809] INFO >
Aug 30 05:00:47 avalanche-node-01 avalanchego[2226]: [08-30|05:00:47.001] INFO
```
To see the synchronization process, you can run the following command:
```bash
sudo journalctl -fu avalanchego
```
# Upgrade Your AvalancheGo Node
URL: /docs/nodes/maintain/upgrade
## Backup Your Node[](#backup-your-node "Direct link to heading")
Before upgrading your node, it is recommended you backup your staker files which are used to identify your node on the network. In the default installation, you can copy them by running following commands:
```bash
cd
cp ~/.avalanchego/staking/staker.crt .
cp ~/.avalanchego/staking/staker.key .
```
Then download `staker.crt` and `staker.key` files and keep them somewhere safe and private. If anything happens to your node or the machine node runs on, these files can be used to fully recreate your node.
If you use your node for development purposes and have keystore users on your node, you should back up those too.
## Node Installed Using the Installer Script[](#node-installed-using-the-installer-script "Direct link to heading")
If you installed your node using the [installer script](/docs/nodes/using-install-script/installing-avalanche-go), to upgrade your node, just run the installer script again.
```bash
./avalanchego-installer.sh
```
It will detect that you already have AvalancheGo installed:
```bash
AvalancheGo installer
---------------------
Preparing environment...
Found 64bit Intel/AMD architecture...
Found AvalancheGo systemd service already installed, switching to upgrade mode.
Stopping service...
```
It will then upgrade your node to the latest version, and after it's done, start the node back up, and print out the information about the latest version:
```bash
Node upgraded, starting service...
New node version:
avalanche/1.1.1 [network=mainnet, database=v1.0.0, commit=f76f1fd5f99736cf468413bbac158d6626f712d2]
Done!
```
And that is it, your node is upgraded to the latest version.
If you installed your node manually, proceed with the rest of the tutorial.
## Stop the Old Node Version[](#stop-the-old-node-version "Direct link to heading")
After the backup is secured, you may start upgrading your node. Begin by stopping the currently running version.
### Node Running from Terminal[](#node-running-from-terminal "Direct link to heading")
If your node is running in a terminal stop it by pressing `ctrl+c`.
### Node Running as a Service[](#node-running-as-a-service "Direct link to heading")
If your node is running as a service, stop it by entering: `sudo systemctl stop avalanchego.service`
(your service may be named differently, `avalanche.service`, or similar)
### Node Running in Background[](#node-running-in-background "Direct link to heading")
If your node is running in the background (by running with `nohup`, for example) then find the process running the node by running `ps aux | grep avalanche`. This will produce output like:
```bash
ubuntu 6834 0.0 0.0 2828 676 pts/1 S+ 19:54 0:00 grep avalanche
ubuntu 2630 26.1 9.4 2459236 753316 ? Sl Dec02 1220:52 /home/ubuntu/build/avalanchego
```
In this example, second line shows information about your node. Note the process id, in this case, `2630`. Stop the node by running `kill -2 2630`.
Now we are ready to download the new version of the node. You can either download the source code and then build the binary program, or you can download the pre-built binary. You don't need to do both.
Downloading pre-built binary is easier and recommended if you're just looking to run your own node and stake on it.
Building the node [from source](/docs/nodes/maintain/upgrade#build-from-source) is recommended if you're a developer looking to experiment and build on Avalanche.
## Download Pre-Built Binary[](#download-pre-built-binary "Direct link to heading")
If you want to download a pre-built binary instead of building it yourself, go to our [releases page](https://github.com/ava-labs/avalanchego/releases), and select the release you want (probably the latest one.)
If you have a node, you can subscribe to the [avalanche notify service](/docs/nodes/maintain/enroll-in-avalanche-notify) with your node ID to be notified about new releases.
In addition, or if you don't have a node ID, you can get release notifications from github. To do so, you can go to our [repository](https://github.com/ava-labs/avalanchego) and look on the top-right corner for the **Watch** option. After you click on it, select **Custom**, and then **Releases**. Press **Apply** and it is done.
Under `Assets`, select the appropriate file.
For MacOS:\
Download: `avalanchego-macos-.zip`\
Unzip: `unzip avalanchego-macos-.zip`\
The resulting folder, `avalanchego-`, contains the binaries.
For Linux on PCs or cloud providers:\
Download: `avalanchego-linux-amd64-.tar.gz`\
Unzip: `tar -xvf avalanchego-linux-amd64-.tar.gz`\
The resulting folder, `avalanchego--linux`, contains the binaries.
For Linux on Arm64-based computers:\
Download: `avalanchego-linux-arm64-.tar.gz`\
Unzip: `tar -xvf avalanchego-linux-arm64-.tar.gz`\
The resulting folder, `avalanchego--linux`, contains the binaries.
You are now ready to run the new version of the node.
### Running the Node from Terminal[](#running-the-node-from-terminal "Direct link to heading")
If you are using the pre-built binaries on MacOS:
```bash
./avalanchego-/build/avalanchego
```
If you are using the pre-built binaries on Linux:
```bash
./avalanchego--linux/avalanchego
```
Add `nohup` at the start of the command if you want to run the node in the background.
### Running the Node as a Service[](#running-the-node-as-a-service "Direct link to heading")
If you're running the node as a service, you need to replace the old binaries with the new ones.
```bash
cp -r avalanchego--linux/*
```
and then restart the service with: `sudo systemctl start avalanchego.service`.
## Build from Source[](#build-from-source "Direct link to heading")
First clone our GitHub repo (you can skip this step if you've done this before):
```bash
git clone https://github.com/ava-labs/avalanchego.git
```
The repository cloning method used is HTTPS, but SSH can be used too:
`git clone git@github.com:ava-labs/avalanchego.git`
You can find more about SSH and how to use it [here](https://docs.github.com/en/authentication/connecting-to-github-with-ssh/about-ssh).
Then move to the AvalancheGo directory:
```bash
cd avalanchego
```
Pull the latest code:
```bash
git pull
```
If the master branch has not been updated with the latest release tag, you can get to it directly via first running `git fetch --all --tags` and then `git checkout --force tags/` (where `` is the latest release tag; for example `v1.3.2`) instead of `git pull`.
Note that your local copy will be in a 'detached HEAD' state, which is not an issue if you do not make changes to the source that you want push back to the repository (in which case you should check out to a branch and to the ordinary merges).
Note also that the `--force` flag will disregard any local changes you might have.
Check that your local code is up to date. Do:
```bash
git rev-parse HEAD
```
and check that the first 7 characters printed match the Latest commit field on our [GitHub](https://github.com/ava-labs/avalanchego).
If you used the `git checkout tags/` then these first 7 characters should match commit hash of that tag.
Now build the binary:
```bash
./scripts/build.sh
```
This should print: `Build Successful`
You can check what version you're running by doing:
```bash
./build/avalanchego --version
```
You can run your node with:
```bash
./build/avalanchego
```
# Amazon Web Services
URL: /docs/nodes/on-third-party-services/amazon-web-services
Learn how to run a node on Amazon Web Services.
## Introduction[](#introduction "Direct link to heading")
This tutorial will guide you through setting up an Avalanche node on [Amazon Web Services (AWS)](https://aws.amazon.com/). Cloud services like AWS are a good way to ensure that your node is highly secure, available, and accessible.
To get started, you'll need:
* An AWS account
* A terminal with which to SSH into your AWS machine
* A place to securely store and back up files
This tutorial assumes your local machine has a Unix style terminal. If you're on Windows, you'll have to adapt some of the commands used here.
## Log Into AWS[](#log-into-aws "Direct link to heading")
Signing up for AWS is outside the scope of this article, but Amazon has instructions [here](https://aws.amazon.com/premiumsupport/knowledge-center/create-and-activate-aws-account).
It is *highly* recommended that you set up Multi-Factor Authentication on your AWS root user account to protect it. Amazon has documentation for this [here](https://docs.aws.amazon.com/IAM/latest/UserGuide/id_credentials_mfa_enable_virtual.html#enable-virt-mfa-for-root).
Once your account is set up, you should create a new EC2 instance. An EC2 is a virtual machine instance in AWS's cloud. Go to the [AWS Management Console](https://console.aws.amazon.com/) and enter the EC2 dashboard.
To log into the EC2 instance, you will need a key on your local machine that grants access to the instance. First, create that key so that it can be assigned to the EC2 instance later on. On the bar on the left side, under **Network & Security**, select **Key Pairs.**
Select **Create key pair** to launch the key pair creation wizard.

Name your key `avalanche`. If your local machine has MacOS or Linux, select the `pem` file format. If it's Windows, use the `ppk` file format. Optionally, you can add tags for the key pair to assist with tracking.
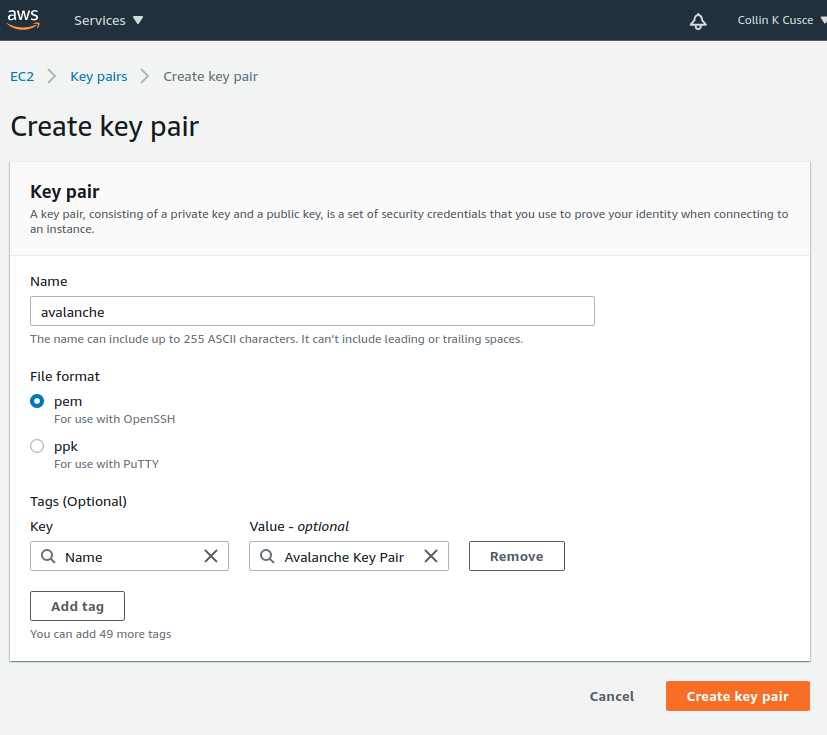
Click `Create key pair`. You should see a success message, and the key file should be downloaded to your local machine. Without this file, you will not be able to access your EC2 instance. **Make a copy of this file and put it on a separate storage medium such as an external hard drive. Keep this file secret; do not share it with others.**
## Create a Security Group[](#create-a-security-group "Direct link to heading")
An AWS Security Group defines what internet traffic can enter and leave your EC2 instance. Think of it like a firewall. Create a new Security Group by selecting **Security Groups** under the **Network & Security** drop-down.
This opens the Security Groups panel. Click **Create security group** in the top right of the Security Groups panel.
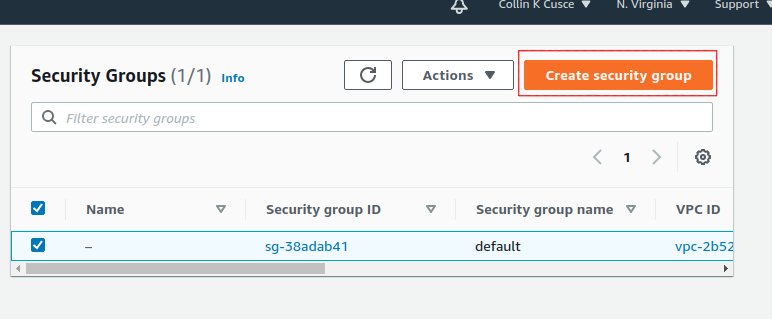
You'll need to specify what inbound traffic is allowed. Allow SSH traffic from your IP address so that you can log into your EC2 instance (each time your ISP changes your IP address, you will need to modify this rule). Allow TCP traffic on port 9651 so your node can communicate with other nodes on the network. Allow TCP traffic on port 9650 from your IP so you can make API calls to your node. **It's important that you only allow traffic on the SSH and API port from your IP.** If you allow incoming traffic from anywhere, this could be used to brute force entry to your node (SSH port) or used as a denial of service attack vector (API port). Finally, allow all outbound traffic.
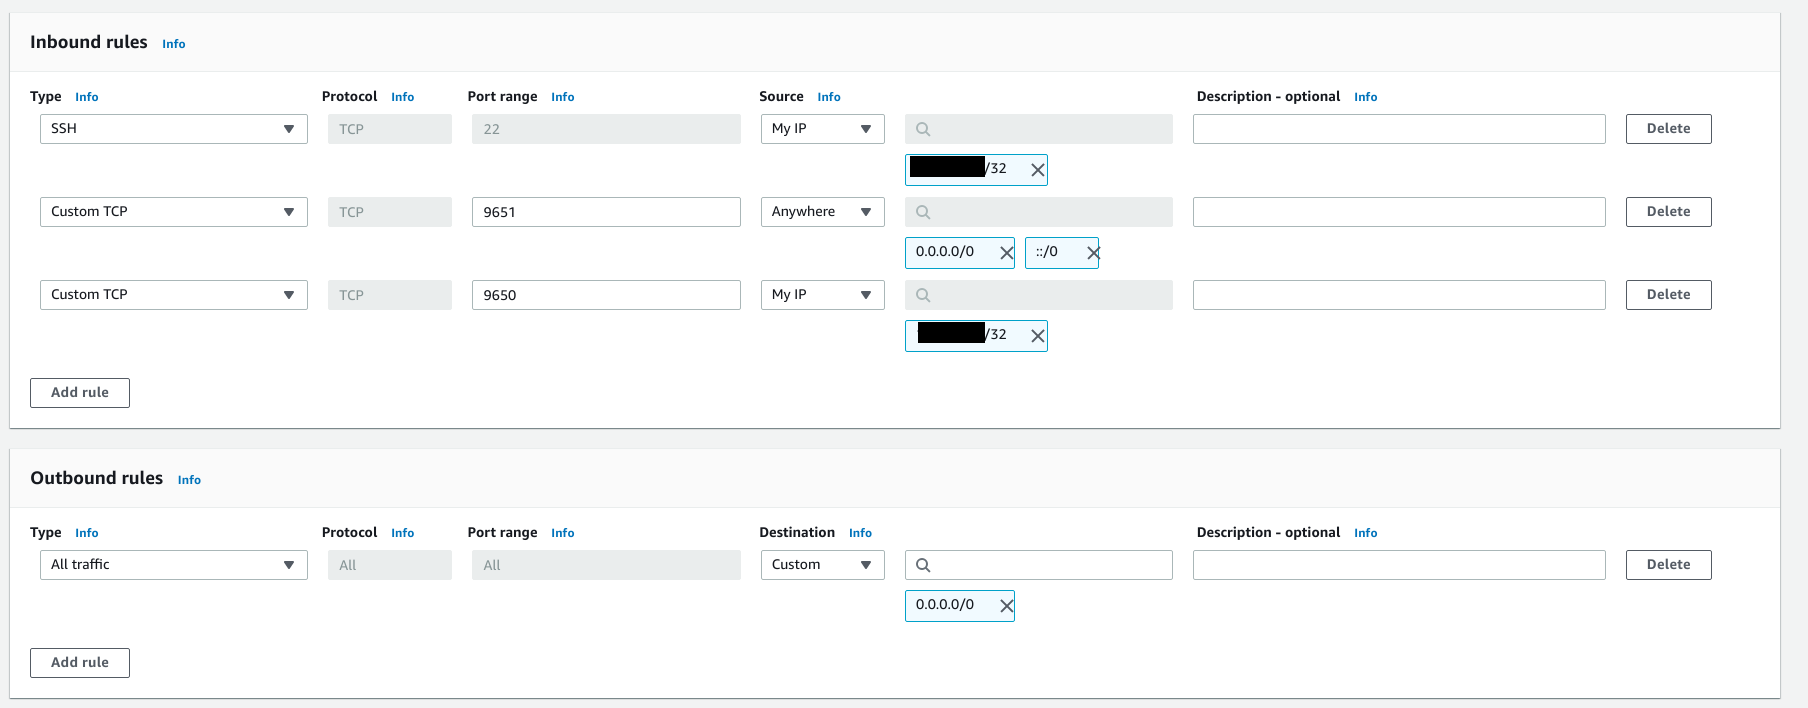
Add a tag to the new security group with key `Name` and value`Avalanche Security Group`. This will enable us to know what this security group is when we see it in the list of security groups.

Click `Create security group`. You should see the new security group in the list of security groups.
## Launch an EC2 Instance[](#launch-an-ec2-instance "Direct link to heading")
Now you're ready to launch an EC2 instance. Go to the EC2 Dashboard and select **Launch instance**.
Select **Ubuntu 20.04 LTS (HVM), SSD Volume Type** for the operating system.

Next, choose your instance type. This defines the hardware specifications of the cloud instance. In this tutorial we set up a **c5.2xlarge**. This should be more than powerful enough since Avalanche is a lightweight consensus protocol. To create a c5.2xlarge instance, select the **Compute-optimized** option from the filter drop-down menu.
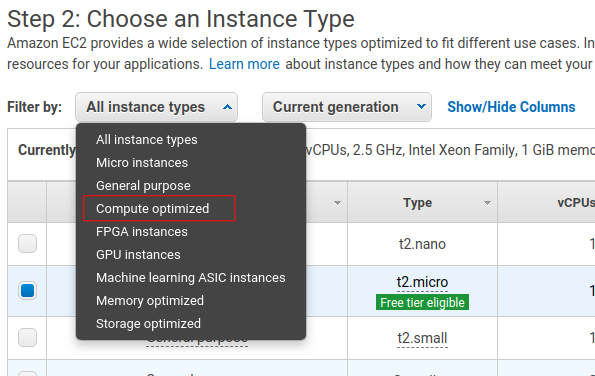
Select the checkbox next to the c5.2xlarge instance in the table.

Click the **Next: Configure Instance Details** button in the bottom right-hand corner.
The instance details can stay as their defaults.
When setting up a node as a validator, it is crucial to select the appropriate AWS instance type to ensure the node can efficiently process transactions and manage the network load. The recommended instance types are as follows:
* For a minimal stake, start with a compute-optimized instance such as c6, c6i, c6a, c7 and similar.
* Use a 2xlarge instance size for the minimal stake configuration.
* As the staked amount increases, choose larger instance sizes to accommodate the additional workload. For every order of magnitude increase in stake, move up one instance size. For example, for a 20k AVAX stake, a 4xlarge instance is suitable.
### Optional: Using Reserved Instances[](#optional-using-reserved-instances "Direct link to heading")
By default, you will be charged hourly for running your EC2 instance. For a long term usage that is not optimal.
You could save money by using a **Reserved Instance**. With a reserved instance, you pay upfront for an entire year of EC2 usage, and receive a lower per-hour rate in exchange for locking in. If you intend to run a node for a long time and don't want to risk service interruptions, this is a good option to save money. Again, do your own research before selecting this option.
### Add Storage, Tags, Security Group[](#add-storage-tags-security-group "Direct link to heading")
Click the **Next: Add Storage** button in the bottom right corner of the screen.
You need to add space to your instance's disk. You should start with at least 700GB of disk space. Although upgrades to reduce disk usage are always in development, on average the database will continually grow, so you need to constantly monitor disk usage on the node and increase disk space if needed.
Note that the image below shows 100GB as disk size, which was appropriate at the time the screenshot was taken. You should check the current [recommended disk space size](https://github.com/ava-labs/avalanchego#installation) before entering the actual value here.

Click **Next: Add Tags** in the bottom right corner of the screen to add tags to the instance. Tags enable us to associate metadata with our instance. Add a tag with key `Name` and value `My Avalanche Node`. This will make it clear what this instance is on your list of EC2 instances.

Now assign the security group created earlier to the instance. Choose **Select an existing security group** and choose the security group created earlier.
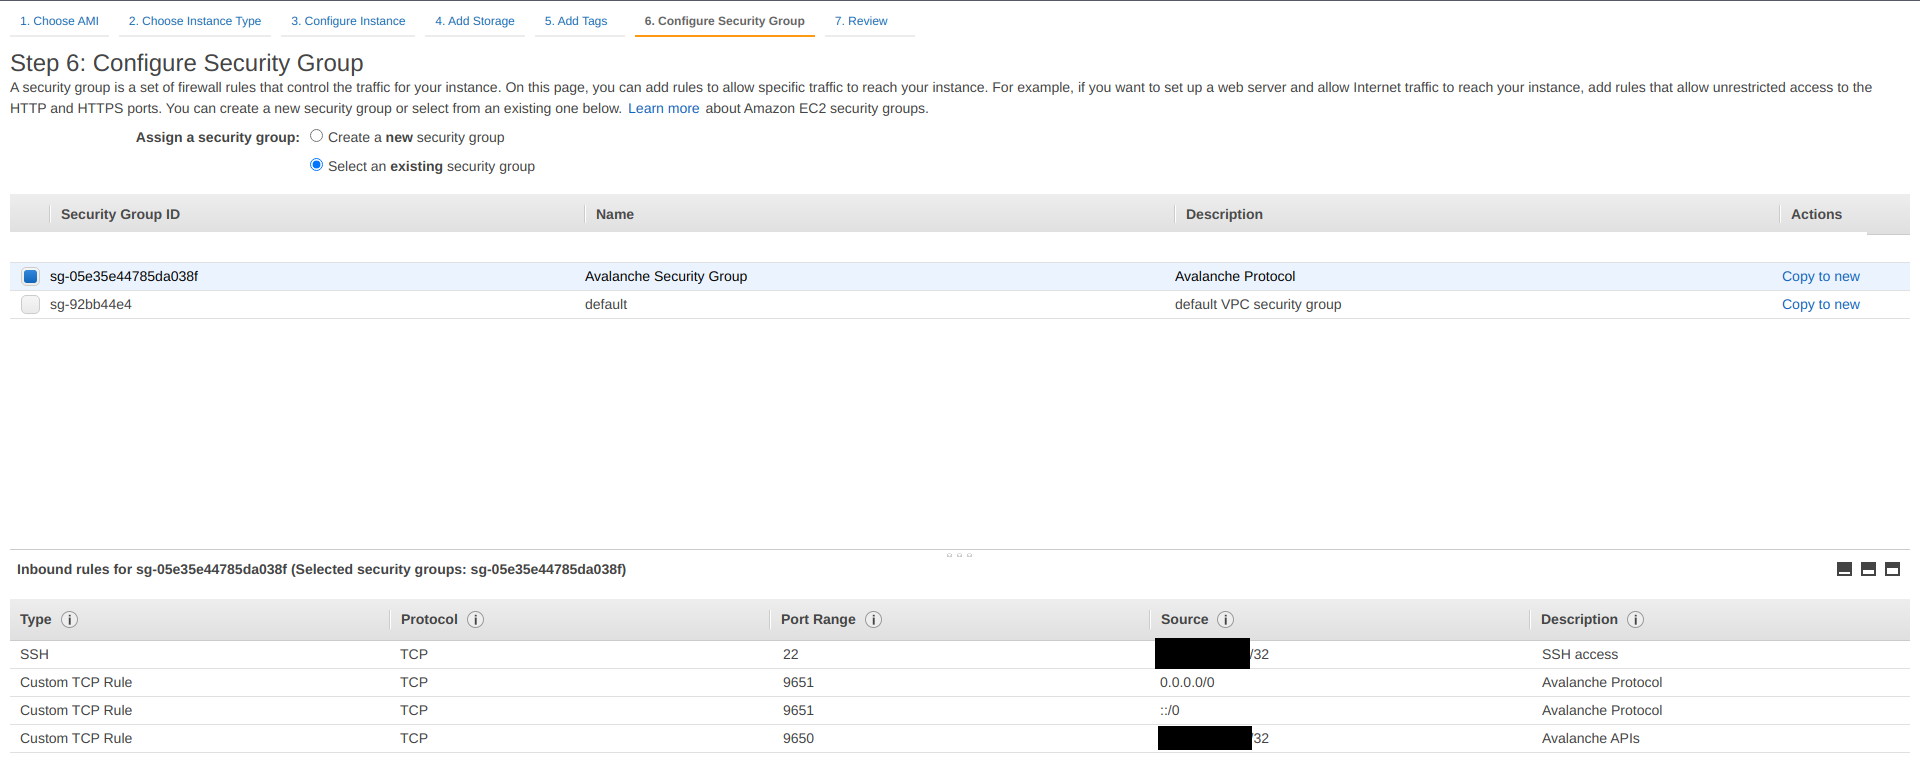
Finally, click **Review and Launch** in the bottom right. A review page will show the details of the instance you're about to launch. Review those, and if all looks good, click the blue **Launch** button in the bottom right corner of the screen.
You'll be asked to select a key pair for this instance. Select **Choose an existing key pair** and then select the `avalanche` key pair you made earlier in the tutorial. Check the box acknowledging that you have access to the `.pem` or `.ppk` file created earlier (make sure you've backed it up!) and then click **Launch Instances**.
You should see a new pop up that confirms the instance is launching!

### Assign an Elastic IP[](#assign-an-elastic-ip "Direct link to heading")
By default, your instance will not have a fixed IP. Let's give it a fixed IP through AWS's Elastic IP service. Go back to the EC2 dashboard. Under **Network & Security,** select **Elastic IPs**.
Select **Allocate Elastic IP address**.

Select the region your instance is running in, and choose to use Amazon's pool of IPv4 addresses. Click **Allocate**.
Select the Elastic IP you just created from the Elastic IP manager. From the **Actions** drop-down, choose **Associate Elastic IP address**.
Select the instance you just created. This will associate the new Elastic IP with the instance and give it a public IP address that won't change.
## Set Up AvalancheGo[](#set-up-avalanchego "Direct link to heading")
Go back to the EC2 Dashboard and select `Running Instances`.
Select the newly created EC2 instance. This opens a details panel with information about the instance.
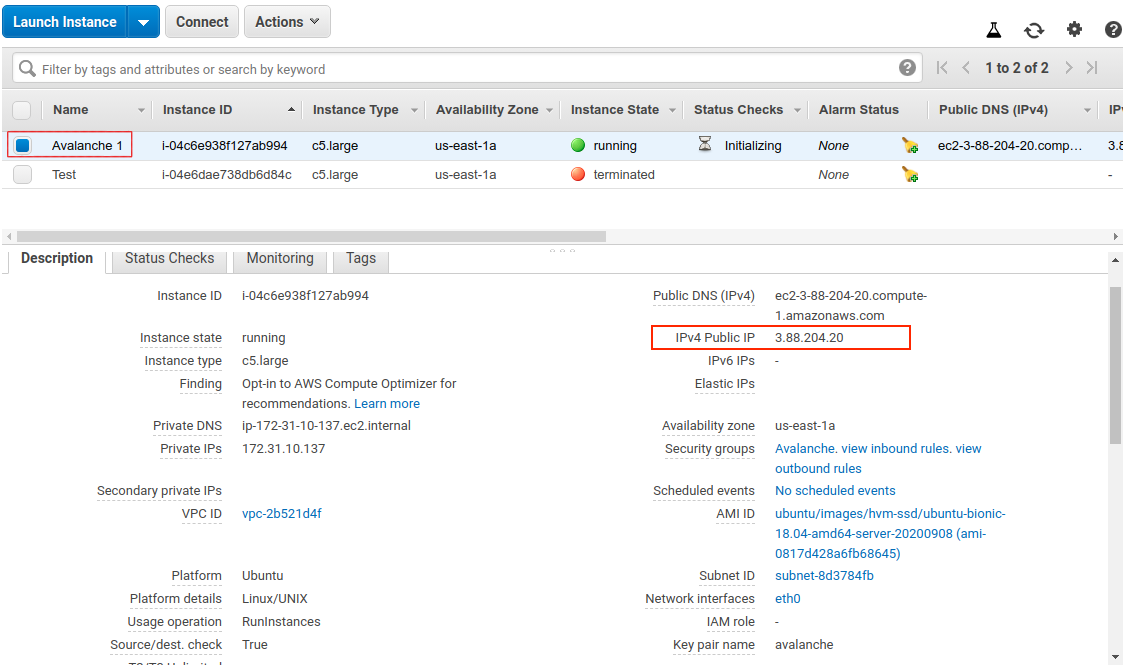
Copy the `IPv4 Public IP` field to use later. From now on we call this value `PUBLICIP`.
**Remember: the terminal commands below assume you're running Linux. Commands may differ for MacOS or other operating systems. When copy-pasting a command from a code block, copy and paste the entirety of the text in the block.**
Log into the AWS instance from your local machine. Open a terminal (try shortcut `CTRL + ALT + T`) and navigate to the directory containing the `.pem` file you downloaded earlier.
Move the `.pem` file to `$HOME/.ssh` (where `.pem` files generally live) with:
Add it to the SSH agent so that we can use it to SSH into your EC2 instance, and mark it as read-only.
```bash
ssh-add ~/.ssh/avalanche.pem; chmod 400 ~/.ssh/avalanche.pem
```
SSH into the instance. (Remember to replace `PUBLICIP` with the public IP field from earlier.)
If the permissions are **not** set correctly, you will see the following error.

You are now logged into the EC2 instance.
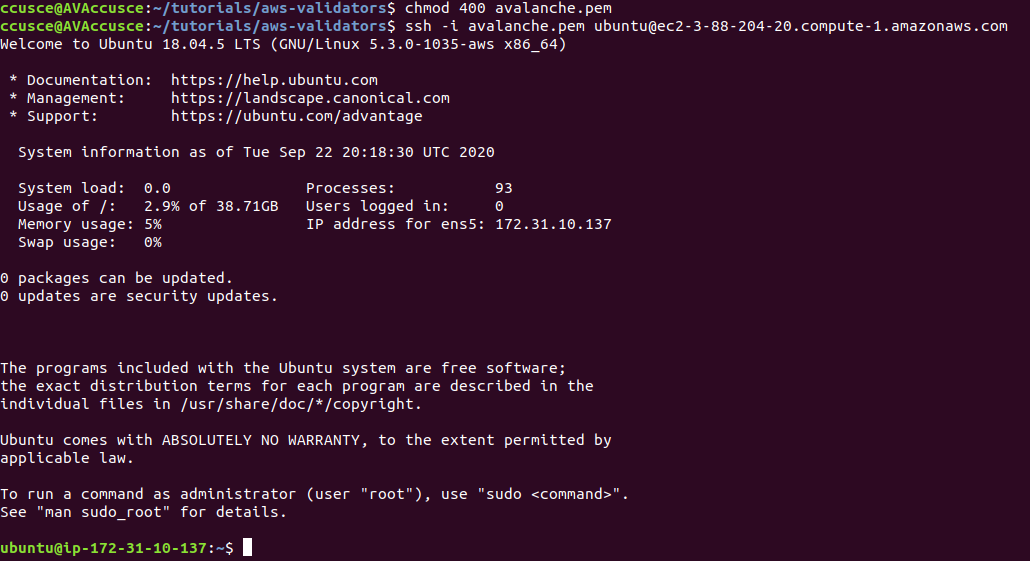
If you have not already done so, update the instance to make sure it has the latest operating system and security updates:
```bash
sudo apt update; sudo apt upgrade -y; sudo reboot
```
This also reboots the instance. Wait 5 minutes, then log in again by running this command on your local machine:
You're logged into the EC2 instance again. Now we'll need to set up our Avalanche node. To do this, follow the [Set Up Avalanche Node With Installer](/docs/nodes/using-install-script/installing-avalanche-go) tutorial which automates the installation process. You will need the `PUBLICIP` we set up earlier.
Your AvalancheGo node should now be running and in the process of bootstrapping, which can take a few hours. To check if it's done, you can issue an API call using `curl`. If you're making the request from the EC2 instance, the request is:
```bash
curl -X POST --data '{
"jsonrpc":"2.0",
"id" :1,
"method" :"info.isBootstrapped",
"params": {
"chain":"X"
}
}' -H 'content-type:application/json;' 127.0.0.1:9650/ext/info
```
Once the node is finished bootstrapping, the response will be:
```json
{
"jsonrpc": "2.0",
"result": {
"isBootstrapped": true
},
"id": 1
}
```
You can continue on, even if AvalancheGo isn't done bootstrapping.
In order to make your node a validator, you'll need its node ID. To get it, run:
```bash
curl -X POST --data '{
"jsonrpc":"2.0",
"id" :1,
"method" :"info.getNodeID"
}' -H 'content-type:application/json;' 127.0.0.1:9650/ext/info
```
The response contains the node ID.
```json
{"jsonrpc":"2.0","result":{"nodeID":"NodeID-DznHmm3o7RkmpLkWMn9NqafH66mqunXbM"},"id":1}
```
In the above example the node ID is`NodeID-DznHmm3o7RkmpLkWMn9NqafH66mqunXbM`. Copy your node ID for later. Your node ID is not a secret, so you can just paste it into a text editor.
AvalancheGo has other APIs, such as the [Health API](/docs/api-reference/health-api), that may be used to interact with the node. Some APIs are disabled by default. To enable such APIs, modify the ExecStart section of `/etc/systemd/system/avalanchego.service` (created during the installation process) to include flags that enable these endpoints. Don't manually enable any APIs unless you have a reason to.
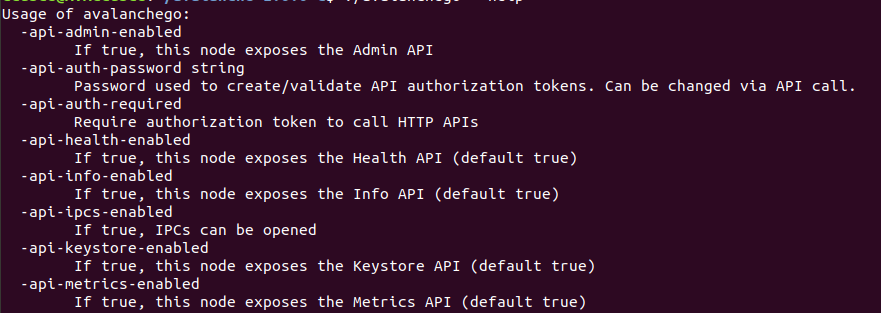
Back up the node's staking key and certificate in case the EC2 instance is corrupted or otherwise unavailable. The node's ID is derived from its staking key and certificate. If you lose your staking key or certificate then your node will get a new node ID, which could cause you to become ineligible for a staking reward if your node is a validator. **It is very strongly advised that you copy your node's staking key and certificate**. The first time you run a node, it will generate a new staking key/certificate pair and store them in directory `/home/ubuntu/.avalanchego/staking`.
Exit out of the SSH instance by running:
Now you're no longer connected to the EC2 instance; you're back on your local machine.
To copy the staking key and certificate to your machine, run the following command. As always, replace `PUBLICIP`.
```bash
scp -r ubuntu@PUBLICIP:/home/ubuntu/.avalanchego/staking ~/aws_avalanche_backup
```
Now your staking key and certificate are in directory `~/aws_avalanche_backup` . **The contents of this directory are secret.** You should hold this directory on storage not connected to the internet (like an external hard drive.)
### Upgrading Your Node[](#upgrading-your-node "Direct link to heading")
AvalancheGo is an ongoing project and there are regular version upgrades. Most upgrades are recommended but not required. Advance notice will be given for upgrades that are not backwards compatible. To update your node to the latest version, SSH into your AWS instance as before and run the installer script again.
```bash
./avalanchego-installer.sh
```
Your machine is now running the newest AvalancheGo version. To see the status of the AvalancheGo service, run `sudo systemctl status avalanchego.`
## Increase Volume Size[](#increase-volume-size "Direct link to heading")
If you need to increase the volume size, follow these instructions from AWS:
* [Request modifications to your EBS volumes](https://docs.aws.amazon.com/AWSEC2/latest/UserGuide/requesting-ebs-volume-modifications.html)
* [Extend a Linux file system after resizing a volume](https://docs.aws.amazon.com/AWSEC2/latest/UserGuide/recognize-expanded-volume-linux.html)
## Wrap Up[](#wrap-up "Direct link to heading")
That's it! You now have an AvalancheGo node running on an AWS EC2 instance. We recommend setting up [node monitoring](/docs/nodes/maintain/monitoring)for your AvalancheGo node. We also recommend setting up AWS billing alerts so you're not surprised when the bill arrives. If you have feedback on this tutorial, or anything else, send us a message on [Discord](https://chat.avalabs.org/).
# AWS Marketplace
URL: /docs/nodes/on-third-party-services/aws-marketplace
Learn how to run a node on AWS Marketplace.
## How to Launch an Avalanche Validator using AWS
With the intention of enabling developers and entrepreneurs to on-ramp into the Avalanche ecosystem with as little friction as possible, Ava Labs recently launched an offering to deploy an Avalanche Validator node via the AWS Marketplace. This tutorial will show the main steps required to get this node running and validating on the Avalanche Fuji testnet.
## Product Overview[](#product-overview "Direct link to heading")
The Avalanche Validator node is available via [the AWS Marketplace](https://aws.amazon.com/marketplace/pp/prodview-nd6wgi2bhhslg). There you'll find a high level product overview. This includes a product description, pricing information, usage instructions, support information and customer reviews. After reviewing this information you want to click the "Continue to Subscribe" button.
## Subscribe to This Software[](#subscribe-to-this-software "Direct link to heading")
Once on the "Subscribe to this Software" page you will see a button which enables you to subscribe to this AWS Marketplace offering. In addition you'll see Terms of service including the seller's End User License Agreement and the [AWS Privacy Notice](https://aws.amazon.com/privacy/). After reviewing these you want to click on the "Continue to Configuration" button.
## Configure This Software[](#configure-this-software "Direct link to heading")
This page lets you choose a fulfillment option and software version to launch this software. No changes are needed as the default settings are sufficient. Leave the `Fulfillment Option` as `64-bit (x86) Amazon Machine Image (AMI)`. The software version is the latest build of [the AvalancheGo full node](https://github.com/ava-labs/avalanchego/releases), `v1.9.5 (Dec 22, 2022)`, AKA `Banff.5`. This will always show the latest version. Also, the Region to deploy in can be left as `US East (N. Virginia)`. On the right you'll see the software and infrastructure pricing. Lastly, click the "Continue to Launch" button.
## Launch This Software[](#launch-this-software "Direct link to heading")
Here you can review the launch configuration details and follow the instructions to launch the Avalanche Validator Node. The changes are very minor. Leave the action as "Launch from Website." The EC2 Instance Type should remain `c5.2xlarge`. The primary change you'll need to make is to choose a keypair which will enable you to `ssh` into the newly created EC2 instance to run `curl` commands on the Validator node. You can search for existing Keypairs or you can create a new keypair and download it to your local machine. If you create a new keypair you'll need to move the keypair to the appropriate location, change the permissions and add it to the OpenSSH authentication agent. For example, on MacOS it would look similar to the following:
```bash
# In this example we have a keypair called avalanche.pem which was downloaded from AWS to ~/Downloads/avalanche.pem
# Confirm the file exists with the following command
test -f ~/Downloads/avalanche.pem && echo "Avalanche.pem exists."
# Running the above command will output the following:
# Avalanche.pem exists.
# Move the avalanche.pem keypair from the ~/Downloads directory to the hidden ~/.ssh directory
mv ~/Downloads/avalanche.pem ~/.ssh
# Next add the private key identity to the OpenSSH authentication agent
ssh-add ~/.ssh/avalanche.pem;
# Change file modes or Access Control Lists
sudo chmod 600 ~/.ssh/avalanche.pem
```
Once these steps are complete you are ready to launch the Validator node on EC2. To make that happen click the "Launch" button

You now have an Avalanche node deployed on an AWS EC2 instance! Copy the `AMI ID` and click on the `EC2 Console` link for the next step.
## EC2 Console[](#ec2-console "Direct link to heading")
Now take the `AMI ID` from the previous step and input it into the search bar on the EC2 Console. This will bring you to the dashboard where you can find the EC2 instances public IP address.
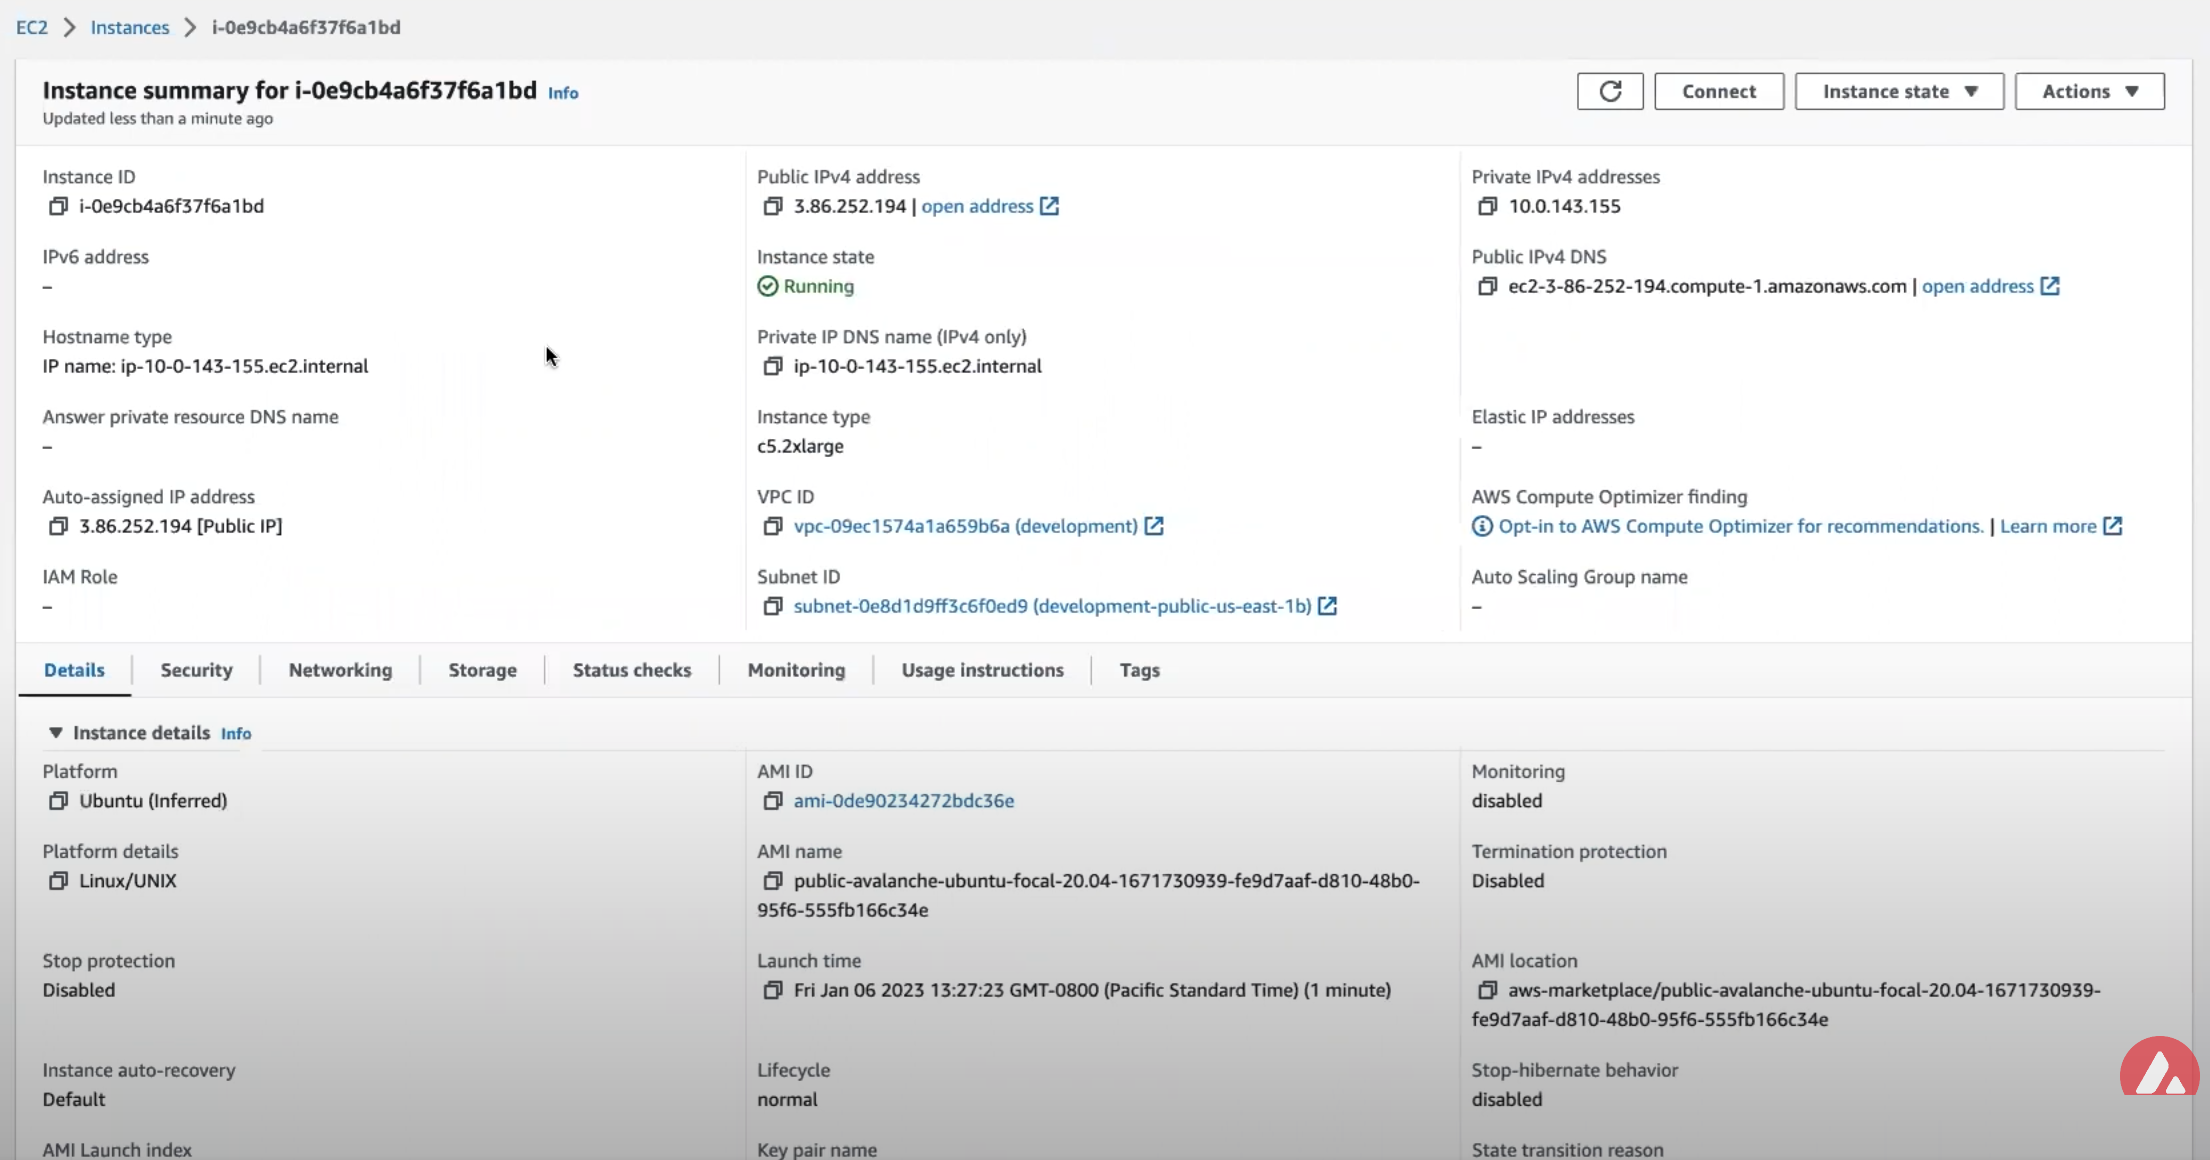
Copy that public IP address and open a Terminal or command line prompt. Once you have the new Terminal open `ssh` into the EC2 instance with the following command.
## Node Configuration[](#node-configuration "Direct link to heading")
### Switch to Fuji Testnet[](#switch-to-fuji-testnet "Direct link to heading")
By default the Avalanche Node available through the AWS Marketplace syncs the Mainnet. If this is what you are looking for, you can skip this step.
For this tutorial you want to sync and validate the Fuji Testnet. Now that you're `ssh`ed into the EC2 instance you can make the required changes to sync Fuji instead of Mainnet.
First, confirm that the node is syncing the Mainnet by running the `info.getNetworkID` command.
#### `info.getNetworkID` Request[](#infogetnetworkid-request "Direct link to heading")
```bash
curl -X POST --data '{
"jsonrpc":"2.0",
"id" :1,
"method" :"info.getNetworkID",
"params": {
}
}' -H 'content-type:application/json;' 127.0.0.1:9650/ext/info
```
#### `info.getNetworkID` Response[](#infogetnetworkid-response "Direct link to heading")
The returned `networkID` will be 1 which is the network ID for Mainnet.
```json
{
"jsonrpc": "2.0",
"result": {
"networkID": "1"
},
"id": 1
}
```
Now you want to edit `/etc/avalanchego/conf.json` and change the `"network-id"` property from `"mainnet"` to `"fuji"`. To see the contents of `/etc/avalanchego/conf.json` you can `cat` the file.
```bash
cat /etc/avalanchego/conf.json
{
"api-keystore-enabled": false,
"http-host": "0.0.0.0",
"log-dir": "/var/log/avalanchego",
"db-dir": "/data/avalanchego",
"api-admin-enabled": false,
"public-ip-resolution-service": "opendns",
"network-id": "mainnet"
}
```
Edit that `/etc/avalanchego/conf.json` with your favorite text editor and change the value of the `"network-id"` property from `"mainnet"` to `"fuji"`. Once that's complete, save the file and restart the Avalanche node via `sudo systemctl restart avalanchego`. You can then call the `info.getNetworkID` endpoint to confirm the change was successful.
#### `info.getNetworkID` Request[](#infogetnetworkid-request-1 "Direct link to heading")
```bash
curl -X POST --data '{
"jsonrpc":"2.0",
"id" :1,
"method" :"info.getNetworkID",
"params": {
}
}' -H 'content-type:application/json;' 127.0.0.1:9650/ext/info
```
#### `info.getNetworkID` Response[](#infogetnetworkid-response-1 "Direct link to heading")
The returned `networkID` will be 5 which is the network ID for Fuji.
```json
{
"jsonrpc": "2.0",
"result": {
"networkID": "5"
},
"id": 1
}
```
Next you run the `info.isBoostrapped` command to confirm if the Avalanche Validator node has finished bootstrapping.
### `info.isBootstrapped` Request[](#infoisbootstrapped-request "Direct link to heading")
```bash
curl -X POST --data '{
"jsonrpc":"2.0",
"id" :1,
"method" :"info.isBootstrapped",
"params": {
"chain":"P"
}
}' -H 'content-type:application/json;' 127.0.0.1:9650/ext/info
```
Once the node is finished bootstrapping, the response will be:
### `info.isBootstrapped` Response[](#infoisbootstrapped-response "Direct link to heading")
```json
{
"jsonrpc": "2.0",
"result": {
"isBootstrapped": true
},
"id": 1
}
```
**Note** that initially the response is `false` because the network is still syncing.\
When you're adding your node as a Validator on the Avalanche Mainnet you'll want to wait for this response to return `true` so that you don't suffer from any downtime while validating. For this tutorial you're not going to wait for it to finish syncing as it's not strictly necessary.
### `info.getNodeID` Request[](#infogetnodeid-request "Direct link to heading")
Next, you want to get the NodeID which will be used to add the node as a Validator. To get the node's ID you call the `info.getNodeID` jsonrpc endpoint.
```bash
curl --location --request POST 'http://127.0.0.1:9650/ext/info' \
--header 'Content-Type: application/json' \
--data-raw '{
"jsonrpc":"2.0",
"id" :1,
"method" :"info.getNodeID",
"params" :{
}
}'
```
### `info.getNodeID` Response[](#infogetnodeid-response "Direct link to heading")
Take a note of the `nodeID` value which is returned as you'll need to use it in the next step when adding a validator via the Avalanche Web Wallet. In this case the `nodeID` is `NodeID-Q8Gfaaio9FAqCmZVEXDq9bFvNPvDi7rt5`
```json
{
"jsonrpc": "2.0",
"result": {
"nodeID": "NodeID-Q8Gfaaio9FAqCmZVEXDq9bFvNPvDi7rt5",
"nodePOP": {
"publicKey": "0x85675db18b326a9585bfd43892b25b71bf01b18587dc5fac136dc5343a9e8892cd6c49b0615ce928d53ff5dc7fd8945d",
"proofOfPossession": "0x98a56f092830161243c1f1a613ad68a7f1fb25d2462ecf85065f22eaebb4e93a60e9e29649a32252392365d8f628b2571174f520331ee0063a94473f8db6888fc3a722be330d5c51e67d0d1075549cb55376e1f21d1b48f859ef807b978f65d9"
}
},
"id": 1
}
```
## Add Node as Validator on Fuji via Core web[](#add-node-as-validator-on-fuji-via-core-web "Direct link to heading")
For adding the new node as a Validator on the Fuji testnet's Primary Network you can use the [Core web](https://core.app/) [connected](https://support.avax.network/en/articles/6639869-core-web-how-do-i-connect-to-core-web) to [Core extension](https://core.app). If you don't have a Core extension already, check out this [guide](https://support.avax.network/en/articles/6100129-core-extension-how-do-i-create-a-new-wallet). If you'd like to import an existing wallet to Core extension, follow [these steps](https://support.avax.network/en/articles/6078933-core-extension-how-do-i-access-my-existing-account).
Core web is a free, all-in-one command center that gives users a more intuitive and comprehensive way to view assets, and use dApps across the Avalanche network, its various Avalanche L1s, and Ethereum. Core web is optimized for use with the Core browser extension and Core mobile (available on both iOS & Android). Together, they are key components of the Core product suite that brings dApps, NFTs, Avalanche Bridge, Avalanche L1s, L2s, and more, directly to users.
### Switching to Testnet Mode[](#switching-to-testnet-mode "Direct link to heading")
By default, Core web and Core extension are connected to Mainnet. For the sake of this demo, you want to connect to the Fuji Testnet.
#### On Core Extension[](#on-core-extension "Direct link to heading")
From the hamburger menu on the top-left corner, choose Advanced, and then toggle the Testnet Mode on.
You can follow the same steps for switching back to Mainnet.
#### On Core web[](#on-core-web "Direct link to heading")
Click on the Settings button top-right corner of the page, then toggle Testnet Mode on.

You can follow the same steps for switching back to Mainnet.
### Adding the Validator[](#adding-the-validator "Direct link to heading")
* Node ID: A unique ID derived from each individual node's staker certificate. Use the `NodeID` which was returned in the `info.getNodeID` response. In this example it's `NodeID-Q8Gfaaio9FAqCmZVEXDq9bFvNPvDi7rt5`
* Staking End Date: Your AVAX tokens will be locked until this date.
* Stake Amount: The amount of AVAX to lock for staking. On Mainnet, the minimum required amount is 2,000 AVAX. On Testnet the minimum required amount is 1 AVAAX.
* Delegation Fee: You will claim this % of the rewards from the delegators on your node.
* Reward Address: A reward address is the destination address of the accumulated staking rewards.
To add a node as a Validator, first select the Stake tab on Core web, in the left hand nav menu. Next click the Validate button, and select Get Started.
This page will open up.
Choose the desired Staking Amount, then click Next.
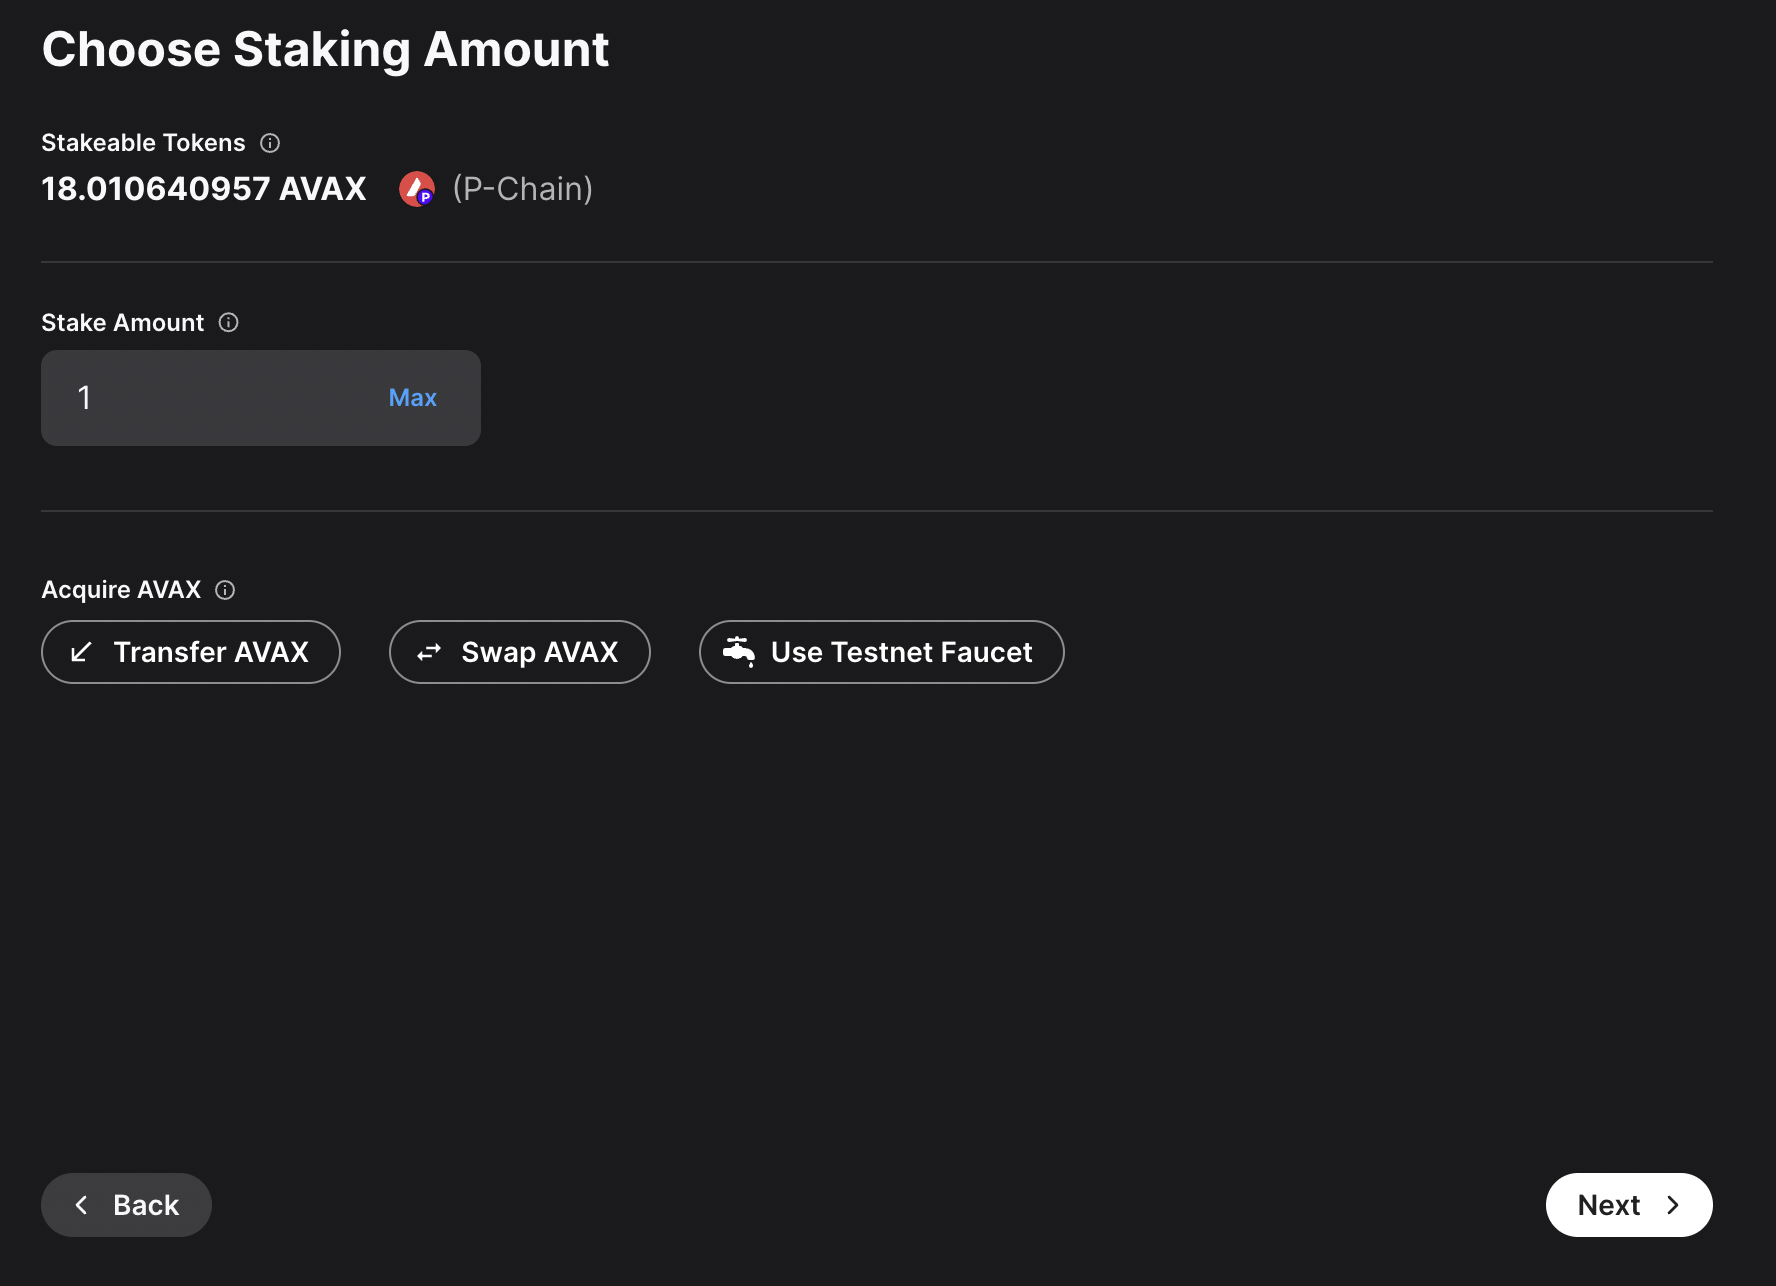
Enter you Node ID, then click Next.
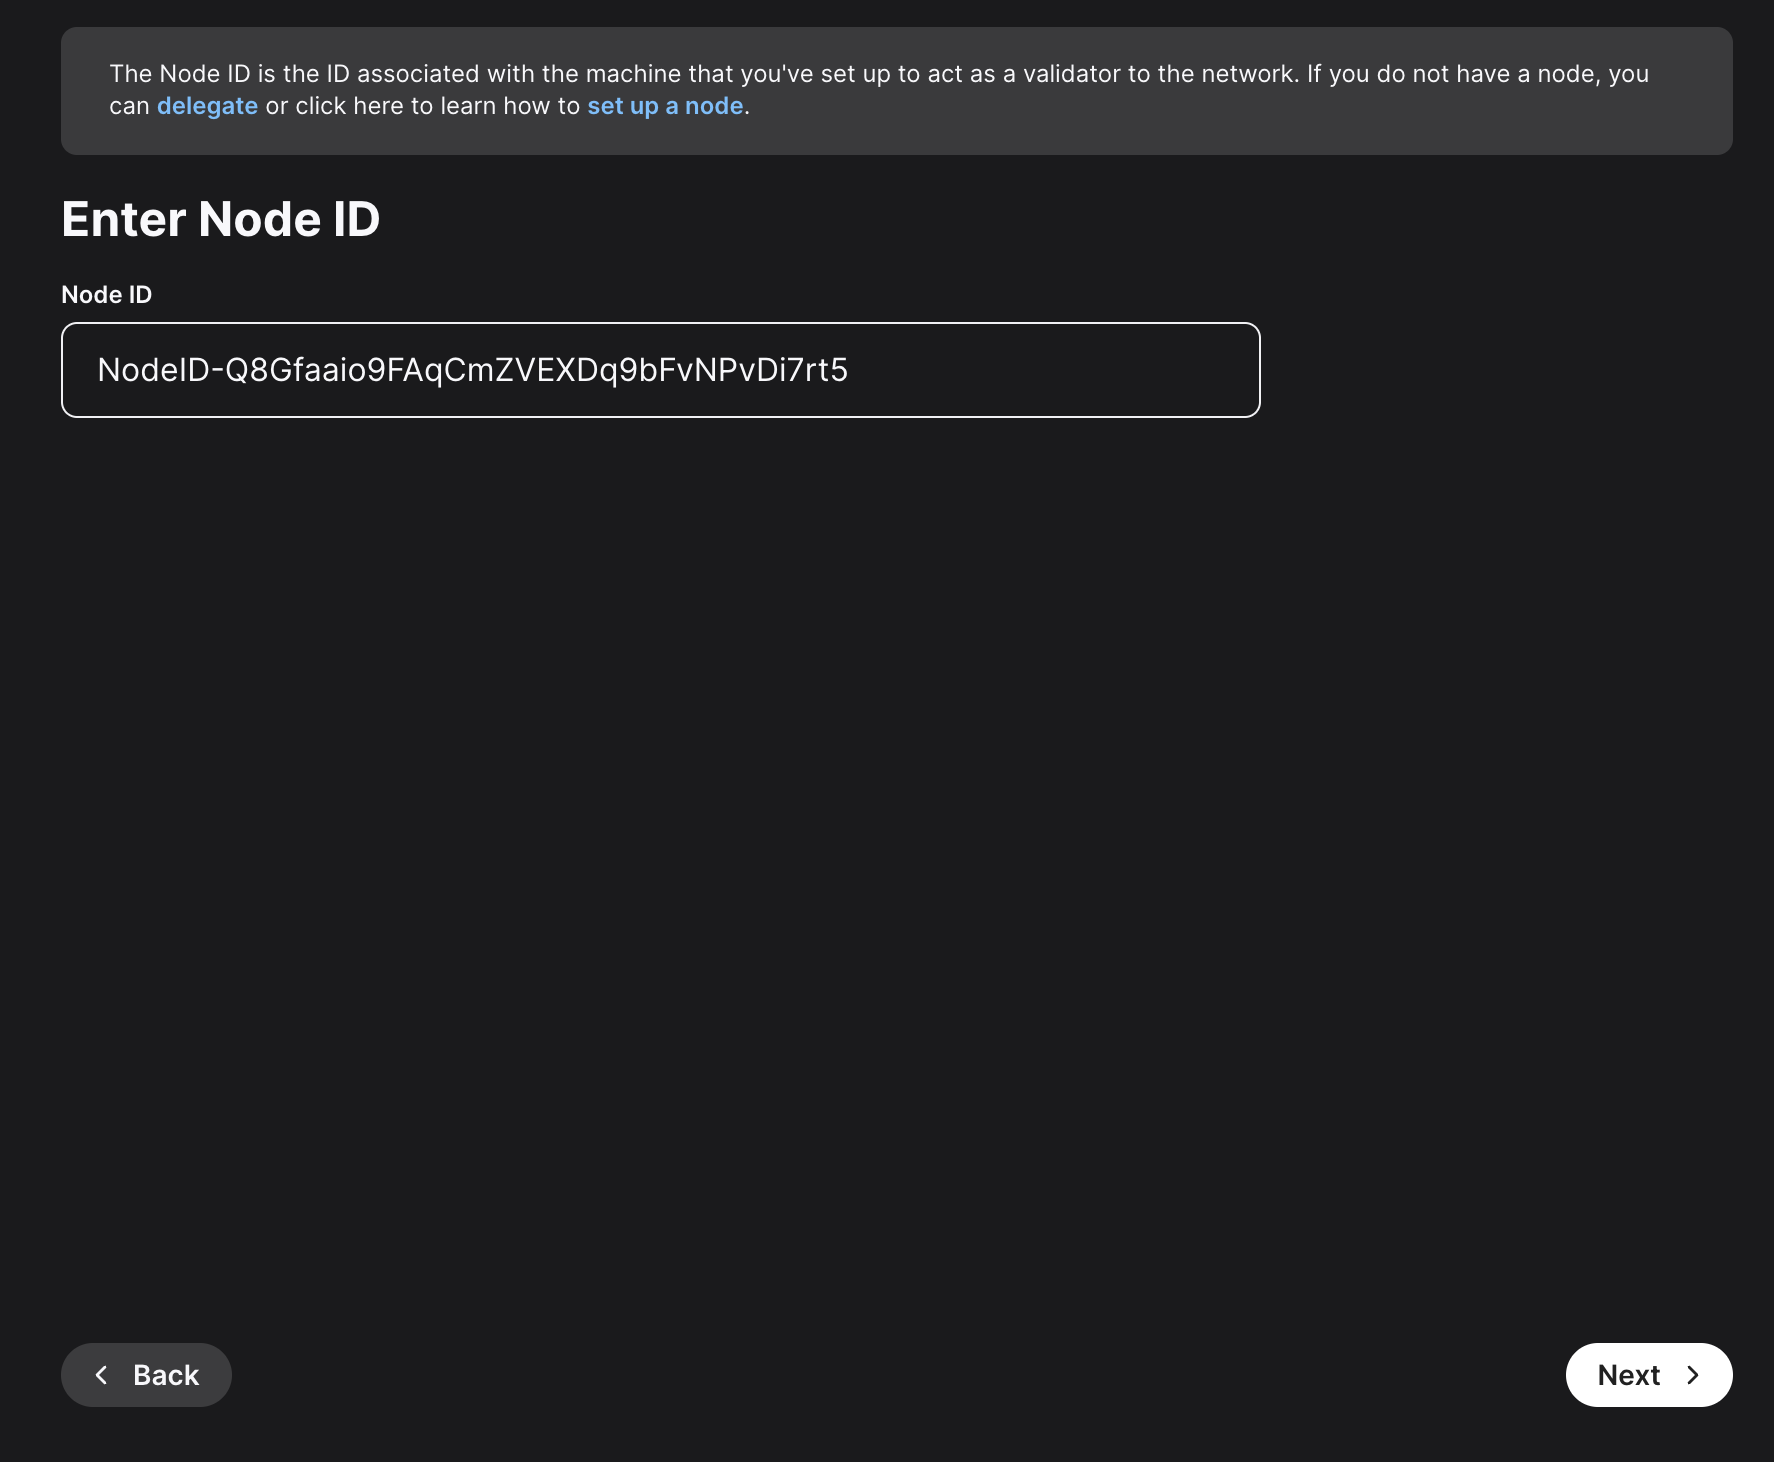
Here, you'll need to choose the staking duration. There are predefined values, like 1 day, 1 month and so on. You can also choose a custom period of time. For this example, 22 days were chosen.
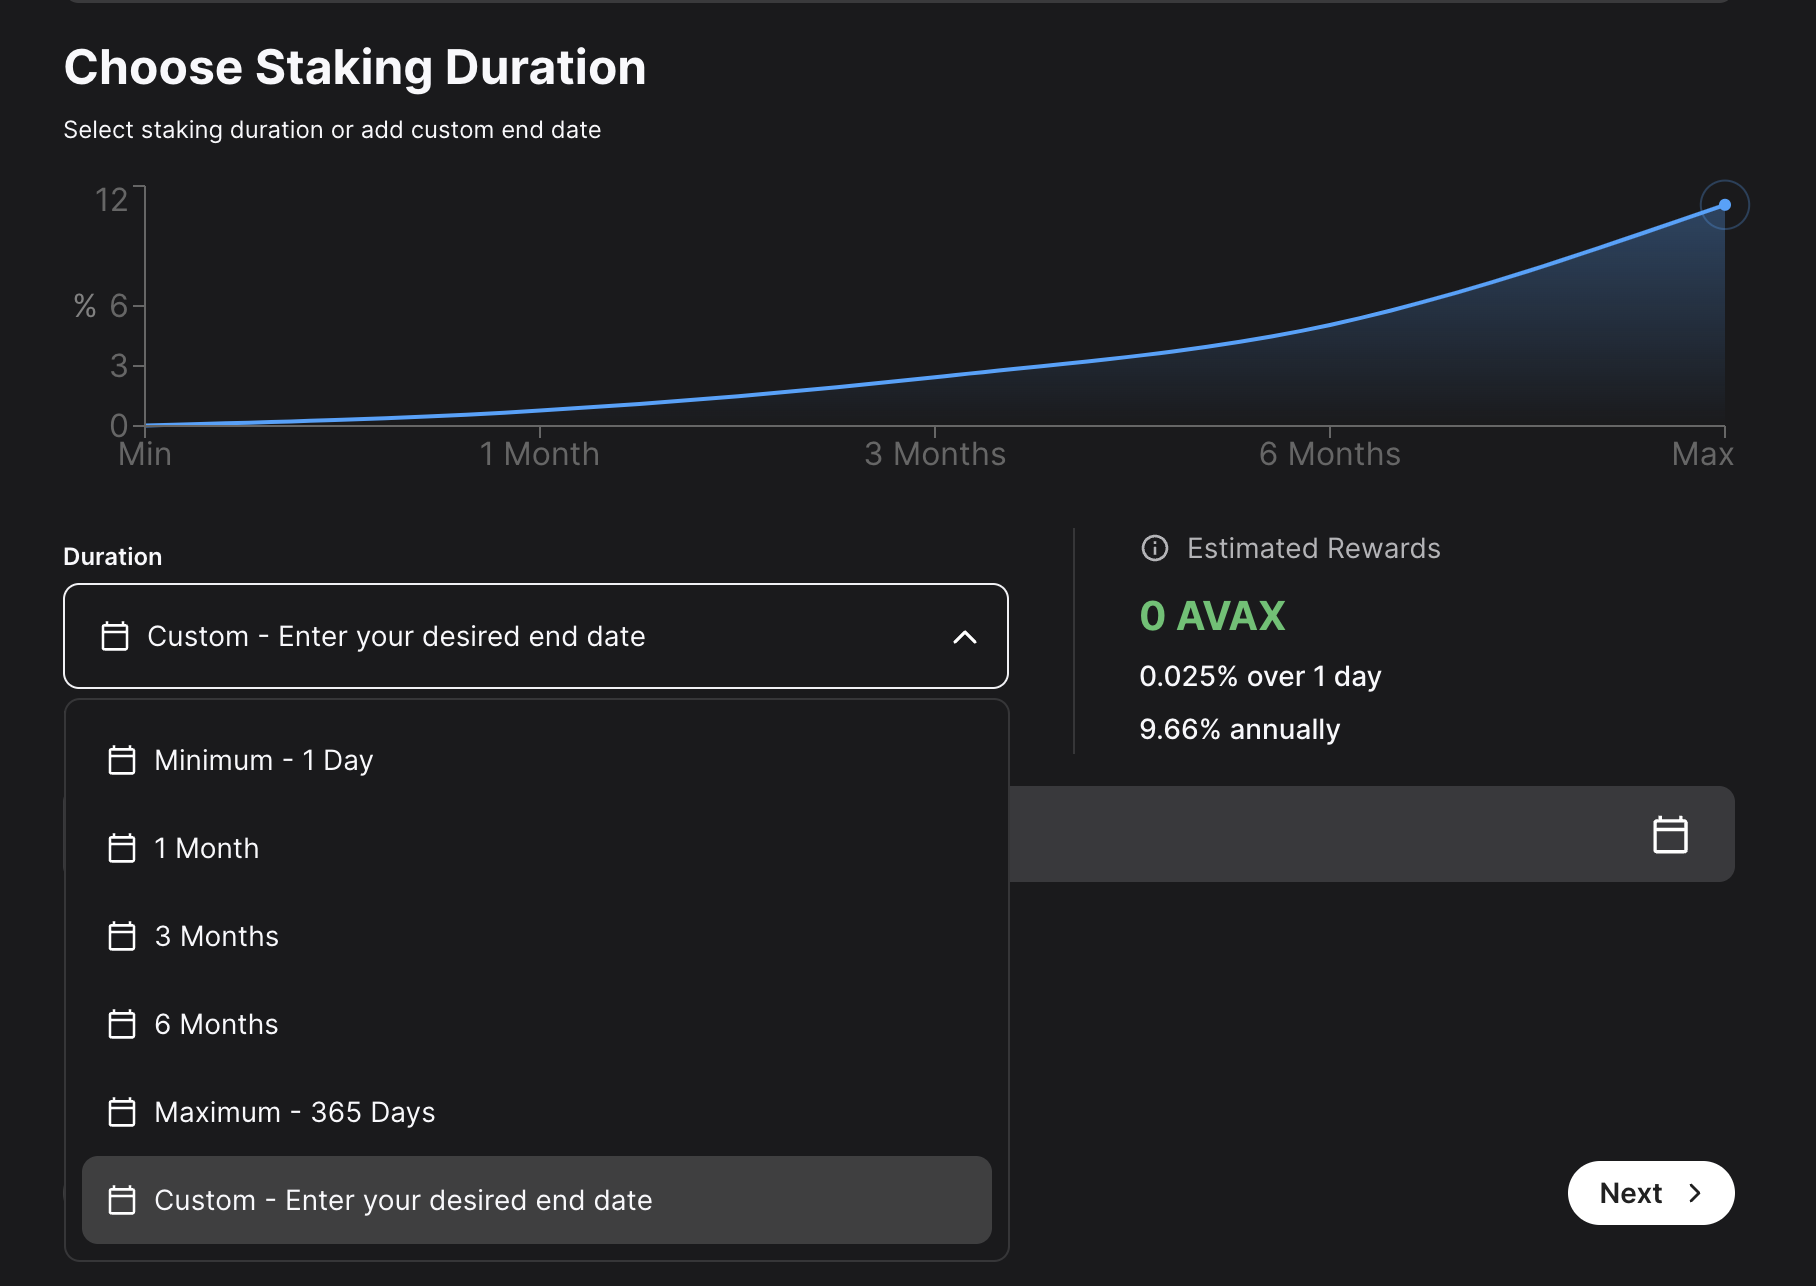
Choose the address that the network will send rewards to. Make sure it's the correct address because once the transaction is submitted this cannot be changed later or undone. You can choose the wallet's P-Chain address, or a custom P-Chain address. After entering the address, click Next.
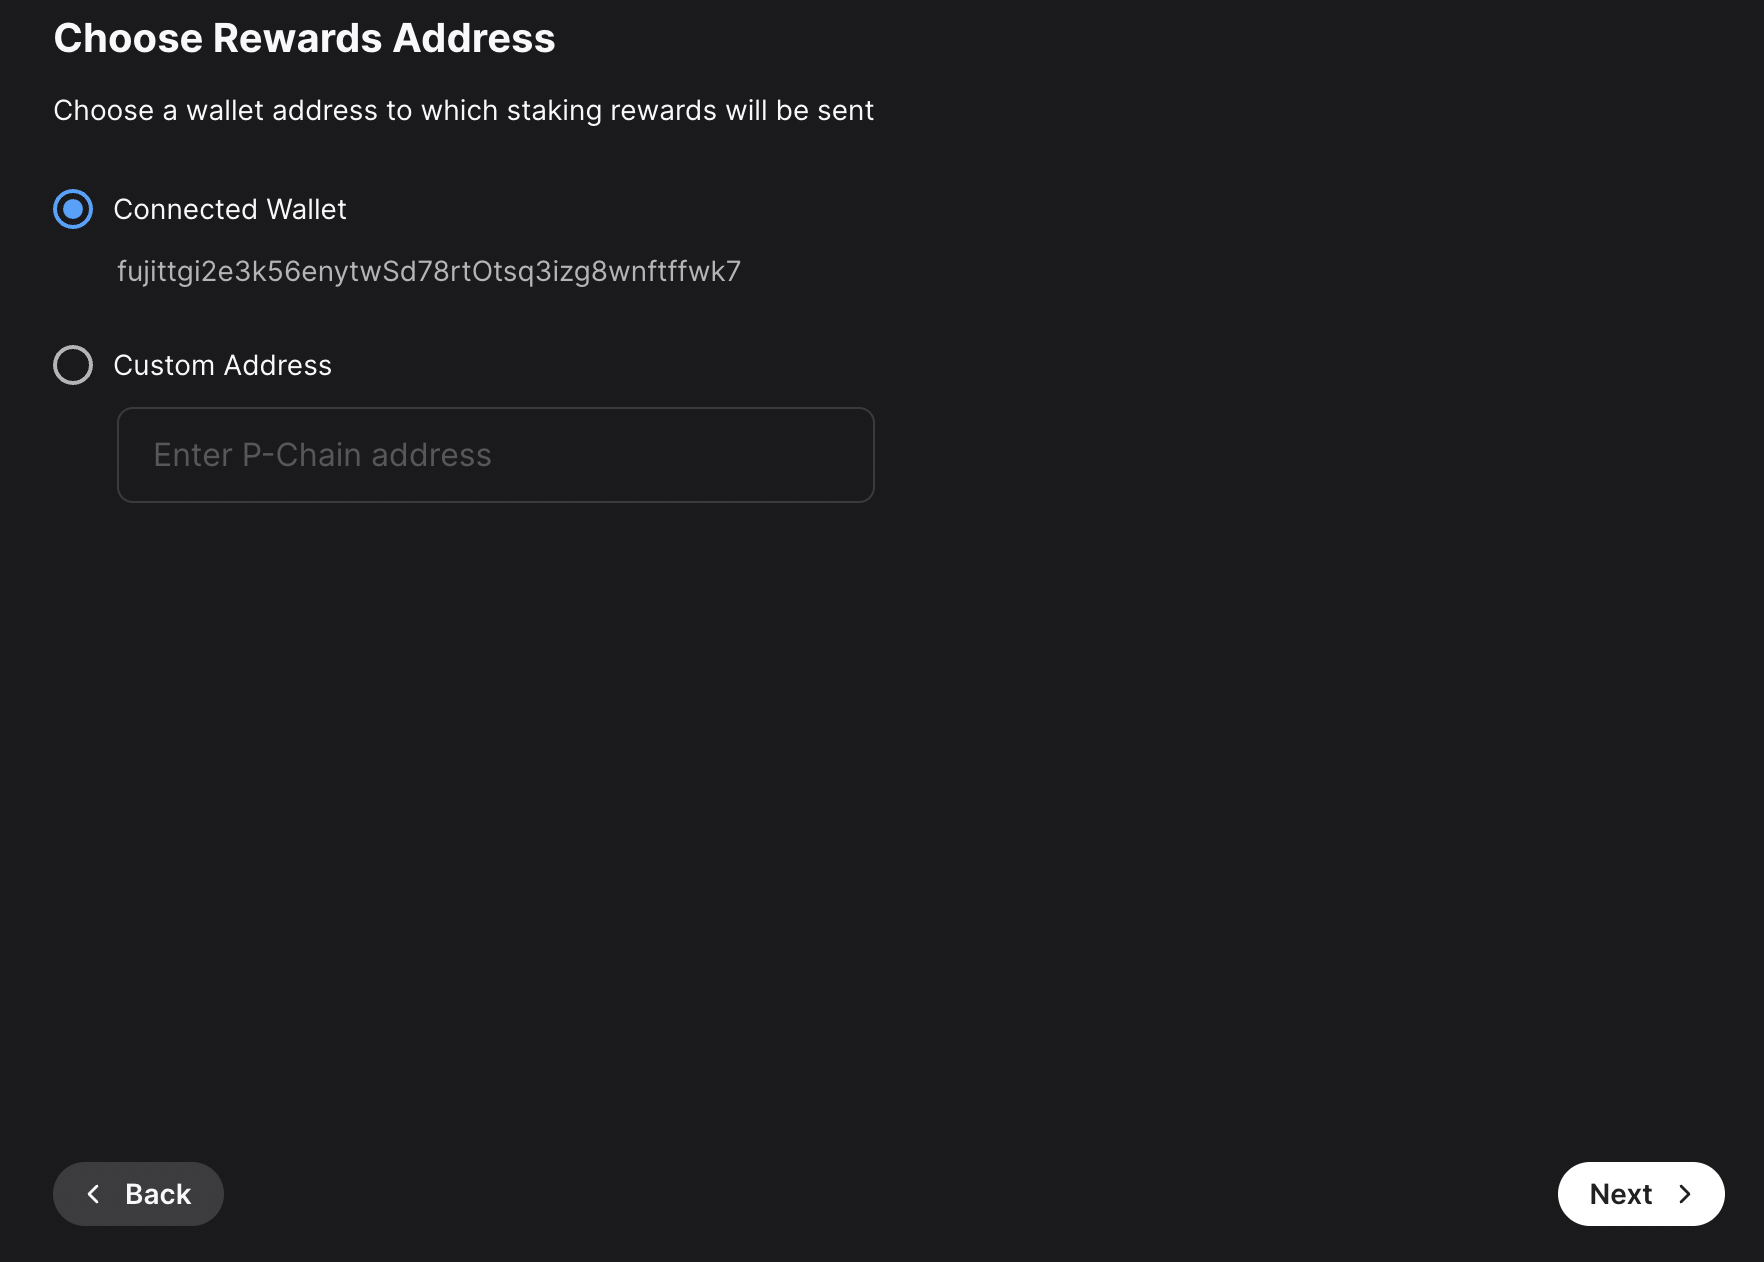
Other individuals can stake to your validator and receive rewards too, known as "delegating." You will claim this percent of the rewards from the delegators on your node. Click Next.

After entering all these details, a summary of your validation will show up. If everything is correct, you can proceed and click on Submit Validation. A new page will open up, prompting you to accept the transaction. Here, please approve the transaction.
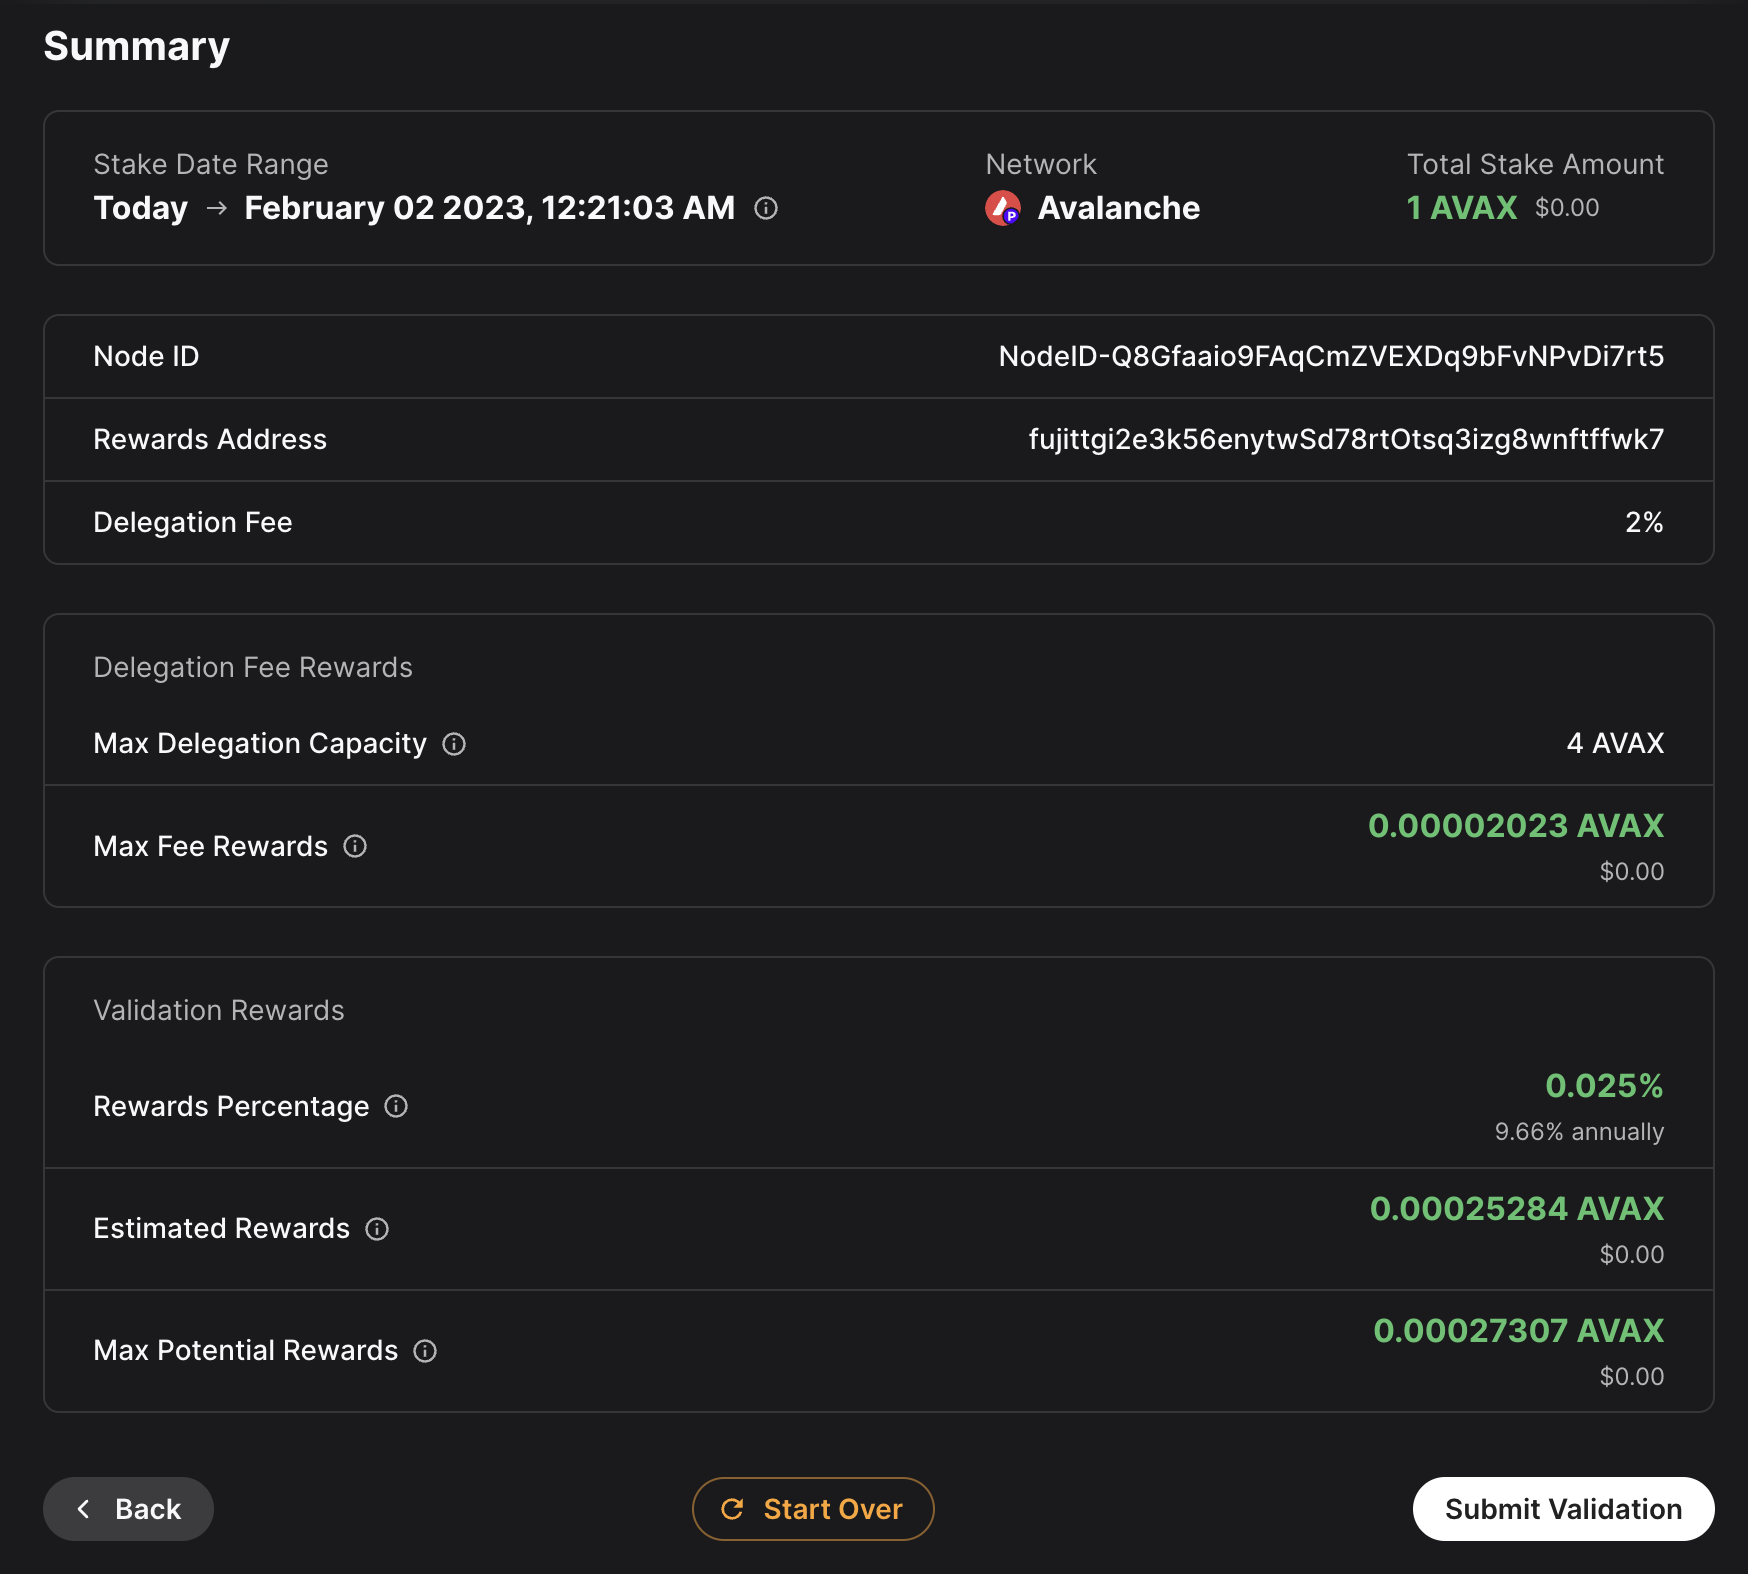
After the transaction is approved, you will see a message saying that your validation transaction was submitted.
If you click on View on explorer, a new browser tab will open with the details of the `AddValidatorTx`. It will show details such as the total value of AVAX transferred, any AVAX which were burned, the blockchainID, the blockID, the NodeID of the validator, and the total time which has elapsed from the entire Validation period.
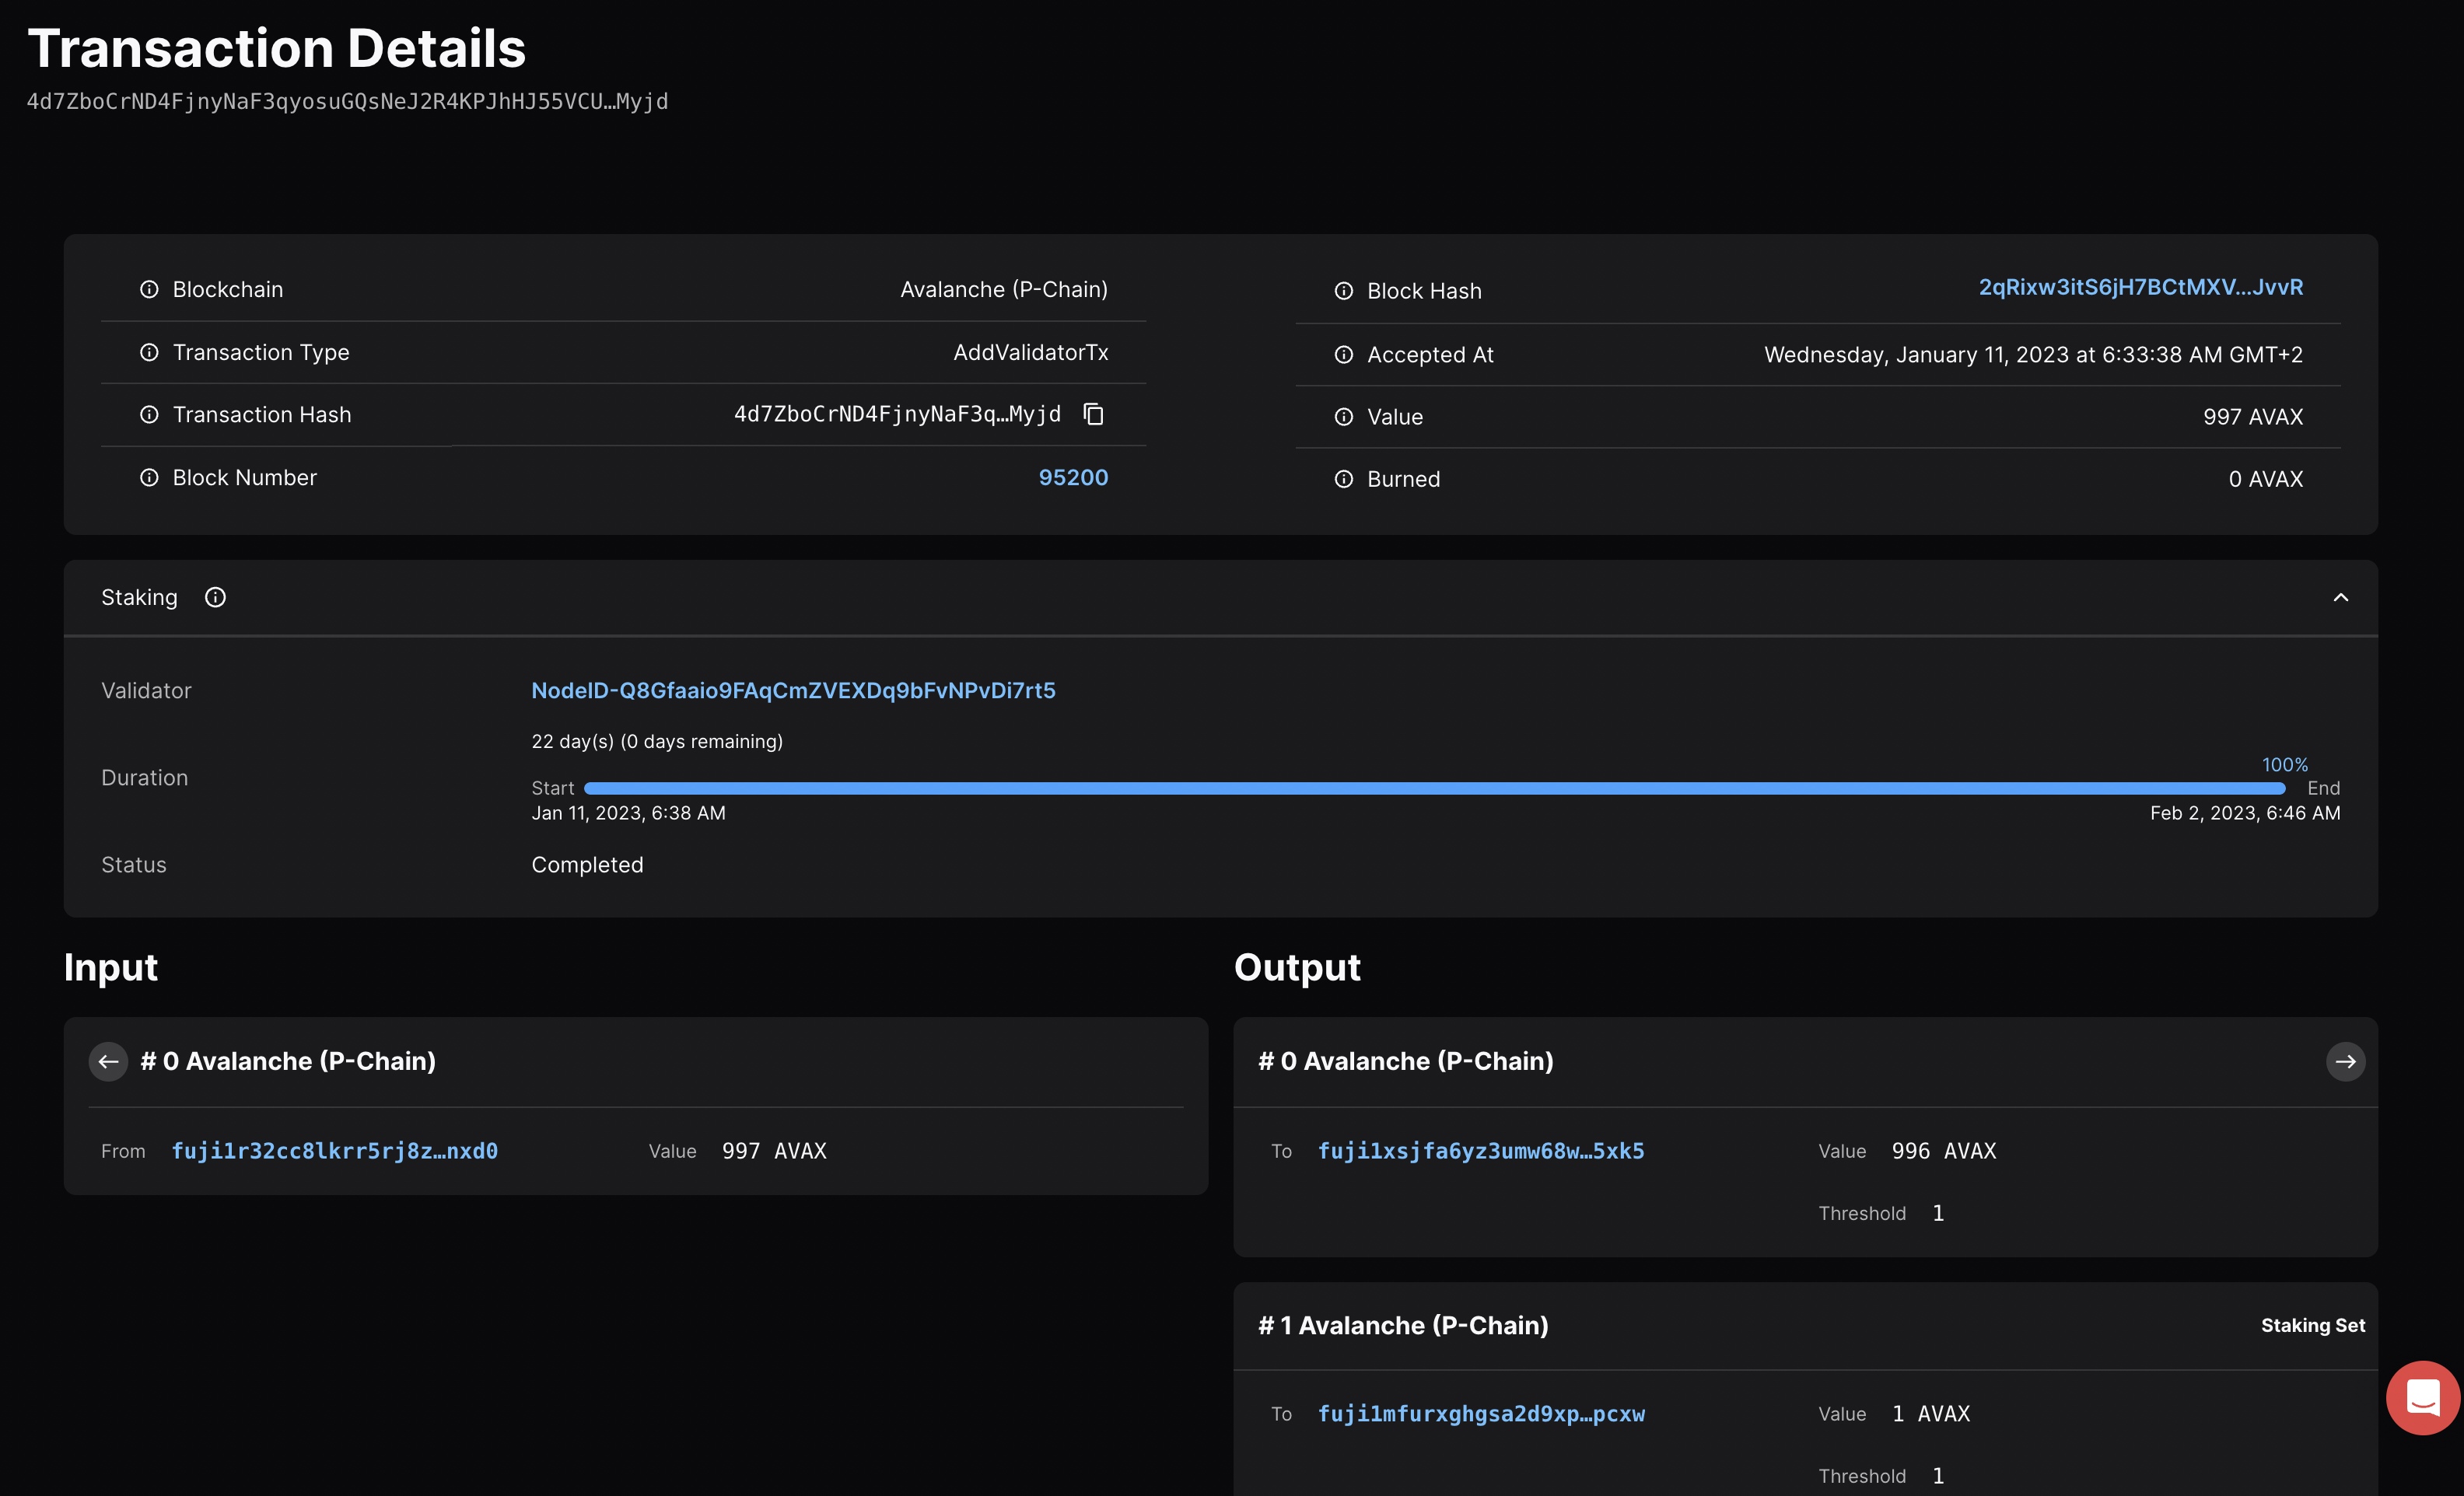
## Confirm That the Node is a Pending Validator on Fuji[](#confirm-that-the-node-is-a-pending-validator-on-fuji "Direct link to heading")
As a last step you can call the `platform.getPendingvalidators` endpoint to confirm that the Avalanche node which was recently spun up on AWS is no in the pending validators queue where it will stay for 5 minutes.
### `platform.getPendingValidators` Request[](#platformgetpendingvalidators-request "Direct link to heading")
```bash
curl --location --request POST 'https://api.avax-test.network/ext/bc/P' \
--header 'Content-Type: application/json' \
--data-raw '{
"jsonrpc": "2.0",
"method": "platform.getPendingValidators",
"params": {
"subnetID": "11111111111111111111111111111111LpoYY",
"nodeIDs": []
},
"id": 1
}'
```
### `platform.getPendingValidators` Response[](#platformgetpendingvalidators-response "Direct link to heading")
```json
{
"jsonrpc": "2.0",
"result": {
"validators": [
{
"txID": "4d7ZboCrND4FjnyNaF3qyosuGQsNeJ2R4KPJhHJ55VCU1Myjd",
"startTime": "1673411918",
"endTime": "1675313170",
"stakeAmount": "1000000000",
"nodeID": "NodeID-Q8Gfaaio9FAqCmZVEXDq9bFvNPvDi7rt5",
"delegationFee": "2.0000",
"connected": false,
"delegators": null
}
],
"delegators": []
},
"id": 1
}
```
You can also pass in the `NodeID` as a string to the `nodeIDs` array in the request body.
```bash
curl --location --request POST 'https://api.avax-test.network/ext/bc/P' \
--header 'Content-Type: application/json' \
--data-raw '{
"jsonrpc": "2.0",
"method": "platform.getPendingValidators",
"params": {
"subnetID": "11111111111111111111111111111111LpoYY",
"nodeIDs": ["NodeID-Q8Gfaaio9FAqCmZVEXDq9bFvNPvDi7rt5"]
},
"id": 1
}'
```
This will filter the response by the `nodeIDs` array which will save you time by no longer requiring you to search through the entire response body for the NodeIDs.
```json
{
"jsonrpc": "2.0",
"result": {
"validators": [
{
"txID": "4d7ZboCrND4FjnyNaF3qyosuGQsNeJ2R4KPJhHJ55VCU1Myjd",
"startTime": "1673411918",
"endTime": "1675313170",
"stakeAmount": "1000000000",
"nodeID": "NodeID-Q8Gfaaio9FAqCmZVEXDq9bFvNPvDi7rt5",
"delegationFee": "2.0000",
"connected": false,
"delegators": null
}
],
"delegators": []
},
"id": 1
}
```
After 5 minutes the node will officially start validating the Avalanche Fuji testnet and you will no longer see it in the response body for the `platform.getPendingValidators` endpoint. Now you will access it via the `platform.getCurrentValidators` endpoint.
### `platform.getCurrentValidators` Request[](#platformgetcurrentvalidators-request "Direct link to heading")
```bash
curl --location --request POST 'https://api.avax-test.network/ext/bc/P' \
--header 'Content-Type: application/json' \
--data-raw '{
"jsonrpc": "2.0",
"method": "platform.getCurrentValidators",
"params": {
"subnetID": "11111111111111111111111111111111LpoYY",
"nodeIDs": ["NodeID-Q8Gfaaio9FAqCmZVEXDq9bFvNPvDi7rt5"]
},
"id": 1
}'
```
### `platform.getCurrentValidators` Response[](#platformgetcurrentvalidators-response "Direct link to heading")
```json
{
"jsonrpc": "2.0",
"result": {
"validators": [
{
"txID": "2hy57Z7KiZ8L3w2KonJJE1fs5j4JDzVHLjEALAHaXPr6VMeDhk",
"startTime": "1673411918",
"endTime": "1675313170",
"stakeAmount": "1000000000",
"nodeID": "NodeID-Q8Gfaaio9FAqCmZVEXDq9bFvNPvDi7rt5",
"rewardOwner": {
"locktime": "0",
"threshold": "1",
"addresses": [
"P-fuji1tgj2c3k56enytw5d78rt0tsq3lzg8wnftffwk7"
]
},
"validationRewardOwner": {
"locktime": "0",
"threshold": "1",
"addresses": [
"P-fuji1tgj2c3k56enytw5d78rt0tsq3lzg8wnftffwk7"
]
},
"delegationRewardOwner": {
"locktime": "0",
"threshold": "1",
"addresses": [
"P-fuji1tgj2c3k56enytw5d78rt0tsq3lzg8wnftffwk7"
]
},
"potentialReward": "5400963",
"delegationFee": "2.0000",
"uptime": "0.0000",
"connected": false,
"delegators": null
}
]
},
"id": 1
}
```
## Mainnet[](#mainnet "Direct link to heading")
All of these steps can be applied to Mainnet. However, the minimum required Avax token amounts to become a validator is 2,000 on the Mainnet. For more information, please read [this doc](/docs/nodes/validate/how-to-stake#validators).
## Maintenance[](#maintenance "Direct link to heading")
AWS one click is meant to be used in automated environments, not as an end-user solution. You can still manage it manually, but it is not as easy as an Ubuntu instance or using the script:
* AvalancheGo binary is at `/usr/local/bin/avalanchego`
* Main node config is at `/etc/avalanchego/conf.json`
* Working directory is at `/home/avalanche/.avalanchego/ (and belongs to avalanchego user)`
* Database is at `/data/avalanchego`
* Logs are at `/var/log/avalanchego`
For a simple upgrade you would need to place the new binary at `/usr/local/bin/`. If you run an Avalanche L1, you would also need to place the VM binary into `/home/avalanche/.avalanchego/plugins`.
You can also look at using [this guide](https://docs.aws.amazon.com/systems-manager/latest/userguide/automation-tutorial-update-ami.html), but that won't address updating the Avalanche L1, if you have one.
## Summary[](#summary "Direct link to heading")
Avalanche is the first decentralized smart contracts platform built for the scale of global finance, with near-instant transaction finality. Now with an Avalanche Validator node available as a one-click install from the AWS Marketplace developers and entrepreneurs can on-ramp into the Avalanche ecosystem in a matter of minutes. If you have any questions or want to follow up in any way please join our Discord server at [https://chat.avax.network](https://chat.avax.network/). For more developer resources please check out our [Developer Documentation](/docs/).
# Google Cloud
URL: /docs/nodes/on-third-party-services/google-cloud
Learn how to run an Avalanche node on Google Cloud.
This document was written by a community member, some information may be outdated.
## Introduction[](#introduction "Direct link to heading")
Google's Cloud Platform (GCP) is a scalable, trusted and reliable hosting platform. Google operates a significant amount of it's own global networking infrastructure. It's [fiber network](https://cloud.google.com/blog/products/networking/google-cloud-networking-in-depth-cloud-cdn) can provide highly stable and consistent global connectivity. In this article, we will leverage GCP to deploy a node on which Avalanche can installed via [terraform](https://www.terraform.io/). Leveraging `terraform` may seem like overkill, it should set you apart as an operator and administrator as it will enable you greater flexibility and provide the basis on which you can easily build further automation.
## Conventions[](#conventions "Direct link to heading")
* `Items` highlighted in this manor are GCP parlance and can be searched for further reference in the Google documentation for their cloud products.
## Important Notes[](#important-notes "Direct link to heading")
* The machine type used in this documentation is for reference only and the actual sizing you use will depend entirely upon the amount that is staked and delegated to the node.
## Architectural Description[](#architectural-description "Direct link to heading")
This section aims to describe the architecture of the system that the steps in the [Setup Instructions](#-setup-instructions) section deploy when enacted. This is done so that the executor can not only deploy the reference architecture, but also understand and potentially optimize it for their needs.
### Project[](#project "Direct link to heading")
We will create and utilize a single GCP `Project` for deployment of all resources.
#### Service Enablement[](#service-enablement "Direct link to heading")
Within our GCP project we will need to enable the following Cloud Services:
* `Compute Engine`
* `IAP`
### Networking[](#networking "Direct link to heading")
#### Compute Network[](#compute-network "Direct link to heading")
We will deploy a single `Compute Network` object. This unit is where we will deploy all subsequent networking objects. It provides a logical boundary and securitization context should you wish to deploy other chain stacks or other infrastructure in GCP.
#### Public IP[](#public-ip "Direct link to heading")
Avalanche requires that a validator communicate outbound on the same public IP address that it advertises for other peers to connect to it on. Within GCP this precludes the possibility of us using a Cloud NAT Router for the outbound communications and requires us to bind the public IP that we provision to the interface of the machine. We will provision a single `EXTERNAL` static IPv4 `Compute Address`.
#### Avalanche L1s[](#avalanche-l1s "Direct link to heading")
For the purposes of this documentation we will deploy a single `Compute Subnetwork` in the US-EAST1 `Region` with a /24 address range giving us 254 IP addresses (not all usable but for the sake of generalized documentation).
### Compute[](#compute "Direct link to heading")
#### Disk[](#disk "Direct link to heading")
We will provision a single 400GB `PD-SSD` disk that will be attached to our VM.
#### Instance[](#instance "Direct link to heading")
We will deploy a single `Compute Instance` of size `e2-standard-8`. Observations of operations using this machine specification suggest it is memory over provisioned and could be brought down to 16GB using custom machine specification; but please review and adjust as needed (the beauty of compute virtualization!!).
#### Zone[](#zone "Direct link to heading")
We will deploy our instance into the `US-EAST1-B` `Zone`
#### Firewall[](#firewall "Direct link to heading")
We will provision the following `Compute Firewall` rules:
* IAP INGRESS for SSH (TCP 22) - this only allows GCP IAP sources inbound on SSH.
* P2P INGRESS for AVAX Peers (TCP 9651)
These are obviously just default ports and can be tailored to your needs as you desire.
## Setup Instructions[](#-setup-instructions "Direct link to heading")
### GCP Account[](#gcp-account "Direct link to heading")
1. If you don't already have a GCP account go create one [here](https://console.cloud.google.com/freetrial)
You will get some free bucks to run a trial, the trial is feature complete but your usage will start to deplete your free bucks so turn off anything you don't need and/or add a credit card to your account if you intend to run things long term to avoid service shutdowns.
### Project[](#project-1 "Direct link to heading")
Login to the GCP `Cloud Console` and create a new `Project` in your organization. Let's use the name `my-avax-nodes` for the sake of this setup.
1. 
2. 
3. 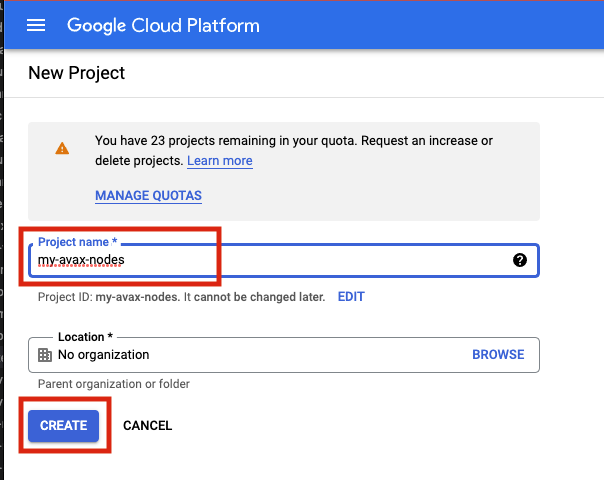
### Terraform State[](#terraform-state "Direct link to heading")
Terraform uses a state files to compose a differential between current infrastructure configuration and the proposed plan. You can store this state in a variety of different places, but using GCP storage is a reasonable approach given where we are deploying so we will stick with that.
1. 
2. 
Authentication to GCP from terraform has a few different options which are laid out [here](https://www.terraform.io/language/settings/backends/gcs). Please chose the option that aligns with your context and ensure those steps are completed before continuing.
Depending upon how you intend to execute your terraform operations you may or may not need to enable public access to the bucket. Obviously, not exposing the bucket for `public` access (even if authenticated) is preferable. If you intend to simply run terraform commands from your local machine then you will need to open the access up. I recommend to employ a full CI/CD pipeline using GCP Cloud Build which if utilized will mean the bucket can be marked as `private`. A full walk through of Cloud Build setup in this context can be found [here](https://cloud.google.com/architecture/managing-infrastructure-as-code)
### Clone GitHub Repository[](#clone-github-repository "Direct link to heading")
I have provided a rudimentary terraform construct to provision a node on which to run Avalanche which can be found [here](https://github.com/meaghanfitzgerald/deprecated-avalanche-docs/tree/master/static/scripts). Documentation below assumes you are using this repository but if you have another terraform skeleton similar steps will apply.
### Terraform Configuration[](#terraform-configuration "Direct link to heading")
1. If running terraform locally, please [install](https://learn.hashicorp.com/tutorials/terraform/install-cli) it.
2. In this repository, navigate to the `terraform` directory.
3. Under the `projects` directory, rename the `my-avax-project` directory to match your GCP project name that you created (not required, but nice to be consistent)
4. Under the folder you just renamed locate the `terraform.tfvars` file.
5. Edit this file and populate it with the values which make sense for your context and save it.
6. Locate the `backend.tf` file in the same directory.
7. Edit this file ensuring to replace the `bucket` property with the GCS bucket name that you created earlier.
If you do not with to use cloud storage to persist terraform state then simply switch the `backend` to some other desirable provider.
### Terraform Execution[](#terraform-execution "Direct link to heading")
Terraform enables us to see what it would do if we were to run it without actually applying any changes... this is called a `plan` operation. This plan is then enacted (optionally) by an `apply`.
#### Plan[](#plan "Direct link to heading")
1. In a terminal which is able to execute the `tf` binary, `cd` to the \~`my-avax-project` directory that you renamed in step 3 of `Terraform Configuration`.
2. Execute the command `tf plan`
3. You should see a JSON output to the stdout of the terminal which lays out the operations that terraform will execute to apply the intended state.
#### Apply[](#apply "Direct link to heading")
1. In a terminal which is able to execute the `tf` binary, `cd` to the \~`my-avax-project` directory that you renamed in step 3 of `Terraform Configuration`.
2. Execute the command `tf apply`
If you want to ensure that terraform does **exactly** what you saw in the `apply` output, you can optionally request for the `plan` output to be saved to a file to feed to `apply`. This is generally considered best practice in highly fluid environments where rapid change is occurring from multiple sources.
## Conclusion[](#conclusion "Direct link to heading")
Establishing CI/CD practices using tools such as GitHub and Terraform to manage your infrastructure assets is a great way to ensure base disaster recovery capabilities and to ensure you have a place to embed any \~tweaks you have to make operationally removing the potential to miss them when you have to scale from 1 node to 10. Having an automated pipeline also gives you a place to build a bigger house... what starts as your interest in building and managing a single AVAX node today can quickly change into you building an infrastructure operation for many different chains working with multiple different team members. I hope this may have inspired you to take a leap into automation in this context!
# Latitude
URL: /docs/nodes/on-third-party-services/latitude
Learn how to run an Avalanche node on Latitude.sh.
## Introduction[](#introduction "Direct link to heading")
This tutorial will guide you through setting up an Avalanche node on [Latitude.sh](https://latitude.sh/). Latitude.sh provides high-performance lighting-fast bare metal servers to ensure that your node is highly secure, available, and accessible.
To get started, you'll need:
* A Latitude.sh account
* A terminal with which to SSH into your Latitude.sh machine
For the instructions on creating an account and server with Latitude.sh, please reference their [GitHub tutorial](https://github.com/NottherealIllest/Latitude.sh-post/blob/main/avalanhe/avax-copy.md) , or visit [this page](https://www.latitude.sh/dashboard/signup) to sign up and create your first project.
This tutorial assumes your local machine has a Unix-style terminal. If you're on Windows, you'll have to adapt some of the commands used here.
## Configuring Your Server[](#configuring-your-server "Direct link to heading")
### Create a Latitude.sh Account[](#create-a-latitudesh-account "Direct link to heading")
At this point your account has been verified, and you have created a new project and deployed the server according to the instructions linked above.
### Access Your Server & Further Steps[](#access-your-server--further-steps "Direct link to heading")
All your Latitude.sh credentials are available by clicking the `server` under your project, and can be used to access your Latitude.sh machine from your local machine using a terminal.
You will need to install the `avalanche node installer script` directly in the server's terminal.
After gaining access, we'll need to set up our Avalanche node. To do this, follow the instructions here to install and run your node [Set Up Avalanche Node With Installer](/docs/nodes/using-install-script/installing-avalanche-go).
Your AvalancheGo node should now be running and in the process of bootstrapping, which can take a few hours. To check if it's done, you can issue an API call using `curl`. The request is:
```bash
curl -X POST --data '{
"jsonrpc":"2.0",
"id" :1,
"method" :"info.isBootstrapped",
"params": {
"chain":"X"
}
}' -H 'content-type:application/json;' 127.0.0.1:9650/ext/info
```
Once the node is finished bootstrapping, the response will be:
```json
{
"jsonrpc": "2.0",
"result": {
"isBootstrapped": true
},
"id": 1
}
```
You can continue on, even if AvalancheGo isn't done bootstrapping. In order to make your node a validator, you'll need its node ID. To get it, run:
```bash
curl -X POST --data '{
"jsonrpc": "2.0",
"id": 1,
"method": "info.getNodeID"
}' -H 'content-type:application/json;' 127.0.0.1:9650/ext/info
```
The response contains the node ID.
```json
{
"jsonrpc": "2.0",
"result": { "nodeID": "KhDnAoZDW8iRJ3F26iQgK5xXVFMPcaYeu" },
"id": 1
}
```
In the above example the node ID is `NodeID-KhDnAoZDW8iRJ3F26iQgK5xXVFMPcaYeu`.
AvalancheGo has other APIs, such as the [Health API](/docs/api-reference/health-api), that may be used to interact with the node. Some APIs are disabled by default. To enable such APIs, modify the ExecStart section of `/etc/systemd/system/avalanchego.service` (created during the installation process) to include flags that enable these endpoints. Don't manually enable any APIs unless you have a reason to.
Exit out of the SSH server by running:
### Upgrading Your Node[](#upgrading-your-node "Direct link to heading")
AvalancheGo is an ongoing project and there are regular version upgrades. Most upgrades are recommended but not required. Advance notice will be given for upgrades that are not backwards compatible. To update your node to the latest version, SSH into your server using a terminal and run the installer script again.
```bash
./avalanchego-installer.sh
```
Your machine is now running the newest AvalancheGo version. To see the status of the AvalancheGo service, run `sudo systemctl status avalanchego.`
## Wrap Up[](#wrap-up "Direct link to heading")
That's it! You now have an AvalancheGo node running on a Latitude.sh machine. We recommend setting up [node monitoring](/docs/nodes/maintain/monitoring) for your AvalancheGo node.
# Microsoft Azure
URL: /docs/nodes/on-third-party-services/microsoft-azure
How to run an Avalanche node on Microsoft Azure.
This document was written by a community member, some information may be out of date.
Running a validator and staking with Avalanche provides extremely competitive rewards of between 9.69% and 11.54% depending on the length you stake for. The maximum rate is earned by staking for a year, whilst the lowest rate for 14 days. There is also no slashing, so you don't need to worry about a hardware failure or bug in the client which causes you to lose part or all of your stake. Instead with Avalanche you only need to currently maintain at least 80% uptime to receive rewards. If you fail to meet this requirement you don't get slashed, but you don't receive the rewards. **You also do not need to put your private keys onto a node to begin validating on that node.** Even if someone breaks into your cloud environment and gains access to the node, the worst they can do is turn off the node.
Not only does running a validator node enable you to receive rewards in AVAX, but later you will also be able to validate other Avalanche L1s in the ecosystem as well and receive rewards in the token native to their Avalanche L1s.
Hardware requirements to run a validator are relatively modest: 8 CPU cores, 16 GB of RAM and 1 TB SSD. It also doesn't use enormous amounts of energy. Avalanche's [revolutionary consensus mechanism](/docs/quick-start/avalanche-consensus) is able to scale to millions of validators participating in consensus at once, offering unparalleled decentralisation.
Currently the minimum amount required to stake to become a validator is 2,000 AVAX. Alternatively, validators can also charge a small fee to enable users to delegate their stake with them to help towards running costs.
In this article we will step through the process of configuring a node on Microsoft Azure. This tutorial assumes no prior experience with Microsoft Azure and will go through each step with as few assumptions possible.
At the time of this article, spot pricing for a virtual machine with 2 Cores and 8 GB memory costs as little as 0.01060perhourwhichworksoutatabout0.01060 per hour which works out at about 113.44 a year, **a saving of 83.76%! compared to normal pay as you go prices.** In comparison a virtual machine in AWS with 2 Cores and 4 GB Memory with spot pricing is around \$462 a year.
## Initial Subscription Configuration[](#initial-subscription-configuration "Direct link to heading")
### Set up 2 Factor[](#set-up-2-factor "Direct link to heading")
First you will need a Microsoft Account, if you don't have one already you will see an option to create one at the following link. If you already have one, make sure to set up 2 Factor authentication to secure your node by going to the following link and then selecting "Two-step verification" and following the steps provided.
[https://account.microsoft.com/security](https://account.microsoft.com/security)

Once two factor has been configured log into the Azure portal by going to [https://portal.azure.com](https://portal.azure.com/) and signing in with your Microsoft account. When you login you won't have a subscription, so we need to create one first. Select "Subscriptions" as highlighted below:

Then select "+ Add" to add a new subscription
If you want to use Spot Instance VM Pricing (which will be considerably cheaper) you can't use a Free Trial account (and you will receive an error upon validation), so **make sure to select Pay-As-You-Go.**

Enter your billing details and confirm identity as part of the sign-up process, when you get to Add technical support select the without support option (unless you want to pay extra for support) and press Next.
## Create a Virtual Machine[](#create-a-virtual-machine "Direct link to heading")
Now that we have a subscription, we can create the Ubuntu Virtual Machine for our Avalanche Node. Select the Icon in the top left for the Menu and choose "+ Create a resource"
Select Ubuntu Server 18.04 LTS (this will normally be under the popular section or alternatively search for it in the marketplace)
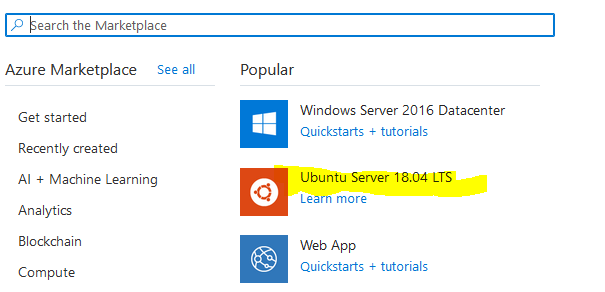
This will take you to the Create a virtual machine page as shown below:
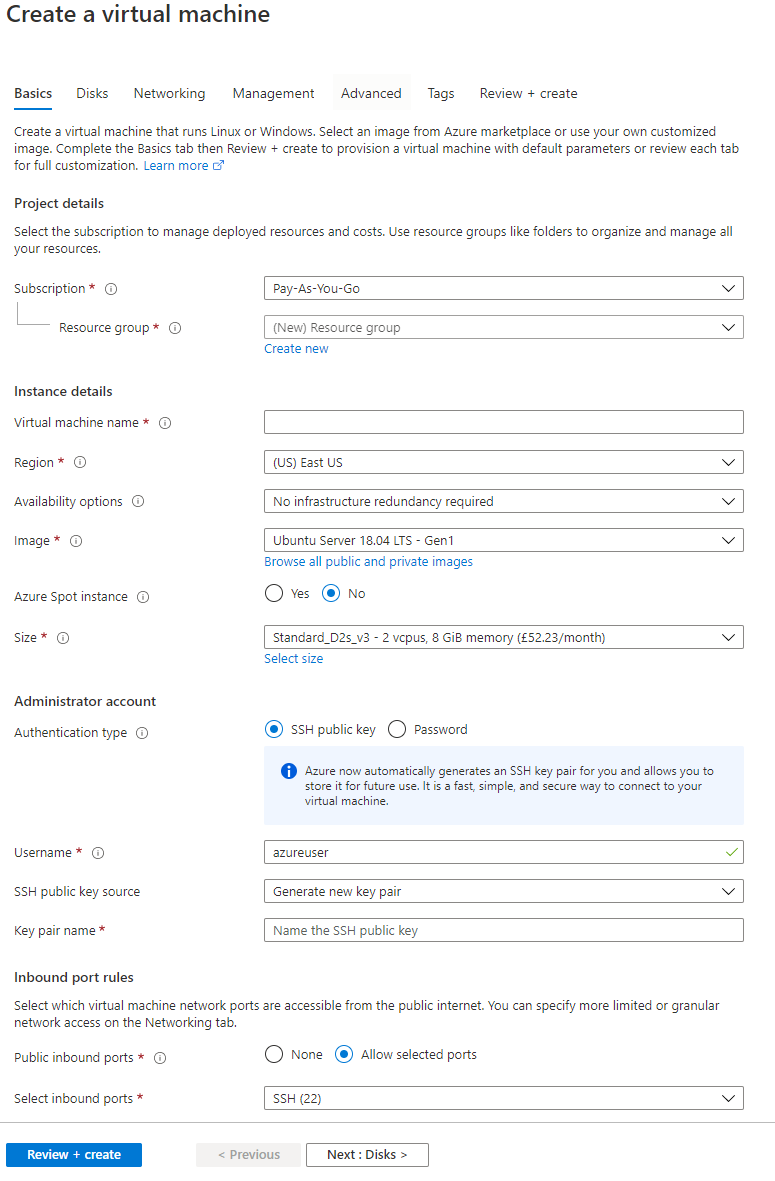
First, enter a virtual machine a name, this can be anything but in my example, I have called it Avalanche (This will also automatically change the resource group name to match)
Then select a region from the drop-down list. Select one of the recommended ones in a region that you prefer as these tend to be the larger ones with most features enabled and cheaper prices. In this example I have selected North Europe.
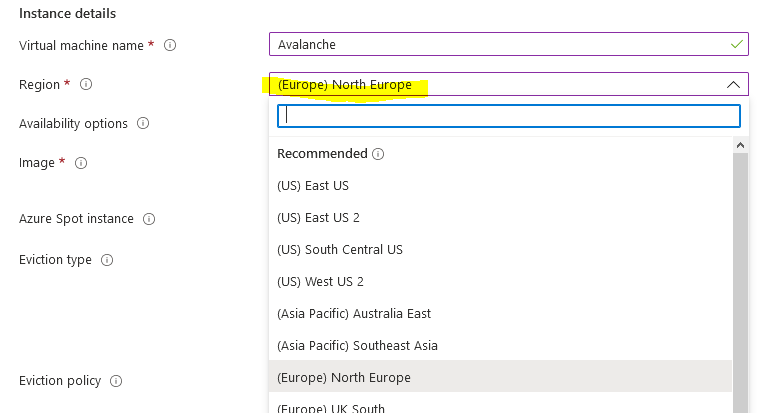
You have the option of using spot pricing to save significant amounts on running costs. Spot instances use a supply and demand market price structure. As demand for instances goes up, the price for the spot instance goes up. If there is insufficient capacity, then your VM will be turned off. The chances of this happening are incredibly low though, especially if you select the Capacity only option. Even in the unlikely event it does get turned off temporarily you only need to maintain at least 80% up time to receive the staking rewards and there is no slashing implemented in Avalanche.
Select Yes for Azure Spot instance, select Eviction type to Capacity Only and **make sure to set the eviction policy to Stop / Deallocate. This is very important otherwise the VM will be deleted**
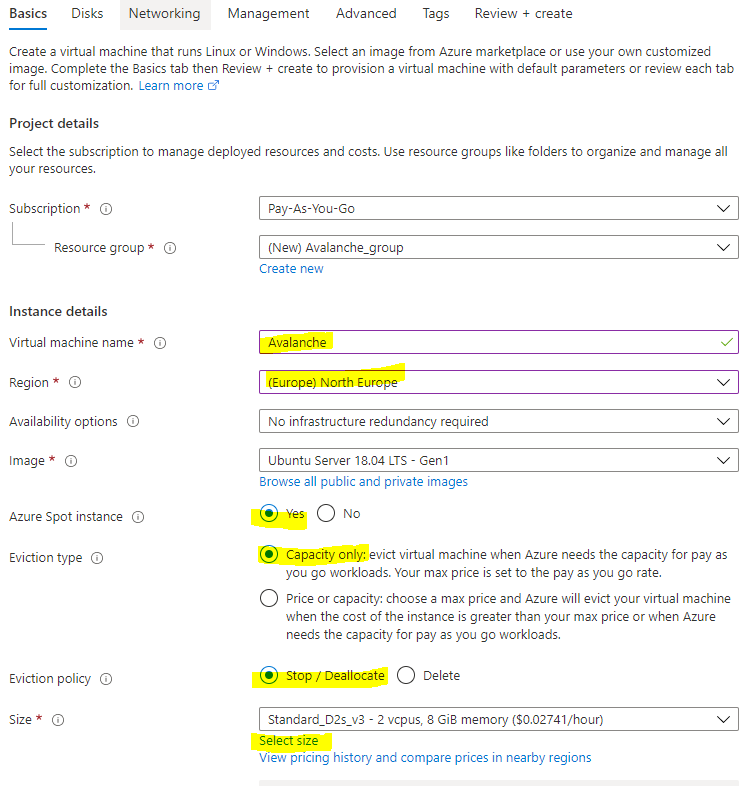
Choose "Select size" to change the Virtual Machine size, and from the menu select D2s\_v4 under the D-Series v4 selection (This size has 2 Cores, 8 GB Memory and enables Premium SSDs). You can use F2s\_v2 instances instead, with are 2 Cores, 4 GB Memory and enables Premium SSDs) but the spot price actually works out cheaper for the larger VM currently with spot instance prices. You can use [this link](https://azure.microsoft.com/en-us/pricing/details/virtual-machines/linux/) to view the prices across the different regions.
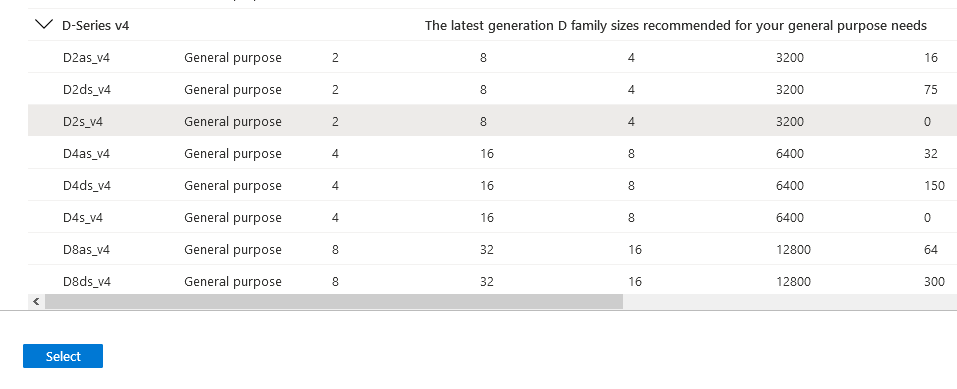
Once you have selected the size of the Virtual Machine, select "View pricing history and compare prices in nearby regions" to see how the spot price has changed over the last 3 months, and whether it's cheaper to use a nearby region which may have more spare capacity.

At the time of this article, spot pricing for D2s\_v4 in North Europe costs 0.07975perhour,oraround0.07975 per hour, or around 698.61 a year. With spot pricing, the price falls to 0.01295perhour,whichworksoutatabout0.01295 per hour, which works out at about 113.44 a year, **a saving of 83.76%!**
There are some regions which are even cheaper, East US for example is 0.01060perhouroraround0.01060 per hour or around 92.86 a year!

Below you can see the price history of the VM over the last 3 months for North Europe and regions nearby.
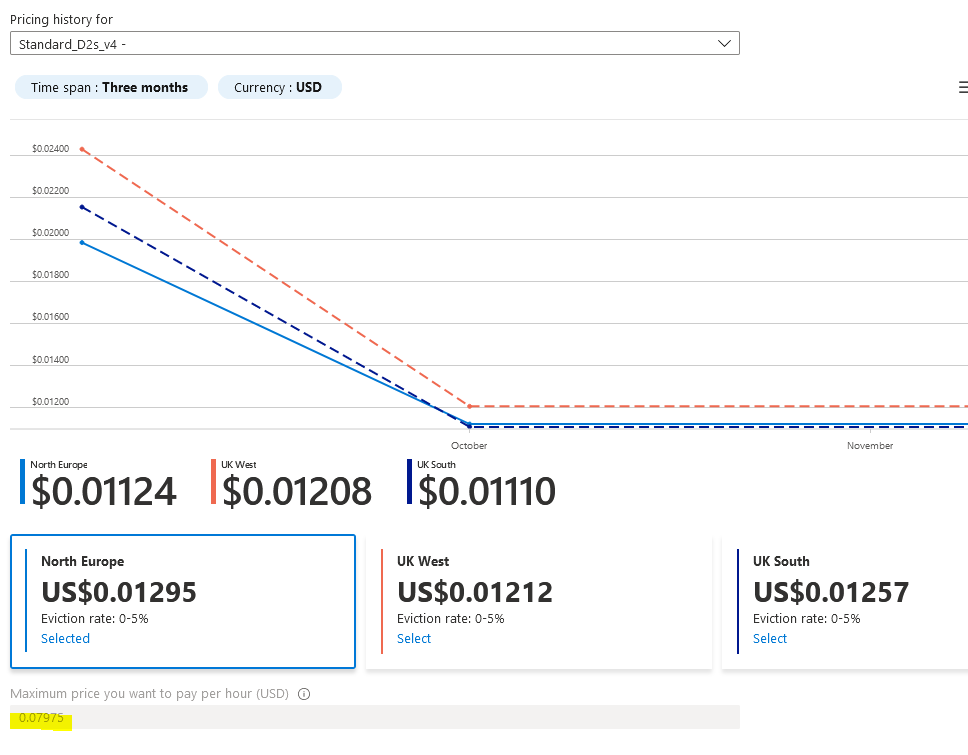
### Cheaper Than Amazon AWS[](#cheaper-than-amazon-aws "Direct link to heading")
As a comparison a c5.large instance costs 0.085USDperhouronAWS.Thistotals 0.085 USD per hour on AWS. This totals \~745 USD per year. Spot instances can save 62%, bringing that total down to \$462.
The next step is to change the username for the VM, to align with other Avalanche tutorials change the username to Ubuntu. Otherwise you will need to change several commands later in this article and swap out Ubuntu with your new username.
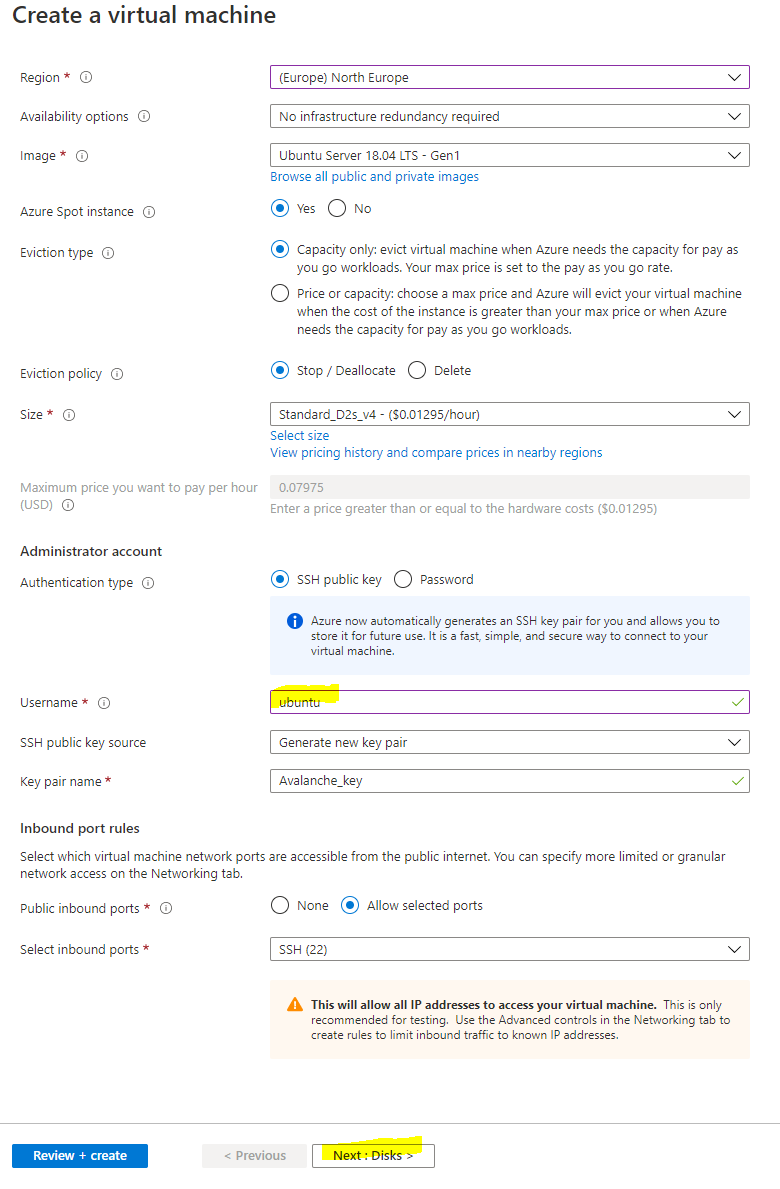
### Disks[](#disks "Direct link to heading")
Select Next: Disks to then configure the disks for the instance. There are 2 choices for disks, either Premium SSD which offer greater performance with a 64 GB disk costs around 10amonth,orthereisthestandardSSDwhichofferslowerperformanceandisaround10 a month, or there is the standard SSD which offers lower performance and is around 5 a month. You also have to pay \$0.002 per 10,000 transaction units (reads / writes and deletes) with the Standard SSD, whereas with Premium SSDs everything is included. Personally, I chose the Premium SSD for greater performance, but also because the disks are likely to be heavily used and so may even work out cheaper in the long run.
Select Next: Networking to move onto the network configuration
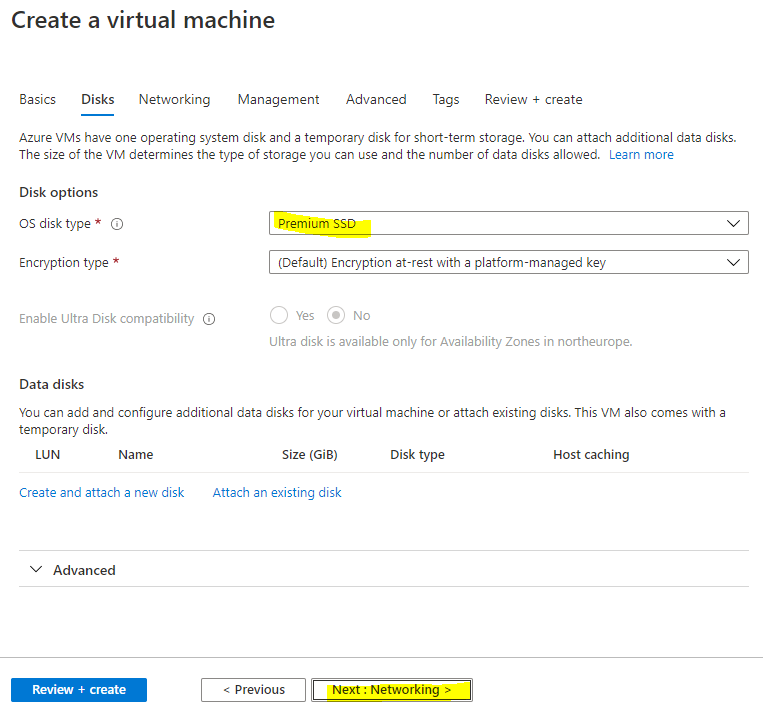
### Network Config[](#network-config "Direct link to heading")
You want to use a Static IP so that the public IP assigned to the node doesn't change in the event it stops. Under Public IP select "Create new"
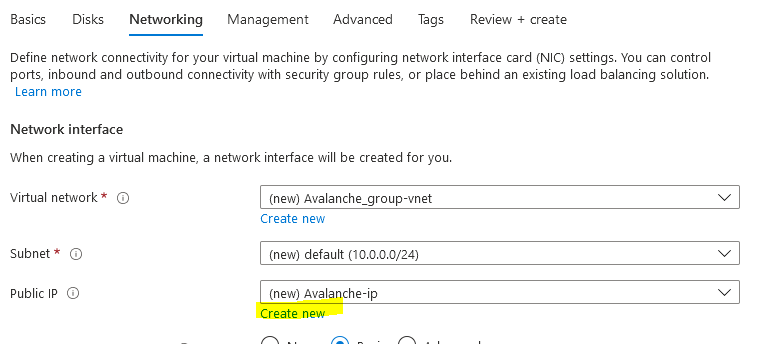
Then select "Static" as the Assignment type
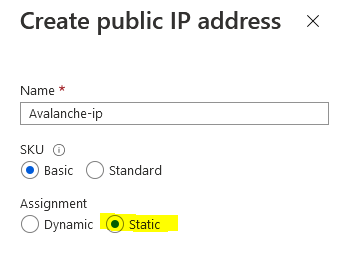
Then we need to configure the network security group to control access inbound to the Avalanche node. Select "Advanced" as the NIC network security group type and select "Create new"

For security purposes you want to restrict who is able to remotely connect to your node. To do this you will first want to find out what your existing public IP is. This can be done by going to google and searching for "what's my IP"
It's likely that you have been assigned a dynamic public IP for your home, unless you have specifically requested it, and so your assigned public IP may change in the future. It's still recommended to restrict access to your current IP though, and then in the event your home IP changes and you are no longer able to remotely connect to the VM, you can just update the network security rules with your new public IP so you are able to connect again.
NOTE: If you need to change the network security group rules after deployment if your home IP has changed, search for "avalanche-nsg" and you can modify the rule for SSH and Port 9650 with the new IP. **Port 9651 needs to remain open to everyone** though as that's how it communicates with other Avalanche nodes.
Now that you have your public IP select the default allow ssh rule on the left under inbound rules to modify it. Change Source from "Any" to "IP Addresses" and then enter in your Public IP address that you found from google in the Source IP address field. Change the Priority towards the bottom to 100 and then press Save.
Then select "+ Add an inbound rule" to add another rule for RPC access, this should also be restricted to only your IP. Change Source to "IP Addresses" and enter in your public IP returned from google into the Source IP field. This time change the "Destination port ranges" field to 9650 and select "TCP" as the protocol. Change the priority to 110 and give it a name of "Avalanche\_RPC" and press Add.
Select "+ Add an inbound rule" to add a final rule for the Avalanche Protocol so that other nodes can communicate with your node. This rule needs to be open to everyone so keep "Source" set to "Any." Change the Destination port range to "9651" and change the protocol to "TCP." Enter a priority of 120 and a name of Avalanche\_Protocol and press Add.
The network security group should look like the below (albeit your public IP address will be different) and press OK.
Leave the other settings as default and then press "Review + create" to create the Virtual machine.
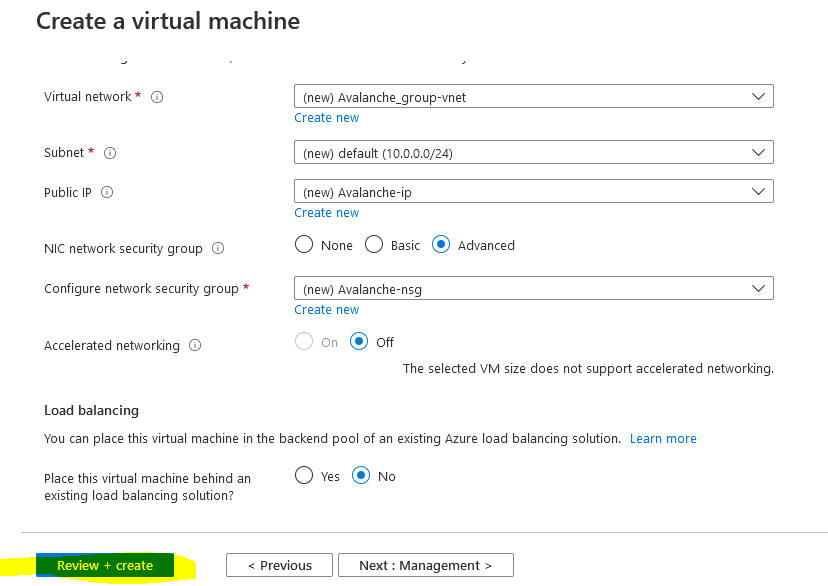
First it will perform a validation test. If you receive an error here, make sure you selected Pay-As-You-Go subscription model and you are not using the Free Trial subscription as Spot instances are not available. Verify everything looks correct and press "Create"
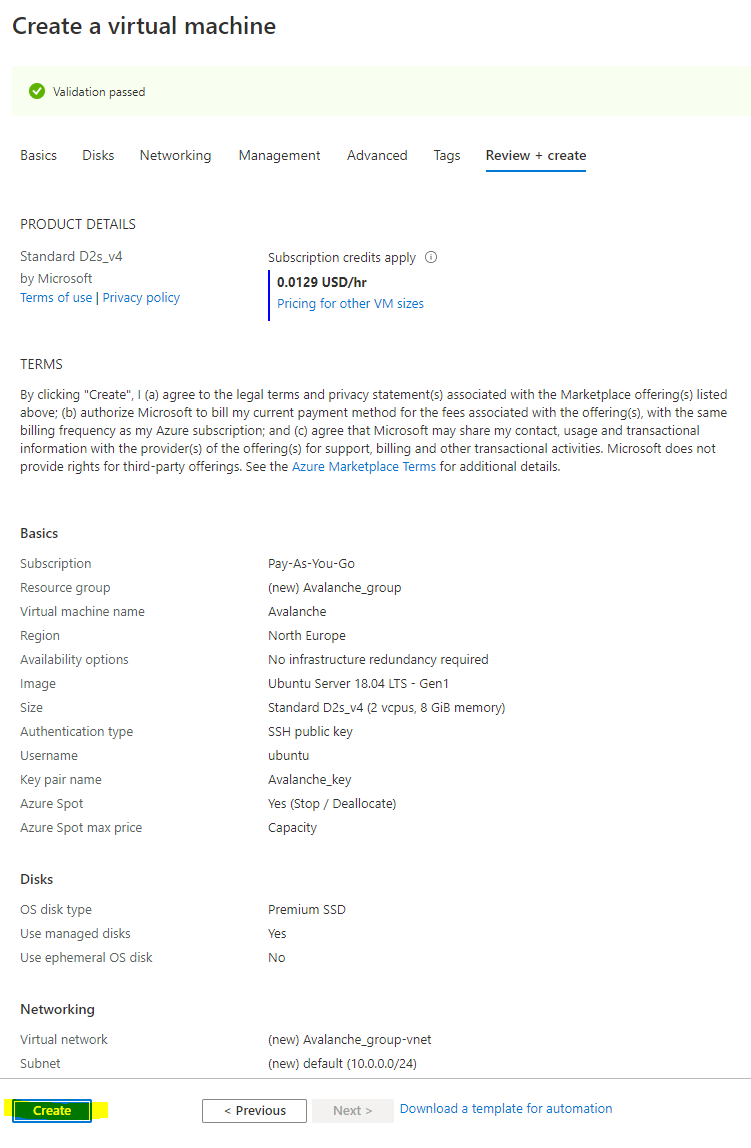
You should then receive a prompt asking you to generate a new key pair to connect your virtual machine. Select "Download private key and create resource" to download the private key to your PC.
Once your deployment has finished, select "Go to resource"
## Change the Provisioned Disk Size[](#change-the-provisioned-disk-size "Direct link to heading")
By default, the Ubuntu VM will be provisioned with a 30 GB Premium SSD. You should increase this to 250 GB, to allow for database growth.
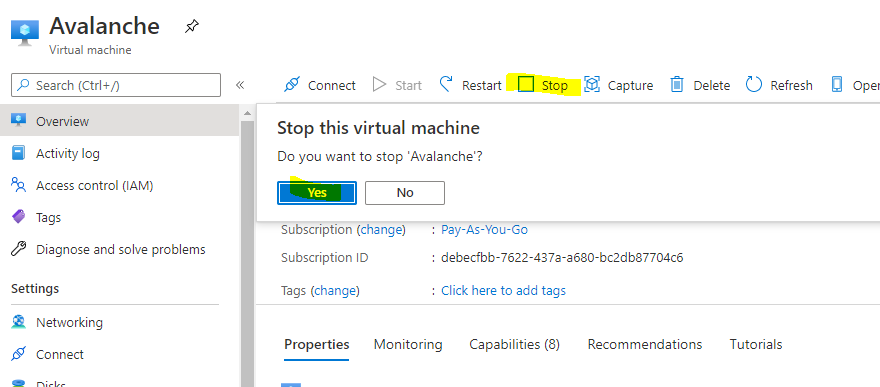
To change the Disk size, the VM needs to be stopped and deallocated. Select "Stop" and wait for the status to show deallocated. Then select "Disks" on the left.
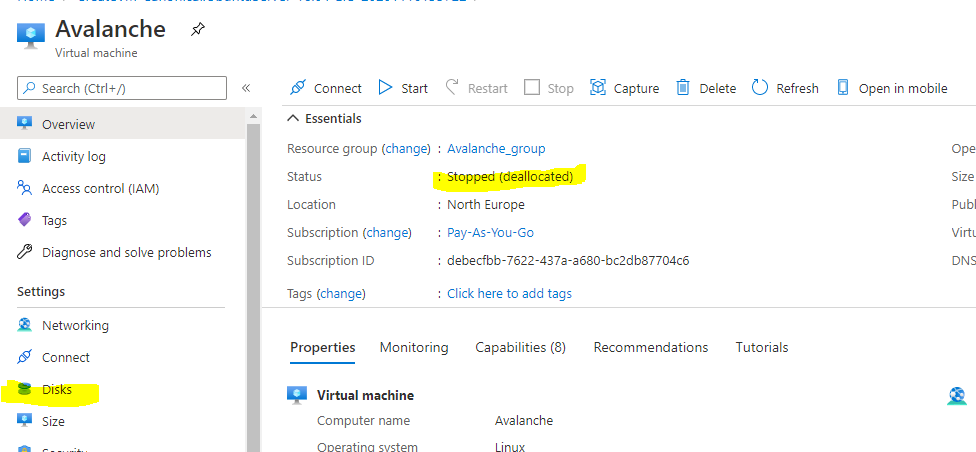
Select the Disk name that's current provisioned to modify it
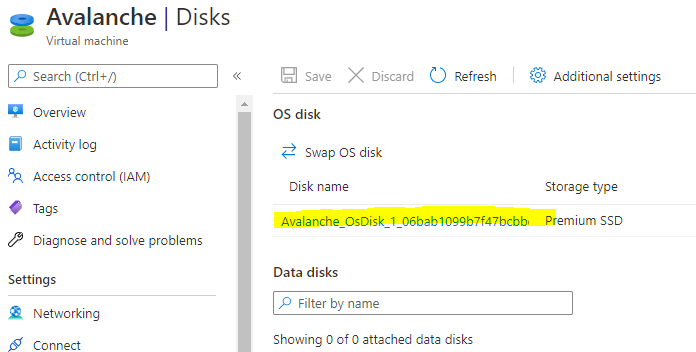
Select "Size + performance" on the left under settings and change the size to 250 GB and press "Resize"
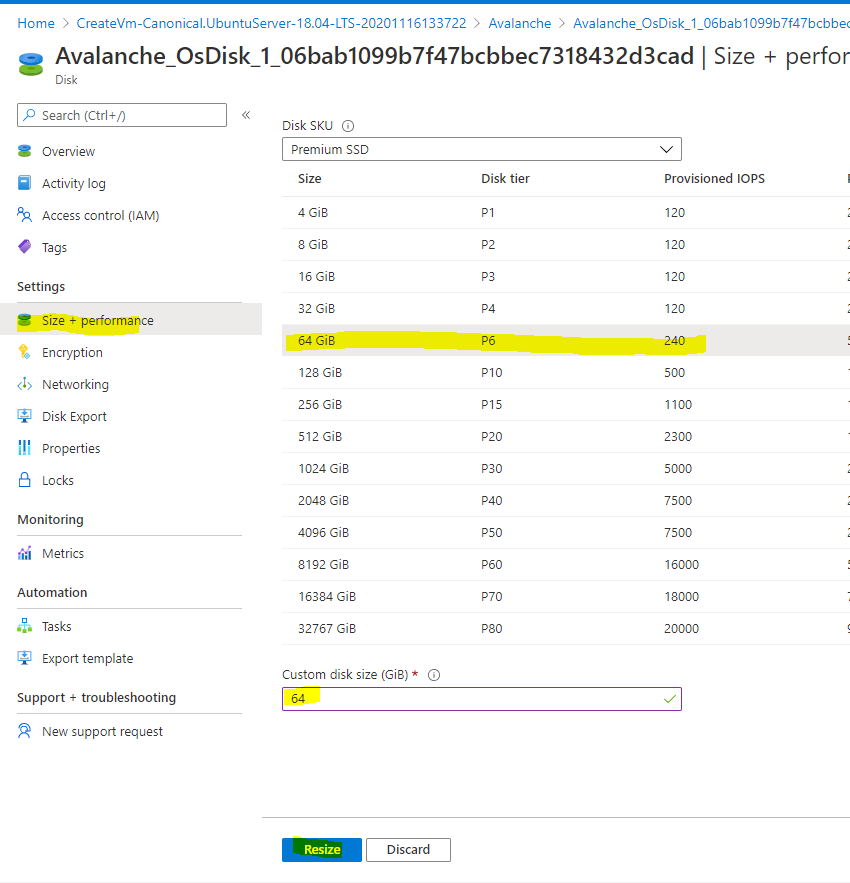
Doing this now will also extend the partition automatically within Ubuntu. To go back to the virtual machine overview page, select Avalanche in the navigation setting.
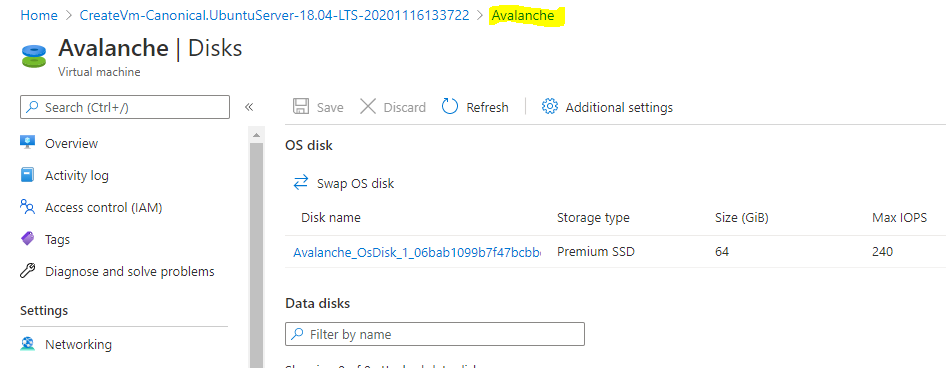
Then start the VM
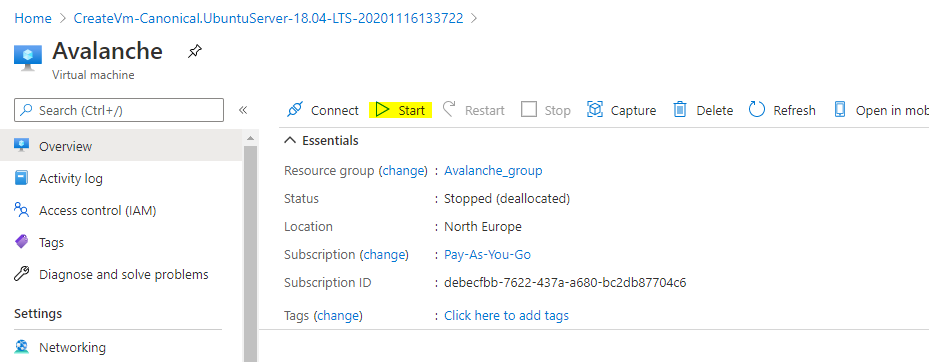
## Connect to the Avalanche Node[](#connect-to-the-avalanche-node "Direct link to heading")
The following instructions show how to connect to the Virtual Machine from a Windows 10 machine. For instructions on how to connect from a Ubuntu machine see the [AWS tutorial](/docs/nodes/on-third-party-services/amazon-web-services).
On your local PC, create a folder on the root of the C: drive called Avalanche and then move the Avalanche\_key.pem file you downloaded before into the folder. Then right click the file and select Properties. Go to the security tab and select "Advanced" at the bottom
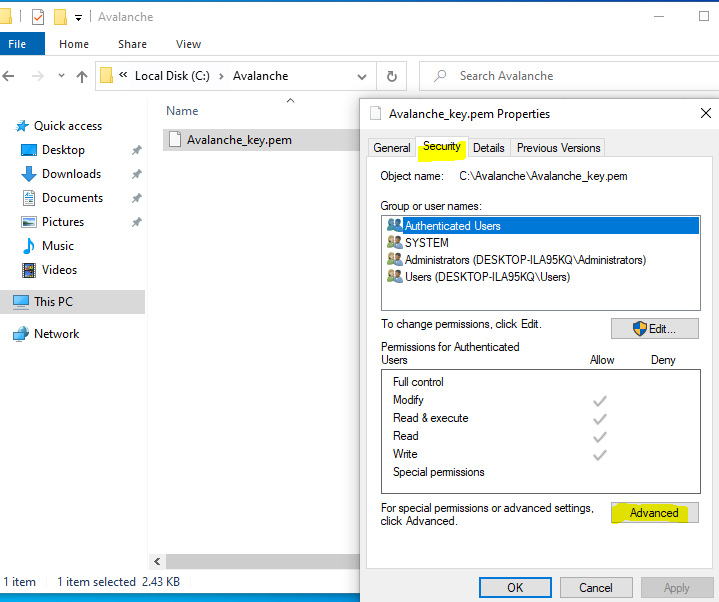
Select "Disable inheritance" and then "Remove all inherited permissions from this object" to remove all existing permissions on that file.
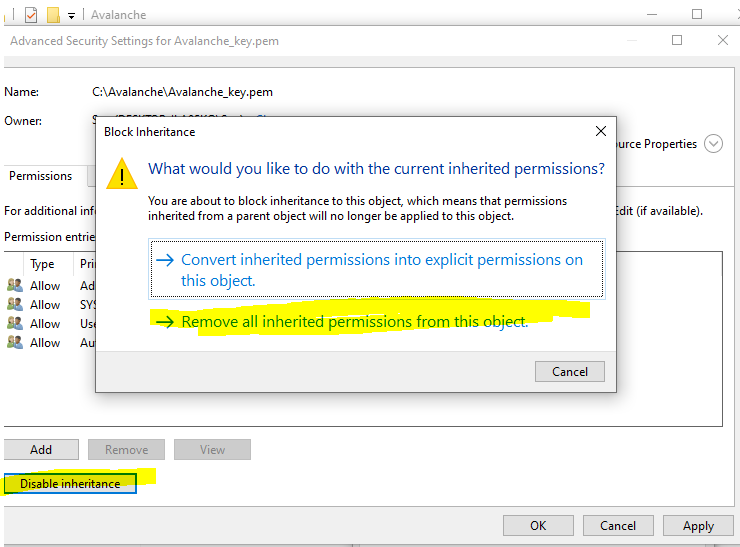
Then select "Add" to add a new permission and choose "Select a principal" at the top. From the pop-up box enter in your user account that you use to log into your machine. In this example I log on with a local user called Seq, you may have a Microsoft account that you use to log in, so use whatever account you login to your PC with and press "Check Names" and it should underline it to verify and press OK.
Then from the permissions section make sure only "Read & Execute" and "Read" are selected and press OK.
It should look something like the below, except with a different PC name / user account. This just means the key file can't be modified or accessed by any other accounts on this machine for security purposes so they can't access your Avalanche Node.
### Find your Avalanche Node Public IP[](#find-your-avalanche-node-public-ip "Direct link to heading")
From the Azure Portal make a note of your static public IP address that has been assigned to your node.

To log onto the Avalanche node, open command prompt by searching for `cmd` and selecting "Command Prompt" on your Windows 10 machine.
Then use the following command and replace the EnterYourAzureIPHere with the static IP address shown on the Azure portal.
ssh -i C:\Avalanche\Avalanche\_key.pem ubuntu\@EnterYourAzureIPHere
for my example its:
ssh -i C:\Avalanche\Avalanche\_key.pem
The first time you connect you will receive a prompt asking to continue, enter yes.

You should now be connected to your Node.
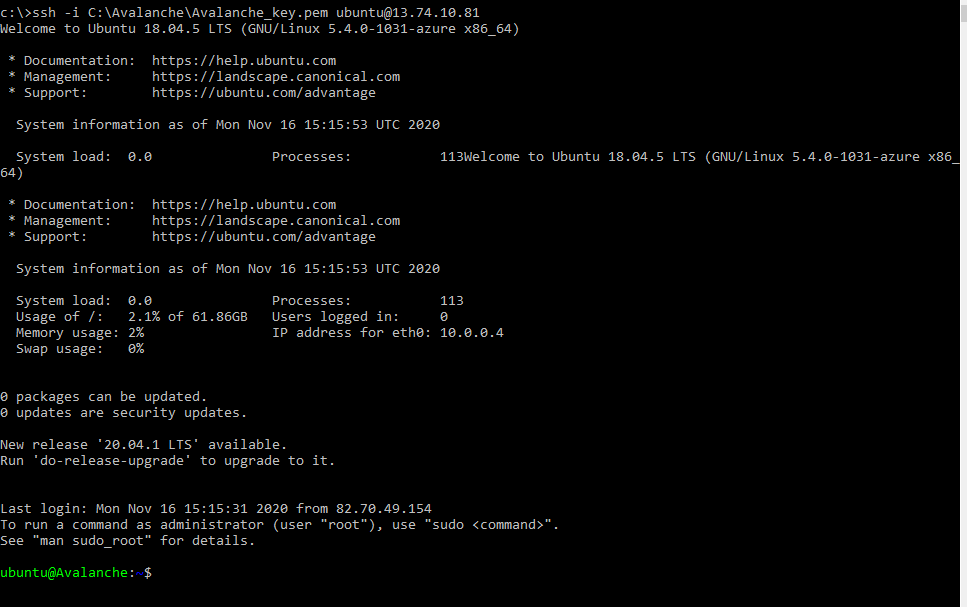
The following section is taken from Colin's excellent tutorial for [configuring an Avalanche Node on Amazon's AWS](/docs/nodes/on-third-party-services/amazon-web-services).
### Update Linux with Security Patches[](#update-linux-with-security-patches "Direct link to heading")
Now that we are on our node, it's a good idea to update it to the latest packages. To do this, run the following commands, one-at-a-time, in order:
```
sudo apt update
sudo apt upgrade -y
sudo reboot
```
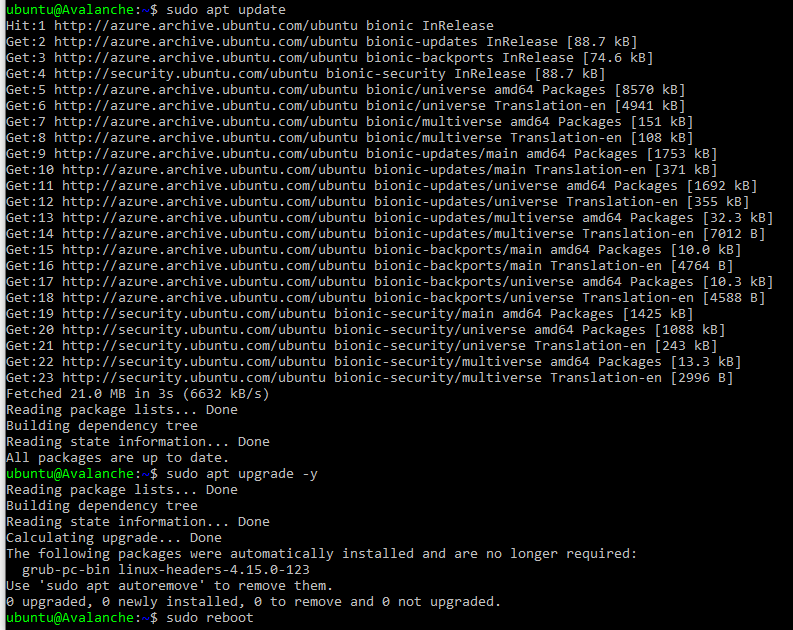
This will make our instance up to date with the latest security patches for our operating system. This will also reboot the node. We'll give the node a minute or two to boot back up, then log in again, same as before.
### Set up the Avalanche Node[](#set-up-the-avalanche-node "Direct link to heading")
Now we'll need to set up our Avalanche node. To do this, follow the [Set Up Avalanche Node With Installer](/docs/nodes/using-install-script/installing-avalanche-go) tutorial which automates the installation process. You will need the "IPv4 Public IP" copied from the Azure Portal we set up earlier.
Once the installation is complete, our node should now be bootstrapping! We can run the following command to take a peek at the latest status of the AvalancheGo node:
```
sudo systemctl status avalanchego
```
To check the status of the bootstrap, we'll need to make a request to the local RPC using `curl`. This request is as follows:
```
curl -X POST --data '{
"jsonrpc":"2.0",
"id" :1,
"method" :"info.isBootstrapped",
"params": {
"chain":"X"
}
}' -H 'content-type:application/json;' 127.0.0.1:9650/ext/info
```
The node can take some time (upward of an hour at this moment writing) to bootstrap. Bootstrapping means that the node downloads and verifies the history of the chains. Give this some time. Once the node is finished bootstrapping, the response will be:
```
{
"jsonrpc": "2.0",
"result": {
"isBootstrapped": true
},
"id": 1
}
```
We can always use `sudo systemctl status avalanchego` to peek at the latest status of our service as before, as well.
### Get Your NodeID[](#get-your-nodeid "Direct link to heading")
We absolutely must get our NodeID if we plan to do any validating on this node. This is retrieved from the RPC as well. We call the following curl command to get our NodeID.
```
curl -X POST --data '{
"jsonrpc":"2.0",
"id" :1,
"method" :"info.getNodeID"
}' -H 'content-type:application/json;' 127.0.0.1:9650/ext/info
```
If all is well, the response should look something like:
```
{"jsonrpc":"2.0","result":{"nodeID":"NodeID-Lve2PzuCvXZrqn8Stqwy9vWZux6VyGUCR"},"id":1}
```
That portion that says, "NodeID-Lve2PzuCvXZrqn8Stqwy9vWZux6VyGUCR" is our NodeID, the entire thing. Copy that and keep that in our notes. There's nothing confidential or secure about this value, but it's an absolute must for when we submit this node to be a validator.
### Backup Your Staking Keys[](#backup-your-staking-keys "Direct link to heading")
The last thing that should be done is backing up our staking keys in the untimely event that our instance is corrupted or terminated. It's just good practice for us to keep these keys. To back them up, we use the following command:
```
scp -i C:\Avalanche\avalanche_key.pem -r ubuntu@EnterYourAzureIPHere:/home/ubuntu/.avalanchego/staking C:\Avalanche
```
As before, we'll need to replace "EnterYourAzureIPHere" with the appropriate value that we retrieved. This backs up our staking key and staking certificate into the C:\Avalanche folder we created before.
# Avalanche L1 Nodes
URL: /docs/nodes/run-a-node/avalanche-l1-nodes
Learn how to run an Avalanche node that tracks an Avalanche L1.
This article describes how to run a node that tracks an Avalanche L1. It requires building AvalancheGo, adding Virtual Machine binaries as plugins to your local data directory, and running AvalancheGo to track these binaries.
This tutorial specifically covers tracking an Avalanche L1 built with Avalanche's [Subnet-EVM](https://github.com/ava-labs/subnet-evm), the default [Virtual Machine](/docs/quick-start/virtual-machines) run by Avalanche L1s on Avalanche.
## Build AvalancheGo
It is recommended that you must complete [this comprehensive guide](/docs/nodes/run-a-node/from-source) which demonstrates how to build and run a basic Avalanche node from source.
## Build Avalanche L1 Binaries
After building AvalancheGo successfully,
Clone [Subnet-EVM](https://github.com/ava-labs/subnet-evm):
```bash
cd $GOPATH/src/github.com/ava-labs
git clone https://github.com/ava-labs/subnet-evm.git
```
In the Subnet-EVM directory, run the build script, and save it in the `plugins` folder of your `.avalanchego` data directory. Name the plugin after the `VMID` of the Avalanche L1 you wish to track. The `VMID` of the WAGMI Avalanche L1 is the value beginning with **srEX...**
```bash
cd $GOPATH/src/github.com/ava-labs/subnet-evm
./scripts/build.sh ~/.avalanchego/plugins/srEXiWaHuhNyGwPUi444Tu47ZEDwxTWrbQiuD7FmgSAQ6X7Dy
```
VMID, Avalanche L1 ID (SubnetID), ChainID, and all other parameters can be found in the "Chain Info" section of the Avalanche L1 Explorer.
* [Avalanche Mainnet](https://subnets.avax.network/c-chain)
* [Fuji Testnet](https://subnets-test.avax.network/c-chain)
Create a file named `config.json` and add a `track-subnets` field that is populated with the `SubnetID` you wish to track. The `SubnetID` of the WAGMI Avalanche L1 is the value beginning with **28nr...**
```bash
cd ~/.avalanchego
echo '{"track-subnets": "28nrH5T2BMvNrWecFcV3mfccjs6axM1TVyqe79MCv2Mhs8kxiY"}' > config.json
```
## Run the Node
Run AvalancheGo with the `—config-file` flag to start your node and ensure it tracks the Avalanche L1s included in the configuration file.
```bash
cd $GOPATH/src/github.com/ava-labs/avalanchego
./build/avalanchego --config-file ~/.avalanchego/config.json --network-id=fuji
```
Note: The above command includes the `--network-id=fuji` command because the WAGMI Avalanche L1 is deployed on Fuji Testnet.
If you would prefer to track Avalanche L1s using a command line flag, you can instead use the `--track-subnets` flag. For example:
```bash
./build/avalanchego --track-subnets 28nrH5T2BMvNrWecFcV3mfccjs6axM1TVyqe79MCv2Mhs8kxiY --network-id=fuji
```
You should now see terminal filled with logs and information to suggest the node is properly running and has began bootstrapping to the network.
## Bootstrapping and RPC Details
It may take a few hours for the node to fully [bootstrap](/docs/nodes/run-a-node/from-source#bootstrapping) to the Avalanche Primary Network and tracked Avalanche L1s.
When finished bootstrapping, the endpoint will be:
```bash
localhost:9650/ext/bc//rpc
```
if run locally, or:
```bash
XXX.XX.XX.XXX:9650/ext/bc//rpc
```
if run on a cloud provider. The “X”s should be replaced with the public IP of your EC2 instance.
For more information on the requests available at these endpoints, please see the [Subnet-EVM API Reference](/docs/api-reference/subnet-evm-api) documentation.
Because each node is also tracking the Primary Network, those [RPC endpoints](/docs/nodes/run-a-node/from-source#rpc) are available as well.
# Common Errors
URL: /docs/nodes/run-a-node/common-errors
Common errors while running a node and their solutions.
If you experience any issues building your node, here are some common errors and possible solutions.
### Failed to Connect to Bootstrap Nodes[](#failed-to-connect-to-bootstrap-nodes "Direct link to heading")
Error: `WARN node/node.go:291 failed to connect to bootstrap nodes`
This error can occur when the node doesn't have access to the Internet or if the NodeID is already being used by a different node in the network. This can occur when an old instance is running and not terminated.
### Cannot Query Unfinalized Data[](#cannot-query-unfinalized-data "Direct link to heading")
Error: `err="cannot query unfinalized data"`
There may be a number of reasons for this issue, but it is likely that the node is not connected properly to other validators, which is usually caused by networking misconfiguration (wrong public IP, closed p2p port 9651).
# Using Source Code
URL: /docs/nodes/run-a-node/from-source
Learn how to run an Avalanche node from AvalancheGo Source code.
The following steps walk through downloading the AvalancheGo source code and locally building the binary program. If you would like to run your node using a pre-built binary, follow [this](/docs/nodes/run-a-node/using-binary) guide.
## Install Dependencies
* Install [gcc](https://gcc.gnu.org/)
* Install [go](https://go.dev/doc/install)
## Build the Node Binary
Set the `$GOPATH`. You can follow [this](https://github.com/golang/go/wiki/SettingGOPATH) guide.
Create a directory in your `$GOPATH`:
```bash
mkdir -p $GOPATH/src/github.com/ava-labs
```
In the `$GOPATH`, clone [AvalancheGo](https://github.com/ava-labs/avalanchego), the consensus engine and node implementation that is the core of the Avalanche Network.
```bash
cd $GOPATH/src/github.com/ava-labs
git clone https://github.com/ava-labs/avalanchego.git
```
From the `avalanchego` directory, run the build script:
```bash
cd $GOPATH/src/github.com/ava-labs/avalanchego
./scripts/build.sh
```
## Start the Node
To be able to make API calls to your node from other machines, include the argument `--http-host=` when starting the node.
For running a node on the Avalanche Mainnet:
```bash
cd $GOPATH/src/github.com/ava-labs/avalanchego
./build/avalanchego
```
For running a node on the Fuji Testnet:
```bash
cd $GOPATH/src/github.com/ava-labs/avalanchego
./build/avalanchego --network-id=fuji
```
To kill the node, press `Ctrl + C`.
## Bootstrapping
A new node needs to catch up to the latest network state before it can participate in consensus and serve API calls. This process (called bootstrapping) currently takes several days for a new node connected to Mainnet, and a day or so for a new node connected to Fuji Testnet. When a given chain is done bootstrapping, it will print logs like this:
```bash
[09-09|17:01:45.295] INFO snowman/transitive.go:392 consensus starting {"lastAcceptedBlock": "2qaFwDJtmCCbMKP4jRpJwH8EFws82Q2yC1HhWgAiy3tGrpGFeb"}
[09-09|17:01:46.199] INFO snowman/transitive.go:392 consensus starting {"lastAcceptedBlock": "2ofmPJuWZbdroCPEMv6aHGvZ45oa8SBp2reEm9gNxvFjnfSGFP"}
[09-09|17:01:51.628] INFO snowman/transitive.go:334 consensus starting {"lenFrontier": 1}
```
### Check Bootstrapping Progress[](#check-bootstrapping-progress "Direct link to heading")
To check if a given chain is done bootstrapping, in another terminal window call [`info.isBootstrapped`](/docs/api-reference/info-api#infoisbootstrapped) by copying and pasting the following command:
```bash
curl -X POST --data '{
"jsonrpc":"2.0",
"id" :1,
"method" :"info.isBootstrapped",
"params": {
"chain":"X"
}
}' -H 'content-type:application/json;' 127.0.0.1:9650/ext/info
```
If this returns `true`, the chain is bootstrapped; otherwise, it returns `false`. If you make other API calls to a chain that is not done bootstrapping, it will return `API call rejected because chain is not done bootstrapping`. If you are still experiencing issues please contact us on [Discord.](https://chat.avalabs.org/)
The 3 chains will bootstrap in the following order: P-chain, X-chain, C-chain.
Learn more about bootstrapping [here](/docs/nodes/maintain/bootstrapping).
## RPC
When finished bootstrapping, the X, P, and C-Chain RPC endpoints will be:
```bash
localhost:9650/ext/bc/P
localhost:9650/ext/bc/X
localhost:9650/ext/bc/C/rpc
```
if run locally, or
```bash
XXX.XX.XX.XXX:9650/ext/bc/P
XXX.XX.XX.XXX:9650/ext/bc/X
XXX.XX.XX.XXX:9650/ext/bc/C/rpc
```
if run on a cloud provider. The “XXX.XX.XX.XXX" should be replaced with the public IP of your EC2 instance.
For more information on the requests available at these endpoints, please see the [AvalancheGo API Reference](/docs/api-reference/p-chain/api) documentation.
## Going Further
Your Avalanche node will perform consensus on its own, but it is not yet a validator on the network. This means that the rest of the network will not query your node when sampling the network during consensus. If you want to add your node as a validator, check out [Add a Validator](/docs/nodes/validate/node-validator) to take it a step further.
Also check out the [Maintain](/docs/nodes/maintain/bootstrapping) section to learn about how to maintain and customize your node to fit your needs.
To track an Avalanche L1 with your node, head to the [Avalanche L1 Node](/docs/nodes/run-a-node/avalanche-l1-nodes) tutorial.
# Using Pre-Built Binary
URL: /docs/nodes/run-a-node/using-binary
Learn how to run an Avalanche node from a pre-built binary program.
## Download Binary
To download a pre-built binary instead of building from source code, go to the official [AvalancheGo releases page](https://github.com/ava-labs/avalanchego/releases), and select the desired version.
Scroll down to the **Assets** section, and select the appropriate file. You can follow below rules to find out the right binary.
### For MacOS
Download the `avalanchego-macos-.zip` file and unzip using the below command:
```bash
unzip avalanchego-macos-.zip
```
The resulting folder, `avalanchego-`, contains the binaries.
### Linux (PCs or Cloud Providers)
Download the `avalanchego-linux-amd64-.tar.gz` file and unzip using the below command:
```bash
tar -xvf avalanchego-linux-amd64-.tar.gz
```
The resulting folder, `avalanchego--linux`, contains the binaries.
### Linux (Arm64)
Download the `avalanchego-linux-arm64-.tar.gz` file and unzip using the below command:
```bash
tar -xvf avalanchego-linux-arm64-.tar.gz
```
The resulting folder, `avalanchego--linux`, contains the binaries.
## Start the Node
To be able to make API calls to your node from other machines, include the argument `--http-host=` when starting the node.
### MacOS
For running a node on the Avalanche Mainnet:
```bash
./avalanchego-/build/avalanchego
```
For running a node on the Fuji Testnet:
```bash
./avalanchego-/build/avalanchego --network-id=fuji
```
### Linux
For running a node on the Avalanche Mainnet:
```bash
./avalanchego--linux/avalanchego
```
For running a node on the Fuji Testnet:
```bash
./avalanchego--linux/avalanchego --network-id=fuji
```
## Bootstrapping
A new node needs to catch up to the latest network state before it can participate in consensus and serve API calls. This process (called bootstrapping) currently takes several days for a new node connected to Mainnet, and a day or so for a new node connected to Fuji Testnet. When a given chain is done bootstrapping, it will print logs like this:
```bash
[09-09|17:01:45.295] INFO snowman/transitive.go:392 consensus starting {"lastAcceptedBlock": "2qaFwDJtmCCbMKP4jRpJwH8EFws82Q2yC1HhWgAiy3tGrpGFeb"}
[09-09|17:01:46.199] INFO snowman/transitive.go:392 consensus starting {"lastAcceptedBlock": "2ofmPJuWZbdroCPEMv6aHGvZ45oa8SBp2reEm9gNxvFjnfSGFP"}
[09-09|17:01:51.628] INFO snowman/transitive.go:334 consensus starting {"lenFrontier": 1}
```
### Check Bootstrapping Progress[](#check-bootstrapping-progress "Direct link to heading")
To check if a given chain is done bootstrapping, in another terminal window call [`info.isBootstrapped`](/docs/api-reference/info-api#infoisbootstrapped) by copying and pasting the following command:
```bash
curl -X POST --data '{
"jsonrpc":"2.0",
"id" :1,
"method" :"info.isBootstrapped",
"params": {
"chain":"X"
}
}' -H 'content-type:application/json;' 127.0.0.1:9650/ext/info
```
If this returns `true`, the chain is bootstrapped; otherwise, it returns `false`. If you make other API calls to a chain that is not done bootstrapping, it will return `API call rejected because chain is not done bootstrapping`. If you are still experiencing issues please contact us on [Discord.](https://chat.avalabs.org/)
The 3 chains will bootstrap in the following order: P-chain, X-chain, C-chain.
Learn more about bootstrapping [here](/docs/nodes/maintain/bootstrapping).
## RPC
When finished bootstrapping, the X, P, and C-Chain RPC endpoints will be:
```bash
localhost:9650/ext/bc/P
localhost:9650/ext/bc/X
localhost:9650/ext/bc/C/rpc
```
if run locally, or
```bash
XXX.XX.XX.XXX:9650/ext/bc/P
XXX.XX.XX.XXX:9650/ext/bc/X
XXX.XX.XX.XXX:9650/ext/bc/C/rpc
```
if run on a cloud provider. The “XXX.XX.XX.XXX" should be replaced with the public IP of your EC2 instance.
For more information on the requests available at these endpoints, please see the [AvalancheGo API Reference](/docs/api-reference/p-chain/api) documentation.
## Going Further
Your Avalanche node will perform consensus on its own, but it is not yet a validator on the network. This means that the rest of the network will not query your node when sampling the network during consensus. If you want to add your node as a validator, check out [Add a Validator](/docs/nodes/validate/node-validator) to take it a step further.
Also check out the [Maintain](/docs/nodes/maintain/bootstrapping) section to learn about how to maintain and customize your node to fit your needs.
To track an Avalanche L1 with your node, head to the [Avalanche L1 Node](/docs/nodes/run-a-node/avalanche-l1-nodes) tutorial.
# Using Docker
URL: /docs/nodes/run-a-node/using-docker
Learn how to run an Avalanche node using Docker.
## Prerequisites
Before beginning, you must ensure that:
* Docker is installed on your system
* You need to clone the [AvalancheGo repository](https://github.com/ava-labs/avalanchego)
* You need to install [GCC](https://gcc.gnu.org/) and [Go](https://go.dev/doc/install)
* Docker daemon is running on your machine
You can verify your Docker installation by running:
```bash
docker --version
```
## Building the Docker Image
To build the Docker image for the latest `avalanchego` branch:
1. Navigate to the project directory
2. Execute the build script:
```bash
./scripts/build_image.sh
```
This script will create a Docker image containing the latest version of AvalancheGo.
## Verifying the Build
After the build completes, verify the image was created successfully:
```bash
docker image ls
```
You should see an image with:
* Repository: `avaplatform/avalanchego`
* Tag: `xxxxxxxx` (where `xxxxxxxx` is the shortened commit hash of the source code used for the build)
## Running AvalancheGo Node
To start an AvalancheGo node, run the following command:
```bash
docker run -ti -p 9650:9650 -p 9651:9651 avaplatform/avalanchego:xxxxxxxx /avalanchego/build/avalanchego
```
This command:
* Creates an interactive container (`-ti`)
* Maps the following ports:
* `9650`: HTTP API port
* `9651`: P2P networking port
* Uses the built AvalancheGo image
* Executes the AvalancheGo binary inside the container
## Port Configuration
The default ports used by AvalancheGo are:
* `9650`: HTTP API
* `9651`: P2P networking
Ensure these ports are available on your host machine and not blocked by firewalls.
# Installing AvalancheGo
URL: /docs/nodes/using-install-script/installing-avalanche-go
Learn how to install AvalancheGo on your system.
## Running the Script
So, now that you prepared your system and have the info ready, let's get to it.
To download and run the script, enter the following in the terminal:
```bash
wget -nd -m https://raw.githubusercontent.com/ava-labs/avalanche-docs/master/scripts/avalanchego-installer.sh;\
chmod 755 avalanchego-installer.sh;\
./avalanchego-installer.sh
```
And we're off! The output should look something like this:
```bash
AvalancheGo installer
---------------------
Preparing environment...
Found arm64 architecture...
Looking for the latest arm64 build...
Will attempt to download:
https://github.com/ava-labs/avalanchego/releases/download/v1.1.1/avalanchego-linux-arm64-v1.1.1.tar.gz
avalanchego-linux-arm64-v1.1.1.tar.gz 100%[=========================================================================>] 29.83M 75.8MB/s in 0.4s
2020-12-28 14:57:47 URL:https://github-production-release-asset-2e65be.s3.amazonaws.com/246387644/f4d27b00-4161-11eb-8fb2-156a992fd2c8?X-Amz-Algorithm=AWS4-HMAC-SHA256&X-Amz-Credential=AKIAIWNJYAX4CSVEH53A%2F20201228%2Fus-east-1%2Fs3%2Faws4_request&X-Amz-Date=20201228T145747Z&X-Amz-Expires=300&X-Amz-Signature=ea838877f39ae940a37a076137c4c2689494c7e683cb95a5a4714c062e6ba018&X-Amz-SignedHeaders=host&actor_id=0&key_id=0&repo_id=246387644&response-content-disposition=attachment%3B%20filename%3Davalanchego-linux-arm64-v1.1.1.tar.gz&response-content-type=application%2Foctet-stream [31283052/31283052] -> "avalanchego-linux-arm64-v1.1.1.tar.gz" [1]
Unpacking node files...
avalanchego-v1.1.1/plugins/
avalanchego-v1.1.1/plugins/evm
avalanchego-v1.1.1/avalanchego
Node files unpacked into /home/ubuntu/avalanche-node
```
And then the script will prompt you for information about the network environment:
```bash
To complete the setup some networking information is needed.
Where is the node installed:
1) residential network (dynamic IP)
2) cloud provider (static IP)
Enter your connection type [1,2]:
```
Enter `1` if you have dynamic IP, and `2` if you have a static IP. If you are on a static IP, it will try to auto-detect the IP and ask for confirmation.
```bash
Detected '3.15.152.14' as your public IP. Is this correct? [y,n]:
```
Confirm with `y`, or `n` if the detected IP is wrong (or empty), and then enter the correct IP at the next prompt.
Next, you have to set up RPC port access for your node. Those are used to query the node for its internal state, to send commands to the node, or to interact with the platform and its chains (sending transactions, for example). You will be prompted:
```bash
RPC port should be public (this is a public API node) or private (this is a validator)? [public, private]:
```
* `private`: this setting only allows RPC requests from the node machine itself.
* `public`: this setting exposes the RPC port to all network interfaces.
As this is a sensitive setting you will be asked to confirm if choosing `public`. Please read the following note carefully:
If you choose to allow RPC requests on any network interface you will need to set up a firewall to only let through RPC requests from known IP addresses, otherwise your node will be accessible to anyone and might be overwhelmed by RPC calls from malicious actors! If you do not plan to use your node to send RPC calls remotely, enter `private`.
The script will then prompt you to choose whether to enable state sync setting or not:
```bash
Do you want state sync bootstrapping to be turned on or off? [on, off]:
```
Turning state sync on will greatly increase the speed of bootstrapping, but will sync only the current network state. If you intend to use your node for accessing historical data (archival node) you should select `off`. Otherwise, select `on`. Validators can be bootstrapped with state sync turned on.
The script will then continue with system service creation and finish with starting the service.
```bash
Created symlink /etc/systemd/system/multi-user.target.wants/avalanchego.service → /etc/systemd/system/avalanchego.service.
Done!
Your node should now be bootstrapping.
Node configuration file is /home/ubuntu/.avalanchego/configs/node.json
C-Chain configuration file is /home/ubuntu/.avalanchego/configs/chains/C/config.json
Plugin directory, for storing subnet VM binaries, is /home/ubuntu/.avalanchego/plugins
To check that the service is running use the following command (q to exit):
sudo systemctl status avalanchego
To follow the log use (ctrl-c to stop):
sudo journalctl -u avalanchego -f
Reach us over on https://chat.avax.network if you're having problems.
```
The script is finished, and you should see the system prompt again.
## Post Installation
AvalancheGo should be running in the background as a service. You can check that it's running with:
```bash
sudo systemctl status avalanchego
```
Below is an example of what the node's latest logs should look like:
```bash
● avalanchego.service - AvalancheGo systemd service
Loaded: loaded (/etc/systemd/system/avalanchego.service; enabled; vendor preset: enabled)
Active: active (running) since Tue 2021-01-05 10:38:21 UTC; 51s ago
Main PID: 2142 (avalanchego)
Tasks: 8 (limit: 4495)
Memory: 223.0M
CGroup: /system.slice/avalanchego.service
└─2142 /home/ubuntu/avalanche-node/avalanchego --public-ip-resolution-service=opendns --http-host=
Jan 05 10:38:45 ip-172-31-30-64 avalanchego[2142]: INFO [01-05|10:38:45] avalanchego/vms/platformvm/vm.go#322: initializing last accepted block as 2FUFPVPxbTpKNn39moGSzsmGroYES4NZRdw3mJgNvMkMiMHJ9e
Jan 05 10:38:45 ip-172-31-30-64 avalanchego[2142]: INFO [01-05|10:38:45]
avalanchego/snow/engine/snowman/transitive.go#58: initializing consensus engine
Jan 05 10:38:45 ip-172-31-30-64 avalanchego[2142]: INFO [01-05|10:38:45] avalanchego/api/server.go#143: adding route /ext/bc/11111111111111111111111111111111LpoYY
Jan 05 10:38:45 ip-172-31-30-64 avalanchego[2142]: INFO [01-05|10:38:45] avalanchego/api/server.go#88: HTTP API server listening on ":9650"
Jan 05 10:38:58 ip-172-31-30-64 avalanchego[2142]: INFO [01-05|10:38:58]
avalanchego/snow/engine/common/bootstrapper.go#185: Bootstrapping started syncing with 1 vertices in the accepted frontier
Jan 05 10:39:02 ip-172-31-30-64 avalanchego[2142]: INFO [01-05|10:39:02]
avalanchego/snow/engine/snowman/bootstrap/bootstrapper.go#210: fetched 2500 blocks
Jan 05 10:39:04 ip-172-31-30-64 avalanchego[2142]: INFO [01-05|10:39:04]
avalanchego/snow/engine/snowman/bootstrap/bootstrapper.go#210: fetched 5000 blocks
Jan 05 10:39:06 ip-172-31-30-64 avalanchego[2142]: INFO [01-05|10:39:06]
avalanchego/snow/engine/snowman/bootstrap/bootstrapper.go#210: fetched 7500 blocks
Jan 05 10:39:09 ip-172-31-30-64 avalanchego[2142]: INFO [01-05|10:39:09]
avalanchego/snow/engine/snowman/bootstrap/bootstrapper.go#210: fetched 10000 blocks
Jan 05 10:39:11 ip-172-31-30-64 avalanchego[2142]: INFO [01-05|10:39:11]
avalanchego/snow/engine/snowman/bootstrap/bootstrapper.go#210: fetched 12500 blocks
```
Note the `active (running)` which indicates the service is running OK. You may need to press `q` to return to the command prompt.
To find out your NodeID, which is used to identify your node to the network, run the following command:
```bash
sudo journalctl -u avalanchego | grep "NodeID"
```
It will produce output like:
```bash
Jan 05 10:38:38 ip-172-31-30-64 avalanchego[2142]: INFO [01-05|10:38:38] avalanchego/node/node.go#428: Set node's ID to 6seStrauyCnVV7NEVwRbfaT9B6EnXEzfY
```
Prepend `NodeID-` to the value to get, for example, `NodeID-6seStrauyCnVV7NEVwRbfaT9B6EnXEzfY`. Store that; it will be needed for staking or looking up your node.
Your node should be in the process of bootstrapping now. You can monitor the progress by issuing the following command:
```bash
sudo journalctl -u avalanchego -f
```
Press `ctrl+C` when you wish to stop reading node output.
# Managing AvalancheGo
URL: /docs/nodes/using-install-script/managing-avalanche-go
Learn how to start, stop and upgrade your AvalancheGo node
## Stop Your Node
To stop AvalancheGo, run:
```bash
sudo systemctl stop avalanchego
```
## Start Your Node
To start your node again, run:
```bash
sudo systemctl start avalanchego
```
## Upgrade Your Node
AvalancheGo is an ongoing project and there are regular version upgrades. Most upgrades are recommended but not required. Advance notice will be given for upgrades that are not backwards compatible. When a new version of the node is released, you will notice log lines like:
```bash
Jan 08 10:26:45 ip-172-31-16-229 avalanchego[6335]: INFO [01-08|10:26:45] avalanchego/network/peer.go#526: beacon 9CkG9MBNavnw7EVSRsuFr7ws9gascDQy3 attempting to connect with newer version avalanche/1.1.1. You may want to update your client
```
It is recommended to always upgrade to the latest version, because new versions bring bug fixes, new features and upgrades.
To upgrade your node, just run the installer script again:
```bash
./avalanchego-installer.sh
```
It will detect that you already have AvalancheGo installed:
```bash
AvalancheGo installer
---------------------
Preparing environment...
Found 64bit Intel/AMD architecture...
Found AvalancheGo systemd service already installed, switching to upgrade mode.
Stopping service...
```
It will then upgrade your node to the latest version, and after it's done, start the node back up, and print out the information about the latest version:
```bash
Node upgraded, starting service...
New node version:
avalanche/1.1.1 [network=mainnet, database=v1.0.0, commit=f76f1fd5f99736cf468413bbac158d6626f712d2]
Done!
```
# Node Config and Maintenance
URL: /docs/nodes/using-install-script/node-config-maintenance
Advanced options for configuring and maintaining your AvalancheGo node.
## Advanced Node Configuration
Without any additional arguments, the script installs the node in a most common configuration. But the script also enables various advanced options to be configured, via the command line prompts. Following is a list of advanced options and their usage:
* `admin` - [Admin API](/docs/api-reference/admin-api) will be enabled
* `archival` - disables database pruning and preserves the complete transaction history
* `state-sync` - if `on` state-sync for the C-Chain is used, if `off` it will use regular transaction replay to bootstrap; state-sync is much faster, but has no historical data
* `db-dir` - use to provide the full path to the location where the database will be stored
* `fuji` - node will connect to Fuji testnet instead of the Mainnet
* `index` - [Index API](/docs/api-reference/index-api) will be enabled
* `ip` - use `dynamic`, `static` arguments, of enter a desired IP directly to be used as the public IP node will advertise to the network
* `rpc` - use `any` or `local` argument to select any or local network interface to be used to listen for RPC calls
* `version` - install a specific node version, instead of the latest. See [here](#using-a-previous-version) for usage.
Configuring the `index` and `archival` options on an existing node will require a fresh bootstrap to recreate the database.
Complete script usage can be displayed by entering:
```bash
./avalanchego-installer.sh --help
```
### Unattended Installation[](#unattended-installation "Direct link to heading")
If you want to use the script in an automated environment where you cannot enter the data at the prompts you must provide at least the `rpc` and `ip` options. For example:
```bash
./avalanchego-installer.sh --ip 1.2.3.4 --rpc local
```
### Usage Examples[](#usage-examples "Direct link to heading")
* To run a Fuji node with indexing enabled and autodetected static IP:
```bash
./avalanchego-installer.sh --fuji --ip static --index
```
* To run an archival Mainnet node with dynamic IP and database located at `/home/node/db`:
```bash
./avalanchego-installer.sh --archival --ip dynamic --db-dir /home/node/db
```
* To use C-Chain state-sync to quickly bootstrap a Mainnet node, with dynamic IP and local RPC only:
```bash
./avalanchego-installer.sh --state-sync on --ip dynamic --rpc local
```
* To reinstall the node using node version 1.7.10 and use specific IP and local RPC only:
```bash
./avalanchego-installer.sh --reinstall --ip 1.2.3.4 --version v1.7.10 --rpc local
```
## Node Configuration[](#node-configuration "Direct link to heading")
The file that configures node operation is `~/.avalanchego/configs/node.json`. You can edit it to add or change configuration options. The documentation of configuration options can be found [here](/docs/nodes/configure/configs-flags). Configuration may look like this:
```json
{
"public-ip-resolution-service": "opendns",
"http-host": ""
}
```
Note that the configuration file needs to be a properly formatted `JSON` file, so switches should formatted differently than they would be for the command line. Therefore, don't enter options like `--public-ip-resolution-service=opendns` as shown in the example above.
The script also creates an empty C-Chain config file, located at `~/.avalanchego/configs/chains/C/config.json`. By editing that file, you can configure the C-Chain, as described in detail [here](/docs/nodes/configure/configs-flags).
## Using a Previous Version[](#using-a-previous-version "Direct link to heading")
The installer script can also be used to install a version of AvalancheGo other than the latest version.
To see a list of available versions for installation, run:
```bash
./avalanchego-installer.sh --list
```
It will print out a list, something like:
```bash
AvalancheGo installer
---------------------
Available versions:
v1.3.2
v1.3.1
v1.3.0
v1.2.4-arm-fix
v1.2.4
v1.2.3-signed
v1.2.3
v1.2.2
v1.2.1
v1.2.0
```
To install a specific version, run the script with `--version` followed by the tag of the version. For example:
```bash
./avalanchego-installer.sh --version v1.3.1
```
Note that not all AvalancheGo versions are compatible. You should generally run the latest version. Running a version other than latest may lead to your node not working properly and, for validators, not receiving a staking reward.
Thanks to community member [Jean Zundel](https://github.com/jzu) for the inspiration and help implementing support for installing non-latest node versions.
## Reinstall and Script Update[](#reinstall-and-script-update "Direct link to heading")
The installer script gets updated from time to time, with new features and capabilities added. To take advantage of new features or to recover from modifications that made the node fail, you may want to reinstall the node. To do that, fetch the latest version of the script from the web with:
```bash
wget -nd -m https://raw.githubusercontent.com/ava-labs/builders-hub/master/scripts/avalanchego-installer.sh
```
After the script has updated, run it again with the `--reinstall` config flag:
```bash
./avalanchego-installer.sh --reinstall
```
This will delete the existing service file, and run the installer from scratch, like it was started for the first time. Note that the database and NodeID will be left intact.
## Removing the Node Installation[](#removing-the-node-installation "Direct link to heading")
If you want to remove the node installation from the machine, you can run the script with the `--remove` option, like this:
```bash
./avalanchego-installer.sh --remove
```
This will remove the service, service definition file and node binaries. It will not remove the working directory, node ID definition or the node database. To remove those as well, you can type:
Please note that this is irreversible and the database and node ID will be deleted!
## What Next?[](#what-next "Direct link to heading")
That's it, you're running an AvalancheGo node! Congratulations! Let us know you did it on our [Twitter](https://x.com/avax), [Telegram](https://t.me/avalancheavax) or [Reddit](https://www.reddit.com/r/Avax/)!
If you're on a residential network (dynamic IP), don't forget to set up port forwarding. If you're on a cloud service provider, you're good to go.
Now you can [interact with your node](/docs/api-reference/standards/guides/issuing-api-calls), [stake your tokens](/docs/nodes/validate/what-is-staking), or level up your installation by setting up [node monitoring](/docs/nodes/maintain/monitoring) to get a better insight into what your node is doing. Also, you might want to use our [Postman Collection](/docs/tooling/avalanche-postman/add-postman-collection) to more easily issue commands to your node.
Finally, if you haven't already, it is a good idea to [back up](/docs/nodes/maintain/backup-restore) important files in case you ever need to restore your node to a different machine.
If you have any questions, or need help, feel free to contact us on our [Discord](https://chat.avalabs.org/) server.
# Preparing Your Environment
URL: /docs/nodes/using-install-script/preparing-environment
Learn how to prepare your environment before using install script.
We have a shell (bash) script that installs AvalancheGo on your computer. This script sets up full, running node in a matter of minutes with minimal user input required. Script can also be used for unattended, automated installs.
This install script assumes:
* AvalancheGo is not running and not already installed as a service
* User running the script has superuser privileges (can run `sudo`)
## Environment Considerations[](#environment-considerations "Direct link to heading")
If you run a different flavor of Linux, the script might not work as intended. It assumes `systemd` is used to run system services. Other Linux flavors might use something else, or might have files in different places than is assumed by the script. It will probably work on any distribution that uses `systemd` but it has been developed for and tested on Ubuntu.
If you have a node already running on the computer, stop it before running the script. Script won't touch the node working directory so you won't need to bootstrap the node again.
### Node Running from Terminal[](#node-running-from-terminal "Direct link to heading")
If your node is running in a terminal stop it by pressing `ctrl+C`.
### Node Running as a Service[](#node-running-as-a-service "Direct link to heading")
If your node is already running as a service, then you probably don't need this script. You're good to go.
### Node Running in the Background[](#node-running-in-the-background "Direct link to heading")
If your node is running in the background (by running with `nohup`, for example) then find the process running the node by running `ps aux | grep avalanche`. This will produce output like:
```bash
ubuntu 6834 0.0 0.0 2828 676 pts/1 S+ 19:54 0:00 grep avalanche
ubuntu 2630 26.1 9.4 2459236 753316 ? Sl Dec02 1220:52 /home/ubuntu/build/avalanchego
```
Look for line that doesn't have `grep` on it. In this example, that is the second line. It shows information about your node. Note the process id, in this case, `2630`. Stop the node by running `kill -2 2630`.
### Node Working Files[](#node-working-files "Direct link to heading")
If you previously ran an AvalancheGo node on this computer, you will have local node files stored in `$HOME/.avalanchego` directory. Those files will not be disturbed, and node set up by the script will continue operation with the same identity and state it had before. That being said, for your node's security, back up `staker.crt` and `staker.key` files, found in `$HOME/.avalanchego/staking` and store them somewhere secure. You can use those files to recreate your node on a different computer if you ever need to. Check out this [tutorial](/docs/nodes/maintain/backup-restore) for backup and restore procedure.
## Networking Considerations[](#networking-considerations "Direct link to heading")
To run successfully, AvalancheGo needs to accept connections from the Internet on the network port `9651`. Before you proceed with the installation, you need to determine the networking environment your node will run in.
### Running on a Cloud Provider[](#running-on-a-cloud-provider "Direct link to heading")
If your node is running on a cloud provider computer instance, it will have a static IP. Find out what that static IP is, or set it up if you didn't already. The script will try to find out the IP by itself, but that might not work in all environments, so you will need to check the IP or enter it yourself.
### Running on a Home Connection[](#running-on-a-home-connection "Direct link to heading")
If you're running a node on a computer that is on a residential internet connection, you have a dynamic IP; that is, your IP will change periodically. The install script will configure the node appropriately for that situation. But, for a home connection, you will need to set up inbound port forwarding of port `9651` from the internet to the computer the node is installed on.
As there are too many models and router configurations, we cannot provide instructions on what exactly to do, but there are online guides to be found (like [this](https://www.noip.com/support/knowledgebase/general-port-forwarding-guide/), or [this](https://www.howtogeek.com/66214/how-to-forward-ports-on-your-router/) ), and your service provider support might help too.
Please note that a fully connected Avalanche node maintains and communicates over a couple of thousand of live TCP connections. For some low-powered and older home routers that might be too much to handle. If that is the case you may experience lagging on other computers connected to the same router, node getting benched, failing to sync and similar issues.
# How to Stake
URL: /docs/nodes/validate/how-to-stake
Learn how to stake on Avalanche.
## Staking Parameters on Avalanche[](#staking-parameters-on-avalanche "Direct link to heading")
When a validator is done validating the [Primary Network](http://support.avalabs.org/en/articles/4135650-what-is-the-primary-network), it receives back the AVAX tokens it staked. It may receive a reward for helping to secure the network. A validator only receives a [validation reward](http://support.avalabs.org/en/articles/4587396-what-are-validator-staking-rewards) if it is sufficiently responsive and correct during the time it validates. Read the [Avalanche token white paper](https://www.avalabs.org/whitepapers) to learn more about AVAX and the mechanics of staking.
Staking rewards are sent to your wallet address at the end of the staking term **as long as all of these parameters are met**.
### Mainnet[](#mainnet "Direct link to heading")
* The minimum amount that a validator must stake is 2,000 AVAX
* The minimum amount that a delegator must delegate is 25 AVAX
* The minimum amount of time one can stake funds for validation is 2 weeks
* The maximum amount of time one can stake funds for validation is 1 year
* The minimum amount of time one can stake funds for delegation is 2 weeks
* The maximum amount of time one can stake funds for delegation is 1 year
* The minimum delegation fee rate is 2%
* The maximum weight of a validator (their own stake + stake delegated to them) is the minimum of 3 million AVAX and 5 times the amount the validator staked. For example, if you staked 2,000 AVAX to become a validator, only 8000 AVAX can be delegated to your node total (not per delegator)
A validator will receive a staking reward if they are online and response for more than 80% of their validation period, as measured by a majority of validators, weighted by stake. **You should aim for your validator be online and responsive 100% of the time.**
You can call API method `info.uptime` on your node to learn its weighted uptime and what percentage of the network currently thinks your node has an uptime high enough to receive a staking reward. See [here.](/docs/api-reference/info-api#infouptime) You can get another opinion on your node's uptime from Avalanche's [Validator Health dashboard](https://stats.avax.network/dashboard/validator-health-check/). If your reported uptime is not close to 100%, there may be something wrong with your node setup, which may jeopardize your staking reward. If this is the case, please see [here](#why-is-my-uptime-low) or contact us on [Discord](https://chat.avax.network/) so we can help you find the issue. Note that only checking the uptime of your validator as measured by non-staking nodes, validators with small stake, or validators that have not been online for the full duration of your validation period can provide an inaccurate view of your node's true uptime.
### Fuji Testnet[](#fuji-testnet "Direct link to heading")
On Fuji Testnet, all staking parameters are the same as those on Mainnet except the following ones:
* The minimum amount that a validator must stake is 1 AVAX
* The minimum amount that a delegator must delegate is 1 AVAX
* The minimum amount of time one can stake funds for validation is 24 hours
* The minimum amount of time one can stake funds for delegation is 24 hours
## Validators[](#validators "Direct link to heading")
**Validators** secure Avalanche, create new blocks, and process transactions. To achieve consensus, validators repeatedly sample each other. The probability that a given validator is sampled is proportional to its stake.
When you add a node to the validator set, you specify:
* Your node's ID
* Your node's BLS key and BLS signature
* When you want to start and stop validating
* How many AVAX you are staking
* The address to send any rewards to
* Your delegation fee rate (see below)
The minimum amount that a validator must stake is 2,000 AVAX.
Note that once you issue the transaction to add a node as a validator, there is no way to change the parameters. **You can't remove your stake early or change the stake amount, node ID, or reward address.**
Please make sure you're using the correct values in the API calls below. If you're not sure, ask for help on [Discord](https://chat.avax.network/). If you want to add more tokens to your own validator, you can delegate the tokens to this node - but you cannot increase the base validation amount (so delegating to yourself goes against your delegation cap).
### Running a Validator[](#running-a-validator "Direct link to heading")
If you're running a validator, it's important that your node is well connected to ensure that you receive a reward.
When you issue the transaction to add a validator, the staked tokens and transaction fee (which is 0) are deducted from the addresses you control. When you are done validating, the staked funds are returned to the addresses they came from. If you earned a reward, it is sent to the address you specified when you added yourself as a validator.
#### Allow API Calls[](#allow-api-calls "Direct link to heading")
To make API calls to your node from remote machines, allow traffic on the API port (`9650` by default), and run your node with argument `--http-host=`
You should disable all APIs you will not use via command-line arguments. You should configure your network to only allow access to the API port from trusted machines (for example, your personal computer.)
#### Why Is My Uptime Low?[](#why-is-my-uptime-low "Direct link to heading")
Every validator on Avalanche keeps track of the uptime of other validators. Every validator has a weight (that is the amount staked on it.) The more weight a validator has, the more influence they have when validators vote on whether your node should receive a staking reward. You can call API method `info.uptime` on your node to learn its weighted uptime and what percentage of the network stake currently thinks your node has an uptime high enough to receive a staking reward.
You can also see the connections a node has by calling `info.peers`, as well as the uptime of each connection. **This is only one node's point of view**. Other nodes may perceive the uptime of your node differently. Just because one node perceives your uptime as being low does not mean that you will not receive staking rewards.
If your node's uptime is low, make sure you're setting config option `--public-ip=[NODE'S PUBLIC IP]` and that your node can receive incoming TCP traffic on port 9651.
#### Secret Management[](#secret-management "Direct link to heading")
The only secret that you need on your validating node is its Staking Key, the TLS key that determines your node's ID. The first time you start a node, the Staking Key is created and put in `$HOME/.avalanchego/staking/staker.key`. You should back up this file (and `staker.crt`) somewhere secure. Losing your Staking Key could jeopardize your validation reward, as your node will have a new ID.
You do not need to have AVAX funds on your validating node. In fact, it's best practice to **not** have a lot of funds on your node. Almost all of your funds should be in "cold" addresses whose private key is not on any computer.
#### Monitoring[](#monitoring "Direct link to heading")
Follow this [tutorial](/docs/nodes/maintain/monitoring) to learn how to monitor your node's uptime, general health, etc.
### Reward Formula[](#reward-formula "Direct link to heading")
Consider a validator which stakes a $Stake$ amount of Avax for $StakingPeriod$ seconds.
Assume that at the start of the staking period there is a $Supply$ amount of Avax in the Primary Network.
The maximum amount of Avax is $MaximumSupply$ . Then at the end of its staking period, a responsive validator receives a reward calculated as follows:
$$
Reward = \left(MaximumSupply - Supply \right) \times \frac{Stake}{Supply} \times \frac{Staking Period}{Minting Period} \times EffectiveConsumptionRate
$$
where,
$$
EffectiveConsumptionRate =
$$
$$
\frac{MinConsumptionRate}{PercentDenominator} \times \left(1- \frac{Staking Period}{Minting Period}\right) + \frac{MaxConsumptionRate}{PercentDenominator} \times \frac{Staking Period}{Minting Period}
$$
Note that $StakingPeriod$ is the staker's entire staking period, not just the staker's uptime, that is the aggregated time during which the staker has been responsive. The uptime comes into play only to decide whether a staker should be rewarded; to calculate the actual reward, only the staking period duration is taken into account.
$EffectiveConsumptionRate$ is a linear combination of $MinConsumptionRate$ and $MaxConsumptionRate$.
$MinConsumptionRate$ and $MaxConsumptionRate$ bound $EffectiveConsumptionRate$ because
$$
MinConsumptionRate \leq EffectiveConsumptionRate \leq MaxConsumptionRate
$$
The larger $StakingPeriod$ is, the closer $EffectiveConsumptionRate$ is to $MaxConsumptionRate$.
A staker achieves the maximum reward for its stake if $StakingPeriod$ = $Minting Period$.
The reward is:
$$
Max Reward = \left(MaximumSupply - Supply \right) \times \frac{Stake}{Supply} \times \frac{MaxConsumptionRate}{PercentDenominator}
$$
## Delegators[](#delegators "Direct link to heading")
A delegator is a token holder, who wants to participate in staking, but chooses to trust an existing validating node through delegation.
When you delegate stake to a validator, you specify:
* The ID of the node you're delegating to
* When you want to start/stop delegating stake (must be while the validator is validating)
* How many AVAX you are staking
* The address to send any rewards to
The minimum amount that a delegator must delegate is 25 AVAX.
Note that once you issue the transaction to add your stake to a delegator, there is no way to change the parameters. **You can't remove your stake early or change the stake amount, node ID, or reward address.** If you're not sure, ask for help on [Discord](https://chat.avax.network/).
### Delegator Rewards[](#delegator-rewards "Direct link to heading")
If the validator that you delegate tokens to is sufficiently correct and responsive, you will receive a reward when you are done delegating. Delegators are rewarded according to the same function as validators. However, the validator that you delegate to keeps a portion of your reward specified by the validator's delegation fee rate.
When you issue the transaction to delegate tokens, the staked tokens and transaction fee are deducted from the addresses you control. When you are done delegating, the staked tokens are returned to your address. If you earned a reward, it is sent to the address you specified when you delegated tokens. Rewards are sent to delegators right after the delegation ends with the return of staked tokens, and before the validation period of the node they're delegating to is complete.
## FAQ[](#faq "Direct link to heading")
### Is There a Tool to Check the Health of a Validator?[](#is-there-a-tool-to-check-the-health-of-a-validator "Direct link to heading")
Yes, just enter your node's ID in the Avalanche Stats [Validator Health Dashboard](https://stats.avax.network/dashboard/validator-health-check/?nodeid=NodeID-Jp4dLMTHd6huttS1jZhqNnBN9ZMNmTmWC).
### How Is It Determined Whether a Validator Receives a Staking Reward?[](#how-is-it-determined-whether-a-validator-receives-a-staking-reward "Direct link to heading")
When a node leaves the validator set, the validators vote on whether the leaving node should receive a staking reward or not. If a validator calculates that the leaving node was responsive for more than the required uptime (currently 80%), the validator will vote for the leaving node to receive a staking reward. Otherwise, the validator will vote that the leaving node should not receive a staking reward. The result of this vote, which is weighted by stake, determines whether the leaving node receives a reward or not.
Each validator only votes "yes" or "no." It does not share its data such as the leaving node's uptime.
Each validation period is considered separately. That is, suppose a node joins the validator set, and then leaves. Then it joins and leaves again. The node's uptime during its first period in the validator set does not affect the uptime calculation in the second period, hence, has no impact on whether the node receives a staking reward for its second period in the validator set.
### How Are Delegation Fees Distributed To Validators?[](#how-are-delegation-fees-distributed-to-validators "Direct link to heading")
If a validator is online for 80% of a delegation period, they receive a % of the reward (the fee) earned by the delegator. The P-Chain used to distribute this fee as a separate UTXO per delegation period. After the [Cortina Activation](https://medium.com/avalancheavax/cortina-x-chain-linearization-a1d9305553f6), instead of sending a fee UTXO for each successful delegation period, fees are now batched during a node's entire validation period and are distributed when it is unstaked.
### Error: Couldn't Issue TX: Validator Would Be Over Delegated[](#error-couldnt-issue-tx-validator-would-be-over-delegated "Direct link to heading")
This error occurs whenever the delegator can not delegate to the named validator. This can be caused by the following.
* The delegator `startTime` is before the validator `startTime`
* The delegator `endTime` is after the validator `endTime`
* The delegator weight would result in the validator total weight exceeding its maximum weight
# Turn Node Into Validator
URL: /docs/nodes/validate/node-validator
This tutorial will show you how to add a node to the validator set of Primary Network on Avalanche.
## Introduction
The [Primary Network](/docs/quick-start/primary-network)
is inherent to the Avalanche platform and validates Avalanche's built-in
blockchains. In this
tutorial, we'll add a node to the Primary Network on Avalanche.
The P-Chain manages metadata on Avalanche. This includes tracking which nodes
are in which Avalanche L1s, which blockchains exist, and which Avalanche L1s are validating
which blockchains. To add a validator, we'll issue
[transactions](http://support.avalabs.org/en/articles/4587384-what-is-a-transaction)
to the P-Chain.
Note that once you issue the transaction to add a node as a validator, there is
no way to change the parameters. **You can't remove your stake early or change
the stake amount, node ID, or reward address.** Please make sure you're using
the correct values in the API calls below. If you're not sure, feel free to join
our [Discord](https://chat.avalabs.org/) to ask questions.
## Requirements
You've completed [Run an Avalanche Node](/docs/nodes/run-a-node/from-source) and are familiar with
[Avalanche's architecture](/docs/quick-start/primary-network). In this
tutorial, we use [AvalancheJS](/docs/tooling/avalanche-js) and
[Avalanche's Postman collection](/docs/tooling/avalanchego-postman-collection)
to help us make API calls.
In order to ensure your node is well-connected, make sure that your node can
receive and send TCP traffic on the staking port (`9651` by default) and your node
has a public IP address(it's optional to set --public-ip=\[YOUR NODE'S PUBLIC IP HERE]
when executing the AvalancheGo binary, as by default, the node will attempt to perform
NAT traversal to get the node's IP according to its router). Failing to do either of
these may jeopardize your staking reward.
## Add a Validator with Core extension
First, we show you how to add your node as a validator by using [Core web](https://core.app).
### Retrieve the Node ID, the BLS signature and the BLS key
Get this info by calling [`info.getNodeID`](/docs/api-reference/info-api#infogetnodeid):
```bash
curl -X POST --data '{
"jsonrpc":"2.0",
"id" :1,
"method" :"info.getNodeID"
}' -H 'content-type:application/json' 127.0.0.1:9650/ext/info
```
The response has your node's ID, the BLS key (public key) and the BLS signature (proof of possession):
```json
{
"jsonrpc": "2.0",
"result": {
"nodeID": "NodeID-5mb46qkSBj81k9g9e4VFjGGSbaaSLFRzD",
"nodePOP": {
"publicKey": "0x8f95423f7142d00a48e1014a3de8d28907d420dc33b3052a6dee03a3f2941a393c2351e354704ca66a3fc29870282e15",
"proofOfPossession": "0x86a3ab4c45cfe31cae34c1d06f212434ac71b1be6cfe046c80c162e057614a94a5bc9f1ded1a7029deb0ba4ca7c9b71411e293438691be79c2dbf19d1ca7c3eadb9c756246fc5de5b7b89511c7d7302ae051d9e03d7991138299b5ed6a570a98"
}
},
"id": 1
}
```
### Add as a Validator
Connect [Core extension](https://core.app) to [Core web](https://core.app), and go the 'Staking' tab.
Here, choose 'Validate' from the menu.
Fill out the staking parameters. They are explained in more detail in [this doc](/docs/nodes/validate/how-to-stake). When you've
filled in all the staking parameters and double-checked them, click `Submit Validation`. Make sure the staking period is at
least 2 weeks, the delegation fee rate is at least 2%, and you're staking at
least 2,000 AVAX on Mainnet (1 AVAX on Fuji Testnet). A full guide about this can be found
[here](https://support.avax.network/en/articles/8117267-core-web-how-do-i-validate-in-core-stake).
You should see a success message, and your balance should be updated.
Go back to the `Stake` tab, and you'll see here an overview of your validation,
with information like the amount staked, staking time, and more.
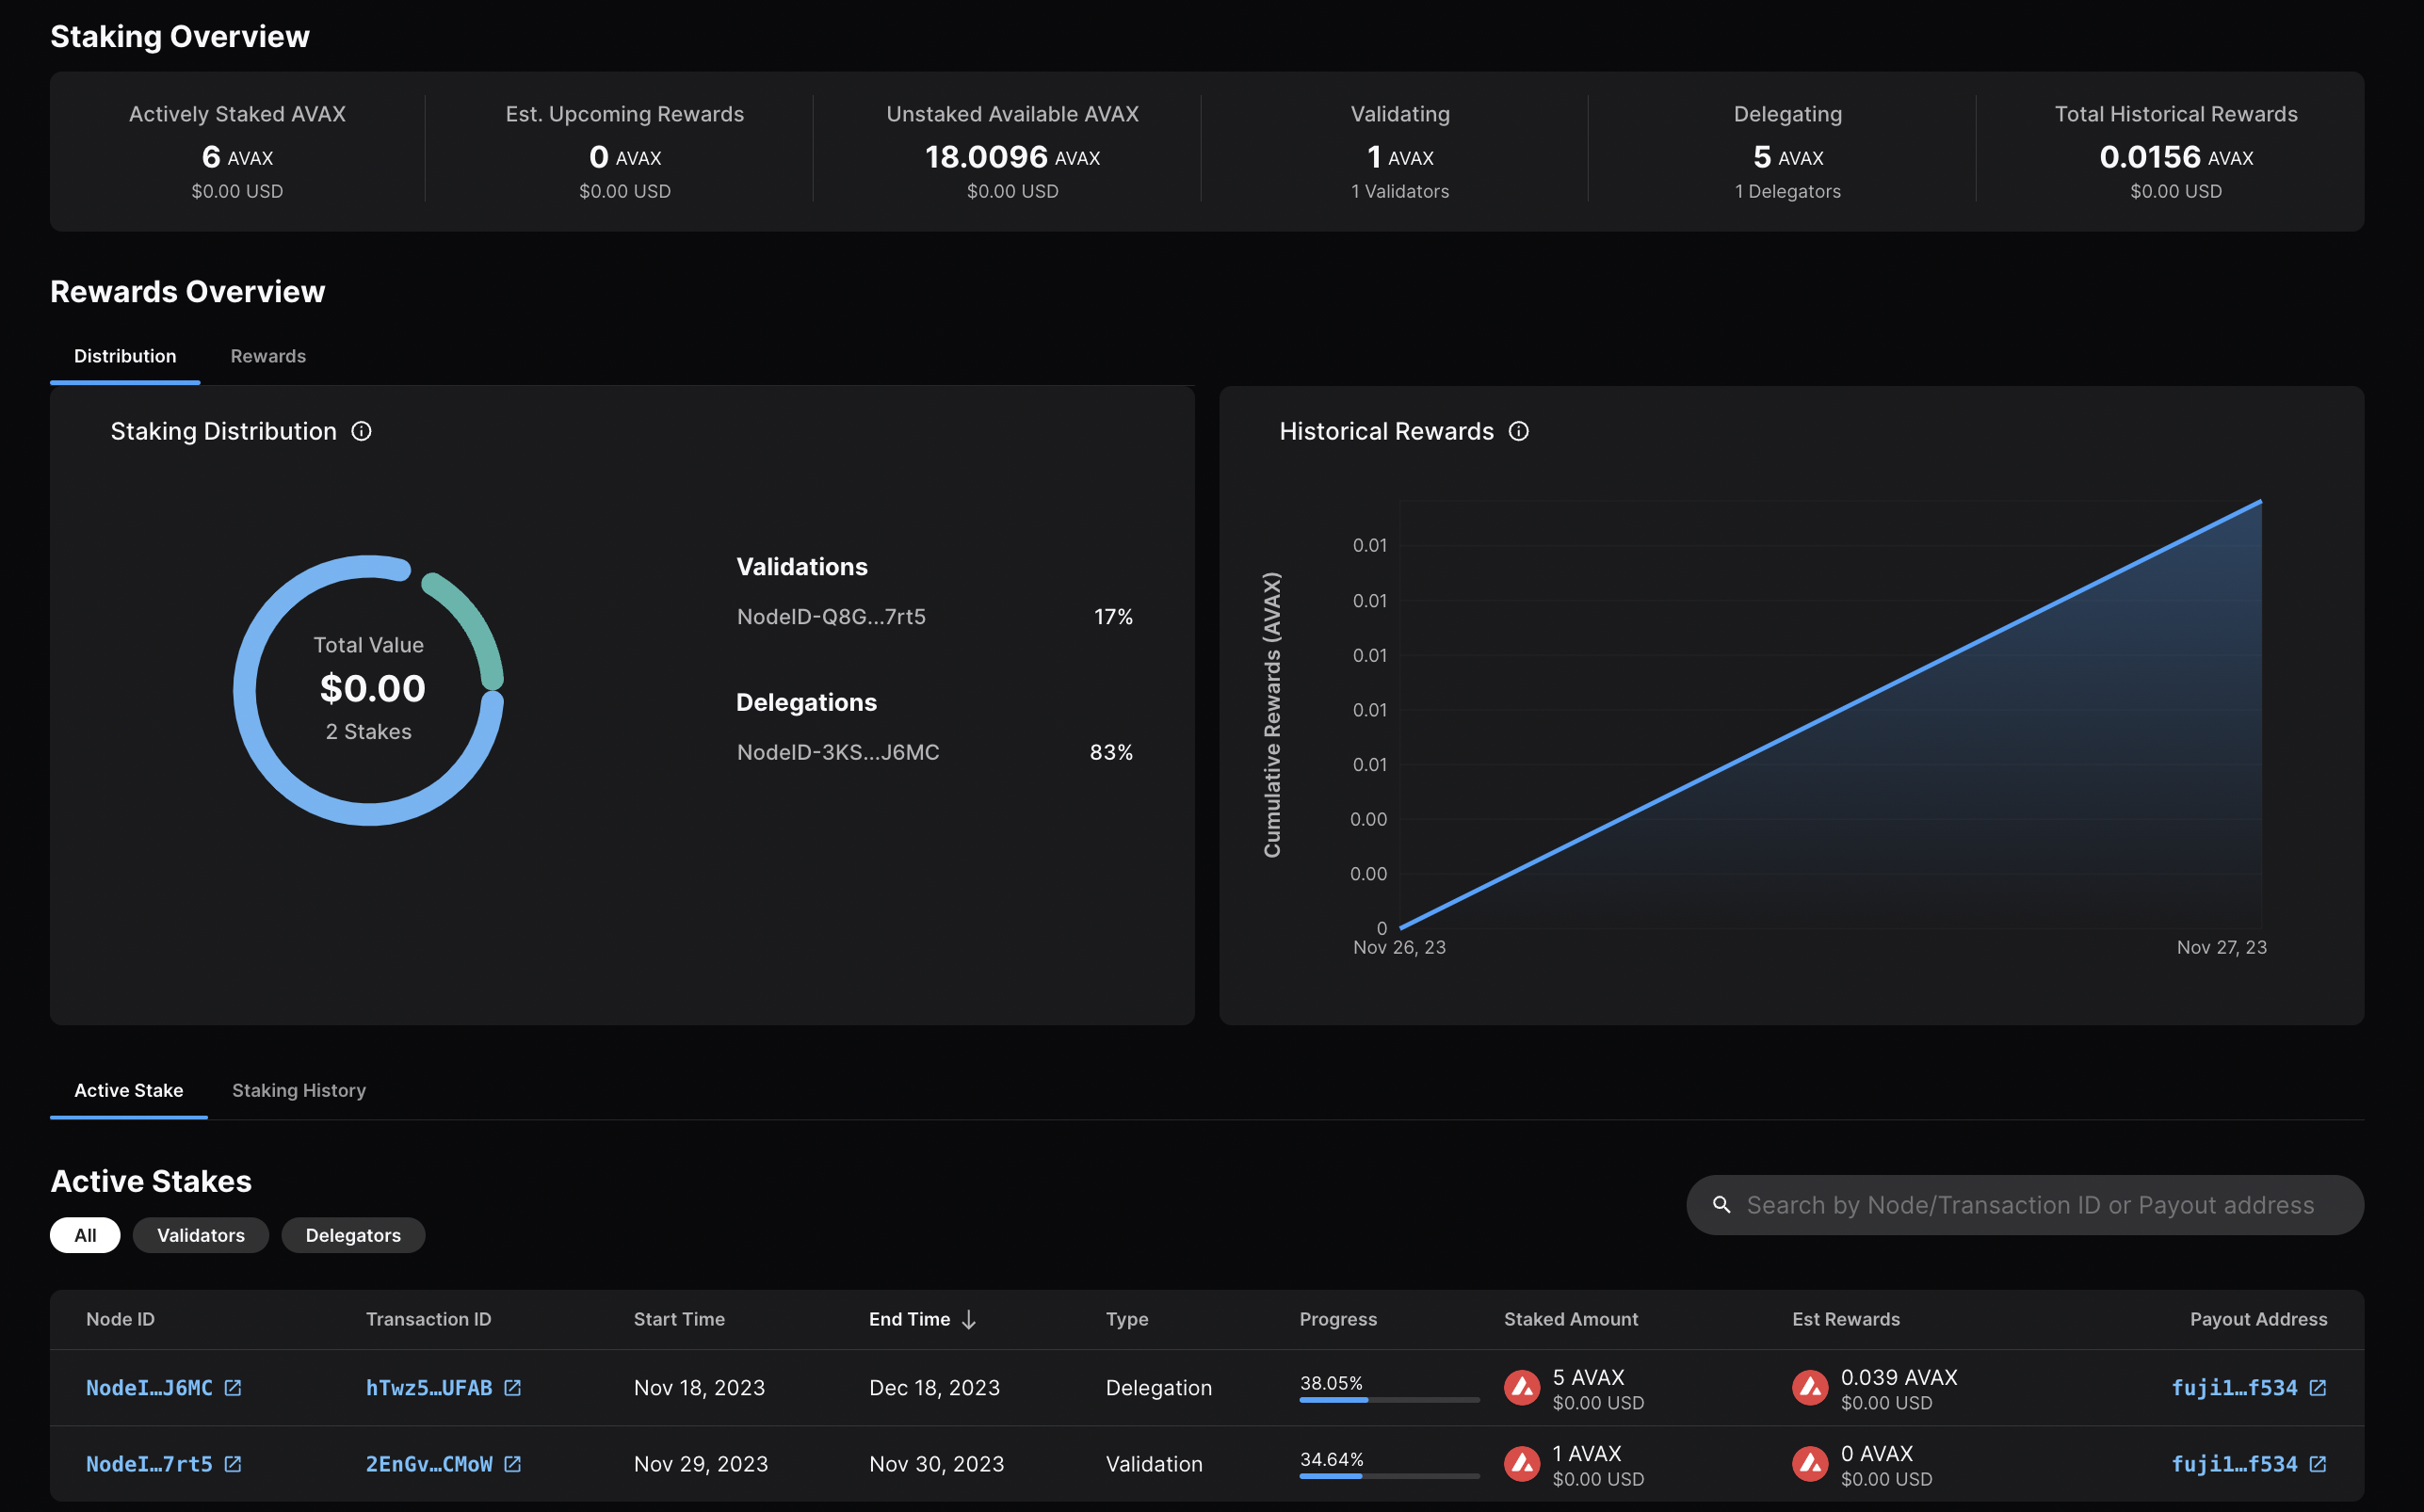
Calling
[`platform.getPendingValidators`](/docs/api-reference/p-chain/api#platformgetpendingvalidators)
verifies that your transaction was accepted. Note that this API call should be
made before your node's validation start time, otherwise, the return will not
include your node's id as it is no longer pending.
You can also call
[`platform.getCurrentValidators`](/docs/api-reference/p-chain/api#platformgetcurrentvalidators)
to check that your node's id is included in the response.
That's it!
## Add a Validator with AvalancheJS
We can also add a node to the validator set using [AvalancheJS](/docs/tooling/avalanche-js).
### Install AvalancheJS
To use AvalancheJS, you can clone the repo:
```bash
git clone https://github.com/ava-labs/avalanchejs.git
```
The repository cloning method used is HTTPS, but SSH can be used too:
`git clone git@github.com:ava-labs/avalanchejs.git`
You can find more about SSH and how to use it
[here](https://docs.github.com/en/authentication/connecting-to-github-with-ssh/about-ssh).
or add it to an existing project:
```bash
yarn add @avalabs/avalanchejs
```
For this tutorial we will use [`ts-node`](https://www.npmjs.com/package/ts-node)
to run the example scripts directly from an AvalancheJS directory.
### Fuji Workflow
In this section, we will use Fuji Testnet to show how to add a node to the validator set.
Open your AvalancheJS directory and select the
[**`examples/p-chain`**](https://github.com/ava-labs/avalanchejs/tree/master/examples/p-chain)
folder to view the source code for the examples scripts.
We will use the
[**`validate.ts`**](https://github.com/ava-labs/avalanchejs/blob/master/examples/p-chain/validate.ts)
script to add a validator.
#### Add Necessary Environment Variables
Locate the `.env.example` file at the root of AvalancheJS, and remove `.example`
from the title. Now, this will be the `.env` file for global variables.
Add the private key and the P-Chain address associated with it.
The API URL is already set to Fuji (`https://api.avax-test.network/`).

#### Retrieve the Node ID, the BLS signature and the BLS key
Get this info by calling [`info.getNodeID`](/docs/api-reference/info-api#infogetnodeid):
```bash
curl -X POST --data '{
"jsonrpc":"2.0",
"id" :1,
"method" :"info.getNodeID"
}' -H 'content-type:application/json' 127.0.0.1:9650/ext/info
```
The response has your node's ID, the BLS key (public key) and the BLS signature (proof of possession):
```json
{
"jsonrpc": "2.0",
"result": {
"nodeID": "NodeID-JXJNyJXhgXzvVGisLkrDiZvF938zJxnT5",
"nodePOP": {
"publicKey": "0xb982b485916c1d74e3b749e7ce49730ac0e52d28279ce4c5c989d75a43256d3012e04b1de0561276631ea6c2c8dc4429",
"proofOfPossession": "0xb6cdf3927783dba3245565bd9451b0c2a39af2087fdf401956489b42461452ec7639b9082195b7181907177b1ea09a6200a0d32ebbc668d9c1e9156872633cfb7e161fbd0e75943034d28b25ec9d9cdf2edad4aaf010adf804af8f6d0d5440c5"
}
},
"id": 1
}
```
#### Fill in the Node ID, the BLS signature and the BLS key
After retrieving this data, go to `examples/p-chain/validate.ts`.
Replace the `nodeID`, `blsPublicKey` and `blsSignature` with your
own node's values.

#### Settings for Validation
Next we need to specify the node's validation period and delegation fee.
#### Validation Period
The validation period is set by default to 21 days, the start date
being the date and time the transaction is issued. The start date
cannot be modified.
The end date can be adjusted in the code.
Let's say we want the validation period to end after 50 days.
You can achieve this by adding the number of desired days to
`endTime.getDate()`, in this case `50`.
```ts
// move ending date 50 days into the future
endTime.setDate(endTime.getDate() + 50);
```
Now let's say you want the staking period to end on a specific
date and time, for example May 15, 2024, at 11:20 AM.
It can be achieved as shown in the code below.
```ts
const startTime = await new PVMApi().getTimestamp();
const startDate = new Date(startTime.timestamp);
const start = BigInt(startDate.getTime() / 1000);
// Set the end time to a specific date and time
const endTime = new Date('2024-05-15T11:20:00'); // May 15, 2024, at 11:20 AM
const end = BigInt(endTime.getTime() / 1000);
```
#### Delegation Fee Rate
Avalanche allows for delegation of stake. This parameter is the percent fee this
validator charges when others delegate stake to them. For example, if
`delegationFeeRate` is `10` and someone delegates to this validator, then when
the delegation period is over, 10% of the reward goes to the validator and the
rest goes to the delegator, if this node meets the validation reward
requirements.
The delegation fee on AvalancheJS is set `20`. To change this, you need
to provide the desired fee percent as a parameter to `newAddPermissionlessValidatorTx`,
which is by default `1e4 * 20`.
For example, if you'd want it to be `10`, the updated code would look like this:
```ts
const tx = newAddPermissionlessValidatorTx(
context,
utxos,
[bech32ToBytes(P_CHAIN_ADDRESS)],
nodeID,
PrimaryNetworkID.toString(),
start,
end,
BigInt(1e9),
[bech32ToBytes(P_CHAIN_ADDRESS)],
[bech32ToBytes(P_CHAIN_ADDRESS)],
1e4 * 10, // delegation fee, replaced 20 with 10
undefined,
1,
0n,
blsPublicKey,
blsSignature,
);
```
#### Stake Amount
Set the amount being locked for validation when calling
`newAddPermissionlessValidatorTx` by replacing `weight` with a number
in the unit of nAVAX. For example, `2 AVAX` would be `2e9 nAVAX`.
```ts
const tx = newAddPermissionlessValidatorTx(
context,
utxos,
[bech32ToBytes(P_CHAIN_ADDRESS)],
nodeID,
PrimaryNetworkID.toString(),
start,
end,
BigInt(2e9), // the amount to stake
[bech32ToBytes(P_CHAIN_ADDRESS)],
[bech32ToBytes(P_CHAIN_ADDRESS)],
1e4 * 10,
undefined,
1,
0n,
blsPublicKey,
blsSignature,
);
```
#### Execute the Code
Now that we have made all of the necessary changes to the example script, it's
time to add a validator to the Fuji Network.
Run the command:
```bash
node --loader ts-node/esm examples/p-chain/validate.ts
```
The response:
```bash
laviniatalpas@Lavinias-MacBook-Pro avalanchejs % node --loader ts-node/esm examples/p-chain/validate.ts
(node:87616) ExperimentalWarning: `--experimental-loader` may be removed in the future; instead use `register()`:
--import 'data:text/javascript,import { register } from "node:module"; import { pathToFileURL } from "node:url"; register("ts-node/esm", pathToFileURL("./"));'
(Use `node --trace-warnings ...` to show where the warning was created)
{ txID: 'RVe3CFRieRbBvKXKPu24Zbt1QehdyGVT6X4tPWVBeACPX3Ab8' }
```
We can check the transaction's status by running the example script with
[`platform.getTxStatus`](/docs/api-reference/p-chain/api#platformgettxstatus)
or looking up the validator directly on the
[explorer](https://subnets-test.avax.network/validators/NodeID-JXJNyJXhgXzvVGisLkrDiZvF938zJxnT5).
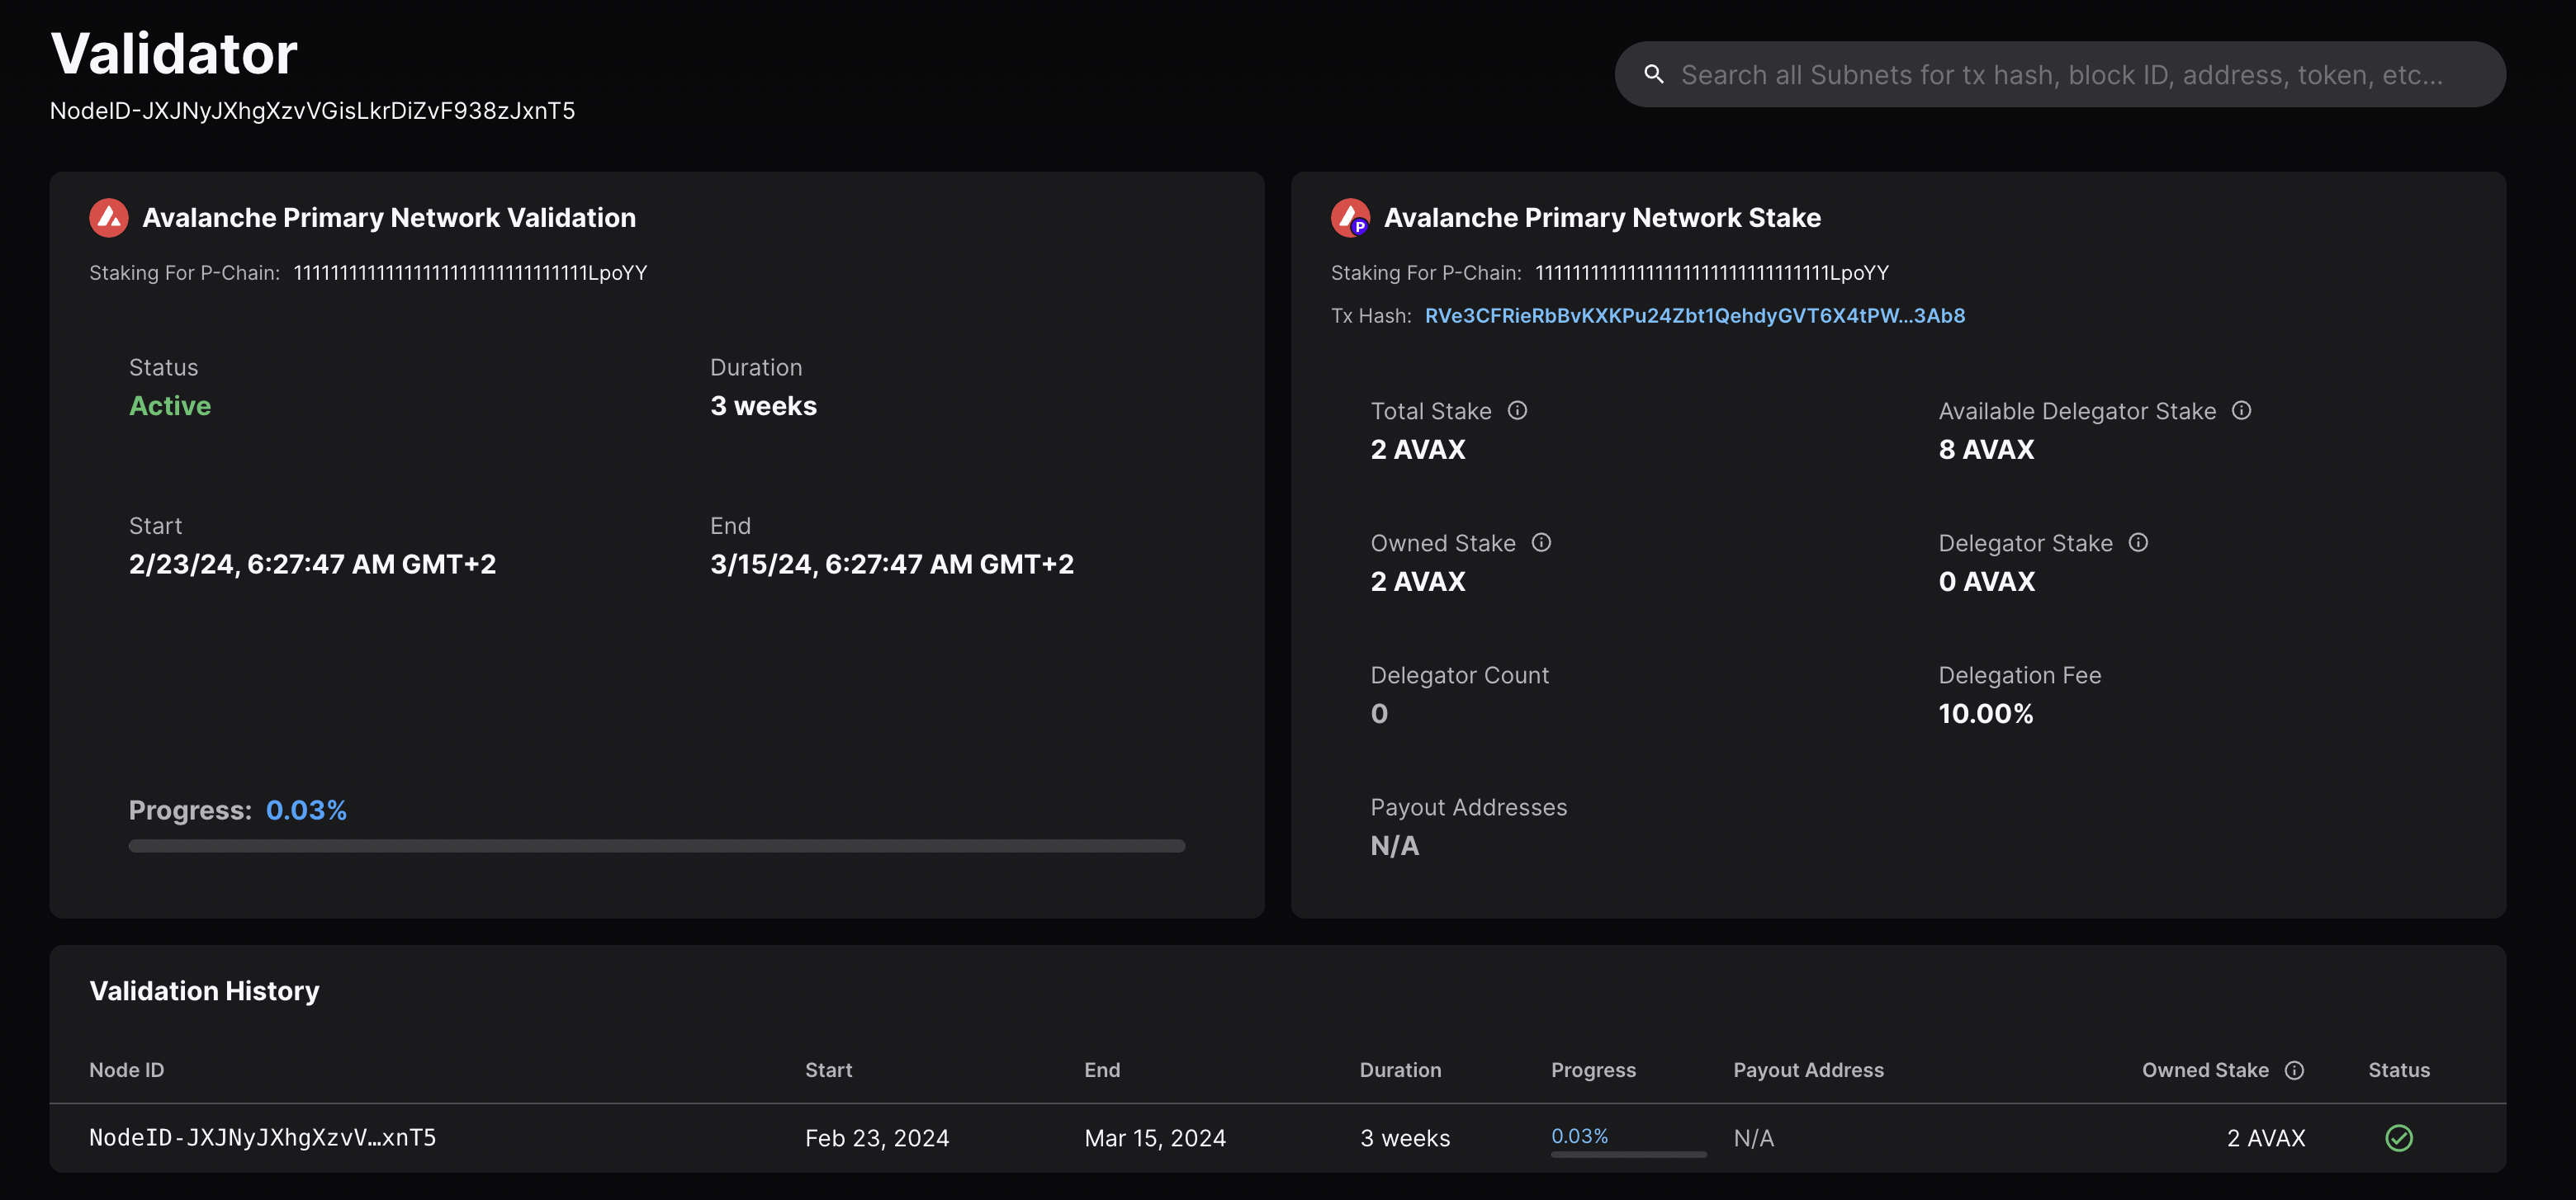
### Mainnet Workflow
The Fuji workflow above can be adapted to Mainnet with the following modifications:
* `AVAX_PUBLIC_URL` should be `https://api.avax.network/`.
* `P_CHAIN_ADDRESS` should be the Mainnet P-Chain address.
* Set the correct amount to stake.
* The `blsPublicKey`, `blsSignature` and `nodeID` need to be the ones for your Mainnet Node.
# Validate vs. Delegate
URL: /docs/nodes/validate/validate-vs-delegate
Understand the difference between validation and delegation.
## Validation[](#validation "Direct link to heading")
Validation in the context of staking refers to the act of running a node on the blockchain network to validate transactions and secure the network.
* **Stake Requirement**: To become a validator on the Avalanche network, one must stake a minimum amount of 2,000 AVAX tokens on the Mainnet (1 AVAX on the Fuji Testnet).
* **Process**: Validators participate in achieving consensus by repeatedly sampling other validators. The probability of being sampled is proportional to the validator's stake, meaning the more tokens a validator stakes, the more influential they are in the consensus process.
* **Rewards**: Validators are eligible to receive rewards for their efforts in securing the network. To receive rewards, a validator must be online and responsive for more than 80% of their validation period.
## Delegation[](#delegation "Direct link to heading")
Delegation allows token holders who do not wish to run their own validator node to still participate in staking by "delegating" their tokens to an existing validator node.
* **Stake Requirement**: To delegate on the Avalanche network, a minimum of 25 AVAX tokens is required on the Mainnet (1 AVAX on the Fuji Testnet).
* **Process**: Delegators choose a specific validator node to delegate their tokens to, trusting that the validator will behave correctly and help secure the network on their behalf.
* **Rewards**: Delegators are also eligible to receive rewards for their stake. The validator they delegate to shares a portion of the reward with them, according to the validator's delegation fee rate.
## Key Differences[](#key-differences "Direct link to heading")
* **Responsibilities**: Validators actively run a node, validate transactions, and actively participate in securing the network. Delegators, on the other hand, do not run a node themselves but entrust their tokens to a validator to participate on their behalf.
* **Stake Requirement**: Validators have a higher minimum stake requirement compared to delegators, as they take on more responsibility in the network.
* **Rewards Distribution**: Validators receive rewards directly for their validation efforts. Delegators receive rewards indirectly through the validator they delegate to, sharing a portion of the validator's reward.
In summary, validation involves actively participating in securing the network by running a node, while delegation allows token holders to participate passively by trusting their stake to a chosen validator. Both validators and delegators can earn rewards, but validators have higher stakes and more direct involvement in the Avalanche network.
# What Is Staking?
URL: /docs/nodes/validate/what-is-staking
Learn about staking and how it works in Avalanche.
Staking is the process where users lock up their tokens to support a blockchain network and, in return, receive rewards. It is an essential part of proof-of-stake (PoS) consensus mechanisms used by many blockchain networks, including Avalanche. PoS systems require participants to stake a certain amount of tokens as collateral to participate in the network and validate transactions.
## How Does Proof-of-Stake Work?[](#how-does-proof-of-stake-work "Direct link to heading")
To resist [sybil attacks](https://support.avalabs.org/en/articles/4064853-what-is-a-sybil-attack), a decentralized network must require that network influence is paid with a scarce resource. This makes it infeasibly expensive for an attacker to gain enough influence over the network to compromise its security. On Avalanche, the scarce resource is the native token, [AVAX](/docs/quick-start/avax-token). For a node to validate a blockchain on Avalanche, it must stake AVAX.
# ANR Commands
URL: /docs/tooling/avalanche-network-runner/anr-commands
Commands for the Avalanche Network Runner.
## Global Flags[](#global-flags "Direct link to heading")
* `--dial-timeout duration` server dial timeout (default 10s)
* `--endpoint string` server endpoint (default "localhost:8080")
* `--log-dir string` log directory
* `--log-level string` log level (default "INFO")
* `--request-timeout duration` client request timeout (default 3m0s)
## Ping[](#ping "Direct link to heading")
Pings the server.
```bash
avalanche-network-runner ping [options] [flags]
```
### Example[](#example "Direct link to heading")
```bash
avalanche-network-runner ping
```
```bash
curl --location --request POST 'http://localhost:8081/v1/ping'
```
## Server[](#server "Direct link to heading")
Starts a network runner server.
```bash
avalanche-network-runner server [options] [flags]
```
### Flags[](#flags "Direct link to heading")
* `--dial-timeout duration` server dial timeout (default 10s)
* `--disable-grpc-gateway`true to disable grpc-gateway server (overrides `--grpc-gateway-port`)
* `--disable-nodes-output` true to disable nodes stdout/stderr
* `--grpc-gateway-port string` grpc-gateway server port (default ":8081")
* `--log-dir string` log directory
* `--log-level string` log level for server logs (default "INFO")
* `--port string` server port (default ":8080")
* `--snapshots-dir string` directory for snapshots
### Example[](#example-1 "Direct link to heading")
```bash
avalanche-network-runner server
```
## Control[](#control "Direct link to heading")
Network runner control commands.
```bash
avalanche-network-runner control [command]
```
### `add-node`[](#add-node "Direct link to heading")
Adds a new node to the network.
```bash
avalanche-network-runner control add-node node-name [options] [flags]
```
#### Flags[](#flags-1 "Direct link to heading")
* `--avalanchego-path string` AvalancheGo binary path
* `--chain-configs string` \[optional] JSON string of map from chain id to its config file contents
* `--node-config string` node config as string
* `--plugin-dir string` \[optional] plugin directory
* `--subnet-configs string` \[optional] JSON string of map from Avalanche L1 id (SubnetID) to its config file contents
* `--upgrade-configs string` \[optional] JSON string of map from chain id to its upgrade file contents
#### Example[](#example-2 "Direct link to heading")
```bash
avalanche-network-runner control add-node node6
```
```bash
curl --location 'http://localhost:8081/v1/control/addnode' \
--header 'Content-Type: application/json' \
--data '{
"name": "node6"
}'
```
### `add-subnet-validators`[](#add-avalanche-l1-validators "Direct link to heading")
Adds Avalanche L1 validators.
```bash
avalanche-network-runner control add-subnet-validators validatorsSpec [options] [flags]
```
#### Example[](#example-5 "Direct link to heading")
```bash
avalanche-network-runner control add-subnet-validators '[{"subnet_id": "p433wpuXyJiDhyazPYyZMJeaoPSW76CBZ2x7wrVPLgvokotXz", "node_names":["node1"]}]'
```
```bash
curl --location 'http://localhost:8081/v1/control/addsubnetvalidators' \
--header 'Content-Type: application/json' \
--data '[{"subnetId": "p433wpuXyJiDhyazPYyZMJeaoPSW76CBZ2x7wrVPLgvokotXz", "nodeNames":["node1"]}]'
```
### `attach-peer`[](#attach-peer "Direct link to heading")
Attaches a peer to the node.
```bash
avalanche-network-runner control attach-peer node-name [options] [flags]
```
#### Example[](#example-6 "Direct link to heading")
```bash
avalanche-network-runner control attach-peer node5
```
```bash
curl --location 'http://localhost:8081/v1/control/attachpeer' \
--header 'Content-Type: application/json' \
--data '{
"nodeName":"node5"
}'
```
### `create-blockchains`[](#create-blockchains "Direct link to heading")
Creates blockchains.
```bash
avalanche-network-runner control create-blockchains blockchain-specs [options] [flags]
```
#### Example[](#example-7 "Direct link to heading")
```bash
avalanche-network-runner control create-blockchains '[{"vm_name":"subnetevm","genesis":"/path/to/genesis.json", "subnet_id": "p433wpuXyJiDhyazPYyZMJeaoPSW76CBZ2x7wrVPLgvokotXz"}]'
```
```bash
curl --location 'http://localhost:8081/v1/control/createblockchains' \
--header 'Content-Type: application/json' \
--data '{
"blockchainSpecs": [
{
"vm_name": "subnetevm",
"genesis": "/path/to/genesis.json",
"subnet_id": "p433wpuXyJiDhyazPYyZMJeaoPSW76CBZ2x7wrVPLgvokotXz"
}
]
}'
```
### `create-subnets`[](#create-avalanche-l1s "Direct link to heading")
Creates Avalanche L1s.
```bash
avalanche-network-runner control create-subnets [options] [flags]
```
#### Example[](#example-8 "Direct link to heading")
```bash
avalanche-network-runner control create-subnets '[{"participants": ["node1", "node2", "node3", "node4", "node5"]}]'
```
```bash
curl --location 'http://localhost:8081/v1/control/createsubnets' \
--header 'Content-Type: application/json' \
--data '
{
"participants": [
"node1",
"node2",
"node3",
"node4",
"node5"
]
}'
```
### `get-snapshot-names`[](#get-snapshot-names "Direct link to heading")
Lists available snapshots.
```bash
avalanche-network-runner control get-snapshot-names [options] [flags]
```
#### Example[](#example-10 "Direct link to heading")
```bash
avalanche-network-runner control get-snapshot-names
```
```bash
curl --location --request POST 'http://localhost:8081/v1/control/getsnapshotnames'
```
### `health`[](#health "Direct link to heading")
Waits until local cluster is ready.
```bash
avalanche-network-runner control health [options] [flags]
```
#### Example[](#example-11 "Direct link to heading")
```bash
./build/avalanche-network-runner control health
```
```bash
curl --location --request POST 'http://localhost:8081/v1/control/health'
```
### `list-blockchains`[](#list-blockchains "Direct link to heading")
Lists all blockchain ids of the network.
```bash
avalanche-network-runner control list-blockchains [flags]
```
#### Example[](#example-12 "Direct link to heading")
```bash
avalanche-network-runner control list-blockchains
```
```bash
curl --location --request POST 'http://localhost:8081/v1/control/listblockchains'
```
### `list-rpcs`[](#list-rpcs "Direct link to heading")
Lists RPCs for all blockchains in the network.
#### Flags[](#flags-2 "Direct link to heading")
```bash
avalanche-network-runner control list-rpcs [flags]
```
#### Example[](#example-13 "Direct link to heading")
```bash
avalanche-network-runner control list-rpcs
```
```bash
curl --location --request POST 'http://localhost:8081/v1/control/listrpcs'
```
### `list-subnets`[](#list-avalanche-l1s "Direct link to heading")
Lists all Avalanche L1 IDs (SubnetID) of the network.
```bash
avalanche-network-runner control list-subnets [flags]
```
#### Example[](#example-14 "Direct link to heading")
```bash
avalanche-network-runner control list-subnets
```
```bash
curl --location --request POST 'http://localhost:8081/v1/control/listsubnets'
```
### `load-snapshot`[](#load-snapshot "Direct link to heading")
Loads a network snapshot.
```bash
avalanche-network-runner control load-snapshot snapshot-name [flags]
if the `AVALANCHEGO_EXEC_PATH` and `AVALANCHEGO_PLUGIN_PATH` env vars aren't set then you should pass them in as a flag
avalanche-network-runner control load-snapshot snapshotName --avalanchego-path /path/to/avalanchego/binary --plugin-dir /path/to/avalanchego/plugins
```
#### Flags[](#flags-3 "Direct link to heading")
* `--avalanchego-path string` AvalancheGo binary path
* `--chain-configs string` \[optional] JSON string of map from chain id to its config file contents
* `--global-node-config string` \[optional] global node config as JSON string, applied to all nodes
* `--plugin-dir string` plugin directory
* `--reassign-ports-if-used` true to reassign snapshot ports if already taken
* `--root-data-dir string` root data directory to store logs and configurations
* `--subnet-configs string` \[optional] JSON string of map from Avalanche L1 id to its config file contents
* `--upgrade-configs string` \[optional] JSON string of map from chain id to its upgrade file contents
#### Example[](#example-15 "Direct link to heading")
```bash
avalanche-network-runner control load-snapshot snapshot
```
```bash
curl --location 'http://localhost:8081/v1/control/loadsnapshot' \
--header 'Content-Type: application/json' \
--data '{
"snapshotName":"snapshot"
}'
if the `AVALANCHEGO_EXEC_PATH` and `AVALANCHEGO_PLUGIN_PATH` env vars aren't set then you should pass them in to the curl
curl -X POST -k http://localhost:8081/v1/control/loadsnapshot -d '{"snapshotName":"node5","execPath":"/path/to/avalanchego/binary","pluginDir":"/path/to/avalanchego/plugins"}'
```
### `pause-node`[](#pause-node "Direct link to heading")
Pauses a node.
```bash
avalanche-network-runner control pause-node node-name [options] [flags]
```
#### Example[](#example-16 "Direct link to heading")
```bash
avalanche-network-runner control pause-node node5
```
```bash
curl --location 'http://localhost:8081/v1/control/pausenode' \
--header 'Content-Type: application/json' \
--data '{
"name": "node5"
}'
```
### `remove-node`[](#remove-node "Direct link to heading")
Removes a node.
```bash
avalanche-network-runner control remove-node node-name [options] [flags]
```
#### Example[](#example-17 "Direct link to heading")
```bash
avalanche-network-runner control remove-node node5
```
```bash
curl --location 'http://localhost:8081/v1/control/removenode' \
--header 'Content-Type: application/json' \
--data '{
"name":"node5"
}'
```
### `remove-snapshot`[](#remove-snapshot "Direct link to heading")
Removes a network snapshot.
```bash
avalanche-network-runner control remove-snapshot snapshot-name [flags]
```
#### Example[](#example-18 "Direct link to heading")
```bash
avalanche-network-runner control remove-snapshot node5
```
```bash
curl --location 'http://localhost:8081/v1/control/removesnapshot' \
--header 'Content-Type: application/json' \
--data '{
"snapshot_name":"node5"
}'
```
### `remove-subnet-validator`[](#remove-avalanche-l1-validator "Direct link to heading")
Removes an Avalanche L1 validator.
```bash
avalanche-network-runner control remove-subnet-validator removeValidatorSpec [options] [flags]
```
#### Example[](#example-19 "Direct link to heading")
```bash
avalanche-network-runner control remove-subnet-validator '[{"subnet_id": "p433wpuXyJiDhyazPYyZMJeaoPSW76CBZ2x7wrVPLgvokotXz", "node_names":["node1"]}]'
```
```bash
curl --location 'http://localhost:8081/v1/control/removesubnetvalidator' \
--header 'Content-Type: application/json' \
--data '[{"subnetId": "p433wpuXyJiDhyazPYyZMJeaoPSW76CBZ2x7wrVPLgvokotXz", "nodeNames":["node1"]}]'
```
### `restart-node`[](#restart-node "Direct link to heading")
Restarts a node.
```bash
avalanche-network-runner control restart-node node-name [options] [flags]
```
#### Flags[](#flags-4 "Direct link to heading")
* `--avalanchego-path string` AvalancheGo binary path
* `--chain-configs string` \[optional] JSON string of map from chain id to its config file contents
* `--plugin-dir string` \[optional] plugin directory
* `--subnet-configs string` \[optional] JSON string of map from Avalanche L1 id (SubnetID) to its config file contents
* `--upgrade-configs string` \[optional] JSON string of map from chain id to its upgrade file contents
* `--whitelisted-subnets string` \[optional] whitelisted Avalanche L1s (comma-separated)
#### Example[](#example-20 "Direct link to heading")
```bash
avalanche-network-runner control restart-node \
--request-timeout=3m \
--log-level debug \
--endpoint="localhost:8080" \
node1
```
```bash
curl --location 'http://localhost:8081/v1/control/restartnode' \
--header 'Content-Type: application/json' \
--data '{
"name": "node5"
}'
```
### `resume-node`[](#resume-node "Direct link to heading")
Resumes a node.
```bash
avalanche-network-runner control resume-node node-name [options] [flags]
```
#### Example[](#example-21 "Direct link to heading")
```bash
avalanche-network-runner control resume-node node5
```
```bash
curl --location 'http://localhost:8081/v1/control/resumenode' \
--header 'Content-Type: application/json' \
--data '{
"name": "node5"
}'
```
### `rpc_version`[](#rpc_version "Direct link to heading")
Gets RPC server version.
```bash
avalanche-network-runner control rpc_version [flags]
```
#### Example[](#example-22 "Direct link to heading")
```bash
./build/avalanche-network-runner control rpc_version
```
```bash
curl --location --request POST 'http://localhost:8081/v1/control/rpcversion'
```
### `save-snapshot`[](#save-snapshot "Direct link to heading")
Saves a network snapshot.
```bash
avalanche-network-runner control save-snapshot snapshot-name [flags]
```
#### Example[](#example-23 "Direct link to heading")
```bash
avalanche-network-runner control save-snapshot snapshotName
```
```bash
curl --location 'http://localhost:8081/v1/control/savesnapshot' \
--header 'Content-Type: application/json' \
--data '{
"snapshot_name":"node5"
}'
```
### `send-outbound-message`[](#send-outbound-message "Direct link to heading")
Sends an outbound message to an attached peer.
```bash
avalanche-network-runner control send-outbound-message node-name [options] [flags]
```
#### Flags[](#flags-5 "Direct link to heading")
* `--message-bytes-b64 string` Message bytes in base64 encoding
* `--message-op uint32` Message operation type
* `--peer-id string` peer ID to send a message to
#### Example[](#example-24 "Direct link to heading")
```bash
avalanche-network-runner control send-outbound-message \
--request-timeout=3m \
--log-level debug \
--endpoint="localhost:8080" \
--node-name node1 \
--peer-id "7Xhw2mDxuDS44j42TCB6U5579esbSt3Lg" \
--message-op=16 \
--message-bytes-b64="EAAAAAAAAAAAAAAAAAAAAAAAAAAAAAAAAAAAAAAAAAAAAAAAKgAAAAPpAqmoZkC/2xzQ42wMyYK4Pldl+tX2u+ar3M57WufXx0oXcgXfXCmSnQbbnZQfg9XqmF3jAgFemSUtFkaaZhDbX6Ke1DVpA9rCNkcTxg9X2EcsfdpKXgjYioitjqca7WA="
```
```bash
curl -X POST -k http://localhost:8081/v1/control/sendoutboundmessage -d '{"nodeName":"node1","peerId":"7Xhw2mDxuDS44j42TCB6U5579esbSt3Lg","op":16,"bytes":"EAAAAAAAAAAAAAAAAAAAAAAAAAAAAAAAAAAAAAAAAAAAAAAAKgAAAAPpAqmoZkC/2xzQ42wMyYK4Pldl+tX2u+ar3M57WufXx0oXcgXfXCmSnQbbnZQfg9XqmF3jAgFemSUtFkaaZhDbX6Ke1DVpA9rCNkcTxg9X2EcsfdpKXgjYioitjqca7WA="}'
```
### `start`[](#start "Direct link to heading")
Starts a network.
```bash
avalanche-network-runner control start [options] [flags]
```
#### Flags[](#flags-6 "Direct link to heading")
* `--avalanchego-path string` AvalancheGo binary path
* `--blockchain-specs string` \[optional] JSON string of array of \[(VM name, genesis file path)]
* `--chain-configs string` \[optional] JSON string of map from chain id to its config file contents
* `--custom-node-configs global-node-config` \[optional] custom node configs as JSON string of map, for each node individually. Common entries override global-node-config, but can be combined. Invalidates `number-of-nodes` (provide all node configs if used).
* `--dynamic-ports` true to assign dynamic ports
* `--global-node-config string` \[optional] global node config as JSON string, applied to all nodes
* `--number-of-nodes uint32` number of nodes of the network (default 5)
* `--plugin-dir string` \[optional] plugin directory
* `--reassign-ports-if-used` true to reassign default/given ports if already taken
* `--root-data-dir string` \[optional] root data directory to store logs and configurations
* `--subnet-configs string` \[optional] JSON string of map from Avalanche L1 id (SubnetID) to its config file contents
* `--upgrade-configs string` \[optional] JSON string of map from chain id to its upgrade file contents
* `--whitelisted-subnets string` \[optional] whitelisted Avalanche L1s (comma-separated)
#### Example[](#example-25 "Direct link to heading")
```bash
avalanche-network-runner control start \
--log-level debug \
--endpoint="localhost:8080" \
--number-of-nodes=5 \
--blockchain-specs '[{"vm_name": "subnetevm", "genesis": "./path/to/config.json"}]'
```
```bash
curl --location 'http://localhost:8081/v1/control/start' \
--header 'Content-Type: application/json' \
--data '{
"numNodes": 5,
"blockchainSpecs": [
{
"vm_name": "subnetevm",
"genesis": "/path/to/config.json"
}
]
}'
```
### `status`[](#status "Direct link to heading")
Gets network status.
```bash
avalanche-network-runner control status [options] [flags]
```
#### Example[](#example-26 "Direct link to heading")
```bash
./build/avalanche-network-runner control status
```
```bash
curl --location --request POST 'http://localhost:8081/v1/control/status'
```
### `stop`[](#stop "Direct link to heading")
Stops the network.
```bash
avalanche-network-runner control stop [options] [flags]
```
#### Example[](#example-27 "Direct link to heading")
```bash
avalanche-network-runner control stop
```
```bash
curl --location --request POST 'http://localhost:8081/v1/control/stop'
```
### `stream-status`[](#stream-status "Direct link to heading")
Gets a stream of network status.
```bash
avalanche-network-runner control stream-status [options] [flags]
```
#### Flags[](#flags-7 "Direct link to heading")
`--push-interval duration` interval that server pushes status updates to the client (default 5s)
#### Example[](#example-28 "Direct link to heading")
```bash
avalanche-network-runner control stream-status
```
```bash
curl --location --request POST 'http://localhost:8081/v1/control/streamstatus'
```
### `uris`[](#uris "Direct link to heading")
Lists network URIs.
```bash
avalanche-network-runner control uris [options] [flags]
```
#### Example[](#example-29 "Direct link to heading")
```bash
avalanche-network-runner control uris
```
```bash
curl --location --request POST 'http://localhost:8081/v1/control/uris'
```
### `vmid`[](#vmid "Direct link to heading")
Returns the VM ID associated to the given VM name.
```bash
avalanche-network-runner control vmid vm-name [flags]
```
#### Example[](#example-30 "Direct link to heading")
```bash
/build/avalanche-network-runner control vmid subnetevm
```
```bash
curl --location 'http://localhost:8081/v1/control/vmid' \
--header 'Content-Type: application/json' \
--data '{
"vmName": "subnetevm"
}'
```
### `wait-for-healthy`[](#wait-for-healthy "Direct link to heading")
Waits until local cluster and custom VMs are ready.
```bash
avalanche-network-runner control wait-for-healthy [options] [flags]
```
#### Example[](#example-31 "Direct link to heading")
```bash
./build/avalanche-network-runner control wait-for-healthy
```
```bash
curl --location --request POST 'http://localhost:8081/v1/control/waitforhealthy'
```
# Introduction
URL: /docs/tooling/avalanche-network-runner/introduction
The Avalanche Network Runner (ANR) allows a user to define, create and interact with a network of Avalanche nodes. It can be used for development and testing.
[Link to GitHub](https://github.com/ava-labs/avalanche-network-runner)
Developing P2P systems is hard, and blockchains are no different. A developer can't just focus on the functionality of a node, but needs to consider the dynamics of the network, the interaction of nodes and emergent system properties. A lot of testing can't be addressed by unit testing, but needs a special kind of integration testing, where the code runs in interaction with other nodes, attempting to simulate real network scenarios.
In the context of Avalanche, **[Avalanche L1s](/docs/quick-start/avalanche-l1s)** are a special focus which requires new tooling and support for playing, working and testing with this unique feature of the Avalanche ecosystem.
The ANR aims at being a tool for developers and system integrators alike, offering functionality to run networks of AvalancheGo nodes with support for custom node, Avalanche L1 and network configurations, allowing to locally test code before deploying to Mainnet or even public testnets like `fuji`.
You can also use the [Avalanche Network Runner Postman collection](https://github.com/ava-labs/avalanche-network-runner-postman-collection).
**Note that this tool is not for running production nodes, and that because it is being heavily** **developed right now, documentation might differ slightly from the actual code.**
## Installation
```
curl -sSfL https://raw.githubusercontent.com/ava-labs/avalanche-network-runner/main/scripts/install.sh | sh
```
The script installs the binary inside the `~/bin` directory. If the directory doesn't exist, it will be created.
Please make sure that `~/bin` is in your `$PATH`:
To add it to your path permanently, add an export command to your shell initialization script. If you run `bash`, use `.bashrc`. If you run `zsh`, use `.zshrc`.
Furthermore, `AVALANCHEGO_EXEC_PATH` should be set properly in all shells you run commands related to Avalanche Network Runner. We strongly recommend that you put the following in to your shell's configuration file.
```
# replace execPath with the path to AvalancheGo on your machine
# e.g., ${HOME}/go/src/github.com/ava-labs/avalanchego/build/avalanchego
AVALANCHEGO_EXEC_PATH="${HOME}/go/src/github.com/ava-labs/avalanchego/build/avalanchego"
```
Unless otherwise specified, file paths given below are relative to the root of this repository.
## Usage
There are two main ways to use the network-runner:
* Run ANR as a binary
This is the recommended approach for most use cases. Doesn't require Golang installation and provides a RPC server with an HTTP API and a client library for easy interaction.
* Import this repository into your go program
This allows for custom network scenarios and high flexibility, but requires more code to be written.
Running the binary, the user can send requests to the RPC server in order to start a network, create Avalanche L1s, add nodes to the network, remove nodes from the network, restart nodes, etc. You can make requests through the `avalanche-network-runner` command or by making API calls. Requests are "translated" into gRPC and sent to the server.
Each node can then also be reached via [API](https://github.com/ava-labs/avalanche-network-runner/tree/main/api) endpoints which each node exposes.
## Examples
When running with the binary, ANR runs a server process as an RPC server which then waits for API calls and handles them. Therefore we run one shell with the RPC server, and another one for issuing calls.
### Start the Server
```
avalanche-network-runner server \
--log-level debug \
--port=":8080" \
--grpc-gateway-port=":8081"
```
Note that the above command will run until you stop it with `CTRL + C`. Further commands will have to be run in a separate terminal.
The RPC server listens to two ports:
* `port`: the main gRPC port (see [gRPC](https://grpc.io/)).
* `grpc-gateway-port`: the gRPC gateway port (see [gRPC-gateway](https://grpc-ecosystem.github.io/grpc-gateway/)), which allows for HTTP requests.
When using the binary to issue calls, the main port will be hit. In this mode, the binary executes compiled code to issue calls. Alternatively, plain HTTP can be used to issue calls, without the need to use the binary. In this mode, the `grpc-gateway-port` should be queried.
Each of the examples below will show both modes, clarifying its usage.
### Run Queries
#### Ping the Server
```
curl -X POST -k http://localhost:8081/v1/ping -d ''
```
or
```
avalanche-network-runner ping \
--log-level debug \
--endpoint="0.0.0.0:8080"
```
#### Start a New Avalanche Network with Five Nodes
```
curl -X POST -k http://localhost:8081/v1/control/start -d '{"execPath":"'${AVALANCHEGO_EXEC_PATH}'","numNodes":5}'
```
or
```
avalanche-network-runner control start \
--log-level debug \
--endpoint="0.0.0.0:8080" \
--number-of-nodes=5 \
--avalanchego-path ${AVALANCHEGO_EXEC_PATH}
```
Additional optional parameters which can be passed to the start command:
```
--plugin-dir ${AVALANCHEGO_PLUGIN_PATH} \
--blockchain-specs '[{"vm_name":"subnetevm","genesis":"/tmp/subnet-evm.genesis.json"}]' \
--global-node-config '{"index-enabled":false, "api-admin-enabled":true,"network-peer-list-gossip-frequency":"300ms"}' \
--custom-node-configs" '{"node1":{"log-level":"debug","api-admin-enabled":false},"node2":{...},...}'
```
`--plugin-dir` and `--blockchain-specs` are parameters relevant to Avalanche L1 operation.
`--plugin-dir` can be used to indicate to ANR where it will find plugin binaries for your own VMs. It is optional. If not set, ANR will assume a default location which is relative to the `avalanchego-path` given.
`--blockchain-specs` specifies details about how to create your own blockchains. It takes a JSON array for each blockchain, with the following possible fields:
```
"vm_name": human readable name for the VM
"genesis": path to a file containing the genesis for your blockchain (must be a valid path)
```
See the [Avalanche-CLI documentation](/docs/tooling/create-deploy-avalanche-l1s/deploy-locally) for details about how to create and run Avalanche L1s with our *Avalanche-CLI* tool.
The network-runner supports AvalancheGo node configuration at different levels.
1. If neither `--global-node-config` nor `--custom-node-configs` is supplied, all nodes get a standard set of config options. Currently this set contains:
```
{
"network-peer-list-gossip-frequency": "250ms",
"network-max-reconnect-delay": "1s",
"public-ip": "127.0.0.1",
"health-check-frequency": "2s",
"api-admin-enabled": true,
"index-enabled": true
}
```
2. `--global-node-config` is a JSON string representing a *single* AvalancheGo config, which will be applied to **all nodes**. This makes it easy to define common properties to all nodes. Whatever is set here will be *combined* with the standard set above.
3. `--custom-node-configs` is a map of JSON strings representing the *complete* network with individual configs. This allows to configure each node independently. If set, `--number-of-nodes` will be **ignored** to avoid conflicts.
4. The configs can be combined and will be merged, that is one could set global `--global-node-config` entries applied to each node, and also set `--custom-node-configs` for additional entries.
5. Common `--custom-node-configs` entries override `--global-node-config` entries which override the standard set.
6. The following entries will be **ignored in all cases** because the network-runner needs to set them internally to function properly:
```
--log-dir
--db-dir
--http-port
--staking-port
--public-ipc
```
#### Wait for All the Nodes in the Cluster to Become Healthy
```
curl -X POST -k http://localhost:8081/v1/control/health -d ''
```
or
```
avalanche-network-runner control health \
--log-level debug \
--endpoint="0.0.0.0:8080"
```
The response to this call is actually pretty large, as it contains the state of the whole cluster. At the very end of it there should be a text saying `healthy:true` (it would say `false` if it wasn't healthy).
#### Get API Endpoints of All Nodes in the Cluster
```
curl -X POST -k http://localhost:8081/v1/control/uris -d ''
```
or
```
avalanche-network-runner control uris \
--log-level debug \
--endpoint="0.0.0.0:8080"
```
#### Query Cluster Status from the Server
```
curl -X POST -k http://localhost:8081/v1/control/status -d ''
```
or
```
avalanche-network-runner control status \
--log-level debug \
--endpoint="0.0.0.0:8080"
```
#### Stream Cluster Status
```
avalanche-network-runner control \
--request-timeout=3m \
stream-status \
--push-interval=5s \
--log-level debug \
--endpoint="0.0.0.0:8080"
```
#### Remove (Stop) a Node
```
curl -X POST -k http://localhost:8081/v1/control/removenode -d '{"name":"node5"}'
```
or
```
avalanche-network-runner control remove-node node5 \
--request-timeout=3m \
--log-level debug \
--endpoint="0.0.0.0:8080" \
```
#### Restart a Node
In this example we are stopping the node named `node1`.
**Note**: By convention all node names start with `node` and a number. We suggest to stick to this convention to avoid issues.
```
# e.g., ${HOME}/go/src/github.com/ava-labs/avalanchego/build/avalanchego
AVALANCHEGO_EXEC_PATH="avalanchego"
```
Note that you can restart the node with a different binary by providing
```
curl -X POST -k http://localhost:8081/v1/control/restartnode -d '{"name":"node1","execPath":"'${AVALANCHEGO_EXEC_PATH}'"}'
```
or
```
avalanche-network-runner control restart-node node1 \
--request-timeout=3m \
--log-level debug \
--endpoint="0.0.0.0:8080" \
--avalanchego-path ${AVALANCHEGO_EXEC_PATH}
```
#### Add a Node
In this example we are adding a node named `node99`.
```
# e.g., ${HOME}/go/src/github.com/ava-labs/avalanchego/build/avalanchego
AVALANCHEGO_EXEC_PATH="avalanchego"
```
Note that you can add the new node with a different binary by providing
```
curl -X POST -k http://localhost:8081/v1/control/addnode -d '{"name":"node99","execPath":"'${AVALANCHEGO_EXEC_PATH}'"}'
```
or
```
avalanche-network-runner control add-node node99 \
--request-timeout=3m \
--endpoint="0.0.0.0:8080" \
--avalanchego-path ${AVALANCHEGO_EXEC_PATH}
```
It's also possible to provide individual node config parameters:
```
--node-config '{"index-enabled":false, "api-admin-enabled":true,"network-peer-list-gossip-frequency":"300ms"}'
```
`--node-config` allows to specify specific AvalancheGo config parameters to the new node. See [here](/docs/nodes/configure/configs-flags) for the reference of supported flags.
**Note**: The following parameters will be *ignored* if set in `--node-config`, because the network runner needs to set its own in order to function properly: `--log-dir` `--db-dir`
**Note**: The following Avalanche L1 parameters will be set from the global network configuration to this node: `--track-subnets` `--plugin-dir`
#### Terminate the Cluster
Note that this will still require to stop your RPC server process with `Ctrl-C` to free the shell.
```
curl -X POST -k http://localhost:8081/v1/control/stop -d ''
```
or
```
avalanche-network-runner control stop \
--log-level debug \
--endpoint="0.0.0.0:8080"
```
## Avalanche L1s
For general Avalanche L1 documentation, please refer to [Avalanche L1s](/docs/quick-start/avalanche-l1s). ANR can be a great helper working with Avalanche L1s, and can be used to develop and test new Avalanche L1s before deploying them in public networks. However, for a smooth and guided experience, we recommend using [Avalanche-CLI](/docs/tooling/create-deploy-avalanche-l1s/deploy-locally). These examples expect a basic understanding of what Avalanche L1s are and their usage.
### RPC Server Subnet-EVM Example
The Subnet-EVM is a simplified version of Coreth VM (C-Chain). This chain implements the Ethereum Virtual Machine and supports Solidity smart-contracts as well as most other Ethereum client functionality. It can be used to create your own fully Ethereum-compatible Avalanche L1 running on Avalanche. This means you can run your Ethereum-compatible dApps in custom Avalanche L1s, defining your own gas limits and fees, and deploying solidity smart-contracts while taking advantage of Avalanche's validator network, fast finality, consensus mechanism and other features. Essentially, think of it as your own Ethereum where you can concentrate on your business case rather than the infrastructure. See [Subnet-EVM](https://github.com/ava-labs/subnet-evm) for further information.
## Using Avalanche Network as a Library
The Avalanche Network Runner can also be imported as a library into your programs so that you can use it to programmatically start, interact with and stop Avalanche networks. For an example of using the Network Runner in a program, see an [example](https://github.com/ava-labs/avalanche-network-runner/blob/main/examples/local/fivenodenetwork/main.go).
Creating a network is as simple as:
```
network, err := local.NewDefaultNetwork(log, binaryPath)
```
where `log` is a logger of type [`logging.Logger`](https://github.com/ava-labs/avalanchego/blob/master/utils/logging/logger.go#L12) and `binaryPath` is the path of the AvalancheGo binary that each node that exists on network startup will run.
For example, the below snippet creates a new network using default configurations, and each node in the network runs the binaries at `/home/user/go/src/github.com/ava-labs/avalanchego/build`:
```
network, err := local.NewDefaultNetwork(log,"/home/user/go/src/github.com/ava-labs/avalanchego/build")
```
**Once you create a network, you must eventually call `Stop()` on it to make sure all of the nodes** **in the network stop.** Calling this method kills all of the Avalanche nodes in the network. You probably want to call this method in a `defer` statement to make sure it runs.
To wait until the network is ready to use, use the network's `Healthy` method. It returns a channel which will be notified when all nodes are healthy.
Each node has a unique name. Use the network's `GetNodeNames()` method to get the names of all nodes.
Use the network's method `GetNode(string)` to get a node by its name. For example:
```
names, _ := network.GetNodeNames()
node, _ := network.GetNode(names[0])
```
Then you can make API calls to the node:
```
id, _ := node.GetAPIClient().InfoAPI().GetNodeID() // Gets the node's node ID
balance, _ := node.GetAPIClient().XChainAPI().GetBalance(address,assetID,false) // Pretend these arguments are defined
```
After a network has been created and is healthy, you can add or remove nodes to/from the network:
```
newNode, _ := network.AddNode(nodeConfig)
err := network.RemoveNode(names[0])
```
Where `nodeConfig` is a struct which contains information about the new node to be created. For a local node, the most important elements are its name, its binary path and its identity, given by a TLS key/cert.
You can create a network where nodes are running different binaries -- just provide different binary paths to each:
```
stakingCert, stakingKey, err := staking.NewCertAndKeyBytes()
if err != nil {
return err
}
nodeConfig := node.Config{
Name: "New Node",
ImplSpecificConfig: local.NodeConfig{
BinaryPath: "/tmp/my-avalanchego/build",
},
StakingKey: stakingKey,
StakingCert: stakingCert,
}
```
After adding a node, you may want to call the network's `Healthy` method again and wait until the new node is healthy before making API calls to it.
### Creating Custom Networks
To create custom networks, pass a custom config (the second parameter) to the `local.NewNetwork(logging.Logger, network.Config)` function. The config defines the number of nodes when the network starts, the genesis state of the network, and the configs for each node.
Please refer to [NetworkConfig](https://github.com/ava-labs/avalanche-network-runner#network-creation) for more details.
# Import Collection
URL: /docs/tooling/avalanche-postman/add-postman-collection
We have made a Postman collection for Avalanche, that includes all the public API calls that are available on an [AvalancheGo instance](https://github.com/ava-labs/avalanchego/releases/), including environment variables, allowing developers to quickly issue commands to a node and see the response, without having to copy and paste long and complicated `curl` commands.
[Link to GitHub](https://github.com/ava-labs/avalanche-postman-collection/)
## What Is Postman?[](#what-is-postman "Direct link to heading")
Postman is a free tool used by developers to quickly and easily send REST, SOAP, and GraphQL requests and test APIs. It is available as both an online tool and an application for Linux, MacOS and Windows. Postman allows you to quickly issue API calls and see the responses in a nicely formatted, searchable form.
Along with the API collection, there is also the example Avalanche environment for Postman, that defines common variables such as IP address of the node, Avalanche addresses and similar common elements of the queries, so you don't have to enter them multiple times.
Combined, they will allow you to easily keep tabs on an Avalanche node, check on its state and do quick queries to find out details about its operation.
## Setup[](#setup "Direct link to heading")
### Postman Installation[](#postman-installation "Direct link to heading")
Postman can be installed locally or used as a web app. We recommend installing the application, as it simplifies operation. You can download Postman from its [website](https://www.postman.com/downloads/). It is recommended that you sign up using your email address as then your workspace can be easily backed up and shared between the web app and the app installed on your computer.
When you run Postman for the first time, it will prompt you to create an account or log in. Again, it is not necessary, but recommended.
### Collection Import[](#collection-import "Direct link to heading")
Select `Create workspace` from Workspaces tab and follow the prompts to create a new workspace. This will be where the rest of the work will be done.

We're ready to import the collection. On the top-left corner of the Workspaces tab select `Import` and switch to `Link` tab.

There, in the URL input field paste the link below to the collection:
```bash
https://raw.githubusercontent.com/ava-labs/avalanche-postman-collection/master/Avalanche.postman_collection.json
```
Postman will recognize the format of the file content and offer to import the file as a collection. Complete the import. Now you will have Avalanche collection in your Workspace.
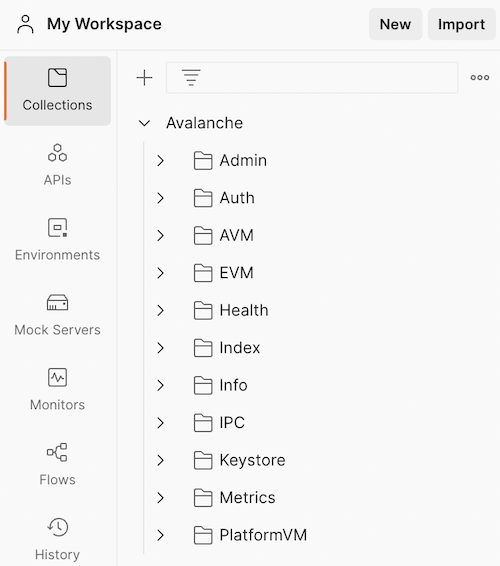
### Environment Import[](#environment-import "Direct link to heading")
Next, we have to import the environment variables. Again, on the top-left corner of the Workspaces tab select `Import` and switch to `Link` tab. This time, paste the link below to the environment JSON:
```bash
https://raw.githubusercontent.com/ava-labs/avalanche-postman-collection/master/Example-Avalanche-Environment.postman_environment.json
```
Postman will recognize the format of the file:
Import it to your workspace. Now, we will need to edit that environment to suit the actual parameters of your particular installation. These are the parameters that differ from the defaults in the imported file.
Select the Environments tab, choose the Avalanche environment which was just added. You can directly edit any values here:
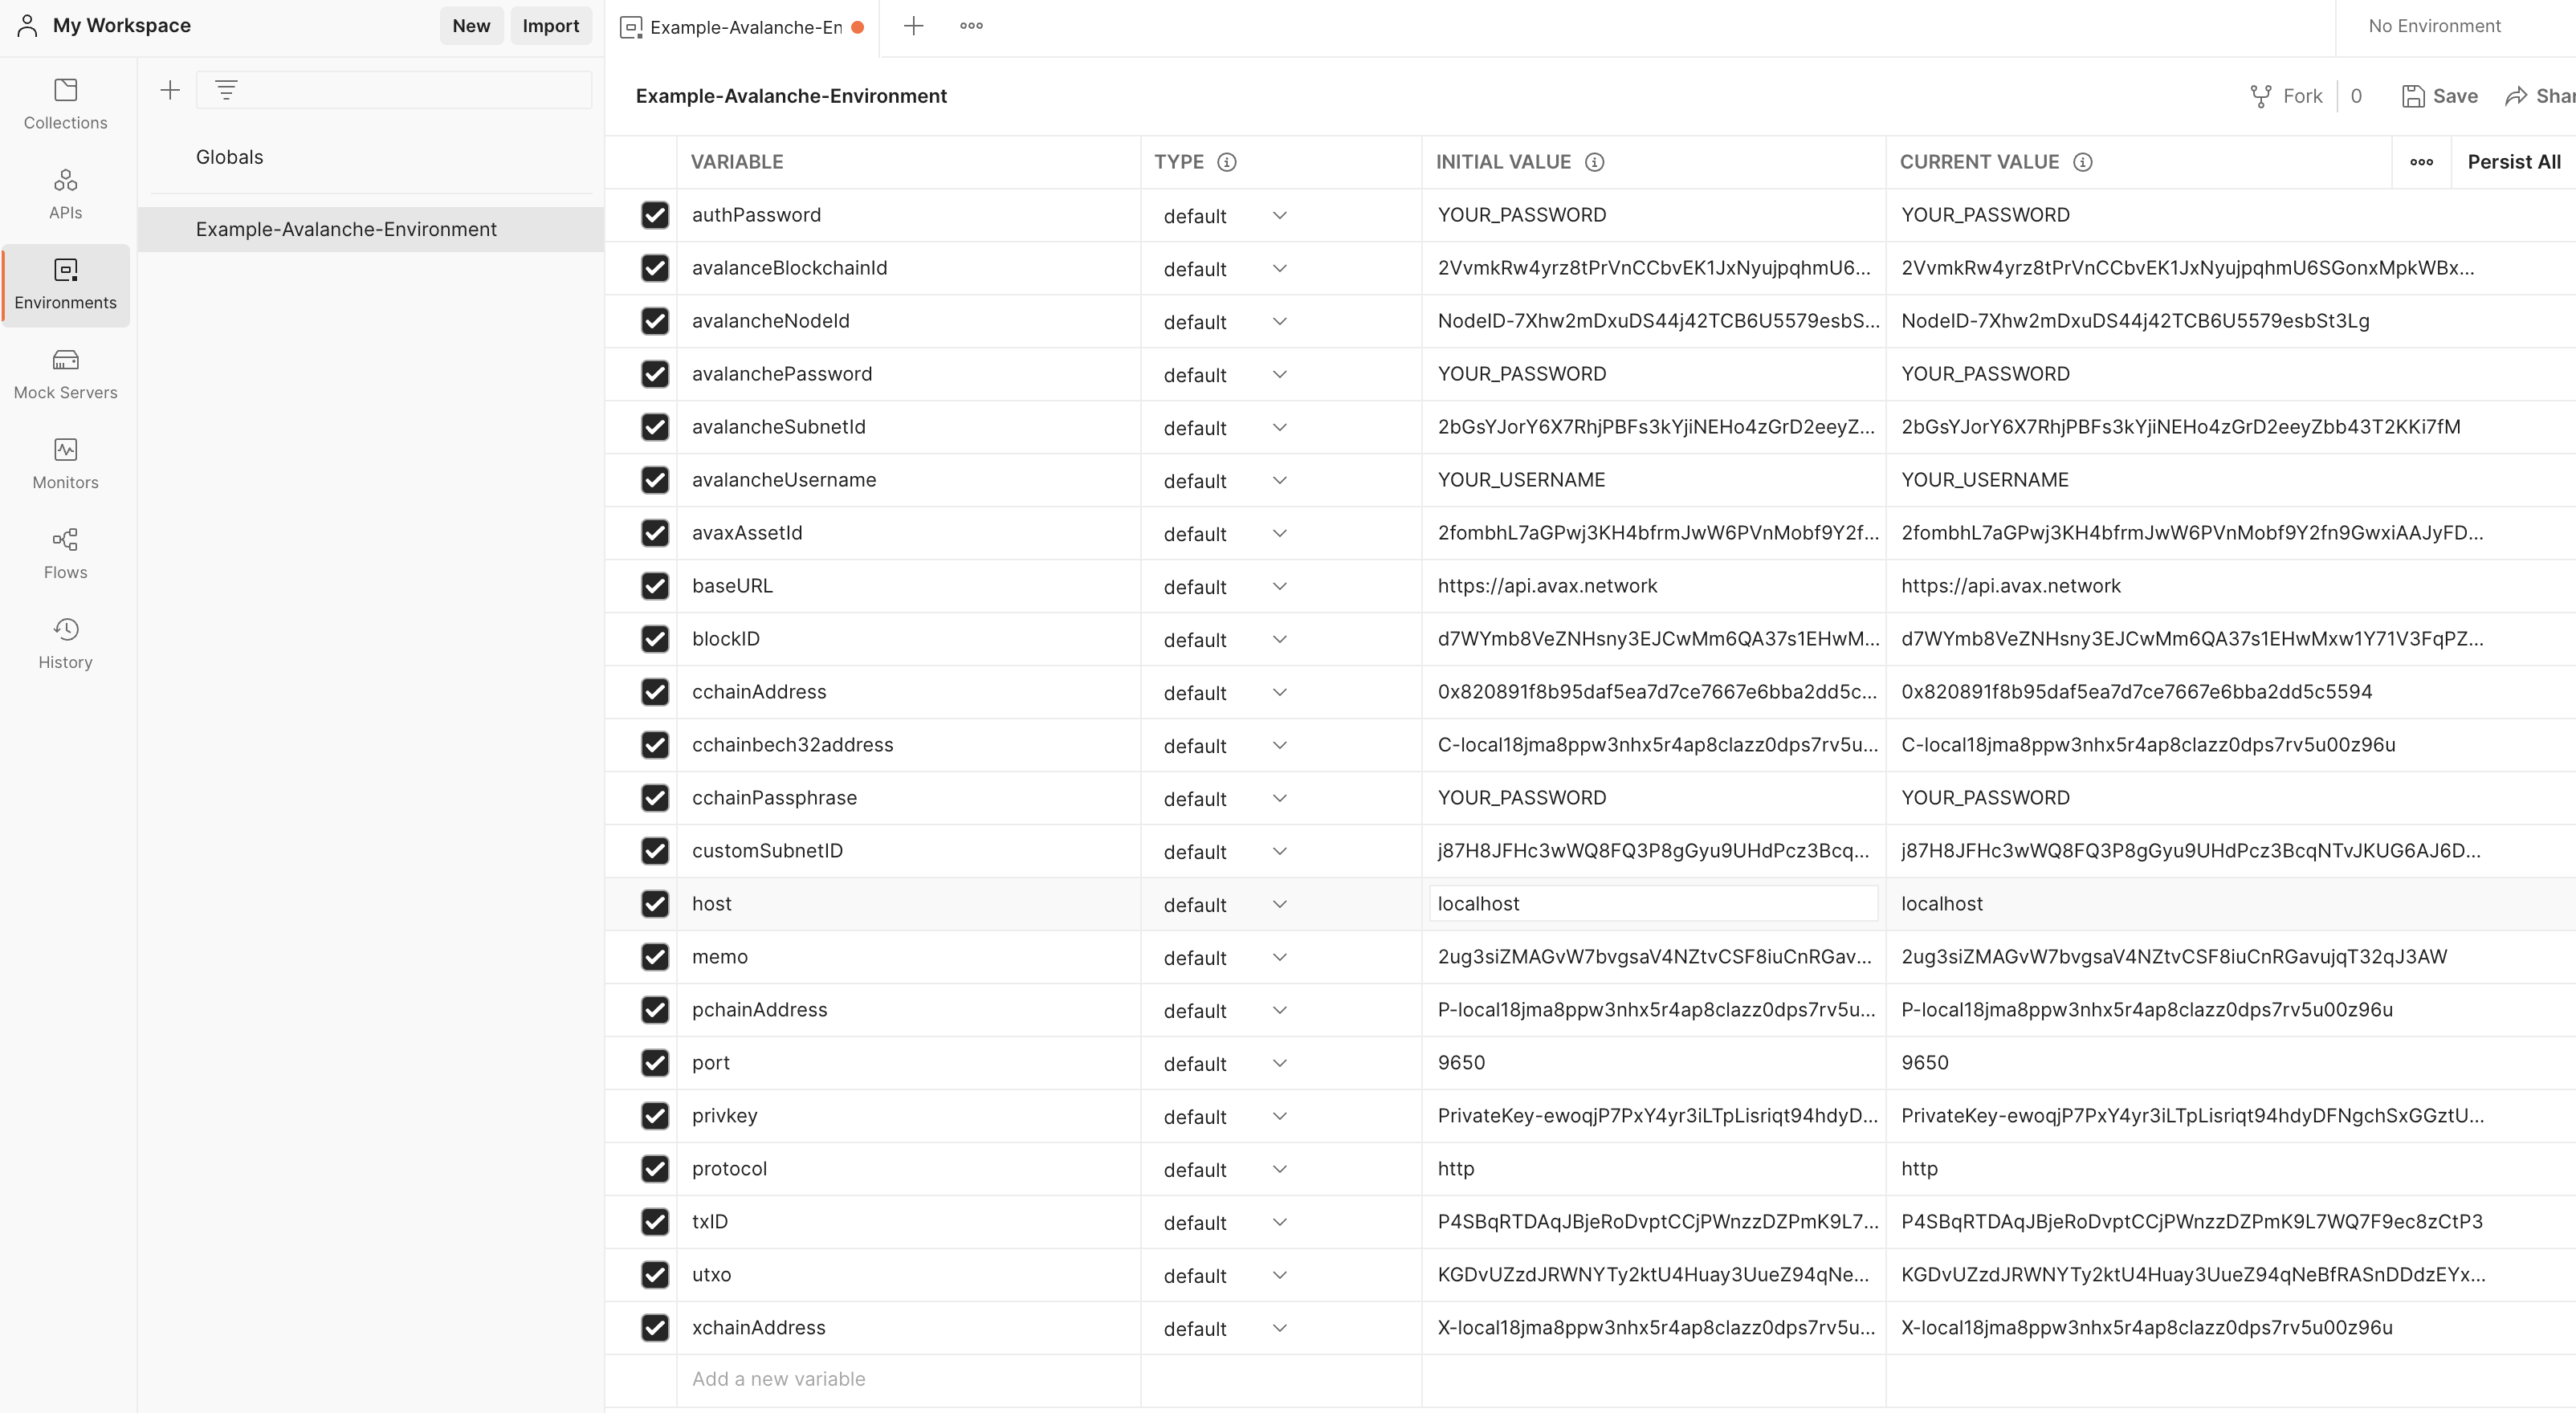
As a minimum, you will need to change the IP address of your node, which is the value of the `host` variable. Change it to the IP of your node (change both the `initial` and `current` values). Also, if your node is not running on the same machine where you installed Postman, make sure your node is accepting the connections on the API port from the outside by checking the appropriate [command line option](/docs/nodes/configure/configs-flags#http-server).
Now we sorted everything out, and we're ready to query the node.
## Conclusion[](#conclusion "Direct link to heading")
If you have completed the tutorial, you are now able to quickly [issue API calls](/docs/tooling/avalanche-postman/making-api-calls) to your node without messing with the curl commands in the terminal. This allows you to quickly see the state of your node, track changes or double-check the health or liveness of your node.
## Contributing[](#contributing "Direct link to heading")
We're hoping to continuously keep this collection up-to-date with the [Avalanche APIs](/docs/api-reference/p-chain/api). If you're able to help improve the Avalanche Postman Collection in any way, first create a feature branch by branching off of `master`, next make the improvements on your feature branch and lastly create a [pull request](https://github.com/ava-labs/builders-hub/pulls) to merge your work back in to `master`.
If you have any other questions or suggestions, come [talk to us](https://chat.avalabs.org/).
# Data Visualization
URL: /docs/tooling/avalanche-postman/data-visualization
Data visualization is available for a number of API calls whose responses are transformed and presented in tabular format for easy reference.
Please check out [Setting up Postman](/docs/tooling/avalanche-postman/add-postman-collection#setup) and [Making API Calls](/docs/tooling/avalanche-postman/making-api-calls) beforehand, as this guide assumes that the user has already gone through these steps.
Data visualizations are available for following API calls:
### C-Chain[](#c-chain "Direct link to heading")
* [`eth_baseFee`](/docs/api-reference/c-chain/api#eth_basefee)
* [`eth_blockNumber`](https://www.quicknode.com/docs/ethereum/eth_blockNumber)
* [`eth_chainId`](https://www.quicknode.com/docs/ethereum/eth_chainId)
* [`eth_getBalance`](https://www.quicknode.com/docs/ethereum/eth_getBalance)
* [`eth_getBlockByHash`](https://www.quicknode.com/docs/ethereum/eth_getBlockByHash)
* [`eth_getBlockByNumber`](https://www.quicknode.com/docs/ethereum/eth_getBlockByNumber)
* [`eth_getTransactionByHash`](https://www.quicknode.com/docs/ethereum/eth_getTransactionByHash)
* [`eth_getTransactionReceipt`](https://www.quicknode.com/docs/ethereum/eth_getTransactionReceipt)
* [`avax.getAtomicTx`](/docs/api-reference/c-chain/api#avaxgetatomictx)
### P-Chain[](#p-chain "Direct link to heading")
* [`platform.getCurrentValidators`](/docs/api-reference/p-chain/api#platformgetcurrentvalidators)
### X-Chain[](#x-chain "Direct link to heading")
* [`avm.getAssetDescription`](/docs/api-reference/x-chain/api#avmgetassetdescription)
* [`avm.getBlock`](/docs/api-reference/x-chain/api#avmgetblock)
* [`avm.getBlockByHeight`](/docs/api-reference/x-chain/api#avmgetblockbyheight)
* [`avm.getTx`](/docs/api-reference/x-chain/api#avmgettx)
## Data Visualization Features[](#data-visualization-features "Direct link to heading")
* The response output is displayed in tabular format, each data category having a different color.
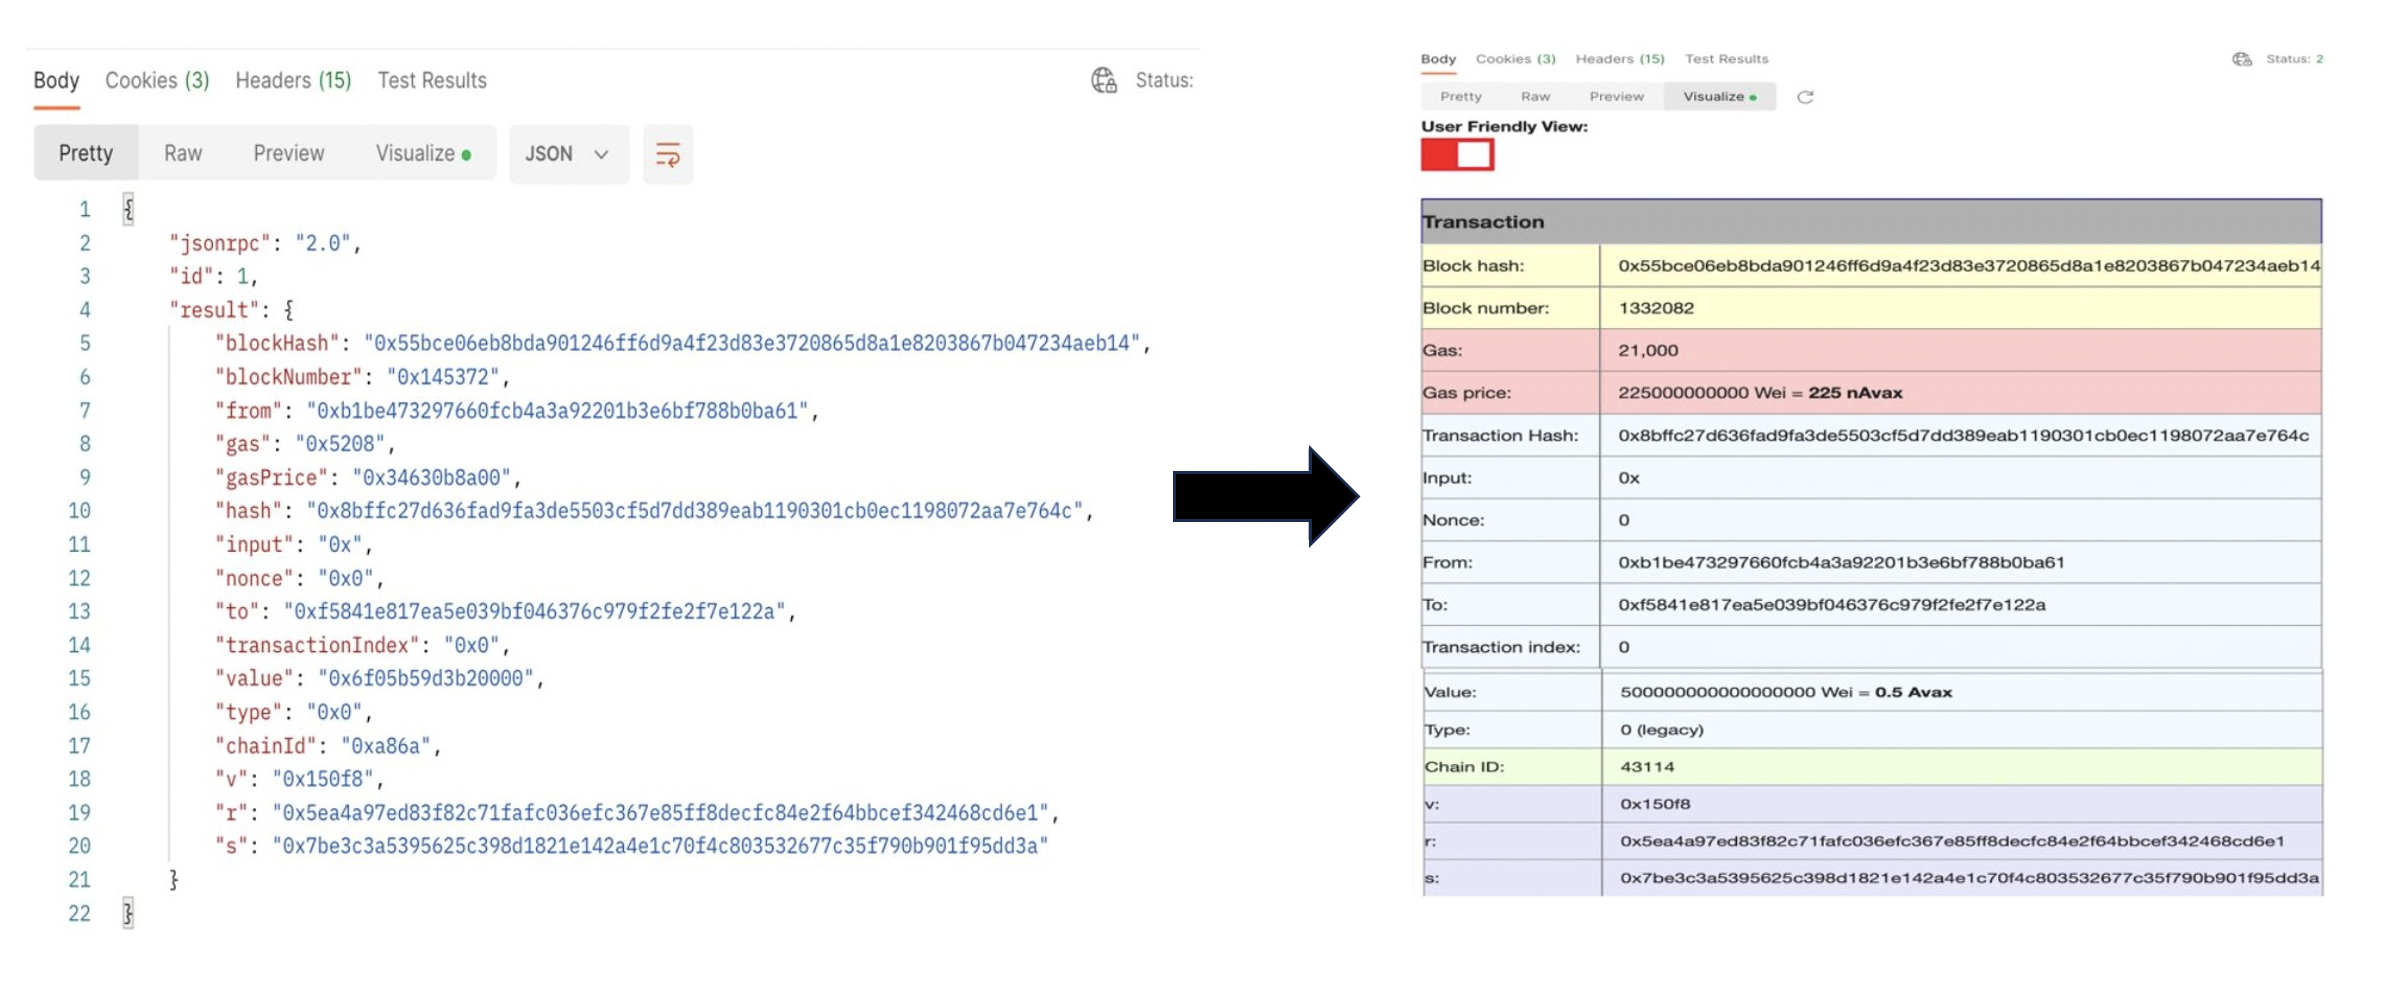
* Unix timestamps are converted to date and time.

* Hexadecimal to decimal conversions.

* Native token amounts shown as AVAX and/or gwei and wei.

* The name of the transaction type added besides the transaction type ID.

* Percentages added for the amount of gas used. This percent represents what percentage of gas was used our of the `gasLimit`.

* Convert the output for atomic transactions from hexadecimal to user readable.
Please note that this only works for C-Chain Mainnet, not Fuji.
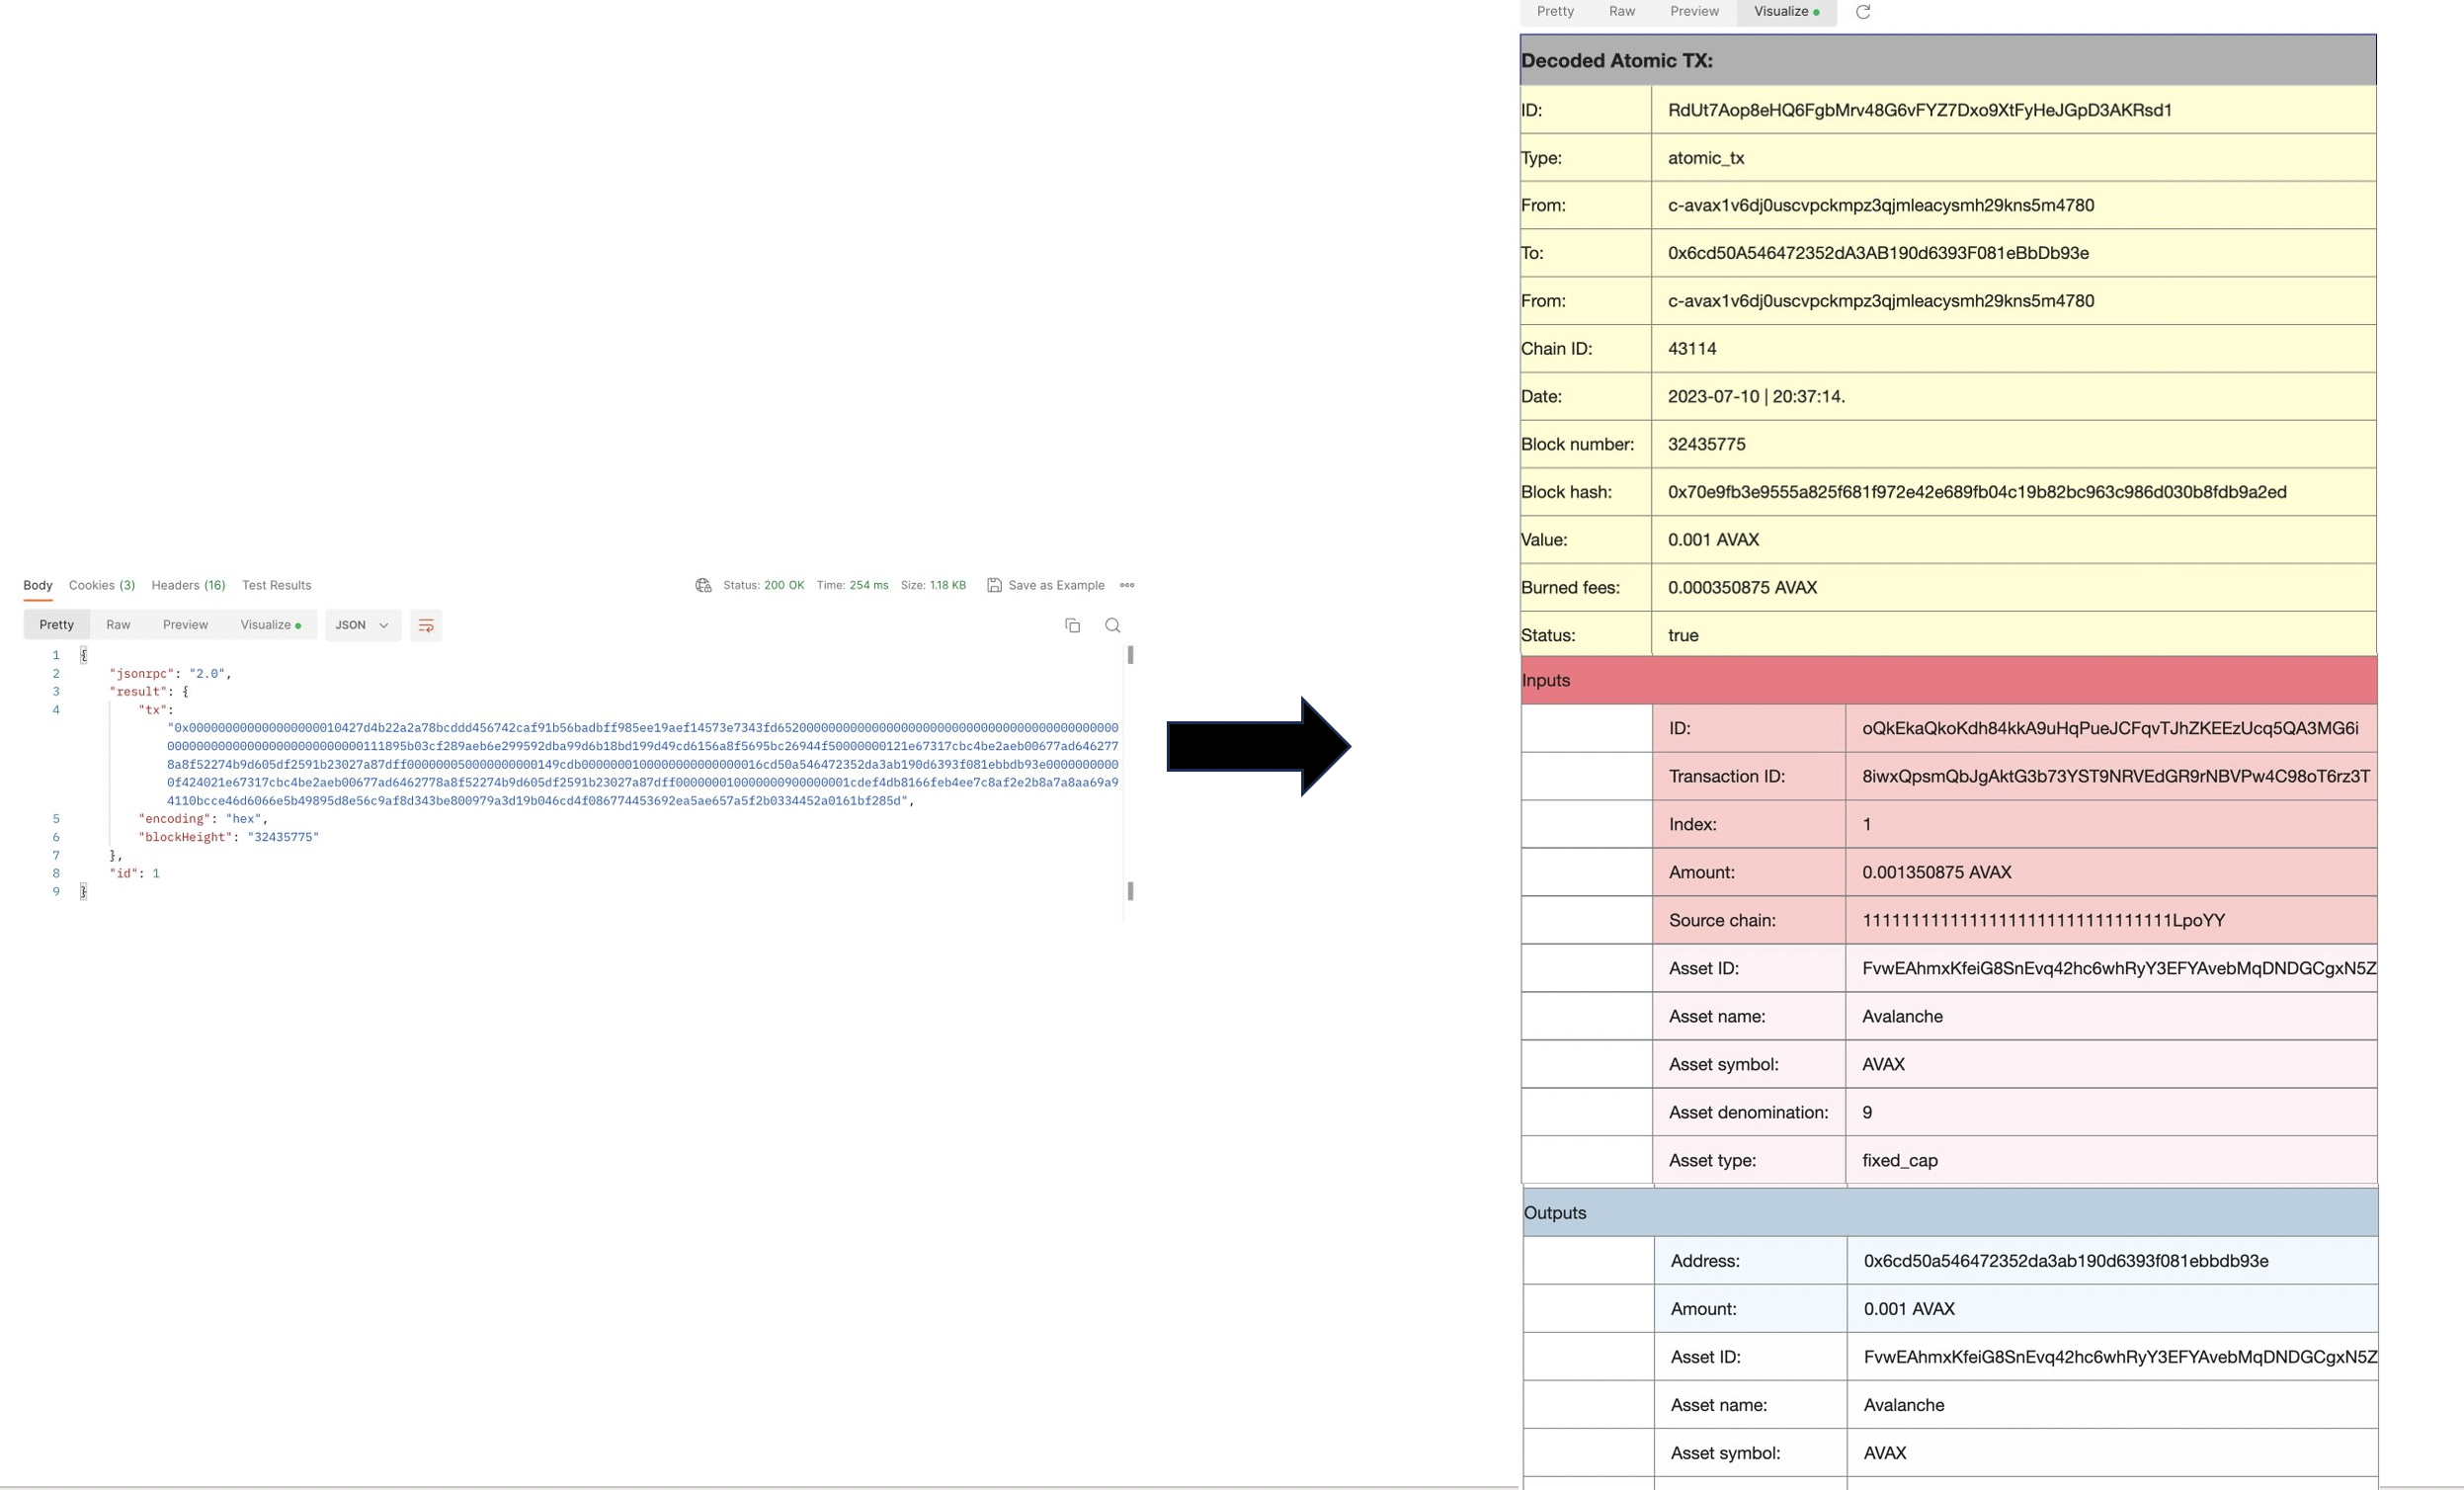
## How to Visualize Responses[](#how-to-visualize-responses "Direct link to heading")
1. After [installing Postman](/docs/tooling/avalanche-postman/add-postman-collection#postman-installation) and importing the [Avalanche collection](/docs/tooling/avalanche-postman/add-postman-collection#collection-import), choose an API to make the call.
2. Make the call.
3. Click on the **Visualize** tab.
4. Now all data from the output is displayed in tabular format.
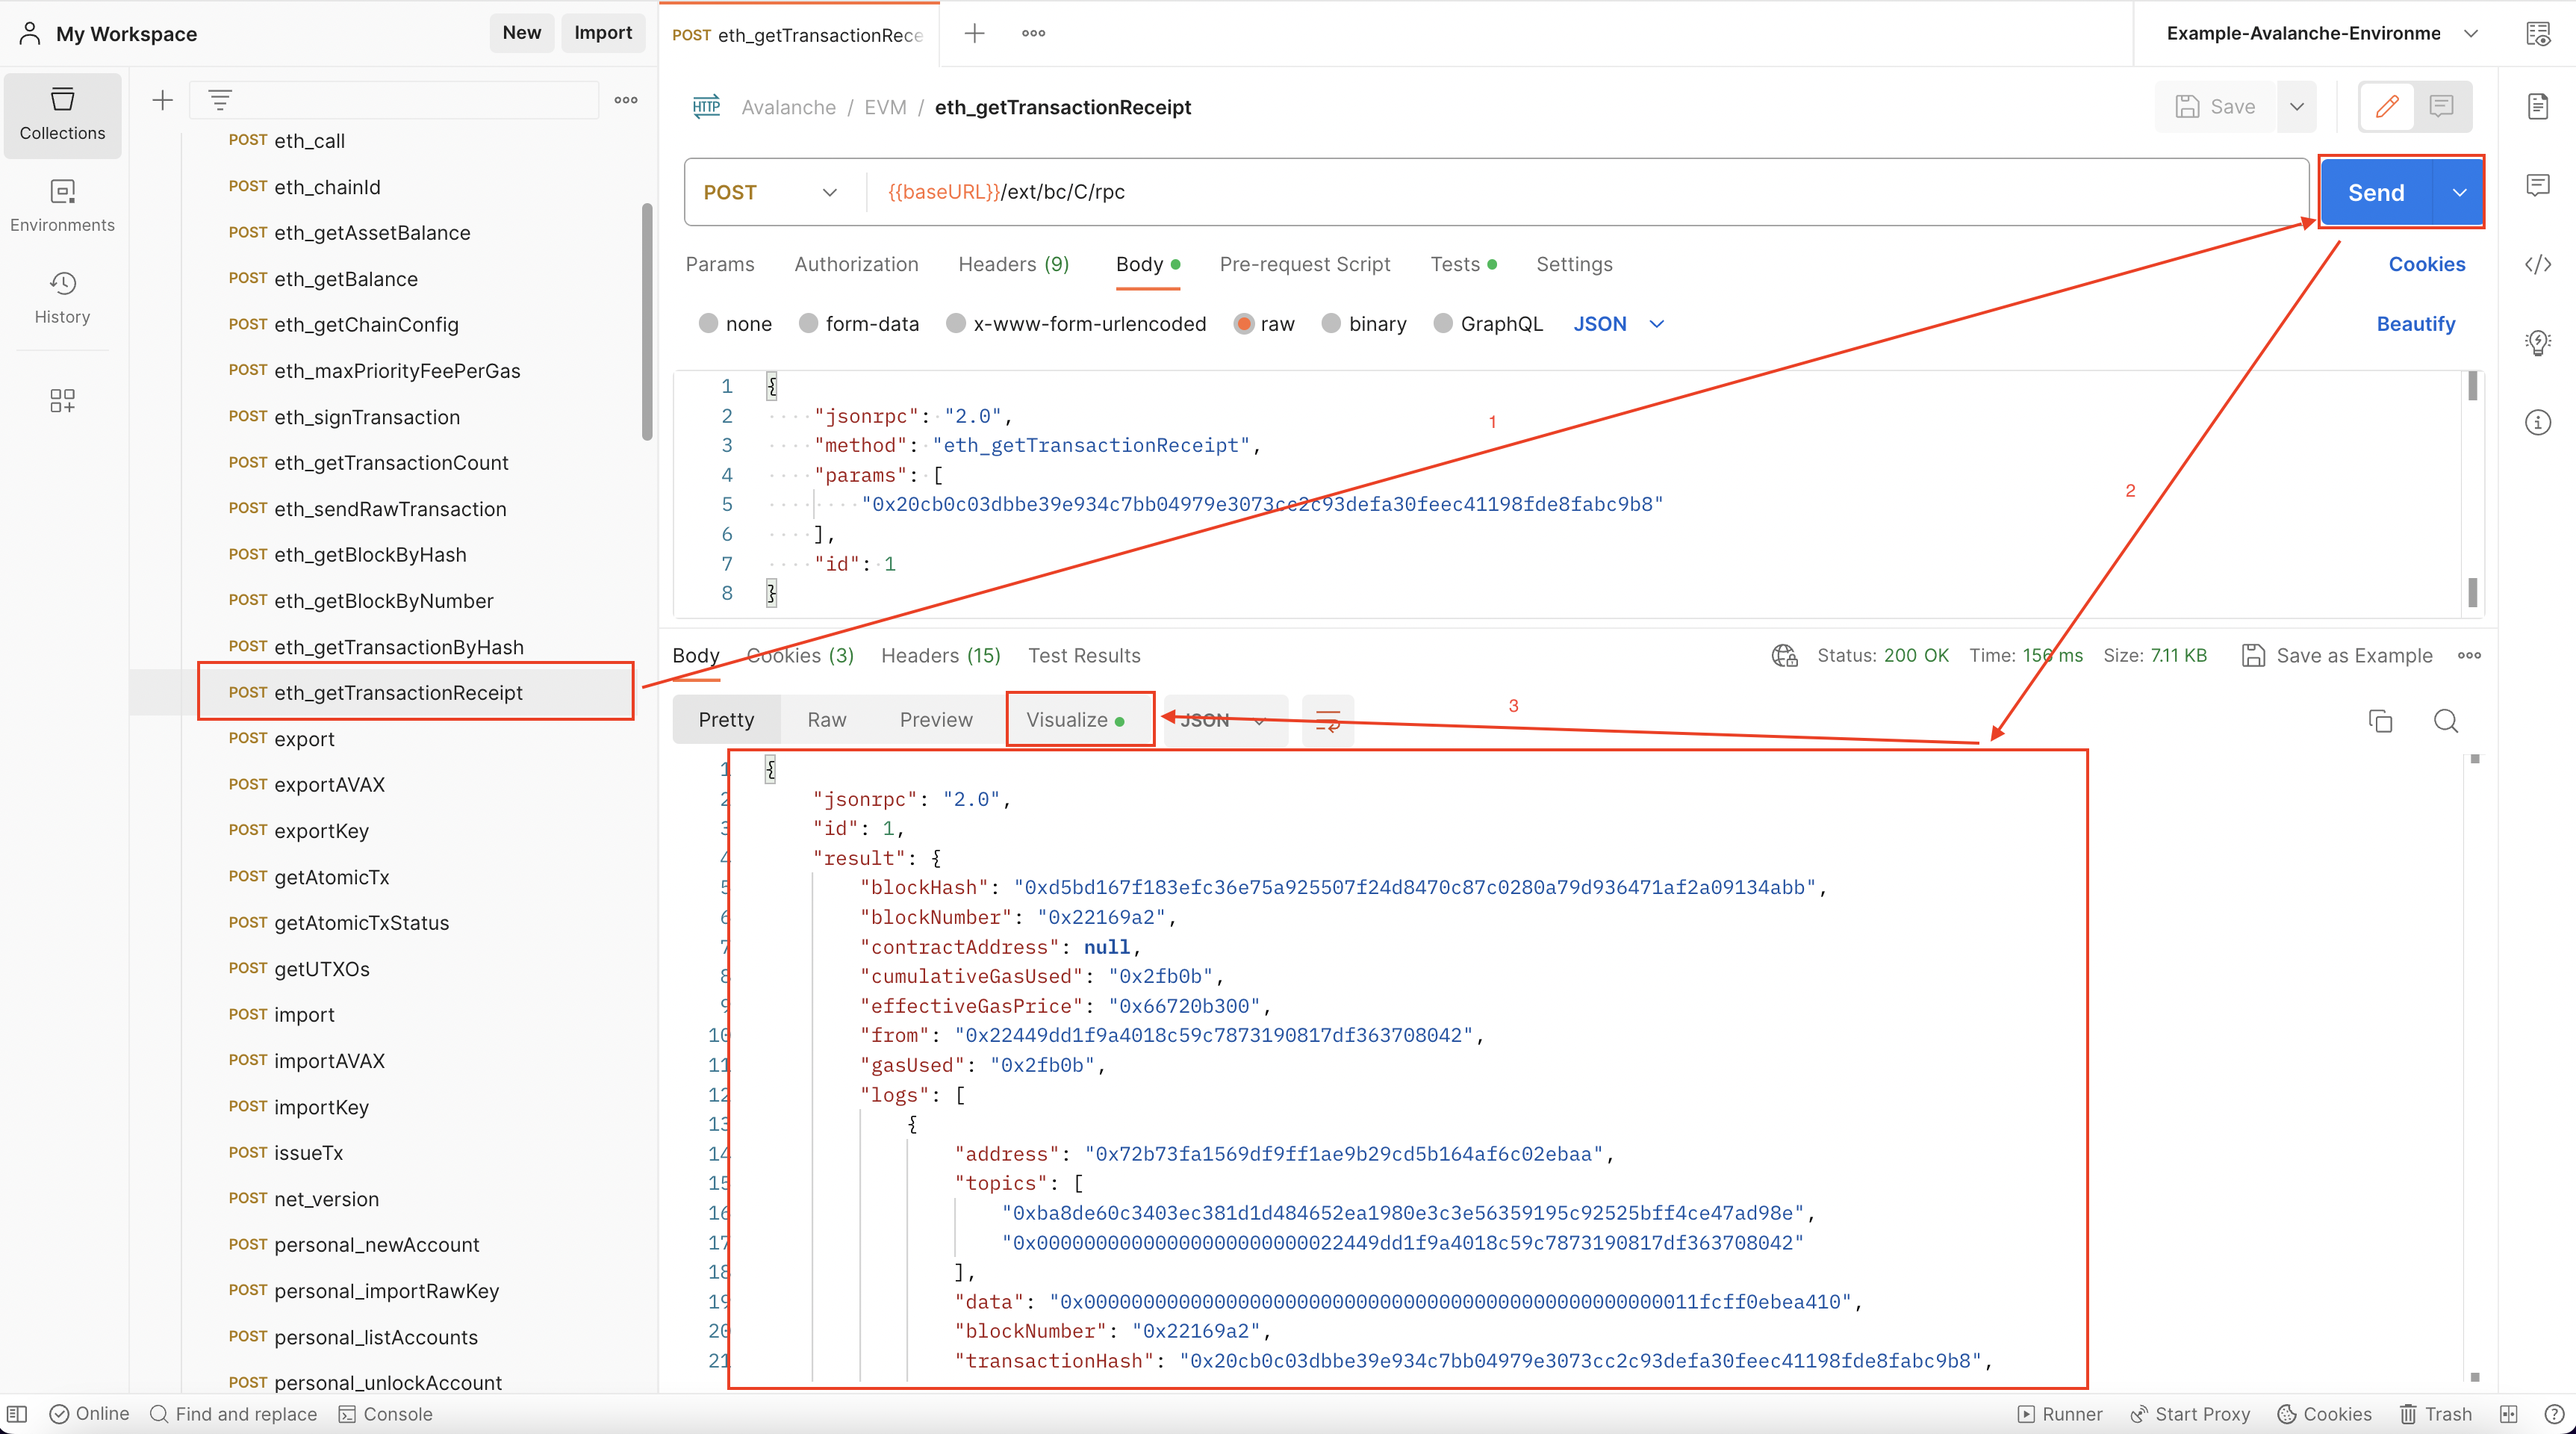 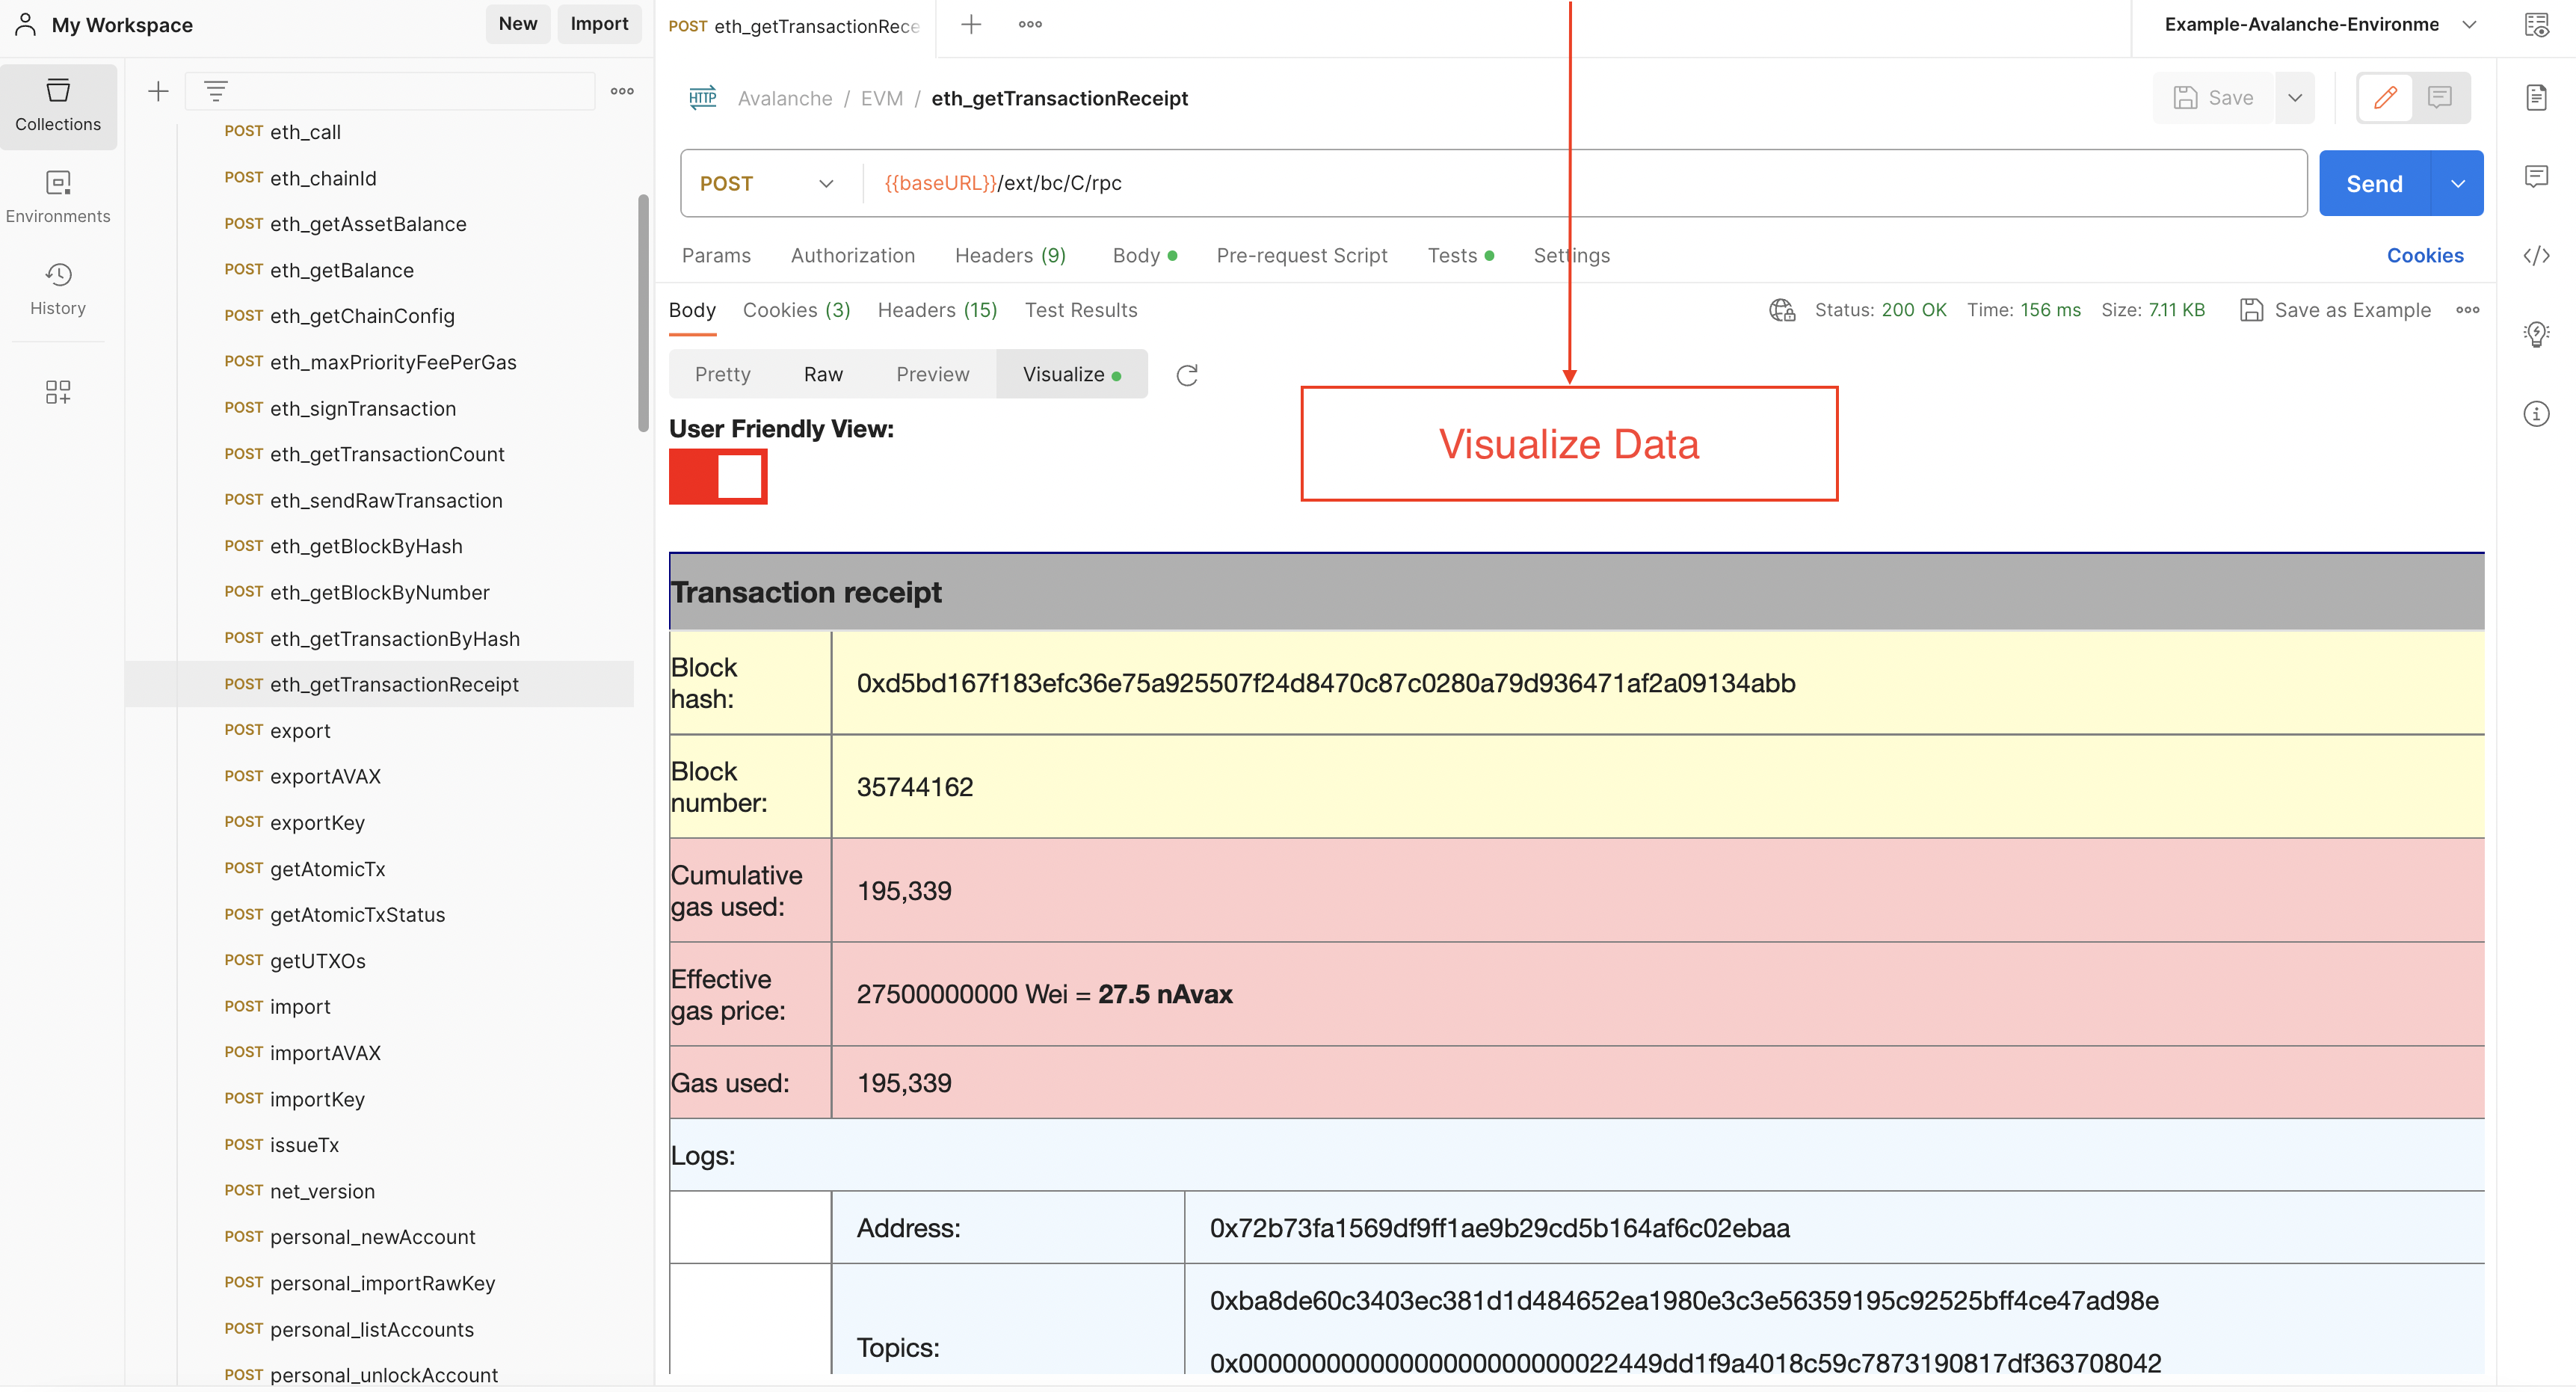
## Examples[](#examples "Direct link to heading")
### `eth_getTransactionByHash`[](#eth_gettransactionbyhash "Direct link to heading")
### `avm.getBlock`[](#avmgetblock "Direct link to heading")
### `platform.getCurrentValidators`[](#platformgetcurrentvalidators "Direct link to heading")
### `avax.getAtomicTx`[](#avaxgetatomictx "Direct link to heading")
### `eth_getBalance`[](#eth_getbalance "Direct link to heading")
# Making API Calls
URL: /docs/tooling/avalanche-postman/making-api-calls
After [installing Postman](/docs/tooling/avalanche-postman/add-postman-collection#setup) and importing the [Avalanche collection](/docs/tooling/avalanche-postman/add-postman-collection#collection-import), you can choose an API to make the call.
You should also make sure the URL is the correct one for the call. This URL consists of the base URL and the endpoint:
* The base URL is set by an environment variable called `baseURL`, and it is by default Avalanche's [public API](/docs/tooling/rpc-providers#mainnet-rpc---public-api-server). If you need to make a local API call, simply change the URL to localhost. This can be done by changing the value of the `baseURL` variable or changing the URL directly on the call tab. Check out the [RPC providers](/docs/tooling/rpc-providers) to see all public URLs.
* The API endpoint depends on which API is used. Please check out [our APIs](/docs/api-reference/c-chain/api) to find the proper endpoint.
The last step is to add the needed parameters for the call. For example, if a user wants to fetch data about a certain transaction, the transaction hash is needed. For fetching data about a block, depending on the call used, the block hash or number will be required.
After clicking the **Send** button, if the call is successfully, the output will be displayed in the **Body** tab.
Data visualization is available for a number of methods. Learn how to use it with the help of [this](/docs/tooling/avalanche-postman/data-visualization) guide.
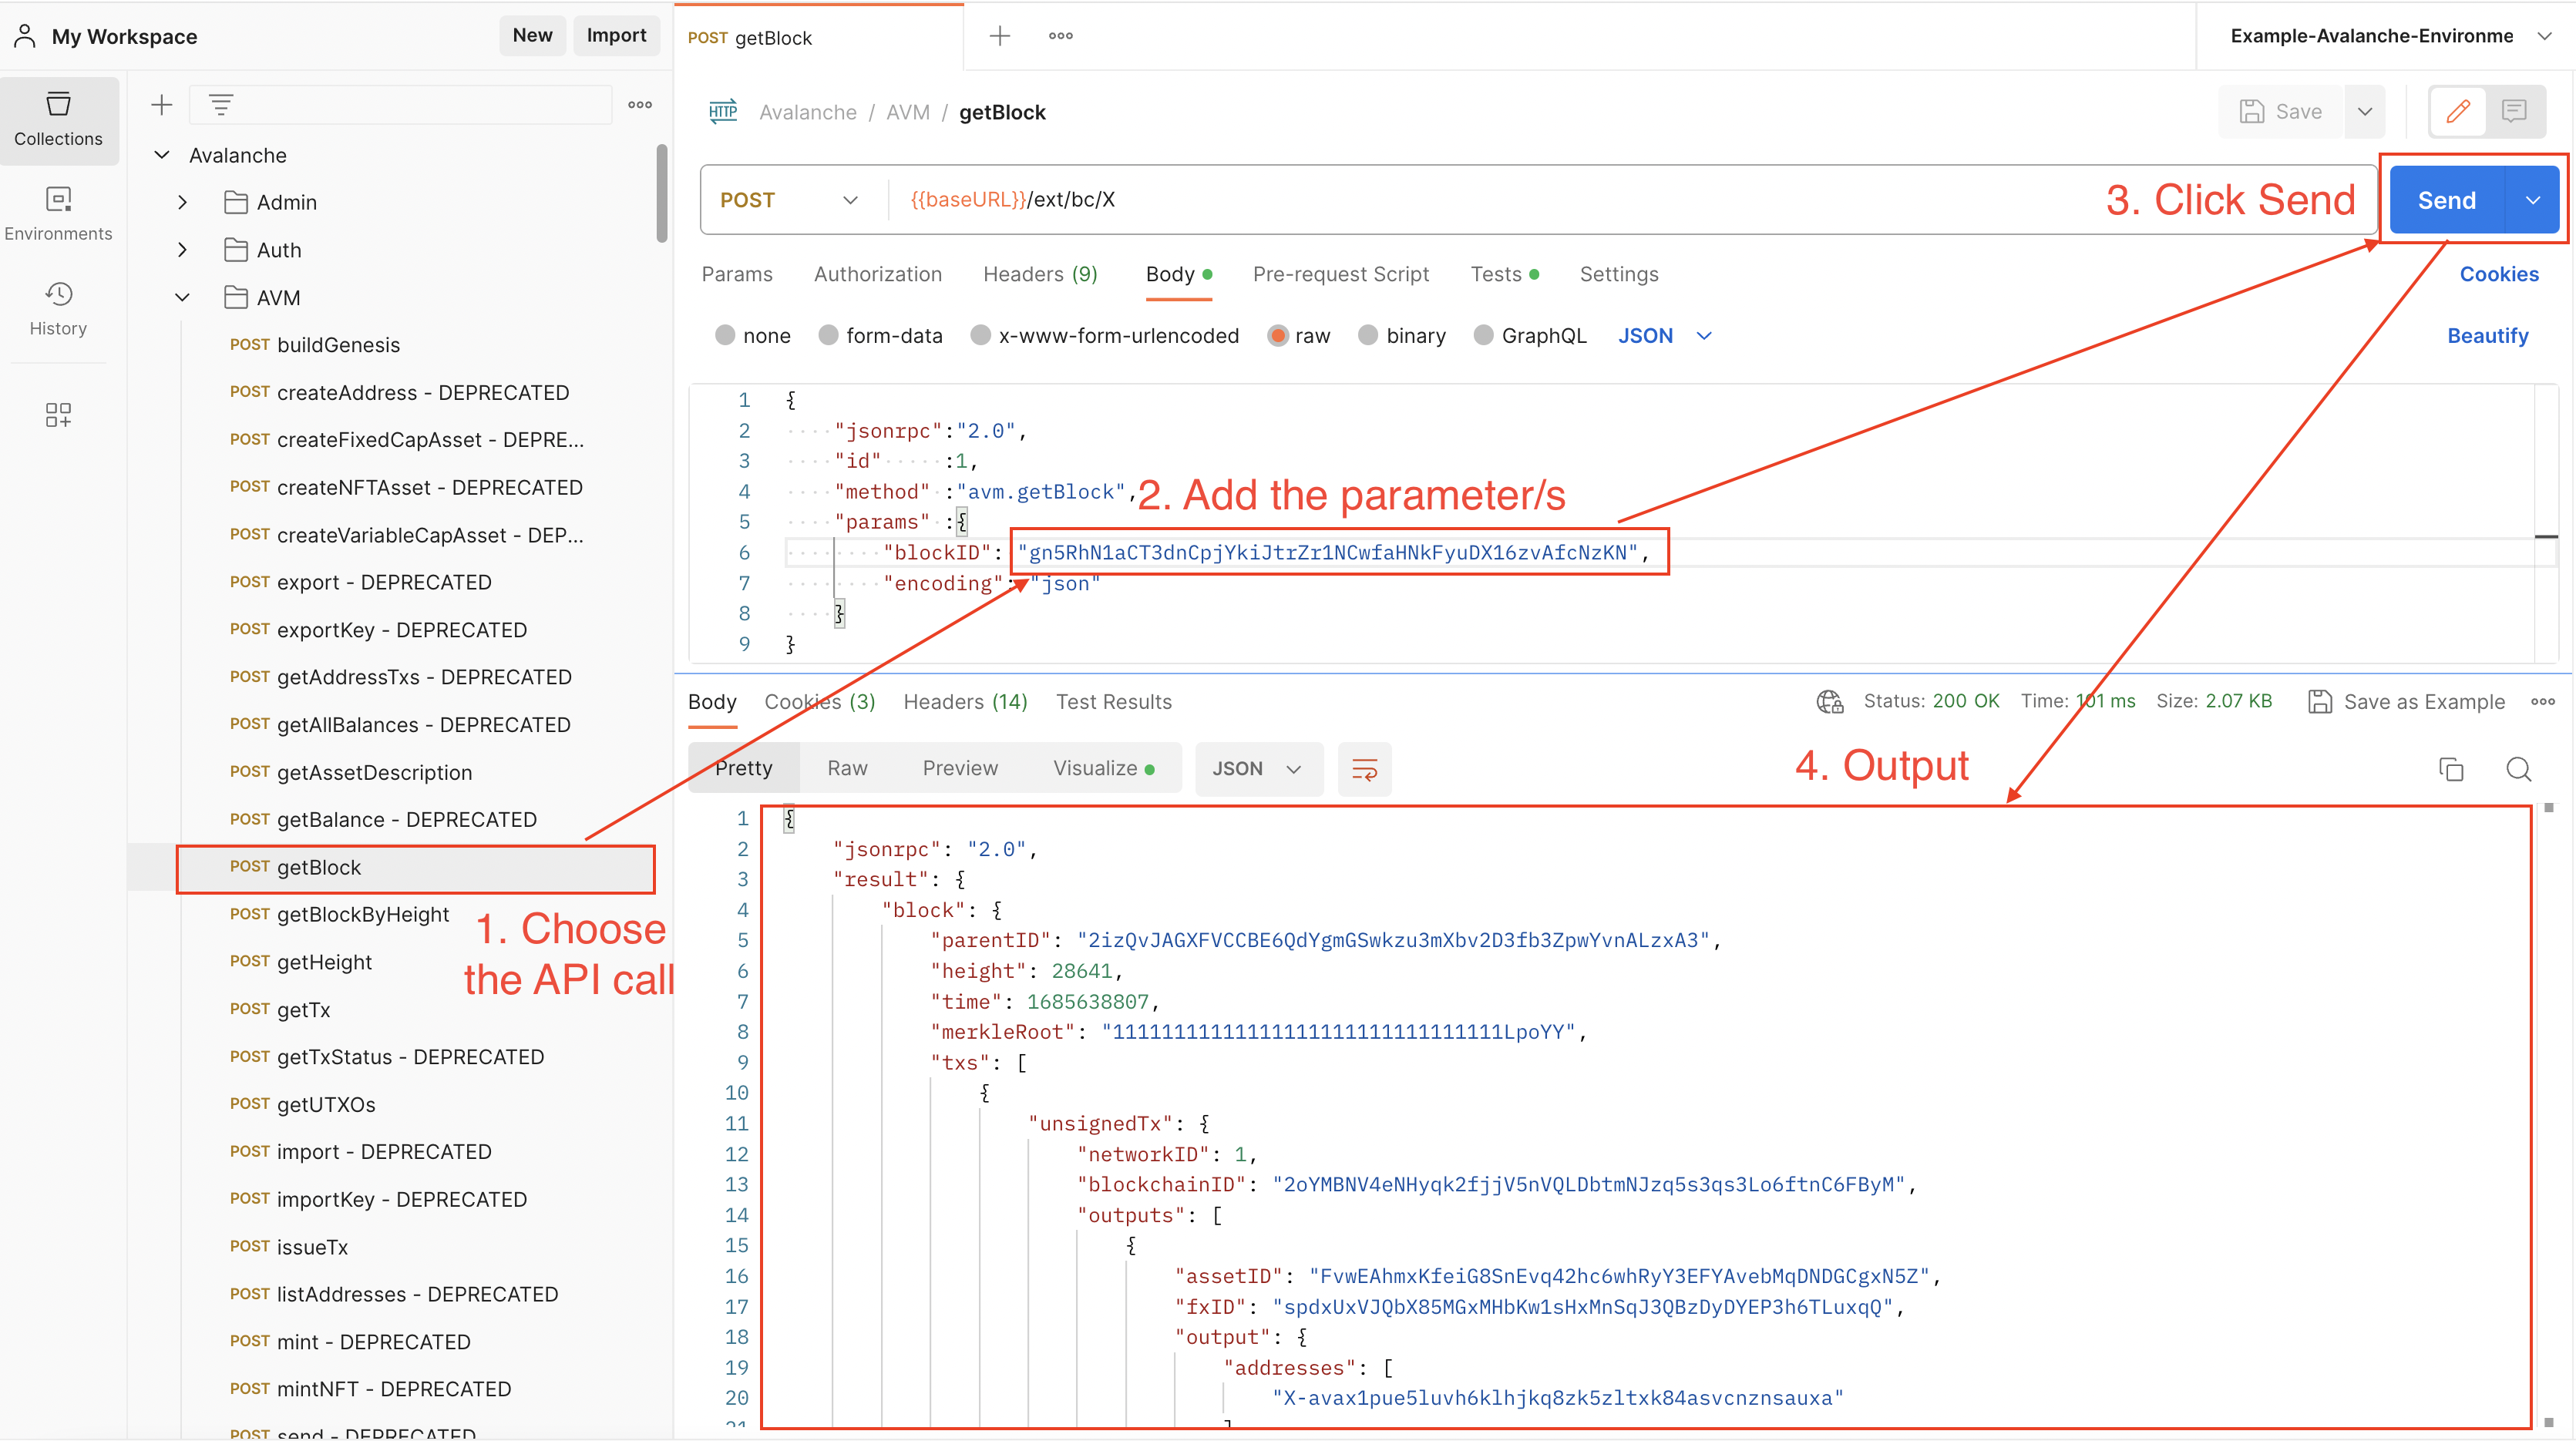
## Examples[](#examples "Direct link to heading")
### C-Chain Public API Call[](#c-chain-public-api-call "Direct link to heading")
Fetching data about a C-Chain transaction using `eth_getTransactionByHash`.
### X-Chain Public API Call[](#x-chain-public-api-call "Direct link to heading")
Fetching data about an X-Chain block using `avm.getBlock`.
### P-Chain Public API Call[](#p-chain-public-api-call "Direct link to heading")
Getting the current P-Chain height using `platform.getHeight`.
### API Call Using Variables[](#api-call-using-variables "Direct link to heading")
Let's say we want fetch data about this `0x20cb0c03dbbe39e934c7bb04979e3073cc2c93defa30feec41198fde8fabc9b8` C-Chain transaction using both:
* `eth_getTransactionReceipt`
* `eth_getTransactionByHash`
We can set up an environment variable with the transaction hash as value and use it on both calls.
Find out more about variables [here](/docs/tooling/avalanche-postman/variables).
# Variable Types
URL: /docs/tooling/avalanche-postman/variables
Variables at different scopes are supported by Postman, as it follows:
* **Global variables**: A global variable can be used with every collection. Basically, it allows user to access data between collections.
* **Collection variables**: They are available for a certain collection and are independent of an environment.
* **Environment variables**: An environment allows you to use a set of variables, which are called environment variables. Every collection can use an environment at a time, but the same environment can be used with multiple collections. This type of variables make the most sense to use with the Avalanche Postman collection, therefore an environment file with preset variables is provided
* **Data variables**: Provided by external CSV and JSON files.
* **Local variables**: Temporary variables that can be used in a script. For example, the returned block number from querying a transaction can be a local variable. It exists only for that request, and it will change when fetching data for another transaction hash.
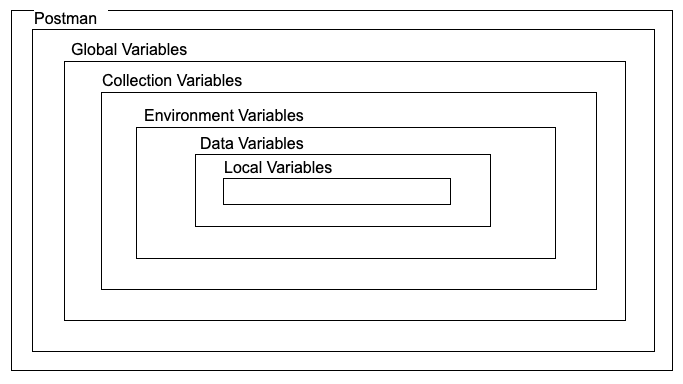
There are two types of variables:
* **Default type**: Every variable is automatically assigned this type when created.
* **Secret type**: Masks variable's value. It is used to store sensitive data.
Only default variables are used in the Avalanche Environment file. To learn more about using the secret type of variables, please checkout the [Postman documentation](https://learning.postman.com/docs/sending-requests/variables/#variable-types).
The [environment variables](/docs/tooling/avalanche-postman/add-postman-collection#environment-import) can be used to ease the process of making an API call. A variable contains the preset value of an API parameter, therefore it can be used in multiple places without having to add the value manually.
## How to Use Variables[](#how-to-use-variables "Direct link to heading")
Let's say we want to use both `eth_getTransactionByHash` and `eth_getTransctionReceipt` for a transaction with the following hash: `0x631dc45342a47d360915ea0d193fc317777f8061fe57b4a3e790e49d26960202`. We can set a variable which contains the transaction hash, and then use it on both API calls. Then, when wanting to fetch data about another transaction, the variable can be updated and the new transaction hash will be used again on both calls.
Below are examples on how to set the transaction hash as variable of each scope.
### Set a Global Variable[](#set-a-global-variable "Direct link to heading")
Go to Environments
Select Globals

Click on the Add a new variable area
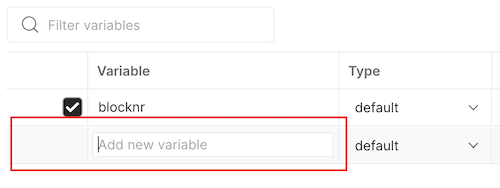
Add the variable name and value. Make sure to use quotes.

Click Save

Now it can be used on any call from any collection
### Set a Collection Variable[](#set-a-collection-variable "Direct link to heading")
Click on the three dots next to the Avalanche collection and select Edit
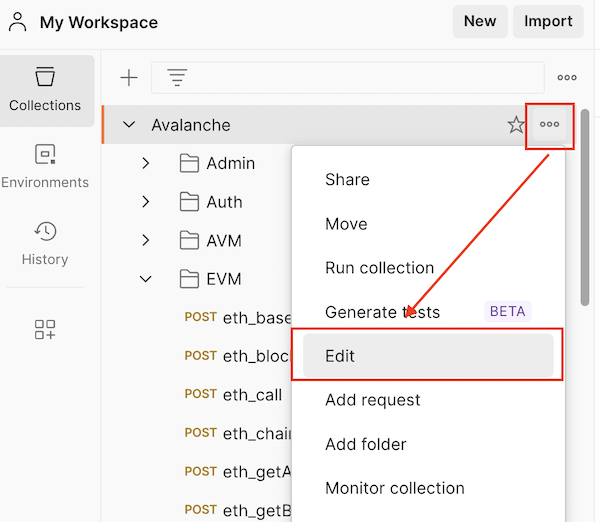
Go to the Variables tab
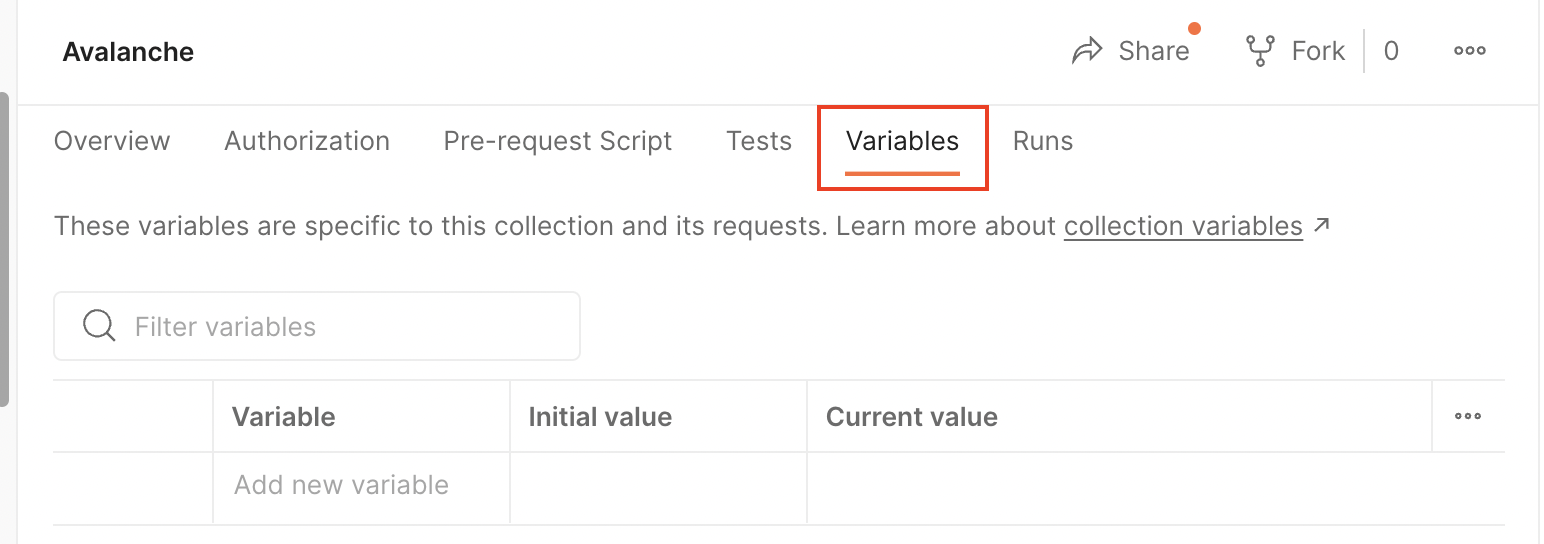
Click on the Add a new variable area

Add the variable name and value. Make sure to use quotes.

Click Save

Now it can be used on any call from this collection
### Set an Environment Variable[](#set-an-environment-variable "Direct link to heading")
Go to Environments
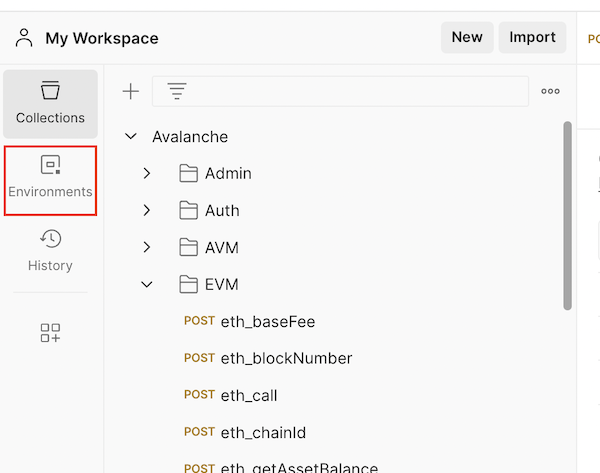
Select an environment. In this case, it is Example-Avalanche-Environment.
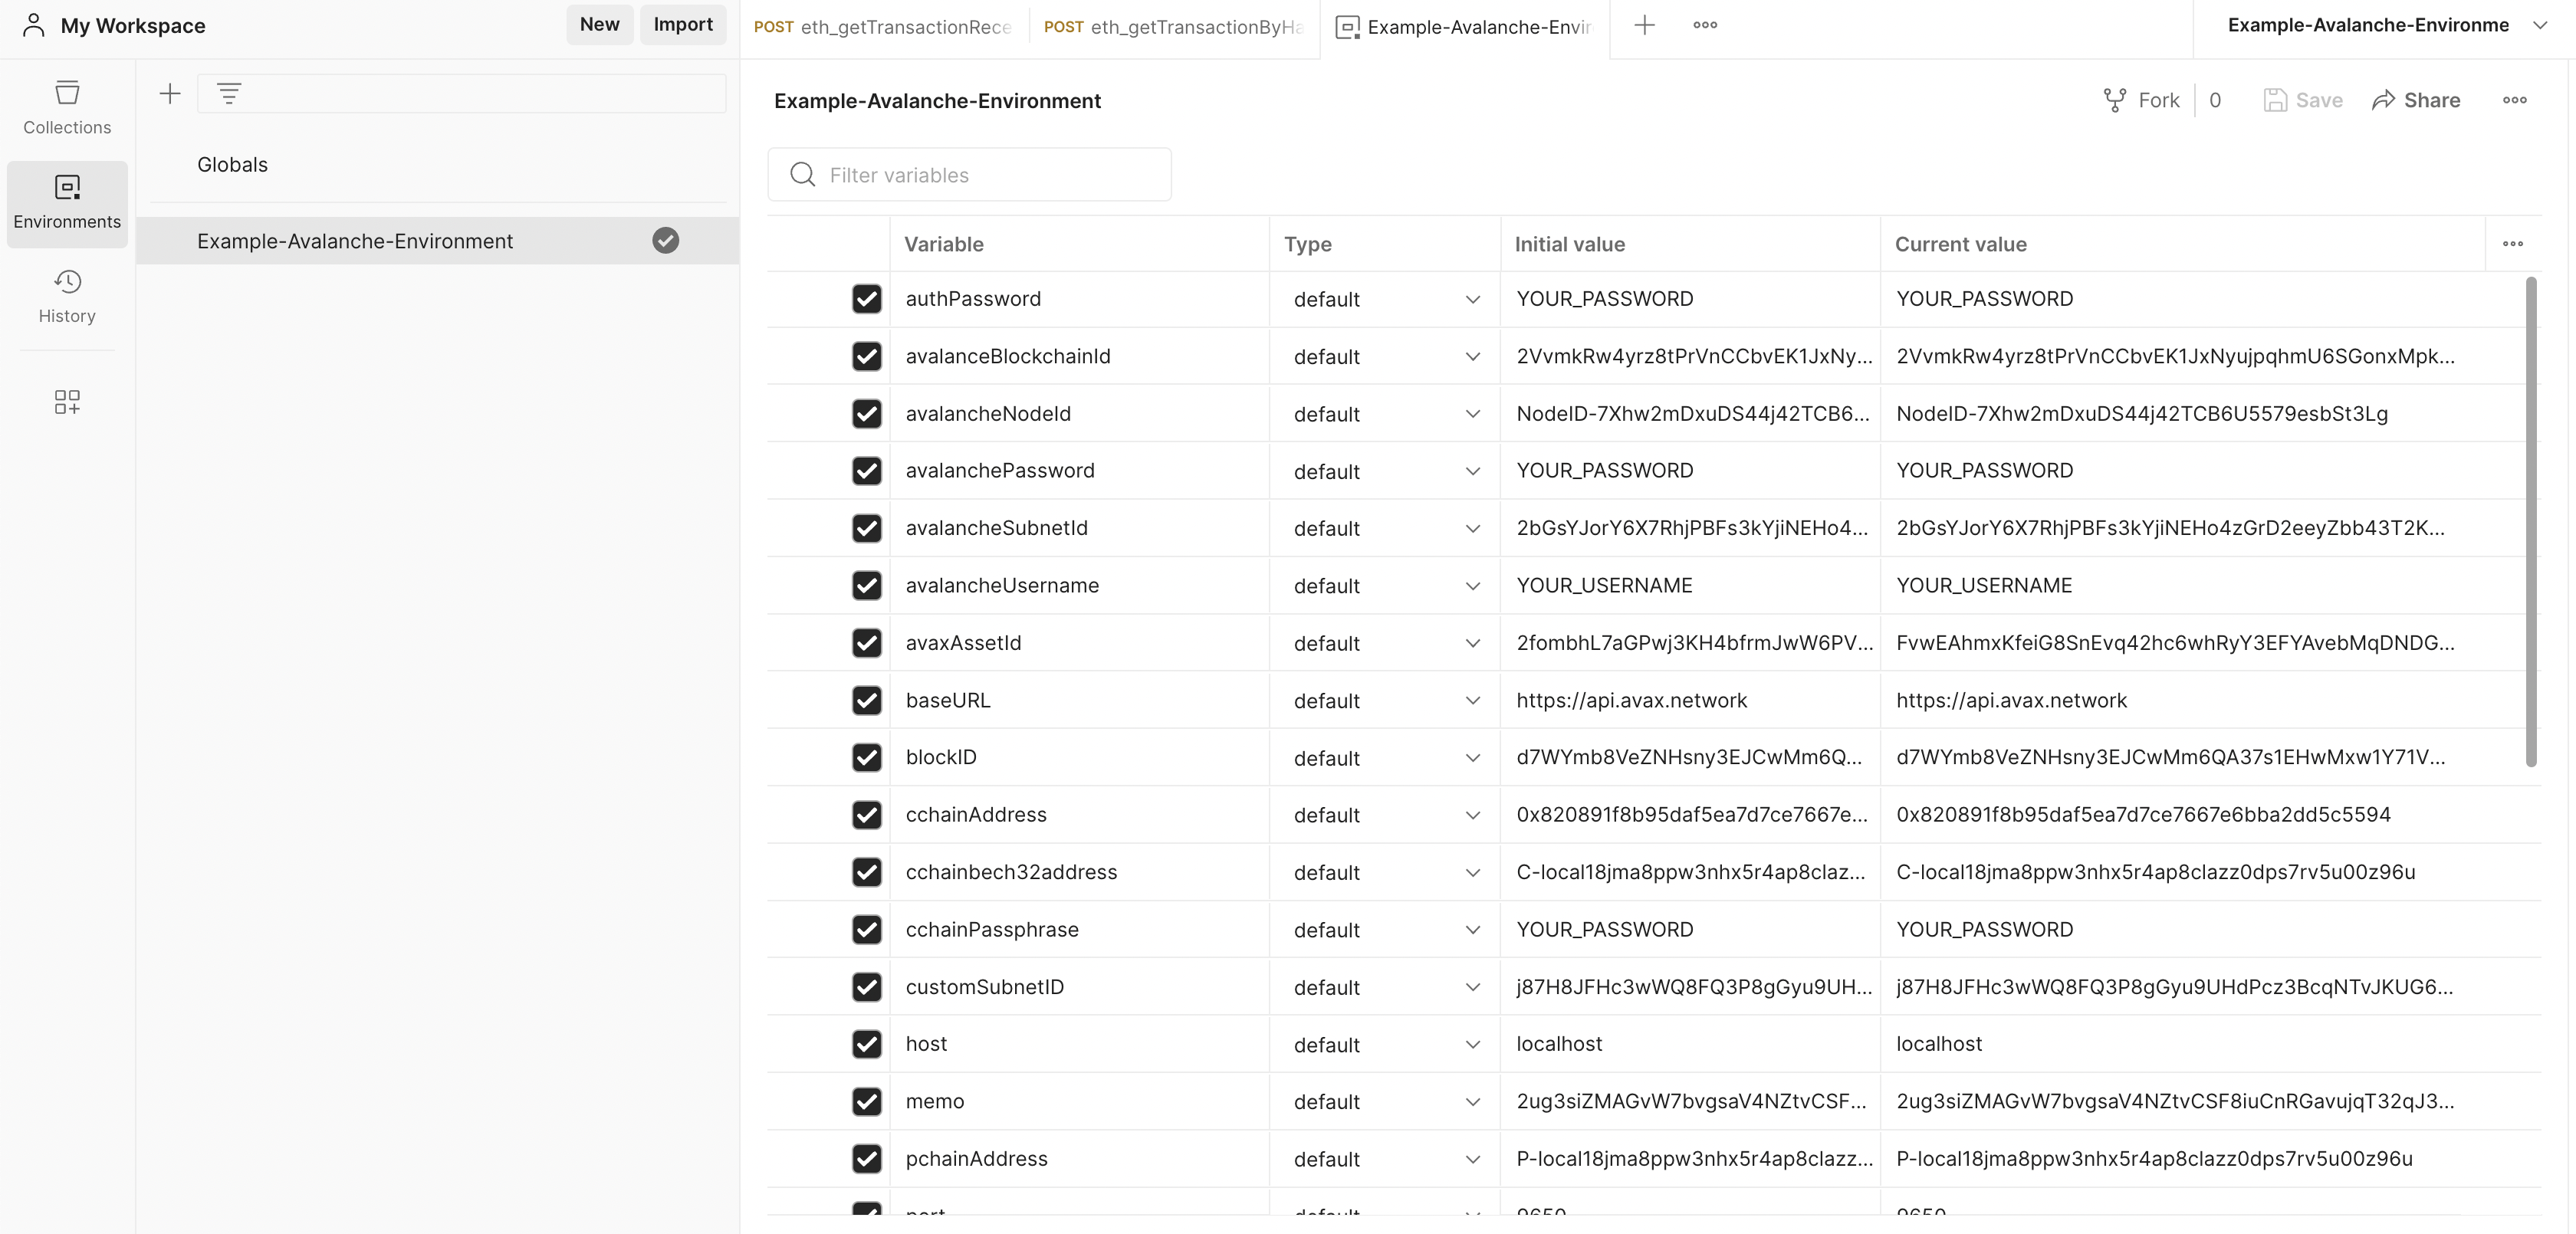
Scroll down until you find the Add a new variable area and click on it.
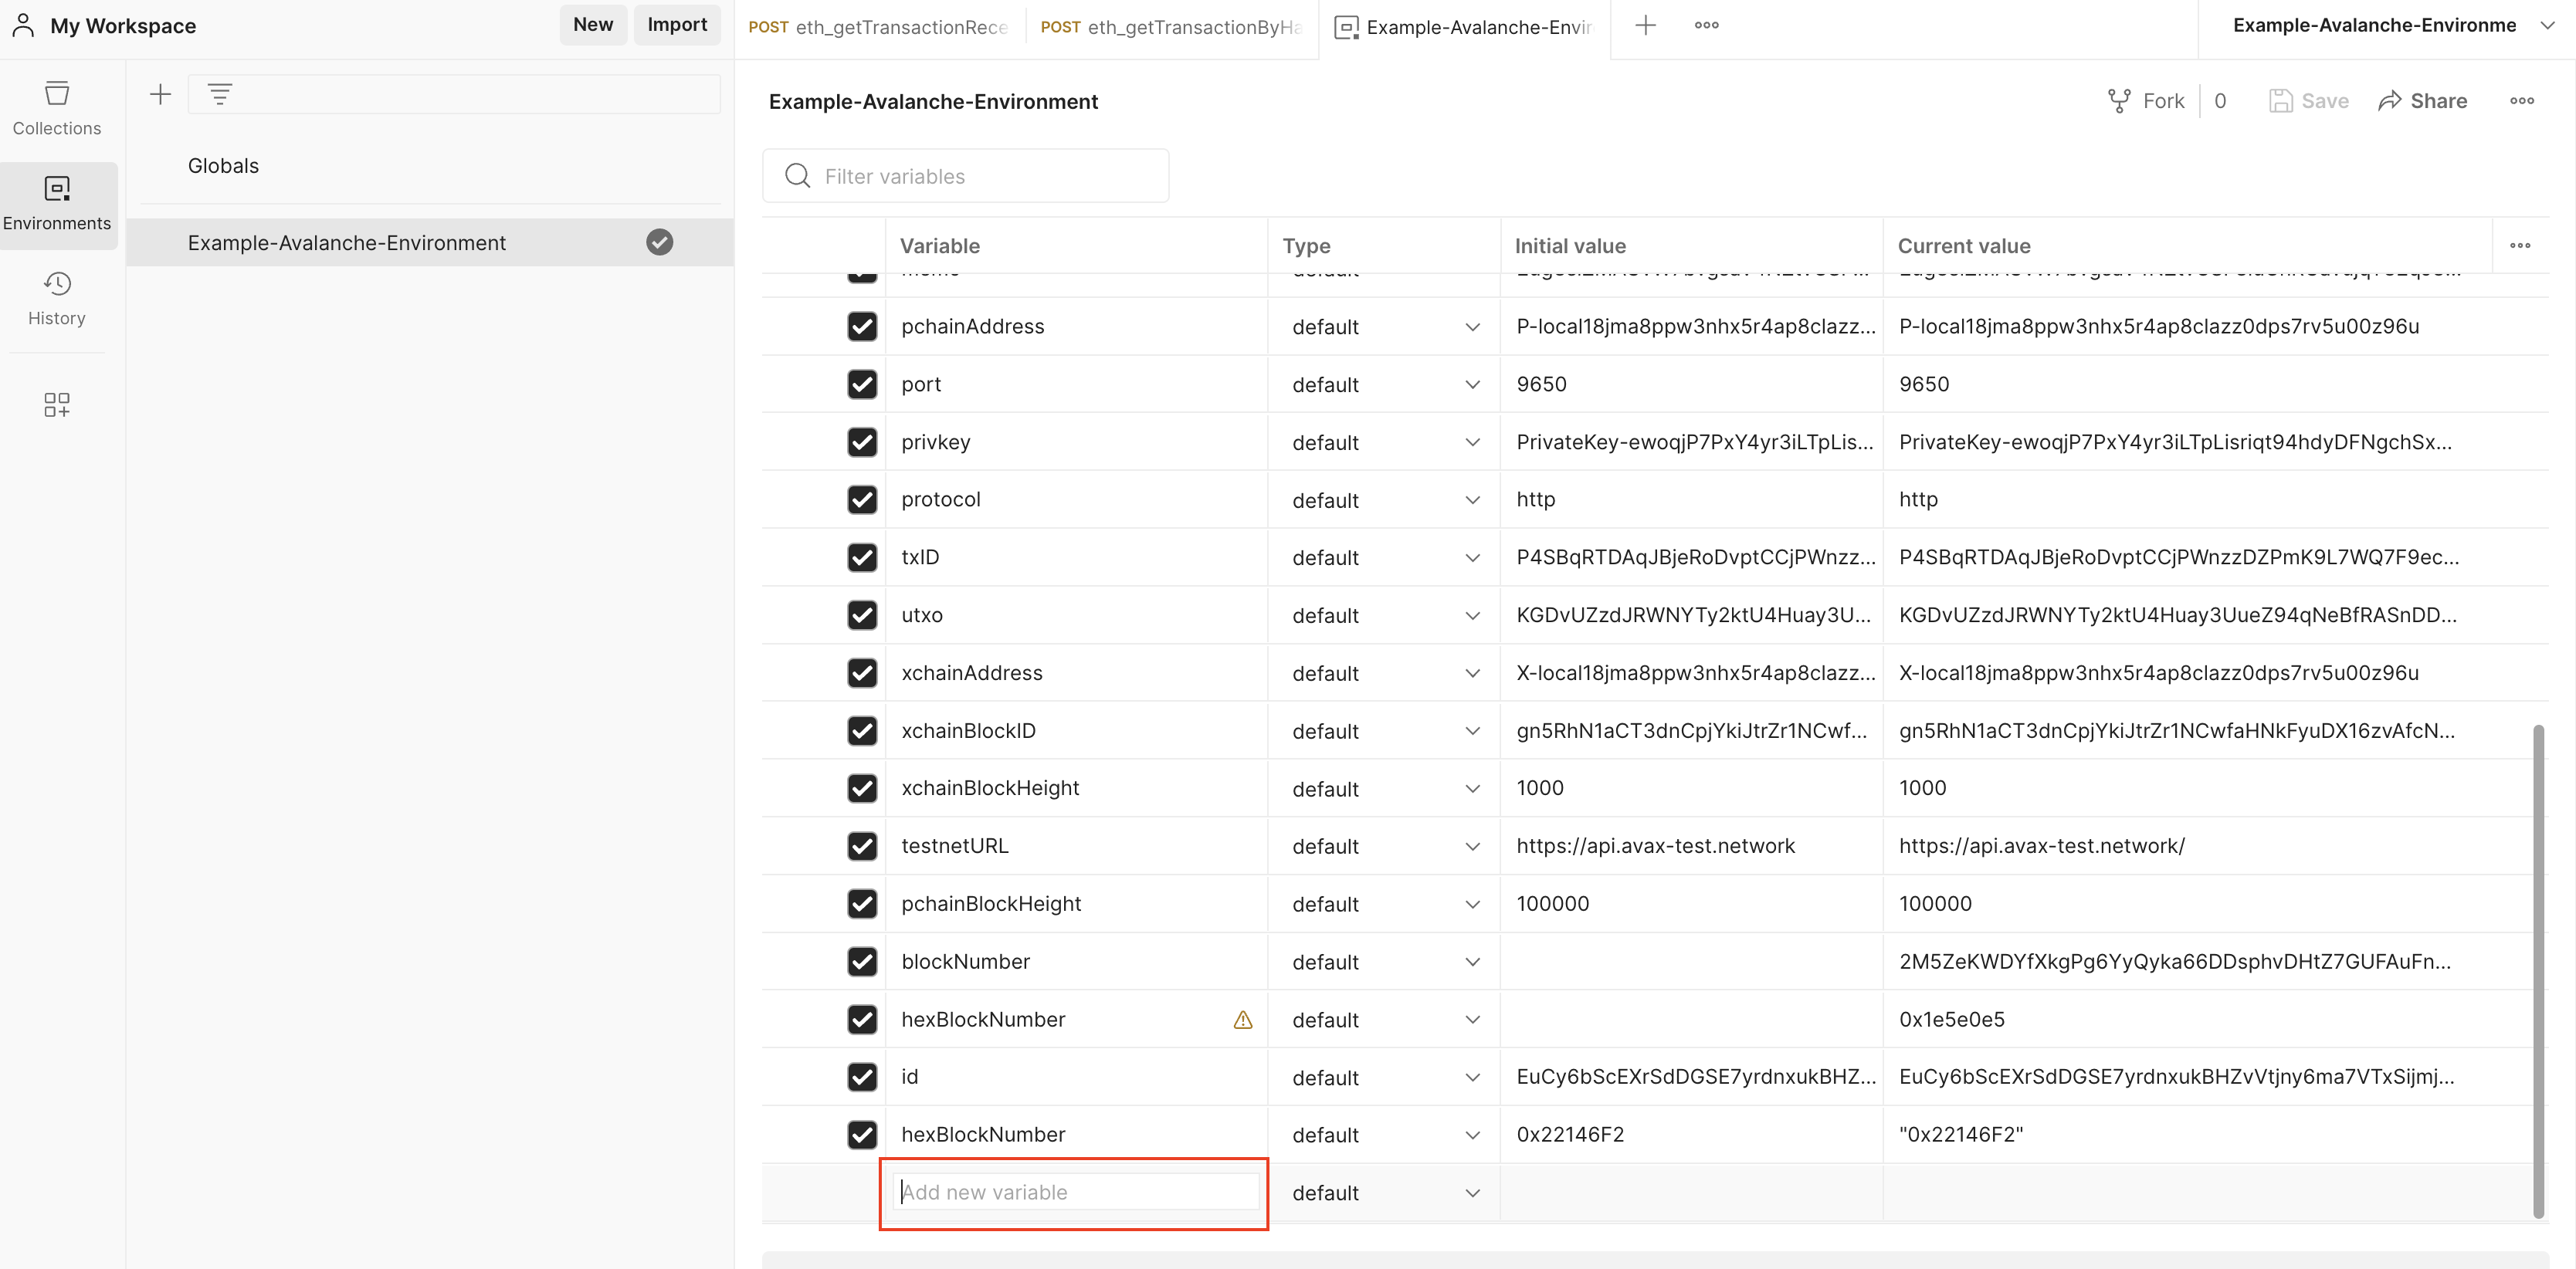
Add the variable name and value. Make sure to use quotes.

Click Save.
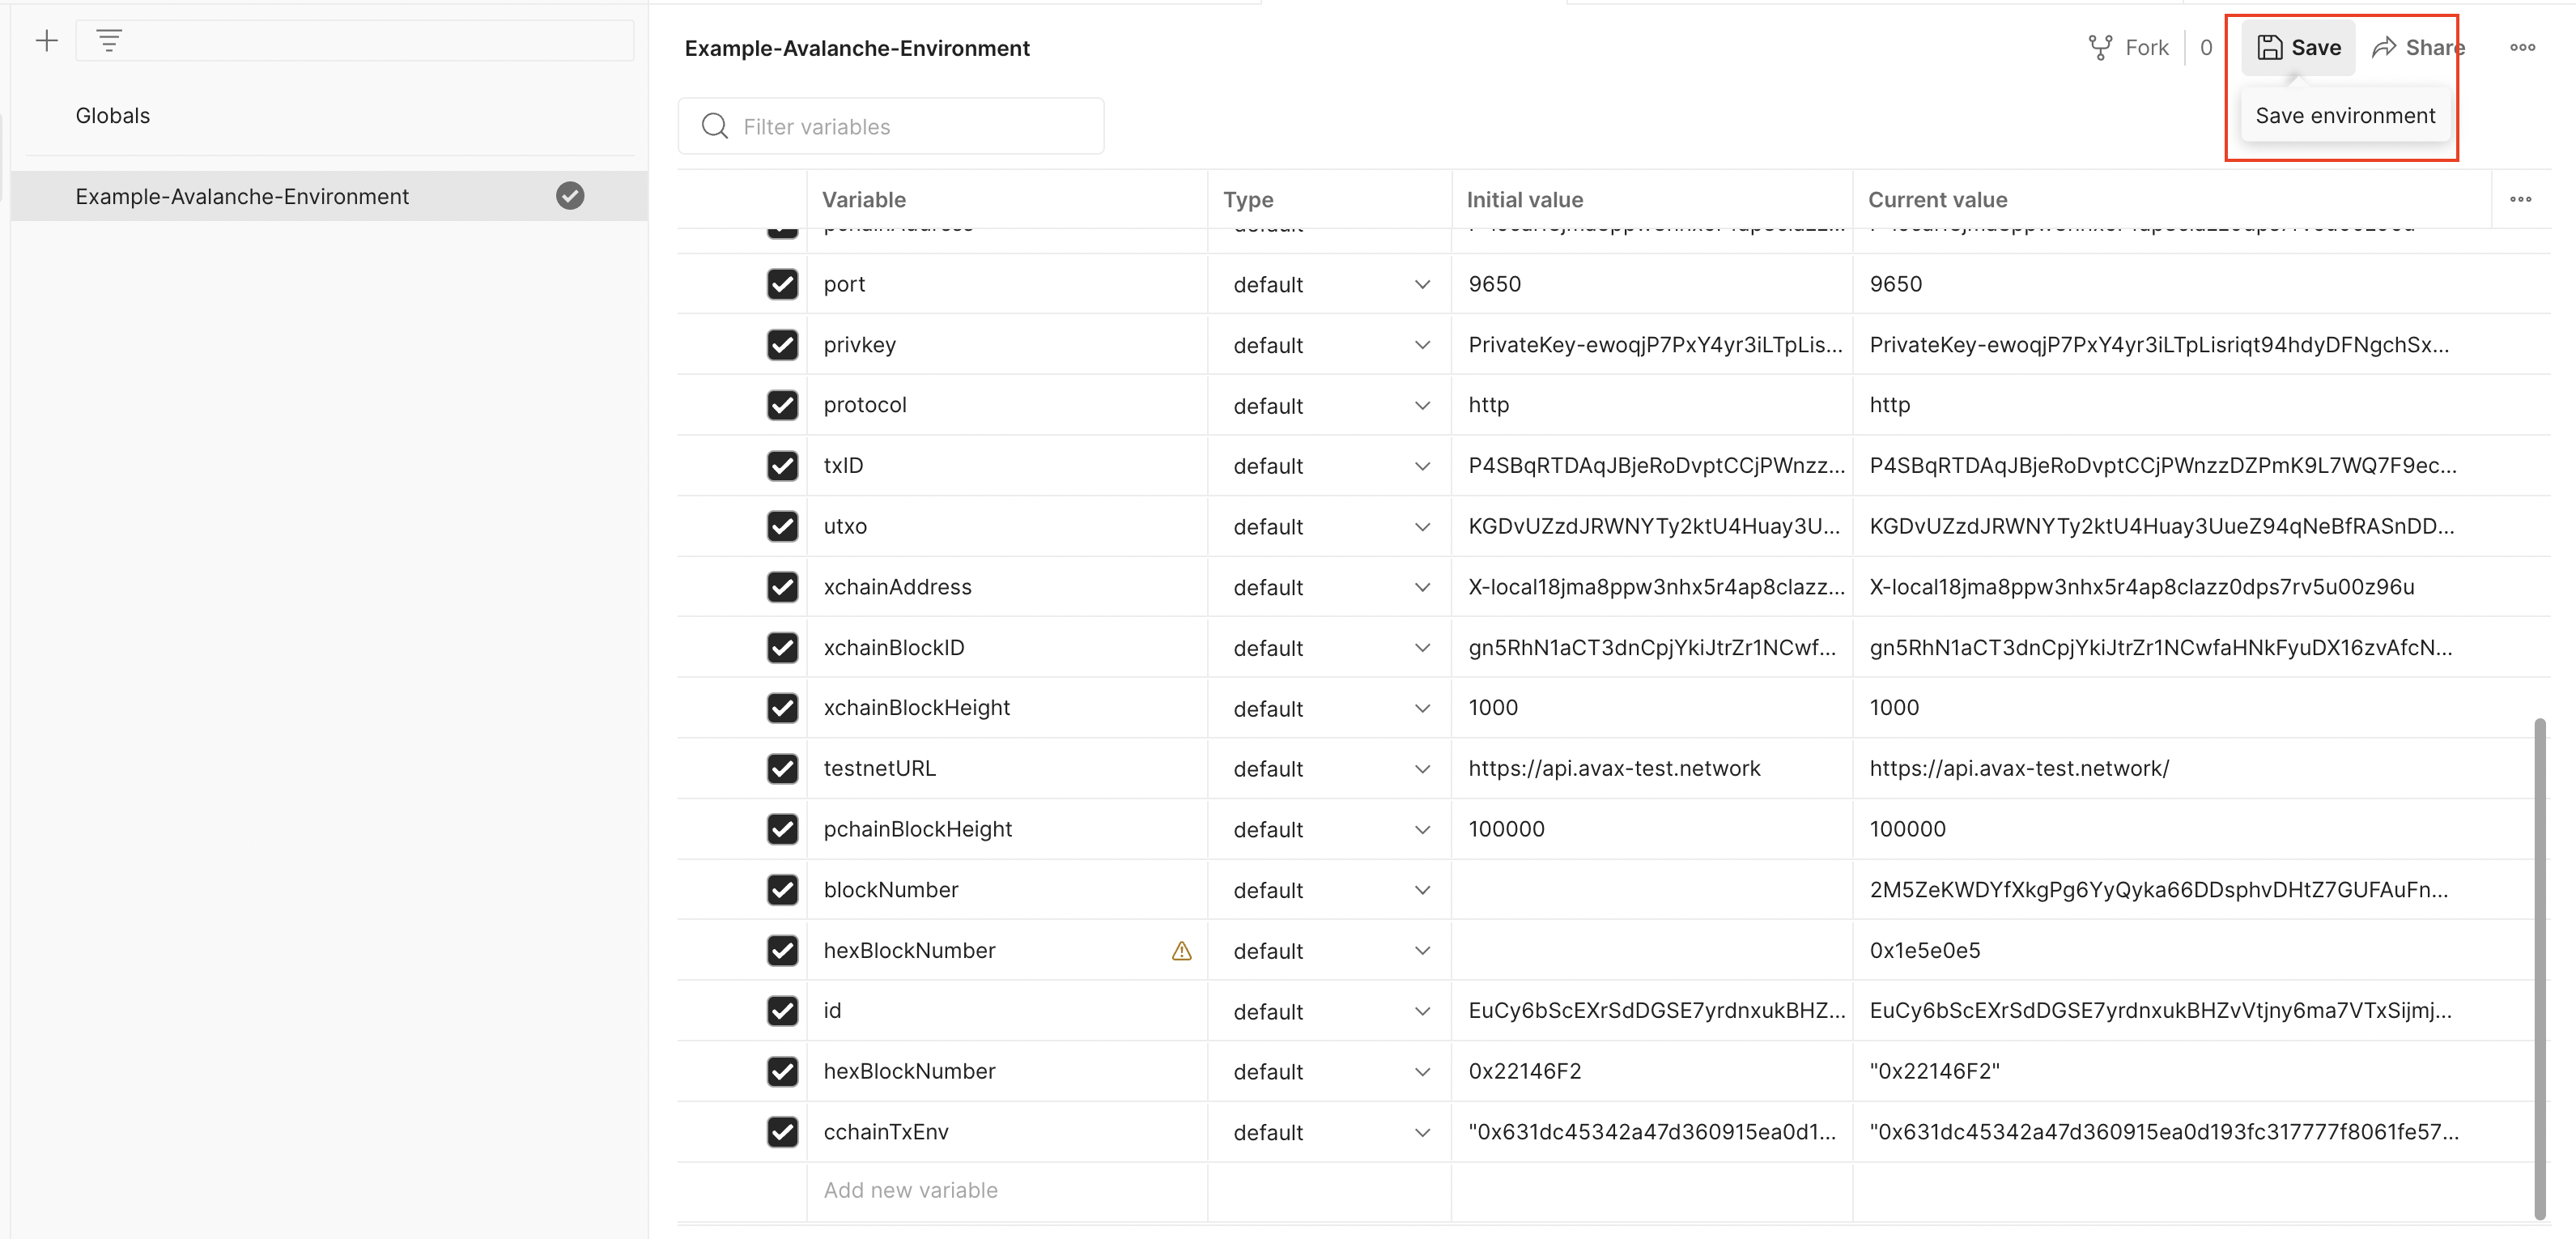
The variable is available now for any call collection that uses this environment.
### Set a Data Variable[](#set-a-data-variable "Direct link to heading")
Please check out [this guide](https://www.softwaretestinghelp.com/postman-variables/#5_Data) and [this video](https://www.youtube.com/watch?v=9wl_UQtRLw4) on how to use data variables.
### Set a Local Variable[](#set-a-local-variable "Direct link to heading")
Please check out [this guide](https://www.softwaretestinghelp.com/postman-variables/#4_Local) and [this video](https://www.youtube.com/watch?v=gOF7Oc0sXmE) on how to use local variables.
# Deploy Custom VM
URL: /docs/tooling/create-avalanche-nodes/deploy-custom-vm
This page demonstrates how to deploy a custom VM into cloud-based validators using Avalanche-CLI.
Currently, only Fuji network and Devnets are supported.
ALPHA WARNING: This command is currently in experimental mode. Proceed at your own risk.
## Prerequisites
Before we begin, you will need to have:
* Created a cloud server node as described [here](/docs/tooling/create-avalanche-nodes/run-validators-aws)
* Created a Custom VM, as described [here](/docs/virtual-machines).
* (Ignore for Devnet) Set up a key to be able to pay for transaction Fees, as described [here](/docs/tooling/create-deploy-avalanche-l1s/deploy-on-fuji-testnet).
Currently, only AWS & GCP cloud services are supported.
## Deploying the VM[](#deploying-the-vm "Direct link to heading")
We will be deploying the [MorpheusVM](https://github.com/ava-labs/hypersdk/tree/main/examples/morpheusvm) example built with the HyperSDK.
The following settings will be used:
* Repo url: `https://github.com/ava-labs/hypersdk/`
* Branch Name: `vryx-poc`
* Build Script: `examples/morpheusvm/scripts/build.sh`
The CLI needs a public repo url in order to be able to download and install the custom VM on cloud.
### Genesis File[](#genesis-file "Direct link to heading")
The following contents will serve as the chain genesis. They were generated using `morpheus-cli` as shown [here](https://github.com/ava-labs/hypersdk/blob/main/examples/morpheusvm/scripts/run.sh).
Save it into a file with path `` (for example `~/morpheusvm_genesis.json`):
```bash
{
"stateBranchFactor":16,
"minBlockGap":1000,
"minUnitPrice":[1,1,1,1,1],
"maxChunkUnits":[1800000,18446744073709551615,18446744073709551615,18446744073709551615,18446744073709551615],
"epochDuration":60000,
"validityWindow":59000,
"partitions":8,
"baseUnits":1,
"baseWarpUnits":1024,
"warpUnitsPerSigner":128,
"outgoingWarpComputeUnits":1024,
"storageKeyReadUnits":5,
"storageValueReadUnits":2,
"storageKeyAllocateUnits":20,
"storageValueAllocateUnits":5,
"storageKeyWriteUnits":10,
"storageValueWriteUnits":3,
"customAllocation": [
{
"address":"morpheus1qrzvk4zlwj9zsacqgtufx7zvapd3quufqpxk5rsdd4633m4wz2fdjk97rwu",
"balance":3000000000000000000
},
{"address":"morpheus1qryyvfut6td0l2vwn8jwae0pmmev7eqxs2vw0fxpd2c4lr37jj7wvrj4vc3",
"balance":3000000000000000000
},
{"address":"morpheus1qp52zjc3ul85309xn9stldfpwkseuth5ytdluyl7c5mvsv7a4fc76g6c4w4",
"balance":3000000000000000000
},
{"address":"morpheus1qzqjp943t0tudpw06jnvakdc0y8w790tzk7suc92aehjw0epvj93s0uzasn",
"balance":3000000000000000000
},
{"address":"morpheus1qz97wx3vl3upjuquvkulp56nk20l3jumm3y4yva7v6nlz5rf8ukty8fh27r",
"balance":3000000000000000000
}
]
}
```
## Create the Avalanche L1[](#create-the-avalanche-l1 "Direct link to heading")
Let's create an Avalanche L1 called ``, with custom VM binary and genesis.
```bash
avalanche blockchain create
```
Choose custom
```bash
Use the arrow keys to navigate: ↓ ↑ → ←
? Choose your VM:
Subnet-EVM
▸ Custom
```
Provide path to genesis:
```bash
✗ Enter path to custom genesis:
```
Provide the source code repo url:
```bash
✗ Source code repository URL: https://github.com/ava-labs/hypersdk/
```
Set the branch and finally set the build script:
```bash
✗ Build script: examples/morpheusvm/scripts/build.sh
```
CLI will generate a locally compiled binary, and then create the Avalanche L1.
```bash
Cloning into ...
Successfully created subnet configuration
```
## Deploy Avalanche L1
For this example, we will deploy the Avalanche L1 and blockchain on Fuji. Run:
```bash
avalanche blockchain deploy
```
Choose Fuji:
```bash
Use the arrow keys to navigate: ↓ ↑ → ←
? Choose a network to deploy on:
Local Network
▸ Fuji
Mainnet
```
Use the stored key:
```bash
Use the arrow keys to navigate: ↓ ↑ → ←
? Which key source should be used to pay transaction fees?:
▸ Use stored key
Use ledger
```
Choose `` as the key to use to pay the fees:
```bash
Use the arrow keys to navigate: ↓ ↑ → ←
? Which stored key should be used to pay transaction fees?:
▸
```
Use the same key as the control key for the Avalanche L1:
```bash
Use the arrow keys to navigate: ↓ ↑ → ←
? How would you like to set your control keys?:
▸ Use fee-paying key
Use all stored keys
Custom list
```
The successfully creation of our Avalanche L1 and blockchain is confirmed by the following output:
```bash
Your Subnet's control keys: [P-fuji1dlwux652lkflgz79g3nsphjzvl6t35xhmunfk1]
Your subnet auth keys for chain creation: [P-fuji1dlwux652lkflgz79g3nsphjzvl6t35xhmunfk1]
Subnet has been created with ID: RU72cWmBmcXber6ZBPT7R5scFFuVSoFRudcS3vayf3L535ZE3
Now creating blockchain...
+--------------------+----------------------------------------------------+
| DEPLOYMENT RESULTS | |
+--------------------+----------------------------------------------------+
| Chain Name | blockchainName |
+--------------------+----------------------------------------------------+
| Subnet ID | RU72cWmBmcXber6ZBPT7R5scFFuVSoFRudcS3vayf3L535ZE3 |
+--------------------+----------------------------------------------------+
| VM ID | srEXiWaHq58RK6uZMmUNaMF2FzG7vPzREsiXsptAHk9gsZNvN |
+--------------------+----------------------------------------------------+
| Blockchain ID | 2aDgZRYcSBsNoLCsC8qQH6iw3kUSF5DbRHM4sGEqVKwMSfBDRf |
+--------------------+ +
| P-Chain TXID | |
+--------------------+----------------------------------------------------+
```
## Set the Config Files[](#set-the-config-files "Direct link to heading")
Avalanche-CLI supports uploading the full set of configuration files for a blockchain:
* Genesis File
* Blockchain Config
* Avalanche L1 Config
* Network Upgrades
* AvalancheGo Config
The following example uses all of them, but the user can decide to provide a subset of those.
### AvalancheGo Flags[](#avalanchego-flags "Direct link to heading")
Save the following content (as defined [here](https://github.com/ava-labs/hypersdk/blob/vryx-poc/examples/morpheusvm/tests/e2e/e2e_test.go))
into a file with path `` (for example `~/morpheusvm_avago.json`):
```json
{
"log-level":"INFO",
"log-display-level":"INFO",
"proposervm-use-current-height":true,
"throttler-inbound-validator-alloc-size":"10737418240",
"throttler-inbound-at-large-alloc-size":"10737418240",
"throttler-inbound-node-max-processing-msgs":"1000000",
"throttler-inbound-node-max-at-large-bytes":"10737418240",
"throttler-inbound-bandwidth-refill-rate":"1073741824",
"throttler-inbound-bandwidth-max-burst-size":"1073741824",
"throttler-inbound-cpu-validator-alloc":"100000",
"throttler-inbound-cpu-max-non-validator-usage":"100000",
"throttler-inbound-cpu-max-non-validator-node-usage":"100000",
"throttler-inbound-disk-validator-alloc":"10737418240000",
"throttler-outbound-validator-alloc-size":"10737418240",
"throttler-outbound-at-large-alloc-size":"10737418240",
"throttler-outbound-node-max-at-large-bytes":"10737418240",
"consensus-on-accept-gossip-validator-size":"10",
"consensus-on-accept-gossip-peer-size":"10",
"network-compression-type":"zstd",
"consensus-app-concurrency":"128",
"profile-continuous-enabled":true,
"profile-continuous-freq":"1m",
"http-host":"",
"http-allowed-origins": "*",
"http-allowed-hosts": "*"
}
```
Then set the Avalanche L1 to use it by executing:
```bash
avalanche blockchain configure blockchainName
```
Select node-config.json:
```bash
Use the arrow keys to navigate: ↓ ↑ → ←
? Which configuration file would you like to provide?:
▸ node-config.json
chain.json
subnet.json
per-node-chain.json
```
Provide the path to the AvalancheGo config file:
```bash
✗ Enter the path to your configuration file:
```
Finally, choose no:
```bash
Use the arrow keys to navigate: ↓ ↑ → ←
? Would you like to provide the chain.json file as well?:
▸ No
Yes
File ~/.avalanche-cli/subnets/blockchainName/node-config.json successfully written
```
### Blockchain Config[](#blockchain-config "Direct link to heading")
`morpheus-cli` as shown [here](https://github.com/ava-labs/hypersdk/blob/vryx-poc/examples/morpheusvm/scripts/run.sh).
Save the following content (generated by this [script](https://github.com/ava-labs/hypersdk/blob/vryx-poc/examples/morpheusvm/scripts/run.sh))
in a known file path (for example `~/morpheusvm_chain.json`):
```json
{
"chunkBuildFrequency": 250,
"targetChunkBuildDuration": 250,
"blockBuildFrequency": 100,
"mempoolSize": 2147483648,
"mempoolSponsorSize": 10000000,
"authExecutionCores": 16,
"precheckCores": 16,
"actionExecutionCores": 8,
"missingChunkFetchers": 48,
"verifyAuth": true,
"authRPCCores": 48,
"authRPCBacklog": 10000000,
"authGossipCores": 16,
"authGossipBacklog": 10000000,
"chunkStorageCores": 16,
"chunkStorageBacklog": 10000000,
"streamingBacklogSize": 10000000,
"continuousProfilerDir":"/home/ubuntu/morpheusvm-profiles",
"logLevel": "INFO"
}
```
Then set the Avalanche L1 to use it by executing:
```bash
avalanche blockchain configure blockchainName
```
Select chain.json:
```bash
Use the arrow keys to navigate: ↓ ↑ → ←
? Which configuration file would you like to provide?:
node-config.json
▸ chain.json
subnet.json
per-node-chain.json
```
Provide the path to the blockchain config file:
```bash
✗ Enter the path to your configuration file: ~/morpheusvm_chain.json
```
Finally choose no:
```bash
Use the arrow keys to navigate: ↓ ↑ → ←
? Would you like to provide the subnet.json file as well?:
▸ No
Yes
File ~/.avalanche-cli/subnets/blockchainName/chain.json successfully written
```
### Avalanche L1 Config[](#avalanche-l1-config "Direct link to heading")
Save the following content (generated by this [script](https://github.com/ava-labs/hypersdk/blob/vryx-poc/examples/morpheusvm/scripts/run.sh))
in a known path (for example `~/morpheusvm_subnet.json`):
```json
{
"proposerMinBlockDelay": 0,
"proposerNumHistoricalBlocks": 512
}
```
Then set the Avalanche L1 to use it by executing:
```bash
avalanche blockchain configure blockchainName
```
Select `subnet.json`:
```bash
Use the arrow keys to navigate: ↓ ↑ → ←
? Which configuration file would you like to provide?:
node-config.json
chain.json
▸ subnet.json
per-node-chain.json
```
Provide the path to the Avalanche L1 config file:
```bash
✗ Enter the path to your configuration file: ~/morpheusvm_subnet.json
```
Choose no:
```bash
Use the arrow keys to navigate: ↓ ↑ → ←
? Would you like to provide the chain.json file as well?:
▸ No
Yes
File ~/.avalanche-cli/subnets/blockchainName/subnet.json successfully written
```
### Network Upgrades[](#network-upgrades "Direct link to heading")
Save the following content (currently with no network upgrades) in a known path (for example `~/morpheusvm_upgrades.json`):
Then set the Avalanche L1 to use it by executing:
```bash
avalanche blockchain upgrade import blockchainName
```
Provide the path to the network upgrades file:
```bash
✗ Provide the path to the upgrade file to import: ~/morpheusvm_upgrades.json
```
## Deploy Our Custom VM[](#deploy-our-custom-vm "Direct link to heading")
To deploy our Custom VM, run:
```bash
avalanche node sync
```
```bash
Node(s) successfully started syncing with Subnet!
```
Your custom VM is successfully deployed!
You can also use `avalanche node update blockchain ` to reinstall the binary when the branch is updated, or update the config files.
# Execute SSH Command
URL: /docs/tooling/create-avalanche-nodes/execute-ssh-commands
This page demonstrates how to execute a SSH command on a Cluster or Node managed by Avalanche-CLI
ALPHA WARNING: This command is currently in experimental mode. Proceed at your own risk.
## Prerequisites
Before we begin, you will need to have a cluster managed by CLI, either a [Fuji Cluster using AWS](/docs/tooling/create-avalanche-nodes/run-validators-aws), a [Fuji Cluster using GCP](/docs/tooling/create-avalanche-nodes/run-validators-gcp), or a [Devnet](/docs/tooling/create-avalanche-nodes/setup-devnet),
## SSH Warning[](#ssh-warning "Direct link to heading")
Note: An expected warning may be seen when executing the command on a given cluster for the first time:
```bash
Warning: Permanently added 'IP' (ED25519) to the list of known hosts.
```
## Get SSH Connection Instructions for All Clusters[](#get-ssh-connection-instructions-for-all-clusters "Direct link to heading")
Just execute `node ssh`:
```bash
avalanche node ssh
Cluster "" (Devnet)
[i-0cf58a280bf3ef9a1] ssh -o IdentitiesOnly=yes -o StrictHostKeyChecking=no [email protected] -i /home/fm/.ssh/fm-us-east-1-avalanche-cli-us-east-1-kp.pem
[i-0e2abd71a586e56b4] ssh -o IdentitiesOnly=yes -o StrictHostKeyChecking=no [email protected] -i /home/fm/.ssh/fm-us-east-1-avalanche-cli-us-east-1-kp.pem
[i-027417a4f2ca0a478] ssh -o IdentitiesOnly=yes -o StrictHostKeyChecking=no [email protected] -i /home/fm/.ssh/fm-us-east-1-avalanche-cli-us-east-1-kp.pem
[i-0360a867aa295d8a4] ssh -o IdentitiesOnly=yes -o StrictHostKeyChecking=no [email protected] -i /home/fm/.ssh/fm-us-east-1-avalanche-cli-us-east-1-kp.pem
[i-0759b102acfd5b585] ssh -o IdentitiesOnly=yes -o StrictHostKeyChecking=no [email protected] -i /home/fm/.ssh/fm-us-east-1-avalanche-cli-us-east-1-kp.pem
```
## Get the AvalancheGo PID for All Nodes in ``[](#get-the-avalanchego-pid-for-all-nodes-in-clustername "Direct link to heading")
```bash
avalanche node ssh pgrep avalanchego
[i-0cf58a280bf3ef9a1] ssh -o IdentitiesOnly=yes -o StrictHostKeyChecking=no [email protected] -i /home/fm/.ssh/fm-us-east-1-avalanche-cli-us-east-1-kp.pem pgrep avalanchego
14508
[i-0e2abd71a586e56b4] ssh -o IdentitiesOnly=yes -o StrictHostKeyChecking=no [email protected] -i /home/fm/.ssh/fm-us-east-1-avalanche-cli-us-east-1-kp.pem pgrep avalanchego
14555
[i-027417a4f2ca0a478] ssh -o IdentitiesOnly=yes -o StrictHostKeyChecking=no [email protected] -i /home/fm/.ssh/fm-us-east-1-avalanche-cli-us-east-1-kp.pem pgrep avalanchego
14545
[i-0360a867aa295d8a4] ssh -o IdentitiesOnly=yes -o StrictHostKeyChecking=no [email protected] -i /home/fm/.ssh/fm-us-east-1-avalanche-cli-us-east-1-kp.pem pgrep avalanchego
14531
[i-0759b102acfd5b585] ssh -o IdentitiesOnly=yes -o StrictHostKeyChecking=no [email protected] -i /home/fm/.ssh/fm-us-east-1-avalanche-cli-us-east-1-kp.pem pgrep avalanchego
14555
```
Please note that commands via `ssh` on cluster are executed sequentially by default. It's possible to run command on all nodes at the same time by using `--parallel=true` flag
## Get the AvalancheGo Configuration for All Nodes in `

