/config.json`.
>
> For the AvalancheGo node configuration options, see the AvalancheGo Configuration page.
This document describes all configuration options available for Subnet-EVM.
## Example Configuration
```json
{
"eth-apis": ["eth", "eth-filter", "net", "web3"],
"pruning-enabled": true,
"commit-interval": 4096,
"trie-clean-cache": 512,
"trie-dirty-cache": 512,
"snapshot-cache": 256,
"rpc-gas-cap": 50000000,
"log-level": "info",
"metrics-expensive-enabled": true,
"continuous-profiler-dir": "./profiles",
"state-sync-enabled": false,
"accepted-cache-size": 32
}
```
## Configuration Format
Configuration is provided as a JSON object. All fields are optional unless otherwise specified.
## API Configuration
### Ethereum APIs
| Option | Type | Description | Default |
|--------|------|-------------|---------|
| `eth-apis` | array of strings | List of Ethereum services that should be enabled | `["eth", "eth-filter", "net", "web3", "internal-eth", "internal-blockchain", "internal-transaction"]` |
### Subnet-EVM Specific APIs
| Option | Type | Description | Default |
|--------|------|-------------|---------|
| `validators-api-enabled` | bool | Enable the validators API | `true` |
| `admin-api-enabled` | bool | Enable the admin API for administrative operations | `false` |
| `admin-api-dir` | string | Directory for admin API operations | - |
| `warp-api-enabled` | bool | Enable the Warp API for cross-chain messaging | `false` |
### API Limits and Security
| Option | Type | Description | Default |
|--------|------|-------------|---------|
| `rpc-gas-cap` | uint64 | Maximum gas limit for RPC calls | `50,000,000` |
| `rpc-tx-fee-cap` | float64 | Maximum transaction fee cap in AVAX | `100` |
| `api-max-duration` | duration | Maximum duration for API calls (0 = no limit) | `0` |
| `api-max-blocks-per-request` | int64 | Maximum number of blocks per getLogs request (0 = no limit) | `0` |
| `http-body-limit` | uint64 | Maximum size of HTTP request bodies | - |
| `batch-request-limit` | uint64 | Maximum number of requests that can be batched in an RPC call. For no limit, set either this or `batch-response-max-size` to 0 | `1000` |
| `batch-response-max-size` | uint64 | Maximum size (in bytes) of response that can be returned from a batched RPC call. For no limit, set either this or `batch-request-limit` to 0. Defaults to `25 MB`| `1000` |
### WebSocket Settings
| Option | Type | Description | Default |
|--------|------|-------------|---------|
| `ws-cpu-refill-rate` | duration | Rate at which WebSocket CPU usage quota is refilled (0 = no limit) | `0` |
| `ws-cpu-max-stored` | duration | Maximum stored WebSocket CPU usage quota (0 = no limit) | `0` |
## Cache Configuration
### Trie Caches
| Option | Type | Description | Default |
|--------|------|-------------|---------|
| `trie-clean-cache` | int | Size of the trie clean cache in MB | `512` |
| `trie-dirty-cache` | int | Size of the trie dirty cache in MB | `512` |
| `trie-dirty-commit-target` | int | Memory limit to target in the dirty cache before performing a commit in MB | `20` |
| `trie-prefetcher-parallelism` | int | Maximum concurrent disk reads trie prefetcher should perform | `16` |
### Other Caches
| Option | Type | Description | Default |
|--------|------|-------------|---------|
| `snapshot-cache` | int | Size of the snapshot disk layer clean cache in MB | `256` |
| `accepted-cache-size` | int | Depth to keep in the accepted headers and logs cache (blocks) | `32` |
| `state-sync-server-trie-cache` | int | Trie cache size for state sync server in MB | `64` |
## Ethereum Settings
### Transaction Processing
| Option | Type | Description | Default |
|--------|------|-------------|---------|
| `preimages-enabled` | bool | Enable preimage recording | `false` |
| `allow-unfinalized-queries` | bool | Allow queries for unfinalized blocks | `false` |
| `allow-unprotected-txs` | bool | Allow unprotected transactions (without EIP-155) | `false` |
| `allow-unprotected-tx-hashes` | array | List of specific transaction hashes allowed to be unprotected | EIP-1820 registry tx |
| `local-txs-enabled` | bool | Enable treatment of transactions from local accounts as local | `false` |
### Snapshots
| Option | Type | Description | Default |
|--------|------|-------------|---------|
| `snapshot-wait` | bool | Wait for snapshot generation on startup | `false` |
| `snapshot-verification-enabled` | bool | Enable snapshot verification | `false` |
## Pruning and State Management
### Basic Pruning
| Option | Type | Description | Default |
|--------|------|-------------|---------|
| `pruning-enabled` | bool | Enable state pruning to save disk space | `true` |
| `commit-interval` | uint64 | Interval at which to persist EVM and atomic tries (blocks) | `4096` |
| `accepted-queue-limit` | int | Maximum blocks to queue before blocking during acceptance | `64` |
### State Reconstruction
| Option | Type | Description | Default |
|--------|------|-------------|---------|
| `allow-missing-tries` | bool | Suppress warnings about incomplete trie index | `false` |
| `populate-missing-tries` | uint64 | Starting block for re-populating missing tries (null = disabled) | `null` |
| `populate-missing-tries-parallelism` | int | Concurrent readers for re-populating missing tries | `1024` |
### Offline Pruning
| Option | Type | Description | Default |
|--------|------|-------------|---------|
| `offline-pruning-enabled` | bool | Enable offline pruning | `false` |
| `offline-pruning-bloom-filter-size` | uint64 | Bloom filter size for offline pruning in MB | `512` |
| `offline-pruning-data-directory` | string | Directory for offline pruning data | - |
### Historical Data
| Option | Type | Description | Default |
|--------|------|-------------|---------|
| `historical-proof-query-window` | uint64 | Number of blocks before last accepted for proof queries (archive mode only, ~24 hours) | `43200` |
| `state-history` | uint64 | Number of most recent states that are accesible on disk (pruning mode only) | `32` |
## Transaction Pool Configuration
| Option | Type | Description | Default |
|--------|------|-------------|---------|
| `tx-pool-price-limit` | uint64 | Minimum gas price for transaction acceptance | - |
| `tx-pool-price-bump` | uint64 | Minimum price bump percentage for transaction replacement | - |
| `tx-pool-account-slots` | uint64 | Maximum number of executable transaction slots per account | - |
| `tx-pool-global-slots` | uint64 | Maximum number of executable transaction slots for all accounts | - |
| `tx-pool-account-queue` | uint64 | Maximum number of non-executable transaction slots per account | - |
| `tx-pool-global-queue` | uint64 | Maximum number of non-executable transaction slots for all accounts | - |
| `tx-pool-lifetime` | duration | Maximum time transactions can stay in the pool | - |
## Gossip Configuration
### Push Gossip Settings
| Option | Type | Description | Default |
|--------|------|-------------|---------|
| `push-gossip-percent-stake` | float64 | Percentage of total stake to push gossip to (range: [0, 1]) | `0.9` |
| `push-gossip-num-validators` | int | Number of validators to push gossip to | `100` |
| `push-gossip-num-peers` | int | Number of non-validator peers to push gossip to | `0` |
### Regossip Settings
| Option | Type | Description | Default |
|--------|------|-------------|---------|
| `push-regossip-num-validators` | int | Number of validators to regossip to | `10` |
| `push-regossip-num-peers` | int | Number of non-validator peers to regossip to | `0` |
| `priority-regossip-addresses` | array | Addresses to prioritize for regossip | - |
### Timing Configuration
| Option | Type | Description | Default |
|--------|------|-------------|---------|
| `push-gossip-frequency` | duration | Frequency of push gossip | `100ms` |
| `pull-gossip-frequency` | duration | Frequency of pull gossip | `1s` |
| `regossip-frequency` | duration | Frequency of regossip | `30s` |
## Logging and Monitoring
### Logging
| Option | Type | Description | Default |
|--------|------|-------------|---------|
| `log-level` | string | Logging level (trace, debug, info, warn, error, crit) | `"info"` |
| `log-json-format` | bool | Use JSON format for logs | `false` |
### Profiling
| Option | Type | Description | Default |
|--------|------|-------------|---------|
| `continuous-profiler-dir` | string | Directory for continuous profiler output (empty = disabled) | - |
| `continuous-profiler-frequency` | duration | Frequency to run continuous profiler | `15m` |
| `continuous-profiler-max-files` | int | Maximum number of profiler files to maintain | `5` |
### Metrics
| Option | Type | Description | Default |
|--------|------|-------------|---------|
| `metrics-expensive-enabled` | bool | Enable expensive debug-level metrics; this includes Firewood metrics | `true` |
## Security and Access
### Keystore
| Option | Type | Description | Default |
|--------|------|-------------|---------|
| `keystore-directory` | string | Directory for keystore files (absolute or relative path) | - |
| `keystore-external-signer` | string | External signer configuration | - |
| `keystore-insecure-unlock-allowed` | bool | Allow insecure account unlocking | `false` |
### Fee Configuration
| Option | Type | Description | Default |
|--------|------|-------------|---------|
| `feeRecipient` | string | Address to send transaction fees to (leave empty if not supported) | - |
## Network and Sync
### Network
| Option | Type | Description | Default |
|--------|------|-------------|---------|
| `max-outbound-active-requests` | int64 | Maximum number of outbound active requests for VM2VM network | `16` |
### State Sync
| Option | Type | Description | Default |
|--------|------|-------------|---------|
| `state-sync-enabled` | bool | Enable state sync | `false` |
| `state-sync-skip-resume` | bool | Force state sync to use highest available summary block | `false` |
| `state-sync-ids` | string | Comma-separated list of state sync IDs | - |
| `state-sync-commit-interval` | uint64 | Commit interval for state sync (blocks) | `16384` |
| `state-sync-min-blocks` | uint64 | Minimum blocks ahead required for state sync | `300000` |
| `state-sync-request-size` | uint16 | Number of key/values to request per state sync request | `1024` |
## Database Configuration
> **WARNING**: `firewood` and `path` schemes are untested in production. Using `path` is strongly discouraged. To use `firewood`, you must also set the following config options:
>
> - `pruning-enabled: true` (enabled by default)
> - `state-sync-enabled: false`
> - `snapshot-cache: 0`
Failing to set these options will result in errors on VM initialization. Additionally, not all APIs are available - see these portions of the config documentation for more details.
| Option | Type | Description | Default |
|--------|------|-------------|---------|
| `database-type` | string | Type of database to use | `"pebbledb"` |
| `database-path` | string | Path to database directory | - |
| `database-read-only` | bool | Open database in read-only mode | `false` |
| `database-config` | string | Inline database configuration | - |
| `database-config-file` | string | Path to database configuration file | - |
| `use-standalone-database` | bool | Use standalone database instead of shared one | - |
| `inspect-database` | bool | Inspect database on startup | `false` |
| `state-scheme` | string | EXPERIMENTAL: specifies the database scheme to store state data; can be one of `hash` or `firewood` | `hash` |
## Transaction Indexing
| Option | Type | Description | Default |
|--------|------|-------------|---------|
| `transaction-history` | uint64 | Maximum number of blocks from head whose transaction indices are reserved (0 = no limit) | - |
| `tx-lookup-limit` | uint64 | **Deprecated** - use `transaction-history` instead | - |
| `skip-tx-indexing` | bool | Skip indexing transactions entirely | `false` |
## Warp Configuration
| Option | Type | Description | Default |
|--------|------|-------------|---------|
| `warp-off-chain-messages` | array | Off-chain messages the node should be willing to sign | - |
| `prune-warp-db-enabled` | bool | Clear warp database on startup | `false` |
## Miscellaneous
| Option | Type | Description | Default |
|--------|------|-------------|---------|
| `airdrop` | string | Path to airdrop file | - |
| `skip-upgrade-check` | bool | Skip checking that upgrades occur before last accepted block ⚠️ **Warning**: Only use when you understand the implications | `false` |
| `min-delay-target` | integer | The minimum delay between blocks (in milliseconds) that this node will attempt to use when creating blocks | Parent block's target |
## Gossip Constants
The following constants are defined for transaction gossip behavior and cannot be configured without a custom build of Subnet-EVM:
| Constant | Type | Description | Value |
|----------|------|-------------|-------|
| Bloom Filter Min Target Elements | int | Minimum target elements for bloom filter | `8,192` |
| Bloom Filter Target False Positive Rate | float | Target false positive rate | `1%` |
| Bloom Filter Reset False Positive Rate | float | Reset false positive rate | `5%` |
| Bloom Filter Churn Multiplier | int | Churn multiplier | `3` |
| Push Gossip Discarded Elements | int | Number of discarded elements | `16,384` |
| Tx Gossip Target Message Size | size | Target message size for transaction gossip | `20 KiB` |
| Tx Gossip Throttling Period | duration | Throttling period | `10s` |
| Tx Gossip Throttling Limit | int | Throttling limit | `2` |
| Tx Gossip Poll Size | int | Poll size | `1` |
## Validation Notes
- Cannot enable `populate-missing-tries` while pruning or offline pruning is enabled
- Cannot run offline pruning while pruning is disabled
- Commit interval must be non-zero when pruning is enabled
- `push-gossip-percent-stake` must be in range `[0, 1]`
- Some settings may require node restart to take effect
# X-Chain Configs (/docs/nodes/chain-configs/x-chain)
---
title: "X-Chain Configs"
description: "This page describes the configuration options available for the X-Chain."
edit_url: https://github.com/ava-labs/avalanchego/edit/master/vms/avm/config.md
---
In order to specify a config for the X-Chain, a JSON config file should be
placed at `{chain-config-dir}/X/config.json`.
For example if `chain-config-dir` has the default value which is
`$HOME/.avalanchego/configs/chains`, then `config.json` can be placed at
`$HOME/.avalanchego/configs/chains/X/config.json`.
This allows you to specify a config to be passed into the X-Chain. The default
values for this config are:
```json
{
"checksums-enabled": false
}
```
Default values are overridden only if explicitly specified in the config.
The parameters are as follows:
### `checksums-enabled`
_Boolean_
Enables checksums if set to `true`.
# Avalanche L1 Configs (/docs/nodes/configure/avalanche-l1-configs)
---
title: "Avalanche L1 Configs"
description: "This page describes the configuration options available for Avalanche L1s."
edit_url: https://github.com/ava-labs/avalanchego/edit/master/subnets/config.md
---
# Subnet Configs
It is possible to provide parameters for a Subnet. Parameters here apply to all
chains in the specified Subnet.
AvalancheGo looks for files specified with `{subnetID}.json` under
`--subnet-config-dir` as documented
[here](https://build.avax.network/docs/nodes/configure/configs-flags#subnet-configs).
Here is an example of Subnet config file:
```json
{
"validatorOnly": false,
"consensusParameters": {
"k": 25,
"alpha": 18
}
}
```
## Parameters
### Private Subnet
#### `validatorOnly` (bool)
If `true` this node does not expose Subnet blockchain contents to non-validators
via P2P messages. Defaults to `false`.
Avalanche Subnets are public by default. It means that every node can sync and
listen ongoing transactions/blocks in Subnets, even they're not validating the
listened Subnet.
Subnet validators can choose not to publish contents of blockchains via this
configuration. If a node sets `validatorOnly` to true, the node exchanges
messages only with this Subnet's validators. Other peers will not be able to
learn contents of this Subnet from this node.
:::tip
This is a node-specific configuration. Every validator of this Subnet has to use
this configuration in order to create a full private Subnet.
:::
#### `allowedNodes` (string list)
If `validatorOnly=true` this allows explicitly specified NodeIDs to be allowed
to sync the Subnet regardless of validator status. Defaults to be empty.
:::tip
This is a node-specific configuration. Every validator of this Subnet has to use
this configuration in order to properly allow a node in the private Subnet.
:::
### Consensus Parameters
Subnet configs supports loading new consensus parameters. JSON keys are
different from their matching `CLI` keys. These parameters must be grouped under
`consensusParameters` key. The consensus parameters of a Subnet default to the
same values used for the Primary Network, which are given [CLI Snow Parameters](https://build.avax.network/docs/nodes/configure/configs-flags#snow-parameters).
| CLI Key | JSON Key |
| :------------------------------- | :-------------------- |
| --snow-sample-size | k |
| --snow-quorum-size | alpha |
| --snow-commit-threshold | `beta` |
| --snow-concurrent-repolls | concurrentRepolls |
| --snow-optimal-processing | `optimalProcessing` |
| --snow-max-processing | maxOutstandingItems |
| --snow-max-time-processing | maxItemProcessingTime |
| --snow-avalanche-batch-size | `batchSize` |
| --snow-avalanche-num-parents | `parentSize` |
#### `proposerMinBlockDelay` (duration)
The minimum delay performed when building snowman++ blocks. Default is set to 1 second.
As one of the ways to control network congestion, Snowman++ will only build a
block `proposerMinBlockDelay` after the parent block's timestamp. Some
high-performance custom VMs may find this too strict. This flag allows tuning the
frequency at which blocks are built.
### Gossip Configs
It's possible to define different Gossip configurations for each Subnet without
changing values for Primary Network. JSON keys of these
parameters are different from their matching `CLI` keys. These parameters
default to the same values used for the Primary Network. For more information
see [CLI Gossip Configs](https://build.avax.network/docs/nodes/configure/configs-flags#gossiping).
| CLI Key | JSON Key |
| :------------------------------------------------------ | :------------------------------------- |
| --consensus-accepted-frontier-gossip-validator-size | gossipAcceptedFrontierValidatorSize |
| --consensus-accepted-frontier-gossip-non-validator-size | gossipAcceptedFrontierNonValidatorSize |
| --consensus-accepted-frontier-gossip-peer-size | gossipAcceptedFrontierPeerSize |
| --consensus-on-accept-gossip-validator-size | gossipOnAcceptValidatorSize |
| --consensus-on-accept-gossip-non-validator-size | gossipOnAcceptNonValidatorSize |
| --consensus-on-accept-gossip-peer-size | gossipOnAcceptPeerSize |
# AvalancheGo Config Flags (/docs/nodes/configure/configs-flags)
---
title: "AvalancheGo Config Flags"
description: "This page lists all available configuration options for AvalancheGo nodes."
edit_url: https://github.com/ava-labs/avalanchego/edit/master/config/config.md
---
# AvalancheGo Configs and Flags
This document lists all available configuration options for AvalancheGo nodes. You can configure your node using either command-line flags or environment variables.
> **Note:** For comparison with the previous documentation format (using individual flag headings), see the [archived version](https://gist.github.com/navillanueva/cdb9c49c411bd89a9480f05a7afbab37).
## Environment Variable Naming Convention
All environment variables follow the pattern: `AVAGO_` + flag name where the flag name is converted to uppercase with hyphens replaced by underscores.
For example:
- Flag: `--api-admin-enabled`
- Environment Variable: `AVAGO_API_ADMIN_ENABLED`
## Example Usage
### Using Command-Line Flags
```bash
avalanchego --network-id=fuji --http-host=0.0.0.0 --log-level=debug
```
### Using Environment Variables
```bash
export AVAGO_NETWORK_ID=fuji
export AVAGO_HTTP_HOST=0.0.0.0
export AVAGO_LOG_LEVEL=debug
avalanchego
```
### Using Config File
Create a JSON config file:
```json
{
"network-id": "fuji",
"http-host": "0.0.0.0",
"log-level": "debug"
}
```
Run with:
```bash
avalanchego --config-file=/path/to/config.json
```
## Configuration Precedence
Configuration sources are applied in the following order (highest to lowest precedence):
1. Command-line flags
2. Environment variables
3. Config file
4. Default values
# Configuration Options
### APIs
Configuration for various APIs exposed by the node.
| Flag | Env Var | Type | Default | Description |
|--------|--------|------|----|--------------------|
| `--api-admin-enabled` | `AVAGO_API_ADMIN_ENABLED` | bool | `false` | If set to `true`, this node will expose the Admin API. See [here](https://build.avax.network/docs/api-reference/admin-api) for more information. |
| `--api-health-enabled` | `AVAGO_API_HEALTH_ENABLED` | bool | `true` | If set to `false`, this node will not expose the Health API. See [here](https://build.avax.network/docs/api-reference/health-api) for more information. |
| `--index-enabled` | `AVAGO_INDEX_ENABLED` | bool | `false` | If set to `true`, this node will enable the indexer and the Index API will be available. See [here](https://build.avax.network/docs/api-reference/index-api) for more information. |
| `--api-info-enabled` | `AVAGO_API_INFO_ENABLED` | bool | `true` | If set to `false`, this node will not expose the Info API. See [here](https://build.avax.network/docs/api-reference/info-api) for more information. |
| `--api-metrics-enabled` | `AVAGO_API_METRICS_ENABLED` | bool | `true` | If set to `false`, this node will not expose the Metrics API. See [here](https://build.avax.network/docs/api-reference/metrics-api) for more information. |
### Avalanche Community Proposals
Support for [Avalanche Community Proposals](https://github.com/avalanche-foundation/ACPs).
| Flag | Env Var | Type | Default | Description |
|--------|--------|------|----|--------------------|
| `--acp-support` | `AVAGO_ACP_SUPPORT` | []int | `[]` | The `--acp-support` flag allows an AvalancheGo node to indicate support for a set of [Avalanche Community Proposals](https://github.com/avalanche-foundation/ACPs). |
| `--acp-object` | `AVAGO_ACP_OBJECT` | []int | `[]` | The `--acp-object` flag allows an AvalancheGo node to indicate objection for a set of [Avalanche Community Proposals](https://github.com/avalanche-foundation/ACPs). |
### Bootstrapping
Configuration for node bootstrapping process.
| Flag | Env Var | Type | Default | Description |
|--------|--------|------|----|--------------------|
| `--bootstrap-ancestors-max-containers-sent` | `AVAGO_BOOTSTRAP_ANCESTORS_MAX_CONTAINERS_SENT` | uint | `2000` | Max number of containers in an `Ancestors` message sent by this node. |
| `--bootstrap-ancestors-max-containers-received` | `AVAGO_BOOTSTRAP_ANCESTORS_MAX_CONTAINERS_RECEIVED` | uint | `2000` | This node reads at most this many containers from an incoming `Ancestors` message. |
| `--bootstrap-beacon-connection-timeout` | `AVAGO_BOOTSTRAP_BEACON_CONNECTION_TIMEOUT` | duration | `1m` | Timeout when attempting to connect to bootstrapping beacons. |
| `--bootstrap-ids` | `AVAGO_BOOTSTRAP_IDS` | string | network dependent | Bootstrap IDs is a comma-separated list of validator IDs. These IDs will be used to authenticate bootstrapping peers. An example setting of this field would be `--bootstrap-ids="NodeID-7Xhw2mDxuDS44j42TCB6U5579esbSt3Lg,NodeID-MFrZFVCXPv5iCn6M9K6XduxGTYp891xXZ"`. The number of given IDs here must be same with number of given `--bootstrap-ips`. The default value depends on the network ID. |
| `--bootstrap-ips` | `AVAGO_BOOTSTRAP_IPS` | string | network dependent | Bootstrap IPs is a comma-separated list of IP:port pairs. These IP Addresses will be used to bootstrap the current Avalanche state. An example setting of this field would be `--bootstrap-ips="127.0.0.1:12345,1.2.3.4:5678"`. The number of given IPs here must be same with number of given `--bootstrap-ids`. The default value depends on the network ID. |
| `--bootstrap-max-time-get-ancestors` | `AVAGO_BOOTSTRAP_MAX_TIME_GET_ANCESTORS` | duration | `50ms` | Max Time to spend fetching a container and its ancestors when responding to a GetAncestors message. |
| `--bootstrap-retry-enabled` | `AVAGO_BOOTSTRAP_RETRY_ENABLED` | bool | `true` | If set to `false`, will not retry bootstrapping if it fails. |
| `--bootstrap-retry-warn-frequency` | `AVAGO_BOOTSTRAP_RETRY_WARN_FREQUENCY` | uint | `50` | Specifies how many times bootstrap should be retried before warning the operator. |
### Chain Configuration
Some blockchains allow the node operator to provide custom configurations for individual blockchains. These custom configurations are broken down into two categories: network upgrades and optional chain configurations. AvalancheGo reads in these configurations from the chain configuration directory and passes them into the VM on initialization.
| Flag | Env Var | Type | Default | Description |
|--------|--------|------|----|--------------------|
| `--chain-config-dir` | `AVAGO_CHAIN_CONFIG_DIR` | string | `$HOME/.avalanchego/configs/chains` | Specifies the directory that contains chain configs, as described [here](https://build.avax.network/docs/nodes/chain-configs). If this flag is not provided and the default directory does not exist, AvalancheGo will not exit since custom configs are optional. However, if the flag is set, the specified folder must exist, or AvalancheGo will exit with an error. This flag is ignored if `--chain-config-content` is specified. Network upgrades are passed in from the location: `chain-config-dir`/`blockchainID`/`upgrade.*`. The chain configs are passed in from the location `chain-config-dir`/`blockchainID`/`config.*`. See [here](https://build.avax.network/docs/nodes/chain-configs) for more information. |
| `--chain-config-content` | `AVAGO_CHAIN_CONFIG_CONTENT` | string | - | As an alternative to `--chain-config-dir`, chains custom configurations can be loaded altogether from command line via `--chain-config-content` flag. Content must be base64 encoded. Example: First, encode the chain config: `echo -n '{"log-level":"trace"}' \| base64`. This will output something like `eyJsb2ctbGV2ZWwiOiJ0cmFjZSJ9`. Then create the full config JSON and encode it: `echo -n '{"C":{"Config":"eyJsb2ctbGV2ZWwiOiJ0cmFjZSJ9","Upgrade":null}}' \| base64`. Finally run: `avalanchego --chain-config-content "eyJDIjp7IkNvbmZpZyI6ImV5SnNiMmN0YkdWMlpXd2lPaUowY21GalpTSjkiLCJVcGdyYWRlIjpudWxsfX0="` |
| `--chain-aliases-file` | `AVAGO_CHAIN_ALIASES_FILE` | string | `~/.avalanchego/configs/chains/aliases.json` | Path to JSON file that defines aliases for Blockchain IDs. This flag is ignored if `--chain-aliases-file-content` is specified. Example content: `{"q2aTwKuyzgs8pynF7UXBZCU7DejbZbZ6EUyHr3JQzYgwNPUPi": ["DFK"]}`. The above example aliases the Blockchain whose ID is `"q2aTwKuyzgs8pynF7UXBZCU7DejbZbZ6EUyHr3JQzYgwNPUPi"` to `"DFK"`. Chain aliases are added after adding primary network aliases and before any changes to the aliases via the admin API. This means that the first alias included for a Blockchain on a Subnet will be treated as the `"Primary Alias"` instead of the full blockchainID. The Primary Alias is used in all metrics and logs. |
| `--chain-aliases-file-content` | `AVAGO_CHAIN_ALIASES_FILE_CONTENT` | string | - | As an alternative to `--chain-aliases-file`, it allows specifying base64 encoded aliases for Blockchains. |
| `--chain-data-dir` | `AVAGO_CHAIN_DATA_DIR` | string | `$HOME/.avalanchego/chainData` | Chain specific data directory. |
### Config File
| Flag | Env Var | Type | Default | Description |
|--------|--------|------|----|--------------------|
|`--config-file` | `AVAGO_CONFIG_FILE` | string | - | Path to a JSON file that specifies this node's configuration. Command line arguments will override arguments set in the config file. This flag is ignored if `--config-file-content` is specified. Example JSON config file: `{"log-level": "debug"}`. [Install Script](https://build.avax.network/docs/tooling/avalanche-go-installer) creates the node config file at `~/.avalanchego/configs/node.json`. No default file is created if [AvalancheGo is built from source](https://build.avax.network/docs/nodes/run-a-node/from-source), you would need to create it manually if needed. |
| `--config-file-content` | `AVAGO_CONFIG_FILE_CONTENT` | string | - | As an alternative to `--config-file`, it allows specifying base64 encoded config content. |
| `--config-file-content-type` | `AVAGO_CONFIG_FILE_CONTENT_TYPE` | string | `JSON` | Specifies the format of the base64 encoded config content. JSON, TOML, YAML are among currently supported file format (see [here](https://github.com/spf13/viper#reading-config-files) for full list). |
### Data Directory
| Flag | Env Var | Type | Default | Description |
|--------|--------|------|----|--------------------|
| `--data-dir` | `AVAGO_DATA_DIR` | string | `$HOME/.avalanchego` | Sets the base data directory where default sub-directories will be placed unless otherwise specified. |
### Database
| Flag | Env Var | Type | Default | Description |
|--------|--------|------|----|--------------------|
| `--db-dir` | `AVAGO_DB_DIR` | string | `$HOME/.avalanchego/db` | Specifies the directory to which the database is persisted. |
| `--db-type` | `AVAGO_DB_TYPE` | string | `leveldb` | Specifies the type of database to use. Must be one of `leveldb`, `memdb`, or `pebbledb`. `memdb` is an in-memory, non-persisted database. Note: `memdb` stores everything in memory. So if you have a 900 GiB LevelDB instance, then using `memdb` you'd need 900 GiB of RAM. `memdb` is useful for fast one-off testing, not for running an actual node (on Fuji or Mainnet). Also note that `memdb` doesn't persist after restart. So any time you restart the node it would start syncing from scratch. |
#### Database Config
| Flag | Env Var | Type | Default | Description |
|--------|--------|------|----|--------------------|
| `--db-config-file` | `AVAGO_DB_CONFIG_FILE` | string | - | Path to the database config file. Ignored if `--db-config-file-content` is specified. |
| `--db-config-file-content` | `AVAGO_DB_CONFIG_FILE_CONTENT` | string | - | As an alternative to `--db-config-file`, it allows specifying base64 encoded database config content. |
A LevelDB config file must be JSON and may have these keys. Any keys not given will receive the default value. See [here](https://pkg.go.dev/github.com/syndtr/goleveldb/leveldb/opt#Options) for more information.
### File Descriptor Limit
| Flag | Env Var | Type | Default | Description |
|--------|--------|------|----|--------------------|
| `--fd-limit` | `AVAGO_FD_LIMIT` | int | `32768` | Attempts to raise the process file descriptor limit to at least this value and error if the value is above the system max. |
### Genesis
| Flag | Env Var | Type | Default | Description |
|--------|--------|------|----|--------------------|
| `--genesis-file` | `AVAGO_GENESIS_FILE` | string | - | Path to a JSON file containing the genesis data to use. Ignored when running standard networks (Mainnet, Fuji Testnet), or when `--genesis-file-content` is specified. If not given, uses default genesis data. See the documentation for the genesis JSON format [here](https://github.com/ava-labs/avalanchego/blob/master/genesis/README.md) and an example for a local network [here](https://github.com/ava-labs/avalanchego/blob/master/genesis/genesis_local.json). |
| `--genesis-file-content` | `AVAGO_GENESIS_FILE_CONTENT` | string | - | As an alternative to `--genesis-file`, it allows specifying base64 encoded genesis data to use. |
### HTTP Server
| Flag | Env Var | Type | Default | Description |
|--------|--------|------|----|--------------------|
| `--http-allowed-hosts` | `AVAGO_HTTP_ALLOWED_HOSTS` | string | `localhost` | List of acceptable host names in API requests. Provide the wildcard (`'*'`) to accept requests from all hosts. API requests where the `Host` field is empty or an IP address will always be accepted. An API call whose HTTP `Host` field isn't acceptable will receive a 403 error code. |
| `--http-allowed-origins` | `AVAGO_HTTP_ALLOWED_ORIGINS` | string | `*` | Origins to allow on the HTTP port. Example: `"https://*.avax.network https://*.avax-test.network"` |
| `--http-host` | `AVAGO_HTTP_HOST` | string | `127.0.0.1` | The address that HTTP APIs listen on. This means that by default, your node can only handle API calls made from the same machine. To allow API calls from other machines, use `--http-host=`. You can also enter domain names as parameter. |
| `--http-port` | `AVAGO_HTTP_PORT` | int | `9650` | Each node runs an HTTP server that provides the APIs for interacting with the node and the Avalanche network. This argument specifies the port that the HTTP server will listen on. |
| `--http-idle-timeout` | `AVAGO_HTTP_IDLE_TIMEOUT` | duration | `120s` | Maximum duration to wait for the next request when keep-alives are enabled. If `--http-idle-timeout` is zero, the value of `--http-read-timeout` is used. If both are zero, there is no timeout. |
| `--http-read-timeout` | `AVAGO_HTTP_READ_TIMEOUT` | duration | `30s` | Maximum duration for reading the entire request, including the body. A zero or negative value means there will be no timeout. |
| `--http-read-header-timeout` | `AVAGO_HTTP_READ_HEADER_TIMEOUT` | duration | `30s` | Maximum duration to read request headers. The connection's read deadline is reset after reading the headers. If `--http-read-header-timeout` is zero, the value of `--http-read-timeout` is used. If both are zero, there is no timeout. |
| `--http-write-timeout` | `AVAGO_HTTP_WRITE_TIMEOUT` | duration | `30s` | Maximum duration before timing out writes of the response. It is reset whenever a new request's header is read. A zero or negative value means there will be no timeout. |
| `--http-shutdown-timeout` | `AVAGO_HTTP_SHUTDOWN_TIMEOUT` | duration | `10s` | Maximum duration to wait for existing connections to complete during node shutdown. |
| `--http-shutdown-wait` | `AVAGO_HTTP_SHUTDOWN_WAIT` | duration | `0s` | Duration to wait after receiving SIGTERM or SIGINT before initiating shutdown. The `/health` endpoint will return unhealthy during this duration (if the Health API is enabled.) |
| `--http-tls-enabled` | `AVAGO_HTTP_TLS_ENABLED` | boolean | `false` | If set to `true`, this flag will attempt to upgrade the server to use HTTPS. |
| `--http-tls-cert-file` | `AVAGO_HTTP_TLS_CERT_FILE` | string | - | This argument specifies the location of the TLS certificate used by the node for the HTTPS server. This must be specified when `--http-tls-enabled=true`. There is no default value. This flag is ignored if `--http-tls-cert-file-content` is specified. |
| `--http-tls-cert-file-content` | `AVAGO_HTTP_TLS_CERT_FILE_CONTENT` | string | - | As an alternative to `--http-tls-cert-file`, it allows specifying base64 encoded content of the TLS certificate used by the node for the HTTPS server. Note that full certificate content, with the leading and trailing header, must be base64 encoded. This must be specified when `--http-tls-enabled=true`. |
| `--http-tls-key-file` | `AVAGO_HTTP_TLS_KEY_FILE` | string | - | This argument specifies the location of the TLS private key used by the node for the HTTPS server. This must be specified when `--http-tls-enabled=true`. There is no default value. This flag is ignored if `--http-tls-key-file-content` is specified. |
| `--http-tls-key-file-content` | `AVAGO_HTTP_TLS_KEY_FILE_CONTENT` | string | - | As an alternative to `--http-tls-key-file`, it allows specifying base64 encoded content of the TLS private key used by the node for the HTTPS server. Note that full private key content, with the leading and trailing header, must be base64 encoded. This must be specified when `--http-tls-enabled=true`. |
### Logging
| Flag | Env Var | Type | Default | Description |
|--------|--------|------|----|--------------------|
| `--log-level=off` | `AVAGO_LOG_LEVEL` | string | `info` | No logs. |
| `--log-level=fatal` | `AVAGO_LOG_LEVEL` | string | `info` | Fatal errors that are not recoverable. |
| `--log-level=error` | `AVAGO_LOG_LEVEL` | string | `info` | Errors that the node encounters, these errors were able to be recovered. |
| `--log-level=warn` | `AVAGO_LOG_LEVEL` | string | `info` | Warnings that might be indicative of a spurious byzantine node, or potential future error. |
| `--log-level=info` | `AVAGO_LOG_LEVEL` | string | `info` | Useful descriptions of node status updates. |
| `--log-level=trace` | `AVAGO_LOG_LEVEL` | string | `info` | Traces container job results, useful for tracing container IDs and their outcomes. |
| `--log-level=debug` | `AVAGO_LOG_LEVEL` | string | `info` | Useful when attempting to understand possible bugs in the code. |
| `--log-level=verbo` | `AVAGO_LOG_LEVEL` | string | `info` | Tracks extensive amounts of information the node is processing, including message contents and binary dumps of data for extremely low level protocol analysis. |
| `--log-display-level` | `AVAGO_LOG_DISPLAY_LEVEL` | string | value of `--log-level` | The log level determines which events to display to stdout. If left blank, will default to the value provided to `--log-level`. |
| `--log-format=auto` | `AVAGO_LOG_FORMAT` | string | `auto` | Formats terminal-like logs when the output is a terminal. |
| `--log-format=plain` | `AVAGO_LOG_FORMAT` | string | `auto` | Plain text log format. |
| `--log-format=colors` | `AVAGO_LOG_FORMAT` | string | `auto` | Colored log format. |
| `--log-format=json` | `AVAGO_LOG_FORMAT` | string | `auto` | JSON log format. |
| `--log-dir` | `AVAGO_LOG_DIR` | string | `$HOME/.avalanchego/logs` | Specifies the directory in which system logs are kept. If you are running the node as a system service (ex. using the installer script) logs will also be stored in `$HOME/var/log/syslog`. |
| `--log-disable-display-plugin-logs` | `AVAGO_LOG_DISABLE_DISPLAY_PLUGIN_LOGS` | boolean | `false` | Disables displaying plugin logs in stdout. |
| `--log-rotater-max-size` | `AVAGO_LOG_ROTATER_MAX_SIZE` | uint | `8` | The maximum file size in megabytes of the log file before it gets rotated. |
| `--log-rotater-max-files` | `AVAGO_LOG_ROTATER_MAX_FILES` | uint | `7` | The maximum number of old log files to retain. 0 means retain all old log files. |
| `--log-rotater-max-age` | `AVAGO_LOG_ROTATER_MAX_AGE` | uint | `0` | The maximum number of days to retain old log files based on the timestamp encoded in their filename. 0 means retain all old log files. |
| `--log-rotater-compress-enabled` | `AVAGO_LOG_ROTATER_COMPRESS_ENABLED` | boolean | `false` | Enables the compression of rotated log files through gzip. |
### Continuous Profiling
You can configure your node to continuously run memory/CPU profiles and save the most recent ones. Continuous memory/CPU profiling is enabled if `--profile-continuous-enabled` is set.
| Flag | Env Var | Type | Default | Description |
|--------|--------|------|----|--------------------|
| `--profile-continuous-enabled` | `AVAGO_PROFILE_CONTINUOUS_ENABLED` | boolean | `false` | Whether the app should continuously produce performance profiles. |
| `--profile-dir` | `AVAGO_PROFILE_DIR` | string | `$HOME/.avalanchego/profiles/` | If profiling is enabled, node continuously runs memory/CPU profiles and puts them at this directory. |
| `--profile-continuous-freq` | `AVAGO_PROFILE_CONTINUOUS_FREQ` | duration | `15m` | How often a new CPU/memory profile is created. |
| `--profile-continuous-max-files` | `AVAGO_PROFILE_CONTINUOUS_MAX_FILES` | int | `5` | Maximum number of CPU/memory profile files to keep. |
### Network
| Flag | Env Var | Type | Default | Description |
|--------|--------|------|----|--------------------|
| `--network-id=mainnet` | `AVAGO_NETWORK_ID` | string | `mainnet` | Connect to Mainnet (default). |
| `--network-id=fuji` | `AVAGO_NETWORK_ID` | string | `mainnet` | Connect to the Fuji test-network. |
| `--network-id=testnet` | `AVAGO_NETWORK_ID` | string | `mainnet` | Connect to the current test-network (currently Fuji). |
| `--network-id=local` | `AVAGO_NETWORK_ID` | string | `mainnet` | Connect to a local test-network. |
| `--network-id=network-[id]` | `AVAGO_NETWORK_ID` | string | `mainnet` | Connect to the network with the given ID. `id` must be in the range \[0, 2^32\). |
### OpenTelemetry
AvalancheGo supports collecting and exporting [OpenTelemetry](https://opentelemetry.io/) traces. This might be useful for debugging, performance analysis, or monitoring.
| Flag | Env Var | Type | Default | Description |
|--------|--------|------|----|--------------------|
| `--tracing-endpoint` | `AVAGO_TRACING_ENDPOINT` | string | `localhost:4317` (gRPC) or `localhost:4318` (HTTP) | The endpoint to export trace data to. Default depends on `--tracing-exporter-type`. |
| `--tracing-exporter-type` | `AVAGO_TRACING_EXPORTER_TYPE` | string | `disabled` | Type of exporter to use for tracing. Options are \`disabled\`, \`grpc\`, \`http\`. |
| `--tracing-insecure` | `AVAGO_TRACING_INSECURE` | boolean | `true` | If true, don't use TLS when exporting trace data. |
| `--tracing-sample-rate` | `AVAGO_TRACING_SAMPLE_RATE` | float | `0.1` | The fraction of traces to sample. If \>= 1, always sample. If \<= 0, never sample. |
### Partial Sync Primary Network
| Flag | Env Var | Type | Default | Description |
|--------|--------|------|----|--------------------|
| `--partial-sync-primary-network` | `AVAGO_PARTIAL_SYNC_PRIMARY_NETWORK` | boolean | `false` | Partial sync enables nodes that are not primary network validators to optionally sync only the P-chain on the primary network. Nodes that use this option can still track Subnets. After the Etna upgrade, nodes that use this option can also validate L1s. |
### Public IP
Validators must know one of their public facing IP addresses so they can enable other nodes to connect to them. By default, the node will attempt to perform NAT traversal to get the node's IP according to its router.
| Flag | Env Var | Type | Default | Description |
|--------|--------|------|----|--------------------|
| `--public-ip` | `AVAGO_PUBLIC_IP` | string | - | If this argument is provided, the node assumes this is its public IP. When running a local network it may be easiest to set this value to `127.0.0.1`. |
| `--public-ip-resolution-frequency` | `AVAGO_PUBLIC_IP_RESOLUTION_FREQUENCY` | duration | `5m` | Frequency at which this node resolves/updates its public IP and renew NAT mappings, if applicable. |
| `--public-ip-resolution-service` | `AVAGO_PUBLIC_IP_RESOLUTION_SERVICE` | string | - | When provided, the node will use that service to periodically resolve/update its public IP. Only acceptable values are `ifconfigCo`, `opendns` or `ifconfigMe`. |
### State Syncing
| Flag | Env Var | Type | Default | Description |
|--------|--------|------|----|--------------------|
| `--state-sync-ids` | `AVAGO_STATE_SYNC_IDS` | string | - | State sync IDs is a comma-separated list of validator IDs. The specified validators will be contacted to get and authenticate the starting point (state summary) for state sync. An example setting of this field would be `--state-sync-ids="NodeID-7Xhw2mDxuDS44j42TCB6U5579esbSt3Lg,NodeID-MFrZFVCXPv5iCn6M9K6XduxGTYp891xXZ"`. The number of given IDs here must be same with number of given `--state-sync-ips`. The default value is empty, which results in all validators being sampled. |
| `--state-sync-ips` | `AVAGO_STATE_SYNC_IPS` | string | - | State sync IPs is a comma-separated list of IP:port pairs. These IP Addresses will be contacted to get and authenticate the starting point (state summary) for state sync. An example setting of this field would be `--state-sync-ips="127.0.0.1:12345,1.2.3.4:5678"`. The number of given IPs here must be the same with the number of given `--state-sync-ids`. |
### Staking
| Flag | Env Var | Type | Default | Description |
|--------|--------|------|----|--------------------|
| `--staking-port` | `AVAGO_STAKING_PORT` | int | `9651` | The port through which the network peers will connect to this node externally. Having this port accessible from the internet is required for correct node operation. |
| `--staking-tls-cert-file` | `AVAGO_STAKING_TLS_CERT_FILE` | string | `$HOME/.avalanchego/staking/staker.crt` | Avalanche uses two-way authenticated TLS connections to securely connect nodes. This argument specifies the location of the TLS certificate used by the node. This flag is ignored if `--staking-tls-cert-file-content` is specified. |
| `--staking-tls-cert-file-content` | `AVAGO_STAKING_TLS_CERT_FILE_CONTENT` | string | - | As an alternative to `--staking-tls-cert-file`, it allows specifying base64 encoded content of the TLS certificate used by the node. Note that full certificate content, with the leading and trailing header, must be base64 encoded. |
| `--staking-tls-key-file` | `AVAGO_STAKING_TLS_KEY_FILE` | string | `$HOME/.avalanchego/staking/staker.key` | Avalanche uses two-way authenticated TLS connections to securely connect nodes. This argument specifies the location of the TLS private key used by the node. This flag is ignored if `--staking-tls-key-file-content` is specified. |
| `--staking-tls-key-file-content` | `AVAGO_STAKING_TLS_KEY_FILE_CONTENT` | string | - | As an alternative to `--staking-tls-key-file`, it allows specifying base64 encoded content of the TLS private key used by the node. Note that full private key content, with the leading and trailing header, must be base64 encoded. |
### Subnets
#### Subnet Tracking
| Flag | Env Var | Type | Default | Description |
|--------|--------|------|----|--------------------|
| `--track-subnets` | `AVAGO_TRACK_SUBNETS` | string | - | Comma separated list of Subnet IDs that this node would track if added to. Defaults to empty (will only validate the Primary Network). |
#### Subnet Configs
It is possible to provide parameters for Subnets. Parameters here apply to all chains in the specified Subnets. Parameters must be specified with a `[subnetID].json` config file under `--subnet-config-dir`. AvalancheGo loads configs for Subnets specified in `--track-subnets` parameter. Full reference for all configuration options for a Subnet can be found in a separate [Subnet Configs](https://build.avax.network/docs/nodes/configure/avalanche-l1-configs) document.
| Flag | Env Var | Type | Default | Description |
|--------|--------|------|----|--------------------|
| `--subnet-config-dir` | `AVAGO_SUBNET_CONFIG_DIR` | string | `$HOME/.avalanchego/configs/subnets` | Specifies the directory that contains Subnet configs, as described above. If the flag is set explicitly, the specified folder must exist, or AvalancheGo will exit with an error. This flag is ignored if `--subnet-config-content` is specified. Example: Let's say we have a Subnet with ID `p4jUwqZsA2LuSftroCd3zb4ytH8W99oXKuKVZdsty7eQ3rXD6`. We can create a config file under the default `subnet-config-dir` at `$HOME/.avalanchego/configs/subnets/p4jUwqZsA2LuSftroCd3zb4ytH8W99oXKuKVZdsty7eQ3rXD6.json`. An example config file is: `{"validatorOnly": false, "consensusParameters": {"k": 25, "alpha": 18}}`. By default, none of these directories and/or files exist. You would need to create them manually if needed. |
| `--subnet-config-content` | `AVAGO_SUBNET_CONFIG_CONTENT` | string | - | As an alternative to `--subnet-config-dir`, it allows specifying base64 encoded parameters for a Subnet. |
### Version
| Flag | Env Var | Type | Default | Description |
|--------|--------|------|----|--------------------|
| `--version` | `AVAGO_VERSION` | boolean | `false` | If this is `true`, print the version and quit. |
# Advanced Configuration Options
⚠️ **Warning**: The following options may affect the correctness of a node. Only power users should change these.
### Gossiping
Consensus gossiping parameters.
| Flag | Env Var | Type | Default | Description |
|--------|--------|------|----|--------------------|
| `--consensus-accepted-frontier-gossip-validator-size` | `AVAGO_CONSENSUS_ACCEPTED_FRONTIER_GOSSIP_VALIDATOR_SIZE` | uint | `0` | Number of validators to gossip to when gossiping accepted frontier. |
| `--consensus-accepted-frontier-gossip-non-validator-size` | `AVAGO_CONSENSUS_ACCEPTED_FRONTIER_GOSSIP_NON_VALIDATOR_SIZE` | uint | `0` | Number of non-validators to gossip to when gossiping accepted frontier. |
| `--consensus-accepted-frontier-gossip-peer-size` | `AVAGO_CONSENSUS_ACCEPTED_FRONTIER_GOSSIP_PEER_SIZE` | uint | `15` | Number of peers to gossip to when gossiping accepted frontier. |
| `--consensus-accepted-frontier-gossip-frequency` | `AVAGO_CONSENSUS_ACCEPTED_FRONTIER_GOSSIP_FREQUENCY` | duration | `10s` | Time between gossiping accepted frontiers. |
| `--consensus-on-accept-gossip-validator-size` | `AVAGO_CONSENSUS_ON_ACCEPT_GOSSIP_VALIDATOR_SIZE` | uint | `0` | Number of validators to gossip to each accepted container to. |
| `--consensus-on-accept-gossip-non-validator-size` | `AVAGO_CONSENSUS_ON_ACCEPT_GOSSIP_NON_VALIDATOR_SIZE` | uint | `0` | Number of non-validators to gossip to each accepted container to. |
| `--consensus-on-accept-gossip-peer-size` | `AVAGO_CONSENSUS_ON_ACCEPT_GOSSIP_PEER_SIZE` | uint | `10` | Number of peers to gossip to each accepted container to. |
### Sybil Protection
Sybil protection configuration. These settings affect how the node participates in consensus.
| Flag | Env Var | Type | Default | Description |
|--------|--------|------|----|--------------------|
| `--sybil-protection-enabled` | `AVAGO_SYBIL_PROTECTION_ENABLED` | boolean | `true` | Avalanche uses Proof of Stake (PoS) as sybil resistance to make it prohibitively expensive to attack the network. If false, sybil resistance is disabled and all peers will be sampled during consensus. Note that this can not be disabled on public networks (`Fuji` and `Mainnet`). Setting this flag to `false` **does not** mean "this node is not a validator." It means that this node will sample all nodes, not just validators. **You should not set this flag to false unless you understand what you are doing.** |
| `--sybil-protection-disabled-weight` | `AVAGO_SYBIL_PROTECTION_DISABLED_WEIGHT` | uint | `100` | Weight to provide to each peer when staking is disabled. |
### Benchlist
Peer benchlisting configuration.
| Flag | Env Var | Type | Default | Description |
|--------|--------|------|----|--------------------|
| `--benchlist-duration` | `AVAGO_BENCHLIST_DURATION` | duration | `15m` | Maximum amount of time a peer is benchlisted after surpassing `--benchlist-fail-threshold`. |
| `--benchlist-fail-threshold` | `AVAGO_BENCHLIST_FAIL_THRESHOLD` | int | `10` | Number of consecutive failed queries to a node before benching it (assuming all queries to it will fail). |
| `--benchlist-min-failing-duration` | `AVAGO_BENCHLIST_MIN_FAILING_DURATION` | duration | `150s` | Minimum amount of time queries to a peer must be failing before the peer is benched. |
### Consensus Parameters
:::note
Some of these parameters can only be set on a local or private network, not on Fuji Testnet or Mainnet
:::
| Flag | Env Var | Type | Default | Description |
|--------|--------|------|----|--------------------|
| `--consensus-shutdown-timeout` | `AVAGO_CONSENSUS_SHUTDOWN_TIMEOUT` | duration | `5s` | Timeout before killing an unresponsive chain. |
| `--create-asset-tx-fee` | `AVAGO_CREATE_ASSET_TX_FEE` | int | `10000000` | Transaction fee, in nAVAX, for transactions that create new assets. This can only be changed on a local network. |
| `--tx-fee` | `AVAGO_TX_FEE` | int | `1000000` | The required amount of nAVAX to be burned for a transaction to be valid on the X-Chain, and for import/export transactions on the P-Chain. This parameter requires network agreement in its current form. Changing this value from the default should only be done on private networks or local network. |
| `--uptime-requirement` | `AVAGO_UPTIME_REQUIREMENT` | float | `0.8` | Fraction of time a validator must be online to receive rewards. This can only be changed on a local network. |
| `--uptime-metric-freq` | `AVAGO_UPTIME_METRIC_FREQ` | duration | `30s` | Frequency of renewing this node's average uptime metric. |
### Staking Parameters
Staking economics configuration.
| Flag | Env Var | Type | Default | Description |
|--------|--------|------|----|--------------------|
| `--min-validator-stake` | `AVAGO_MIN_VALIDATOR_STAKE` | int | network dependent | The minimum stake, in nAVAX, required to validate the Primary Network. This can only be changed on a local network. Defaults to `2000000000000` (2,000 AVAX) on Mainnet. Defaults to `5000000` (.005 AVAX) on Test Net. |
| `--max-validator-stake` | `AVAGO_MAX_VALIDATOR_STAKE` | int | network dependent | The maximum stake, in nAVAX, that can be placed on a validator on the primary network. This includes stake provided by both the validator and by delegators to the validator. This can only be changed on a local network. |
| `--min-delegator-stake` | `AVAGO_MIN_DELEGATOR_STAKE` | int | network dependent | The minimum stake, in nAVAX, that can be delegated to a validator of the Primary Network. Defaults to `25000000000` (25 AVAX) on Mainnet. Defaults to `5000000` (.005 AVAX) on Test Net. This can only be changed on a local network. |
| `--min-delegation-fee` | `AVAGO_MIN_DELEGATION_FEE` | int | `20000` | The minimum delegation fee that can be charged for delegation on the Primary Network, multiplied by \`10,000\`. Must be in the range \[0, 1000000\]. This can only be changed on a local network. |
| `--min-stake-duration` | `AVAGO_MIN_STAKE_DURATION` | duration | `336h` | Minimum staking duration. This can only be changed on a local network. This applies to both delegation and validation periods. |
| `--max-stake-duration` | `AVAGO_MAX_STAKE_DURATION` | duration | `8760h` | The maximum staking duration, in hours. This can only be changed on a local network. |
| `--stake-minting-period` | `AVAGO_STAKE_MINTING_PERIOD` | duration | `8760h` | Consumption period of the staking function, in hours. This can only be changed on a local network. |
| `--stake-max-consumption-rate` | `AVAGO_STAKE_MAX_CONSUMPTION_RATE` | uint | `120000` | The maximum percentage of the consumption rate for the remaining token supply in the minting period, which is 1 year on Mainnet. This can only be changed on a local network. |
| `--stake-min-consumption-rate` | `AVAGO_STAKE_MIN_CONSUMPTION_RATE` | uint | `100000` | The minimum percentage of the consumption rate for the remaining token supply in the minting period, which is 1 year on Mainnet. This can only be changed on a local network. |
| `--stake-supply-cap` | `AVAGO_STAKE_SUPPLY_CAP` | uint | `720000000000000000` | The maximum stake supply, in nAVAX, that can be placed on a validator. This can only be changed on a local network. |
### Snow Consensus
Snow consensus protocol parameters.
| Flag | Env Var | Type | Default | Description |
|--------|--------|------|----|--------------------|
| `--snow-concurrent-repolls` | `AVAGO_SNOW_CONCURRENT_REPOLLS` | int | `4` | Snow consensus requires repolling transactions that are issued during low time of network usage. This parameter lets one define how aggressive the client will be in finalizing these pending transactions. This should only be changed after careful consideration of the tradeoffs of Snow consensus. The value must be at least `1` and at most `--snow-commit-threshold`. |
| `--snow-sample-size` | `AVAGO_SNOW_SAMPLE_SIZE` | int | `20` | Snow consensus defines `k` as the number of validators that are sampled during each network poll. This parameter lets one define the `k` value used for consensus. This should only be changed after careful consideration of the tradeoffs of Snow consensus. The value must be at least `1`. |
| `--snow-quorum-size` | `AVAGO_SNOW_QUORUM_SIZE` | int | `15` | Snow consensus defines `alpha` as the number of validators that must prefer a transaction during each network poll to increase the confidence in the transaction. This parameter lets us define the `alpha` value used for consensus. This should only be changed after careful consideration of the tradeoffs of Snow consensus. The value must be at greater than `k/2`. |
| `--snow-commit-threshold` | `AVAGO_SNOW_COMMIT_THRESHOLD` | int | `20` | Snow consensus defines `beta` as the number of consecutive polls that a container must increase its confidence for it to be accepted. This parameter lets us define the `beta` value used for consensus. This should only be changed after careful consideration of the tradeoffs of Snow consensus. The value must be at least `1`. |
| `--snow-optimal-processing` | `AVAGO_SNOW_OPTIMAL_PROCESSING` | int | `50` | Optimal number of processing items in consensus. The value must be at least `1`. |
| `--snow-max-processing` | `AVAGO_SNOW_MAX_PROCESSING` | int | `1024` | Maximum number of processing items to be considered healthy. Reports unhealthy if more than this number of items are outstanding. The value must be at least `1`. |
| `--snow-max-time-processing` | `AVAGO_SNOW_MAX_TIME_PROCESSING` | duration | `2m` | Maximum amount of time an item should be processing and still be healthy. Reports unhealthy if there is an item processing for longer than this duration. The value must be greater than `0`. |
### ProposerVM
ProposerVM configuration.
| Flag | Env Var | Type | Default | Description |
|--------|--------|------|----|--------------------|
| `--proposervm-use-current-height` | `AVAGO_PROPOSERVM_USE_CURRENT_HEIGHT` | boolean | `false` | Have the ProposerVM always report the last accepted P-chain block height. |
| `--proposervm-min-block-delay` | `AVAGO_PROPOSERVM_MIN_BLOCK_DELAY` | duration | `1s` | The minimum delay to enforce when building a snowman++ block for the primary network chains and the default minimum delay for subnets. A non-default value is only suggested for non-production nodes. |
### Health Checks
Health monitoring configuration.
| Flag | Env Var | Type | Default | Description |
|--------|--------|------|----|--------------------|
| `--health-check-frequency` | `AVAGO_HEALTH_CHECK_FREQUENCY` | duration | `30s` | Health check runs with this frequency. |
| `--health-check-averager-halflife` | `AVAGO_HEALTH_CHECK_AVERAGER_HALFLIFE` | duration | `10s` | Half life of averagers used in health checks (to measure the rate of message failures, for example.) Larger value -> less volatile calculation of averages. |
### Network Configuration
Advanced network settings.
| Flag | Env Var | Type | Default | Description |
|--------|--------|------|----|--------------------|
| `--network-allow-private-ips` | `AVAGO_NETWORK_ALLOW_PRIVATE_IPS` | boolean | `true` | Allows the node to connect peers with private IPs. |
| `--network-compression-type` | `AVAGO_NETWORK_COMPRESSION_TYPE` | string | `gzip` | The type of compression to use when sending messages to peers. Must be one of \`gzip\`, \`zstd\`, \`none\`. Nodes can handle inbound \`gzip\` compressed messages but by default send \`zstd\` compressed messages. |
| `--network-initial-timeout` | `AVAGO_NETWORK_INITIAL_TIMEOUT` | duration | `5s` | Initial timeout value of the adaptive timeout manager. |
| `--network-initial-reconnect-delay` | `AVAGO_NETWORK_INITIAL_RECONNECT_DELAY` | duration | `1s` | Initial delay duration must be waited before attempting to reconnect a peer. |
| `--network-max-reconnect-delay` | `AVAGO_NETWORK_MAX_RECONNECT_DELAY` | duration | `1h` | Maximum delay duration must be waited before attempting to reconnect a peer. |
| `--network-minimum-timeout` | `AVAGO_NETWORK_MINIMUM_TIMEOUT` | duration | `2s` | Minimum timeout value of the adaptive timeout manager. |
| `--network-maximum-timeout` | `AVAGO_NETWORK_MAXIMUM_TIMEOUT` | duration | `10s` | Maximum timeout value of the adaptive timeout manager. |
| `--network-maximum-inbound-timeout` | `AVAGO_NETWORK_MAXIMUM_INBOUND_TIMEOUT` | duration | `10s` | Maximum timeout value of an inbound message. Defines duration within which an incoming message must be fulfilled. Incoming messages containing deadline higher than this value will be overridden with this value. |
| `--network-timeout-halflife` | `AVAGO_NETWORK_TIMEOUT_HALFLIFE` | duration | `5m` | Half life used when calculating average network latency. Larger value -> less volatile network latency calculation. |
| `--network-timeout-coefficient` | `AVAGO_NETWORK_TIMEOUT_COEFFICIENT` | float | `2` | Requests to peers will time out after \[network-timeout-coefficient\] \* \[average request latency\]. |
| `--network-read-handshake-timeout` | `AVAGO_NETWORK_READ_HANDSHAKE_TIMEOUT` | duration | `15s` | Timeout value for reading handshake messages. |
| `--network-ping-timeout` | `AVAGO_NETWORK_PING_TIMEOUT` | duration | `30s` | Timeout value for Ping-Pong with a peer. |
| `--network-ping-frequency` | `AVAGO_NETWORK_PING_FREQUENCY` | duration | `22.5s` | Frequency of pinging other peers. |
| `--network-health-min-conn-peers` | `AVAGO_NETWORK_HEALTH_MIN_CONN_PEERS` | uint | `1` | Node will report unhealthy if connected to less than this many peers. |
| `--network-health-max-time-since-msg-received` | `AVAGO_NETWORK_HEALTH_MAX_TIME_SINCE_MSG_RECEIVED` | duration | `1m` | Node will report unhealthy if it hasn't received a message for this amount of time. |
| `--network-health-max-time-since-msg-sent` | `AVAGO_NETWORK_HEALTH_MAX_TIME_SINCE_MSG_SENT` | duration | `1m` | Network layer returns unhealthy if haven't sent a message for at least this much time. |
| `--network-health-max-portion-send-queue-full` | `AVAGO_NETWORK_HEALTH_MAX_PORTION_SEND_QUEUE_FULL` | float | `0.9` | Node will report unhealthy if its send queue is more than this portion full. Must be in \[0,1\]. |
| `--network-health-max-send-fail-rate` | `AVAGO_NETWORK_HEALTH_MAX_SEND_FAIL_RATE` | float | `0.25` | Node will report unhealthy if more than this portion of message sends fail. Must be in \[0,1\]. |
| `--network-health-max-outstanding-request-duration` | `AVAGO_NETWORK_HEALTH_MAX_OUTSTANDING_REQUEST_DURATION` | duration | `5m` | Node reports unhealthy if there has been a request outstanding for this duration. |
| `--network-max-clock-difference` | `AVAGO_NETWORK_MAX_CLOCK_DIFFERENCE` | duration | `1m` | Max allowed clock difference value between this node and peers. |
| `--network-require-validator-to-connect` | `AVAGO_NETWORK_REQUIRE_VALIDATOR_TO_CONNECT` | boolean | `false` | If true, this node will only maintain a connection with another node if this node is a validator, the other node is a validator, or the other node is a beacon. |
| `--network-tcp-proxy-enabled` | `AVAGO_NETWORK_TCP_PROXY_ENABLED` | boolean | `false` | Require all P2P connections to be initiated with a TCP proxy header. |
| `--network-tcp-proxy-read-timeout` | `AVAGO_NETWORK_TCP_PROXY_READ_TIMEOUT` | duration | `3s` | Maximum duration to wait for a TCP proxy header. |
| `--network-outbound-connection-timeout` | `AVAGO_NETWORK_OUTBOUND_CONNECTION_TIMEOUT` | duration | `30s` | Timeout while dialing a peer. |
### Message Rate-Limiting
These flags govern rate-limiting of inbound and outbound messages. For more information on rate-limiting and the flags below, see package `throttling` in AvalancheGo.
#### CPU Based Rate-Limiting
Rate-limiting based on how much CPU usage a peer causes.
| Flag | Env Var | Type | Default | Description |
|--------|--------|------|----|--------------------|
| `--throttler-inbound-cpu-validator-alloc` | `AVAGO_THROTTLER_INBOUND_CPU_VALIDATOR_ALLOC` | float | half of CPUs | Number of CPU allocated for use by validators. Value should be in range \(0, total core count\]. |
| `--throttler-inbound-cpu-max-recheck-delay` | `AVAGO_THROTTLER_INBOUND_CPU_MAX_RECHECK_DELAY` | duration | `5s` | In the CPU rate-limiter, check at least this often whether the node's CPU usage has fallen to an acceptable level. |
| `--throttler-inbound-disk-max-recheck-delay` | `AVAGO_THROTTLER_INBOUND_DISK_MAX_RECHECK_DELAY` | duration | `5s` | In the disk-based network throttler, check at least this often whether the node's disk usage has fallen to an acceptable level. |
| `--throttler-inbound-cpu-max-non-validator-usage` | `AVAGO_THROTTLER_INBOUND_CPU_MAX_NON_VALIDATOR_USAGE` | float | 80% of CPUs | Number of CPUs that if fully utilized, will rate limit all non-validators. Value should be in range \[0, total core count\]. |
| `--throttler-inbound-cpu-max-non-validator-node-usage` | `AVAGO_THROTTLER_INBOUND_CPU_MAX_NON_VALIDATOR_NODE_USAGE` | float | CPUs / 8 | Maximum number of CPUs that a non-validator can utilize. Value should be in range \[0, total core count\]. |
| `--throttler-inbound-disk-validator-alloc` | `AVAGO_THROTTLER_INBOUND_DISK_VALIDATOR_ALLOC` | float | `1000 GiB/s` | Maximum number of disk reads/writes per second to allocate for use by validators. Must be > 0. |
| `--throttler-inbound-disk-max-non-validator-usage` | `AVAGO_THROTTLER_INBOUND_DISK_MAX_NON_VALIDATOR_USAGE` | float | `1000 GiB/s` | Number of disk reads/writes per second that, if fully utilized, will rate limit all non-validators. Must be \>= 0. |
| `--throttler-inbound-disk-max-non-validator-node-usage` | `AVAGO_THROTTLER_INBOUND_DISK_MAX_NON_VALIDATOR_NODE_USAGE` | float | `1000 GiB/s` | Maximum number of disk reads/writes per second that a non-validator can utilize. Must be \>= 0. |
#### Bandwidth Based Rate-Limiting
Rate-limiting based on the bandwidth a peer uses.
| Flag | Env Var | Type | Default | Description |
|--------|--------|------|----|--------------------|
| `--throttler-inbound-bandwidth-refill-rate` | `AVAGO_THROTTLER_INBOUND_BANDWIDTH_REFILL_RATE` | uint | `512` | Max average inbound bandwidth usage of a peer, in bytes per second. See interface `throttling.BandwidthThrottler`. |
| `--throttler-inbound-bandwidth-max-burst-size` | `AVAGO_THROTTLER_INBOUND_BANDWIDTH_MAX_BURST_SIZE` | uint | `2 MiB` | Max inbound bandwidth a node can use at once. See interface `throttling.BandwidthThrottler`. |
#### Message Size Based Rate-Limiting
Rate-limiting based on the total size, in bytes, of unprocessed messages.
| Flag | Env Var | Type | Default | Description |
|--------|--------|------|----|--------------------|
| `--throttler-inbound-at-large-alloc-size` | `AVAGO_THROTTLER_INBOUND_AT_LARGE_ALLOC_SIZE` | uint | `6 MiB` | Size, in bytes, of at-large allocation in the inbound message throttler. |
| `--throttler-inbound-validator-alloc-size` | `AVAGO_THROTTLER_INBOUND_VALIDATOR_ALLOC_SIZE` | uint | `32 MiB` | Size, in bytes, of validator allocation in the inbound message throttler. |
| `--throttler-inbound-node-max-at-large-bytes` | `AVAGO_THROTTLER_INBOUND_NODE_MAX_AT_LARGE_BYTES` | uint | `2 MiB` | Maximum number of bytes a node can take from the at-large allocation of the inbound message throttler. |
#### Message Based Rate-Limiting
Rate-limiting based on the number of unprocessed messages.
| Flag | Env Var | Type | Default | Description |
|--------|--------|------|----|--------------------|
| `--throttler-inbound-node-max-processing-msgs` | `AVAGO_THROTTLER_INBOUND_NODE_MAX_PROCESSING_MSGS` | uint | `1024` | Node will stop reading messages from a peer when it is processing this many messages from the peer. Will resume reading messages from the peer when it is processing less than this many messages. |
#### Outbound Rate-Limiting
Rate-limiting for outbound messages.
| Flag | Env Var | Type | Default | Description |
|--------|--------|------|----|--------------------|
| `--throttler-outbound-at-large-alloc-size` | `AVAGO_THROTTLER_OUTBOUND_AT_LARGE_ALLOC_SIZE` | uint | `32 MiB` | Size, in bytes, of at-large allocation in the outbound message throttler. |
| `--throttler-outbound-validator-alloc-size` | `AVAGO_THROTTLER_OUTBOUND_VALIDATOR_ALLOC_SIZE` | uint | `32 MiB` | Size, in bytes, of validator allocation in the outbound message throttler. |
| `--throttler-outbound-node-max-at-large-bytes` | `AVAGO_THROTTLER_OUTBOUND_NODE_MAX_AT_LARGE_BYTES` | uint | `2 MiB` | Maximum number of bytes a node can take from the at-large allocation of the outbound message throttler. |
### Connection Rate-Limiting
| Flag | Env Var | Type | Default | Description |
|--------|--------|------|----|--------------------|
| `--network-inbound-connection-throttling-cooldown` | `AVAGO_NETWORK_INBOUND_CONNECTION_THROTTLING_COOLDOWN` | duration | `10s` | Node will upgrade an inbound connection from a given IP at most once within this duration. If 0 or negative, will not consider recency of last upgrade when deciding whether to upgrade. |
| `--network-inbound-connection-throttling-max-conns-per-sec` | `AVAGO_NETWORK_INBOUND_CONNECTION_THROTTLING_MAX_CONNS_PER_SEC` | uint | `512` | Node will accept at most this many inbound connections per second. |
| `--network-outbound-connection-throttling-rps` | `AVAGO_NETWORK_OUTBOUND_CONNECTION_THROTTLING_RPS` | uint | `50` | Node makes at most this many outgoing peer connection attempts per second. |
### Peer List Gossiping
Nodes gossip peers to each other so that each node can have an up-to-date peer list. A node gossips `--network-peer-list-num-validator-ips` validator IPs to `--network-peer-list-validator-gossip-size` validators, `--network-peer-list-non-validator-gossip-size` non-validators and `--network-peer-list-peers-gossip-size` peers every `--network-peer-list-gossip-frequency`.
| Flag | Env Var | Type | Default | Description |
|--------|--------|------|----|--------------------|
| `--network-peer-list-num-validator-ips` | `AVAGO_NETWORK_PEER_LIST_NUM_VALIDATOR_IPS` | int | `15` | Number of validator IPs to gossip to other nodes. |
| `--network-peer-list-validator-gossip-size` | `AVAGO_NETWORK_PEER_LIST_VALIDATOR_GOSSIP_SIZE` | int | `20` | Number of validators that the node will gossip peer list to. |
| `--network-peer-list-non-validator-gossip-size` | `AVAGO_NETWORK_PEER_LIST_NON_VALIDATOR_GOSSIP_SIZE` | int | `0` | Number of non-validators that the node will gossip peer list to. |
| `--network-peer-list-peers-gossip-size` | `AVAGO_NETWORK_PEER_LIST_PEERS_GOSSIP_SIZE` | int | `0` | Number of total peers (including non-validator or validator) that the node will gossip peer list to. |
| `--network-peer-list-gossip-frequency` | `AVAGO_NETWORK_PEER_LIST_GOSSIP_FREQUENCY` | duration | `1m` | Frequency to gossip peers to other nodes. |
| `--network-peer-read-buffer-size` | `AVAGO_NETWORK_PEER_READ_BUFFER_SIZE` | int | `8 KiB` | Size of the buffer that peer messages are read into (there is one buffer per peer). |
| `--network-peer-write-buffer-size` | `AVAGO_NETWORK_PEER_WRITE_BUFFER_SIZE` | int | `8 KiB` | Size of the buffer that peer messages are written into (there is one buffer per peer). |
### Resource Usage Tracking
| Flag | Env Var | Type | Default | Description |
|--------|--------|------|----|--------------------|
| `--meter-vms-enabled` | `AVAGO_METER_VMS_ENABLED` | boolean | `true` | Enable Meter VMs to track VM performance with more granularity. |
| `--system-tracker-frequency` | `AVAGO_SYSTEM_TRACKER_FREQUENCY` | duration | `500ms` | Frequency to check the real system usage of tracked processes. More frequent checks -> usage metrics are more accurate, but more expensive to track. |
| `--system-tracker-processing-halflife` | `AVAGO_SYSTEM_TRACKER_PROCESSING_HALFLIFE` | duration | `15s` | Half life to use for the processing requests tracker. Larger half life -> usage metrics change more slowly. |
| `--system-tracker-cpu-halflife` | `AVAGO_SYSTEM_TRACKER_CPU_HALFLIFE` | duration | `15s` | Half life to use for the CPU tracker. Larger half life -> CPU usage metrics change more slowly. |
| `--system-tracker-disk-halflife` | `AVAGO_SYSTEM_TRACKER_DISK_HALFLIFE` | duration | `1m` | Half life to use for the disk tracker. Larger half life -> disk usage metrics change more slowly. |
| `--system-tracker-disk-required-available-space` | `AVAGO_SYSTEM_TRACKER_DISK_REQUIRED_AVAILABLE_SPACE` | uint | `536870912` | Minimum number of available bytes on disk, under which the node will shutdown. |
| `--system-tracker-disk-warning-threshold-available-space` | `AVAGO_SYSTEM_TRACKER_DISK_WARNING_THRESHOLD_AVAILABLE_SPACE` | uint | `1073741824` | Warning threshold for the number of available bytes on disk, under which the node will be considered unhealthy. Must be \>= `--system-tracker-disk-required-available-space`. |
### Plugins
| Flag | Env Var | Type | Default | Description |
|--------|--------|------|----|--------------------|
| `--plugin-dir` | `AVAGO_PLUGIN_DIR` | string | `$HOME/.avalanchego/plugins` | Sets the directory for [VM plugins](https://build.avax.network/docs/virtual-machines). |
### Virtual Machine (VM) Configs
| Flag | Env Var | Type | Default | Description |
|--------|--------|------|----|--------------------|
| `--vm-aliases-file` | `AVAGO_VM_ALIASES_FILE` | string | `~/.avalanchego/configs/vms/aliases.json` | Path to JSON file that defines aliases for Virtual Machine IDs. This flag is ignored if `--vm-aliases-file-content` is specified. Example content: `{"tGas3T58KzdjLHhBDMnH2TvrddhqTji5iZAMZ3RXs2NLpSnhH": ["timestampvm", "timerpc"]}`. The above example aliases the VM whose ID is `"tGas3T58KzdjLHhBDMnH2TvrddhqTji5iZAMZ3RXs2NLpSnhH"` to `"timestampvm"` and `"timerpc"`. |
| `--vm-aliases-file-content` | `AVAGO_VM_ALIASES_FILE_CONTENT` | string | - | As an alternative to `--vm-aliases-file`, it allows specifying base64 encoded aliases for Virtual Machine IDs. |
### Indexing
| Flag | Env Var | Type | Default | Description |
|--------|--------|------|----|--------------------|
| `--index-allow-incomplete` | `AVAGO_INDEX_ALLOW_INCOMPLETE` | boolean | `false` | If true, allow running the node in such a way that could cause an index to miss transactions. Ignored if index is disabled. |
### Router
| Flag | Env Var | Type | Default | Description |
|--------|--------|------|----|--------------------|
| `--router-health-max-drop-rate` | `AVAGO_ROUTER_HEALTH_MAX_DROP_RATE` | float | `1` | Node reports unhealthy if the router drops more than this portion of messages. |
| `--router-health-max-outstanding-requests` | `AVAGO_ROUTER_HEALTH_MAX_OUTSTANDING_REQUESTS` | uint | `1024` | Node reports unhealthy if there are more than this many outstanding consensus requests (Get, PullQuery, etc.) over all chains. |
## Additional Resources
- [Full documentation](https://build.avax.network/docs/quick-start)
- [Example configurations](https://github.com/ava-labs/avalanchego/tree/master/config)
- [Network upgrade schedules](https://build.avax.network/docs/quick-start/primary-network)
# Backup and Restore (/docs/nodes/maintain/backup-restore)
---
title: Backup and Restore
---
Once you have your node up and running, it's time to prepare for disaster recovery. Should your machine ever have a catastrophic failure due to either hardware or software issues, or even a case of natural disaster, it's best to be prepared for such a situation by making a backup.
When running, a complete node installation along with the database can grow to be multiple gigabytes in size. Having to back up and restore such a large volume of data can be expensive, complicated and time-consuming. Luckily, there is a better way.
Instead of having to back up and restore everything, we need to back up only what is essential, that is, those files that cannot be reconstructed because they are unique to your node. For AvalancheGo node, unique files are those that identify your node on the network, in other words, files that define your NodeID.
Even if your node is a validator on the network and has multiple delegations on it, you don't need to worry about backing up anything else, because the validation and delegation transactions are also stored on the blockchain and will be restored during bootstrapping, along with the rest of the blockchain data.
The installation itself can be easily recreated by installing the node on a new machine, and all the remaining gigabytes of blockchain data can be easily recreated by the process of bootstrapping, which copies the data over from other network peers. However, if you would like to speed up the process, see the [Database Backup and Restore section](#database)
NodeID[](#nodeid "Direct link to heading")
-------------------------------------------
If more than one running nodes share the same NodeID, the communications from other nodes in the Avalanche network to this NodeID will be random to one of these nodes. If this NodeID is of a validator, it will dramatically impact the uptime calculation of the validator which will very likely disqualify the validator from receiving the staking rewards. Please make sure only one node with the same NodeID run at one time.
NodeID is a unique identifier that differentiates your node from all the other peers on the network. It's a string formatted like `NodeID-5mb46qkSBj81k9g9e4VFjGGSbaaSLFRzD`. You can look up the technical background of how the NodeID is constructed [here](/docs/api-reference/standards/cryptographic-primitives#tls-addresses). In essence, NodeID is defined by two files:
- `staker.crt`
- `staker.key`
NodePOP is this node's BLS key and proof of possession. Nodes must register a BLS key to act as a validator on the Primary Network. Your node's POP is logged on startup and is accessible over this endpoint.
- `publicKey` is the 48 byte hex representation of the BLS key.
- `proofOfPossession` is the 96 byte hex representation of the BLS signature.
NodePOP is defined by the `signer.key` file.
In the default installation, they can be found in the working directory, specifically in `~/.avalanchego/staking/`. All we need to do to recreate the node on another machine is to run a new installation with those same three files.
If `staker.key` and `staker.crt` are removed from a node, which is restarted afterwards, they will be recreated and a new node ID will be assigned.
If the `signer.key` is regenerated, the node will lose its previous BLS identity, which includes its public key and proof of possession. This change means that the node's former identity on the network will no longer be recognized, affecting its ability to participate in the consensus mechanism as before. Consequently, the node may lose its established reputation and any associated staking rewards.
If you have users defined in the keystore of your node, then you need to back up and restore those as well. [Keystore API](/docs/api-reference/keystore-api) has methods that can be used to export and import user keys. Note that Keystore API is used by developers only and not intended for use in production nodes. If you don't know what a keystore API is and have not used it, you don't need to worry about it.
### Backup[](#backup "Direct link to heading")
To back up your node, we need to store `staker.crt` and `staker.key` files somewhere safe and private, preferably to a different computer, to your private To back up your node, we need to store `staker.crt`, `staker.key` and `signer.key` files somewhere safe and private, preferably to a different computer.
If someone gets a hold of your staker files, they still cannot get to your funds, as they are controlled by the wallet private keys, not by the node. But, they could re-create your node somewhere else, and depending on the circumstances make you lose the staking rewards. So make sure your staker files are secure.
If someone gains access to your `signer.key`, they could potentially sign transactions on behalf of your node, which might disrupt the operations and integrity of your node on the network.
Let's get the files off the machine running the node.
#### From Local Node[](#from-local-node "Direct link to heading")
If you're running the node locally, on your desktop computer, just navigate to where the files are and copy them somewhere safe.
On a default Linux installation, the path to them will be `/home/USERNAME/.avalanchego/staking/`, where `USERNAME` needs to be replaced with the actual username running the node. Select and copy the files from there to a backup location. You don't need to stop the node to do that.
#### From Remote Node Using `scp`[](#from-remote-node-using-scp "Direct link to heading")
`scp` is a 'secure copy' command line program, available built-in on Linux and MacOS computers. There is also a Windows version, `pscp`, as part of the [PuTTY](https://www.chiark.greenend.org.uk/~sgtatham/putty/latest.html) package. If using `pscp`, in the following commands replace each usage of `scp` with `pscp -scp`.
To copy the files from the node, you will need to be able to remotely log into the machine. You can use account password, but the secure and recommended way is to use the SSH keys. The procedure for acquiring and setting up SSH keys is highly dependent on your cloud provider and machine configuration. You can refer to our [Amazon Web Services](/docs/nodes/on-third-party-services/amazon-web-services) and [Microsoft Azure](/docs/nodes/on-third-party-services/microsoft-azure) setup guides for those providers. Other providers will have similar procedures.
When you have means of remote login into the machine, you can copy the files over with the following command:
```bash
scp -r ubuntu@PUBLICIP:/home/ubuntu/.avalanchego/staking ~/avalanche_backup
```
This assumes the username on the machine is `ubuntu`, replace with correct username in both places if it is different. Also, replace `PUBLICIP` with the actual public IP of the machine. If `scp` doesn't automatically use your downloaded SSH key, you can point to it manually:
```bash
scp -i /path/to/the/key.pem -r ubuntu@PUBLICIP:/home/ubuntu/.avalanchego/staking ~/avalanche_backup
```
Once executed, this command will create `avalanche_backup` directory and place those three files in it. You need to store them somewhere safe.
### Restore[](#restore "Direct link to heading")
To restore your node from a backup, we need to do the reverse: restore `staker.key`, `staker.crt` and `signer.key` from the backup to the working directory of the new node.
First, we need to do the usual [installation](/docs/nodes/using-install-script/installing-avalanche-go) of the node. This will create a new NodeID, a new BLS key and a new BLS signature, which we need to replace. When the node is installed correctly, log into the machine where the node is running and stop it:
```bash
sudo systemctl stop avalanchego
```
We're ready to restore the node.
#### To Local Node[](#to-local-node "Direct link to heading")
If you're running the node locally, just copy the `staker.key`, `staker.crt` and `signer.key` files from the backup location into the working directory, which on the default Linux installation will be `/home/USERNAME/.avalanchego/staking/`. Replace `USERNAME` with the actual username used to run the node.
#### To Remote Node Using `scp`[](#to-remote-node-using-scp "Direct link to heading")
Again, the process is just the reverse operation. Using `scp` we need to copy the `staker.key`, `staker.crt` and `signer.key` files from the backup location into the remote working directory. Assuming the backed up files are located in the directory where the above backup procedure placed them:
```bash
scp ~/avalanche_backup/{staker.*,signer.key} ubuntu@PUBLICIP:/home/ubuntu/.avalanchego/staking
```
Or if you need to specify the path to the SSH key:
```bash
scp -i /path/to/the/key.pem ~/avalanche_backup/{staker.*,signer.key} ubuntu@PUBLICIP:/home/ubuntu/.avalanchego/staking
```
And again, replace `ubuntu` with correct username if different, and `PUBLICIP` with the actual public IP of the machine running the node, as well as the path to the SSH key if used.
#### Restart the Node and Verify[](#restart-the-node-and-verify "Direct link to heading")
Once the files have been replaced, log into the machine and start the node using:
```bash
sudo systemctl start avalanchego
```
You can now check that the node is restored with the correct NodeID and NodePOP by issuing the [getNodeID](/docs/api-reference/info-api#infogetnodeid) API call in the same console you ran the previous command:
```bash
curl -X POST --data '{
"jsonrpc":"2.0",
"id" :1,
"method" :"info.getNodeID"
}' -H 'content-type:application/json;' 127.0.0.1:9650/ext/info
```
You should see your original NodeID and NodePOP (BLS key and BLS signature). Restore process is done.
Database[](#database "Direct link to heading")
-----------------------------------------------
Normally, when starting a new node, you can just bootstrap from scratch. However, there are situations when you may prefer to reuse an existing database (ex: preserve keystore records, reduce sync time).
This tutorial will walk you through compressing your node's DB and moving it to another computer using `zip` and `scp`.
### Database Backup[](#database-backup "Direct link to heading")
First, make sure to stop AvalancheGo, run:
```bash
sudo systemctl stop avalanchego
```
You must stop the Avalanche node before you back up the database otherwise data could become corrupted.
Once the node is stopped, you can `zip` the database directory to reduce the size of the backup and speed up the transfer using `scp`:
```bash
zip -r avalanche_db_backup.zip .avalanchego/db
```
_Note: It may take > 30 minutes to zip the node's DB._
Next, you can transfer the backup to another machine:
```bash
scp -r ubuntu@PUBLICIP:/home/ubuntu/avalanche_db_backup.zip ~/avalanche_db_backup.zip
```
This assumes the username on the machine is `ubuntu`, replace with correct username in both places if it is different. Also, replace `PUBLICIP` with the actual public IP of the machine. If `scp` doesn't automatically use your downloaded SSH key, you can point to it manually:
```bash
scp -i /path/to/the/key.pem -r ubuntu@PUBLICIP:/home/ubuntu/avalanche_db_backup.zip ~/avalanche_db_backup.zip
```
Once executed, this command will create `avalanche_db_backup.zip` directory in you home directory.
### Database Restore[](#database-restore "Direct link to heading")
_This tutorial assumes you have already completed "Database Backup" and have a backup at ~/avalanche\_db\_backup.zip._
First, we need to do the usual [installation](/docs/nodes/using-install-script/installing-avalanche-go) of the node. When the node is installed correctly, log into the machine where the node is running and stop it:
```bash
sudo systemctl stop avalanchego
```
You must stop the Avalanche node before you restore the database otherwise data could become corrupted.
We're ready to restore the database. First, let's move the DB on the existing node (you can remove this old DB later if the restore was successful):
```bash
mv .avalanchego/db .avalanchego/db-old
```
Next, we'll unzip the backup we moved from another node (this will place the unzipped files in `~/.avalanchego/db` when the command is run in the home directory):
```bash
unzip avalanche_db_backup.zip
```
After the database has been restored on a new node, use this command to start the node:
```bash
sudo systemctl start avalanchego
```
Node should now be running from the database on the new instance. To check that everything is in order and that node is not bootstrapping from scratch (which would indicate a problem), use:
```bash
sudo journalctl -u avalanchego -f
```
The node should be catching up to the network and fetching a small number of blocks before resuming normal operation (all the ones produced from the time when the node was stopped before the backup).
Once the backup has been restored and is working as expected, the zip can be deleted:
```bash
rm avalanche_db_backup.zip
```
### Database Direct Copy[](#database-direct-copy "Direct link to heading")
You may be in a situation where you don't have enough disk space to create the archive containing the whole database, so you cannot complete the backup process as described previously.
In that case, you can still migrate your database to a new computer, by using a different approach: `direct copy`. Instead of creating the archive, moving the archive and unpacking it, we can do all of that on the fly.
To do so, you will need `ssh` access from the destination machine (where you want the database to end up) to the source machine (where the database currently is). Setting up `ssh` is the same as explained for `scp` earlier in the document.
Same as shown previously, you need to stop the node (on both machines):
```bash
sudo systemctl stop avalanchego
```
You must stop the Avalanche node before you back up the database otherwise data could become corrupted.
Then, on the destination machine, change to a directory where you would like to the put the database files, enter the following command:
```bash
ssh -i /path/to/the/key.pem ubuntu@PUBLICIP 'tar czf - .avalanchego/db' | tar xvzf - -C .
```
Make sure to replace the correct path to the key, and correct IP of the source machine. This will compress the database, but instead of writing it to a file it will pipe it over `ssh` directly to destination machine, where it will be decompressed and written to disk. The process can take a long time, make sure it completes before continuing.
After copying is done, all you need to do now is move the database to the correct location on the destination machine. Assuming there is a default AvalancheGo node installation, we remove the old database and replace it with the new one:
```bash
rm -rf ~/.avalanchego/db
mv db ~/.avalanchego/db
```
You can now start the node on the destination machine:
```bash
sudo systemctl start avalanchego
```
Node should now be running from the copied database. To check that everything is in order and that node is not bootstrapping from scratch (which would indicate a problem), use:
```bash
sudo journalctl -u avalanchego -f
```
The node should be catching up to the network and fetching a small number of blocks before resuming normal operation (all the ones produced from the time when the node was stopped before the backup).
Summary[](#summary "Direct link to heading")
---------------------------------------------
Essential part of securing your node is the backup that enables full and painless restoration of your node. Following this tutorial you can rest easy knowing that should you ever find yourself in a situation where you need to restore your node from scratch, you can easily and quickly do so.
If you have any problems following this tutorial, comments you want to share with us or just want to chat, you can reach us on our [Discord](https://chat.avalabs.org/) server.
# Node Bootstrap (/docs/nodes/maintain/bootstrapping)
---
title: Node Bootstrap
---
Node Bootstrap is the process where a node _securely_ downloads linear chain blocks to recreate the latest state of the chain locally.
Bootstrap must guarantee that the local state of a node is in sync with the state of other valid nodes. Once bootstrap is completed, a node has the latest state of the chain and can verify new incoming transactions and reach consensus with other nodes, collectively moving forward the chains.
Bootstrapping a node is a multi-step process which requires downloading the chains required by the Primary Network (that is, the C-Chain, P-Chain, and X-Chain), as well as the chains required by any additional Avalanche L1s that the node explicitly tracks.
This document covers the high-level technical details of how bootstrapping works. This document glosses over some specifics, but the [AvalancheGo](https://github.com/ava-labs/avalanchego) codebase is open-source and is available for curious-minded readers to learn more.
Validators and Where to Find Them[](#validators-and-where-to-find-them "Direct link to heading")
-------------------------------------------------------------------------------------------------
Bootstrapping is all about downloading all previously accepted containers _securely_ so a node can have the latest correct state of the chain. A node can't arbitrarily trust any source - a malicious actor could provide malicious blocks, corrupting the bootstrapping node's local state, and making it impossible for the node to correctly validate the network and reach consensus with other correct nodes.
What's the most reliable source of information in the Avalanche ecosystem? It's a _large enough_ majority of validators. Therefore, the first step of bootstrapping is finding a sufficient amount of validators to download containers from.
The P-Chain is responsible for all platform-level operations, including staking events that modify an Avalanche L1's validator set. Whenever any chain (aside from the P-Chain itself) bootstraps, it requests an up-to-date validator set for that Avalanche L1 (Primary Network is an Avalanche L1 too). Once the Avalanche L1's current validator set is known, the node can securely download containers from these validators to bootstrap the chain.
There is a caveat here: the validator set must be _up-to-date_. If a bootstrapping node's validator set is stale, the node may incorrectly believe that some nodes are still validators when their validation period has already expired. A node might unknowingly end up requesting blocks from non-validators which respond with malicious blocks that aren't safe to download.
**For this reason, every Avalanche node must fully bootstrap the P-chain first before moving on to the other Primary Network chains and other Avalanche L1s to guarantee that their validator sets are up-to-date**.
What about the P-chain? The P-chain can't ever have an up-to-date validator set before completing its bootstrap. To solve this chicken-and-egg situation the Avalanche Foundation maintains a trusted default set of validators called beacons (but users are free to configure their own). Beacon Node-IDs and IP addresses are listed in the [AvalancheGo codebase](https://github.com/ava-labs/avalanchego/blob/master/genesis/bootstrappers.json). Every node has the beacon list available from the start and can reach out to them as soon as it starts.
Validators are the only sources of truth for a blockchain. Validator availability is so key to the bootstrapping process that **bootstrapping is blocked until the node establishes a sufficient amount of secure connections to validators**. If the node fails to reach a sufficient amount within a given period of time, it shuts down as no operation can be carried out safely.
Bootstrapping the Blockchain[](#bootstrapping-the-blockchain "Direct link to heading")
---------------------------------------------------------------------------------------
Once a node is able to discover and connect to validator and beacon nodes, it's able to start bootstrapping the blockchain by downloading the individual containers.
One common misconception is that Avalanche blockchains are bootstrapped by retrieving containers starting at genesis and working up to the currently accepted frontier.
Instead, containers are downloaded from the accepted frontier downwards to genesis, and then their corresponding state transitions are executed upwards from genesis to the accepted frontier. The accepted frontier is the last accepted block for linear chains.
Why can't nodes simply download blocks in chronological order, starting from genesis upwards? The reason is efficiency: if nodes downloaded containers upwards they would only get a safety guarantee by polling a majority of validators for every single container. That's a lot of network traffic for a single container, and a node would still need to do that for each container in the chain.
Instead, if a node starts by securely retrieving the accepted frontier from a majority of honest nodes and then recursively fetches the parent containers from the accepted frontier down to genesis, it can cheaply check that containers are correct just by verifying their IDs. Each Avalanche container has the IDs of its parents (one block parent for linear chains) and an ID's integrity can be guaranteed cryptographically.
Let's dive deeper into the two bootstrap phases - frontier retrieval and container execution.
### Frontier Retrieval[](#frontier-retrieval "Direct link to heading")
The current frontier is retrieved by requesting them from validator or beacon nodes. Avalanche bootstrap is designed to be robust - it must be able to make progress even in the presence of slow validators or network failures. This process needs to be fault-tolerant to these types of failures, since bootstrapping may take quite some time to complete and network connections can be unreliable.
Bootstrap starts when a node has connected to a sufficient majority of validator stake. A node is able to start bootstrapping when it has connected to at least 75%75\\% of total validator stake.
Seeders are the first set of peers that a node reaches out to when trying to figure out the current frontier. A subset of seeders is randomly sampled from the validator set. Seeders might be slow and provide a stale frontier, be malicious and return malicious container IDs, but they always provide an initial set of candidate frontiers to work with.
Once a node has received the candidate frontiers form its seeders, it polls **every network validator** to vet the candidates frontiers. It sends the list of candidate frontiers it received from the seeders to each validator, asking whether or not they know about these frontiers. Each validator responds returning the subset of known candidates, regardless of how up-to-date or stale the containers are. Each validator returns containers irrespective of their age so that bootstrap works even in the presence of a stale frontier.
Frontier retrieval is completed when at least one of the candidate frontiers is supported by at least 50%50\\% of total validator stake. Multiple candidate frontiers may be supported by a majority of stake, after which point the next phase, container fetching starts.
At any point in these steps a network issue may occur, preventing a node from retrieving or validating frontiers. If this occurs, bootstrap restarts by sampling a new set of seeders and repeating the bootstrapping process, optimistically assuming that the network issue will go away.
### Containers Execution[](#containers-execution "Direct link to heading")
Once a node has at least one valid frontiers, it starts downloading parent containers for each frontier. If it's the first time the node is running, it won't know about any containers and will try fetching all parent containers recursively from the accepted frontier down to genesis (unless [state sync](#state-sync) is enabled). If bootstrap had already run previously, some containers are already available locally and the node will stop as soon as it finds a known one.
A node first just fetches and parses containers. Once the chain is complete, the node executes them in chronological order starting from the earliest downloaded container to the accepted frontier. This allows the node to rebuild the full chain state and to eventually be in sync with the rest of the network.
When Does Bootstrapping Finish?[](#when-does-bootstrapping-finish "Direct link to heading")
--------------------------------------------------------------------------------------------
You've seen how [bootstrap works](#bootstrapping-the-blockchain) for a single chain. However, a node must bootstrap the chains in the Primary Network as well as the chains in each Avalanche L1 it tracks. This begs the questions - when are these chains bootstrapped? When is a node done bootstrapping?
The P-chain is always the first to bootstrap before any other chain. Once the P-Chain has finished, all other chains start bootstrapping in parallel, connecting to their own validators independently of one another.
A node completes bootstrapping an Avalanche L1 once all of its corresponding chains have completed bootstrapping. Because the Primary Network is a special case of Avalanche L1 that includes the entire network, this applies to it as well as any other manually tracked Avalanche L1s.
Note that Avalanche L1s bootstrap is independently of one another - so even if one Avalanche L1 has bootstrapped and is validating new transactions and adding new containers, other Avalanche L1s may still be bootstrapping in parallel.
Within a single Avalanche L1 however, an Avalanche L1 isn't done bootstrapping until the last chain completes bootstrapping. It's possible for a single chain to effectively stall a node from finishing the bootstrap for a single Avalanche L1, if it has a sufficiently long history or each operation is complex and time consuming. Even worse, other Avalanche L1 validators are continuously accepting new transactions and adding new containers on top of the previously known frontier, so a node that's slow to bootstrap can continuously fall behind the rest of the network.
Nodes mitigate this by restarting bootstrap for any chains which is blocked waiting for the remaining Avalanche L1 chains to finish bootstrapping. These chains repeat the frontier retrieval and container downloading phases to stay up-to-date with the Avalanche L1's ever moving current frontier until the slowest chain has completed bootstrapping.
Once this is complete, a node is finally ready to validate the network.
State Sync[](#state-sync "Direct link to heading")
---------------------------------------------------
The full node bootstrap process is long, and gets longer and longer over time as more and more containers are accepted. Nodes need to bootstrap a chain by reconstructing the full chain state locally - but downloading and executing each container isn't the only way to do this.
Starting from [AvalancheGo version 1.7.11](https://github.com/ava-labs/avalanchego/releases/tag/v1.7.11), nodes can use state sync to drastically cut down bootstrapping time on the C-Chain. Instead of executing each block, state sync uses cryptographic techniques to download and verify just the state associated with the current frontier. State synced nodes can't serve every C-chain block ever historically accepted, but they can safely retrieve the full C-chain state needed to validate in a much shorter time. State sync will fetch the previous 256 blocks prior to support the previous block hash operation code.
State sync is currently only available for the C-chain. The P-chain and X-chain currently bootstrap by downloading all blocks. Note that irrespective of the bootstrap method used (including state sync), each chain is still blocked on all other chains in its Avalanche L1 completing their bootstrap before continuing into normal operation.
There are no configs to state sync an archival node. If you need all the historical state then you must not use state sync and setup the config of the node for an archival node.
Conclusions and FAQ[](#conclusions-and-faq "Direct link to heading")
---------------------------------------------------------------------
If you got this far, you've hopefully gotten a better idea of what's going on when your node bootstraps. Here's a few frequently asked questions about bootstrapping.
### How Can I Get the ETA for Node Bootstrap?[](#how-can-i-get-the-eta-for-node-bootstrap "Direct link to heading")
Logs provide information about both container downloading and their execution for each chain. Here is an example
```bash
[02-16|17:31:42.950] INFO bootstrap/bootstrapper.go:494 fetching blocks {"numFetchedBlocks": 5000, "numTotalBlocks": 101357, "eta": "2m52s"}
[02-16|17:31:58.110] INFO
bootstrap/bootstrapper.go:494 fetching blocks {"numFetchedBlocks": 10000, "numTotalBlocks": 101357, "eta": "3m40s"}
[02-16|17:32:04.554] INFO
bootstrap/bootstrapper.go:494 fetching blocks {"numFetchedBlocks": 15000, "numTotalBlocks": 101357, "eta": "2m56s"}
...
[02-16|17:36:52.404] INFO
queue/jobs.go:203 executing operations {"numExecuted": 17881, "numToExecute": 101357, "eta": "2m20s"}
[02-16|17:37:22.467] INFO
queue/jobs.go:203 executing operations {"numExecuted": 35009, "numToExecute": 101357, "eta": "1m54s"}
[02-16|17:37:52.468] INFO
queue/jobs.go:203 executing operations {"numExecuted": 52713, "numToExecute": 101357, "eta": "1m23s"}
```
Similar logs are emitted for X and C chains and any chain in explicitly tracked Avalanche L1s.
### Why Chain Bootstrap ETA Keeps On Changing?[](#why-chain-bootstrap-eta-keeps-on-changing "Direct link to heading")
As you saw in the [bootstrap completion section](#when-does-bootstrapping-finish), an Avalanche L1 like the Primary Network completes once all of its chains finish bootstrapping. Some Avalanche L1 chains may have to wait for the slowest to finish. They'll restart bootstrapping in the meantime, to make sure they won't fall back too much with respect to the network accepted frontier.
What Order Do The Chains Bootstrap?[](#what-order-do-the-chains-bootstrap "Direct link to heading")
----------------------------------------------------------------------------------------------------
The 3 chains will bootstrap in the following order: P-chain, X-chain, C-chain.
### Why Are AvalancheGo APIs Disabled During Bootstrapping?[](#why-are-avalanchego-apis-disabled-during-bootstrapping "Direct link to heading")
AvalancheGo APIs are [explicitly disabled](https://github.com/ava-labs/avalanchego/blob/master/api/server/server.go#L367:L379) during bootstrapping. The reason is that if the node has not fully rebuilt its Avalanche L1s state, it can't provide accurate information. AvalancheGo APIs are activated once bootstrap completes and node transition into its normal operating mode, accepting and validating transactions.
# Enroll in Avalanche Notify (/docs/nodes/maintain/enroll-in-avalanche-notify)
---
title: Enroll in Avalanche Notify
---
To receive email alerts if a validator becomes unresponsive or out-of-date, sign up with the Avalanche Notify tool: [http://notify.avax.network](http://notify.avax.network/).
Avalanche Notify is an active monitoring system that checks a validator's responsiveness each minute.
An email alert is sent if a validator is down for 5 consecutive checks and when a validator recovers (is responsive for 5 checks in a row).
} >
When signing up for email alerts, consider using a new, alias, or auto-forwarding email address to protect your privacy. Otherwise, it will be possible to link your NodeID to your email.
This tool is currently in BETA and validator alerts may erroneously be triggered, not triggered, or delayed. The best way to maximize the likelihood of earning staking rewards is to run redundant monitoring/alerting.
# Monitoring (/docs/nodes/maintain/monitoring)
---
title: Monitoring
description: Learn how to monitor an AvalancheGo node.
---
This tutorial demonstrates how to set up infrastructure to monitor an instance of [AvalancheGo](https://github.com/ava-labs/avalanchego). We will use:
- [Prometheus](https://prometheus.io/) to gather and store data
- [`node_exporter`](https://github.com/prometheus/node_exporter) to get information about the machine,
- AvalancheGo's [Metrics API](/docs/api-reference/metrics-api) to get information about the node
- [Grafana](https://grafana.com/) to visualize data on a dashboard.
- A set of pre-made [Avalanche dashboards](https://github.com/ava-labs/avalanche-monitoring/tree/main/grafana/dashboards)
## Prerequisites:
- A running AvalancheGo node
- Shell access to the machine running the node
- Administrator privileges on the machine
This tutorial assumes you have Ubuntu 20.04 running on your node. Other Linux flavors that use `systemd` for running services and `apt-get` for package management might work but have not been tested. Community member has reported it works on Debian 10, might work on other Debian releases as well.
### Caveat: Security
The system as described here **should not** be opened to the public internet. Neither Prometheus nor Grafana as shown here is hardened against unauthorized access. Make sure that both of them are accessible only over a secured proxy, local network, or VPN. Setting that up is beyond the scope of this tutorial, but exercise caution. Bad security practices could lead to attackers gaining control over your node! It is your responsibility to follow proper security practices.
Monitoring Installer Script[](#monitoring-installer-script "Direct link to heading")
-------------------------------------------------------------------------------------
In order to make node monitoring easier to install, we have made a script that does most of the work for you. To download and run the script, log into the machine the node runs on with a user that has administrator privileges and enter the following command:
```bash
wget -nd -m https://raw.githubusercontent.com/ava-labs/avalanche-monitoring/main/grafana/monitoring-installer.sh ;\
chmod 755 monitoring-installer.sh;
```
This will download the script and make it executable.
Script itself is run multiple times with different arguments, each installing a different tool or part of the environment. To make sure it downloaded and set up correctly, begin by running:
```bash
./monitoring-installer.sh --help
```
It should display:
```bash
Usage: ./monitoring-installer.sh [--1|--2|--3|--4|--5|--help]
Options:
--help Shows this message
--1 Step 1: Installs Prometheus
--2 Step 2: Installs Grafana
--3 Step 3: Installs node_exporter
--4 Step 4: Installs AvalancheGo Grafana dashboards
--5 Step 5: (Optional) Installs additional dashboards
Run without any options, script will download and install latest version of AvalancheGo dashboards.
```
Let's get to it.
Step 1: Set up Prometheus [](#step-1-set-up-prometheus- "Direct link to heading")
----------------------------------------------------------------------------------
Run the script to execute the first step:
```bash
./monitoring-installer.sh --1
```
It should produce output something like this:
```bash
AvalancheGo monitoring installer
--------------------------------
STEP 1: Installing Prometheus
Checking environment...
Found arm64 architecture...
Prometheus install archive found:
https://github.com/prometheus/prometheus/releases/download/v2.31.0/prometheus-2.31.0.linux-arm64.tar.gz
Attempting to download:
https://github.com/prometheus/prometheus/releases/download/v2.31.0/prometheus-2.31.0.linux-arm64.tar.gz
prometheus.tar.gz 100%[=========================================================================================>] 65.11M 123MB/s in 0.5s
2021-11-05 14:16:11 URL:https://github-releases.githubusercontent.com/6838921/a215b0e7-df1f-402b-9541-a3ec9d431f76?X-Amz-Algorithm=AWS4-HMAC-SHA256&X-Amz-Credential=AKIAIWNJYAX4CSVEH53A%2F20211105%2Fus-east-1%2Fs3%2Faws4_request&X-Amz-Date=20211105T141610Z&X-Amz-Expires=300&X-Amz-Signature=72a8ae4c6b5cea962bb9cad242cb4478082594b484d6a519de58b8241b319d94&X-Amz-SignedHeaders=host&actor_id=0&key_id=0&repo_id=6838921&response-content-disposition=attachment%3B%20filename%3Dprometheus-2.31.0.linux-arm64.tar.gz&response-content-type=application%2Foctet-stream [68274531/68274531] -> "prometheus.tar.gz" [1]
...
```
You may be prompted to confirm additional package installs, do that if asked. Script run should end with instructions on how to check that Prometheus installed correctly. Let's do that, run:
```bash
sudo systemctl status prometheus
```
It should output something like:
```bash
● prometheus.service - Prometheus
Loaded: loaded (/etc/systemd/system/prometheus.service; enabled; vendor preset: enabled)
Active: active (running) since Fri 2021-11-12 11:38:32 UTC; 17min ago
Docs: https://prometheus.io/docs/introduction/overview/
Main PID: 548 (prometheus)
Tasks: 10 (limit: 9300)
Memory: 95.6M
CGroup: /system.slice/prometheus.service
└─548 /usr/local/bin/prometheus --config.file=/etc/prometheus/prometheus.yml --storage.tsdb.path=/var/lib/prometheus --web.console.templates=/etc/prometheus/con>
Nov 12 11:38:33 ip-172-31-36-200 prometheus[548]: ts=2021-11-12T11:38:33.644Z caller=head.go:590 level=info component=tsdb msg="WAL segment loaded" segment=81 maxSegment=84
Nov 12 11:38:33 ip-172-31-36-200 prometheus[548]: ts=2021-11-12T11:38:33.773Z caller=head.go:590 level=info component=tsdb msg="WAL segment loaded" segment=82 maxSegment=84
```
Note the `active (running)` status (press `q` to exit). You can also check Prometheus web interface, available on `http://your-node-host-ip:9090/`
You may need to do `sudo ufw allow 9090/tcp` if the firewall is on, and/or adjust the security settings to allow connections to port 9090 if the node is running on a cloud instance. For AWS, you can look it up [here](/docs/nodes/on-third-party-services/amazon-web-services#create-a-security-group). If on public internet, make sure to only allow your IP to connect!
If everything is OK, let's move on.
Step 2: Install Grafana [](#step-2-install-grafana- "Direct link to heading")
------------------------------------------------------------------------------
Run the script to execute the second step:
```bash
./monitoring-installer.sh --2
```
It should produce output something like this:
```bash
AvalancheGo monitoring installer
--------------------------------
STEP 2: Installing Grafana
OK
deb https://packages.grafana.com/oss/deb stable main
Hit:1 http://us-east-2.ec2.ports.ubuntu.com/ubuntu-ports focal InRelease
Get:2 http://us-east-2.ec2.ports.ubuntu.com/ubuntu-ports focal-updates InRelease [114 kB]
Get:3 http://us-east-2.ec2.ports.ubuntu.com/ubuntu-ports focal-backports InRelease [101 kB]
Hit:4 http://ppa.launchpad.net/longsleep/golang-backports/ubuntu focal InRelease
Get:5 http://ports.ubuntu.com/ubuntu-ports focal-security InRelease [114 kB]
Get:6 https://packages.grafana.com/oss/deb stable InRelease [12.1 kB]
...
```
To make sure it's running properly:
```bash
sudo systemctl status grafana-server
```
which should again show Grafana as `active`. Grafana should now be available at `http://your-node-host-ip:3000/` from your browser. Log in with username: admin, password: admin, and you will be prompted to set up a new, secure password. Do that.
You may need to do `sudo ufw allow 3000/tcp` if the firewall is on, and/or adjust the cloud instance settings to allow connections to port 3000. If on public internet, make sure to only allow your IP to connect!
Prometheus and Grafana are now installed, we're ready for the next step.
Step 3: Set up `node_exporter` [](#step-3-set-up-node_exporter- "Direct link to heading")
------------------------------------------------------------------------------------------
In addition to metrics from AvalancheGo, let's set up monitoring of the machine itself, so we can check CPU, memory, network and disk usage and be aware of any anomalies. For that, we will use `node_exporter`, a Prometheus plugin.
Run the script to execute the third step:
```bash
./monitoring-installer.sh --3
```
The output should look something like this:
```bash
AvalancheGo monitoring installer
--------------------------------
STEP 3: Installing node_exporter
Checking environment...
Found arm64 architecture...
Downloading archive...
https://github.com/prometheus/node_exporter/releases/download/v1.2.2/node_exporter-1.2.2.linux-arm64.tar.gz
node_exporter.tar.gz 100%[=========================================================================================>] 7.91M --.-KB/s in 0.1s
2021-11-05 14:57:25 URL:https://github-releases.githubusercontent.com/9524057/6dc22304-a1f5-419b-b296-906f6dd168dc?X-Amz-Algorithm=AWS4-HMAC-SHA256&X-Amz-Credential=AKIAIWNJYAX4CSVEH53A%2F20211105%2Fus-east-1%2Fs3%2Faws4_request&X-Amz-Date=20211105T145725Z&X-Amz-Expires=300&X-Amz-Signature=3890e09e58ea9d4180684d9286c9e791b96b0c411d8f8a494f77e99f260bdcbb&X-Amz-SignedHeaders=host&actor_id=0&key_id=0&repo_id=9524057&response-content-disposition=attachment%3B%20filename%3Dnode_exporter-1.2.2.linux-arm64.tar.gz&response-content-type=application%2Foctet-stream [8296266/8296266] -> "node_exporter.tar.gz" [1]
node_exporter-1.2.2.linux-arm64/LICENSE
```
Again, we check that the service is running correctly:
```bash
sudo systemctl status node_exporter
```
If the service is running, Prometheus, Grafana and `node_exporter` should all work together now. To check, in your browser visit Prometheus web interface on `http://your-node-host-ip:9090/targets`. You should see three targets enabled:
- Prometheus
- AvalancheGo
- `avalanchego-machine`
Make sure that all of them have `State` as `UP`.
If you run your AvalancheGo node with TLS enabled on your API port, you will need to manually edit the `/etc/prometheus/prometheus.yml` file and change the `avalanchego` job to look like this:
```yml
- job_name: "avalanchego"
metrics_path: "/ext/metrics"
scheme: "https"
tls_config:
insecure_skip_verify: true
static_configs:
- targets: ["localhost:9650"]
```
Mind the spacing (leading spaces too)! You will need admin privileges to do that (use `sudo`). Restart Prometheus service afterwards with `sudo systemctl restart prometheus`.
All that's left to do now is to provision the data source and install the actual dashboards that will show us the data.
Step 4: Dashboards [](#step-4-dashboards- "Direct link to heading")
--------------------------------------------------------------------
Run the script to install the dashboards:
```bash
./monitoring-installer.sh --4
```
It will produce output something like this:
```bash
AvalancheGo monitoring installer
--------------------------------
Downloading...
Last-modified header missing -- time-stamps turned off.
2021-11-05 14:57:47 URL:https://raw.githubusercontent.com/ava-labs/avalanche-monitoring/master/grafana/dashboards/c_chain.json [50282/50282] -> "c_chain.json" [1]
FINISHED --2021-11-05 14:57:47--
Total wall clock time: 0.2s
Downloaded: 1 files, 49K in 0s (132 MB/s)
Last-modified header missing -- time-stamps turned off.
...
```
This will download the latest versions of the dashboards from GitHub and provision Grafana to load them, as well as defining Prometheus as a data source. It may take up to 30 seconds for the dashboards to show up. In your browser, go to: `http://your-node-host-ip:3000/dashboards`. You should see 7 Avalanche dashboards:
Select 'Avalanche Main Dashboard' by clicking its title. It should load, and look similar to this:
Some graphs may take some time to populate fully, as they need a series of data points in order to render correctly.
You can bookmark the main dashboard as it shows the most important information about the node at a glance. Every dashboard has a link to all the others as the first row, so you can move between them easily.
Step 5: Additional Dashboards (Optional)[](#step-5-additional-dashboards-optional "Direct link to heading")
------------------------------------------------------------------------------------------------------------
Step 4 installs the basic set of dashboards that make sense to have on any node. Step 5 is for installing additional dashboards that may not be useful for every installation.
Currently, there is only one additional dashboard: Avalanche L1s. If your node is running any Avalanche L1s, you may want to add this as well. Do:
```bash
./monitoring-installer.sh --5
```
This will add the Avalanche L1s dashboard. It allows you to monitor operational data for any Avalanche L1 that is synced on the node. There is an Avalanche L1 switcher that allows you to switch between different Avalanche L1s. As there are many Avalanche L1s and not every node will have all of them, by default, it comes populated only with Spaces and WAGMI Avalanche L1s that exist on Fuji testnet:
To configure the dashboard and add any Layer 1s that your node is syncing, you will need to edit the dashboard. Select the `dashboard settings` icon (image of a cog) in the upper right corner of the dashboard display and switch to `Variables` section and select the `subnet` variable. It should look something like this:
The variable format is:
```bash
Subnet name:
```
and the separator between entries is a comma. Entries for Spaces and WAGMI look like:
```bash
Spaces (Fuji) : 2ebCneCbwthjQ1rYT41nhd7M76Hc6YmosMAQrTFhBq8qeqh6tt, WAGMI (Fuji) : 2AM3vsuLoJdGBGqX2ibE8RGEq4Lg7g4bot6BT1Z7B9dH5corUD
```
After editing the values, press `Update` and then click `Save dashboard` button and confirm. Press the back arrow in the upper left corner to return to the dashboard. New values should now be selectable from the dropdown and data for the selected Avalanche L1 will be shown in the panels.
Updating[](#updating "Direct link to heading")
-----------------------------------------------
Available node metrics are updated constantly, new ones are added and obsolete removed, so it is good a practice to update the dashboards from time to time, especially if you notice any missing data in panels. Updating the dashboards is easy, just run the script with no arguments, and it will refresh the dashboards with the latest available versions. Allow up to 30s for dashboards to update in Grafana.
If you added the optional extra dashboards (step 5), they will be updated as well.
Summary[](#summary "Direct link to heading")
---------------------------------------------
Using the script to install node monitoring is easy, and it gives you insight into how your node is behaving and what's going on under the hood. Also, pretty graphs!
If you have feedback on this tutorial, problems with the script or following the steps, send us a message on [Discord](https://chat.avalabs.org/).
# Reduce Disk Usage (/docs/nodes/maintain/reduce-disk-usage)
---
title: Reduce Disk Usage
---
Offline Pruning is ported from `go-ethereum` to reduce the amount of disk space taken up by the TrieDB (storage for the Merkle Forest).
Offline pruning creates a bloom filter and adds all trie nodes in the active state to the bloom filter to mark the data as protected. This ensures that any part of the active state will not be removed during offline pruning.
After generating the bloom filter, offline pruning iterates over the database and searches for trie nodes that are safe to be removed from disk.
A bloom filter is a probabilistic data structure that reports whether an item is definitely not in a set or possibly in a set. Therefore, for each key we iterate, we check if it is in the bloom filter. If the key is definitely not in the bloom filter, then it is not in the active state and we can safely delete it. If the key is possibly in the set, then we skip over it to ensure we do not delete any active state.
During iteration, the underlying database (LevelDB) writes deletion markers, causing a temporary increase in disk usage.
After iterating over the database and deleting any old trie nodes that it can, offline pruning then runs compaction to minimize the DB size after the potentially large number of delete operations.
Finding the C-Chain Config File[](#finding-the-c-chain-config-file "Direct link to heading")
---------------------------------------------------------------------------------------------
In order to enable offline pruning, you need to update the C-Chain config file to include the parameters `offline-pruning-enabled` and `offline-pruning-data-directory`.
The default location of the C-Chain config file is `~/.avalanchego/configs/chains/C/config.json`. **Please note that by default, this file does not exist. You would need to create it manually.** You can update the directory for chain configs by passing in the directory of your choice via the CLI argument: `chain-config-dir`. See [this](/docs/nodes/configure/configs-flags) for more info. For example, if you start your node with:
```bash
./build/avalanchego --chain-config-dir=/home/ubuntu/chain-configs
```
The chain config directory will be updated to `/home/ubuntu/chain-configs` and the corresponding C-Chain config file will be: `/home/ubuntu/chain-configs/C/config.json`.
Running Offline Pruning[](#running-offline-pruning "Direct link to heading")
-----------------------------------------------------------------------------
In order to enable offline pruning, update the C-Chain config file to include the following parameters:
```json
{
"offline-pruning-enabled": true,
"offline-pruning-data-directory": "/home/ubuntu/offline-pruning"
}
```
This will set `/home/ubuntu/offline-pruning` as the directory to be used by the offline pruner. Offline pruning will store the bloom filter in this location, so you must ensure that the path exists.
Now that the C-Chain config file has been updated, you can start your node with the command (no CLI arguments are necessary if using the default chain config directory):
Once AvalancheGo starts the C-Chain, you can expect to see update logs from the offline pruner:
```bash
INFO [02-09|00:20:15.625] Iterating state snapshot accounts=297,231 slots=6,669,708 elapsed=16.001s eta=1m29.03s
INFO [02-09|00:20:23.626] Iterating state snapshot accounts=401,907 slots=10,698,094 elapsed=24.001s eta=1m32.522s
INFO [02-09|00:20:31.626] Iterating state snapshot accounts=606,544 slots=13,891,948 elapsed=32.002s eta=1m10.927s
INFO [02-09|00:20:39.626] Iterating state snapshot accounts=760,948 slots=18,025,523 elapsed=40.002s eta=1m2.603s
INFO [02-09|00:20:47.626] Iterating state snapshot accounts=886,583 slots=21,769,199 elapsed=48.002s eta=1m8.834s
INFO [02-09|00:20:55.626] Iterating state snapshot accounts=1,046,295 slots=26,120,100 elapsed=56.002s eta=57.401s
INFO [02-09|00:21:03.626] Iterating state snapshot accounts=1,229,257 slots=30,241,391 elapsed=1m4.002s eta=47.674s
INFO [02-09|00:21:11.626] Iterating state snapshot accounts=1,344,091 slots=34,128,835 elapsed=1m12.002s eta=45.185s
INFO [02-09|00:21:19.626] Iterating state snapshot accounts=1,538,009 slots=37,791,218 elapsed=1m20.002s eta=34.59s
INFO [02-09|00:21:27.627] Iterating state snapshot accounts=1,729,564 slots=41,694,303 elapsed=1m28.002s eta=25.006s
INFO [02-09|00:21:35.627] Iterating state snapshot accounts=1,847,617 slots=45,646,011 elapsed=1m36.003s eta=20.052s
INFO [02-09|00:21:43.627] Iterating state snapshot accounts=1,950,875 slots=48,832,722 elapsed=1m44.003s eta=9.299s
INFO [02-09|00:21:47.342] Iterated snapshot accounts=1,950,875 slots=49,667,870 elapsed=1m47.718s
INFO [02-09|00:21:47.351] Writing state bloom to disk name=/home/ubuntu/offline-pruning/statebloom.0xd6fca36db4b60b34330377040ef6566f6033ed8464731cbb06dc35c8401fa38e.bf.gz
INFO [02-09|00:23:04.421] State bloom filter committed name=/home/ubuntu/offline-pruning/statebloom.0xd6fca36db4b60b34330377040ef6566f6033ed8464731cbb06dc35c8401fa38e.bf.gz
```
The bloom filter should be populated and committed to disk after about 5 minutes. At this point, if the node shuts down, it will resume the offline pruning session when it restarts (note: this operation cannot be cancelled).
In order to ensure that users do not mistakenly leave offline pruning enabled for the long term (which could result in an hour of downtime on each restart), we have added a manual protection which requires that after an offline pruning session, the node must be started with offline pruning disabled at least once before it will start with offline pruning enabled again. Therefore, once the bloom filter has been committed to disk, you should update the C-Chain config file to include the following parameters:
```json
{
"offline-pruning-enabled": false,
"offline-pruning-data-directory": "/home/ubuntu/offline-pruning"
}
```
It is important to keep the same data directory in the config file, so that the node knows where to look for the bloom filter on a restart if offline pruning has not finished.
Now if your node restarts, it will be marked as having correctly disabled offline pruning after the run and be allowed to resume normal operation once offline pruning has finished running.
You will see progress logs throughout the offline pruning run which will indicate the session's progress:
```bash
INFO [02-09|00:31:51.920] Pruning state data nodes=40,116,759 size=10.08GiB elapsed=8m47.499s eta=12m50.961s
INFO [02-09|00:31:59.921] Pruning state data nodes=41,659,059 size=10.47GiB elapsed=8m55.499s eta=12m13.822s
INFO [02-09|00:32:07.921] Pruning state data nodes=41,687,047 size=10.48GiB elapsed=9m3.499s eta=12m23.915s
INFO [02-09|00:32:15.921] Pruning state data nodes=41,715,823 size=10.48GiB elapsed=9m11.499s eta=12m33.965s
INFO [02-09|00:32:23.921] Pruning state data nodes=41,744,167 size=10.49GiB elapsed=9m19.500s eta=12m44.004s
INFO [02-09|00:32:31.921] Pruning state data nodes=41,772,613 size=10.50GiB elapsed=9m27.500s eta=12m54.01s
INFO [02-09|00:32:39.921] Pruning state data nodes=41,801,267 size=10.50GiB elapsed=9m35.500s eta=13m3.992s
INFO [02-09|00:32:47.922] Pruning state data nodes=41,829,714 size=10.51GiB elapsed=9m43.500s eta=13m13.951s
INFO [02-09|00:32:55.922] Pruning state data nodes=41,858,400 size=10.52GiB elapsed=9m51.501s eta=13m23.885s
INFO [02-09|00:33:03.923] Pruning state data nodes=41,887,131 size=10.53GiB elapsed=9m59.501s eta=13m33.79s
INFO [02-09|00:33:11.923] Pruning state data nodes=41,915,583 size=10.53GiB elapsed=10m7.502s eta=13m43.678s
INFO [02-09|00:33:19.924] Pruning state data nodes=41,943,891 size=10.54GiB elapsed=10m15.502s eta=13m53.551s
INFO [02-09|00:33:27.924] Pruning state data nodes=41,972,281 size=10.55GiB elapsed=10m23.502s eta=14m3.389s
INFO [02-09|00:33:35.924] Pruning state data nodes=42,001,414 size=10.55GiB elapsed=10m31.503s eta=14m13.192s
INFO [02-09|00:33:43.925] Pruning state data nodes=42,029,987 size=10.56GiB elapsed=10m39.504s eta=14m22.976s
INFO [02-09|00:33:51.925] Pruning state data nodes=42,777,042 size=10.75GiB elapsed=10m47.504s eta=14m7.245s
INFO [02-09|00:34:00.950] Pruning state data nodes=42,865,413 size=10.77GiB elapsed=10m56.529s eta=14m15.927s
INFO [02-09|00:34:08.956] Pruning state data nodes=42,918,719 size=10.79GiB elapsed=11m4.534s eta=14m24.453s
INFO [02-09|00:34:22.816] Pruning state data nodes=42,952,925 size=10.79GiB elapsed=11m18.394s eta=14m41.243s
INFO [02-09|00:34:30.818] Pruning state data nodes=42,998,715 size=10.81GiB elapsed=11m26.397s eta=14m49.961s
INFO [02-09|00:34:38.828] Pruning state data nodes=43,046,476 size=10.82GiB elapsed=11m34.407s eta=14m58.572s
INFO [02-09|00:34:46.893] Pruning state data nodes=43,107,656 size=10.83GiB elapsed=11m42.472s eta=15m6.729s
INFO [02-09|00:34:55.038] Pruning state data nodes=43,168,834 size=10.85GiB elapsed=11m50.616s eta=15m14.934s
INFO [02-09|00:35:03.039] Pruning state data nodes=43,446,900 size=10.92GiB elapsed=11m58.618s eta=15m14.705s
```
When the node completes, it will emit the following log and resume normal operation:
```bash
INFO [02-09|00:42:16.009] Pruning state data nodes=93,649,812 size=23.53GiB elapsed=19m11.588s eta=1m2.658s
INFO [02-09|00:42:24.009] Pruning state data nodes=95,045,956 size=23.89GiB elapsed=19m19.588s eta=45.149s
INFO [02-09|00:42:32.009] Pruning state data nodes=96,429,410 size=24.23GiB elapsed=19m27.588s eta=28.041s
INFO [02-09|00:42:40.009] Pruning state data nodes=97,811,804 size=24.58GiB elapsed=19m35.588s eta=11.204s
INFO [02-09|00:42:45.359] Pruned state data nodes=98,744,430 size=24.82GiB elapsed=19m40.938s
INFO [02-09|00:42:45.360] Compacting database range=0x00-0x10 elapsed="2.157µs"
INFO [02-09|00:43:12.311] Compacting database range=0x10-0x20 elapsed=26.951s
INFO [02-09|00:43:38.763] Compacting database range=0x20-0x30 elapsed=53.402s
INFO [02-09|00:44:04.847] Compacting database range=0x30-0x40 elapsed=1m19.486s
INFO [02-09|00:44:31.194] Compacting database range=0x40-0x50 elapsed=1m45.834s
INFO [02-09|00:45:31.580] Compacting database range=0x50-0x60 elapsed=2m46.220s
INFO [02-09|00:45:58.465] Compacting database range=0x60-0x70 elapsed=3m13.104s
INFO [02-09|00:51:17.593] Compacting database range=0x70-0x80 elapsed=8m32.233s
INFO [02-09|00:56:19.679] Compacting database range=0x80-0x90 elapsed=13m34.319s
INFO [02-09|00:56:46.011] Compacting database range=0x90-0xa0 elapsed=14m0.651s
INFO [02-09|00:57:12.370] Compacting database range=0xa0-0xb0 elapsed=14m27.010s
INFO [02-09|00:57:38.600] Compacting database range=0xb0-0xc0 elapsed=14m53.239s
INFO [02-09|00:58:06.311] Compacting database range=0xc0-0xd0 elapsed=15m20.951s
INFO [02-09|00:58:35.484] Compacting database range=0xd0-0xe0 elapsed=15m50.123s
INFO [02-09|00:59:05.449] Compacting database range=0xe0-0xf0 elapsed=16m20.089s
INFO [02-09|00:59:34.365] Compacting database range=0xf0- elapsed=16m49.005s
INFO [02-09|00:59:34.367] Database compaction finished elapsed=16m49.006s
INFO [02-09|00:59:34.367] State pruning successful pruned=24.82GiB elapsed=39m34.749s
INFO [02-09|00:59:34.367] Completed offline pruning. Re-initializing blockchain.
INFO [02-09|00:59:34.387] Loaded most recent local header number=10,671,401 hash=b52d0a..7bd166 age=40m29s
INFO [02-09|00:59:34.387] Loaded most recent local full block number=10,671,401 hash=b52d0a..7bd166 age=40m29s
INFO [02-09|00:59:34.387] Initializing snapshots async=true
DEBUG[02-09|00:59:34.390] Reinjecting stale transactions count=0
INFO [02-09|00:59:34.395] Transaction pool price threshold updated price=470,000,000,000
INFO [02-09|00:59:34.396] Transaction pool price threshold updated price=225,000,000,000
INFO [02-09|00:59:34.396] Transaction pool price threshold updated price=0
INFO [02-09|00:59:34.396] lastAccepted = 0xb52d0a1302e4055b487c3a0243106b5e13a915c6e178da9f8491cebf017bd166
INFO [02-09|00:59:34] snow/engine/snowman/transitive.go#67: initializing consensus engine
INFO [02-09|00:59:34] snow/engine/snowman/bootstrap/bootstrapper.go#220: Starting bootstrap...
INFO [02-09|00:59:34] chains/manager.go#246: creating chain:
ID: 2oYMBNV4eNHyqk2fjjV5nVQLDbtmNJzq5s3qs3Lo6ftnC6FByM
VMID:jvYyfQTxGMJLuGWa55kdP2p2zSUYsQ5Raupu4TW34ZAUBAbtq
INFO [02-09|00:59:34.425] Enabled APIs: eth, eth-filter, net, web3, internal-eth, internal-blockchain, internal-transaction, avax
DEBUG[02-09|00:59:34.425] Allowed origin(s) for WS RPC interface [*]
INFO [02-09|00:59:34] api/server/server.go#203: adding route /ext/bc/2q9e4r6Mu3U68nU1fYjgbR6JvwrRx36CohpAX5UQxse55x1Q5/avax
INFO [02-09|00:59:34] api/server/server.go#203: adding route /ext/bc/2q9e4r6Mu3U68nU1fYjgbR6JvwrRx36CohpAX5UQxse55x1Q5/rpc
INFO [02-09|00:59:34] api/server/server.go#203: adding route /ext/bc/2q9e4r6Mu3U68nU1fYjgbR6JvwrRx36CohpAX5UQxse55x1Q5/ws
INFO [02-09|00:59:34] vms/avm/vm.go#437: Fee payments are using Asset with Alias: AVAX, AssetID: FvwEAhmxKfeiG8SnEvq42hc6whRyY3EFYAvebMqDNDGCgxN5Z
INFO [02-09|00:59:34] vms/avm/vm.go#229: address transaction indexing is disabled
INFO [02-09|00:59:34] snow/engine/avalanche/transitive.go#71: initializing consensus engine
INFO [02-09|00:59:34] snow/engine/avalanche/bootstrap/bootstrapper.go#258: Starting bootstrap...
INFO [02-09|00:59:34] api/server/server.go#203: adding route /ext/bc/2oYMBNV4eNHyqk2fjjV5nVQLDbtmNJzq5s3qs3Lo6ftnC6FByM
INFO [02-09|00:59:34] snow/engine/snowman/bootstrap/bootstrapper.go#445: waiting for the remaining chains in this subnet to finish syncing
INFO [02-09|00:59:34] api/server/server.go#203: adding route /ext/bc/2oYMBNV4eNHyqk2fjjV5nVQLDbtmNJzq5s3qs3Lo6ftnC6FByM/wallet
INFO [02-09|00:59:34] api/server/server.go#203: adding route /ext/bc/2oYMBNV4eNHyqk2fjjV5nVQLDbtmNJzq5s3qs3Lo6ftnC6FByM/events
INFO [02-09|00:59:34]
snow/engine/common/bootstrapper.go#235: Bootstrapping started syncing with 1 vertices in the accepted frontier
INFO [02-09|00:59:46] snow/engine/common/bootstrapper.go#235: Bootstrapping started syncing with 2 vertices in the accepted frontier
INFO [02-09|00:59:49] snow/engine/common/bootstrapper.go#235: Bootstrapping started syncing with 1 vertices in the accepted frontier
INFO [02-09|00:59:49] snow/engine/avalanche/bootstrap/bootstrapper.go#473: bootstrapping fetched 55 vertices. Executing transaction state transitions...
INFO [02-09|00:59:49] snow/engine/common/queue/jobs.go#171: executed 55 operations
INFO [02-09|00:59:49] snow/engine/avalanche/bootstrap/bootstrapper.go#484: executing vertex state transitions...
INFO [02-09|00:59:49] snow/engine/common/queue/jobs.go#171: executed 55 operations
INFO [02-09|01:00:07] snow/engine/snowman/bootstrap/bootstrapper.go#406: bootstrapping fetched 1241 blocks. Executing state transitions...
```
At this point, the node will go into bootstrapping and (once bootstrapping completes) resume consensus and operate as normal.
Disk Space Considerations[](#disk-space-considerations "Direct link to heading")
---------------------------------------------------------------------------------
To ensure the node does not enter an inconsistent state, the bloom filter used for pruning is persisted to `offline-pruning-data-directory` for the duration of the operation. This directory should have `offline-pruning-bloom-filter-size` available in disk space (default 512 MB).
The underlying database (LevelDB) uses deletion markers (tombstones) to identify newly deleted keys. These markers are temporarily persisted to disk until they are removed during a process known as compaction. This will lead to an increase in disk usage during pruning. If your node runs out of disk space during pruning, you may safely restart the pruning operation. This may succeed as restarting the node triggers compaction.
If restarting the pruning operation does not succeed, additional disk space should be provisioned.
# Run Avalanche Node in Background (/docs/nodes/maintain/run-as-background-service)
---
title: Run Avalanche Node in Background
---
This page demonstrates how to set up a `avalanchego.service` file to enable a manually deployed validator node to run in the background of a server instead of in the terminal directly.
Make sure that AvalancheGo is already installed on your machine.
Steps[](#steps "Direct link to heading")
-----------------------------------------
### Fuji Testnet Config[](#fuji-testnet-config "Direct link to heading")
Run this command in your terminal to create the `avalanchego.service` file
```bash
sudo nano /etc/systemd/system/avalanchego.service
```
Paste the following configuration into the `avalanchego.service` file
Remember to modify the values of:
- _**user=**_
- _**group=**_
- _**WorkingDirectory=**_
- _**ExecStart=**_
For those that you have configured on your Server:
```toml
[Unit]
Description=Avalanche Node service
After=network.target
[Service]
User='YourUserHere'
Group='YourUserHere'
Restart=always
PrivateTmp=true
TimeoutStopSec=60s
TimeoutStartSec=10s
StartLimitInterval=120s
StartLimitBurst=5
WorkingDirectory=/Your/Path/To/avalanchego
ExecStart=/Your/Path/To/avalanchego/./avalanchego \
--network-id=fuji \
--api-metrics-enabled=true
[Install]
WantedBy=multi-user.target
```
Press **Ctrl + X** then **Y** then **Enter** to save and exit.
Now, run:
```bash
sudo systemctl daemon-reload
```
### Mainnet Config[](#mainnet-config "Direct link to heading")
Run this command in your terminal to create the `avalanchego.service` file
```bash
sudo nano /etc/systemd/system/avalanchego.service
```
Paste the following configuration into the `avalanchego.service` file
```toml
[Unit]
Description=Avalanche Node service
After=network.target
[Service]
User='YourUserHere'
Group='YourUserHere'
Restart=always
PrivateTmp=true
TimeoutStopSec=60s
TimeoutStartSec=10s
StartLimitInterval=120s
StartLimitBurst=5
WorkingDirectory=/Your/Path/To/avalanchego
ExecStart=/Your/Path/To/avalanchego/./avalanchego \
--api-metrics-enabled=true
[Install]
WantedBy=multi-user.target
```
Press **Ctrl + X** then **Y** then **Enter** to save and exit.
Now, run:
```bash
sudo systemctl daemon-reload
```
Start the Node[](#start-the-node "Direct link to heading")
-----------------------------------------------------------
This command makes your node start automatically in case of a reboot, run it:
```bash
sudo systemctl enable avalanchego
```
To start the node, run:
```bash
sudo systemctl start avalanchego
sudo systemctl status avalanchego
```
Output:
```bash
socopower@avalanche-node-01:~$ sudo systemctl status avalanchego
● avalanchego.service - Avalanche Node service
Loaded: loaded (/etc/systemd/system/avalanchego.service; enabled; vendor p>
Active: active (running) since Tue 2023-08-29 23:14:45 UTC; 5h 46min ago
Main PID: 2226 (avalanchego)
Tasks: 27 (limit: 38489)
Memory: 8.7G
CPU: 5h 50min 31.165s
CGroup: /system.slice/avalanchego.service
└─2226 /usr/local/bin/avalanchego/./avalanchego --network-id=fuji
Aug 30 03:02:50 avalanche-node-01 avalanchego[2226]: INFO [08-30|03:02:50.685] >
Aug 30 03:02:51 avalanche-node-01 avalanchego[2226]: INFO [08-30|03:02:51.185] >
Aug 30 03:03:09 avalanche-node-01 avalanchego[2226]: [08-30|03:03:09.380] INFO >
Aug 30 03:03:23 avalanche-node-01 avalanchego[2226]: [08-30|03:03:23.983] INFO >
Aug 30 03:05:15 avalanche-node-01 avalanchego[2226]: [08-30|03:05:15.192] INFO >
Aug 30 03:05:15 avalanche-node-01 avalanchego[2226]: [08-30|03:05:15.237] INFO >
Aug 30 03:05:15 avalanche-node-01 avalanchego[2226]: [08-30|03:05:15.238] INFO >
Aug 30 03:05:19 avalanche-node-01 avalanchego[2226]: [08-30|03:05:19.809] INFO >
Aug 30 03:05:19 avalanche-node-01 avalanchego[2226]: [08-30|03:05:19.809] INFO >
Aug 30 05:00:47 avalanche-node-01 avalanchego[2226]: [08-30|05:00:47.001] INFO
```
To see the synchronization process, you can run the following command:
```bash
sudo journalctl -fu avalanchego
```
# Upgrade Your AvalancheGo Node (/docs/nodes/maintain/upgrade)
---
title: Upgrade Your AvalancheGo Node
---
Backup Your Node[](#backup-your-node "Direct link to heading")
---------------------------------------------------------------
Before upgrading your node, it is recommended you backup your staker files which are used to identify your node on the network. In the default installation, you can copy them by running following commands:
```bash
cd
cp ~/.avalanchego/staking/staker.crt .
cp ~/.avalanchego/staking/staker.key .
```
Then download `staker.crt` and `staker.key` files and keep them somewhere safe and private. If anything happens to your node or the machine node runs on, these files can be used to fully recreate your node.
If you use your node for development purposes and have keystore users on your node, you should back up those too.
Node Installed Using the Installer Script[](#node-installed-using-the-installer-script "Direct link to heading")
-----------------------------------------------------------------------------------------------------------------
If you installed your node using the [installer script](/docs/nodes/using-install-script/installing-avalanche-go), to upgrade your node, just run the installer script again.
```bash
./avalanchego-installer.sh
```
It will detect that you already have AvalancheGo installed:
```bash
AvalancheGo installer
---------------------
Preparing environment...
Found 64bit Intel/AMD architecture...
Found AvalancheGo systemd service already installed, switching to upgrade mode.
Stopping service...
```
It will then upgrade your node to the latest version, and after it's done, start the node back up, and print out the information about the latest version:
```bash
Node upgraded, starting service...
New node version:
avalanche/1.1.1 [network=mainnet, database=v1.0.0, commit=f76f1fd5f99736cf468413bbac158d6626f712d2]
Done!
```
And that is it, your node is upgraded to the latest version.
If you installed your node manually, proceed with the rest of the tutorial.
Stop the Old Node Version[](#stop-the-old-node-version "Direct link to heading")
---------------------------------------------------------------------------------
After the backup is secured, you may start upgrading your node. Begin by stopping the currently running version.
### Node Running from Terminal[](#node-running-from-terminal "Direct link to heading")
If your node is running in a terminal stop it by pressing `ctrl+c`.
### Node Running as a Service[](#node-running-as-a-service "Direct link to heading")
If your node is running as a service, stop it by entering: `sudo systemctl stop avalanchego.service`
(your service may be named differently, `avalanche.service`, or similar)
### Node Running in Background[](#node-running-in-background "Direct link to heading")
If your node is running in the background (by running with `nohup`, for example) then find the process running the node by running `ps aux | grep avalanche`. This will produce output like:
```bash
ubuntu 6834 0.0 0.0 2828 676 pts/1 S+ 19:54 0:00 grep avalanche
ubuntu 2630 26.1 9.4 2459236 753316 ? Sl Dec02 1220:52 /home/ubuntu/build/avalanchego
```
In this example, second line shows information about your node. Note the process id, in this case, `2630`. Stop the node by running `kill -2 2630`.
Now we are ready to download the new version of the node. You can either download the source code and then build the binary program, or you can download the pre-built binary. You don't need to do both.
Downloading pre-built binary is easier and recommended if you're just looking to run your own node and stake on it.
Building the node [from source](/docs/nodes/maintain/upgrade#build-from-source) is recommended if you're a developer looking to experiment and build on Avalanche.
Download Pre-Built Binary[](#download-pre-built-binary "Direct link to heading")
---------------------------------------------------------------------------------
If you want to download a pre-built binary instead of building it yourself, go to our [releases page](https://github.com/ava-labs/avalanchego/releases), and select the release you want (probably the latest one.)
If you have a node, you can subscribe to the [avalanche notify service](/docs/nodes/maintain/enroll-in-avalanche-notify) with your node ID to be notified about new releases.
In addition, or if you don't have a node ID, you can get release notifications from github. To do so, you can go to our [repository](https://github.com/ava-labs/avalanchego) and look on the top-right corner for the **Watch** option. After you click on it, select **Custom**, and then **Releases**. Press **Apply** and it is done.
Under `Assets`, select the appropriate file.
For MacOS:
Download: `avalanchego-macos-.zip`
Unzip: `unzip avalanchego-macos-.zip`
The resulting folder, `avalanchego-`, contains the binaries.
For Linux on PCs or cloud providers:
Download: `avalanchego-linux-amd64-.tar.gz`
Unzip: `tar -xvf avalanchego-linux-amd64-.tar.gz`
The resulting folder, `avalanchego--linux`, contains the binaries.
For Linux on Arm64-based computers:
Download: `avalanchego-linux-arm64-.tar.gz`
Unzip: `tar -xvf avalanchego-linux-arm64-.tar.gz`
The resulting folder, `avalanchego--linux`, contains the binaries.
You are now ready to run the new version of the node.
### Running the Node from Terminal[](#running-the-node-from-terminal "Direct link to heading")
If you are using the pre-built binaries on MacOS:
```bash
./avalanchego-/build/avalanchego
```
If you are using the pre-built binaries on Linux:
```bash
./avalanchego--linux/avalanchego
```
Add `nohup` at the start of the command if you want to run the node in the background.
### Running the Node as a Service[](#running-the-node-as-a-service "Direct link to heading")
If you're running the node as a service, you need to replace the old binaries with the new ones.
```bash
cp -r avalanchego--linux/*
```
and then restart the service with: `sudo systemctl start avalanchego.service`.
Build from Source[](#build-from-source "Direct link to heading")
-----------------------------------------------------------------
First clone our GitHub repo (you can skip this step if you've done this before):
```bash
git clone https://github.com/ava-labs/avalanchego.git
```
The repository cloning method used is HTTPS, but SSH can be used too:
`git clone git@github.com:ava-labs/avalanchego.git`
You can find more about SSH and how to use it [here](https://docs.github.com/en/authentication/connecting-to-github-with-ssh/about-ssh).
Then move to the AvalancheGo directory:
```bash
cd avalanchego
```
Pull the latest code:
```bash
git pull
```
If the master branch has not been updated with the latest release tag, you can get to it directly via first running `git fetch --all --tags` and then `git checkout --force tags/` (where `` is the latest release tag; for example `v1.3.2`) instead of `git pull`.
Note that your local copy will be in a 'detached HEAD' state, which is not an issue if you do not make changes to the source that you want push back to the repository (in which case you should check out to a branch and to the ordinary merges).
Note also that the `--force` flag will disregard any local changes you might have.
Check that your local code is up to date. Do:
```bash
git rev-parse HEAD
```
and check that the first 7 characters printed match the Latest commit field on our [GitHub](https://github.com/ava-labs/avalanchego).
If you used the `git checkout tags/` then these first 7 characters should match commit hash of that tag.
Now build the binary:
```bash
./scripts/build.sh
```
This should print: `Build Successful`
You can check what version you're running by doing:
```bash
./build/avalanchego --version
```
You can run your node with:
```bash
./build/avalanchego
```
# Amazon Web Services (/docs/nodes/on-third-party-services/amazon-web-services)
---
title: Amazon Web Services
description: Learn how to run a node on Amazon Web Services.
---
Introduction[](#introduction "Direct link to heading")
-------------------------------------------------------
This tutorial will guide you through setting up an Avalanche node on [Amazon Web Services (AWS)](https://aws.amazon.com/). Cloud services like AWS are a good way to ensure that your node is highly secure, available, and accessible.
To get started, you'll need:
- An AWS account
- A terminal with which to SSH into your AWS machine
- A place to securely store and back up files
This tutorial assumes your local machine has a Unix style terminal. If you're on Windows, you'll have to adapt some of the commands used here.
Log Into AWS[](#log-into-aws "Direct link to heading")
-------------------------------------------------------
Signing up for AWS is outside the scope of this article, but Amazon has instructions [here](https://aws.amazon.com/premiumsupport/knowledge-center/create-and-activate-aws-account).
It is _highly_ recommended that you set up Multi-Factor Authentication on your AWS root user account to protect it. Amazon has documentation for this [here](https://docs.aws.amazon.com/IAM/latest/UserGuide/id_credentials_mfa_enable_virtual.html#enable-virt-mfa-for-root).
Once your account is set up, you should create a new EC2 instance. An EC2 is a virtual machine instance in AWS's cloud. Go to the [AWS Management Console](https://console.aws.amazon.com/) and enter the EC2 dashboard.
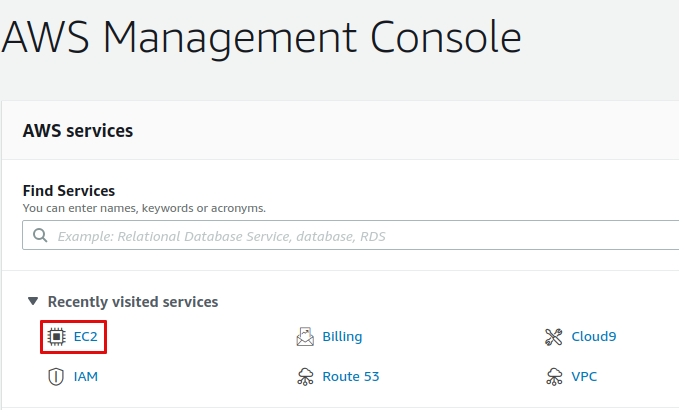
To log into the EC2 instance, you will need a key on your local machine that grants access to the instance. First, create that key so that it can be assigned to the EC2 instance later on. On the bar on the left side, under **Network & Security**, select **Key Pairs.**
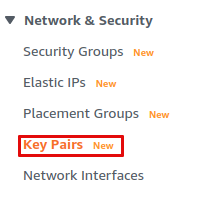
Select **Create key pair** to launch the key pair creation wizard.
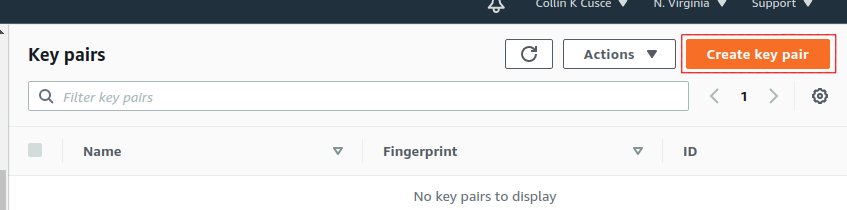
Name your key `avalanche`. If your local machine has MacOS or Linux, select the `pem` file format. If it's Windows, use the `ppk` file format. Optionally, you can add tags for the key pair to assist with tracking.

Click `Create key pair`. You should see a success message, and the key file should be downloaded to your local machine. Without this file, you will not be able to access your EC2 instance. **Make a copy of this file and put it on a separate storage medium such as an external hard drive. Keep this file secret; do not share it with others.**
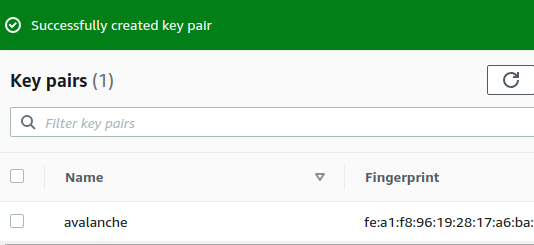
Create a Security Group[](#create-a-security-group "Direct link to heading")
-----------------------------------------------------------------------------
An AWS Security Group defines what internet traffic can enter and leave your EC2 instance. Think of it like a firewall. Create a new Security Group by selecting **Security Groups** under the **Network & Security** drop-down.
This opens the Security Groups panel. Click **Create security group** in the top right of the Security Groups panel.
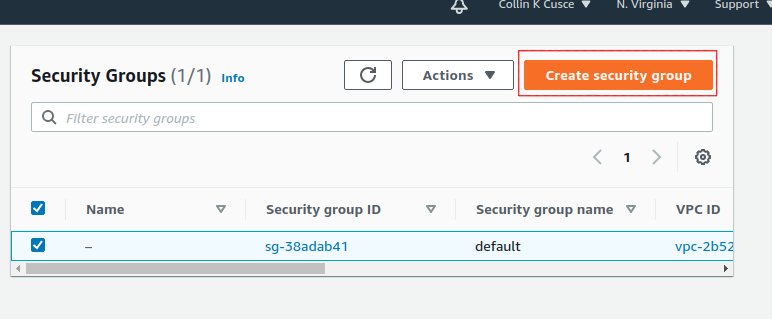
You'll need to specify what inbound traffic is allowed. Allow SSH traffic from your IP address so that you can log into your EC2 instance (each time your ISP changes your IP address, you will need to modify this rule). Allow TCP traffic on port 9651 so your node can communicate with other nodes on the network. Allow TCP traffic on port 9650 from your IP so you can make API calls to your node. **It's important that you only allow traffic on the SSH and API port from your IP.** If you allow incoming traffic from anywhere, this could be used to brute force entry to your node (SSH port) or used as a denial of service attack vector (API port). Finally, allow all outbound traffic.
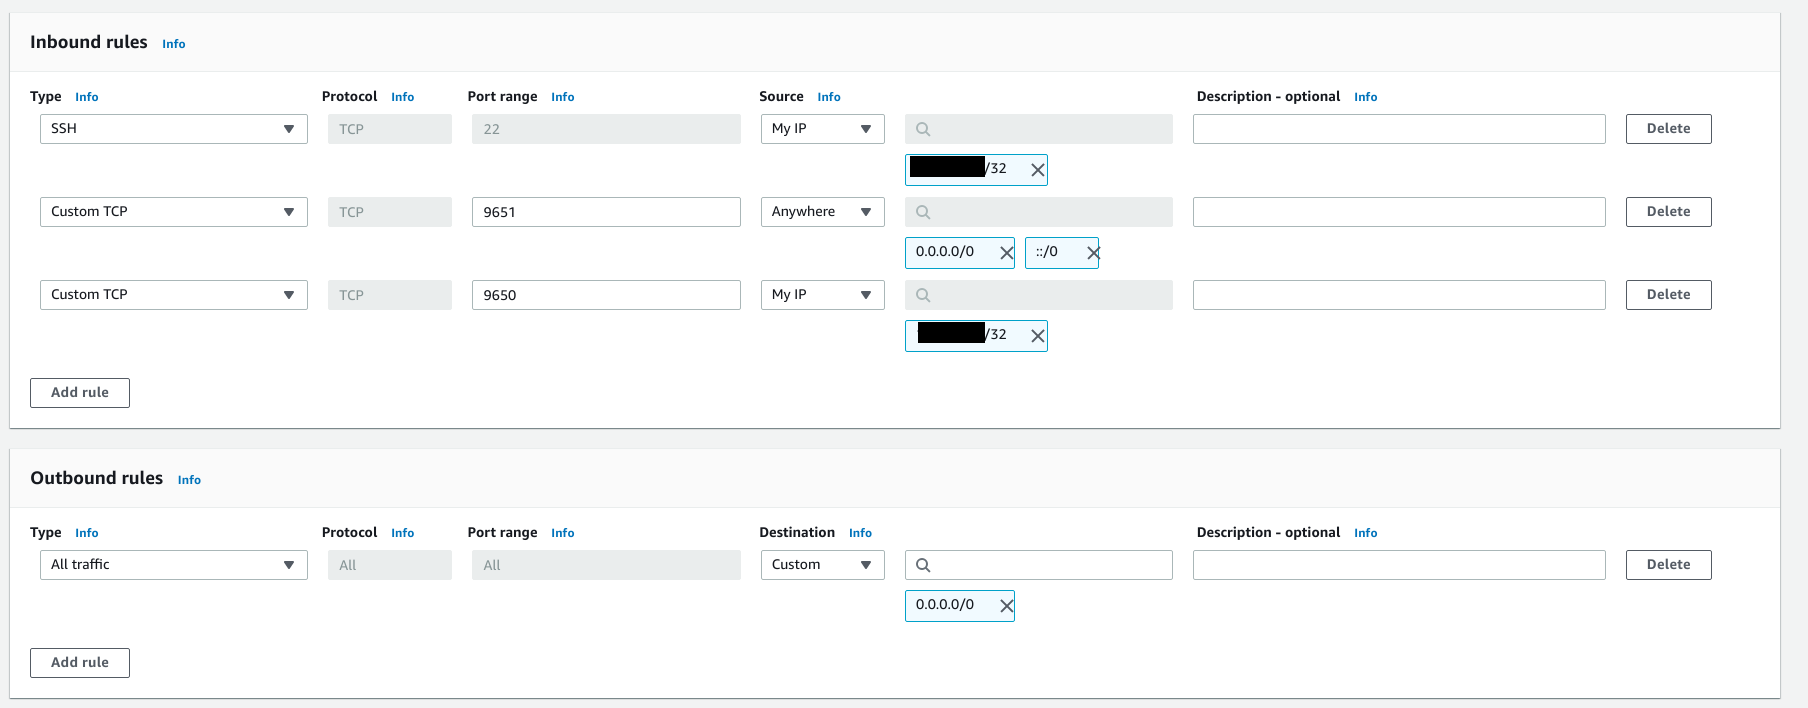
Add a tag to the new security group with key `Name` and value`Avalanche Security Group`. This will enable us to know what this security group is when we see it in the list of security groups.

Click `Create security group`. You should see the new security group in the list of security groups.
Launch an EC2 Instance[](#launch-an-ec2-instance "Direct link to heading")
---------------------------------------------------------------------------
Now you're ready to launch an EC2 instance. Go to the EC2 Dashboard and select **Launch instance**.
Select **Ubuntu 20.04 LTS (HVM), SSD Volume Type** for the operating system.
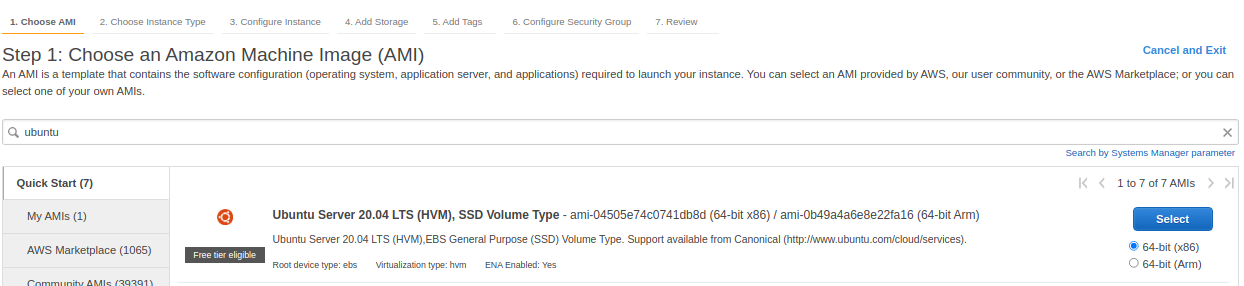
Next, choose your instance type. This defines the hardware specifications of the cloud instance. In this tutorial we set up a **c5.2xlarge**. This should be more than powerful enough since Avalanche is a lightweight consensus protocol. To create a c5.2xlarge instance, select the **Compute-optimized** option from the filter drop-down menu.
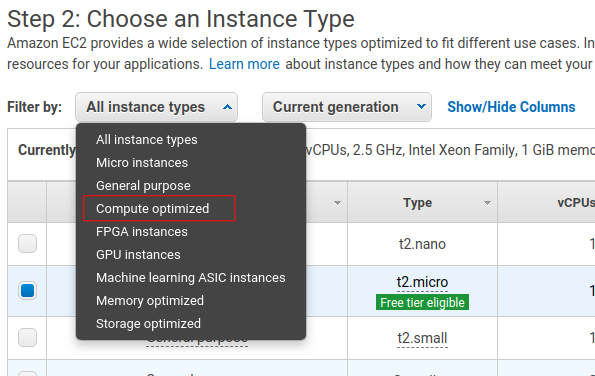
Select the checkbox next to the c5.2xlarge instance in the table.

Click the **Next: Configure Instance Details** button in the bottom right-hand corner.
The instance details can stay as their defaults.
When setting up a node as a validator, it is crucial to select the appropriate AWS instance type to ensure the node can efficiently process transactions and manage the network load. The recommended instance types are as follows:
- For a minimal stake, start with a compute-optimized instance such as c6, c6i, c6a, c7 and similar.
- Use a 2xlarge instance size for the minimal stake configuration.
- As the staked amount increases, choose larger instance sizes to accommodate the additional workload. For every order of magnitude increase in stake, move up one instance size. For example, for a 20k AVAX stake, a 4xlarge instance is suitable.
### Optional: Using Reserved Instances[](#optional-using-reserved-instances "Direct link to heading")
By default, you will be charged hourly for running your EC2 instance. For a long term usage that is not optimal.
You could save money by using a **Reserved Instance**. With a reserved instance, you pay upfront for an entire year of EC2 usage, and receive a lower per-hour rate in exchange for locking in. If you intend to run a node for a long time and don't want to risk service interruptions, this is a good option to save money. Again, do your own research before selecting this option.
### Add Storage, Tags, Security Group[](#add-storage-tags-security-group "Direct link to heading")
Click the **Next: Add Storage** button in the bottom right corner of the screen.
You need to add space to your instance's disk. You should start with at least 700GB of disk space. Although upgrades to reduce disk usage are always in development, on average the database will continually grow, so you need to constantly monitor disk usage on the node and increase disk space if needed.
Note that the image below shows 100GB as disk size, which was appropriate at the time the screenshot was taken. You should check the current [recommended disk space size](https://github.com/ava-labs/avalanchego#installation) before entering the actual value here.

Click **Next: Add Tags** in the bottom right corner of the screen to add tags to the instance. Tags enable us to associate metadata with our instance. Add a tag with key `Name` and value `My Avalanche Node`. This will make it clear what this instance is on your list of EC2 instances.
Now assign the security group created earlier to the instance. Choose **Select an existing security group** and choose the security group created earlier.
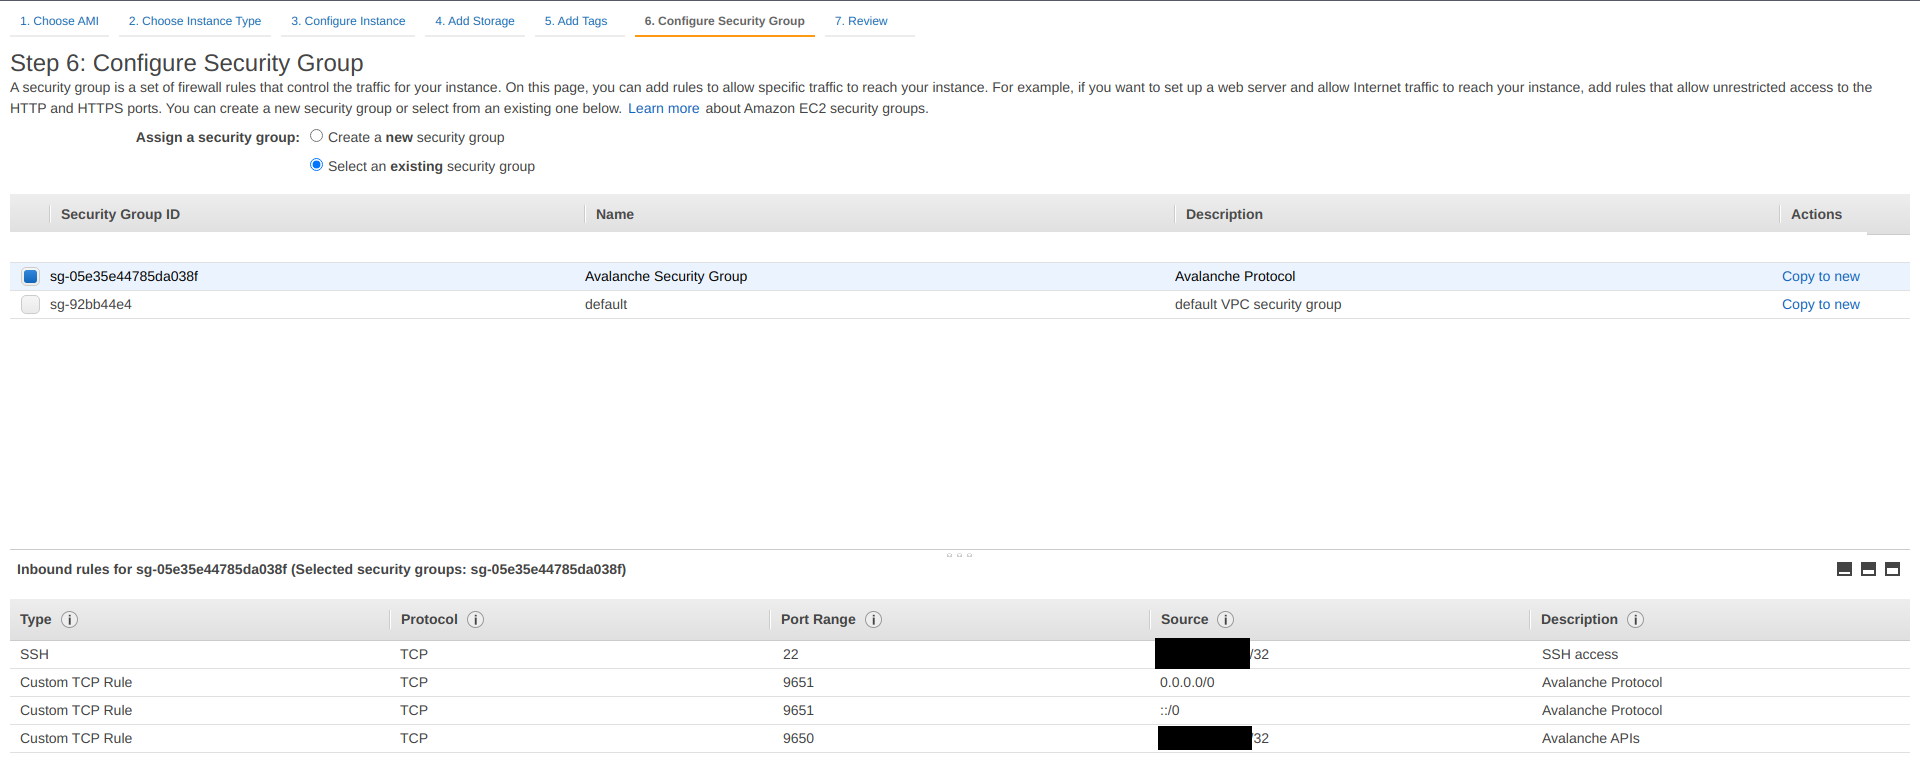
Finally, click **Review and Launch** in the bottom right. A review page will show the details of the instance you're about to launch. Review those, and if all looks good, click the blue **Launch** button in the bottom right corner of the screen.
You'll be asked to select a key pair for this instance. Select **Choose an existing key pair** and then select the `avalanche` key pair you made earlier in the tutorial. Check the box acknowledging that you have access to the `.pem` or `.ppk` file created earlier (make sure you've backed it up!) and then click **Launch Instances**.
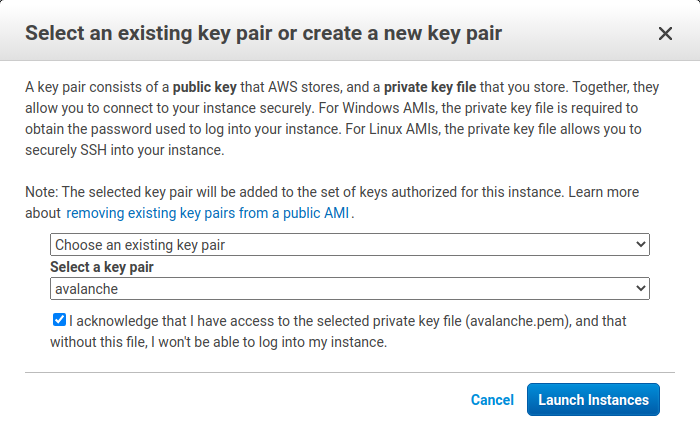
You should see a new pop up that confirms the instance is launching!
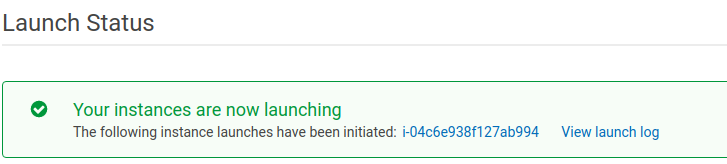
### Assign an Elastic IP[](#assign-an-elastic-ip "Direct link to heading")
By default, your instance will not have a fixed IP. Let's give it a fixed IP through AWS's Elastic IP service. Go back to the EC2 dashboard. Under **Network & Security,** select **Elastic IPs**.
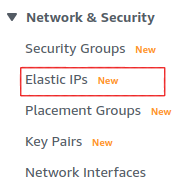
Select **Allocate Elastic IP address**.
Select the region your instance is running in, and choose to use Amazon's pool of IPv4 addresses. Click **Allocate**.
Select the Elastic IP you just created from the Elastic IP manager. From the **Actions** drop-down, choose **Associate Elastic IP address**.
Select the instance you just created. This will associate the new Elastic IP with the instance and give it a public IP address that won't change.
Set Up AvalancheGo[](#set-up-avalanchego "Direct link to heading")
-------------------------------------------------------------------
Go back to the EC2 Dashboard and select `Running Instances`.
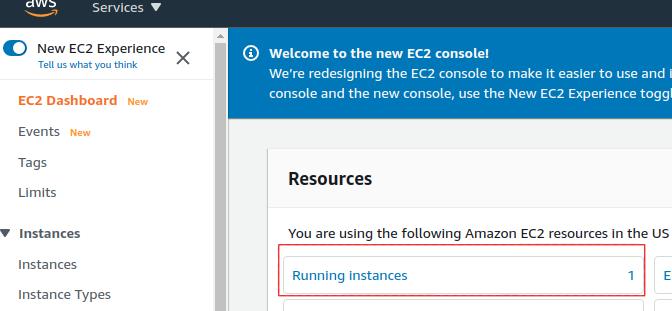
Select the newly created EC2 instance. This opens a details panel with information about the instance.
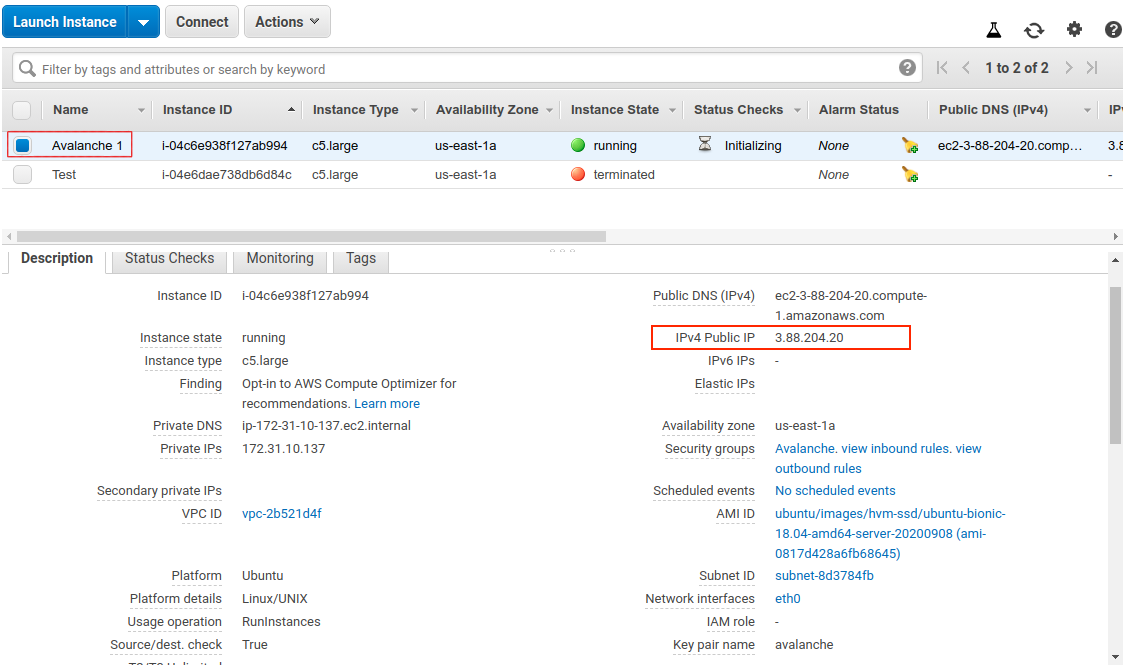
Copy the `IPv4 Public IP` field to use later. From now on we call this value `PUBLICIP`.
**Remember: the terminal commands below assume you're running Linux. Commands may differ for MacOS or other operating systems. When copy-pasting a command from a code block, copy and paste the entirety of the text in the block.**
Log into the AWS instance from your local machine. Open a terminal (try shortcut `CTRL + ALT + T`) and navigate to the directory containing the `.pem` file you downloaded earlier.
Move the `.pem` file to `$HOME/.ssh` (where `.pem` files generally live) with:
Add it to the SSH agent so that we can use it to SSH into your EC2 instance, and mark it as read-only.
```bash
ssh-add ~/.ssh/avalanche.pem; chmod 400 ~/.ssh/avalanche.pem
```
SSH into the instance. (Remember to replace `PUBLICIP` with the public IP field from earlier.)
If the permissions are **not** set correctly, you will see the following error.
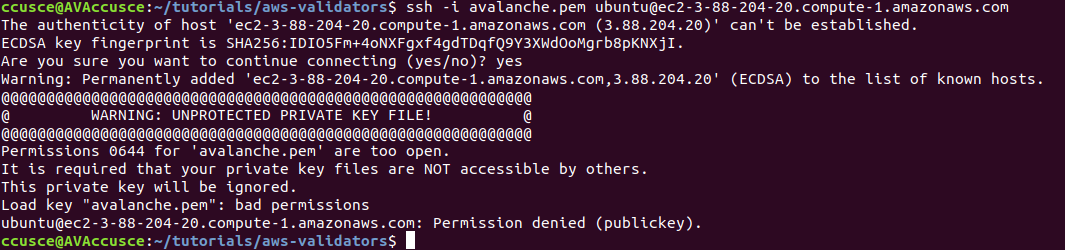
You are now logged into the EC2 instance.
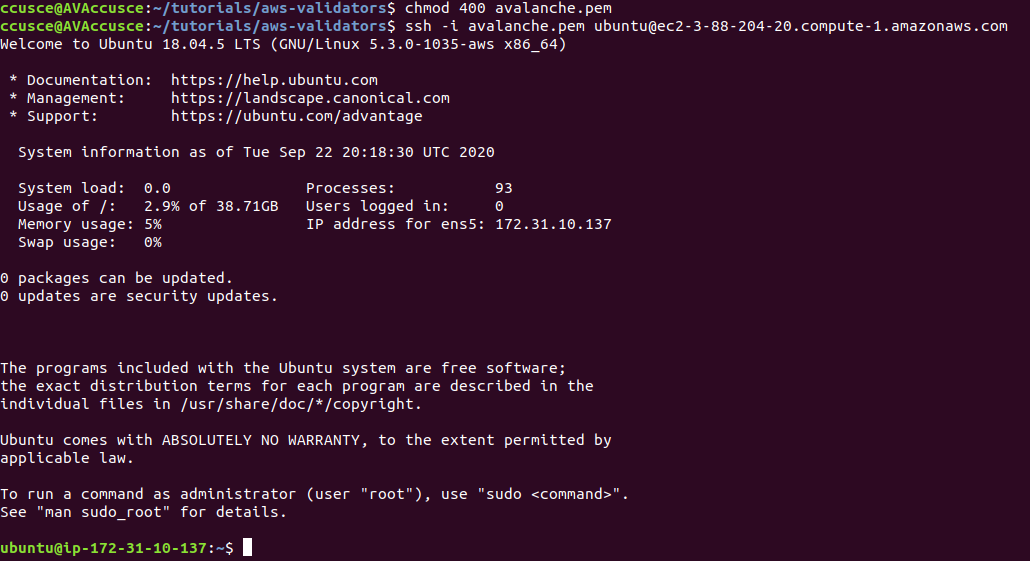
If you have not already done so, update the instance to make sure it has the latest operating system and security updates:
```bash
sudo apt update; sudo apt upgrade -y; sudo reboot
```
This also reboots the instance. Wait 5 minutes, then log in again by running this command on your local machine:
You're logged into the EC2 instance again. Now we'll need to set up our Avalanche node. To do this, follow the [Set Up Avalanche Node With Installer](/docs/nodes/using-install-script/installing-avalanche-go) tutorial which automates the installation process. You will need the `PUBLICIP` we set up earlier.
Your AvalancheGo node should now be running and in the process of bootstrapping, which can take a few hours. To check if it's done, you can issue an API call using `curl`. If you're making the request from the EC2 instance, the request is:
```bash
curl -X POST --data '{
"jsonrpc":"2.0",
"id" :1,
"method" :"info.isBootstrapped",
"params": {
"chain":"X"
}
}' -H 'content-type:application/json;' 127.0.0.1:9650/ext/info
```
Once the node is finished bootstrapping, the response will be:
```json
{
"jsonrpc": "2.0",
"result": {
"isBootstrapped": true
},
"id": 1
}
```
You can continue on, even if AvalancheGo isn't done bootstrapping.
In order to make your node a validator, you'll need its node ID. To get it, run:
```bash
curl -X POST --data '{
"jsonrpc":"2.0",
"id" :1,
"method" :"info.getNodeID"
}' -H 'content-type:application/json;' 127.0.0.1:9650/ext/info
```
The response contains the node ID.
```json
{"jsonrpc":"2.0","result":{"nodeID":"NodeID-DznHmm3o7RkmpLkWMn9NqafH66mqunXbM"},"id":1}
```
In the above example the node ID is`NodeID-DznHmm3o7RkmpLkWMn9NqafH66mqunXbM`. Copy your node ID for later. Your node ID is not a secret, so you can just paste it into a text editor.
AvalancheGo has other APIs, such as the [Health API](/docs/api-reference/health-api), that may be used to interact with the node. Some APIs are disabled by default. To enable such APIs, modify the ExecStart section of `/etc/systemd/system/avalanchego.service` (created during the installation process) to include flags that enable these endpoints. Don't manually enable any APIs unless you have a reason to.
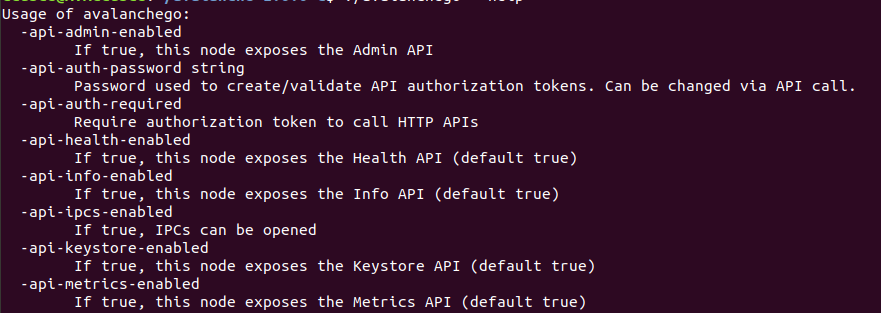
Back up the node's staking key and certificate in case the EC2 instance is corrupted or otherwise unavailable. The node's ID is derived from its staking key and certificate. If you lose your staking key or certificate then your node will get a new node ID, which could cause you to become ineligible for a staking reward if your node is a validator. **It is very strongly advised that you copy your node's staking key and certificate**. The first time you run a node, it will generate a new staking key/certificate pair and store them in directory `/home/ubuntu/.avalanchego/staking`.
Exit out of the SSH instance by running:
Now you're no longer connected to the EC2 instance; you're back on your local machine.
To copy the staking key and certificate to your machine, run the following command. As always, replace `PUBLICIP`.
```bash
scp -r ubuntu@PUBLICIP:/home/ubuntu/.avalanchego/staking ~/aws_avalanche_backup
```
Now your staking key and certificate are in directory `~/aws_avalanche_backup` . **The contents of this directory are secret.** You should hold this directory on storage not connected to the internet (like an external hard drive.)
### Upgrading Your Node[](#upgrading-your-node "Direct link to heading")
AvalancheGo is an ongoing project and there are regular version upgrades. Most upgrades are recommended but not required. Advance notice will be given for upgrades that are not backwards compatible. To update your node to the latest version, SSH into your AWS instance as before and run the installer script again.
```bash
./avalanchego-installer.sh
```
Your machine is now running the newest AvalancheGo version. To see the status of the AvalancheGo service, run `sudo systemctl status avalanchego.`
Increase Volume Size[](#increase-volume-size "Direct link to heading")
-----------------------------------------------------------------------
If you need to increase the volume size, follow these instructions from AWS:
- [Request modifications to your EBS volumes](https://docs.aws.amazon.com/AWSEC2/latest/UserGuide/requesting-ebs-volume-modifications.html)
- [Extend a Linux file system after resizing a volume](https://docs.aws.amazon.com/AWSEC2/latest/UserGuide/recognize-expanded-volume-linux.html)
Wrap Up[](#wrap-up "Direct link to heading")
---------------------------------------------
That's it! You now have an AvalancheGo node running on an AWS EC2 instance. We recommend setting up [node monitoring](/docs/nodes/maintain/monitoring)for your AvalancheGo node. We also recommend setting up AWS billing alerts so you're not surprised when the bill arrives. If you have feedback on this tutorial, or anything else, send us a message on [Discord](https://chat.avalabs.org/).
# AWS Marketplace (/docs/nodes/on-third-party-services/aws-marketplace)
---
title: AWS Marketplace
description: Learn how to run a node on AWS Marketplace.
---
## How to Launch an Avalanche Validator using AWS
With the intention of enabling developers and entrepreneurs to on-ramp into the Avalanche ecosystem with as little friction as possible, Ava Labs recently launched an offering to deploy an Avalanche Validator node via the AWS Marketplace. This tutorial will show the main steps required to get this node running and validating on the Avalanche Fuji testnet.
Product Overview[](#product-overview "Direct link to heading")
---------------------------------------------------------------
The Avalanche Validator node is available via [the AWS Marketplace](https://aws.amazon.com/marketplace/pp/prodview-nd6wgi2bhhslg). There you'll find a high level product overview. This includes a product description, pricing information, usage instructions, support information and customer reviews. After reviewing this information you want to click the "Continue to Subscribe" button.
Subscribe to This Software[](#subscribe-to-this-software "Direct link to heading")
-----------------------------------------------------------------------------------
Once on the "Subscribe to this Software" page you will see a button which enables you to subscribe to this AWS Marketplace offering. In addition you'll see Terms of service including the seller's End User License Agreement and the [AWS Privacy Notice](https://aws.amazon.com/privacy/). After reviewing these you want to click on the "Continue to Configuration" button.
Configure This Software[](#configure-this-software "Direct link to heading")
-----------------------------------------------------------------------------
This page lets you choose a fulfillment option and software version to launch this software. No changes are needed as the default settings are sufficient. Leave the `Fulfillment Option` as `64-bit (x86) Amazon Machine Image (AMI)`. The software version is the latest build of [the AvalancheGo full node](https://github.com/ava-labs/avalanchego/releases), `v1.9.5 (Dec 22, 2022)`, AKA `Banff.5`. This will always show the latest version. Also, the Region to deploy in can be left as `US East (N. Virginia)`. On the right you'll see the software and infrastructure pricing. Lastly, click the "Continue to Launch" button.
Launch This Software[](#launch-this-software "Direct link to heading")
-----------------------------------------------------------------------
Here you can review the launch configuration details and follow the instructions to launch the Avalanche Validator Node. The changes are very minor. Leave the action as "Launch from Website." The EC2 Instance Type should remain `c5.2xlarge`. The primary change you'll need to make is to choose a keypair which will enable you to `ssh` into the newly created EC2 instance to run `curl` commands on the Validator node. You can search for existing Keypairs or you can create a new keypair and download it to your local machine. If you create a new keypair you'll need to move the keypair to the appropriate location, change the permissions and add it to the OpenSSH authentication agent. For example, on MacOS it would look similar to the following:
```bash
# In this example we have a keypair called avalanche.pem which was downloaded from AWS to ~/Downloads/avalanche.pem
# Confirm the file exists with the following command
test -f ~/Downloads/avalanche.pem && echo "Avalanche.pem exists."
# Running the above command will output the following:
# Avalanche.pem exists.
# Move the avalanche.pem keypair from the ~/Downloads directory to the hidden ~/.ssh directory
mv ~/Downloads/avalanche.pem ~/.ssh
# Next add the private key identity to the OpenSSH authentication agent
ssh-add ~/.ssh/avalanche.pem;
# Change file modes or Access Control Lists
sudo chmod 600 ~/.ssh/avalanche.pem
```
Once these steps are complete you are ready to launch the Validator node on EC2. To make that happen click the "Launch" button

You now have an Avalanche node deployed on an AWS EC2 instance! Copy the `AMI ID` and click on the `EC2 Console` link for the next step.
EC2 Console[](#ec2-console "Direct link to heading")
-----------------------------------------------------
Now take the `AMI ID` from the previous step and input it into the search bar on the EC2 Console. This will bring you to the dashboard where you can find the EC2 instances public IP address.
Copy that public IP address and open a Terminal or command line prompt. Once you have the new Terminal open `ssh` into the EC2 instance with the following command.
Node Configuration[](#node-configuration "Direct link to heading")
-------------------------------------------------------------------
### Switch to Fuji Testnet[](#switch-to-fuji-testnet "Direct link to heading")
By default the Avalanche Node available through the AWS Marketplace syncs the Mainnet. If this is what you are looking for, you can skip this step.
For this tutorial you want to sync and validate the Fuji Testnet. Now that you're `ssh`ed into the EC2 instance you can make the required changes to sync Fuji instead of Mainnet.
First, confirm that the node is syncing the Mainnet by running the `info.getNetworkID` command.
#### `info.getNetworkID` Request[](#infogetnetworkid-request "Direct link to heading")
```bash
curl -X POST --data '{
"jsonrpc":"2.0",
"id" :1,
"method" :"info.getNetworkID",
"params": {
}
}' -H 'content-type:application/json;' 127.0.0.1:9650/ext/info
```
#### `info.getNetworkID` Response[](#infogetnetworkid-response "Direct link to heading")
The returned `networkID` will be 1 which is the network ID for Mainnet.
```json
{
"jsonrpc": "2.0",
"result": {
"networkID": "1"
},
"id": 1
}
```
Now you want to edit `/etc/avalanchego/conf.json` and change the `"network-id"` property from `"mainnet"` to `"fuji"`. To see the contents of `/etc/avalanchego/conf.json` you can `cat` the file.
```bash
cat /etc/avalanchego/conf.json
{
"api-keystore-enabled": false,
"http-host": "0.0.0.0",
"log-dir": "/var/log/avalanchego",
"db-dir": "/data/avalanchego",
"api-admin-enabled": false,
"public-ip-resolution-service": "opendns",
"network-id": "mainnet"
}
```
Edit that `/etc/avalanchego/conf.json` with your favorite text editor and change the value of the `"network-id"` property from `"mainnet"` to `"fuji"`. Once that's complete, save the file and restart the Avalanche node via `sudo systemctl restart avalanchego`. You can then call the `info.getNetworkID` endpoint to confirm the change was successful.
#### `info.getNetworkID` Request[](#infogetnetworkid-request-1 "Direct link to heading")
```bash
curl -X POST --data '{
"jsonrpc":"2.0",
"id" :1,
"method" :"info.getNetworkID",
"params": {
}
}' -H 'content-type:application/json;' 127.0.0.1:9650/ext/info
```
#### `info.getNetworkID` Response[](#infogetnetworkid-response-1 "Direct link to heading")
The returned `networkID` will be 5 which is the network ID for Fuji.
```json
{
"jsonrpc": "2.0",
"result": {
"networkID": "5"
},
"id": 1
}
```
Next you run the `info.isBoostrapped` command to confirm if the Avalanche Validator node has finished bootstrapping.
### `info.isBootstrapped` Request[](#infoisbootstrapped-request "Direct link to heading")
```bash
curl -X POST --data '{
"jsonrpc":"2.0",
"id" :1,
"method" :"info.isBootstrapped",
"params": {
"chain":"P"
}
}' -H 'content-type:application/json;' 127.0.0.1:9650/ext/info
```
Once the node is finished bootstrapping, the response will be:
### `info.isBootstrapped` Response[](#infoisbootstrapped-response "Direct link to heading")
```json
{
"jsonrpc": "2.0",
"result": {
"isBootstrapped": true
},
"id": 1
}
```
**Note** that initially the response is `false` because the network is still syncing.
When you're adding your node as a Validator on the Avalanche Mainnet you'll want to wait for this response to return `true` so that you don't suffer from any downtime while validating. For this tutorial you're not going to wait for it to finish syncing as it's not strictly necessary.
### `info.getNodeID` Request[](#infogetnodeid-request "Direct link to heading")
Next, you want to get the NodeID which will be used to add the node as a Validator. To get the node's ID you call the `info.getNodeID` jsonrpc endpoint.
```bash
curl --location --request POST 'http://127.0.0.1:9650/ext/info' \
--header 'Content-Type: application/json' \
--data-raw '{
"jsonrpc":"2.0",
"id" :1,
"method" :"info.getNodeID",
"params" :{
}
}'
```
### `info.getNodeID` Response[](#infogetnodeid-response "Direct link to heading")
Take a note of the `nodeID` value which is returned as you'll need to use it in the next step when adding a validator via the Avalanche Web Wallet. In this case the `nodeID` is `NodeID-Q8Gfaaio9FAqCmZVEXDq9bFvNPvDi7rt5`
```json
{
"jsonrpc": "2.0",
"result": {
"nodeID": "NodeID-Q8Gfaaio9FAqCmZVEXDq9bFvNPvDi7rt5",
"nodePOP": {
"publicKey": "0x85675db18b326a9585bfd43892b25b71bf01b18587dc5fac136dc5343a9e8892cd6c49b0615ce928d53ff5dc7fd8945d",
"proofOfPossession": "0x98a56f092830161243c1f1a613ad68a7f1fb25d2462ecf85065f22eaebb4e93a60e9e29649a32252392365d8f628b2571174f520331ee0063a94473f8db6888fc3a722be330d5c51e67d0d1075549cb55376e1f21d1b48f859ef807b978f65d9"
}
},
"id": 1
}
```
Add Node as Validator on Fuji via Core web[](#add-node-as-validator-on-fuji-via-core-web "Direct link to heading")
-------------------------------------------------------------------------------------------------------------------
For adding the new node as a Validator on the Fuji testnet's Primary Network you can use the [Core web](https://core.app/) [connected](https://support.avax.network/en/articles/6639869-core-web-how-do-i-connect-to-core-web) to [Core extension](https://core.app). If you don't have a Core extension already, check out this [guide](https://support.avax.network/en/articles/6100129-core-extension-how-do-i-create-a-new-wallet). If you'd like to import an existing wallet to Core extension, follow [these steps](https://support.avax.network/en/articles/6078933-core-extension-how-do-i-access-my-existing-account).
Core web is a free, all-in-one command center that gives users a more intuitive and comprehensive way to view assets, and use dApps across the Avalanche network, its various Avalanche L1s, and Ethereum. Core web is optimized for use with the Core browser extension and Core mobile (available on both iOS & Android). Together, they are key components of the Core product suite that brings dApps, NFTs, Avalanche Bridge, Avalanche L1s, L2s, and more, directly to users.
### Switching to Testnet Mode[](#switching-to-testnet-mode "Direct link to heading")
By default, Core web and Core extension are connected to Mainnet. For the sake of this demo, you want to connect to the Fuji Testnet.
#### On Core Extension[](#on-core-extension "Direct link to heading")
From the hamburger menu on the top-left corner, choose Advanced, and then toggle the Testnet Mode on.
You can follow the same steps for switching back to Mainnet.
#### On Core web[](#on-core-web "Direct link to heading")
Click on the Settings button top-right corner of the page, then toggle Testnet Mode on.

You can follow the same steps for switching back to Mainnet.
### Adding the Validator[](#adding-the-validator "Direct link to heading")
- Node ID: A unique ID derived from each individual node's staker certificate. Use the `NodeID` which was returned in the `info.getNodeID` response. In this example it's `NodeID-Q8Gfaaio9FAqCmZVEXDq9bFvNPvDi7rt5`
- Staking End Date: Your AVAX tokens will be locked until this date.
- Stake Amount: The amount of AVAX to lock for staking. On Mainnet, the minimum required amount is 2,000 AVAX. On Testnet the minimum required amount is 1 AVAAX.
- Delegation Fee: You will claim this % of the rewards from the delegators on your node.
- Reward Address: A reward address is the destination address of the accumulated staking rewards.
To add a node as a Validator, first select the Stake tab on Core web, in the left hand nav menu. Next click the Validate button, and select Get Started.
This page will open up.
Choose the desired Staking Amount, then click Next.
Enter you Node ID, then click Next.
Here, you'll need to choose the staking duration. There are predefined values, like 1 day, 1 month and so on. You can also choose a custom period of time. For this example, 22 days were chosen.
Choose the address that the network will send rewards to. Make sure it's the correct address because once the transaction is submitted this cannot be changed later or undone. You can choose the wallet's P-Chain address, or a custom P-Chain address. After entering the address, click Next.
Other individuals can stake to your validator and receive rewards too, known as "delegating." You will claim this percent of the rewards from the delegators on your node. Click Next.
After entering all these details, a summary of your validation will show up. If everything is correct, you can proceed and click on Submit Validation. A new page will open up, prompting you to accept the transaction. Here, please approve the transaction.
After the transaction is approved, you will see a message saying that your validation transaction was submitted.
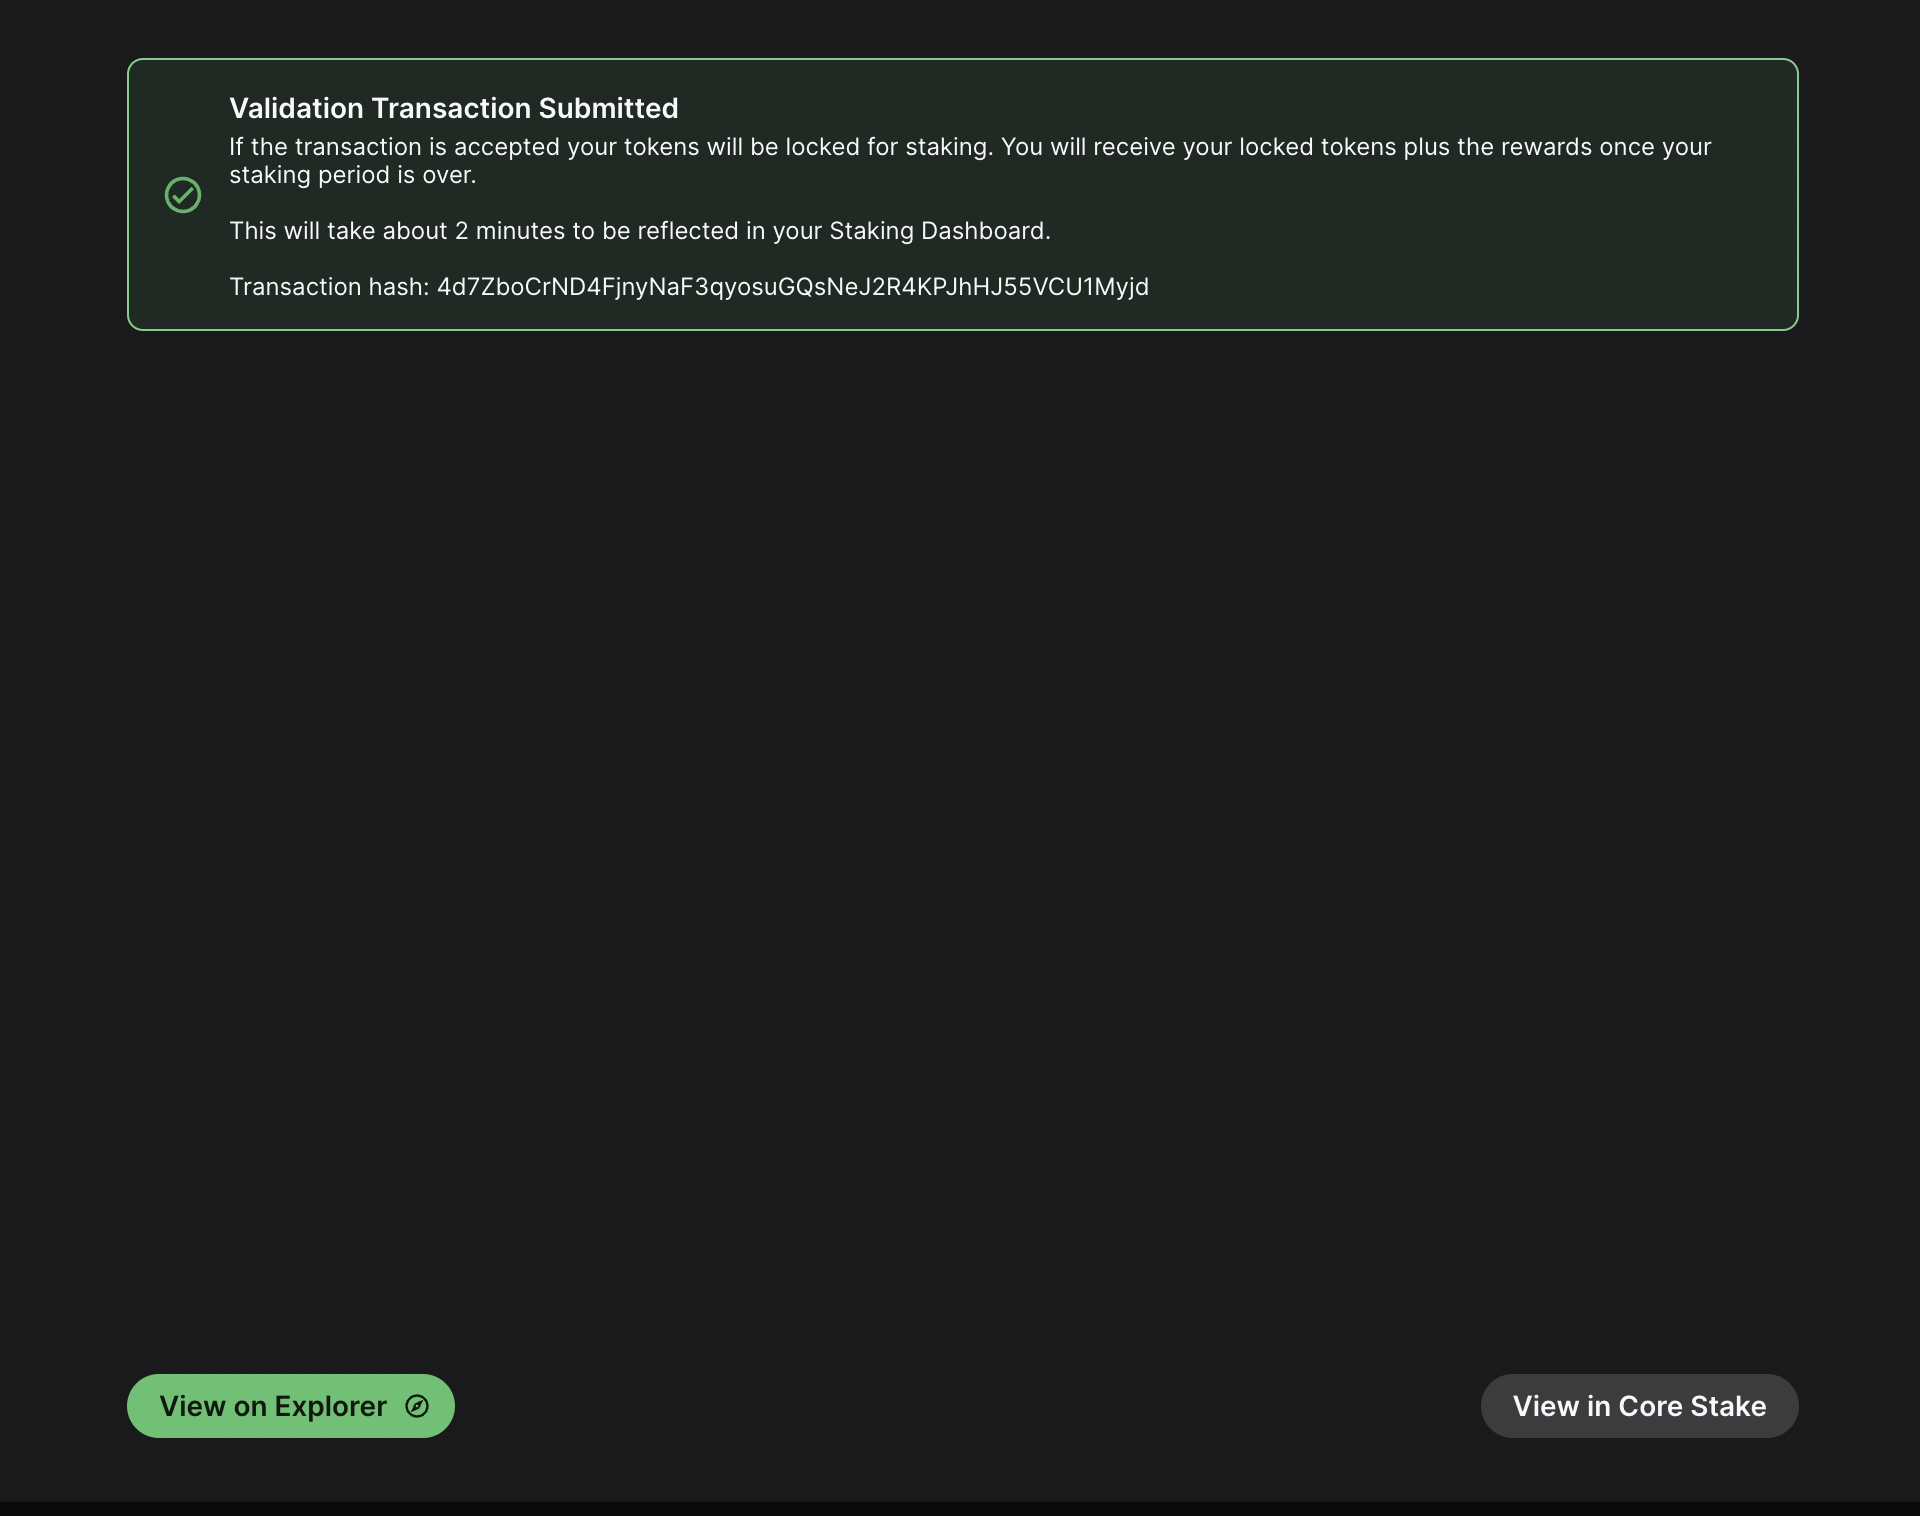
If you click on View on explorer, a new browser tab will open with the details of the `AddValidatorTx`. It will show details such as the total value of AVAX transferred, any AVAX which were burned, the blockchainID, the blockID, the NodeID of the validator, and the total time which has elapsed from the entire Validation period.
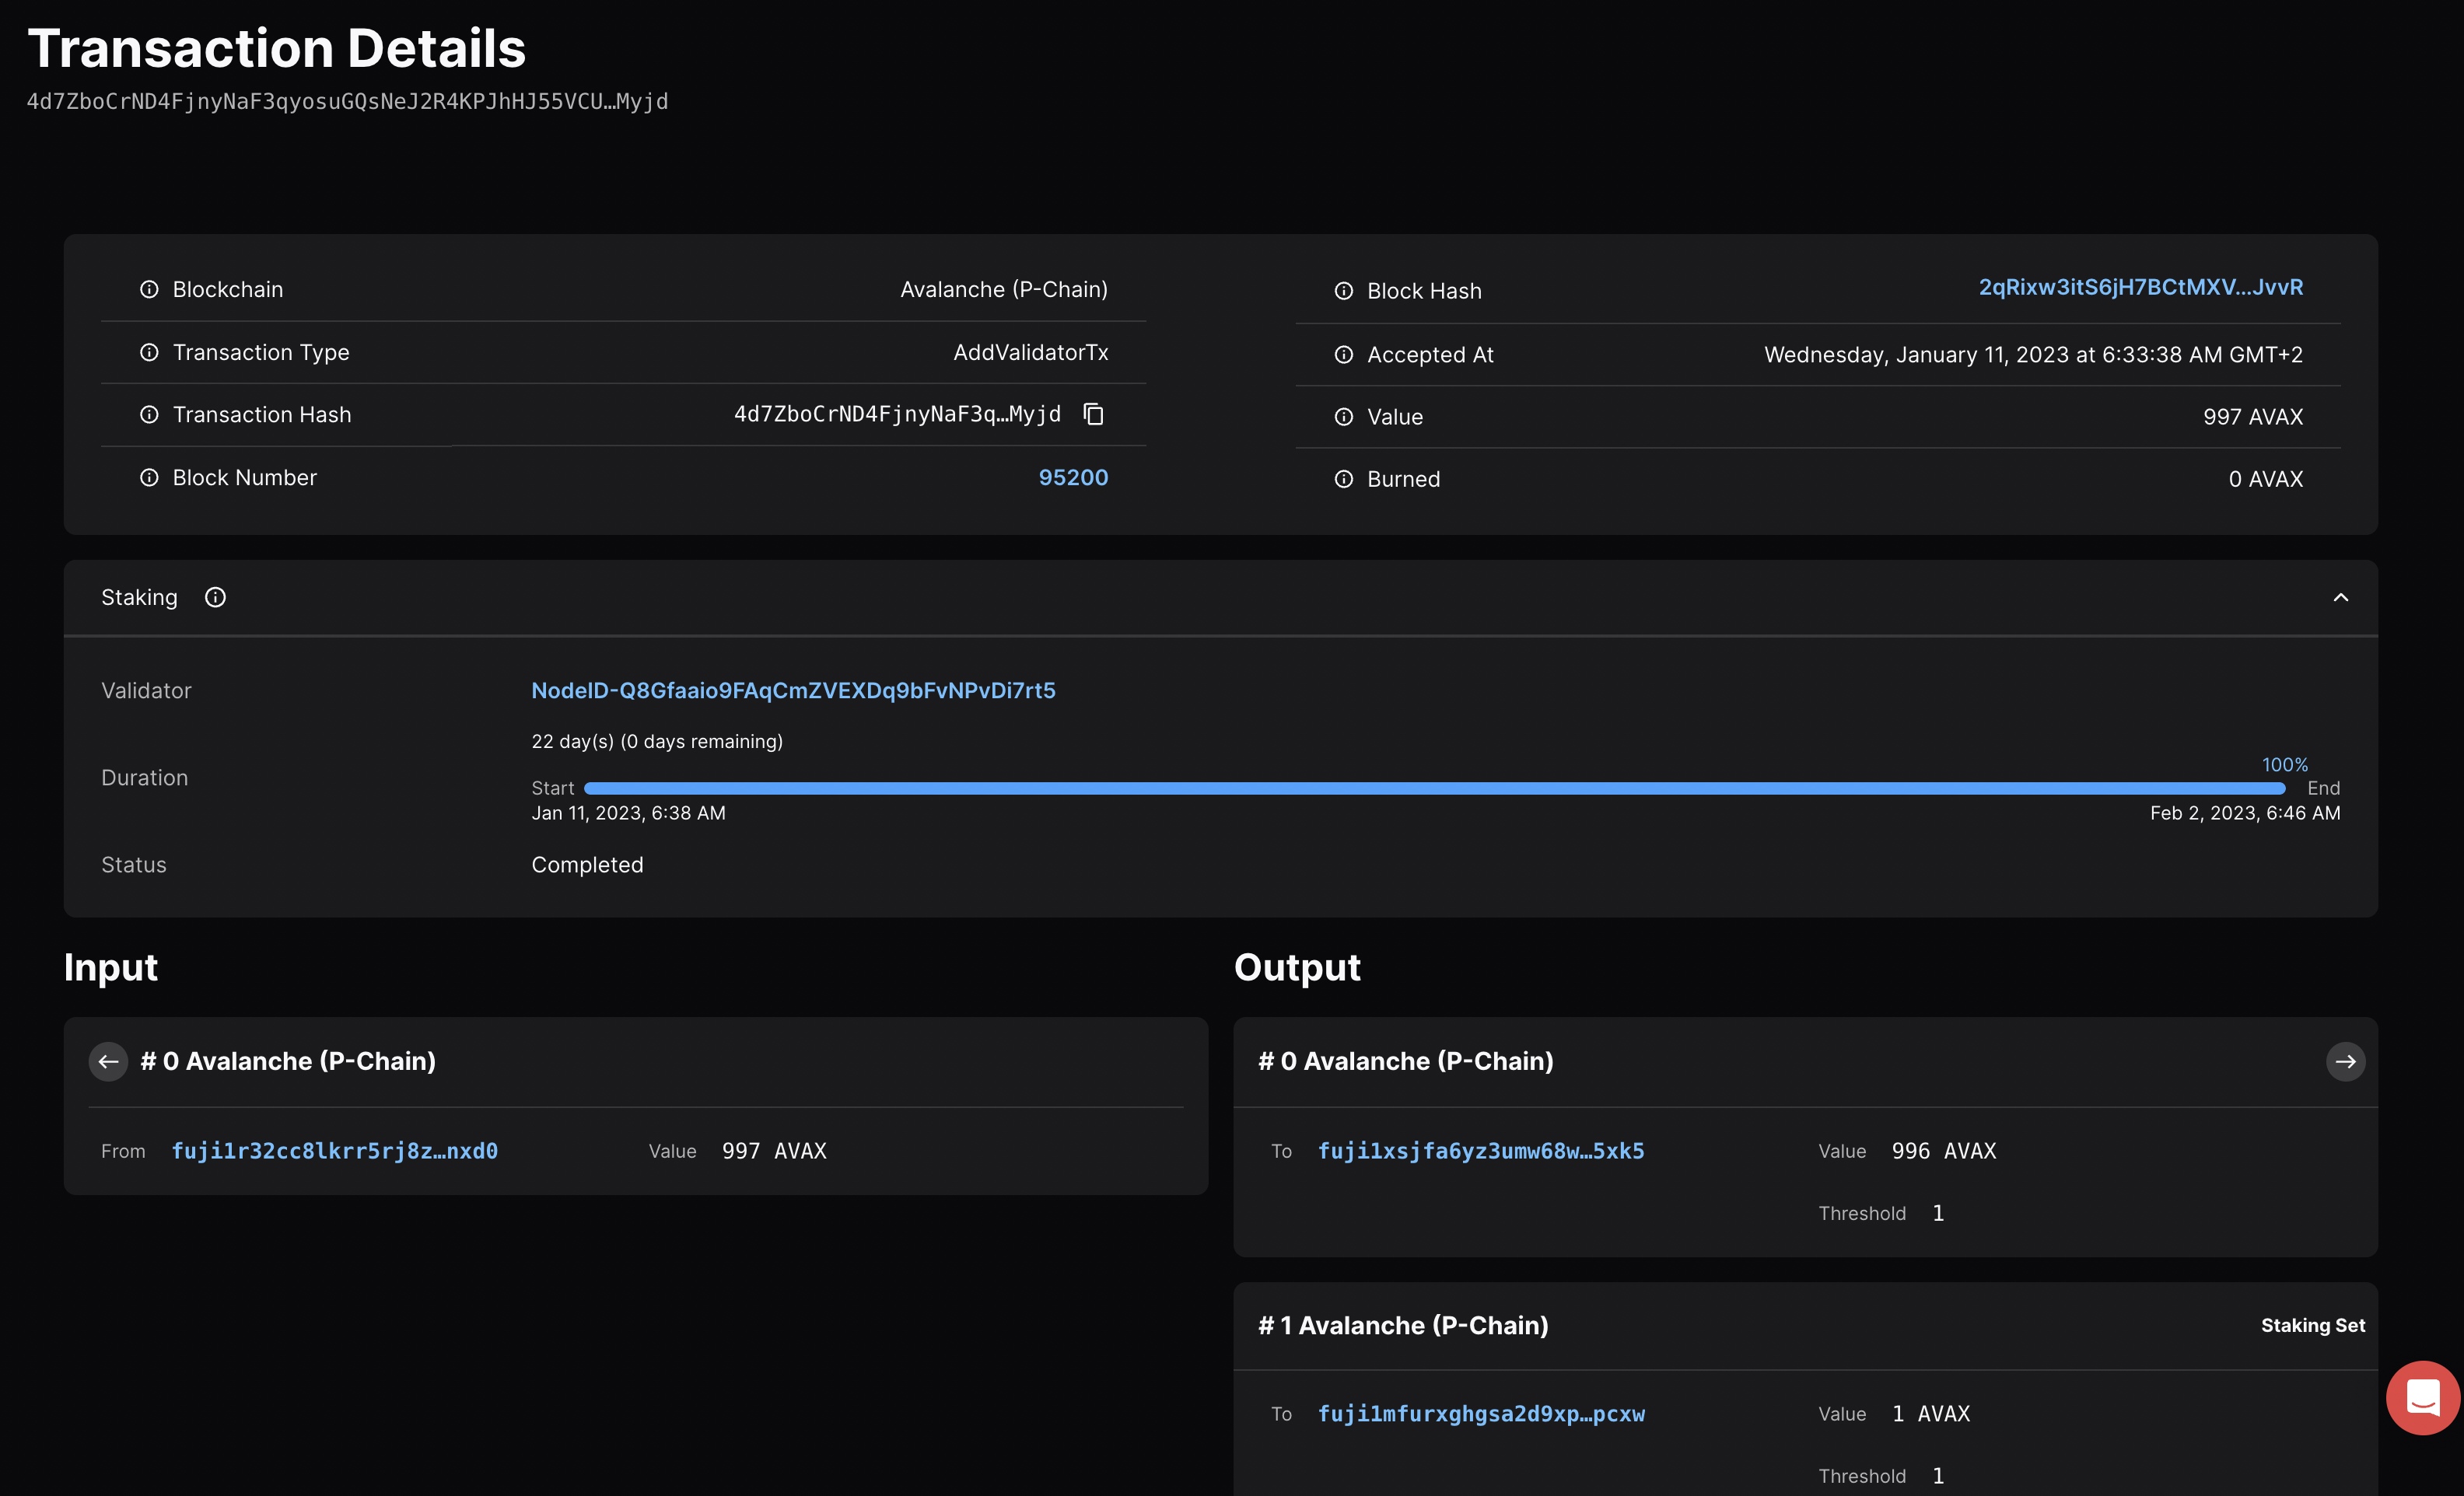
Confirm That the Node is a Pending Validator on Fuji[](#confirm-that-the-node-is-a-pending-validator-on-fuji "Direct link to heading")
---------------------------------------------------------------------------------------------------------------------------------------
As a last step you can call the `platform.getPendingvalidators` endpoint to confirm that the Avalanche node which was recently spun up on AWS is no in the pending validators queue where it will stay for 5 minutes.
### `platform.getPendingValidators` Request[](#platformgetpendingvalidators-request "Direct link to heading")
```bash
curl --location --request POST 'https://api.avax-test.network/ext/bc/P' \
--header 'Content-Type: application/json' \
--data-raw '{
"jsonrpc": "2.0",
"method": "platform.getPendingValidators",
"params": {
"subnetID": "11111111111111111111111111111111LpoYY",
"nodeIDs": []
},
"id": 1
}'
```
### `platform.getPendingValidators` Response[](#platformgetpendingvalidators-response "Direct link to heading")
```json
{
"jsonrpc": "2.0",
"result": {
"validators": [
{
"txID": "4d7ZboCrND4FjnyNaF3qyosuGQsNeJ2R4KPJhHJ55VCU1Myjd",
"startTime": "1673411918",
"endTime": "1675313170",
"stakeAmount": "1000000000",
"nodeID": "NodeID-Q8Gfaaio9FAqCmZVEXDq9bFvNPvDi7rt5",
"delegationFee": "2.0000",
"connected": false,
"delegators": null
}
],
"delegators": []
},
"id": 1
}
```
You can also pass in the `NodeID` as a string to the `nodeIDs` array in the request body.
```bash
curl --location --request POST 'https://api.avax-test.network/ext/bc/P' \
--header 'Content-Type: application/json' \
--data-raw '{
"jsonrpc": "2.0",
"method": "platform.getPendingValidators",
"params": {
"subnetID": "11111111111111111111111111111111LpoYY",
"nodeIDs": ["NodeID-Q8Gfaaio9FAqCmZVEXDq9bFvNPvDi7rt5"]
},
"id": 1
}'
```
This will filter the response by the `nodeIDs` array which will save you time by no longer requiring you to search through the entire response body for the NodeIDs.
```json
{
"jsonrpc": "2.0",
"result": {
"validators": [
{
"txID": "4d7ZboCrND4FjnyNaF3qyosuGQsNeJ2R4KPJhHJ55VCU1Myjd",
"startTime": "1673411918",
"endTime": "1675313170",
"stakeAmount": "1000000000",
"nodeID": "NodeID-Q8Gfaaio9FAqCmZVEXDq9bFvNPvDi7rt5",
"delegationFee": "2.0000",
"connected": false,
"delegators": null
}
],
"delegators": []
},
"id": 1
}
```
After 5 minutes the node will officially start validating the Avalanche Fuji testnet and you will no longer see it in the response body for the `platform.getPendingValidators` endpoint. Now you will access it via the `platform.getCurrentValidators` endpoint.
### `platform.getCurrentValidators` Request[](#platformgetcurrentvalidators-request "Direct link to heading")
```bash
curl --location --request POST 'https://api.avax-test.network/ext/bc/P' \
--header 'Content-Type: application/json' \
--data-raw '{
"jsonrpc": "2.0",
"method": "platform.getCurrentValidators",
"params": {
"subnetID": "11111111111111111111111111111111LpoYY",
"nodeIDs": ["NodeID-Q8Gfaaio9FAqCmZVEXDq9bFvNPvDi7rt5"]
},
"id": 1
}'
```
### `platform.getCurrentValidators` Response[](#platformgetcurrentvalidators-response "Direct link to heading")
```json
{
"jsonrpc": "2.0",
"result": {
"validators": [
{
"txID": "2hy57Z7KiZ8L3w2KonJJE1fs5j4JDzVHLjEALAHaXPr6VMeDhk",
"startTime": "1673411918",
"endTime": "1675313170",
"stakeAmount": "1000000000",
"nodeID": "NodeID-Q8Gfaaio9FAqCmZVEXDq9bFvNPvDi7rt5",
"rewardOwner": {
"locktime": "0",
"threshold": "1",
"addresses": [
"P-fuji1tgj2c3k56enytw5d78rt0tsq3lzg8wnftffwk7"
]
},
"validationRewardOwner": {
"locktime": "0",
"threshold": "1",
"addresses": [
"P-fuji1tgj2c3k56enytw5d78rt0tsq3lzg8wnftffwk7"
]
},
"delegationRewardOwner": {
"locktime": "0",
"threshold": "1",
"addresses": [
"P-fuji1tgj2c3k56enytw5d78rt0tsq3lzg8wnftffwk7"
]
},
"potentialReward": "5400963",
"delegationFee": "2.0000",
"uptime": "0.0000",
"connected": false,
"delegators": null
}
]
},
"id": 1
}
```
Mainnet[](#mainnet "Direct link to heading")
---------------------------------------------
All of these steps can be applied to Mainnet. However, the minimum required Avax token amounts to become a validator is 2,000 on the Mainnet. For more information, please read [this doc](/docs/nodes/validate/how-to-stake#validators).
Maintenance[](#maintenance "Direct link to heading")
-----------------------------------------------------
AWS one click is meant to be used in automated environments, not as an end-user solution. You can still manage it manually, but it is not as easy as an Ubuntu instance or using the script:
- AvalancheGo binary is at `/usr/local/bin/avalanchego`
- Main node config is at `/etc/avalanchego/conf.json`
- Working directory is at `/home/avalanche/.avalanchego/ (and belongs to avalanchego user)`
- Database is at `/data/avalanchego`
- Logs are at `/var/log/avalanchego`
For a simple upgrade you would need to place the new binary at `/usr/local/bin/`. If you run an Avalanche L1, you would also need to place the VM binary into `/home/avalanche/.avalanchego/plugins`.
You can also look at using [this guide](https://docs.aws.amazon.com/systems-manager/latest/userguide/automation-tutorial-update-ami.html), but that won't address updating the Avalanche L1, if you have one.
Summary[](#summary "Direct link to heading")
---------------------------------------------
Avalanche is the first decentralized smart contracts platform built for the scale of global finance, with near-instant transaction finality. Now with an Avalanche Validator node available as a one-click install from the AWS Marketplace developers and entrepreneurs can on-ramp into the Avalanche ecosystem in a matter of minutes. If you have any questions or want to follow up in any way please join our Discord server at [https://discord.gg/avax](https://discord.gg/avax/). For more developer resources please check out our [Developer Documentation](/docs/).
# Google Cloud (/docs/nodes/on-third-party-services/google-cloud)
---
title: Google Cloud
description: Learn how to run an Avalanche node on Google Cloud.
---
This document was written by a community member, some information may be outdated.
Introduction[](#introduction "Direct link to heading")
-------------------------------------------------------
Google's Cloud Platform (GCP) is a scalable, trusted and reliable hosting platform. Google operates a significant amount of it's own global networking infrastructure. It's [fiber network](https://cloud.google.com/blog/products/networking/google-cloud-networking-in-depth-cloud-cdn) can provide highly stable and consistent global connectivity. In this article, we will leverage GCP to deploy a node on which Avalanche can installed via [terraform](https://www.terraform.io/). Leveraging `terraform` may seem like overkill, it should set you apart as an operator and administrator as it will enable you greater flexibility and provide the basis on which you can easily build further automation.
Conventions[](#conventions "Direct link to heading")
-----------------------------------------------------
- `Items` highlighted in this manor are GCP parlance and can be searched for further reference in the Google documentation for their cloud products.
Important Notes[](#important-notes "Direct link to heading")
-------------------------------------------------------------
- The machine type used in this documentation is for reference only and the actual sizing you use will depend entirely upon the amount that is staked and delegated to the node.
Architectural Description[](#architectural-description "Direct link to heading")
---------------------------------------------------------------------------------
This section aims to describe the architecture of the system that the steps in the [Setup Instructions](#-setup-instructions) section deploy when enacted. This is done so that the executor can not only deploy the reference architecture, but also understand and potentially optimize it for their needs.
### Project[](#project "Direct link to heading")
We will create and utilize a single GCP `Project` for deployment of all resources.
#### Service Enablement[](#service-enablement "Direct link to heading")
Within our GCP project we will need to enable the following Cloud Services:
- `Compute Engine`
- `IAP`
### Networking[](#networking "Direct link to heading")
#### Compute Network[](#compute-network "Direct link to heading")
We will deploy a single `Compute Network` object. This unit is where we will deploy all subsequent networking objects. It provides a logical boundary and securitization context should you wish to deploy other chain stacks or other infrastructure in GCP.
#### Public IP[](#public-ip "Direct link to heading")
Avalanche requires that a validator communicate outbound on the same public IP address that it advertises for other peers to connect to it on. Within GCP this precludes the possibility of us using a Cloud NAT Router for the outbound communications and requires us to bind the public IP that we provision to the interface of the machine. We will provision a single `EXTERNAL` static IPv4 `Compute Address`.
#### Avalanche L1s[](#avalanche-l1s "Direct link to heading")
For the purposes of this documentation we will deploy a single `Compute Subnetwork` in the US-EAST1 `Region` with a /24 address range giving us 254 IP addresses (not all usable but for the sake of generalized documentation).
### Compute[](#compute "Direct link to heading")
#### Disk[](#disk "Direct link to heading")
We will provision a single 400GB `PD-SSD` disk that will be attached to our VM.
#### Instance[](#instance "Direct link to heading")
We will deploy a single `Compute Instance` of size `e2-standard-8`. Observations of operations using this machine specification suggest it is memory over provisioned and could be brought down to 16GB using custom machine specification; but please review and adjust as needed (the beauty of compute virtualization!!).
#### Zone[](#zone "Direct link to heading")
We will deploy our instance into the `US-EAST1-B` `Zone`
#### Firewall[](#firewall "Direct link to heading")
We will provision the following `Compute Firewall` rules:
- IAP INGRESS for SSH (TCP 22) - this only allows GCP IAP sources inbound on SSH.
- P2P INGRESS for AVAX Peers (TCP 9651)
These are obviously just default ports and can be tailored to your needs as you desire.
Setup Instructions[](#-setup-instructions "Direct link to heading")
--------------------------------------------------------------------
### GCP Account[](#gcp-account "Direct link to heading")
1. If you don't already have a GCP account go create one [here](https://console.cloud.google.com/freetrial)
You will get some free bucks to run a trial, the trial is feature complete but your usage will start to deplete your free bucks so turn off anything you don't need and/or add a credit card to your account if you intend to run things long term to avoid service shutdowns.
### Project[](#project-1 "Direct link to heading")
Login to the GCP `Cloud Console` and create a new `Project` in your organization. Let's use the name `my-avax-nodes` for the sake of this setup.
1. 
2. 
3. 
### Terraform State[](#terraform-state "Direct link to heading")
Terraform uses a state files to compose a differential between current infrastructure configuration and the proposed plan. You can store this state in a variety of different places, but using GCP storage is a reasonable approach given where we are deploying so we will stick with that.
1. 
2. 
Authentication to GCP from terraform has a few different options which are laid out [here](https://www.terraform.io/language/settings/backends/gcs). Please chose the option that aligns with your context and ensure those steps are completed before continuing.
Depending upon how you intend to execute your terraform operations you may or may not need to enable public access to the bucket. Obviously, not exposing the bucket for `public` access (even if authenticated) is preferable. If you intend to simply run terraform commands from your local machine then you will need to open the access up. I recommend to employ a full CI/CD pipeline using GCP Cloud Build which if utilized will mean the bucket can be marked as `private`. A full walk through of Cloud Build setup in this context can be found [here](https://cloud.google.com/architecture/managing-infrastructure-as-code)
### Clone GitHub Repository[](#clone-github-repository "Direct link to heading")
I have provided a rudimentary terraform construct to provision a node on which to run Avalanche which can be found [here](https://github.com/meaghanfitzgerald/deprecated-avalanche-docs/tree/master/static/scripts). Documentation below assumes you are using this repository but if you have another terraform skeleton similar steps will apply.
### Terraform Configuration[](#terraform-configuration "Direct link to heading")
1. If running terraform locally, please [install](https://learn.hashicorp.com/tutorials/terraform/install-cli) it.
2. In this repository, navigate to the `terraform` directory.
3. Under the `projects` directory, rename the `my-avax-project` directory to match your GCP project name that you created (not required, but nice to be consistent)
4. Under the folder you just renamed locate the `terraform.tfvars` file.
5. Edit this file and populate it with the values which make sense for your context and save it.
6. Locate the `backend.tf` file in the same directory.
7. Edit this file ensuring to replace the `bucket` property with the GCS bucket name that you created earlier.
If you do not with to use cloud storage to persist terraform state then simply switch the `backend` to some other desirable provider.
### Terraform Execution[](#terraform-execution "Direct link to heading")
Terraform enables us to see what it would do if we were to run it without actually applying any changes... this is called a `plan` operation. This plan is then enacted (optionally) by an `apply`.
#### Plan[](#plan "Direct link to heading")
1. In a terminal which is able to execute the `tf` binary, `cd` to the ~`my-avax-project` directory that you renamed in step 3 of `Terraform Configuration`.
2. Execute the command `tf plan`
3. You should see a JSON output to the stdout of the terminal which lays out the operations that terraform will execute to apply the intended state.
#### Apply[](#apply "Direct link to heading")
1. In a terminal which is able to execute the `tf` binary, `cd` to the ~`my-avax-project` directory that you renamed in step 3 of `Terraform Configuration`.
2. Execute the command `tf apply`
If you want to ensure that terraform does **exactly** what you saw in the `apply` output, you can optionally request for the `plan` output to be saved to a file to feed to `apply`. This is generally considered best practice in highly fluid environments where rapid change is occurring from multiple sources.
Conclusion[](#conclusion "Direct link to heading")
---------------------------------------------------
Establishing CI/CD practices using tools such as GitHub and Terraform to manage your infrastructure assets is a great way to ensure base disaster recovery capabilities and to ensure you have a place to embed any ~tweaks you have to make operationally removing the potential to miss them when you have to scale from 1 node to 10. Having an automated pipeline also gives you a place to build a bigger house... what starts as your interest in building and managing a single AVAX node today can quickly change into you building an infrastructure operation for many different chains working with multiple different team members. I hope this may have inspired you to take a leap into automation in this context!
# Latitude (/docs/nodes/on-third-party-services/latitude)
---
title: Latitude
description: Learn how to run an Avalanche node on Latitude.sh.
---
Introduction[](#introduction "Direct link to heading")
-------------------------------------------------------
This tutorial will guide you through setting up an Avalanche node on [Latitude.sh](https://latitude.sh/). Latitude.sh provides high-performance lighting-fast bare metal servers to ensure that your node is highly secure, available, and accessible.
To get started, you'll need:
- A Latitude.sh account
- A terminal with which to SSH into your Latitude.sh machine
For the instructions on creating an account and server with Latitude.sh, please reference their [GitHub tutorial](https://github.com/NottherealIllest/Latitude.sh-post/blob/main/avalanhe/avax-copy.md) , or visit [this page](https://www.latitude.sh/dashboard/signup) to sign up and create your first project.
This tutorial assumes your local machine has a Unix-style terminal. If you're on Windows, you'll have to adapt some of the commands used here.
Configuring Your Server[](#configuring-your-server "Direct link to heading")
-----------------------------------------------------------------------------
### Create a Latitude.sh Account[](#create-a-latitudesh-account "Direct link to heading")
At this point your account has been verified, and you have created a new project and deployed the server according to the instructions linked above.
### Access Your Server & Further Steps[](#access-your-server--further-steps "Direct link to heading")
All your Latitude.sh credentials are available by clicking the `server` under your project, and can be used to access your Latitude.sh machine from your local machine using a terminal.
You will need to install the `avalanche node installer script` directly in the server's terminal.
After gaining access, we'll need to set up our Avalanche node. To do this, follow the instructions here to install and run your node [Set Up Avalanche Node With Installer](/docs/nodes/using-install-script/installing-avalanche-go).
Your AvalancheGo node should now be running and in the process of bootstrapping, which can take a few hours. To check if it's done, you can issue an API call using `curl`. The request is:
```bash
curl -X POST --data '{
"jsonrpc":"2.0",
"id" :1,
"method" :"info.isBootstrapped",
"params": {
"chain":"X"
}
}' -H 'content-type:application/json;' 127.0.0.1:9650/ext/info
```
Once the node is finished bootstrapping, the response will be:
```json
{
"jsonrpc": "2.0",
"result": {
"isBootstrapped": true
},
"id": 1
}
```
You can continue on, even if AvalancheGo isn't done bootstrapping. In order to make your node a validator, you'll need its node ID. To get it, run:
```bash
curl -X POST --data '{
"jsonrpc": "2.0",
"id": 1,
"method": "info.getNodeID"
}' -H 'content-type:application/json;' 127.0.0.1:9650/ext/info
```
The response contains the node ID.
```json
{
"jsonrpc": "2.0",
"result": { "nodeID": "KhDnAoZDW8iRJ3F26iQgK5xXVFMPcaYeu" },
"id": 1
}
```
In the above example the node ID is `NodeID-KhDnAoZDW8iRJ3F26iQgK5xXVFMPcaYeu`.
AvalancheGo has other APIs, such as the [Health API](/docs/api-reference/health-api), that may be used to interact with the node. Some APIs are disabled by default. To enable such APIs, modify the ExecStart section of `/etc/systemd/system/avalanchego.service` (created during the installation process) to include flags that enable these endpoints. Don't manually enable any APIs unless you have a reason to.
Exit out of the SSH server by running:
### Upgrading Your Node[](#upgrading-your-node "Direct link to heading")
AvalancheGo is an ongoing project and there are regular version upgrades. Most upgrades are recommended but not required. Advance notice will be given for upgrades that are not backwards compatible. To update your node to the latest version, SSH into your server using a terminal and run the installer script again.
```bash
./avalanchego-installer.sh
```
Your machine is now running the newest AvalancheGo version. To see the status of the AvalancheGo service, run `sudo systemctl status avalanchego.`
Wrap Up[](#wrap-up "Direct link to heading")
---------------------------------------------
That's it! You now have an AvalancheGo node running on a Latitude.sh machine. We recommend setting up [node monitoring](/docs/nodes/maintain/monitoring) for your AvalancheGo node.
# Microsoft Azure (/docs/nodes/on-third-party-services/microsoft-azure)
---
title: Microsoft Azure
description: How to run an Avalanche node on Microsoft Azure.
---
This document was written by a community member, some information may be out of date.
Running a validator and staking with Avalanche provides extremely competitive rewards of between 9.69% and 11.54% depending on the length you stake for. The maximum rate is earned by staking for a year, whilst the lowest rate for 14 days. There is also no slashing, so you don't need to worry about a hardware failure or bug in the client which causes you to lose part or all of your stake. Instead with Avalanche you only need to currently maintain at least 80% uptime to receive rewards. If you fail to meet this requirement you don't get slashed, but you don't receive the rewards. **You also do not need to put your private keys onto a node to begin validating on that node.** Even if someone breaks into your cloud environment and gains access to the node, the worst they can do is turn off the node.
Not only does running a validator node enable you to receive rewards in AVAX, but later you will also be able to validate other Avalanche L1s in the ecosystem as well and receive rewards in the token native to their Avalanche L1s.
Hardware requirements to run a validator are relatively modest: 8 CPU cores, 16 GB of RAM and 1 TB SSD. It also doesn't use enormous amounts of energy. Avalanche's [revolutionary consensus mechanism](/docs/quick-start/avalanche-consensus) is able to scale to millions of validators participating in consensus at once, offering unparalleled decentralisation.
Currently the minimum amount required to stake to become a validator is 2,000 AVAX. Alternatively, validators can also charge a small fee to enable users to delegate their stake with them to help towards running costs.
In this article we will step through the process of configuring a node on Microsoft Azure. This tutorial assumes no prior experience with Microsoft Azure and will go through each step with as few assumptions possible.
At the time of this article, spot pricing for a virtual machine with 2 Cores and 8 GB memory costs as little as 0.01060perhourwhichworksoutatabout0.01060 per hour which works out at about 113.44 a year, **a saving of 83.76%! compared to normal pay as you go prices.** In comparison a virtual machine in AWS with 2 Cores and 4 GB Memory with spot pricing is around $462 a year.
Initial Subscription Configuration[](#initial-subscription-configuration "Direct link to heading")
---------------------------------------------------------------------------------------------------
### Set up 2 Factor[](#set-up-2-factor "Direct link to heading")
First you will need a Microsoft Account, if you don't have one already you will see an option to create one at the following link. If you already have one, make sure to set up 2 Factor authentication to secure your node by going to the following link and then selecting "Two-step verification" and following the steps provided.
[https://account.microsoft.com/security](https://account.microsoft.com/security)
Once two factor has been configured log into the Azure portal by going to [https://portal.azure.com](https://portal.azure.com/) and signing in with your Microsoft account. When you login you won't have a subscription, so we need to create one first. Select "Subscriptions" as highlighted below:

Then select "+ Add" to add a new subscription
If you want to use Spot Instance VM Pricing (which will be considerably cheaper) you can't use a Free Trial account (and you will receive an error upon validation), so **make sure to select Pay-As-You-Go.**

Enter your billing details and confirm identity as part of the sign-up process, when you get to Add technical support select the without support option (unless you want to pay extra for support) and press Next.

Create a Virtual Machine[](#create-a-virtual-machine "Direct link to heading")
-------------------------------------------------------------------------------
Now that we have a subscription, we can create the Ubuntu Virtual Machine for our Avalanche Node. Select the Icon in the top left for the Menu and choose "+ Create a resource"
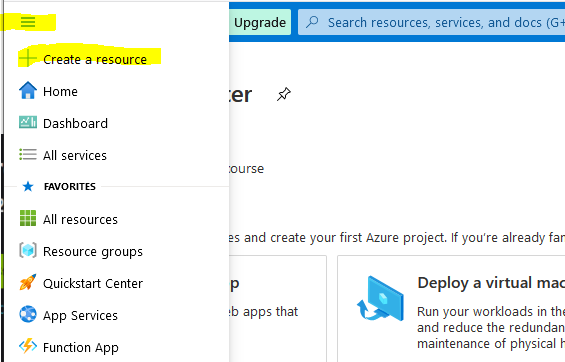
Select Ubuntu Server 18.04 LTS (this will normally be under the popular section or alternatively search for it in the marketplace)
This will take you to the Create a virtual machine page as shown below:
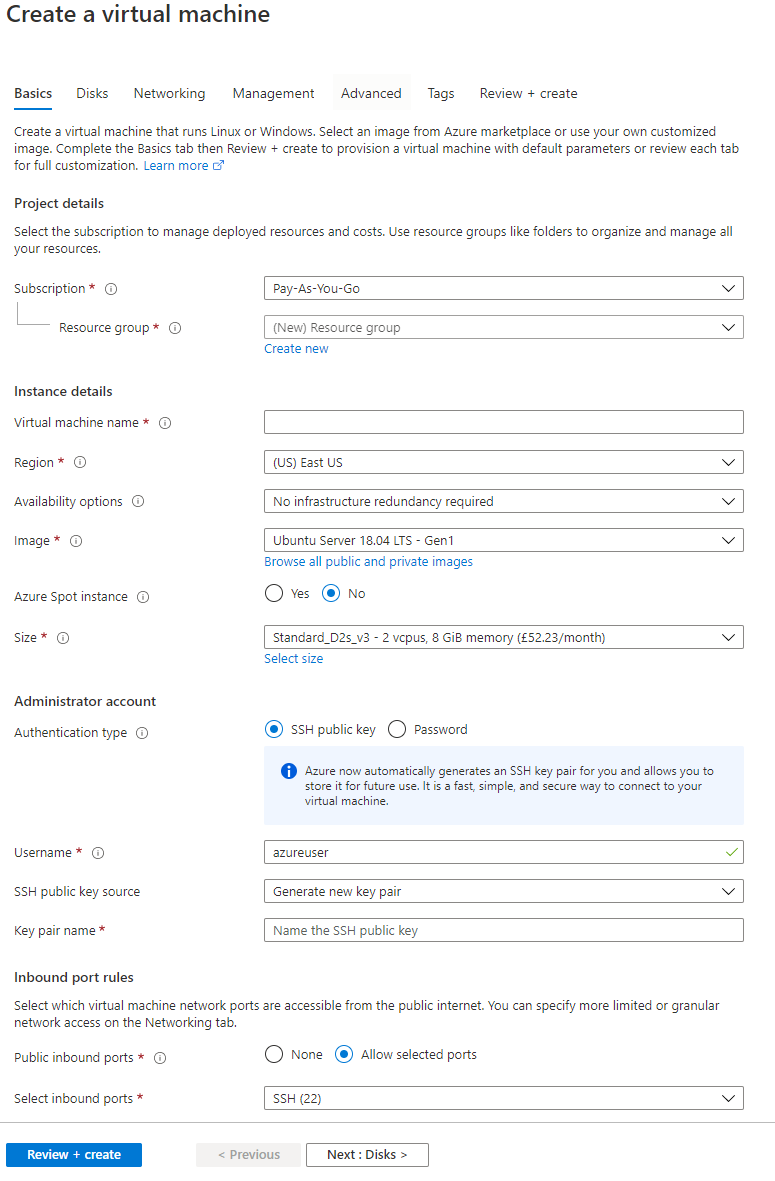
First, enter a virtual machine a name, this can be anything but in my example, I have called it Avalanche (This will also automatically change the resource group name to match)
Then select a region from the drop-down list. Select one of the recommended ones in a region that you prefer as these tend to be the larger ones with most features enabled and cheaper prices. In this example I have selected North Europe.
You have the option of using spot pricing to save significant amounts on running costs. Spot instances use a supply and demand market price structure. As demand for instances goes up, the price for the spot instance goes up. If there is insufficient capacity, then your VM will be turned off. The chances of this happening are incredibly low though, especially if you select the Capacity only option. Even in the unlikely event it does get turned off temporarily you only need to maintain at least 80% up time to receive the staking rewards and there is no slashing implemented in Avalanche.
Select Yes for Azure Spot instance, select Eviction type to Capacity Only and **make sure to set the eviction policy to Stop / Deallocate. This is very important otherwise the VM will be deleted**
Choose "Select size" to change the Virtual Machine size, and from the menu select D2s\_v4 under the D-Series v4 selection (This size has 2 Cores, 8 GB Memory and enables Premium SSDs). You can use F2s\_v2 instances instead, with are 2 Cores, 4 GB Memory and enables Premium SSDs) but the spot price actually works out cheaper for the larger VM currently with spot instance prices. You can use [this link](https://azure.microsoft.com/en-us/pricing/details/virtual-machines/linux/) to view the prices across the different regions.
Once you have selected the size of the Virtual Machine, select "View pricing history and compare prices in nearby regions" to see how the spot price has changed over the last 3 months, and whether it's cheaper to use a nearby region which may have more spare capacity.

At the time of this article, spot pricing for D2s\_v4 in North Europe costs 0.07975perhour,oraround0.07975 per hour, or around 698.61 a year. With spot pricing, the price falls to 0.01295perhour,whichworksoutatabout0.01295 per hour, which works out at about 113.44 a year, **a saving of 83.76%!**
There are some regions which are even cheaper, East US for example is 0.01060perhouroraround0.01060 per hour or around 92.86 a year!
Below you can see the price history of the VM over the last 3 months for North Europe and regions nearby.
### Cheaper Than Amazon AWS[](#cheaper-than-amazon-aws "Direct link to heading")
As a comparison a c5.large instance costs 0.085USDperhouronAWS.Thistotals 0.085 USD per hour on AWS. This totals ~745 USD per year. Spot instances can save 62%, bringing that total down to $462.
The next step is to change the username for the VM, to align with other Avalanche tutorials change the username to Ubuntu. Otherwise you will need to change several commands later in this article and swap out Ubuntu with your new username.
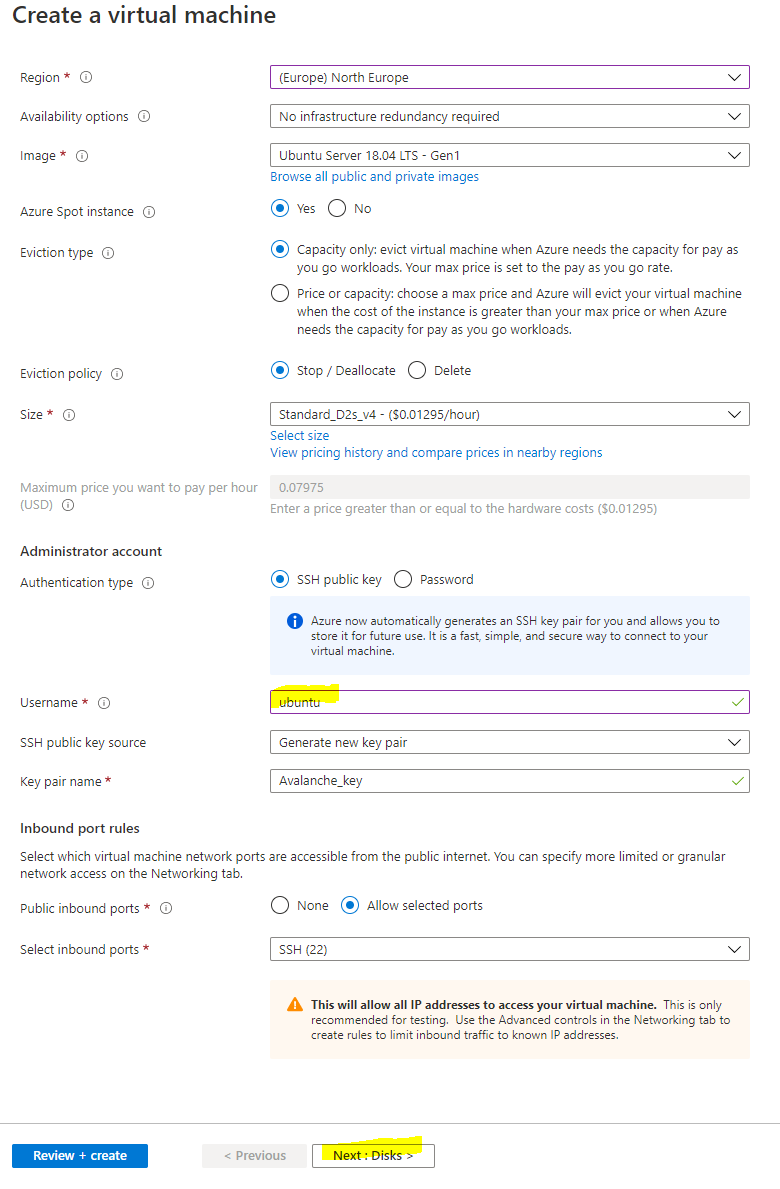
### Disks[](#disks "Direct link to heading")
Select Next: Disks to then configure the disks for the instance. There are 2 choices for disks, either Premium SSD which offer greater performance with a 64 GB disk costs around 10amonth,orthereisthestandardSSDwhichofferslowerperformanceandisaround10 a month, or there is the standard SSD which offers lower performance and is around 5 a month. You also have to pay $0.002 per 10,000 transaction units (reads / writes and deletes) with the Standard SSD, whereas with Premium SSDs everything is included. Personally, I chose the Premium SSD for greater performance, but also because the disks are likely to be heavily used and so may even work out cheaper in the long run.
Select Next: Networking to move onto the network configuration
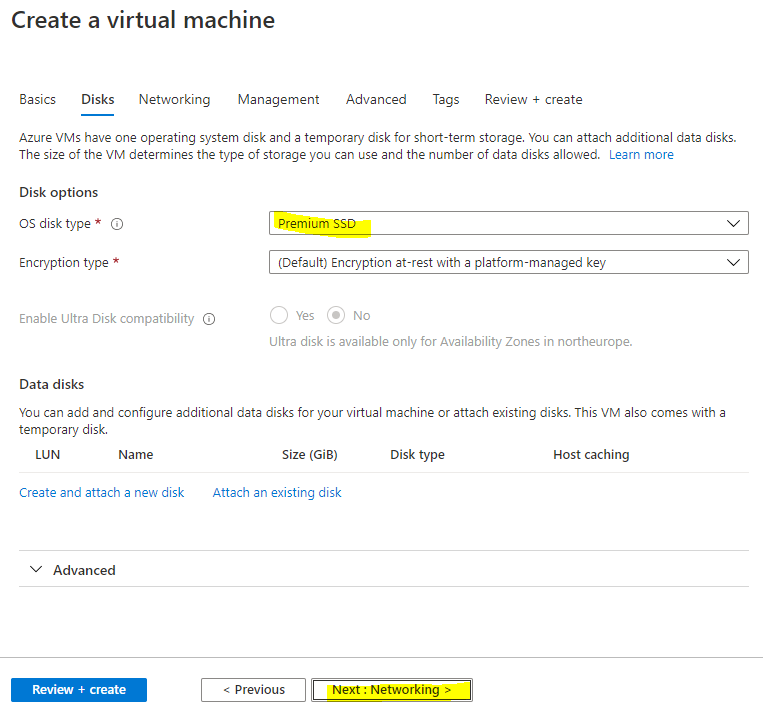
### Network Config[](#network-config "Direct link to heading")
You want to use a Static IP so that the public IP assigned to the node doesn't change in the event it stops. Under Public IP select "Create new"
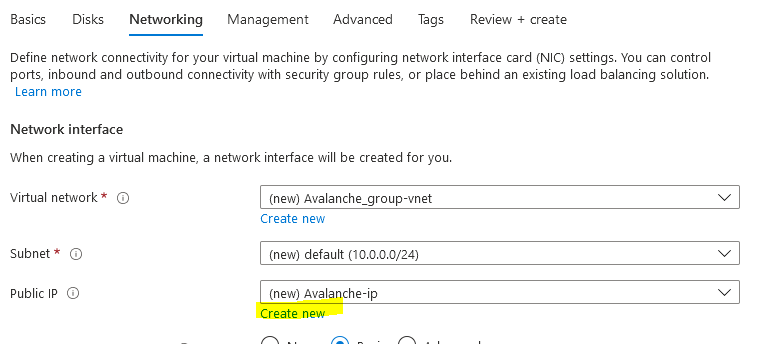
Then select "Static" as the Assignment type
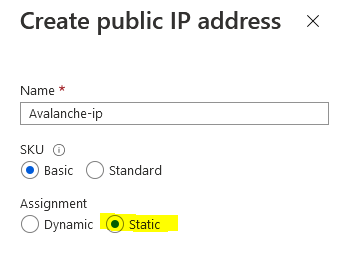
Then we need to configure the network security group to control access inbound to the Avalanche node. Select "Advanced" as the NIC network security group type and select "Create new"
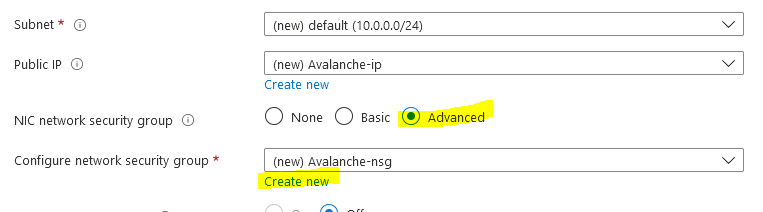
For security purposes you want to restrict who is able to remotely connect to your node. To do this you will first want to find out what your existing public IP is. This can be done by going to google and searching for "what's my IP"
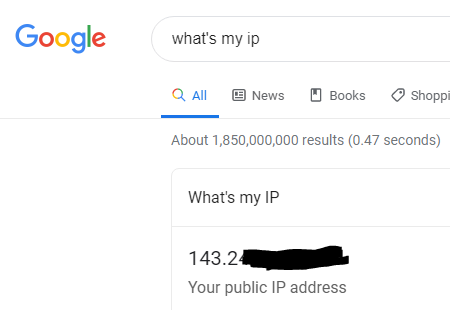
It's likely that you have been assigned a dynamic public IP for your home, unless you have specifically requested it, and so your assigned public IP may change in the future. It's still recommended to restrict access to your current IP though, and then in the event your home IP changes and you are no longer able to remotely connect to the VM, you can just update the network security rules with your new public IP so you are able to connect again.
NOTE: If you need to change the network security group rules after deployment if your home IP has changed, search for "avalanche-nsg" and you can modify the rule for SSH and Port 9650 with the new IP. **Port 9651 needs to remain open to everyone** though as that's how it communicates with other Avalanche nodes.
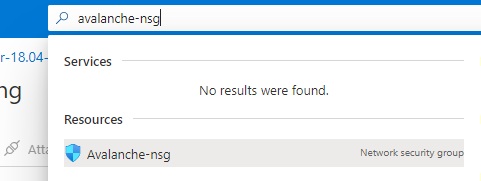
Now that you have your public IP select the default allow ssh rule on the left under inbound rules to modify it. Change Source from "Any" to "IP Addresses" and then enter in your Public IP address that you found from google in the Source IP address field. Change the Priority towards the bottom to 100 and then press Save.
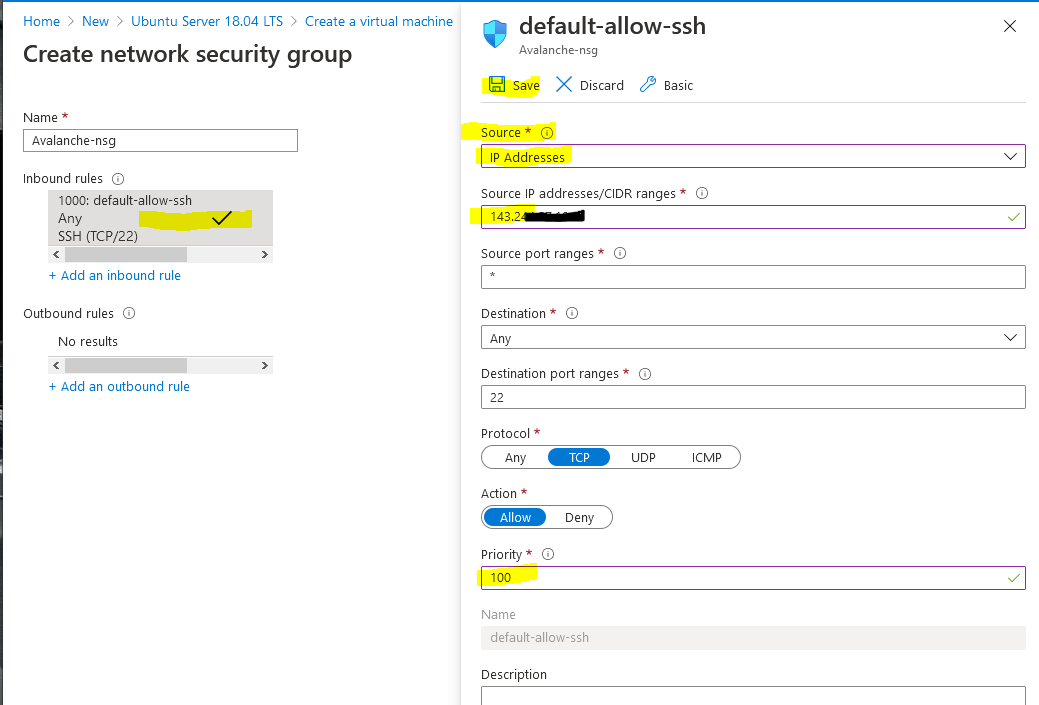
Then select "+ Add an inbound rule" to add another rule for RPC access, this should also be restricted to only your IP. Change Source to "IP Addresses" and enter in your public IP returned from google into the Source IP field. This time change the "Destination port ranges" field to 9650 and select "TCP" as the protocol. Change the priority to 110 and give it a name of "Avalanche\_RPC" and press Add.
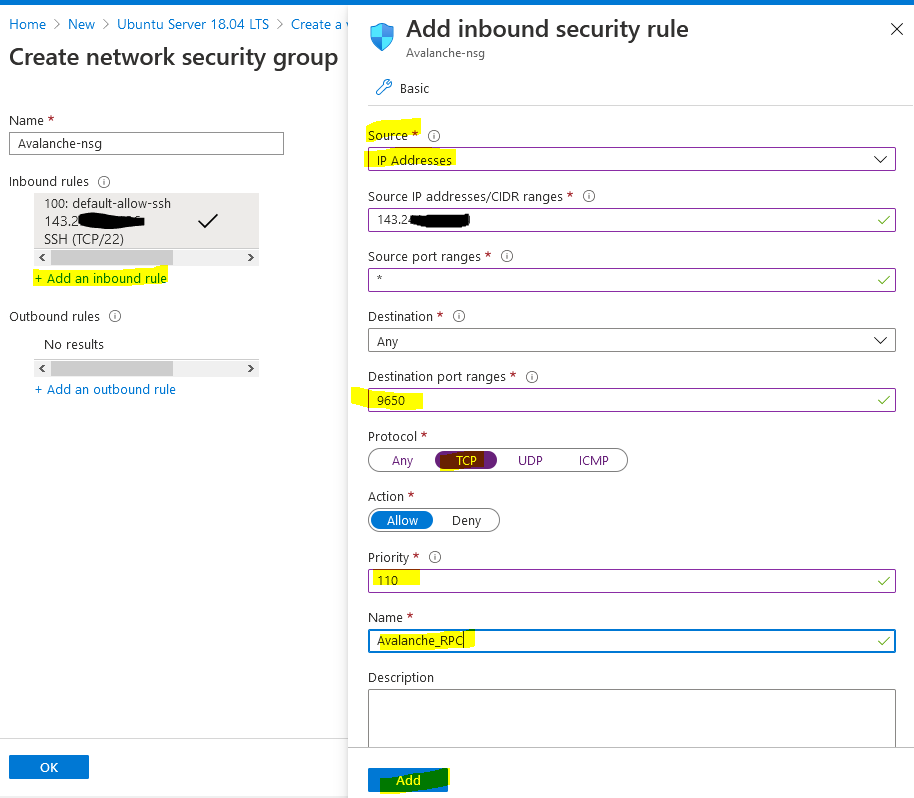
Select "+ Add an inbound rule" to add a final rule for the Avalanche Protocol so that other nodes can communicate with your node. This rule needs to be open to everyone so keep "Source" set to "Any." Change the Destination port range to "9651" and change the protocol to "TCP." Enter a priority of 120 and a name of Avalanche\_Protocol and press Add.
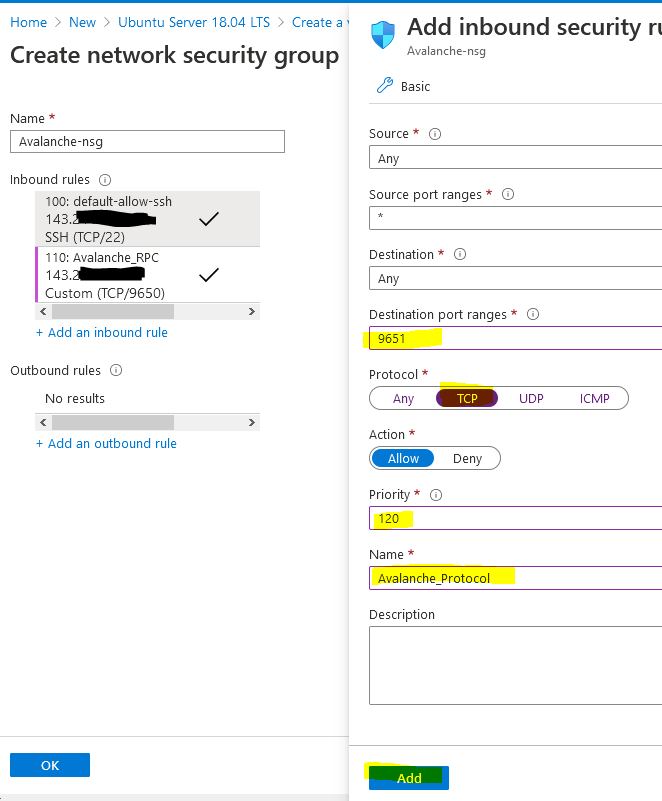
The network security group should look like the below (albeit your public IP address will be different) and press OK.
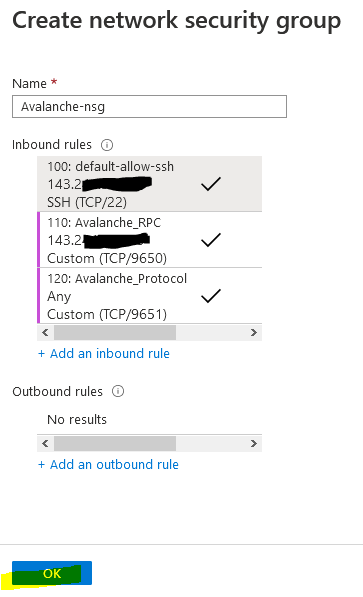
Leave the other settings as default and then press "Review + create" to create the Virtual machine.
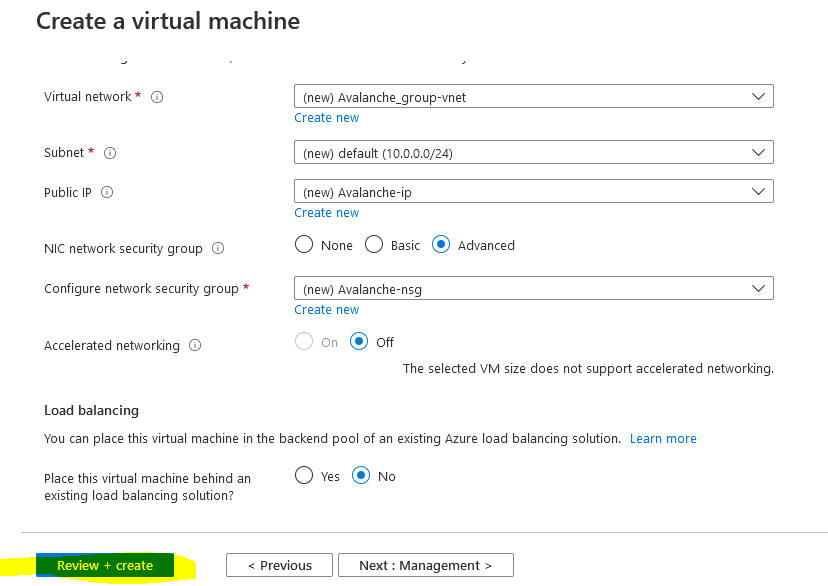
First it will perform a validation test. If you receive an error here, make sure you selected Pay-As-You-Go subscription model and you are not using the Free Trial subscription as Spot instances are not available. Verify everything looks correct and press "Create"
You should then receive a prompt asking you to generate a new key pair to connect your virtual machine. Select "Download private key and create resource" to download the private key to your PC.
Once your deployment has finished, select "Go to resource"
Change the Provisioned Disk Size[](#change-the-provisioned-disk-size "Direct link to heading")
-----------------------------------------------------------------------------------------------
By default, the Ubuntu VM will be provisioned with a 30 GB Premium SSD. You should increase this to 250 GB, to allow for database growth.
To change the Disk size, the VM needs to be stopped and deallocated. Select "Stop" and wait for the status to show deallocated. Then select "Disks" on the left.
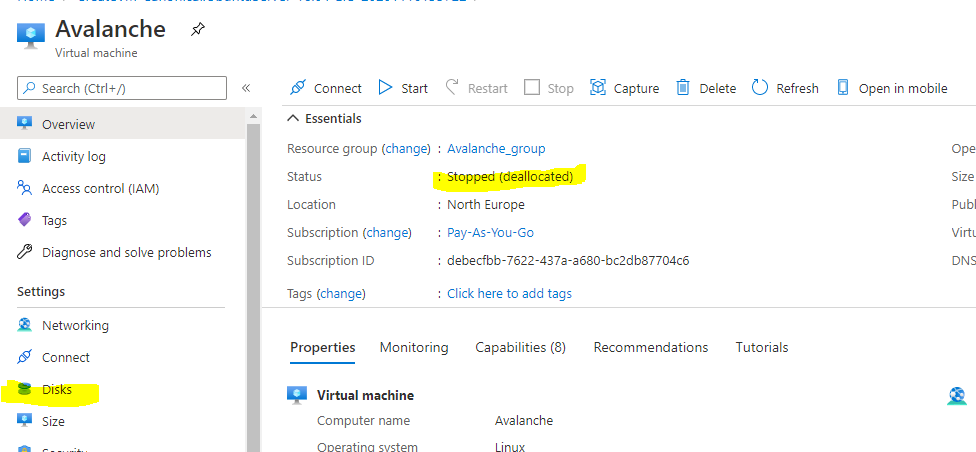
Select the Disk name that's current provisioned to modify it
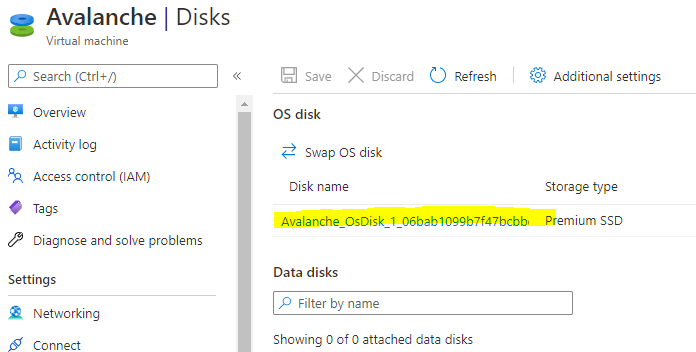
Select "Size + performance" on the left under settings and change the size to 250 GB and press "Resize"
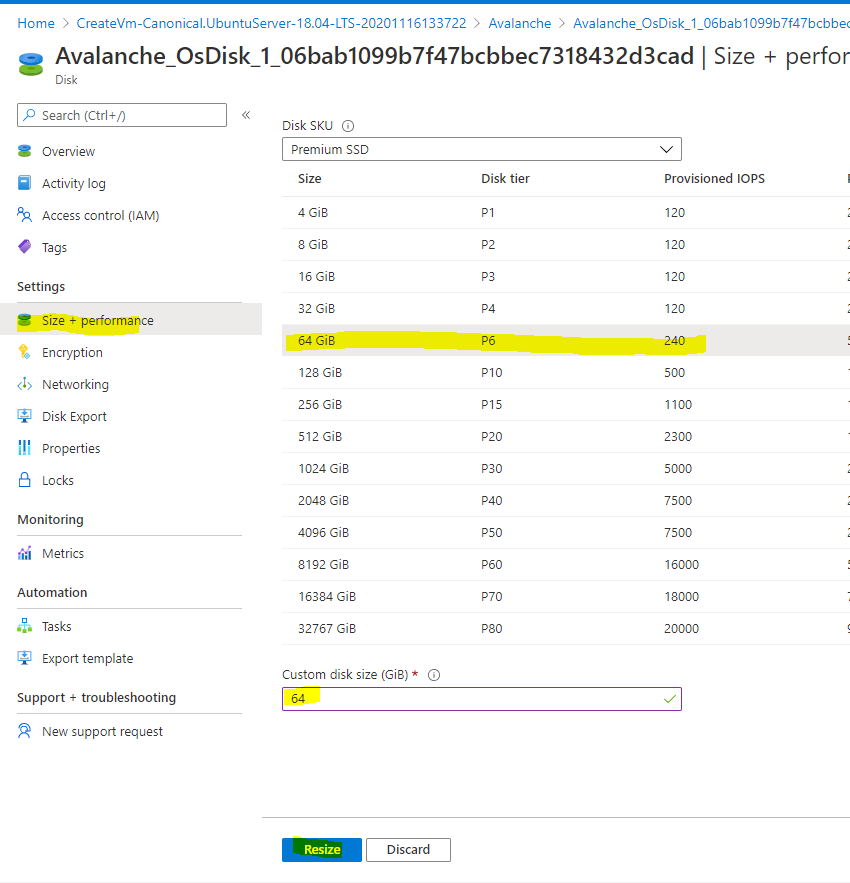
Doing this now will also extend the partition automatically within Ubuntu. To go back to the virtual machine overview page, select Avalanche in the navigation setting.
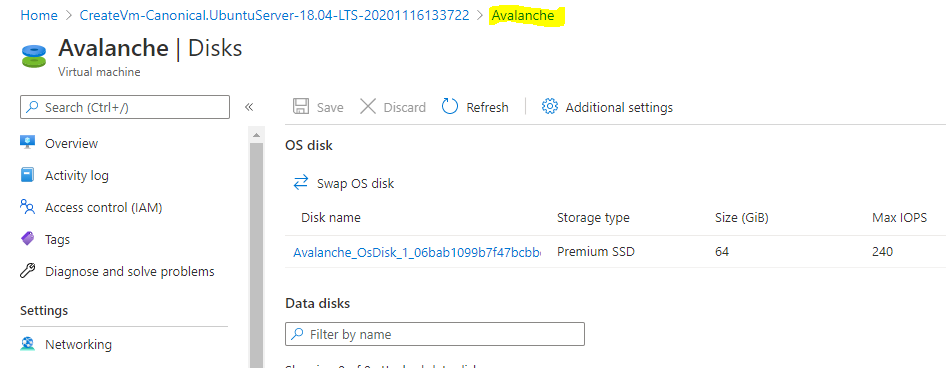
Then start the VM
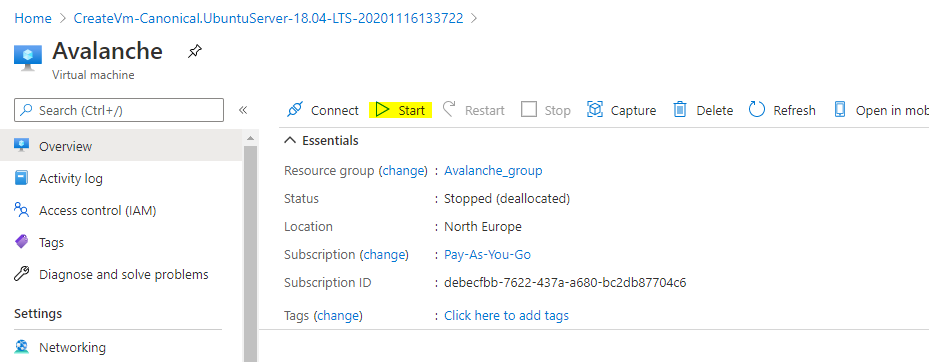
Connect to the Avalanche Node[](#connect-to-the-avalanche-node "Direct link to heading")
-----------------------------------------------------------------------------------------
The following instructions show how to connect to the Virtual Machine from a Windows 10 machine. For instructions on how to connect from a Ubuntu machine see the [AWS tutorial](/docs/nodes/on-third-party-services/amazon-web-services).
On your local PC, create a folder on the root of the C: drive called Avalanche and then move the Avalanche\_key.pem file you downloaded before into the folder. Then right click the file and select Properties. Go to the security tab and select "Advanced" at the bottom
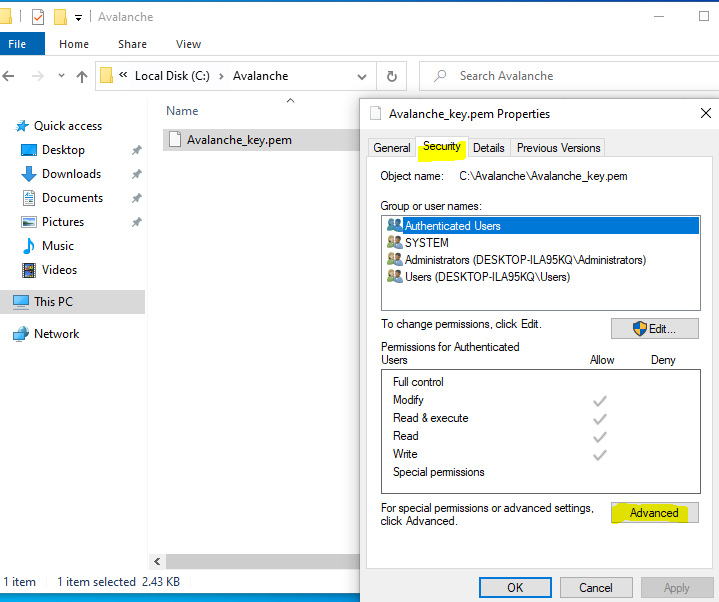
Select "Disable inheritance" and then "Remove all inherited permissions from this object" to remove all existing permissions on that file.
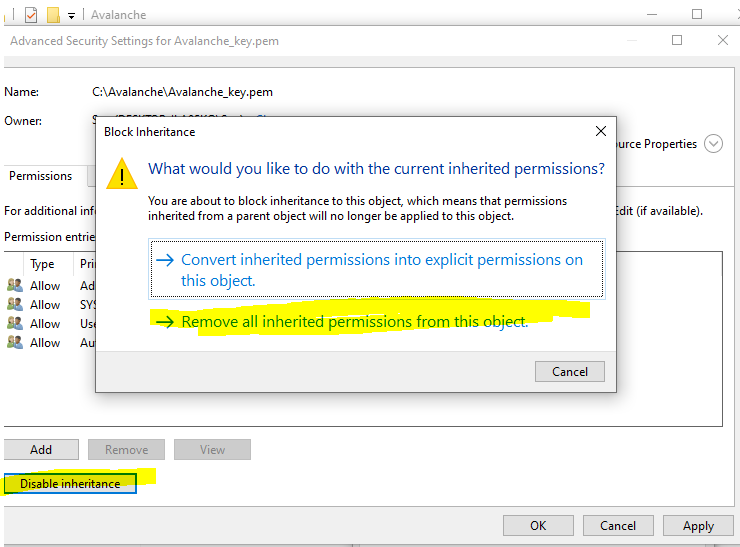
Then select "Add" to add a new permission and choose "Select a principal" at the top. From the pop-up box enter in your user account that you use to log into your machine. In this example I log on with a local user called Seq, you may have a Microsoft account that you use to log in, so use whatever account you login to your PC with and press "Check Names" and it should underline it to verify and press OK.
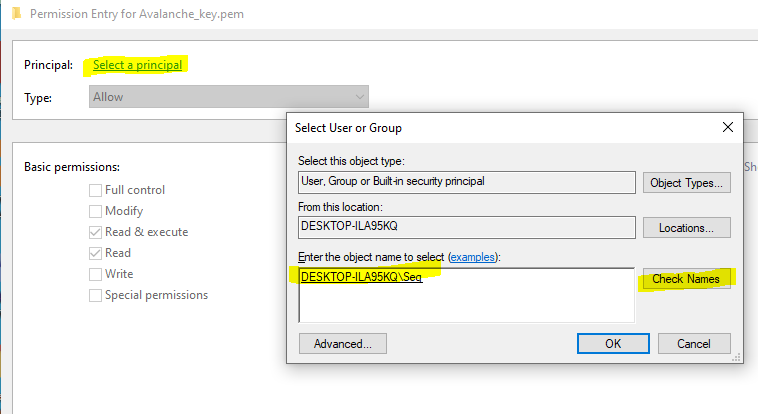
Then from the permissions section make sure only "Read & Execute" and "Read" are selected and press OK.
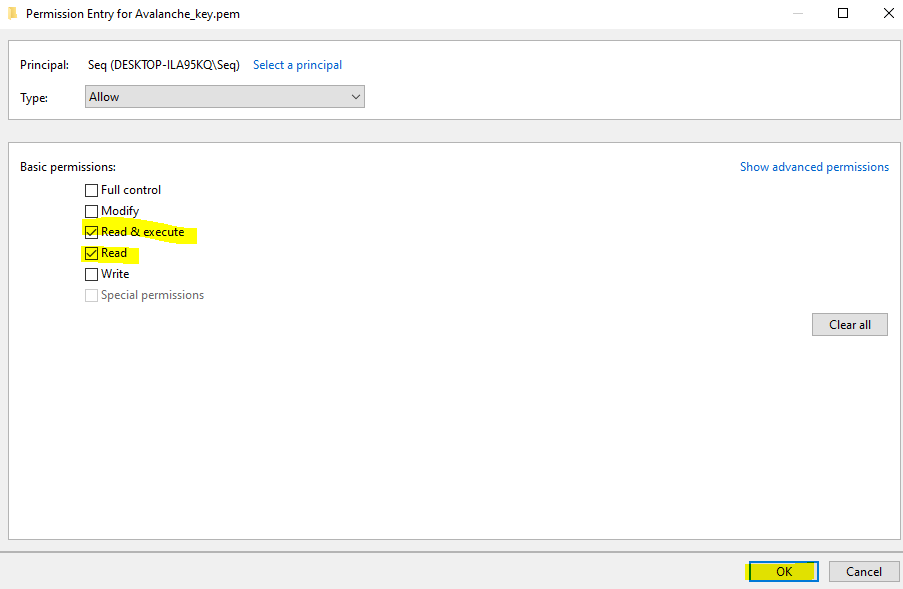
It should look something like the below, except with a different PC name / user account. This just means the key file can't be modified or accessed by any other accounts on this machine for security purposes so they can't access your Avalanche Node.
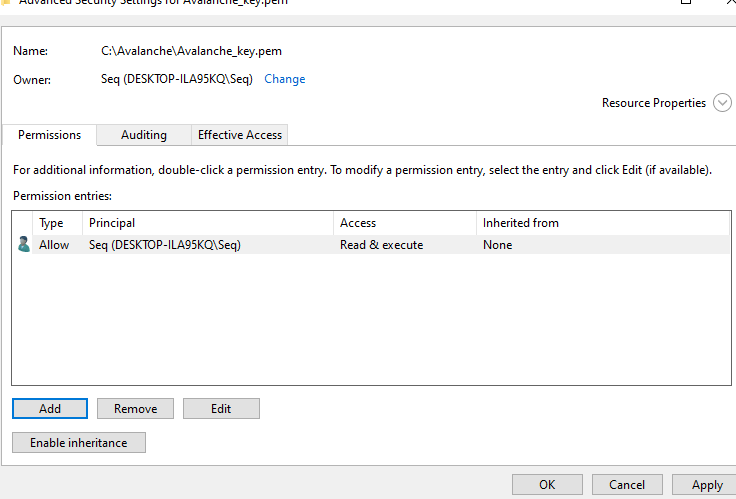
### Find your Avalanche Node Public IP[](#find-your-avalanche-node-public-ip "Direct link to heading")
From the Azure Portal make a note of your static public IP address that has been assigned to your node.
To log onto the Avalanche node, open command prompt by searching for `cmd` and selecting "Command Prompt" on your Windows 10 machine.
Then use the following command and replace the EnterYourAzureIPHere with the static IP address shown on the Azure portal.
ssh -i C:\\Avalanche\\Avalanche\_key.pem ubuntu@EnterYourAzureIPHere
for my example its:
ssh -i C:\\Avalanche\\Avalanche\_key.pem
The first time you connect you will receive a prompt asking to continue, enter yes.

You should now be connected to your Node.
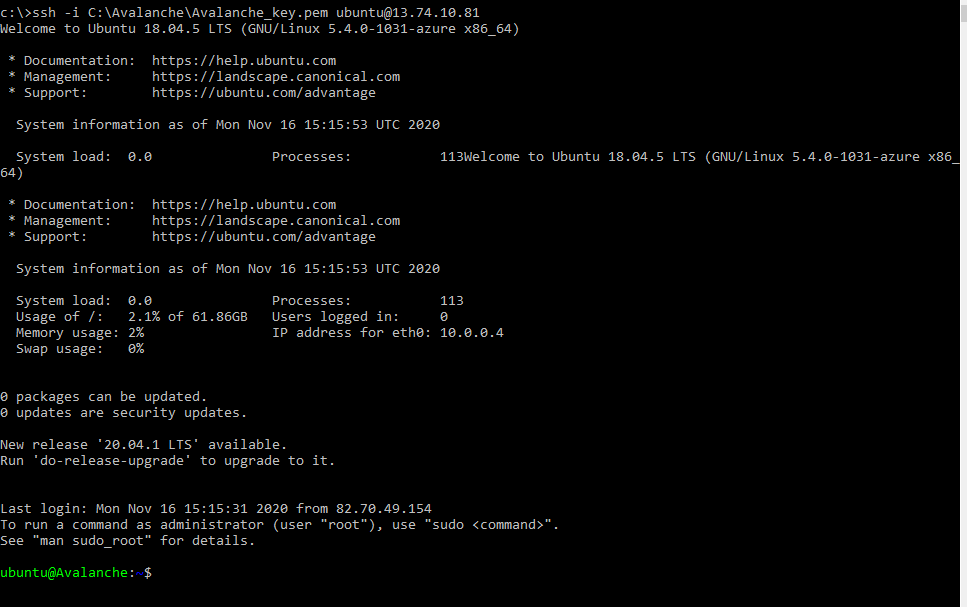
The following section is taken from Colin's excellent tutorial for [configuring an Avalanche Node on Amazon's AWS](/docs/nodes/on-third-party-services/amazon-web-services).
### Update Linux with Security Patches[](#update-linux-with-security-patches "Direct link to heading")
Now that we are on our node, it's a good idea to update it to the latest packages. To do this, run the following commands, one-at-a-time, in order:
```
sudo apt update
sudo apt upgrade -y
sudo reboot
```
This will make our instance up to date with the latest security patches for our operating system. This will also reboot the node. We'll give the node a minute or two to boot back up, then log in again, same as before.
### Set up the Avalanche Node[](#set-up-the-avalanche-node "Direct link to heading")
Now we'll need to set up our Avalanche node. To do this, follow the [Set Up Avalanche Node With Installer](/docs/nodes/using-install-script/installing-avalanche-go) tutorial which automates the installation process. You will need the "IPv4 Public IP" copied from the Azure Portal we set up earlier.
Once the installation is complete, our node should now be bootstrapping! We can run the following command to take a peek at the latest status of the AvalancheGo node:
```
sudo systemctl status avalanchego
```
To check the status of the bootstrap, we'll need to make a request to the local RPC using `curl`. This request is as follows:
```
curl -X POST --data '{
"jsonrpc":"2.0",
"id" :1,
"method" :"info.isBootstrapped",
"params": {
"chain":"X"
}
}' -H 'content-type:application/json;' 127.0.0.1:9650/ext/info
```
The node can take some time (upward of an hour at this moment writing) to bootstrap. Bootstrapping means that the node downloads and verifies the history of the chains. Give this some time. Once the node is finished bootstrapping, the response will be:
```
{
"jsonrpc": "2.0",
"result": {
"isBootstrapped": true
},
"id": 1
}
```
We can always use `sudo systemctl status avalanchego` to peek at the latest status of our service as before, as well.
### Get Your NodeID[](#get-your-nodeid "Direct link to heading")
We absolutely must get our NodeID if we plan to do any validating on this node. This is retrieved from the RPC as well. We call the following curl command to get our NodeID.
```
curl -X POST --data '{
"jsonrpc":"2.0",
"id" :1,
"method" :"info.getNodeID"
}' -H 'content-type:application/json;' 127.0.0.1:9650/ext/info
```
If all is well, the response should look something like:
```
{"jsonrpc":"2.0","result":{"nodeID":"NodeID-Lve2PzuCvXZrqn8Stqwy9vWZux6VyGUCR"},"id":1}
```
That portion that says, "NodeID-Lve2PzuCvXZrqn8Stqwy9vWZux6VyGUCR" is our NodeID, the entire thing. Copy that and keep that in our notes. There's nothing confidential or secure about this value, but it's an absolute must for when we submit this node to be a validator.
### Backup Your Staking Keys[](#backup-your-staking-keys "Direct link to heading")
The last thing that should be done is backing up our staking keys in the untimely event that our instance is corrupted or terminated. It's just good practice for us to keep these keys. To back them up, we use the following command:
```
scp -i C:\Avalanche\avalanche_key.pem -r ubuntu@EnterYourAzureIPHere:/home/ubuntu/.avalanchego/staking C:\Avalanche
```
As before, we'll need to replace "EnterYourAzureIPHere" with the appropriate value that we retrieved. This backs up our staking key and staking certificate into the C:\\Avalanche folder we created before.
# Avalanche L1 Nodes (/docs/nodes/run-a-node/avalanche-l1-nodes)
---
title: Avalanche L1 Nodes
description: Learn how to run an Avalanche node that tracks an Avalanche L1.
---
This article describes how to run a node that tracks an Avalanche L1. It requires building AvalancheGo, adding Virtual Machine binaries as plugins to your local data directory, and running AvalancheGo to track these binaries.
This tutorial specifically covers tracking an Avalanche L1 built with Avalanche's [Subnet-EVM](https://github.com/ava-labs/subnet-evm), the default [Virtual Machine](/docs/quick-start/virtual-machines) run by Avalanche L1s on Avalanche.
## Build AvalancheGo
It is recommended that you must complete [this comprehensive guide](/docs/nodes/run-a-node/from-source) which demonstrates how to build and run a basic Avalanche node from source.
## Build Avalanche L1 Binaries
After building AvalancheGo successfully,
Clone [Subnet-EVM](https://github.com/ava-labs/subnet-evm):
```bash
cd $GOPATH/src/github.com/ava-labs
git clone https://github.com/ava-labs/subnet-evm.git
```
In the Subnet-EVM directory, run the build script, and save it in the `plugins` folder of your `.avalanchego` data directory. Name the plugin after the `VMID` of the Avalanche L1 you wish to track. The `VMID` of the WAGMI Avalanche L1 is the value beginning with **srEX...**
```bash
cd $GOPATH/src/github.com/ava-labs/subnet-evm
./scripts/build.sh ~/.avalanchego/plugins/srEXiWaHuhNyGwPUi444Tu47ZEDwxTWrbQiuD7FmgSAQ6X7Dy
```
VMID, Avalanche L1 ID (SubnetID), ChainID, and all other parameters can be found in the "Chain Info" section of the Avalanche L1 Explorer.
- [Avalanche Mainnet](https://subnets.avax.network/c-chain)
- [Fuji Testnet](https://subnets-test.avax.network/c-chain)
Create a file named `config.json` and add a `track-subnets` field that is populated with the `SubnetID` you wish to track. The `SubnetID` of the WAGMI Avalanche L1 is the value beginning with **28nr...**
```bash
cd ~/.avalanchego
echo '{"track-subnets": "28nrH5T2BMvNrWecFcV3mfccjs6axM1TVyqe79MCv2Mhs8kxiY"}' > config.json
```
## Run the Node
Run AvalancheGo with the `—config-file` flag to start your node and ensure it tracks the Avalanche L1s included in the configuration file.
```bash
cd $GOPATH/src/github.com/ava-labs/avalanchego
./build/avalanchego --config-file ~/.avalanchego/config.json --network-id=fuji
```
Note: The above command includes the `--network-id=fuji` command because the WAGMI Avalanche L1 is deployed on Fuji Testnet.
If you would prefer to track Avalanche L1s using a command line flag, you can instead use the `--track-subnets` flag. For example:
```bash
./build/avalanchego --track-subnets 28nrH5T2BMvNrWecFcV3mfccjs6axM1TVyqe79MCv2Mhs8kxiY --network-id=fuji
```
You should now see terminal filled with logs and information to suggest the node is properly running and has began bootstrapping to the network.
## Bootstrapping and RPC Details
It may take a few hours for the node to fully [bootstrap](/docs/nodes/run-a-node/from-source#bootstrapping) to the Avalanche Primary Network and tracked Avalanche L1s.
When finished bootstrapping, the endpoint will be:
```bash
localhost:9650/ext/bc//rpc
```
if run locally, or:
```bash
XXX.XX.XX.XXX:9650/ext/bc//rpc
```
if run on a cloud provider. The “X”s should be replaced with the public IP of your EC2 instance.
For more information on the requests available at these endpoints, please see the [Subnet-EVM API Reference](/docs/api-reference/subnet-evm-api) documentation.
Because each node is also tracking the Primary Network, those [RPC endpoints](/docs/nodes/run-a-node/from-source#rpc) are available as well.
# Common Errors (/docs/nodes/run-a-node/common-errors)
---
title: Common Errors
description: Common errors while running a node and their solutions.
---
If you experience any issues building your node, here are some common errors and possible solutions.
### Failed to Connect to Bootstrap Nodes[](#failed-to-connect-to-bootstrap-nodes "Direct link to heading")
Error: `WARN node/node.go:291 failed to connect to bootstrap nodes`
This error can occur when the node doesn't have access to the Internet or if the NodeID is already being used by a different node in the network. This can occur when an old instance is running and not terminated.
### Cannot Query Unfinalized Data[](#cannot-query-unfinalized-data "Direct link to heading")
Error: `err="cannot query unfinalized data"`
There may be a number of reasons for this issue, but it is likely that the node is not connected properly to other validators, which is usually caused by networking misconfiguration (wrong public IP, closed p2p port 9651).
# Using Source Code (/docs/nodes/run-a-node/from-source)
---
title: Using Source Code
description: Learn how to run an Avalanche node from AvalancheGo Source code.
---
The following steps walk through downloading the AvalancheGo source code and locally building the binary program. If you would like to run your node using a pre-built binary, follow [this](/docs/nodes/run-a-node/using-binary) guide.
## Install Dependencies
- Install [gcc](https://gcc.gnu.org/)
- Install [go](https://go.dev/doc/install)
## Build the Node Binary
Set the `$GOPATH`. You can follow [this](https://github.com/golang/go/wiki/SettingGOPATH) guide.
Create a directory in your `$GOPATH`:
```bash
mkdir -p $GOPATH/src/github.com/ava-labs
```
In the `$GOPATH`, clone [AvalancheGo](https://github.com/ava-labs/avalanchego), the consensus engine and node implementation that is the core of the Avalanche Network.
```bash
cd $GOPATH/src/github.com/ava-labs
git clone https://github.com/ava-labs/avalanchego.git
```
From the `avalanchego` directory, run the build script:
```bash
cd $GOPATH/src/github.com/ava-labs/avalanchego
./scripts/build.sh
```
## Start the Node
To be able to make API calls to your node from other machines, include the argument `--http-host=` when starting the node.
For running a node on the Avalanche Mainnet:
```bash
cd $GOPATH/src/github.com/ava-labs/avalanchego
./build/avalanchego
```
For running a node on the Fuji Testnet:
```bash
cd $GOPATH/src/github.com/ava-labs/avalanchego
./build/avalanchego --network-id=fuji
```
To kill the node, press `Ctrl + C`.
## Bootstrapping
A new node needs to catch up to the latest network state before it can participate in consensus and serve API calls. This process (called bootstrapping) currently takes several days for a new node connected to Mainnet, and a day or so for a new node connected to Fuji Testnet. When a given chain is done bootstrapping, it will print logs like this:
```bash
[09-09|17:01:45.295] INFO snowman/transitive.go:392 consensus starting {"lastAcceptedBlock": "2qaFwDJtmCCbMKP4jRpJwH8EFws82Q2yC1HhWgAiy3tGrpGFeb"}
[09-09|17:01:46.199] INFO snowman/transitive.go:392 consensus starting {"lastAcceptedBlock": "2ofmPJuWZbdroCPEMv6aHGvZ45oa8SBp2reEm9gNxvFjnfSGFP"}
[09-09|17:01:51.628] INFO snowman/transitive.go:334 consensus starting {"lenFrontier": 1}
```
### Check Bootstrapping Progress[](#check-bootstrapping-progress "Direct link to heading")
To check if a given chain is done bootstrapping, in another terminal window call [`info.isBootstrapped`](/docs/api-reference/info-api#infoisbootstrapped) by copying and pasting the following command:
```bash
curl -X POST --data '{
"jsonrpc":"2.0",
"id" :1,
"method" :"info.isBootstrapped",
"params": {
"chain":"X"
}
}' -H 'content-type:application/json;' 127.0.0.1:9650/ext/info
```
If this returns `true`, the chain is bootstrapped; otherwise, it returns `false`. If you make other API calls to a chain that is not done bootstrapping, it will return `API call rejected because chain is not done bootstrapping`. If you are still experiencing issues please contact us on [Discord.](https://chat.avalabs.org/)
The 3 chains will bootstrap in the following order: P-chain, X-chain, C-chain.
Learn more about bootstrapping [here](/docs/nodes/maintain/bootstrapping).
## RPC
When finished bootstrapping, the X, P, and C-Chain RPC endpoints will be:
```bash
localhost:9650/ext/bc/P
localhost:9650/ext/bc/X
localhost:9650/ext/bc/C/rpc
```
if run locally, or
```bash
XXX.XX.XX.XXX:9650/ext/bc/P
XXX.XX.XX.XXX:9650/ext/bc/X
XXX.XX.XX.XXX:9650/ext/bc/C/rpc
```
if run on a cloud provider. The “XXX.XX.XX.XXX" should be replaced with the public IP of your EC2 instance.
For more information on the requests available at these endpoints, please see the [AvalancheGo API Reference](/docs/api-reference/p-chain/api) documentation.
## Going Further
Your Avalanche node will perform consensus on its own, but it is not yet a validator on the network. This means that the rest of the network will not query your node when sampling the network during consensus. If you want to add your node as a validator, check out [Add a Validator](/docs/nodes/validate/node-validator) to take it a step further.
Also check out the [Maintain](/docs/nodes/maintain/bootstrapping) section to learn about how to maintain and customize your node to fit your needs.
To track an Avalanche L1 with your node, head to the [Avalanche L1 Node](/docs/nodes/run-a-node/avalanche-l1-nodes) tutorial.
# Using Pre-Built Binary (/docs/nodes/run-a-node/using-binary)
---
title: Using Pre-Built Binary
description: Learn how to run an Avalanche node from a pre-built binary program.
---
## Download Binary
To download a pre-built binary instead of building from source code, go to the official [AvalancheGo releases page](https://github.com/ava-labs/avalanchego/releases), and select the desired version.
Scroll down to the **Assets** section, and select the appropriate file. You can follow below rules to find out the right binary.
### For MacOS
Download the `avalanchego-macos-.zip` file and unzip using the below command:
```bash
unzip avalanchego-macos-.zip
```
The resulting folder, `avalanchego-`, contains the binaries.
### Linux (PCs or Cloud Providers)
Download the `avalanchego-linux-amd64-.tar.gz` file and unzip using the below command:
```bash
tar -xvf avalanchego-linux-amd64-.tar.gz
```
The resulting folder, `avalanchego--linux`, contains the binaries.
### Linux (Arm64)
Download the `avalanchego-linux-arm64-.tar.gz` file and unzip using the below command:
```bash
tar -xvf avalanchego-linux-arm64-.tar.gz
```
The resulting folder, `avalanchego--linux`, contains the binaries.
## Start the Node
To be able to make API calls to your node from other machines, include the argument `--http-host=` when starting the node.
### MacOS
For running a node on the Avalanche Mainnet:
```bash
./avalanchego-/build/avalanchego
```
For running a node on the Fuji Testnet:
```bash
./avalanchego-/build/avalanchego --network-id=fuji
```
### Linux
For running a node on the Avalanche Mainnet:
```bash
./avalanchego--linux/avalanchego
```
For running a node on the Fuji Testnet:
```bash
./avalanchego--linux/avalanchego --network-id=fuji
```
## Bootstrapping
A new node needs to catch up to the latest network state before it can participate in consensus and serve API calls. This process (called bootstrapping) currently takes several days for a new node connected to Mainnet, and a day or so for a new node connected to Fuji Testnet. When a given chain is done bootstrapping, it will print logs like this:
```bash
[09-09|17:01:45.295] INFO snowman/transitive.go:392 consensus starting {"lastAcceptedBlock": "2qaFwDJtmCCbMKP4jRpJwH8EFws82Q2yC1HhWgAiy3tGrpGFeb"}
[09-09|17:01:46.199] INFO snowman/transitive.go:392 consensus starting {"lastAcceptedBlock": "2ofmPJuWZbdroCPEMv6aHGvZ45oa8SBp2reEm9gNxvFjnfSGFP"}
[09-09|17:01:51.628] INFO snowman/transitive.go:334 consensus starting {"lenFrontier": 1}
```
### Check Bootstrapping Progress[](#check-bootstrapping-progress "Direct link to heading")
To check if a given chain is done bootstrapping, in another terminal window call [`info.isBootstrapped`](/docs/api-reference/info-api#infoisbootstrapped) by copying and pasting the following command:
```bash
curl -X POST --data '{
"jsonrpc":"2.0",
"id" :1,
"method" :"info.isBootstrapped",
"params": {
"chain":"X"
}
}' -H 'content-type:application/json;' 127.0.0.1:9650/ext/info
```
If this returns `true`, the chain is bootstrapped; otherwise, it returns `false`. If you make other API calls to a chain that is not done bootstrapping, it will return `API call rejected because chain is not done bootstrapping`. If you are still experiencing issues please contact us on [Discord.](https://chat.avalabs.org/)
The 3 chains will bootstrap in the following order: P-chain, X-chain, C-chain.
Learn more about bootstrapping [here](/docs/nodes/maintain/bootstrapping).
## RPC
When finished bootstrapping, the X, P, and C-Chain RPC endpoints will be:
```bash
localhost:9650/ext/bc/P
localhost:9650/ext/bc/X
localhost:9650/ext/bc/C/rpc
```
if run locally, or
```bash
XXX.XX.XX.XXX:9650/ext/bc/P
XXX.XX.XX.XXX:9650/ext/bc/X
XXX.XX.XX.XXX:9650/ext/bc/C/rpc
```
if run on a cloud provider. The “XXX.XX.XX.XXX" should be replaced with the public IP of your EC2 instance.
For more information on the requests available at these endpoints, please see the [AvalancheGo API Reference](/docs/api-reference/p-chain/api) documentation.
## Going Further
Your Avalanche node will perform consensus on its own, but it is not yet a validator on the network. This means that the rest of the network will not query your node when sampling the network during consensus. If you want to add your node as a validator, check out [Add a Validator](/docs/nodes/validate/node-validator) to take it a step further.
Also check out the [Maintain](/docs/nodes/maintain/bootstrapping) section to learn about how to maintain and customize your node to fit your needs.
To track an Avalanche L1 with your node, head to the [Avalanche L1 Node](/docs/nodes/run-a-node/avalanche-l1-nodes) tutorial.
# Using Docker (/docs/nodes/run-a-node/using-docker)
---
title: Using Docker
description: Learn how to run an Avalanche node using Docker.
---
## Prerequisites
Before beginning, you must ensure that:
- Docker is installed on your system
- You need to clone the [AvalancheGo repository](https://github.com/ava-labs/avalanchego)
- You need to install [GCC](https://gcc.gnu.org/) and [Go](https://go.dev/doc/install)
- Docker daemon is running on your machine
You can verify your Docker installation by running:
```bash
docker --version
```
## Building the Docker Image
To build the Docker image for the latest `avalanchego` branch:
1. Navigate to the project directory
2. Execute the build script:
```bash
./scripts/build_image.sh
```
This script will create a Docker image containing the latest version of AvalancheGo.
## Verifying the Build
After the build completes, verify the image was created successfully:
```bash
docker image ls
```
You should see an image with:
- Repository: `avaplatform/avalanchego`
- Tag: `xxxxxxxx` (where `xxxxxxxx` is the shortened commit hash of the source code used for the build)
## Running AvalancheGo Node
To start an AvalancheGo node, run the following command:
```bash
docker run -ti -p 9650:9650 -p 9651:9651 avaplatform/avalanchego:xxxxxxxx /avalanchego/build/avalanchego
```
This command:
- Creates an interactive container (`-ti`)
- Maps the following ports:
- `9650`: HTTP API port
- `9651`: P2P networking port
- Uses the built AvalancheGo image
- Executes the AvalancheGo binary inside the container
## Port Configuration
The default ports used by AvalancheGo are:
- `9650`: HTTP API
- `9651`: P2P networking
Ensure these ports are available on your host machine and not blocked by firewalls.
# Installing AvalancheGo (/docs/nodes/using-install-script/installing-avalanche-go)
---
title: Installing AvalancheGo
description: Learn how to install AvalancheGo on your system.
---
## Running the Script
So, now that you prepared your system and have the info ready, let's get to it.
To download and run the script, enter the following in the terminal:
```bash
wget -nd -m https://raw.githubusercontent.com/ava-labs/avalanche-docs/master/scripts/avalanchego-installer.sh;\
chmod 755 avalanchego-installer.sh;\
./avalanchego-installer.sh
```
And we're off! The output should look something like this:
```bash
AvalancheGo installer
---------------------
Preparing environment...
Found arm64 architecture...
Looking for the latest arm64 build...
Will attempt to download:
https://github.com/ava-labs/avalanchego/releases/download/v1.1.1/avalanchego-linux-arm64-v1.1.1.tar.gz
avalanchego-linux-arm64-v1.1.1.tar.gz 100%[=========================================================================>] 29.83M 75.8MB/s in 0.4s
2020-12-28 14:57:47 URL:https://github-production-release-asset-2e65be.s3.amazonaws.com/246387644/f4d27b00-4161-11eb-8fb2-156a992fd2c8?X-Amz-Algorithm=AWS4-HMAC-SHA256&X-Amz-Credential=AKIAIWNJYAX4CSVEH53A%2F20201228%2Fus-east-1%2Fs3%2Faws4_request&X-Amz-Date=20201228T145747Z&X-Amz-Expires=300&X-Amz-Signature=ea838877f39ae940a37a076137c4c2689494c7e683cb95a5a4714c062e6ba018&X-Amz-SignedHeaders=host&actor_id=0&key_id=0&repo_id=246387644&response-content-disposition=attachment%3B%20filename%3Davalanchego-linux-arm64-v1.1.1.tar.gz&response-content-type=application%2Foctet-stream [31283052/31283052] -> "avalanchego-linux-arm64-v1.1.1.tar.gz" [1]
Unpacking node files...
avalanchego-v1.1.1/plugins/
avalanchego-v1.1.1/plugins/evm
avalanchego-v1.1.1/avalanchego
Node files unpacked into /home/ubuntu/avalanche-node
```
And then the script will prompt you for information about the network environment:
```bash
To complete the setup some networking information is needed.
Where is the node installed:
1) residential network (dynamic IP)
2) cloud provider (static IP)
Enter your connection type [1,2]:
```
Enter `1` if you have dynamic IP, and `2` if you have a static IP. If you are on a static IP, it will try to auto-detect the IP and ask for confirmation.
```bash
Detected '3.15.152.14' as your public IP. Is this correct? [y,n]:
```
Confirm with `y`, or `n` if the detected IP is wrong (or empty), and then enter the correct IP at the next prompt.
Next, you have to set up RPC port access for your node. Those are used to query the node for its internal state, to send commands to the node, or to interact with the platform and its chains (sending transactions, for example). You will be prompted:
```bash
RPC port should be public (this is a public API node) or private (this is a validator)? [public, private]:
```
- `private`: this setting only allows RPC requests from the node machine itself.
- `public`: this setting exposes the RPC port to all network interfaces.
As this is a sensitive setting you will be asked to confirm if choosing `public`. Please read the following note carefully:
If you choose to allow RPC requests on any network interface you will need to set up a firewall to only let through RPC requests from known IP addresses, otherwise your node will be accessible to anyone and might be overwhelmed by RPC calls from malicious actors! If you do not plan to use your node to send RPC calls remotely, enter `private`.
The script will then prompt you to choose whether to enable state sync setting or not:
```bash
Do you want state sync bootstrapping to be turned on or off? [on, off]:
```
Turning state sync on will greatly increase the speed of bootstrapping, but will sync only the current network state. If you intend to use your node for accessing historical data (archival node) you should select `off`. Otherwise, select `on`. Validators can be bootstrapped with state sync turned on.
The script will then continue with system service creation and finish with starting the service.
```bash
Created symlink /etc/systemd/system/multi-user.target.wants/avalanchego.service → /etc/systemd/system/avalanchego.service.
Done!
Your node should now be bootstrapping.
Node configuration file is /home/ubuntu/.avalanchego/configs/node.json
C-Chain configuration file is /home/ubuntu/.avalanchego/configs/chains/C/config.json
Plugin directory, for storing subnet VM binaries, is /home/ubuntu/.avalanchego/plugins
To check that the service is running use the following command (q to exit):
sudo systemctl status avalanchego
To follow the log use (ctrl-c to stop):
sudo journalctl -u avalanchego -f
Reach us over on https://discord.gg/avax if you're having problems.
```
The script is finished, and you should see the system prompt again.
## Post Installation
AvalancheGo should be running in the background as a service. You can check that it's running with:
```bash
sudo systemctl status avalanchego
```
Below is an example of what the node's latest logs should look like:
```bash
● avalanchego.service - AvalancheGo systemd service
Loaded: loaded (/etc/systemd/system/avalanchego.service; enabled; vendor preset: enabled)
Active: active (running) since Tue 2021-01-05 10:38:21 UTC; 51s ago
Main PID: 2142 (avalanchego)
Tasks: 8 (limit: 4495)
Memory: 223.0M
CGroup: /system.slice/avalanchego.service
└─2142 /home/ubuntu/avalanche-node/avalanchego --public-ip-resolution-service=opendns --http-host=
Jan 05 10:38:45 ip-172-31-30-64 avalanchego[2142]: INFO [01-05|10:38:45] avalanchego/vms/platformvm/vm.go#322: initializing last accepted block as 2FUFPVPxbTpKNn39moGSzsmGroYES4NZRdw3mJgNvMkMiMHJ9e
Jan 05 10:38:45 ip-172-31-30-64 avalanchego[2142]: INFO [01-05|10:38:45]
avalanchego/snow/engine/snowman/transitive.go#58: initializing consensus engine
Jan 05 10:38:45 ip-172-31-30-64 avalanchego[2142]: INFO [01-05|10:38:45] avalanchego/api/server.go#143: adding route /ext/bc/11111111111111111111111111111111LpoYY
Jan 05 10:38:45 ip-172-31-30-64 avalanchego[2142]: INFO [01-05|10:38:45] avalanchego/api/server.go#88: HTTP API server listening on ":9650"
Jan 05 10:38:58 ip-172-31-30-64 avalanchego[2142]: INFO [01-05|10:38:58]
avalanchego/snow/engine/common/bootstrapper.go#185: Bootstrapping started syncing with 1 vertices in the accepted frontier
Jan 05 10:39:02 ip-172-31-30-64 avalanchego[2142]: INFO [01-05|10:39:02]
avalanchego/snow/engine/snowman/bootstrap/bootstrapper.go#210: fetched 2500 blocks
Jan 05 10:39:04 ip-172-31-30-64 avalanchego[2142]: INFO [01-05|10:39:04]
avalanchego/snow/engine/snowman/bootstrap/bootstrapper.go#210: fetched 5000 blocks
Jan 05 10:39:06 ip-172-31-30-64 avalanchego[2142]: INFO [01-05|10:39:06]
avalanchego/snow/engine/snowman/bootstrap/bootstrapper.go#210: fetched 7500 blocks
Jan 05 10:39:09 ip-172-31-30-64 avalanchego[2142]: INFO [01-05|10:39:09]
avalanchego/snow/engine/snowman/bootstrap/bootstrapper.go#210: fetched 10000 blocks
Jan 05 10:39:11 ip-172-31-30-64 avalanchego[2142]: INFO [01-05|10:39:11]
avalanchego/snow/engine/snowman/bootstrap/bootstrapper.go#210: fetched 12500 blocks
```
Note the `active (running)` which indicates the service is running OK. You may need to press `q` to return to the command prompt.
To find out your NodeID, which is used to identify your node to the network, run the following command:
```bash
sudo journalctl -u avalanchego | grep "NodeID"
```
It will produce output like:
```bash
Jan 05 10:38:38 ip-172-31-30-64 avalanchego[2142]: INFO [01-05|10:38:38] avalanchego/node/node.go#428: Set node's ID to 6seStrauyCnVV7NEVwRbfaT9B6EnXEzfY
```
Prepend `NodeID-` to the value to get, for example, `NodeID-6seStrauyCnVV7NEVwRbfaT9B6EnXEzfY`. Store that; it will be needed for staking or looking up your node.
Your node should be in the process of bootstrapping now. You can monitor the progress by issuing the following command:
```bash
sudo journalctl -u avalanchego -f
```
Press `ctrl+C` when you wish to stop reading node output.
# Managing AvalancheGo (/docs/nodes/using-install-script/managing-avalanche-go)
---
title: Managing AvalancheGo
description: Learn how to start, stop and upgrade your AvalancheGo node
---
## Stop Your Node
To stop AvalancheGo, run:
```bash
sudo systemctl stop avalanchego
```
## Start Your Node
To start your node again, run:
```bash
sudo systemctl start avalanchego
```
## Upgrade Your Node
AvalancheGo is an ongoing project and there are regular version upgrades. Most upgrades are recommended but not required. Advance notice will be given for upgrades that are not backwards compatible. When a new version of the node is released, you will notice log lines like:
```bash
Jan 08 10:26:45 ip-172-31-16-229 avalanchego[6335]: INFO [01-08|10:26:45] avalanchego/network/peer.go#526: beacon 9CkG9MBNavnw7EVSRsuFr7ws9gascDQy3 attempting to connect with newer version avalanche/1.1.1. You may want to update your client
```
It is recommended to always upgrade to the latest version, because new versions bring bug fixes, new features and upgrades.
To upgrade your node, just run the installer script again:
```bash
./avalanchego-installer.sh
```
It will detect that you already have AvalancheGo installed:
```bash
AvalancheGo installer
---------------------
Preparing environment...
Found 64bit Intel/AMD architecture...
Found AvalancheGo systemd service already installed, switching to upgrade mode.
Stopping service...
```
It will then upgrade your node to the latest version, and after it's done, start the node back up, and print out the information about the latest version:
```bash
Node upgraded, starting service...
New node version:
avalanche/1.1.1 [network=mainnet, database=v1.0.0, commit=f76f1fd5f99736cf468413bbac158d6626f712d2]
Done!
```
# Node Config and Maintenance (/docs/nodes/using-install-script/node-config-maintenance)
---
title: Node Config and Maintenance
description: Advanced options for configuring and maintaining your AvalancheGo node.
---
## Advanced Node Configuration
Without any additional arguments, the script installs the node in a most common configuration. But the script also enables various advanced options to be configured, via the command line prompts. Following is a list of advanced options and their usage:
- `admin` - [Admin API](/docs/api-reference/admin-api) will be enabled
- `archival` - disables database pruning and preserves the complete transaction history
- `state-sync` - if `on` state-sync for the C-Chain is used, if `off` it will use regular transaction replay to bootstrap; state-sync is much faster, but has no historical data
- `db-dir` - use to provide the full path to the location where the database will be stored
- `fuji` - node will connect to Fuji testnet instead of the Mainnet
- `index` - [Index API](/docs/api-reference/index-api) will be enabled
- `ip` - use `dynamic`, `static` arguments, of enter a desired IP directly to be used as the public IP node will advertise to the network
- `rpc` - use `any` or `local` argument to select any or local network interface to be used to listen for RPC calls
- `version` - install a specific node version, instead of the latest. See [here](#using-a-previous-version) for usage.
Configuring the `index` and `archival` options on an existing node will require a fresh bootstrap to recreate the database.
Complete script usage can be displayed by entering:
```bash
./avalanchego-installer.sh --help
```
### Unattended Installation[](#unattended-installation "Direct link to heading")
If you want to use the script in an automated environment where you cannot enter the data at the prompts you must provide at least the `rpc` and `ip` options. For example:
```bash
./avalanchego-installer.sh --ip 1.2.3.4 --rpc local
```
### Usage Examples[](#usage-examples "Direct link to heading")
- To run a Fuji node with indexing enabled and autodetected static IP:
```bash
./avalanchego-installer.sh --fuji --ip static --index
```
- To run an archival Mainnet node with dynamic IP and database located at `/home/node/db`:
```bash
./avalanchego-installer.sh --archival --ip dynamic --db-dir /home/node/db
```
- To use C-Chain state-sync to quickly bootstrap a Mainnet node, with dynamic IP and local RPC only:
```bash
./avalanchego-installer.sh --state-sync on --ip dynamic --rpc local
```
- To reinstall the node using node version 1.7.10 and use specific IP and local RPC only:
```bash
./avalanchego-installer.sh --reinstall --ip 1.2.3.4 --version v1.7.10 --rpc local
```
Node Configuration[](#node-configuration "Direct link to heading")
-------------------------------------------------------------------
The file that configures node operation is `~/.avalanchego/configs/node.json`. You can edit it to add or change configuration options. The documentation of configuration options can be found [here](/docs/nodes/configure/configs-flags). Configuration may look like this:
```json
{
"public-ip-resolution-service": "opendns",
"http-host": ""
}
```
Note that the configuration file needs to be a properly formatted `JSON` file, so switches should formatted differently than they would be for the command line. Therefore, don't enter options like `--public-ip-resolution-service=opendns` as shown in the example above.
The script also creates an empty C-Chain config file, located at `~/.avalanchego/configs/chains/C/config.json`. By editing that file, you can configure the C-Chain, as described in detail [here](/docs/nodes/configure/configs-flags).
Using a Previous Version[](#using-a-previous-version "Direct link to heading")
-------------------------------------------------------------------------------
The installer script can also be used to install a version of AvalancheGo other than the latest version.
To see a list of available versions for installation, run:
```bash
./avalanchego-installer.sh --list
```
It will print out a list, something like:
```bash
AvalancheGo installer
---------------------
Available versions:
v1.3.2
v1.3.1
v1.3.0
v1.2.4-arm-fix
v1.2.4
v1.2.3-signed
v1.2.3
v1.2.2
v1.2.1
v1.2.0
```
To install a specific version, run the script with `--version` followed by the tag of the version. For example:
```bash
./avalanchego-installer.sh --version v1.3.1
```
Note that not all AvalancheGo versions are compatible. You should generally run the latest version. Running a version other than latest may lead to your node not working properly and, for validators, not receiving a staking reward.
Thanks to community member [Jean Zundel](https://github.com/jzu) for the inspiration and help implementing support for installing non-latest node versions.
Reinstall and Script Update[](#reinstall-and-script-update "Direct link to heading")
-------------------------------------------------------------------------------------
The installer script gets updated from time to time, with new features and capabilities added. To take advantage of new features or to recover from modifications that made the node fail, you may want to reinstall the node. To do that, fetch the latest version of the script from the web with:
```bash
wget -nd -m https://raw.githubusercontent.com/ava-labs/builders-hub/master/scripts/avalanchego-installer.sh
```
After the script has updated, run it again with the `--reinstall` config flag:
```bash
./avalanchego-installer.sh --reinstall
```
This will delete the existing service file, and run the installer from scratch, like it was started for the first time. Note that the database and NodeID will be left intact.
Removing the Node Installation[](#removing-the-node-installation "Direct link to heading")
-------------------------------------------------------------------------------------------
If you want to remove the node installation from the machine, you can run the script with the `--remove` option, like this:
```bash
./avalanchego-installer.sh --remove
```
This will remove the service, service definition file and node binaries. It will not remove the working directory, node ID definition or the node database. To remove those as well, you can type:
Please note that this is irreversible and the database and node ID will be deleted!
What Next?[](#what-next "Direct link to heading")
--------------------------------------------------
That's it, you're running an AvalancheGo node! Congratulations! Let us know you did it on our [X](https://x.com/avax), [Telegram](https://t.me/avalancheavax) or [Reddit](https://www.reddit.com/r/Avax/)!
If you're on a residential network (dynamic IP), don't forget to set up port forwarding. If you're on a cloud service provider, you're good to go.
Now you can [interact with your node](/docs/api-reference/standards/guides/issuing-api-calls), [stake your tokens](/docs/nodes/validate/what-is-staking), or level up your installation by setting up [node monitoring](/docs/nodes/maintain/monitoring) to get a better insight into what your node is doing. Also, you might want to use our [Postman Collection](/docs/tooling/avalanche-postman/add-postman-collection) to more easily issue commands to your node.
Finally, if you haven't already, it is a good idea to [back up](/docs/nodes/maintain/backup-restore) important files in case you ever need to restore your node to a different machine.
If you have any questions, or need help, feel free to contact us on our [Discord](https://chat.avalabs.org/) server.
# Preparing Your Environment (/docs/nodes/using-install-script/preparing-environment)
---
title: Preparing Your Environment
description: Learn how to prepare your environment before using install script.
---
We have a shell (bash) script that installs AvalancheGo on your computer. This script sets up full, running node in a matter of minutes with minimal user input required. Script can also be used for unattended, automated installs.
This install script assumes:
- AvalancheGo is not running and not already installed as a service
- User running the script has superuser privileges (can run `sudo`)
Environment Considerations[](#environment-considerations "Direct link to heading")
-----------------------------------------------------------------------------------
If you run a different flavor of Linux, the script might not work as intended. It assumes `systemd` is used to run system services. Other Linux flavors might use something else, or might have files in different places than is assumed by the script. It will probably work on any distribution that uses `systemd` but it has been developed for and tested on Ubuntu.
If you have a node already running on the computer, stop it before running the script. Script won't touch the node working directory so you won't need to bootstrap the node again.
### Node Running from Terminal[](#node-running-from-terminal "Direct link to heading")
If your node is running in a terminal stop it by pressing `ctrl+C`.
### Node Running as a Service[](#node-running-as-a-service "Direct link to heading")
If your node is already running as a service, then you probably don't need this script. You're good to go.
### Node Running in the Background[](#node-running-in-the-background "Direct link to heading")
If your node is running in the background (by running with `nohup`, for example) then find the process running the node by running `ps aux | grep avalanche`. This will produce output like:
```bash
ubuntu 6834 0.0 0.0 2828 676 pts/1 S+ 19:54 0:00 grep avalanche
ubuntu 2630 26.1 9.4 2459236 753316 ? Sl Dec02 1220:52 /home/ubuntu/build/avalanchego
```
Look for line that doesn't have `grep` on it. In this example, that is the second line. It shows information about your node. Note the process id, in this case, `2630`. Stop the node by running `kill -2 2630`.
### Node Working Files[](#node-working-files "Direct link to heading")
If you previously ran an AvalancheGo node on this computer, you will have local node files stored in `$HOME/.avalanchego` directory. Those files will not be disturbed, and node set up by the script will continue operation with the same identity and state it had before. That being said, for your node's security, back up `staker.crt` and `staker.key` files, found in `$HOME/.avalanchego/staking` and store them somewhere secure. You can use those files to recreate your node on a different computer if you ever need to. Check out this [tutorial](/docs/nodes/maintain/backup-restore) for backup and restore procedure.
Networking Considerations[](#networking-considerations "Direct link to heading")
---------------------------------------------------------------------------------
To run successfully, AvalancheGo needs to accept connections from the Internet on the network port `9651`. Before you proceed with the installation, you need to determine the networking environment your node will run in.
### Running on a Cloud Provider[](#running-on-a-cloud-provider "Direct link to heading")
If your node is running on a cloud provider computer instance, it will have a static IP. Find out what that static IP is, or set it up if you didn't already. The script will try to find out the IP by itself, but that might not work in all environments, so you will need to check the IP or enter it yourself.
### Running on a Home Connection[](#running-on-a-home-connection "Direct link to heading")
If you're running a node on a computer that is on a residential internet connection, you have a dynamic IP; that is, your IP will change periodically. The install script will configure the node appropriately for that situation. But, for a home connection, you will need to set up inbound port forwarding of port `9651` from the internet to the computer the node is installed on.
As there are too many models and router configurations, we cannot provide instructions on what exactly to do, but there are online guides to be found (like [this](https://www.noip.com/support/knowledgebase/general-port-forwarding-guide/), or [this](https://www.howtogeek.com/66214/how-to-forward-ports-on-your-router/) ), and your service provider support might help too.
Please note that a fully connected Avalanche node maintains and communicates over a couple of thousand of live TCP connections. For some low-powered and older home routers that might be too much to handle. If that is the case you may experience lagging on other computers connected to the same router, node getting benched, failing to sync and similar issues.
# How to Stake (/docs/nodes/validate/how-to-stake)
---
title: How to Stake
description: Learn how to stake on Avalanche.
---
Staking Parameters on Avalanche[](#staking-parameters-on-avalanche "Direct link to heading")
---------------------------------------------------------------------------------------------
When a validator is done validating the [Primary Network](http://support.avalabs.org/en/articles/4135650-what-is-the-primary-network), it receives back the AVAX tokens it staked. It may receive a reward for helping to secure the network. A validator only receives a [validation reward](http://support.avalabs.org/en/articles/4587396-what-are-validator-staking-rewards) if it is sufficiently responsive and correct during the time it validates. Read the [Avalanche token white paper](https://www.avalabs.org/whitepapers) to learn more about AVAX and the mechanics of staking.
Staking rewards are sent to your wallet address at the end of the staking term **as long as all of these parameters are met**.
### Mainnet[](#mainnet "Direct link to heading")
- The minimum amount that a validator must stake is 2,000 AVAX
- The minimum amount that a delegator must delegate is 25 AVAX
- The minimum amount of time one can stake funds for validation is 2 weeks
- The maximum amount of time one can stake funds for validation is 1 year
- The minimum amount of time one can stake funds for delegation is 2 weeks
- The maximum amount of time one can stake funds for delegation is 1 year
- The minimum delegation fee rate is 2%
- The maximum weight of a validator (their own stake + stake delegated to them) is the minimum of 3 million AVAX and 5 times the amount the validator staked. For example, if you staked 2,000 AVAX to become a validator, only 8000 AVAX can be delegated to your node total (not per delegator)
A validator will receive a staking reward if they are online and response for more than 80% of their validation period, as measured by a majority of validators, weighted by stake. **You should aim for your validator be online and responsive 100% of the time.**
You can call API method `info.uptime` on your node to learn its weighted uptime and what percentage of the network currently thinks your node has an uptime high enough to receive a staking reward. See [here.](/docs/api-reference/info-api#infouptime) You can get another opinion on your node's uptime from Avalanche's [Validator Health dashboard](https://stats.avax.network/dashboard/validator-health-check/). If your reported uptime is not close to 100%, there may be something wrong with your node setup, which may jeopardize your staking reward. If this is the case, please see [here](#why-is-my-uptime-low) or contact us on [Discord](https://discord.gg/avax/) so we can help you find the issue. Note that only checking the uptime of your validator as measured by non-staking nodes, validators with small stake, or validators that have not been online for the full duration of your validation period can provide an inaccurate view of your node's true uptime.
### Fuji Testnet[](#fuji-testnet "Direct link to heading")
On Fuji Testnet, all staking parameters are the same as those on Mainnet except the following ones:
- The minimum amount that a validator must stake is 1 AVAX
- The minimum amount that a delegator must delegate is 1 AVAX
- The minimum amount of time one can stake funds for validation is 24 hours
- The minimum amount of time one can stake funds for delegation is 24 hours
Validators[](#validators "Direct link to heading")
---------------------------------------------------
**Validators** secure Avalanche, create new blocks, and process transactions. To achieve consensus, validators repeatedly sample each other. The probability that a given validator is sampled is proportional to its stake.
When you add a node to the validator set, you specify:
- Your node's ID
- Your node's BLS key and BLS signature
- When you want to start and stop validating
- How many AVAX you are staking
- The address to send any rewards to
- Your delegation fee rate (see below)
The minimum amount that a validator must stake is 2,000 AVAX.
Note that once you issue the transaction to add a node as a validator, there is no way to change the parameters. **You can't remove your stake early or change the stake amount, node ID, or reward address.**
Please make sure you're using the correct values in the API calls below. If you're not sure, ask for help on [Discord](https://discord.gg/avax/). If you want to add more tokens to your own validator, you can delegate the tokens to this node - but you cannot increase the base validation amount (so delegating to yourself goes against your delegation cap).
### Running a Validator[](#running-a-validator "Direct link to heading")
If you're running a validator, it's important that your node is well connected to ensure that you receive a reward.
When you issue the transaction to add a validator, the staked tokens and transaction fee (which is 0) are deducted from the addresses you control. When you are done validating, the staked funds are returned to the addresses they came from. If you earned a reward, it is sent to the address you specified when you added yourself as a validator.
#### Allow API Calls[](#allow-api-calls "Direct link to heading")
To make API calls to your node from remote machines, allow traffic on the API port (`9650` by default), and run your node with argument `--http-host=`
You should disable all APIs you will not use via command-line arguments. You should configure your network to only allow access to the API port from trusted machines (for example, your personal computer.)
#### Why Is My Uptime Low?[](#why-is-my-uptime-low "Direct link to heading")
Every validator on Avalanche keeps track of the uptime of other validators. Every validator has a weight (that is the amount staked on it.) The more weight a validator has, the more influence they have when validators vote on whether your node should receive a staking reward. You can call API method `info.uptime` on your node to learn its weighted uptime and what percentage of the network stake currently thinks your node has an uptime high enough to receive a staking reward.
You can also see the connections a node has by calling `info.peers`, as well as the uptime of each connection. **This is only one node's point of view**. Other nodes may perceive the uptime of your node differently. Just because one node perceives your uptime as being low does not mean that you will not receive staking rewards.
If your node's uptime is low, make sure you're setting config option `--public-ip=[NODE'S PUBLIC IP]` and that your node can receive incoming TCP traffic on port 9651.
#### Secret Management[](#secret-management "Direct link to heading")
The only secret that you need on your validating node is its Staking Key, the TLS key that determines your node's ID. The first time you start a node, the Staking Key is created and put in `$HOME/.avalanchego/staking/staker.key`. You should back up this file (and `staker.crt`) somewhere secure. Losing your Staking Key could jeopardize your validation reward, as your node will have a new ID.
You do not need to have AVAX funds on your validating node. In fact, it's best practice to **not** have a lot of funds on your node. Almost all of your funds should be in "cold" addresses whose private key is not on any computer.
#### Monitoring[](#monitoring "Direct link to heading")
Follow this [tutorial](/docs/nodes/maintain/monitoring) to learn how to monitor your node's uptime, general health, etc.
### Reward Formula[](#reward-formula "Direct link to heading")
Consider a validator which stakes a $Stake$ amount of Avax for $StakingPeriod$ seconds.
Assume that at the start of the staking period there is a $Supply$ amount of Avax in the Primary Network.
The maximum amount of Avax is $MaximumSupply$ . Then at the end of its staking period, a responsive validator receives a reward calculated as follows:
$$
Reward = \left(MaximumSupply - Supply \right) \times \frac{Stake}{Supply} \times \frac{Staking Period}{Minting Period} \times EffectiveConsumptionRate
$$
where,
$$
EffectiveConsumptionRate =
$$
$$
\frac{MinConsumptionRate}{PercentDenominator} \times \left(1- \frac{Staking Period}{Minting Period}\right) + \frac{MaxConsumptionRate}{PercentDenominator} \times \frac{Staking Period}{Minting Period}
$$
Note that $StakingPeriod$ is the staker's entire staking period, not just the staker's uptime, that is the aggregated time during which the staker has been responsive. The uptime comes into play only to decide whether a staker should be rewarded; to calculate the actual reward, only the staking period duration is taken into account.
$EffectiveConsumptionRate$ is a linear combination of $MinConsumptionRate$ and $MaxConsumptionRate$.
$MinConsumptionRate$ and $MaxConsumptionRate$ bound $EffectiveConsumptionRate$ because
$$
MinConsumptionRate \leq EffectiveConsumptionRate \leq MaxConsumptionRate
$$
The larger $StakingPeriod$ is, the closer $EffectiveConsumptionRate$ is to $MaxConsumptionRate$.
A staker achieves the maximum reward for its stake if $StakingPeriod$ = $Minting Period$.
The reward is:
$$
Max Reward = \left(MaximumSupply - Supply \right) \times \frac{Stake}{Supply} \times \frac{MaxConsumptionRate}{PercentDenominator}
$$
Delegators[](#delegators "Direct link to heading")
---------------------------------------------------
A delegator is a token holder, who wants to participate in staking, but chooses to trust an existing validating node through delegation.
When you delegate stake to a validator, you specify:
- The ID of the node you're delegating to
- When you want to start/stop delegating stake (must be while the validator is validating)
- How many AVAX you are staking
- The address to send any rewards to
The minimum amount that a delegator must delegate is 25 AVAX.
Note that once you issue the transaction to add your stake to a delegator, there is no way to change the parameters. **You can't remove your stake early or change the stake amount, node ID, or reward address.** If you're not sure, ask for help on [Discord](https://discord.gg/avax/).
### Delegator Rewards[](#delegator-rewards "Direct link to heading")
If the validator that you delegate tokens to is sufficiently correct and responsive, you will receive a reward when you are done delegating. Delegators are rewarded according to the same function as validators. However, the validator that you delegate to keeps a portion of your reward specified by the validator's delegation fee rate.
When you issue the transaction to delegate tokens, the staked tokens and transaction fee are deducted from the addresses you control. When you are done delegating, the staked tokens are returned to your address. If you earned a reward, it is sent to the address you specified when you delegated tokens. Rewards are sent to delegators right after the delegation ends with the return of staked tokens, and before the validation period of the node they're delegating to is complete.
FAQ[](#faq "Direct link to heading")
-------------------------------------
### Is There a Tool to Check the Health of a Validator?[](#is-there-a-tool-to-check-the-health-of-a-validator "Direct link to heading")
Yes, just enter your node's ID in the Avalanche Stats [Validator Health Dashboard](https://stats.avax.network/dashboard/validator-health-check/?nodeid=NodeID-Jp4dLMTHd6huttS1jZhqNnBN9ZMNmTmWC).
### How Is It Determined Whether a Validator Receives a Staking Reward?[](#how-is-it-determined-whether-a-validator-receives-a-staking-reward "Direct link to heading")
When a node leaves the validator set, the validators vote on whether the leaving node should receive a staking reward or not. If a validator calculates that the leaving node was responsive for more than the required uptime (currently 80%), the validator will vote for the leaving node to receive a staking reward. Otherwise, the validator will vote that the leaving node should not receive a staking reward. The result of this vote, which is weighted by stake, determines whether the leaving node receives a reward or not.
Each validator only votes "yes" or "no." It does not share its data such as the leaving node's uptime.
Each validation period is considered separately. That is, suppose a node joins the validator set, and then leaves. Then it joins and leaves again. The node's uptime during its first period in the validator set does not affect the uptime calculation in the second period, hence, has no impact on whether the node receives a staking reward for its second period in the validator set.
### How Are Delegation Fees Distributed To Validators?[](#how-are-delegation-fees-distributed-to-validators "Direct link to heading")
If a validator is online for 80% of a delegation period, they receive a % of the reward (the fee) earned by the delegator. The P-Chain used to distribute this fee as a separate UTXO per delegation period. After the [Cortina Activation](https://medium.com/avalancheavax/cortina-x-chain-linearization-a1d9305553f6), instead of sending a fee UTXO for each successful delegation period, fees are now batched during a node's entire validation period and are distributed when it is unstaked.
### Error: Couldn't Issue TX: Validator Would Be Over Delegated[](#error-couldnt-issue-tx-validator-would-be-over-delegated "Direct link to heading")
This error occurs whenever the delegator can not delegate to the named validator. This can be caused by the following.
- The delegator `startTime` is before the validator `startTime`
- The delegator `endTime` is after the validator `endTime`
- The delegator weight would result in the validator total weight exceeding its maximum weight
# Turn Node Into Validator (/docs/nodes/validate/node-validator)
---
title: Turn Node Into Validator
description: This tutorial will show you how to add a node to the validator set of Primary Network on Avalanche.
---
## Introduction
The [Primary Network](/docs/quick-start/primary-network)
is inherent to the Avalanche platform and validates Avalanche's built-in
blockchains. In this
tutorial, we'll add a node to the Primary Network on Avalanche.
The P-Chain manages metadata on Avalanche. This includes tracking which nodes
are in which Avalanche L1s, which blockchains exist, and which Avalanche L1s are validating
which blockchains. To add a validator, we'll issue
[transactions](http://support.avalabs.org/en/articles/4587384-what-is-a-transaction)
to the P-Chain.
Note that once you issue the transaction to add a node as a validator, there is
no way to change the parameters. **You can't remove your stake early or change
the stake amount, node ID, or reward address.** Please make sure you're using
the correct values in the API calls below. If you're not sure, feel free to join
our [Discord](https://chat.avalabs.org/) to ask questions.
## Requirements
You've completed [Run an Avalanche Node](/docs/nodes/run-a-node/from-source) and are familiar with
[Avalanche's architecture](/docs/quick-start/primary-network). In this
tutorial, we use [AvalancheJS](/docs/tooling/avalanche-js) and
[Avalanche's Postman collection](/docs/tooling/avalanchego-postman-collection)
to help us make API calls.
In order to ensure your node is well-connected, make sure that your node can
receive and send TCP traffic on the staking port (`9651` by default) and your node
has a public IP address(it's optional to set --public-ip=[YOUR NODE'S PUBLIC IP HERE]
when executing the AvalancheGo binary, as by default, the node will attempt to perform
NAT traversal to get the node's IP according to its router). Failing to do either of
these may jeopardize your staking reward.
## Add a Validator with Core extension
First, we show you how to add your node as a validator by using [Core web](https://core.app).
### Retrieve the Node ID, the BLS signature and the BLS key
Get this info by calling [`info.getNodeID`](/docs/api-reference/info-api#infogetnodeid):
```bash
curl -X POST --data '{
"jsonrpc":"2.0",
"id" :1,
"method" :"info.getNodeID"
}' -H 'content-type:application/json' 127.0.0.1:9650/ext/info
```
The response has your node's ID, the BLS key (public key) and the BLS signature (proof of possession):
```json
{
"jsonrpc": "2.0",
"result": {
"nodeID": "NodeID-5mb46qkSBj81k9g9e4VFjGGSbaaSLFRzD",
"nodePOP": {
"publicKey": "0x8f95423f7142d00a48e1014a3de8d28907d420dc33b3052a6dee03a3f2941a393c2351e354704ca66a3fc29870282e15",
"proofOfPossession": "0x86a3ab4c45cfe31cae34c1d06f212434ac71b1be6cfe046c80c162e057614a94a5bc9f1ded1a7029deb0ba4ca7c9b71411e293438691be79c2dbf19d1ca7c3eadb9c756246fc5de5b7b89511c7d7302ae051d9e03d7991138299b5ed6a570a98"
}
},
"id": 1
}
```
### Add as a Validator
Connect [Core extension](https://core.app) to [Core web](https://core.app), and go the 'Staking' tab.
Here, choose 'Validate' from the menu.
Fill out the staking parameters. They are explained in more detail in [this doc](/docs/nodes/validate/how-to-stake). When you've
filled in all the staking parameters and double-checked them, click `Submit Validation`. Make sure the staking period is at
least 2 weeks, the delegation fee rate is at least 2%, and you're staking at
least 2,000 AVAX on Mainnet (1 AVAX on Fuji Testnet). A full guide about this can be found
[here](https://support.avax.network/en/articles/8117267-core-web-how-do-i-validate-in-core-stake).
You should see a success message, and your balance should be updated.
Go back to the `Stake` tab, and you'll see here an overview of your validation,
with information like the amount staked, staking time, and more.
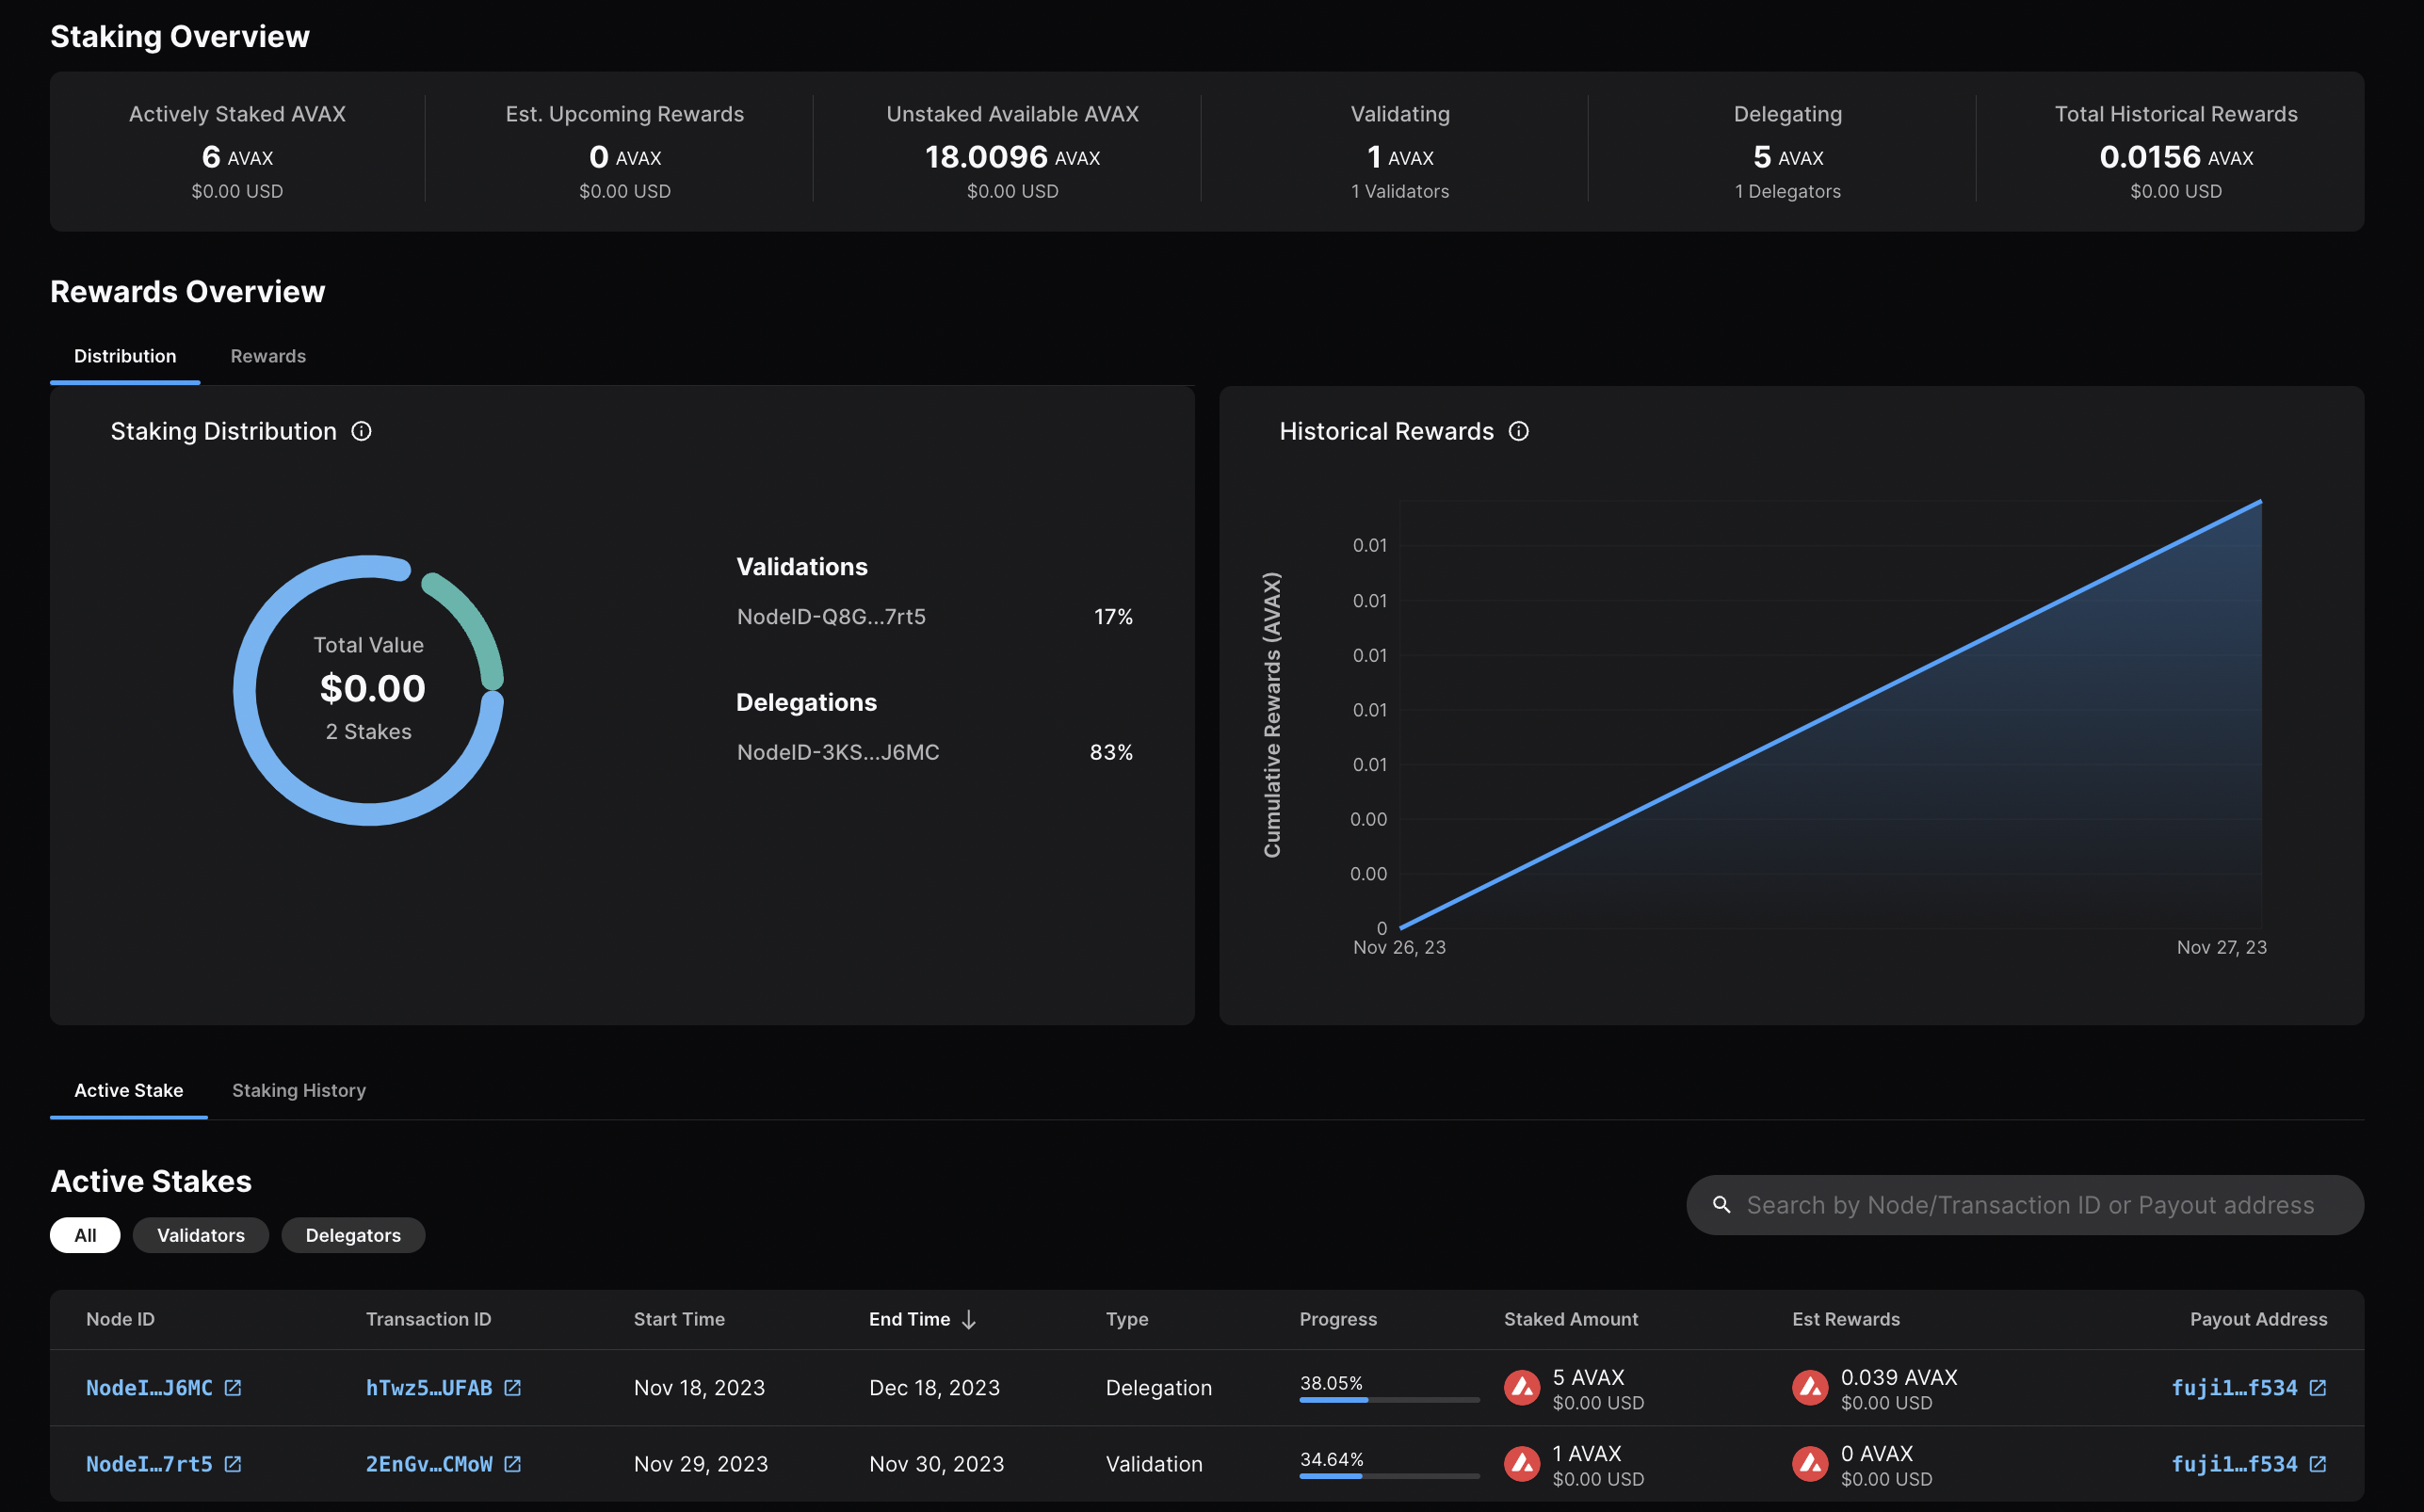
Calling
[`platform.getPendingValidators`](/docs/api-reference/p-chain/api#platformgetpendingvalidators)
verifies that your transaction was accepted. Note that this API call should be
made before your node's validation start time, otherwise, the return will not
include your node's id as it is no longer pending.
You can also call
[`platform.getCurrentValidators`](/docs/api-reference/p-chain/api#platformgetcurrentvalidators)
to check that your node's id is included in the response.
That's it!
## Add a Validator with AvalancheJS
We can also add a node to the validator set using [AvalancheJS](/docs/tooling/avalanche-js).
### Install AvalancheJS
To use AvalancheJS, you can clone the repo:
```bash
git clone https://github.com/ava-labs/avalanchejs.git
```
The repository cloning method used is HTTPS, but SSH can be used too:
`git clone git@github.com:ava-labs/avalanchejs.git`
You can find more about SSH and how to use it
[here](https://docs.github.com/en/authentication/connecting-to-github-with-ssh/about-ssh).
or add it to an existing project:
```bash
yarn add @avalabs/avalanchejs
```
For this tutorial we will use [`ts-node`](https://www.npmjs.com/package/ts-node)
to run the example scripts directly from an AvalancheJS directory.
### Fuji Workflow
In this section, we will use Fuji Testnet to show how to add a node to the validator set.
Open your AvalancheJS directory and select the
[**`examples/p-chain`**](https://github.com/ava-labs/avalanchejs/tree/master/examples/p-chain)
folder to view the source code for the examples scripts.
We will use the
[**`validate.ts`**](https://github.com/ava-labs/avalanchejs/blob/master/examples/p-chain/validate.ts)
script to add a validator.
#### Add Necessary Environment Variables
Locate the `.env.example` file at the root of AvalancheJS, and remove `.example`
from the title. Now, this will be the `.env` file for global variables.
Add the private key and the P-Chain address associated with it.
The API URL is already set to Fuji (`https://api.avax-test.network/`).
#### Retrieve the Node ID, the BLS signature and the BLS key
Get this info by calling [`info.getNodeID`](/docs/api-reference/info-api#infogetnodeid):
```bash
curl -X POST --data '{
"jsonrpc":"2.0",
"id" :1,
"method" :"info.getNodeID"
}' -H 'content-type:application/json' 127.0.0.1:9650/ext/info
```
The response has your node's ID, the BLS key (public key) and the BLS signature (proof of possession):
```json
{
"jsonrpc": "2.0",
"result": {
"nodeID": "NodeID-JXJNyJXhgXzvVGisLkrDiZvF938zJxnT5",
"nodePOP": {
"publicKey": "0xb982b485916c1d74e3b749e7ce49730ac0e52d28279ce4c5c989d75a43256d3012e04b1de0561276631ea6c2c8dc4429",
"proofOfPossession": "0xb6cdf3927783dba3245565bd9451b0c2a39af2087fdf401956489b42461452ec7639b9082195b7181907177b1ea09a6200a0d32ebbc668d9c1e9156872633cfb7e161fbd0e75943034d28b25ec9d9cdf2edad4aaf010adf804af8f6d0d5440c5"
}
},
"id": 1
}
```
#### Fill in the Node ID, the BLS signature and the BLS key
After retrieving this data, go to `examples/p-chain/validate.ts`.
Replace the `nodeID`, `blsPublicKey` and `blsSignature` with your
own node's values.

#### Settings for Validation
Next we need to specify the node's validation period and delegation fee.
#### Validation Period
The validation period is set by default to 21 days, the start date
being the date and time the transaction is issued. The start date
cannot be modified.
The end date can be adjusted in the code.
Let's say we want the validation period to end after 50 days.
You can achieve this by adding the number of desired days to
`endTime.getDate()`, in this case `50`.
```ts
// move ending date 50 days into the future
endTime.setDate(endTime.getDate() + 50);
```
Now let's say you want the staking period to end on a specific
date and time, for example May 15, 2024, at 11:20 AM.
It can be achieved as shown in the code below.
```ts
const startTime = await new PVMApi().getTimestamp();
const startDate = new Date(startTime.timestamp);
const start = BigInt(startDate.getTime() / 1000);
// Set the end time to a specific date and time
const endTime = new Date('2024-05-15T11:20:00'); // May 15, 2024, at 11:20 AM
const end = BigInt(endTime.getTime() / 1000);
```
#### Delegation Fee Rate
Avalanche allows for delegation of stake. This parameter is the percent fee this
validator charges when others delegate stake to them. For example, if
`delegationFeeRate` is `10` and someone delegates to this validator, then when
the delegation period is over, 10% of the reward goes to the validator and the
rest goes to the delegator, if this node meets the validation reward
requirements.
The delegation fee on AvalancheJS is set `20`. To change this, you need
to provide the desired fee percent as a parameter to `newAddPermissionlessValidatorTx`,
which is by default `1e4 * 20`.
For example, if you'd want it to be `10`, the updated code would look like this:
```ts
const tx = newAddPermissionlessValidatorTx(
context,
utxos,
[bech32ToBytes(P_CHAIN_ADDRESS)],
nodeID,
PrimaryNetworkID.toString(),
start,
end,
BigInt(1e9),
[bech32ToBytes(P_CHAIN_ADDRESS)],
[bech32ToBytes(P_CHAIN_ADDRESS)],
1e4 * 10, // delegation fee, replaced 20 with 10
undefined,
1,
0n,
blsPublicKey,
blsSignature,
);
```
#### Stake Amount
Set the amount being locked for validation when calling
`newAddPermissionlessValidatorTx` by replacing `weight` with a number
in the unit of nAVAX. For example, `2 AVAX` would be `2e9 nAVAX`.
```ts
const tx = newAddPermissionlessValidatorTx(
context,
utxos,
[bech32ToBytes(P_CHAIN_ADDRESS)],
nodeID,
PrimaryNetworkID.toString(),
start,
end,
BigInt(2e9), // the amount to stake
[bech32ToBytes(P_CHAIN_ADDRESS)],
[bech32ToBytes(P_CHAIN_ADDRESS)],
1e4 * 10,
undefined,
1,
0n,
blsPublicKey,
blsSignature,
);
```
#### Execute the Code
Now that we have made all of the necessary changes to the example script, it's
time to add a validator to the Fuji Network.
Run the command:
```bash
node --loader ts-node/esm examples/p-chain/validate.ts
```
The response:
```bash
laviniatalpas@Lavinias-MacBook-Pro avalanchejs % node --loader ts-node/esm examples/p-chain/validate.ts
(node:87616) ExperimentalWarning: `--experimental-loader` may be removed in the future; instead use `register()`:
--import 'data:text/javascript,import { register } from "node:module"; import { pathToFileURL } from "node:url"; register("ts-node/esm", pathToFileURL("./"));'
(Use `node --trace-warnings ...` to show where the warning was created)
{ txID: 'RVe3CFRieRbBvKXKPu24Zbt1QehdyGVT6X4tPWVBeACPX3Ab8' }
```
We can check the transaction's status by running the example script with
[`platform.getTxStatus`](/docs/api-reference/p-chain/api#platformgettxstatus)
or looking up the validator directly on the
[explorer](https://subnets-test.avax.network/validators/NodeID-JXJNyJXhgXzvVGisLkrDiZvF938zJxnT5).
### Mainnet Workflow
The Fuji workflow above can be adapted to Mainnet with the following modifications:
- `AVAX_PUBLIC_URL` should be `https://api.avax.network/`.
- `P_CHAIN_ADDRESS` should be the Mainnet P-Chain address.
- Set the correct amount to stake.
- The `blsPublicKey`, `blsSignature` and `nodeID` need to be the ones for your Mainnet Node.
# Validate vs. Delegate (/docs/nodes/validate/validate-vs-delegate)
---
title: Validate vs. Delegate
description: Understand the difference between validation and delegation.
---
Validation[](#validation "Direct link to heading")
---------------------------------------------------
Validation in the context of staking refers to the act of running a node on the blockchain network to validate transactions and secure the network.
- **Stake Requirement**: To become a validator on the Avalanche network, one must stake a minimum amount of 2,000 AVAX tokens on the Mainnet (1 AVAX on the Fuji Testnet).
- **Process**: Validators participate in achieving consensus by repeatedly sampling other validators. The probability of being sampled is proportional to the validator's stake, meaning the more tokens a validator stakes, the more influential they are in the consensus process.
- **Rewards**: Validators are eligible to receive rewards for their efforts in securing the network. To receive rewards, a validator must be online and responsive for more than 80% of their validation period.
Delegation[](#delegation "Direct link to heading")
---------------------------------------------------
Delegation allows token holders who do not wish to run their own validator node to still participate in staking by "delegating" their tokens to an existing validator node.
- **Stake Requirement**: To delegate on the Avalanche network, a minimum of 25 AVAX tokens is required on the Mainnet (1 AVAX on the Fuji Testnet).
- **Process**: Delegators choose a specific validator node to delegate their tokens to, trusting that the validator will behave correctly and help secure the network on their behalf.
- **Rewards**: Delegators are also eligible to receive rewards for their stake. The validator they delegate to shares a portion of the reward with them, according to the validator's delegation fee rate.
Key Differences[](#key-differences "Direct link to heading")
-------------------------------------------------------------
- **Responsibilities**: Validators actively run a node, validate transactions, and actively participate in securing the network. Delegators, on the other hand, do not run a node themselves but entrust their tokens to a validator to participate on their behalf.
- **Stake Requirement**: Validators have a higher minimum stake requirement compared to delegators, as they take on more responsibility in the network.
- **Rewards Distribution**: Validators receive rewards directly for their validation efforts. Delegators receive rewards indirectly through the validator they delegate to, sharing a portion of the validator's reward.
In summary, validation involves actively participating in securing the network by running a node, while delegation allows token holders to participate passively by trusting their stake to a chosen validator. Both validators and delegators can earn rewards, but validators have higher stakes and more direct involvement in the Avalanche network.
# What Is Staking? (/docs/nodes/validate/what-is-staking)
---
title: What Is Staking?
description: Learn about staking and how it works in Avalanche.
---
Staking is the process where users lock up their tokens to support a blockchain network and, in return, receive rewards. It is an essential part of proof-of-stake (PoS) consensus mechanisms used by many blockchain networks, including Avalanche. PoS systems require participants to stake a certain amount of tokens as collateral to participate in the network and validate transactions.
How Does Proof-of-Stake Work?[](#how-does-proof-of-stake-work "Direct link to heading")
----------------------------------------------------------------------------------------
To resist [sybil attacks](https://support.avalabs.org/en/articles/4064853-what-is-a-sybil-attack), a decentralized network must require that network influence is paid with a scarce resource. This makes it infeasibly expensive for an attacker to gain enough influence over the network to compromise its security. On Avalanche, the scarce resource is the native token, [AVAX](/docs/quick-start/avax-token). For a node to validate a blockchain on Avalanche, it must stake AVAX.
# Fuji Testnet (/docs/quick-start/networks/fuji-testnet)
---
title: Fuji Testnet
description: Learn about the official Testnet for the Avalanche ecosystem.
---
Fuji's infrastructure imitates Avalanche Mainnet. It's comprised of a [Primary Network](/docs/quick-start/primary-network) formed by instances of X, P, and C-Chain, as well as many test Avalanche L1s.
## When to Use Fuji
Fuji provides users with a platform to simulate the conditions found in the Mainnet environment. It enables developers to deploy demo Smart Contracts, allowing them to test and refine their applications before deploying them on the [Primary Network](/docs/quick-start/primary-network).
Users interested in experimenting with Avalanche can receive free testnet AVAX, allowing them to explore the platform without any risk. These testnet tokens have no value in the real world and are only meant for experimentation purposes within the Fuji test network.
To receive testnet tokens, users can request funds from the [Avalanche Faucet](/docs/dapps/smart-contract-dev/get-test-funds). If there's already an AVAX balance greater than zero on Mainnet, paste the C-Chain address there, and request test tokens. Otherwise, please request a faucet coupon on [Guild](https://guild.xyz/avalanche). Admins and mods on the official [Discord](https://discord.com/invite/RwXY7P6) can provide testnet AVAX if developers are unable to obtain it from the other two options.
## Add Avalanche C-Chain Testnet to Wallet
- **Network Name**: Avalanche Fuji C-Chain
- **RPC URL**: https://api.avax-test.network/ext/bc/C/rpc
- **WebSocket URL**: wss://api.avax-test.network/ext/bc/C/ws
- **ChainID**: `43113`
- **Symbol**: `AVAX`
- **Explorer**: https://subnets-test.avax.network/c-chain
Head over to explorer linked above and select "Add Avalanche C-Chain to Wallet" under "Chain Info" to automatically add the network.
## Additional Details
- Fuji Testnet has its own dedicated [block explorer](https://subnets-test.avax.network/).
- The Public API endpoint for Fuji is not the same as Mainnet. More info is available in the [Public API Server](/docs/tooling/rpc-providers) documentation.
- You can run a Fuji validator node by staking only **1 Fuji AVAX**.
# Avalanche Mainnet (/docs/quick-start/networks/mainnet)
---
title: Avalanche Mainnet
description: Learn about the Avalanche Mainnet.
---
The Avalanche Mainnet refers to the main network of the Avalanche blockchain where real transactions and smart contract executions occur. It is the final and production-ready version of the blockchain where users can interact with the network and transact with real world assets.
A _network of networks_, Avalanche Mainnet includes the [Primary Network](/docs/quick-start/primary-network) formed by the X, P, and C-Chain, as well as all in-production [Avalanche L1s](/docs/quick-start/avalanche-l1s).
These Avalanche L1s are independent blockchain sub-networks that can be tailored to specific application use cases, use their own consensus mechanisms, define their own token economics, and be run by different [virtual machines](/docs/quick-start/virtual-machines).
## Add Avalanche C-Chain Mainnet to Wallet
- **Network Name**: Avalanche Mainnet C-Chain
- **RPC URL**: https://api.avax.network/ext/bc/C/rpc
- **WebSocket URL**: wss://api.avax.network/ext/bc/C/ws
- **ChainID**: `43114`
- **Symbol**: `AVAX`
- **Explorer**: https://subnets.avax.network/c-chain
Head over to explorer linked above and select "Add Avalanche C-Chain to Wallet" under "Chain Info" to automatically add the network.
# CLI Commands (/docs/tooling/avalanche-cli/cli-commands)
---
title: "CLI Commands"
description: "Complete list of Avalanche CLI commands and their usage."
edit_url: https://github.com/ava-labs/avalanche-cli/edit/main/cmd/commands.md
---
## avalanche blockchain
The blockchain command suite provides a collection of tools for developing
and deploying Blockchains.
To get started, use the blockchain create command wizard to walk through the
configuration of your very first Blockchain. Then, go ahead and deploy it
with the blockchain deploy command. You can use the rest of the commands to
manage your Blockchain configurations and live deployments.
**Usage:**
```bash
avalanche blockchain [subcommand] [flags]
```
**Subcommands:**
- [`addValidator`](#avalanche-blockchain-addvalidator): The blockchain addValidator command adds a node as a validator to
an L1 of the user provided deployed network. If the network is proof of
authority, the owner of the validator manager contract must sign the
transaction. If the network is proof of stake, the node must stake the L1's
staking token. Both processes will issue a RegisterL1ValidatorTx on the P-Chain.
This command currently only works on Blockchains deployed to either the Fuji
Testnet or Mainnet.
- [`changeOwner`](#avalanche-blockchain-changeowner): The blockchain changeOwner changes the owner of the deployed Blockchain.
- [`changeWeight`](#avalanche-blockchain-changeweight): The blockchain changeWeight command changes the weight of a L1 Validator.
The L1 has to be a Proof of Authority L1.
- [`configure`](#avalanche-blockchain-configure): AvalancheGo nodes support several different configuration files.
Each network (a Subnet or an L1) has their own config which applies to all blockchains/VMs in the network (see https://build.avax.network/docs/nodes/configure/avalanche-l1-configs)
Each blockchain within the network can have its own chain config (see https://build.avax.network/docs/nodes/chain-configs/c-chain https://github.com/ava-labs/subnet-evm/blob/master/plugin/evm/config/config.go for subnet-evm options).
A chain can also have special requirements for the AvalancheGo node configuration itself (see https://build.avax.network/docs/nodes/configure/configs-flags).
This command allows you to set all those files.
- [`create`](#avalanche-blockchain-create): The blockchain create command builds a new genesis file to configure your Blockchain.
By default, the command runs an interactive wizard. It walks you through
all the steps you need to create your first Blockchain.
The tool supports deploying Subnet-EVM, and custom VMs. You
can create a custom, user-generated genesis with a custom VM by providing
the path to your genesis and VM binaries with the --genesis and --vm flags.
By default, running the command with a blockchainName that already exists
causes the command to fail. If you'd like to overwrite an existing
configuration, pass the -f flag.
- [`delete`](#avalanche-blockchain-delete): The blockchain delete command deletes an existing blockchain configuration.
- [`deploy`](#avalanche-blockchain-deploy): The blockchain deploy command deploys your Blockchain configuration locally, to Fuji Testnet, or to Mainnet.
At the end of the call, the command prints the RPC URL you can use to interact with the Subnet.
Avalanche-CLI only supports deploying an individual Blockchain once per network. Subsequent
attempts to deploy the same Blockchain to the same network (local, Fuji, Mainnet) aren't
allowed. If you'd like to redeploy a Blockchain locally for testing, you must first call
avalanche network clean to reset all deployed chain state. Subsequent local deploys
redeploy the chain with fresh state. You can deploy the same Blockchain to multiple networks,
so you can take your locally tested Blockchain and deploy it on Fuji or Mainnet.
- [`describe`](#avalanche-blockchain-describe): The blockchain describe command prints the details of a Blockchain configuration to the console.
By default, the command prints a summary of the configuration. By providing the --genesis
flag, the command instead prints out the raw genesis file.
- [`export`](#avalanche-blockchain-export): The blockchain export command write the details of an existing Blockchain deploy to a file.
The command prompts for an output path. You can also provide one with
the --output flag.
- [`import`](#avalanche-blockchain-import): Import blockchain configurations into avalanche-cli.
This command suite supports importing from a file created on another computer,
or importing from blockchains running public networks
(e.g. created manually or with the deprecated subnet-cli)
- [`join`](#avalanche-blockchain-join): The blockchain join command configures your validator node to begin validating a new Blockchain.
To complete this process, you must have access to the machine running your validator. If the
CLI is running on the same machine as your validator, it can generate or update your node's
config file automatically. Alternatively, the command can print the necessary instructions
to update your node manually. To complete the validation process, the Blockchain's admins must add
the NodeID of your validator to the Blockchain's allow list by calling addValidator with your
NodeID.
After you update your validator's config, you need to restart your validator manually. If
you provide the --avalanchego-config flag, this command attempts to edit the config file
at that path.
This command currently only supports Blockchains deployed on the Fuji Testnet and Mainnet.
- [`list`](#avalanche-blockchain-list): The blockchain list command prints the names of all created Blockchain configurations. Without any flags,
it prints some general, static information about the Blockchain. With the --deployed flag, the command
shows additional information including the VMID, BlockchainID and SubnetID.
- [`publish`](#avalanche-blockchain-publish): The blockchain publish command publishes the Blockchain's VM to a repository.
- [`removeValidator`](#avalanche-blockchain-removevalidator): The blockchain removeValidator command stops a whitelisted blockchain network validator from
validating your deployed Blockchain.
To remove the validator from the Subnet's allow list, provide the validator's unique NodeID. You can bypass
these prompts by providing the values with flags.
- [`stats`](#avalanche-blockchain-stats): The blockchain stats command prints validator statistics for the given Blockchain.
- [`upgrade`](#avalanche-blockchain-upgrade): The blockchain upgrade command suite provides a collection of tools for
updating your developmental and deployed Blockchains.
- [`validators`](#avalanche-blockchain-validators): The blockchain validators command lists the validators of a blockchain and provides
several statistics about them.
- [`vmid`](#avalanche-blockchain-vmid): The blockchain vmid command prints the virtual machine ID (VMID) for the given Blockchain.
**Flags:**
```bash
-h, --help help for blockchain
--config string config file (default is $HOME/.avalanche-cli/config.json)
--log-level string log level for the application (default "ERROR")
--skip-update-check skip check for new versions
```
### addValidator
The blockchain addValidator command adds a node as a validator to
an L1 of the user provided deployed network. If the network is proof of
authority, the owner of the validator manager contract must sign the
transaction. If the network is proof of stake, the node must stake the L1's
staking token. Both processes will issue a RegisterL1ValidatorTx on the P-Chain.
This command currently only works on Blockchains deployed to either the Fuji
Testnet or Mainnet.
**Usage:**
```bash
avalanche blockchain addValidator [subcommand] [flags]
```
**Flags:**
```bash
--aggregator-allow-private-peers allow the signature aggregator to connect to peers with private IP (default true)
--aggregator-extra-endpoints strings endpoints for extra nodes that are needed in signature aggregation
--aggregator-log-level string log level to use with signature aggregator (default "Debug")
--aggregator-log-to-stdout use stdout for signature aggregator logs
--balance float set the AVAX balance of the validator that will be used for continuous fee on P-Chain
--blockchain-genesis-key use genesis allocated key to pay fees for completing the validator's registration (blockchain gas token)
--blockchain-key string CLI stored key to use to pay fees for completing the validator's registration (blockchain gas token)
--blockchain-private-key string private key to use to pay fees for completing the validator's registration (blockchain gas token)
--bls-proof-of-possession string set the BLS proof of possession of the validator to add
--bls-public-key string set the BLS public key of the validator to add
--cluster string operate on the given cluster
--create-local-validator create additional local validator and add it to existing running local node
--default-duration (for Subnets, not L1s) set duration so as to validate until primary validator ends its period
--default-start-time (for Subnets, not L1s) use default start time for subnet validator (5 minutes later for fuji & mainnet, 30 seconds later for devnet)
--default-validator-params (for Subnets, not L1s) use default weight/start/duration params for subnet validator
--delegation-fee uint16 (PoS only) delegation fee (in bips) (default 100)
--devnet operate on a devnet network
--disable-owner string P-Chain address that will able to disable the validator with a P-Chain transaction
--endpoint string use the given endpoint for network operations
-e, --ewoq use ewoq key [fuji/devnet only]
-f, --fuji testnet operate on fuji (alias to testnet
-h, --help help for addValidator
-k, --key string select the key to use [fuji/devnet only]
-g, --ledger use ledger instead of key (always true on mainnet, defaults to false on fuji/devnet)
--ledger-addrs strings use the given ledger addresses
-l, --local operate on a local network
-m, --mainnet operate on mainnet
--node-endpoint string gather node id/bls from publicly available avalanchego apis on the given endpoint
--node-id string node-id of the validator to add
--output-tx-path string (for Subnets, not L1s) file path of the add validator tx
--partial-sync set primary network partial sync for new validators (default true)
--remaining-balance-owner string P-Chain address that will receive any leftover AVAX from the validator when it is removed from Subnet
--rpc string connect to validator manager at the given rpc endpoint
--stake-amount uint (PoS only) amount of tokens to stake
--staking-period duration how long this validator will be staking
--start-time string (for Subnets, not L1s) UTC start time when this validator starts validating, in 'YYYY-MM-DD HH:MM:SS' format
--subnet-auth-keys strings (for Subnets, not L1s) control keys that will be used to authenticate add validator tx
-t, --testnet fuji operate on testnet (alias to fuji)
--wait-for-tx-acceptance (for Subnets, not L1s) just issue the add validator tx, without waiting for its acceptance (default true)
--weight uint set the staking weight of the validator to add (default 20)
--config string config file (default is $HOME/.avalanche-cli/config.json)
--log-level string log level for the application (default "ERROR")
--skip-update-check skip check for new versions
```
### changeOwner
The blockchain changeOwner changes the owner of the deployed Blockchain.
**Usage:**
```bash
avalanche blockchain changeOwner [subcommand] [flags]
```
**Flags:**
```bash
--auth-keys strings control keys that will be used to authenticate transfer blockchain ownership tx
--cluster string operate on the given cluster
--control-keys strings addresses that may make blockchain changes
--devnet operate on a devnet network
--endpoint string use the given endpoint for network operations
-e, --ewoq use ewoq key [fuji/devnet]
-f, --fuji testnet operate on fuji (alias to testnet
-h, --help help for changeOwner
-k, --key string select the key to use [fuji/devnet]
-g, --ledger use ledger instead of key (always true on mainnet, defaults to false on fuji/devnet)
--ledger-addrs strings use the given ledger addresses
-l, --local operate on a local network
-m, --mainnet operate on mainnet
--output-tx-path string file path of the transfer blockchain ownership tx
-s, --same-control-key use the fee-paying key as control key
-t, --testnet fuji operate on testnet (alias to fuji)
--threshold uint32 required number of control key signatures to make blockchain changes
--config string config file (default is $HOME/.avalanche-cli/config.json)
--log-level string log level for the application (default "ERROR")
--skip-update-check skip check for new versions
```
### changeWeight
The blockchain changeWeight command changes the weight of a L1 Validator.
The L1 has to be a Proof of Authority L1.
**Usage:**
```bash
avalanche blockchain changeWeight [subcommand] [flags]
```
**Flags:**
```bash
--cluster string operate on the given cluster
--devnet operate on a devnet network
--endpoint string use the given endpoint for network operations
-e, --ewoq use ewoq key [fuji/devnet only]
-f, --fuji testnet operate on fuji (alias to testnet
-h, --help help for changeWeight
-k, --key string select the key to use [fuji/devnet only]
-g, --ledger use ledger instead of key (always true on mainnet, defaults to false on fuji/devnet)
--ledger-addrs strings use the given ledger addresses
-l, --local operate on a local network
-m, --mainnet operate on mainnet
--node-endpoint string gather node id/bls from publicly available avalanchego apis on the given endpoint
--node-id string node-id of the validator
-t, --testnet fuji operate on testnet (alias to fuji)
--weight uint set the new staking weight of the validator
--config string config file (default is $HOME/.avalanche-cli/config.json)
--log-level string log level for the application (default "ERROR")
--skip-update-check skip check for new versions
```
### configure
AvalancheGo nodes support several different configuration files.
Each network (a Subnet or an L1) has their own config which applies to all blockchains/VMs in the network (see https://build.avax.network/docs/nodes/configure/avalanche-l1-configs)
Each blockchain within the network can have its own chain config (see https://build.avax.network/docs/nodes/chain-configs/c-chain https://github.com/ava-labs/subnet-evm/blob/master/plugin/evm/config/config.go for subnet-evm options).
A chain can also have special requirements for the AvalancheGo node configuration itself (see https://build.avax.network/docs/nodes/configure/configs-flags).
This command allows you to set all those files.
**Usage:**
```bash
avalanche blockchain configure [subcommand] [flags]
```
**Flags:**
```bash
--chain-config string path to the chain configuration
-h, --help help for configure
--node-config string path to avalanchego node configuration
--per-node-chain-config string path to per node chain configuration for local network
--subnet-config string path to the subnet configuration
--config string config file (default is $HOME/.avalanche-cli/config.json)
--log-level string log level for the application (default "ERROR")
--skip-update-check skip check for new versions
```
### create
The blockchain create command builds a new genesis file to configure your Blockchain.
By default, the command runs an interactive wizard. It walks you through
all the steps you need to create your first Blockchain.
The tool supports deploying Subnet-EVM, and custom VMs. You
can create a custom, user-generated genesis with a custom VM by providing
the path to your genesis and VM binaries with the --genesis and --vm flags.
By default, running the command with a blockchainName that already exists
causes the command to fail. If you'd like to overwrite an existing
configuration, pass the -f flag.
**Usage:**
```bash
avalanche blockchain create [subcommand] [flags]
```
**Flags:**
```bash
--custom use a custom VM template
--custom-vm-branch string custom vm branch or commit
--custom-vm-build-script string custom vm build-script
--custom-vm-path string file path of custom vm to use
--custom-vm-repo-url string custom vm repository url
--debug enable blockchain debugging (default true)
--evm use the Subnet-EVM as the base template
--evm-chain-id uint chain ID to use with Subnet-EVM
--evm-defaults deprecation notice: use '--production-defaults'
--evm-token string token symbol to use with Subnet-EVM
--external-gas-token use a gas token from another blockchain
-f, --force overwrite the existing configuration if one exists
--from-github-repo generate custom VM binary from github repository
--genesis string file path of genesis to use
-h, --help help for create
--icm interoperate with other blockchains using ICM
--icm-registry-at-genesis setup ICM registry smart contract on genesis [experimental]
--latest use latest Subnet-EVM released version, takes precedence over --vm-version
--pre-release use latest Subnet-EVM pre-released version, takes precedence over --vm-version
--production-defaults use default production settings for your blockchain
--proof-of-authority use proof of authority(PoA) for validator management
--proof-of-stake use proof of stake(PoS) for validator management
--proxy-contract-owner string EVM address that controls ProxyAdmin for TransparentProxy of ValidatorManager contract
--reward-basis-points uint (PoS only) reward basis points for PoS Reward Calculator (default 100)
--sovereign set to false if creating non-sovereign blockchain (default true)
--teleporter interoperate with other blockchains using ICM
--test-defaults use default test settings for your blockchain
--validator-manager-owner string EVM address that controls Validator Manager Owner
--vm string file path of custom vm to use. alias to custom-vm-path
--vm-version string version of Subnet-EVM template to use
--warp generate a vm with warp support (needed for ICM) (default true)
--config string config file (default is $HOME/.avalanche-cli/config.json)
--log-level string log level for the application (default "ERROR")
--skip-update-check skip check for new versions
```
### delete
The blockchain delete command deletes an existing blockchain configuration.
**Usage:**
```bash
avalanche blockchain delete [subcommand] [flags]
```
**Flags:**
```bash
-h, --help help for delete
--config string config file (default is $HOME/.avalanche-cli/config.json)
--log-level string log level for the application (default "ERROR")
--skip-update-check skip check for new versions
```
### deploy
The blockchain deploy command deploys your Blockchain configuration to Local Network, to Fuji Testnet, DevNet or to Mainnet.
At the end of the call, the command prints the RPC URL you can use to interact with the L1 / Subnet.
When deploying an L1, Avalanche-CLI lets you use your local machine as a bootstrap validator, so you don't need to run separate Avalanche nodes.
This is controlled by the --use-local-machine flag (enabled by default on Local Network).
If --use-local-machine is set to true:
- Avalanche-CLI will call CreateSubnetTx, CreateChainTx, ConvertSubnetToL1Tx, followed by syncing the local machine bootstrap validator to the L1 and initialize
Validator Manager Contract on the L1
If using your own Avalanche Nodes as bootstrap validators:
- Avalanche-CLI will call CreateSubnetTx, CreateChainTx, ConvertSubnetToL1Tx
- You will have to sync your bootstrap validators to the L1
- Next, Initialize Validator Manager contract on the L1 using avalanche contract initValidatorManager [L1_Name]
Avalanche-CLI only supports deploying an individual Blockchain once per network. Subsequent
attempts to deploy the same Blockchain to the same network (Local Network, Fuji, Mainnet) aren't
allowed. If you'd like to redeploy a Blockchain locally for testing, you must first call
avalanche network clean to reset all deployed chain state. Subsequent local deploys
redeploy the chain with fresh state. You can deploy the same Blockchain to multiple networks,
so you can take your locally tested Blockchain and deploy it on Fuji or Mainnet.
**Usage:**
```bash
avalanche blockchain deploy [subcommand] [flags]
```
**Flags:**
```bash
--convert-only avoid node track, restart and poa manager setup
-e, --ewoq use ewoq key [local/devnet deploy only]
-h, --help help for deploy
-k, --key string select the key to use [fuji/devnet deploy only]
-g, --ledger use ledger instead of key
--ledger-addrs strings use the given ledger addresses
--mainnet-chain-id uint32 use different ChainID for mainnet deployment
--output-tx-path string file path of the blockchain creation tx (for multi-sig signing)
-u, --subnet-id string do not create a subnet, deploy the blockchain into the given subnet id
--subnet-only command stops after CreateSubnetTx and returns SubnetID
Network Flags (Select One):
--cluster string operate on the given cluster
--devnet operate on a devnet network
--endpoint string use the given endpoint for network operations
--fuji operate on fuji (alias to `testnet`)
--local operate on a local network
--mainnet operate on mainnet
--testnet operate on testnet (alias to `fuji`)
Bootstrap Validators Flags:
--balance float64 set the AVAX balance of each bootstrap validator that will be used for continuous fee on P-Chain (setting balance=1 equals to 1 AVAX for each bootstrap validator)
--bootstrap-endpoints stringSlice take validator node info from the given endpoints
--bootstrap-filepath string JSON file path that provides details about bootstrap validators
--change-owner-address string address that will receive change if node is no longer L1 validator
--generate-node-id set to true to generate Node IDs for bootstrap validators when none are set up. Use these Node IDs to set up your Avalanche Nodes.
--num-bootstrap-validators int number of bootstrap validators to set up in sovereign L1 validator)
Local Machine Flags (Use Local Machine as Bootstrap Validator):
--avalanchego-path string use this avalanchego binary path
--avalanchego-version string use this version of avalanchego (ex: v1.17.12)
--http-port uintSlice http port for node(s)
--partial-sync set primary network partial sync for new validators
--staking-cert-key-path stringSlice path to provided staking cert key for node(s)
--staking-port uintSlice staking port for node(s)
--staking-signer-key-path stringSlice path to provided staking signer key for node(s)
--staking-tls-key-path stringSlice path to provided staking TLS key for node(s)
--use-local-machine use local machine as a blockchain validator
Local Network Flags:
--avalanchego-path string use this avalanchego binary path
--avalanchego-version string use this version of avalanchego (ex: v1.17.12)
--num-nodes uint32 number of nodes to be created on local network deploy
Non Subnet-Only-Validators (Non-SOV) Flags:
--auth-keys stringSlice control keys that will be used to authenticate chain creation
--control-keys stringSlice addresses that may make blockchain changes
--same-control-key use the fee-paying key as control key
--threshold uint32 required number of control key signatures to make blockchain changes
ICM Flags:
--cchain-funding-key string key to be used to fund relayer account on cchain
--cchain-icm-key string key to be used to pay for ICM deploys on C-Chain
--icm-key string key to be used to pay for ICM deploys
--icm-version string ICM version to deploy
--relay-cchain relay C-Chain as source and destination
--relayer-allow-private-ips allow relayer to connec to private ips
--relayer-amount float64 automatically fund relayer fee payments with the given amount
--relayer-key string key to be used by default both for rewards and to pay fees
--relayer-log-level string log level to be used for relayer logs
--relayer-path string relayer binary to use
--relayer-version string relayer version to deploy
--skip-icm-deploy Skip automatic ICM deploy
--skip-relayer skip relayer deploy
--teleporter-messenger-contract-address-path string path to an ICM Messenger contract address file
--teleporter-messenger-deployer-address-path string path to an ICM Messenger deployer address file
--teleporter-messenger-deployer-tx-path string path to an ICM Messenger deployer tx file
--teleporter-registry-bytecode-path string path to an ICM Registry bytecode file
Proof Of Stake Flags:
--pos-maximum-stake-amount uint64 maximum stake amount
--pos-maximum-stake-multiplier uint8 maximum stake multiplier
--pos-minimum-delegation-fee uint16 minimum delegation fee
--pos-minimum-stake-amount uint64 minimum stake amount
--pos-minimum-stake-duration uint64 minimum stake duration (in seconds)
--pos-weight-to-value-factor uint64 weight to value factor
Signature Aggregator Flags:
--aggregator-log-level string log level to use with signature aggregator
--aggregator-log-to-stdout use stdout for signature aggregator logs
```
### describe
The blockchain describe command prints the details of a Blockchain configuration to the console.
By default, the command prints a summary of the configuration. By providing the --genesis
flag, the command instead prints out the raw genesis file.
**Usage:**
```bash
avalanche blockchain describe [subcommand] [flags]
```
**Flags:**
```bash
-g, --genesis Print the genesis to the console directly instead of the summary
-h, --help help for describe
--config string config file (default is $HOME/.avalanche-cli/config.json)
--log-level string log level for the application (default "ERROR")
--skip-update-check skip check for new versions
```
### export
The blockchain export command write the details of an existing Blockchain deploy to a file.
The command prompts for an output path. You can also provide one with
the --output flag.
**Usage:**
```bash
avalanche blockchain export [subcommand] [flags]
```
**Flags:**
```bash
--custom-vm-branch string custom vm branch
--custom-vm-build-script string custom vm build-script
--custom-vm-repo-url string custom vm repository url
-h, --help help for export
-o, --output string write the export data to the provided file path
--config string config file (default is $HOME/.avalanche-cli/config.json)
--log-level string log level for the application (default "ERROR")
--skip-update-check skip check for new versions
```
### import
Import blockchain configurations into avalanche-cli.
This command suite supports importing from a file created on another computer,
or importing from blockchains running public networks
(e.g. created manually or with the deprecated subnet-cli)
**Usage:**
```bash
avalanche blockchain import [subcommand] [flags]
```
**Subcommands:**
- [`file`](#avalanche-blockchain-import-file): The blockchain import command will import a blockchain configuration from a file or a git repository.
To import from a file, you can optionally provide the path as a command-line argument.
Alternatively, running the command without any arguments triggers an interactive wizard.
To import from a repository, go through the wizard. By default, an imported Blockchain doesn't
overwrite an existing Blockchain with the same name. To allow overwrites, provide the --force
flag.
- [`public`](#avalanche-blockchain-import-public): The blockchain import public command imports a Blockchain configuration from a running network.
By default, an imported Blockchain
doesn't overwrite an existing Blockchain with the same name. To allow overwrites, provide the --force
flag.
**Flags:**
```bash
-h, --help help for import
--config string config file (default is $HOME/.avalanche-cli/config.json)
--log-level string log level for the application (default "ERROR")
--skip-update-check skip check for new versions
```
#### import file
The blockchain import command will import a blockchain configuration from a file or a git repository.
To import from a file, you can optionally provide the path as a command-line argument.
Alternatively, running the command without any arguments triggers an interactive wizard.
To import from a repository, go through the wizard. By default, an imported Blockchain doesn't
overwrite an existing Blockchain with the same name. To allow overwrites, provide the --force
flag.
**Usage:**
```bash
avalanche blockchain import file [subcommand] [flags]
```
**Flags:**
```bash
--blockchain string the blockchain configuration to import from the provided repo
--branch string the repo branch to use if downloading a new repo
-f, --force overwrite the existing configuration if one exists
-h, --help help for file
--repo string the repo to import (ex: ava-labs/avalanche-plugins-core) or url to download the repo from
--config string config file (default is $HOME/.avalanche-cli/config.json)
--log-level string log level for the application (default "ERROR")
--skip-update-check skip check for new versions
```
#### import public
The blockchain import public command imports a Blockchain configuration from a running network.
By default, an imported Blockchain
doesn't overwrite an existing Blockchain with the same name. To allow overwrites, provide the --force
flag.
**Usage:**
```bash
avalanche blockchain import public [subcommand] [flags]
```
**Flags:**
```bash
--blockchain-id string the blockchain ID
--cluster string operate on the given cluster
--custom use a custom VM template
--devnet operate on a devnet network
--endpoint string use the given endpoint for network operations
--evm import a subnet-evm
--force overwrite the existing configuration if one exists
-f, --fuji testnet operate on fuji (alias to testnet
-h, --help help for public
-l, --local operate on a local network
-m, --mainnet operate on mainnet
--node-url string [optional] URL of an already running validator
-t, --testnet fuji operate on testnet (alias to fuji)
--config string config file (default is $HOME/.avalanche-cli/config.json)
--log-level string log level for the application (default "ERROR")
--skip-update-check skip check for new versions
```
### join
The blockchain join command configures your validator node to begin validating a new Blockchain.
To complete this process, you must have access to the machine running your validator. If the
CLI is running on the same machine as your validator, it can generate or update your node's
config file automatically. Alternatively, the command can print the necessary instructions
to update your node manually. To complete the validation process, the Blockchain's admins must add
the NodeID of your validator to the Blockchain's allow list by calling addValidator with your
NodeID.
After you update your validator's config, you need to restart your validator manually. If
you provide the --avalanchego-config flag, this command attempts to edit the config file
at that path.
This command currently only supports Blockchains deployed on the Fuji Testnet and Mainnet.
**Usage:**
```bash
avalanche blockchain join [subcommand] [flags]
```
**Flags:**
```bash
--avalanchego-config string file path of the avalanchego config file
--cluster string operate on the given cluster
--data-dir string path of avalanchego's data dir directory
--devnet operate on a devnet network
--endpoint string use the given endpoint for network operations
--force-write if true, skip to prompt to overwrite the config file
-f, --fuji testnet operate on fuji (alias to testnet
-h, --help help for join
-k, --key string select the key to use [fuji only]
-g, --ledger use ledger instead of key (always true on mainnet, defaults to false on fuji)
--ledger-addrs strings use the given ledger addresses
-l, --local operate on a local network
-m, --mainnet operate on mainnet
--node-id string set the NodeID of the validator to check
--plugin-dir string file path of avalanchego's plugin directory
--print if true, print the manual config without prompting
--stake-amount uint amount of tokens to stake on validator
--staking-period duration how long validator validates for after start time
--start-time string start time that validator starts validating
-t, --testnet fuji operate on testnet (alias to fuji)
--config string config file (default is $HOME/.avalanche-cli/config.json)
--log-level string log level for the application (default "ERROR")
--skip-update-check skip check for new versions
```
### list
The blockchain list command prints the names of all created Blockchain configurations. Without any flags,
it prints some general, static information about the Blockchain. With the --deployed flag, the command
shows additional information including the VMID, BlockchainID and SubnetID.
**Usage:**
```bash
avalanche blockchain list [subcommand] [flags]
```
**Flags:**
```bash
--deployed show additional deploy information
-h, --help help for list
--config string config file (default is $HOME/.avalanche-cli/config.json)
--log-level string log level for the application (default "ERROR")
--skip-update-check skip check for new versions
```
### publish
The blockchain publish command publishes the Blockchain's VM to a repository.
**Usage:**
```bash
avalanche blockchain publish [subcommand] [flags]
```
**Flags:**
```bash
--alias string We publish to a remote repo, but identify the repo locally under a user-provided alias (e.g. myrepo).
--force If true, ignores if the blockchain has been published in the past, and attempts a forced publish.
-h, --help help for publish
--no-repo-path string Do not let the tool manage file publishing, but have it only generate the files and put them in the location given by this flag.
--repo-url string The URL of the repo where we are publishing
--subnet-file-path string Path to the Blockchain description file. If not given, a prompting sequence will be initiated.
--vm-file-path string Path to the VM description file. If not given, a prompting sequence will be initiated.
--config string config file (default is $HOME/.avalanche-cli/config.json)
--log-level string log level for the application (default "ERROR")
--skip-update-check skip check for new versions
```
### removeValidator
The blockchain removeValidator command stops a whitelisted blockchain network validator from
validating your deployed Blockchain.
To remove the validator from the Subnet's allow list, provide the validator's unique NodeID. You can bypass
these prompts by providing the values with flags.
**Usage:**
```bash
avalanche blockchain removeValidator [subcommand] [flags]
```
**Flags:**
```bash
--aggregator-allow-private-peers allow the signature aggregator to connect to peers with private IP (default true)
--aggregator-extra-endpoints strings endpoints for extra nodes that are needed in signature aggregation
--aggregator-log-level string log level to use with signature aggregator (default "Debug")
--aggregator-log-to-stdout use stdout for signature aggregator logs
--auth-keys strings (for non-SOV blockchain only) control keys that will be used to authenticate the removeValidator tx
--blockchain-genesis-key use genesis allocated key to pay fees for completing the validator's removal (blockchain gas token)
--blockchain-key string CLI stored key to use to pay fees for completing the validator's removal (blockchain gas token)
--blockchain-private-key string private key to use to pay fees for completing the validator's removal (blockchain gas token)
--cluster string operate on the given cluster
--devnet operate on a devnet network
--endpoint string use the given endpoint for network operations
--force force validator removal even if it's not getting rewarded
-f, --fuji testnet operate on fuji (alias to testnet
-h, --help help for removeValidator
-k, --key string select the key to use [fuji deploy only]
-g, --ledger use ledger instead of key (always true on mainnet, defaults to false on fuji)
--ledger-addrs strings use the given ledger addresses
-l, --local operate on a local network
-m, --mainnet operate on mainnet
--node-endpoint string remove validator that responds to the given endpoint
--node-id string node-id of the validator
--output-tx-path string (for non-SOV blockchain only) file path of the removeValidator tx
--rpc string connect to validator manager at the given rpc endpoint
-t, --testnet fuji operate on testnet (alias to fuji)
--uptime uint validator's uptime in seconds. If not provided, it will be automatically calculated
--config string config file (default is $HOME/.avalanche-cli/config.json)
--log-level string log level for the application (default "ERROR")
--skip-update-check skip check for new versions
```
### stats
The blockchain stats command prints validator statistics for the given Blockchain.
**Usage:**
```bash
avalanche blockchain stats [subcommand] [flags]
```
**Flags:**
```bash
--cluster string operate on the given cluster
--devnet operate on a devnet network
--endpoint string use the given endpoint for network operations
-f, --fuji testnet operate on fuji (alias to testnet
-h, --help help for stats
-l, --local operate on a local network
-m, --mainnet operate on mainnet
-t, --testnet fuji operate on testnet (alias to fuji)
--config string config file (default is $HOME/.avalanche-cli/config.json)
--log-level string log level for the application (default "ERROR")
--skip-update-check skip check for new versions
```
### upgrade
The blockchain upgrade command suite provides a collection of tools for
updating your developmental and deployed Blockchains.
**Usage:**
```bash
avalanche blockchain upgrade [subcommand] [flags]
```
**Subcommands:**
- [`apply`](#avalanche-blockchain-upgrade-apply): Apply generated upgrade bytes to running Blockchain nodes to trigger a network upgrade.
For public networks (Fuji Testnet or Mainnet), to complete this process,
you must have access to the machine running your validator.
If the CLI is running on the same machine as your validator, it can manipulate your node's
configuration automatically. Alternatively, the command can print the necessary instructions
to upgrade your node manually.
After you update your validator's configuration, you need to restart your validator manually.
If you provide the --avalanchego-chain-config-dir flag, this command attempts to write the upgrade file at that path.
Refer to https://docs.avax.network/nodes/maintain/chain-config-flags#subnet-chain-configs for related documentation.
- [`export`](#avalanche-blockchain-upgrade-export): Export the upgrade bytes file to a location of choice on disk
- [`generate`](#avalanche-blockchain-upgrade-generate): The blockchain upgrade generate command builds a new upgrade.json file to customize your Blockchain. It
guides the user through the process using an interactive wizard.
- [`import`](#avalanche-blockchain-upgrade-import): Import the upgrade bytes file into the local environment
- [`print`](#avalanche-blockchain-upgrade-print): Print the upgrade.json file content
- [`vm`](#avalanche-blockchain-upgrade-vm): The blockchain upgrade vm command enables the user to upgrade their Blockchain's VM binary. The command
can upgrade both local Blockchains and publicly deployed Blockchains on Fuji and Mainnet.
The command walks the user through an interactive wizard. The user can skip the wizard by providing
command line flags.
**Flags:**
```bash
-h, --help help for upgrade
--config string config file (default is $HOME/.avalanche-cli/config.json)
--log-level string log level for the application (default "ERROR")
--skip-update-check skip check for new versions
```
#### upgrade apply
Apply generated upgrade bytes to running Blockchain nodes to trigger a network upgrade.
For public networks (Fuji Testnet or Mainnet), to complete this process,
you must have access to the machine running your validator.
If the CLI is running on the same machine as your validator, it can manipulate your node's
configuration automatically. Alternatively, the command can print the necessary instructions
to upgrade your node manually.
After you update your validator's configuration, you need to restart your validator manually.
If you provide the --avalanchego-chain-config-dir flag, this command attempts to write the upgrade file at that path.
Refer to https://docs.avax.network/nodes/maintain/chain-config-flags#subnet-chain-configs for related documentation.
**Usage:**
```bash
avalanche blockchain upgrade apply [subcommand] [flags]
```
**Flags:**
```bash
--avalanchego-chain-config-dir string avalanchego's chain config file directory (default "/home/runner/.avalanchego/chains")
--config create upgrade config for future subnet deployments (same as generate)
--force If true, don't prompt for confirmation of timestamps in the past
--fuji fuji apply upgrade existing fuji deployment (alias for `testnet`)
-h, --help help for apply
--local local apply upgrade existing local deployment
--mainnet mainnet apply upgrade existing mainnet deployment
--print if true, print the manual config without prompting (for public networks only)
--testnet testnet apply upgrade existing testnet deployment (alias for `fuji`)
--log-level string log level for the application (default "ERROR")
--skip-update-check skip check for new versions
```
#### upgrade export
Export the upgrade bytes file to a location of choice on disk
**Usage:**
```bash
avalanche blockchain upgrade export [subcommand] [flags]
```
**Flags:**
```bash
--force If true, overwrite a possibly existing file without prompting
-h, --help help for export
--upgrade-filepath string Export upgrade bytes file to location of choice on disk
--config string config file (default is $HOME/.avalanche-cli/config.json)
--log-level string log level for the application (default "ERROR")
--skip-update-check skip check for new versions
```
#### upgrade generate
The blockchain upgrade generate command builds a new upgrade.json file to customize your Blockchain. It
guides the user through the process using an interactive wizard.
**Usage:**
```bash
avalanche blockchain upgrade generate [subcommand] [flags]
```
**Flags:**
```bash
-h, --help help for generate
--config string config file (default is $HOME/.avalanche-cli/config.json)
--log-level string log level for the application (default "ERROR")
--skip-update-check skip check for new versions
```
#### upgrade import
Import the upgrade bytes file into the local environment
**Usage:**
```bash
avalanche blockchain upgrade import [subcommand] [flags]
```
**Flags:**
```bash
-h, --help help for import
--upgrade-filepath string Import upgrade bytes file into local environment
--config string config file (default is $HOME/.avalanche-cli/config.json)
--log-level string log level for the application (default "ERROR")
--skip-update-check skip check for new versions
```
#### upgrade print
Print the upgrade.json file content
**Usage:**
```bash
avalanche blockchain upgrade print [subcommand] [flags]
```
**Flags:**
```bash
-h, --help help for print
--config string config file (default is $HOME/.avalanche-cli/config.json)
--log-level string log level for the application (default "ERROR")
--skip-update-check skip check for new versions
```
#### upgrade vm
The blockchain upgrade vm command enables the user to upgrade their Blockchain's VM binary. The command
can upgrade both local Blockchains and publicly deployed Blockchains on Fuji and Mainnet.
The command walks the user through an interactive wizard. The user can skip the wizard by providing
command line flags.
**Usage:**
```bash
avalanche blockchain upgrade vm [subcommand] [flags]
```
**Flags:**
```bash
--binary string Upgrade to custom binary
--config upgrade config for future subnet deployments
--fuji fuji upgrade existing fuji deployment (alias for `testnet`)
-h, --help help for vm
--latest upgrade to latest version
--local local upgrade existing local deployment
--mainnet mainnet upgrade existing mainnet deployment
--plugin-dir string plugin directory to automatically upgrade VM
--print print instructions for upgrading
--testnet testnet upgrade existing testnet deployment (alias for `fuji`)
--version string Upgrade to custom version
--log-level string log level for the application (default "ERROR")
--skip-update-check skip check for new versions
```
### validators
The blockchain validators command lists the validators of a blockchain and provides
several statistics about them.
**Usage:**
```bash
avalanche blockchain validators [subcommand] [flags]
```
**Flags:**
```bash
--cluster string operate on the given cluster
--devnet operate on a devnet network
--endpoint string use the given endpoint for network operations
-f, --fuji testnet operate on fuji (alias to testnet
-h, --help help for validators
-l, --local operate on a local network
-m, --mainnet operate on mainnet
-t, --testnet fuji operate on testnet (alias to fuji)
--config string config file (default is $HOME/.avalanche-cli/config.json)
--log-level string log level for the application (default "ERROR")
--skip-update-check skip check for new versions
```
### vmid
The blockchain vmid command prints the virtual machine ID (VMID) for the given Blockchain.
**Usage:**
```bash
avalanche blockchain vmid [subcommand] [flags]
```
**Flags:**
```bash
-h, --help help for vmid
--config string config file (default is $HOME/.avalanche-cli/config.json)
--log-level string log level for the application (default "ERROR")
--skip-update-check skip check for new versions
```
## avalanche config
Customize configuration for Avalanche-CLI
**Usage:**
```bash
avalanche config [subcommand] [flags]
```
**Subcommands:**
- [`authorize-cloud-access`](#avalanche-config-authorize-cloud-access): set preferences to authorize access to cloud resources
- [`metrics`](#avalanche-config-metrics): set user metrics collection preferences
- [`migrate`](#avalanche-config-migrate): migrate command migrates old ~/.avalanche-cli.json and ~/.avalanche-cli/config to /.avalanche-cli/config.json..
- [`snapshotsAutoSave`](#avalanche-config-snapshotsautosave): set user preference between auto saving local network snapshots or not
- [`update`](#avalanche-config-update): set user preference between update check or not
**Flags:**
```bash
-h, --help help for config
--config string config file (default is $HOME/.avalanche-cli/config.json)
--log-level string log level for the application (default "ERROR")
--skip-update-check skip check for new versions
```
### authorize-cloud-access
set preferences to authorize access to cloud resources
**Usage:**
```bash
avalanche config authorize-cloud-access [subcommand] [flags]
```
**Flags:**
```bash
-h, --help help for authorize-cloud-access
--config string config file (default is $HOME/.avalanche-cli/config.json)
--log-level string log level for the application (default "ERROR")
--skip-update-check skip check for new versions
```
### metrics
set user metrics collection preferences
**Usage:**
```bash
avalanche config metrics [subcommand] [flags]
```
**Flags:**
```bash
-h, --help help for metrics
--config string config file (default is $HOME/.avalanche-cli/config.json)
--log-level string log level for the application (default "ERROR")
--skip-update-check skip check for new versions
```
### migrate
migrate command migrates old ~/.avalanche-cli.json and ~/.avalanche-cli/config to /.avalanche-cli/config.json..
**Usage:**
```bash
avalanche config migrate [subcommand] [flags]
```
**Flags:**
```bash
-h, --help help for migrate
--config string config file (default is $HOME/.avalanche-cli/config.json)
--log-level string log level for the application (default "ERROR")
--skip-update-check skip check for new versions
```
### snapshotsAutoSave
set user preference between auto saving local network snapshots or not
**Usage:**
```bash
avalanche config snapshotsAutoSave [subcommand] [flags]
```
**Flags:**
```bash
-h, --help help for snapshotsAutoSave
--config string config file (default is $HOME/.avalanche-cli/config.json)
--log-level string log level for the application (default "ERROR")
--skip-update-check skip check for new versions
```
### update
set user preference between update check or not
**Usage:**
```bash
avalanche config update [subcommand] [flags]
```
**Flags:**
```bash
-h, --help help for update
--config string config file (default is $HOME/.avalanche-cli/config.json)
--log-level string log level for the application (default "ERROR")
--skip-update-check skip check for new versions
```
## avalanche contract
The contract command suite provides a collection of tools for deploying
and interacting with smart contracts.
**Usage:**
```bash
avalanche contract [subcommand] [flags]
```
**Subcommands:**
- [`deploy`](#avalanche-contract-deploy): The contract command suite provides a collection of tools for deploying
smart contracts.
- [`initValidatorManager`](#avalanche-contract-initvalidatormanager): Initializes Proof of Authority(PoA) or Proof of Stake(PoS)Validator Manager contract on a Blockchain and sets up initial validator set on the Blockchain. For more info on Validator Manager, please head to https://github.com/ava-labs/icm-contracts/tree/main/contracts/validator-manager
**Flags:**
```bash
-h, --help help for contract
--config string config file (default is $HOME/.avalanche-cli/config.json)
--log-level string log level for the application (default "ERROR")
--skip-update-check skip check for new versions
```
### deploy
The contract command suite provides a collection of tools for deploying
smart contracts.
**Usage:**
```bash
avalanche contract deploy [subcommand] [flags]
```
**Subcommands:**
- [`erc20`](#avalanche-contract-deploy-erc20): Deploy an ERC20 token into a given Network and Blockchain
**Flags:**
```bash
-h, --help help for deploy
--config string config file (default is $HOME/.avalanche-cli/config.json)
--log-level string log level for the application (default "ERROR")
--skip-update-check skip check for new versions
```
#### deploy erc20
Deploy an ERC20 token into a given Network and Blockchain
**Usage:**
```bash
avalanche contract deploy erc20 [subcommand] [flags]
```
**Flags:**
```bash
--blockchain string deploy the ERC20 contract into the given CLI blockchain
--blockchain-id string deploy the ERC20 contract into the given blockchain ID/Alias
--c-chain deploy the ERC20 contract into C-Chain
--cluster string operate on the given cluster
--devnet operate on a devnet network
--endpoint string use the given endpoint for network operations
-f, --fuji testnet operate on fuji (alias to testnet
--funded string set the funded address
--genesis-key use genesis allocated key as contract deployer
-h, --help help for erc20
--key string CLI stored key to use as contract deployer
-l, --local operate on a local network
-m, --mainnet operate on mainnet
--private-key string private key to use as contract deployer
--rpc string deploy the contract into the given rpc endpoint
--supply uint set the token supply
--symbol string set the token symbol
-t, --testnet fuji operate on testnet (alias to fuji)
--config string config file (default is $HOME/.avalanche-cli/config.json)
--log-level string log level for the application (default "ERROR")
--skip-update-check skip check for new versions
```
### initValidatorManager
Initializes Proof of Authority(PoA) or Proof of Stake(PoS)Validator Manager contract on a Blockchain and sets up initial validator set on the Blockchain. For more info on Validator Manager, please head to https://github.com/ava-labs/icm-contracts/tree/main/contracts/validator-manager
**Usage:**
```bash
avalanche contract initValidatorManager [subcommand] [flags]
```
**Flags:**
```bash
--aggregator-allow-private-peers allow the signature aggregator to connect to peers with private IP (default true)
--aggregator-extra-endpoints strings endpoints for extra nodes that are needed in signature aggregation
--aggregator-log-level string log level to use with signature aggregator (default "Debug")
--aggregator-log-to-stdout dump signature aggregator logs to stdout
--cluster string operate on the given cluster
--devnet operate on a devnet network
--endpoint string use the given endpoint for network operations
-f, --fuji testnet operate on fuji (alias to testnet
--genesis-key use genesis allocated key as contract deployer
-h, --help help for initValidatorManager
--key string CLI stored key to use as contract deployer
-l, --local operate on a local network
-m, --mainnet operate on mainnet
--pos-maximum-stake-amount uint (PoS only) maximum stake amount (default 1000)
--pos-maximum-stake-multiplier uint8 (PoS only )maximum stake multiplier (default 1)
--pos-minimum-delegation-fee uint16 (PoS only) minimum delegation fee (default 1)
--pos-minimum-stake-amount uint (PoS only) minimum stake amount (default 1)
--pos-minimum-stake-duration uint (PoS only) minimum stake duration (in seconds) (default 100)
--pos-reward-calculator-address string (PoS only) initialize the ValidatorManager with reward calculator address
--pos-weight-to-value-factor uint (PoS only) weight to value factor (default 1)
--private-key string private key to use as contract deployer
--rpc string deploy the contract into the given rpc endpoint
-t, --testnet fuji operate on testnet (alias to fuji)
--config string config file (default is $HOME/.avalanche-cli/config.json)
--log-level string log level for the application (default "ERROR")
--skip-update-check skip check for new versions
```
## avalanche help
Help provides help for any command in the application.
Simply type avalanche help [path to command] for full details.
**Usage:**
```bash
avalanche help [subcommand] [flags]
```
**Flags:**
```bash
-h, --help help for help
--config string config file (default is $HOME/.avalanche-cli/config.json)
--log-level string log level for the application (default "ERROR")
--skip-update-check skip check for new versions
```
## avalanche icm
The messenger command suite provides a collection of tools for interacting
with ICM messenger contracts.
**Usage:**
```bash
avalanche icm [subcommand] [flags]
```
**Subcommands:**
- [`deploy`](#avalanche-icm-deploy): Deploys ICM Messenger and Registry into a given L1.
- [`sendMsg`](#avalanche-icm-sendmsg): Sends and wait reception for a ICM msg between two blockchains.
**Flags:**
```bash
-h, --help help for icm
--config string config file (default is $HOME/.avalanche-cli/config.json)
--log-level string log level for the application (default "ERROR")
--skip-update-check skip check for new versions
```
### deploy
Deploys ICM Messenger and Registry into a given L1.
For Local Networks, it also deploys into C-Chain.
**Usage:**
```bash
avalanche icm deploy [subcommand] [flags]
```
**Flags:**
```bash
--blockchain string deploy ICM into the given CLI blockchain
--blockchain-id string deploy ICM into the given blockchain ID/Alias
--c-chain deploy ICM into C-Chain
--cchain-key string key to be used to pay fees to deploy ICM to C-Chain
--cluster string operate on the given cluster
--deploy-messenger deploy ICM Messenger (default true)
--deploy-registry deploy ICM Registry (default true)
--devnet operate on a devnet network
--endpoint string use the given endpoint for network operations
--force-registry-deploy deploy ICM Registry even if Messenger has already been deployed
-f, --fuji testnet operate on fuji (alias to testnet
--genesis-key use genesis allocated key to fund ICM deploy
-h, --help help for deploy
--include-cchain deploy ICM also to C-Chain
--key string CLI stored key to use to fund ICM deploy
-l, --local operate on a local network
-m, --mainnet operate on mainnet
--messenger-contract-address-path string path to a messenger contract address file
--messenger-deployer-address-path string path to a messenger deployer address file
--messenger-deployer-tx-path string path to a messenger deployer tx file
--private-key string private key to use to fund ICM deploy
--registry-bytecode-path string path to a registry bytecode file
--rpc-url string use the given RPC URL to connect to the subnet
-t, --testnet fuji operate on testnet (alias to fuji)
--version string version to deploy (default "latest")
--config string config file (default is $HOME/.avalanche-cli/config.json)
--log-level string log level for the application (default "ERROR")
--skip-update-check skip check for new versions
```
### sendMsg
Sends and wait reception for a ICM msg between two blockchains.
**Usage:**
```bash
avalanche icm sendMsg [subcommand] [flags]
```
**Flags:**
```bash
--cluster string operate on the given cluster
--dest-rpc string use the given destination blockchain rpc endpoint
--destination-address string deliver the message to the given contract destination address
--devnet operate on a devnet network
--endpoint string use the given endpoint for network operations
-f, --fuji testnet operate on fuji (alias to testnet
--genesis-key use genesis allocated key as message originator and to pay source blockchain fees
-h, --help help for sendMsg
--hex-encoded given message is hex encoded
--key string CLI stored key to use as message originator and to pay source blockchain fees
-l, --local operate on a local network
-m, --mainnet operate on mainnet
--private-key string private key to use as message originator and to pay source blockchain fees
--source-rpc string use the given source blockchain rpc endpoint
-t, --testnet fuji operate on testnet (alias to fuji)
--config string config file (default is $HOME/.avalanche-cli/config.json)
--log-level string log level for the application (default "ERROR")
--skip-update-check skip check for new versions
```
## avalanche ictt
The ictt command suite provides tools to deploy and manage Interchain Token Transferrers.
**Usage:**
```bash
avalanche ictt [subcommand] [flags]
```
**Subcommands:**
- [`deploy`](#avalanche-ictt-deploy): Deploys a Token Transferrer into a given Network and Subnets
**Flags:**
```bash
-h, --help help for ictt
--config string config file (default is $HOME/.avalanche-cli/config.json)
--log-level string log level for the application (default "ERROR")
--skip-update-check skip check for new versions
```
### deploy
Deploys a Token Transferrer into a given Network and Subnets
**Usage:**
```bash
avalanche ictt deploy [subcommand] [flags]
```
**Flags:**
```bash
--c-chain-home set the Transferrer's Home Chain into C-Chain
--c-chain-remote set the Transferrer's Remote Chain into C-Chain
--cluster string operate on the given cluster
--deploy-erc20-home string deploy a Transferrer Home for the given Chain's ERC20 Token
--deploy-native-home deploy a Transferrer Home for the Chain's Native Token
--deploy-native-remote deploy a Transferrer Remote for the Chain's Native Token
--devnet operate on a devnet network
--endpoint string use the given endpoint for network operations
-f, --fuji testnet operate on fuji (alias to testnet
-h, --help help for deploy
--home-blockchain string set the Transferrer's Home Chain into the given CLI blockchain
--home-genesis-key use genesis allocated key to deploy Transferrer Home
--home-key string CLI stored key to use to deploy Transferrer Home
--home-private-key string private key to use to deploy Transferrer Home
--home-rpc string use the given RPC URL to connect to the home blockchain
-l, --local operate on a local network
-m, --mainnet operate on mainnet
--remote-blockchain string set the Transferrer's Remote Chain into the given CLI blockchain
--remote-genesis-key use genesis allocated key to deploy Transferrer Remote
--remote-key string CLI stored key to use to deploy Transferrer Remote
--remote-private-key string private key to use to deploy Transferrer Remote
--remote-rpc string use the given RPC URL to connect to the remote blockchain
--remote-token-decimals uint8 use the given number of token decimals for the Transferrer Remote [defaults to token home's decimals (18 for a new wrapped native home token)]
--remove-minter-admin remove the native minter precompile admin found on remote blockchain genesis
-t, --testnet fuji operate on testnet (alias to fuji)
--use-home string use the given Transferrer's Home Address
--version string tag/branch/commit of Avalanche Interchain Token Transfer (ICTT) to be used (defaults to main branch)
--config string config file (default is $HOME/.avalanche-cli/config.json)
--log-level string log level for the application (default "ERROR")
--skip-update-check skip check for new versions
```
## avalanche interchain
The interchain command suite provides a collection of tools to
set and manage interoperability between blockchains.
**Usage:**
```bash
avalanche interchain [subcommand] [flags]
```
**Subcommands:**
- [`messenger`](#avalanche-interchain-messenger): The messenger command suite provides a collection of tools for interacting
with ICM messenger contracts.
- [`relayer`](#avalanche-interchain-relayer): The relayer command suite provides a collection of tools for deploying
and configuring an ICM relayers.
- [`tokenTransferrer`](#avalanche-interchain-tokentransferrer): The tokenTransfer command suite provides tools to deploy and manage Token Transferrers.
**Flags:**
```bash
-h, --help help for interchain
--config string config file (default is $HOME/.avalanche-cli/config.json)
--log-level string log level for the application (default "ERROR")
--skip-update-check skip check for new versions
```
### messenger
The messenger command suite provides a collection of tools for interacting
with ICM messenger contracts.
**Usage:**
```bash
avalanche interchain messenger [subcommand] [flags]
```
**Subcommands:**
- [`deploy`](#avalanche-interchain-messenger-deploy): Deploys ICM Messenger and Registry into a given L1.
- [`sendMsg`](#avalanche-interchain-messenger-sendmsg): Sends and wait reception for a ICM msg between two blockchains.
**Flags:**
```bash
-h, --help help for messenger
--config string config file (default is $HOME/.avalanche-cli/config.json)
--log-level string log level for the application (default "ERROR")
--skip-update-check skip check for new versions
```
#### messenger deploy
Deploys ICM Messenger and Registry into a given L1.
For Local Networks, it also deploys into C-Chain.
**Usage:**
```bash
avalanche interchain messenger deploy [subcommand] [flags]
```
**Flags:**
```bash
--blockchain string deploy ICM into the given CLI blockchain
--blockchain-id string deploy ICM into the given blockchain ID/Alias
--c-chain deploy ICM into C-Chain
--cchain-key string key to be used to pay fees to deploy ICM to C-Chain
--cluster string operate on the given cluster
--deploy-messenger deploy ICM Messenger (default true)
--deploy-registry deploy ICM Registry (default true)
--devnet operate on a devnet network
--endpoint string use the given endpoint for network operations
--force-registry-deploy deploy ICM Registry even if Messenger has already been deployed
-f, --fuji testnet operate on fuji (alias to testnet
--genesis-key use genesis allocated key to fund ICM deploy
-h, --help help for deploy
--include-cchain deploy ICM also to C-Chain
--key string CLI stored key to use to fund ICM deploy
-l, --local operate on a local network
-m, --mainnet operate on mainnet
--messenger-contract-address-path string path to a messenger contract address file
--messenger-deployer-address-path string path to a messenger deployer address file
--messenger-deployer-tx-path string path to a messenger deployer tx file
--private-key string private key to use to fund ICM deploy
--registry-bytecode-path string path to a registry bytecode file
--rpc-url string use the given RPC URL to connect to the subnet
-t, --testnet fuji operate on testnet (alias to fuji)
--version string version to deploy (default "latest")
--config string config file (default is $HOME/.avalanche-cli/config.json)
--log-level string log level for the application (default "ERROR")
--skip-update-check skip check for new versions
```
#### messenger sendMsg
Sends and wait reception for a ICM msg between two blockchains.
**Usage:**
```bash
avalanche interchain messenger sendMsg [subcommand] [flags]
```
**Flags:**
```bash
--cluster string operate on the given cluster
--dest-rpc string use the given destination blockchain rpc endpoint
--destination-address string deliver the message to the given contract destination address
--devnet operate on a devnet network
--endpoint string use the given endpoint for network operations
-f, --fuji testnet operate on fuji (alias to testnet
--genesis-key use genesis allocated key as message originator and to pay source blockchain fees
-h, --help help for sendMsg
--hex-encoded given message is hex encoded
--key string CLI stored key to use as message originator and to pay source blockchain fees
-l, --local operate on a local network
-m, --mainnet operate on mainnet
--private-key string private key to use as message originator and to pay source blockchain fees
--source-rpc string use the given source blockchain rpc endpoint
-t, --testnet fuji operate on testnet (alias to fuji)
--config string config file (default is $HOME/.avalanche-cli/config.json)
--log-level string log level for the application (default "ERROR")
--skip-update-check skip check for new versions
```
### relayer
The relayer command suite provides a collection of tools for deploying
and configuring an ICM relayers.
**Usage:**
```bash
avalanche interchain relayer [subcommand] [flags]
```
**Subcommands:**
- [`deploy`](#avalanche-interchain-relayer-deploy): Deploys an ICM Relayer for the given Network.
- [`logs`](#avalanche-interchain-relayer-logs): Shows pretty formatted AWM relayer logs
- [`start`](#avalanche-interchain-relayer-start): Starts AWM relayer on the specified network (Currently only for local network).
- [`stop`](#avalanche-interchain-relayer-stop): Stops AWM relayer on the specified network (Currently only for local network, cluster).
**Flags:**
```bash
-h, --help help for relayer
--config string config file (default is $HOME/.avalanche-cli/config.json)
--log-level string log level for the application (default "ERROR")
--skip-update-check skip check for new versions
```
#### relayer deploy
Deploys an ICM Relayer for the given Network.
**Usage:**
```bash
avalanche interchain relayer deploy [subcommand] [flags]
```
**Flags:**
```bash
--allow-private-ips allow relayer to connec to private ips (default true)
--amount float automatically fund l1s fee payments with the given amount
--bin-path string use the given relayer binary
--blockchain-funding-key string key to be used to fund relayer account on all l1s
--blockchains strings blockchains to relay as source and destination
--cchain relay C-Chain as source and destination
--cchain-amount float automatically fund cchain fee payments with the given amount
--cchain-funding-key string key to be used to fund relayer account on cchain
--cluster string operate on the given cluster
--devnet operate on a devnet network
--endpoint string use the given endpoint for network operations
-f, --fuji testnet operate on fuji (alias to testnet
-h, --help help for deploy
--key string key to be used by default both for rewards and to pay fees
-l, --local operate on a local network
--log-level string log level to use for relayer logs
-t, --testnet fuji operate on testnet (alias to fuji)
--version string version to deploy (default "latest-prerelease")
--config string config file (default is $HOME/.avalanche-cli/config.json)
--skip-update-check skip check for new versions
```
#### relayer logs
Shows pretty formatted AWM relayer logs
**Usage:**
```bash
avalanche interchain relayer logs [subcommand] [flags]
```
**Flags:**
```bash
--endpoint string use the given endpoint for network operations
--first uint output first N log lines
-f, --fuji testnet operate on fuji (alias to testnet
-h, --help help for logs
--last uint output last N log lines
-l, --local operate on a local network
--raw raw logs output
-t, --testnet fuji operate on testnet (alias to fuji)
--config string config file (default is $HOME/.avalanche-cli/config.json)
--log-level string log level for the application (default "ERROR")
--skip-update-check skip check for new versions
```
#### relayer start
Starts AWM relayer on the specified network (Currently only for local network).
**Usage:**
```bash
avalanche interchain relayer start [subcommand] [flags]
```
**Flags:**
```bash
--bin-path string use the given relayer binary
--cluster string operate on the given cluster
--endpoint string use the given endpoint for network operations
-f, --fuji testnet operate on fuji (alias to testnet
-h, --help help for start
-l, --local operate on a local network
-t, --testnet fuji operate on testnet (alias to fuji)
--version string version to use (default "latest-prerelease")
--config string config file (default is $HOME/.avalanche-cli/config.json)
--log-level string log level for the application (default "ERROR")
--skip-update-check skip check for new versions
```
#### relayer stop
Stops AWM relayer on the specified network (Currently only for local network, cluster).
**Usage:**
```bash
avalanche interchain relayer stop [subcommand] [flags]
```
**Flags:**
```bash
--cluster string operate on the given cluster
--endpoint string use the given endpoint for network operations
-f, --fuji testnet operate on fuji (alias to testnet
-h, --help help for stop
-l, --local operate on a local network
-t, --testnet fuji operate on testnet (alias to fuji)
--config string config file (default is $HOME/.avalanche-cli/config.json)
--log-level string log level for the application (default "ERROR")
--skip-update-check skip check for new versions
```
### tokenTransferrer
The tokenTransfer command suite provides tools to deploy and manage Token Transferrers.
**Usage:**
```bash
avalanche interchain tokenTransferrer [subcommand] [flags]
```
**Subcommands:**
- [`deploy`](#avalanche-interchain-tokentransferrer-deploy): Deploys a Token Transferrer into a given Network and Subnets
**Flags:**
```bash
-h, --help help for tokenTransferrer
--config string config file (default is $HOME/.avalanche-cli/config.json)
--log-level string log level for the application (default "ERROR")
--skip-update-check skip check for new versions
```
#### tokenTransferrer deploy
Deploys a Token Transferrer into a given Network and Subnets
**Usage:**
```bash
avalanche interchain tokenTransferrer deploy [subcommand] [flags]
```
**Flags:**
```bash
--c-chain-home set the Transferrer's Home Chain into C-Chain
--c-chain-remote set the Transferrer's Remote Chain into C-Chain
--cluster string operate on the given cluster
--deploy-erc20-home string deploy a Transferrer Home for the given Chain's ERC20 Token
--deploy-native-home deploy a Transferrer Home for the Chain's Native Token
--deploy-native-remote deploy a Transferrer Remote for the Chain's Native Token
--devnet operate on a devnet network
--endpoint string use the given endpoint for network operations
-f, --fuji testnet operate on fuji (alias to testnet
-h, --help help for deploy
--home-blockchain string set the Transferrer's Home Chain into the given CLI blockchain
--home-genesis-key use genesis allocated key to deploy Transferrer Home
--home-key string CLI stored key to use to deploy Transferrer Home
--home-private-key string private key to use to deploy Transferrer Home
--home-rpc string use the given RPC URL to connect to the home blockchain
-l, --local operate on a local network
-m, --mainnet operate on mainnet
--remote-blockchain string set the Transferrer's Remote Chain into the given CLI blockchain
--remote-genesis-key use genesis allocated key to deploy Transferrer Remote
--remote-key string CLI stored key to use to deploy Transferrer Remote
--remote-private-key string private key to use to deploy Transferrer Remote
--remote-rpc string use the given RPC URL to connect to the remote blockchain
--remote-token-decimals uint8 use the given number of token decimals for the Transferrer Remote [defaults to token home's decimals (18 for a new wrapped native home token)]
--remove-minter-admin remove the native minter precompile admin found on remote blockchain genesis
-t, --testnet fuji operate on testnet (alias to fuji)
--use-home string use the given Transferrer's Home Address
--version string tag/branch/commit of Avalanche Interchain Token Transfer (ICTT) to be used (defaults to main branch)
--config string config file (default is $HOME/.avalanche-cli/config.json)
--log-level string log level for the application (default "ERROR")
--skip-update-check skip check for new versions
```
## avalanche key
The key command suite provides a collection of tools for creating and managing
signing keys. You can use these keys to deploy Subnets to the Fuji Testnet,
but these keys are NOT suitable to use in production environments. DO NOT use
these keys on Mainnet.
To get started, use the key create command.
**Usage:**
```bash
avalanche key [subcommand] [flags]
```
**Subcommands:**
- [`create`](#avalanche-key-create): The key create command generates a new private key to use for creating and controlling
test Subnets. Keys generated by this command are NOT cryptographically secure enough to
use in production environments. DO NOT use these keys on Mainnet.
The command works by generating a secp256 key and storing it with the provided keyName. You
can use this key in other commands by providing this keyName.
If you'd like to import an existing key instead of generating one from scratch, provide the
--file flag.
- [`delete`](#avalanche-key-delete): The key delete command deletes an existing signing key.
To delete a key, provide the keyName. The command prompts for confirmation
before deleting the key. To skip the confirmation, provide the --force flag.
- [`export`](#avalanche-key-export): The key export command exports a created signing key. You can use an exported key in other
applications or import it into another instance of Avalanche-CLI.
By default, the tool writes the hex encoded key to stdout. If you provide the --output
flag, the command writes the key to a file of your choosing.
- [`list`](#avalanche-key-list): The key list command prints information for all stored signing
keys or for the ledger addresses associated to certain indices.
- [`transfer`](#avalanche-key-transfer): The key transfer command allows to transfer funds between stored keys or ledger addresses.
**Flags:**
```bash
-h, --help help for key
--config string config file (default is $HOME/.avalanche-cli/config.json)
--log-level string log level for the application (default "ERROR")
--skip-update-check skip check for new versions
```
### create
The key create command generates a new private key to use for creating and controlling
test Subnets. Keys generated by this command are NOT cryptographically secure enough to
use in production environments. DO NOT use these keys on Mainnet.
The command works by generating a secp256 key and storing it with the provided keyName. You
can use this key in other commands by providing this keyName.
If you'd like to import an existing key instead of generating one from scratch, provide the
--file flag.
**Usage:**
```bash
avalanche key create [subcommand] [flags]
```
**Flags:**
```bash
--file string import the key from an existing key file
-f, --force overwrite an existing key with the same name
-h, --help help for create
--skip-balances do not query public network balances for an imported key
--config string config file (default is $HOME/.avalanche-cli/config.json)
--log-level string log level for the application (default "ERROR")
--skip-update-check skip check for new versions
```
### delete
The key delete command deletes an existing signing key.
To delete a key, provide the keyName. The command prompts for confirmation
before deleting the key. To skip the confirmation, provide the --force flag.
**Usage:**
```bash
avalanche key delete [subcommand] [flags]
```
**Flags:**
```bash
-f, --force delete the key without confirmation
-h, --help help for delete
--config string config file (default is $HOME/.avalanche-cli/config.json)
--log-level string log level for the application (default "ERROR")
--skip-update-check skip check for new versions
```
### export
The key export command exports a created signing key. You can use an exported key in other
applications or import it into another instance of Avalanche-CLI.
By default, the tool writes the hex encoded key to stdout. If you provide the --output
flag, the command writes the key to a file of your choosing.
**Usage:**
```bash
avalanche key export [subcommand] [flags]
```
**Flags:**
```bash
-h, --help help for export
-o, --output string write the key to the provided file path
--config string config file (default is $HOME/.avalanche-cli/config.json)
--log-level string log level for the application (default "ERROR")
--skip-update-check skip check for new versions
```
### list
The key list command prints information for all stored signing
keys or for the ledger addresses associated to certain indices.
**Usage:**
```bash
avalanche key list [subcommand] [flags]
```
**Flags:**
```bash
-a, --all-networks list all network addresses
--blockchains strings blockchains to show information about (p=p-chain, x=x-chain, c=c-chain, and blockchain names) (default p,x,c)
-c, --cchain list C-Chain addresses (default true)
--cluster string operate on the given cluster
--devnet operate on a devnet network
--endpoint string use the given endpoint for network operations
-f, --fuji testnet operate on fuji (alias to testnet
-h, --help help for list
--keys strings list addresses for the given keys
-g, --ledger uints list ledger addresses for the given indices (default [])
-l, --local operate on a local network
-m, --mainnet operate on mainnet
--pchain list P-Chain addresses (default true)
--subnets strings subnets to show information about (p=p-chain, x=x-chain, c=c-chain, and blockchain names) (default p,x,c)
-t, --testnet fuji operate on testnet (alias to fuji)
--tokens strings provide balance information for the given token contract addresses (Evm only) (default [Native])
--use-gwei use gwei for EVM balances
-n, --use-nano-avax use nano Avax for balances
--xchain list X-Chain addresses (default true)
--config string config file (default is $HOME/.avalanche-cli/config.json)
--log-level string log level for the application (default "ERROR")
--skip-update-check skip check for new versions
```
### transfer
The key transfer command allows to transfer funds between stored keys or ledger addresses.
**Usage:**
```bash
avalanche key transfer [subcommand] [flags]
```
**Flags:**
```bash
-o, --amount float amount to send or receive (AVAX or TOKEN units)
--c-chain-receiver receive at C-Chain
--c-chain-sender send from C-Chain
--cluster string operate on the given cluster
-a, --destination-addr string destination address
--destination-key string key associated to a destination address
--destination-subnet string subnet where the funds will be sent (token transferrer experimental)
--destination-transferrer-address string token transferrer address at the destination subnet (token transferrer experimental)
--devnet operate on a devnet network
--endpoint string use the given endpoint for network operations
-f, --fuji testnet operate on fuji (alias to testnet
-h, --help help for transfer
-k, --key string key associated to the sender or receiver address
-i, --ledger uint32 ledger index associated to the sender or receiver address (default 32768)
-l, --local operate on a local network
-m, --mainnet operate on mainnet
--origin-subnet string subnet where the funds belong (token transferrer experimental)
--origin-transferrer-address string token transferrer address at the origin subnet (token transferrer experimental)
--p-chain-receiver receive at P-Chain
--p-chain-sender send from P-Chain
--receiver-blockchain string receive at the given CLI blockchain
--receiver-blockchain-id string receive at the given blockchain ID/Alias
--sender-blockchain string send from the given CLI blockchain
--sender-blockchain-id string send from the given blockchain ID/Alias
-t, --testnet fuji operate on testnet (alias to fuji)
--x-chain-receiver receive at X-Chain
--x-chain-sender send from X-Chain
--config string config file (default is $HOME/.avalanche-cli/config.json)
--log-level string log level for the application (default "ERROR")
--skip-update-check skip check for new versions
```
## avalanche network
The network command suite provides a collection of tools for managing local Blockchain
deployments.
When you deploy a Blockchain locally, it runs on a local, multi-node Avalanche network. The
blockchain deploy command starts this network in the background. This command suite allows you
to shutdown, restart, and clear that network.
This network currently supports multiple, concurrently deployed Blockchains.
**Usage:**
```bash
avalanche network [subcommand] [flags]
```
**Subcommands:**
- [`clean`](#avalanche-network-clean): The network clean command shuts down your local, multi-node network. All deployed Subnets
shutdown and delete their state. You can restart the network by deploying a new Subnet
configuration.
- [`start`](#avalanche-network-start): The network start command starts a local, multi-node Avalanche network on your machine.
By default, the command loads the default snapshot. If you provide the --snapshot-name
flag, the network loads that snapshot instead. The command fails if the local network is
already running.
- [`status`](#avalanche-network-status): The network status command prints whether or not a local Avalanche
network is running and some basic stats about the network.
- [`stop`](#avalanche-network-stop): The network stop command shuts down your local, multi-node network.
All deployed Subnets shutdown gracefully and save their state. If you provide the
--snapshot-name flag, the network saves its state under this named snapshot. You can
reload this snapshot with network start --snapshot-name `snapshotName`. Otherwise, the
network saves to the default snapshot, overwriting any existing state. You can reload the
default snapshot with network start.
**Flags:**
```bash
-h, --help help for network
--config string config file (default is $HOME/.avalanche-cli/config.json)
--log-level string log level for the application (default "ERROR")
--skip-update-check skip check for new versions
```
### clean
The network clean command shuts down your local, multi-node network. All deployed Subnets
shutdown and delete their state. You can restart the network by deploying a new Subnet
configuration.
**Usage:**
```bash
avalanche network clean [subcommand] [flags]
```
**Flags:**
```bash
-h, --help help for clean
--config string config file (default is $HOME/.avalanche-cli/config.json)
--log-level string log level for the application (default "ERROR")
--skip-update-check skip check for new versions
```
### start
The network start command starts a local, multi-node Avalanche network on your machine.
By default, the command loads the default snapshot. If you provide the --snapshot-name
flag, the network loads that snapshot instead. The command fails if the local network is
already running.
**Usage:**
```bash
avalanche network start [subcommand] [flags]
```
**Flags:**
```bash
--avalanchego-path string use this avalanchego binary path
--avalanchego-version string use this version of avalanchego (ex: v1.17.12) (default "latest-prerelease")
-h, --help help for start
--num-nodes uint32 number of nodes to be created on local network (default 2)
--relayer-path string use this relayer binary path
--relayer-version string use this relayer version (default "latest-prerelease")
--snapshot-name string name of snapshot to use to start the network from (default "default")
--config string config file (default is $HOME/.avalanche-cli/config.json)
--log-level string log level for the application (default "ERROR")
--skip-update-check skip check for new versions
```
### status
The network status command prints whether or not a local Avalanche
network is running and some basic stats about the network.
**Usage:**
```bash
avalanche network status [subcommand] [flags]
```
**Flags:**
```bash
-h, --help help for status
--config string config file (default is $HOME/.avalanche-cli/config.json)
--log-level string log level for the application (default "ERROR")
--skip-update-check skip check for new versions
```
### stop
The network stop command shuts down your local, multi-node network.
All deployed Subnets shutdown gracefully and save their state. If you provide the
--snapshot-name flag, the network saves its state under this named snapshot. You can
reload this snapshot with network start --snapshot-name `snapshotName`. Otherwise, the
network saves to the default snapshot, overwriting any existing state. You can reload the
default snapshot with network start.
**Usage:**
```bash
avalanche network stop [subcommand] [flags]
```
**Flags:**
```bash
--dont-save do not save snapshot, just stop the network
-h, --help help for stop
--snapshot-name string name of snapshot to use to save network state into (default "default")
--config string config file (default is $HOME/.avalanche-cli/config.json)
--log-level string log level for the application (default "ERROR")
--skip-update-check skip check for new versions
```
## avalanche node
The node command suite provides a collection of tools for creating and maintaining
validators on Avalanche Network.
To get started, use the node create command wizard to walk through the
configuration to make your node a primary validator on Avalanche public network. You can use the
rest of the commands to maintain your node and make your node a Subnet Validator.
**Usage:**
```bash
avalanche node [subcommand] [flags]
```
**Subcommands:**
- [`addDashboard`](#avalanche-node-adddashboard): (ALPHA Warning) This command is currently in experimental mode.
The node addDashboard command adds custom dashboard to the Grafana monitoring dashboard for the
cluster.
- [`create`](#avalanche-node-create): (ALPHA Warning) This command is currently in experimental mode.
The node create command sets up a validator on a cloud server of your choice.
The validator will be validating the Avalanche Primary Network and Subnet
of your choice. By default, the command runs an interactive wizard. It
walks you through all the steps you need to set up a validator.
Once this command is completed, you will have to wait for the validator
to finish bootstrapping on the primary network before running further
commands on it, e.g. validating a Subnet. You can check the bootstrapping
status by running avalanche node status
The created node will be part of group of validators called `clusterName`
and users can call node commands with `clusterName` so that the command
will apply to all nodes in the cluster
- [`destroy`](#avalanche-node-destroy): (ALPHA Warning) This command is currently in experimental mode.
The node destroy command terminates all running nodes in cloud server and deletes all storage disks.
If there is a static IP address attached, it will be released.
- [`devnet`](#avalanche-node-devnet): (ALPHA Warning) This command is currently in experimental mode.
The node devnet command suite provides a collection of commands related to devnets.
You can check the updated status by calling avalanche node status `clusterName`
- [`export`](#avalanche-node-export): (ALPHA Warning) This command is currently in experimental mode.
The node export command exports cluster configuration and its nodes config to a text file.
If no file is specified, the configuration is printed to the stdout.
Use --include-secrets to include keys in the export. In this case please keep the file secure as it contains sensitive information.
Exported cluster configuration without secrets can be imported by another user using node import command.
- [`import`](#avalanche-node-import): (ALPHA Warning) This command is currently in experimental mode.
The node import command imports cluster configuration and its nodes configuration from a text file
created from the node export command.
Prior to calling this command, call node whitelist command to have your SSH public key and IP whitelisted by
the cluster owner. This will enable you to use avalanche-cli commands to manage the imported cluster.
Please note, that this imported cluster will be considered as EXTERNAL by avalanche-cli, so some commands
affecting cloud nodes like node create or node destroy will be not applicable to it.
- [`list`](#avalanche-node-list): (ALPHA Warning) This command is currently in experimental mode.
The node list command lists all clusters together with their nodes.
- [`loadtest`](#avalanche-node-loadtest): (ALPHA Warning) This command is currently in experimental mode.
The node loadtest command suite starts and stops a load test for an existing devnet cluster.
- [`local`](#avalanche-node-local): The node local command suite provides a collection of commands related to local nodes
- [`refresh-ips`](#avalanche-node-refresh-ips): (ALPHA Warning) This command is currently in experimental mode.
The node refresh-ips command obtains the current IP for all nodes with dynamic IPs in the cluster,
and updates the local node information used by CLI commands.
- [`resize`](#avalanche-node-resize): (ALPHA Warning) This command is currently in experimental mode.
The node resize command can change the amount of CPU, memory and disk space available for the cluster nodes.
- [`scp`](#avalanche-node-scp): (ALPHA Warning) This command is currently in experimental mode.
The node scp command securely copies files to and from nodes. Remote source or destionation can be specified using the following format:
[clusterName|nodeID|instanceID|IP]:/path/to/file. Regular expressions are supported for the source files like /tmp/*.txt.
File transfer to the nodes are parallelized. IF source or destination is cluster, the other should be a local file path.
If both destinations are remote, they must be nodes for the same cluster and not clusters themselves.
For example:
$ avalanche node scp [cluster1|node1]:/tmp/file.txt /tmp/file.txt
$ avalanche node scp /tmp/file.txt [cluster1|NodeID-XXXX]:/tmp/file.txt
$ avalanche node scp node1:/tmp/file.txt NodeID-XXXX:/tmp/file.txt
- [`ssh`](#avalanche-node-ssh): (ALPHA Warning) This command is currently in experimental mode.
The node ssh command execute a given command [cmd] using ssh on all nodes in the cluster if ClusterName is given.
If no command is given, just prints the ssh command to be used to connect to each node in the cluster.
For provided NodeID or InstanceID or IP, the command [cmd] will be executed on that node.
If no [cmd] is provided for the node, it will open ssh shell there.
- [`status`](#avalanche-node-status): (ALPHA Warning) This command is currently in experimental mode.
The node status command gets the bootstrap status of all nodes in a cluster with the Primary Network.
If no cluster is given, defaults to node list behaviour.
To get the bootstrap status of a node with a Blockchain, use --blockchain flag
- [`sync`](#avalanche-node-sync): (ALPHA Warning) This command is currently in experimental mode.
The node sync command enables all nodes in a cluster to be bootstrapped to a Blockchain.
You can check the blockchain bootstrap status by calling avalanche node status `clusterName` --blockchain `blockchainName`
- [`update`](#avalanche-node-update): (ALPHA Warning) This command is currently in experimental mode.
The node update command suite provides a collection of commands for nodes to update
their avalanchego or VM config.
You can check the status after update by calling avalanche node status
- [`upgrade`](#avalanche-node-upgrade): (ALPHA Warning) This command is currently in experimental mode.
The node update command suite provides a collection of commands for nodes to update
their avalanchego or VM version.
You can check the status after upgrade by calling avalanche node status
- [`validate`](#avalanche-node-validate): (ALPHA Warning) This command is currently in experimental mode.
The node validate command suite provides a collection of commands for nodes to join
the Primary Network and Subnets as validators.
If any of the commands is run before the nodes are bootstrapped on the Primary Network, the command
will fail. You can check the bootstrap status by calling avalanche node status `clusterName`
- [`whitelist`](#avalanche-node-whitelist): (ALPHA Warning) The whitelist command suite provides a collection of tools for granting access to the cluster.
Command adds IP if --ip params provided to cloud security access rules allowing it to access all nodes in the cluster via ssh or http.
It also command adds SSH public key to all nodes in the cluster if --ssh params is there.
If no params provided it detects current user IP automaticaly and whitelists it
**Flags:**
```bash
-h, --help help for node
--config string config file (default is $HOME/.avalanche-cli/config.json)
--log-level string log level for the application (default "ERROR")
--skip-update-check skip check for new versions
```
### addDashboard
(ALPHA Warning) This command is currently in experimental mode.
The node addDashboard command adds custom dashboard to the Grafana monitoring dashboard for the
cluster.
**Usage:**
```bash
avalanche node addDashboard [subcommand] [flags]
```
**Flags:**
```bash
--add-grafana-dashboard string path to additional grafana dashboard json file
-h, --help help for addDashboard
--subnet string subnet that the dasbhoard is intended for (if any)
--config string config file (default is $HOME/.avalanche-cli/config.json)
--log-level string log level for the application (default "ERROR")
--skip-update-check skip check for new versions
```
### create
(ALPHA Warning) This command is currently in experimental mode.
The node create command sets up a validator on a cloud server of your choice.
The validator will be validating the Avalanche Primary Network and Subnet
of your choice. By default, the command runs an interactive wizard. It
walks you through all the steps you need to set up a validator.
Once this command is completed, you will have to wait for the validator
to finish bootstrapping on the primary network before running further
commands on it, e.g. validating a Subnet. You can check the bootstrapping
status by running avalanche node status
The created node will be part of group of validators called `clusterName`
and users can call node commands with `clusterName` so that the command
will apply to all nodes in the cluster
**Usage:**
```bash
avalanche node create [subcommand] [flags]
```
**Flags:**
```bash
--add-grafana-dashboard string path to additional grafana dashboard json file
--alternative-key-pair-name string key pair name to use if default one generates conflicts
--authorize-access authorize CLI to create cloud resources
--auto-replace-keypair automatically replaces key pair to access node if previous key pair is not found
--avalanchego-version-from-subnet string install latest avalanchego version, that is compatible with the given subnet, on node/s
--aws create node/s in AWS cloud
--aws-profile string aws profile to use (default "default")
--aws-volume-iops int AWS iops (for gp3, io1, and io2 volume types only) (default 3000)
--aws-volume-size int AWS volume size in GB (default 1000)
--aws-volume-throughput int AWS throughput in MiB/s (for gp3 volume type only) (default 125)
--aws-volume-type string AWS volume type (default "gp3")
--bootstrap-ids stringArray nodeIDs of bootstrap nodes
--bootstrap-ips stringArray IP:port pairs of bootstrap nodes
--cluster string operate on the given cluster
--custom-avalanchego-version string install given avalanchego version on node/s
--devnet operate on a devnet network
--enable-monitoring set up Prometheus monitoring for created nodes. This option creates a separate monitoring cloud instance and incures additional cost
--endpoint string use the given endpoint for network operations
-f, --fuji testnet operate on fuji (alias to testnet
--gcp create node/s in GCP cloud
--gcp-credentials string use given GCP credentials
--gcp-project string use given GCP project
--genesis string path to genesis file
--grafana-pkg string use grafana pkg instead of apt repo(by default), for example https://dl.grafana.com/oss/release/grafana_10.4.1_amd64.deb
-h, --help help for create
--latest-avalanchego-pre-release-version install latest avalanchego pre-release version on node/s
--latest-avalanchego-version install latest avalanchego release version on node/s
-m, --mainnet operate on mainnet
--node-type string cloud instance type. Use 'default' to use recommended default instance type
--num-apis ints number of API nodes(nodes without stake) to create in the new Devnet
--num-validators ints number of nodes to create per region(s). Use comma to separate multiple numbers for each region in the same order as --region flag
--partial-sync primary network partial sync (default true)
--public-http-port allow public access to avalanchego HTTP port
--region strings create node(s) in given region(s). Use comma to separate multiple regions
--ssh-agent-identity string use given ssh identity(only for ssh agent). If not set, default will be used
-t, --testnet fuji operate on testnet (alias to fuji)
--upgrade string path to upgrade file
--use-ssh-agent use ssh agent(ex: Yubikey) for ssh auth
--use-static-ip attach static Public IP on cloud servers (default true)
--config string config file (default is $HOME/.avalanche-cli/config.json)
--log-level string log level for the application (default "ERROR")
--skip-update-check skip check for new versions
```
### destroy
(ALPHA Warning) This command is currently in experimental mode.
The node destroy command terminates all running nodes in cloud server and deletes all storage disks.
If there is a static IP address attached, it will be released.
**Usage:**
```bash
avalanche node destroy [subcommand] [flags]
```
**Flags:**
```bash
--all destroy all existing clusters created by Avalanche CLI
--authorize-access authorize CLI to release cloud resources
-y, --authorize-all authorize all CLI requests
--authorize-remove authorize CLI to remove all local files related to cloud nodes
--aws-profile string aws profile to use (default "default")
-h, --help help for destroy
--config string config file (default is $HOME/.avalanche-cli/config.json)
--log-level string log level for the application (default "ERROR")
--skip-update-check skip check for new versions
```
### devnet
(ALPHA Warning) This command is currently in experimental mode.
The node devnet command suite provides a collection of commands related to devnets.
You can check the updated status by calling avalanche node status `clusterName`
**Usage:**
```bash
avalanche node devnet [subcommand] [flags]
```
**Subcommands:**
- [`deploy`](#avalanche-node-devnet-deploy): (ALPHA Warning) This command is currently in experimental mode.
The node devnet deploy command deploys a subnet into a devnet cluster, creating subnet and blockchain txs for it.
It saves the deploy info both locally and remotely.
- [`wiz`](#avalanche-node-devnet-wiz): (ALPHA Warning) This command is currently in experimental mode.
The node wiz command creates a devnet and deploys, sync and validate a subnet into it. It creates the subnet if so needed.
**Flags:**
```bash
-h, --help help for devnet
--config string config file (default is $HOME/.avalanche-cli/config.json)
--log-level string log level for the application (default "ERROR")
--skip-update-check skip check for new versions
```
#### devnet deploy
(ALPHA Warning) This command is currently in experimental mode.
The node devnet deploy command deploys a subnet into a devnet cluster, creating subnet and blockchain txs for it.
It saves the deploy info both locally and remotely.
**Usage:**
```bash
avalanche node devnet deploy [subcommand] [flags]
```
**Flags:**
```bash
-h, --help help for deploy
--no-checks do not check for healthy status or rpc compatibility of nodes against subnet
--subnet-aliases strings additional subnet aliases to be used for RPC calls in addition to subnet blockchain name
--subnet-only only create a subnet
--config string config file (default is $HOME/.avalanche-cli/config.json)
--log-level string log level for the application (default "ERROR")
--skip-update-check skip check for new versions
```
#### devnet wiz
(ALPHA Warning) This command is currently in experimental mode.
The node wiz command creates a devnet and deploys, sync and validate a subnet into it. It creates the subnet if so needed.
**Usage:**
```bash
avalanche node devnet wiz [subcommand] [flags]
```
**Flags:**
```bash
--add-grafana-dashboard string path to additional grafana dashboard json file
--alternative-key-pair-name string key pair name to use if default one generates conflicts
--authorize-access authorize CLI to create cloud resources
--auto-replace-keypair automatically replaces key pair to access node if previous key pair is not found
--aws create node/s in AWS cloud
--aws-profile string aws profile to use (default "default")
--aws-volume-iops int AWS iops (for gp3, io1, and io2 volume types only) (default 3000)
--aws-volume-size int AWS volume size in GB (default 1000)
--aws-volume-throughput int AWS throughput in MiB/s (for gp3 volume type only) (default 125)
--aws-volume-type string AWS volume type (default "gp3")
--chain-config string path to the chain configuration for subnet
--custom-avalanchego-version string install given avalanchego version on node/s
--custom-subnet use a custom VM as the subnet virtual machine
--custom-vm-branch string custom vm branch or commit
--custom-vm-build-script string custom vm build-script
--custom-vm-repo-url string custom vm repository url
--default-validator-params use default weight/start/duration params for subnet validator
--deploy-icm-messenger deploy Interchain Messenger (default true)
--deploy-icm-registry deploy Interchain Registry (default true)
--deploy-teleporter-messenger deploy Interchain Messenger (default true)
--deploy-teleporter-registry deploy Interchain Registry (default true)
--enable-monitoring set up Prometheus monitoring for created nodes. Please note that this option creates a separate monitoring instance and incures additional cost
--evm-chain-id uint chain ID to use with Subnet-EVM
--evm-defaults use default production settings with Subnet-EVM
--evm-production-defaults use default production settings for your blockchain
--evm-subnet use Subnet-EVM as the subnet virtual machine
--evm-test-defaults use default test settings for your blockchain
--evm-token string token name to use with Subnet-EVM
--evm-version string version of Subnet-EVM to use
--force-subnet-create overwrite the existing subnet configuration if one exists
--gcp create node/s in GCP cloud
--gcp-credentials string use given GCP credentials
--gcp-project string use given GCP project
--grafana-pkg string use grafana pkg instead of apt repo(by default), for example https://dl.grafana.com/oss/release/grafana_10.4.1_amd64.deb
-h, --help help for wiz
--icm generate an icm-ready vm
--icm-messenger-contract-address-path string path to an icm messenger contract address file
--icm-messenger-deployer-address-path string path to an icm messenger deployer address file
--icm-messenger-deployer-tx-path string path to an icm messenger deployer tx file
--icm-registry-bytecode-path string path to an icm registry bytecode file
--icm-version string icm version to deploy (default "latest")
--latest-avalanchego-pre-release-version install latest avalanchego pre-release version on node/s
--latest-avalanchego-version install latest avalanchego release version on node/s
--latest-evm-version use latest Subnet-EVM released version
--latest-pre-released-evm-version use latest Subnet-EVM pre-released version
--node-config string path to avalanchego node configuration for subnet
--node-type string cloud instance type. Use 'default' to use recommended default instance type
--num-apis ints number of API nodes(nodes without stake) to create in the new Devnet
--num-validators ints number of nodes to create per region(s). Use comma to separate multiple numbers for each region in the same order as --region flag
--public-http-port allow public access to avalanchego HTTP port
--region strings create node/s in given region(s). Use comma to separate multiple regions
--relayer run AWM relayer when deploying the vm
--ssh-agent-identity string use given ssh identity(only for ssh agent). If not set, default will be used.
--subnet-aliases strings additional subnet aliases to be used for RPC calls in addition to subnet blockchain name
--subnet-config string path to the subnet configuration for subnet
--subnet-genesis string file path of the subnet genesis
--teleporter generate an icm-ready vm
--teleporter-messenger-contract-address-path string path to an icm messenger contract address file
--teleporter-messenger-deployer-address-path string path to an icm messenger deployer address file
--teleporter-messenger-deployer-tx-path string path to an icm messenger deployer tx file
--teleporter-registry-bytecode-path string path to an icm registry bytecode file
--teleporter-version string icm version to deploy (default "latest")
--use-ssh-agent use ssh agent for ssh
--use-static-ip attach static Public IP on cloud servers (default true)
--validators strings deploy subnet into given comma separated list of validators. defaults to all cluster nodes
--config string config file (default is $HOME/.avalanche-cli/config.json)
--log-level string log level for the application (default "ERROR")
--skip-update-check skip check for new versions
```
### export
(ALPHA Warning) This command is currently in experimental mode.
The node export command exports cluster configuration and its nodes config to a text file.
If no file is specified, the configuration is printed to the stdout.
Use --include-secrets to include keys in the export. In this case please keep the file secure as it contains sensitive information.
Exported cluster configuration without secrets can be imported by another user using node import command.
**Usage:**
```bash
avalanche node export [subcommand] [flags]
```
**Flags:**
```bash
--file string specify the file to export the cluster configuration to
--force overwrite the file if it exists
-h, --help help for export
--include-secrets include keys in the export
--config string config file (default is $HOME/.avalanche-cli/config.json)
--log-level string log level for the application (default "ERROR")
--skip-update-check skip check for new versions
```
### import
(ALPHA Warning) This command is currently in experimental mode.
The node import command imports cluster configuration and its nodes configuration from a text file
created from the node export command.
Prior to calling this command, call node whitelist command to have your SSH public key and IP whitelisted by
the cluster owner. This will enable you to use avalanche-cli commands to manage the imported cluster.
Please note, that this imported cluster will be considered as EXTERNAL by avalanche-cli, so some commands
affecting cloud nodes like node create or node destroy will be not applicable to it.
**Usage:**
```bash
avalanche node import [subcommand] [flags]
```
**Flags:**
```bash
--file string specify the file to export the cluster configuration to
-h, --help help for import
--config string config file (default is $HOME/.avalanche-cli/config.json)
--log-level string log level for the application (default "ERROR")
--skip-update-check skip check for new versions
```
### list
(ALPHA Warning) This command is currently in experimental mode.
The node list command lists all clusters together with their nodes.
**Usage:**
```bash
avalanche node list [subcommand] [flags]
```
**Flags:**
```bash
-h, --help help for list
--config string config file (default is $HOME/.avalanche-cli/config.json)
--log-level string log level for the application (default "ERROR")
--skip-update-check skip check for new versions
```
### loadtest
(ALPHA Warning) This command is currently in experimental mode.
The node loadtest command suite starts and stops a load test for an existing devnet cluster.
**Usage:**
```bash
avalanche node loadtest [subcommand] [flags]
```
**Subcommands:**
- [`start`](#avalanche-node-loadtest-start): (ALPHA Warning) This command is currently in experimental mode.
The node loadtest command starts load testing for an existing devnet cluster. If the cluster does
not have an existing load test host, the command creates a separate cloud server and builds the load
test binary based on the provided load test Git Repo URL and load test binary build command.
The command will then run the load test binary based on the provided load test run command.
- [`stop`](#avalanche-node-loadtest-stop): (ALPHA Warning) This command is currently in experimental mode.
The node loadtest stop command stops load testing for an existing devnet cluster and terminates the
separate cloud server created to host the load test.
**Flags:**
```bash
-h, --help help for loadtest
--config string config file (default is $HOME/.avalanche-cli/config.json)
--log-level string log level for the application (default "ERROR")
--skip-update-check skip check for new versions
```
#### loadtest start
(ALPHA Warning) This command is currently in experimental mode.
The node loadtest command starts load testing for an existing devnet cluster. If the cluster does
not have an existing load test host, the command creates a separate cloud server and builds the load
test binary based on the provided load test Git Repo URL and load test binary build command.
The command will then run the load test binary based on the provided load test run command.
**Usage:**
```bash
avalanche node loadtest start [subcommand] [flags]
```
**Flags:**
```bash
--authorize-access authorize CLI to create cloud resources
--aws create loadtest node in AWS cloud
--aws-profile string aws profile to use (default "default")
--gcp create loadtest in GCP cloud
-h, --help help for start
--load-test-branch string load test branch or commit
--load-test-build-cmd string command to build load test binary
--load-test-cmd string command to run load test
--load-test-repo string load test repo url to use
--node-type string cloud instance type for loadtest script
--region string create load test node in a given region
--ssh-agent-identity string use given ssh identity(only for ssh agent). If not set, default will be used
--use-ssh-agent use ssh agent(ex: Yubikey) for ssh auth
--config string config file (default is $HOME/.avalanche-cli/config.json)
--log-level string log level for the application (default "ERROR")
--skip-update-check skip check for new versions
```
#### loadtest stop
(ALPHA Warning) This command is currently in experimental mode.
The node loadtest stop command stops load testing for an existing devnet cluster and terminates the
separate cloud server created to host the load test.
**Usage:**
```bash
avalanche node loadtest stop [subcommand] [flags]
```
**Flags:**
```bash
-h, --help help for stop
--load-test strings stop specified load test node(s). Use comma to separate multiple load test instance names
--config string config file (default is $HOME/.avalanche-cli/config.json)
--log-level string log level for the application (default "ERROR")
--skip-update-check skip check for new versions
```
### local
The node local command suite provides a collection of commands related to local nodes
**Usage:**
```bash
avalanche node local [subcommand] [flags]
```
**Subcommands:**
- [`destroy`](#avalanche-node-local-destroy): Cleanup local node.
- [`start`](#avalanche-node-local-start): The node local start command creates Avalanche nodes on the local machine.
Once this command is completed, you will have to wait for the Avalanche node
to finish bootstrapping on the primary network before running further
commands on it, e.g. validating a Subnet.
You can check the bootstrapping status by running avalanche node status local.
- [`status`](#avalanche-node-local-status): Get status of local node.
- [`stop`](#avalanche-node-local-stop): Stop local node.
- [`track`](#avalanche-node-local-track): Track specified blockchain with local node
- [`validate`](#avalanche-node-local-validate): Use Avalanche Node set up on local machine to set up specified L1 by providing the
RPC URL of the L1.
This command can only be used to validate Proof of Stake L1.
**Flags:**
```bash
-h, --help help for local
--config string config file (default is $HOME/.avalanche-cli/config.json)
--log-level string log level for the application (default "ERROR")
--skip-update-check skip check for new versions
```
#### local destroy
Cleanup local node.
**Usage:**
```bash
avalanche node local destroy [subcommand] [flags]
```
**Flags:**
```bash
-h, --help help for destroy
--config string config file (default is $HOME/.avalanche-cli/config.json)
--log-level string log level for the application (default "ERROR")
--skip-update-check skip check for new versions
```
#### local start
The node local start command creates Avalanche nodes on the local machine.
Once this command is completed, you will have to wait for the Avalanche node
to finish bootstrapping on the primary network before running further
commands on it, e.g. validating a Subnet.
You can check the bootstrapping status by running avalanche node status local.
**Usage:**
```bash
avalanche node local start [subcommand] [flags]
```
**Flags:**
```bash
--avalanchego-path string use this avalanchego binary path
--bootstrap-id stringArray nodeIDs of bootstrap nodes
--bootstrap-ip stringArray IP:port pairs of bootstrap nodes
--cluster string operate on the given cluster
--custom-avalanchego-version string install given avalanchego version on node/s
--devnet operate on a devnet network
--endpoint string use the given endpoint for network operations
-f, --fuji testnet operate on fuji (alias to testnet
--genesis string path to genesis file
-h, --help help for start
--latest-avalanchego-pre-release-version install latest avalanchego pre-release version on node/s (default true)
--latest-avalanchego-version install latest avalanchego release version on node/s
-l, --local operate on a local network
-m, --mainnet operate on mainnet
--node-config string path to common avalanchego config settings for all nodes
--num-nodes uint32 number of Avalanche nodes to create on local machine (default 1)
--partial-sync primary network partial sync (default true)
--staking-cert-key-path string path to provided staking cert key for node
--staking-signer-key-path string path to provided staking signer key for node
--staking-tls-key-path string path to provided staking tls key for node
-t, --testnet fuji operate on testnet (alias to fuji)
--upgrade string path to upgrade file
--config string config file (default is $HOME/.avalanche-cli/config.json)
--log-level string log level for the application (default "ERROR")
--skip-update-check skip check for new versions
```
#### local status
Get status of local node.
**Usage:**
```bash
avalanche node local status [subcommand] [flags]
```
**Flags:**
```bash
--blockchain string specify the blockchain the node is syncing with
-h, --help help for status
--l1 string specify the blockchain the node is syncing with
--config string config file (default is $HOME/.avalanche-cli/config.json)
--log-level string log level for the application (default "ERROR")
--skip-update-check skip check for new versions
```
#### local stop
Stop local node.
**Usage:**
```bash
avalanche node local stop [subcommand] [flags]
```
**Flags:**
```bash
-h, --help help for stop
--config string config file (default is $HOME/.avalanche-cli/config.json)
--log-level string log level for the application (default "ERROR")
--skip-update-check skip check for new versions
```
#### local track
Track specified blockchain with local node
**Usage:**
```bash
avalanche node local track [subcommand] [flags]
```
**Flags:**
```bash
--avalanchego-path string use this avalanchego binary path
--custom-avalanchego-version string install given avalanchego version on node/s
-h, --help help for track
--latest-avalanchego-pre-release-version install latest avalanchego pre-release version on node/s (default true)
--latest-avalanchego-version install latest avalanchego release version on node/s
--config string config file (default is $HOME/.avalanche-cli/config.json)
--log-level string log level for the application (default "ERROR")
--skip-update-check skip check for new versions
```
#### local validate
Use Avalanche Node set up on local machine to set up specified L1 by providing the
RPC URL of the L1.
This command can only be used to validate Proof of Stake L1.
**Usage:**
```bash
avalanche node local validate [subcommand] [flags]
```
**Flags:**
```bash
--aggregator-log-level string log level to use with signature aggregator (default "Debug")
--aggregator-log-to-stdout use stdout for signature aggregator logs
--balance float amount of AVAX to increase validator's balance by
--blockchain string specify the blockchain the node is syncing with
--delegation-fee uint16 delegation fee (in bips) (default 100)
--disable-owner string P-Chain address that will able to disable the validator with a P-Chain transaction
-h, --help help for validate
--l1 string specify the blockchain the node is syncing with
--minimum-stake-duration uint minimum stake duration (in seconds) (default 100)
--remaining-balance-owner string P-Chain address that will receive any leftover AVAX from the validator when it is removed from Subnet
--rpc string connect to validator manager at the given rpc endpoint
--stake-amount uint amount of tokens to stake
--config string config file (default is $HOME/.avalanche-cli/config.json)
--log-level string log level for the application (default "ERROR")
--skip-update-check skip check for new versions
```
### refresh-ips
(ALPHA Warning) This command is currently in experimental mode.
The node refresh-ips command obtains the current IP for all nodes with dynamic IPs in the cluster,
and updates the local node information used by CLI commands.
**Usage:**
```bash
avalanche node refresh-ips [subcommand] [flags]
```
**Flags:**
```bash
--aws-profile string aws profile to use (default "default")
-h, --help help for refresh-ips
--config string config file (default is $HOME/.avalanche-cli/config.json)
--log-level string log level for the application (default "ERROR")
--skip-update-check skip check for new versions
```
### resize
(ALPHA Warning) This command is currently in experimental mode.
The node resize command can change the amount of CPU, memory and disk space available for the cluster nodes.
**Usage:**
```bash
avalanche node resize [subcommand] [flags]
```
**Flags:**
```bash
--aws-profile string aws profile to use (default "default")
--disk-size string Disk size to resize in Gb (e.g. 1000Gb)
-h, --help help for resize
--node-type string Node type to resize (e.g. t3.2xlarge)
--config string config file (default is $HOME/.avalanche-cli/config.json)
--log-level string log level for the application (default "ERROR")
--skip-update-check skip check for new versions
```
### scp
(ALPHA Warning) This command is currently in experimental mode.
The node scp command securely copies files to and from nodes. Remote source or destionation can be specified using the following format:
[clusterName|nodeID|instanceID|IP]:/path/to/file. Regular expressions are supported for the source files like /tmp/*.txt.
File transfer to the nodes are parallelized. IF source or destination is cluster, the other should be a local file path.
If both destinations are remote, they must be nodes for the same cluster and not clusters themselves.
For example:
$ avalanche node scp [cluster1|node1]:/tmp/file.txt /tmp/file.txt
$ avalanche node scp /tmp/file.txt [cluster1|NodeID-XXXX]:/tmp/file.txt
$ avalanche node scp node1:/tmp/file.txt NodeID-XXXX:/tmp/file.txt
**Usage:**
```bash
avalanche node scp [subcommand] [flags]
```
**Flags:**
```bash
--compress use compression for ssh
-h, --help help for scp
--recursive copy directories recursively
--with-loadtest include loadtest node for scp cluster operations
--with-monitor include monitoring node for scp cluster operations
--config string config file (default is $HOME/.avalanche-cli/config.json)
--log-level string log level for the application (default "ERROR")
--skip-update-check skip check for new versions
```
### ssh
(ALPHA Warning) This command is currently in experimental mode.
The node ssh command execute a given command [cmd] using ssh on all nodes in the cluster if ClusterName is given.
If no command is given, just prints the ssh command to be used to connect to each node in the cluster.
For provided NodeID or InstanceID or IP, the command [cmd] will be executed on that node.
If no [cmd] is provided for the node, it will open ssh shell there.
**Usage:**
```bash
avalanche node ssh [subcommand] [flags]
```
**Flags:**
```bash
-h, --help help for ssh
--parallel run ssh command on all nodes in parallel
--with-loadtest include loadtest node for ssh cluster operations
--with-monitor include monitoring node for ssh cluster operations
--config string config file (default is $HOME/.avalanche-cli/config.json)
--log-level string log level for the application (default "ERROR")
--skip-update-check skip check for new versions
```
### status
(ALPHA Warning) This command is currently in experimental mode.
The node status command gets the bootstrap status of all nodes in a cluster with the Primary Network.
If no cluster is given, defaults to node list behaviour.
To get the bootstrap status of a node with a Blockchain, use --blockchain flag
**Usage:**
```bash
avalanche node status [subcommand] [flags]
```
**Flags:**
```bash
--blockchain string specify the blockchain the node is syncing with
-h, --help help for status
--subnet string specify the blockchain the node is syncing with
--config string config file (default is $HOME/.avalanche-cli/config.json)
--log-level string log level for the application (default "ERROR")
--skip-update-check skip check for new versions
```
### sync
(ALPHA Warning) This command is currently in experimental mode.
The node sync command enables all nodes in a cluster to be bootstrapped to a Blockchain.
You can check the blockchain bootstrap status by calling avalanche node status `clusterName` --blockchain `blockchainName`
**Usage:**
```bash
avalanche node sync [subcommand] [flags]
```
**Flags:**
```bash
-h, --help help for sync
--no-checks do not check for bootstrapped/healthy status or rpc compatibility of nodes against subnet
--subnet-aliases strings subnet alias to be used for RPC calls. defaults to subnet blockchain ID
--validators strings sync subnet into given comma separated list of validators. defaults to all cluster nodes
--config string config file (default is $HOME/.avalanche-cli/config.json)
--log-level string log level for the application (default "ERROR")
--skip-update-check skip check for new versions
```
### update
(ALPHA Warning) This command is currently in experimental mode.
The node update command suite provides a collection of commands for nodes to update
their avalanchego or VM config.
You can check the status after update by calling avalanche node status
**Usage:**
```bash
avalanche node update [subcommand] [flags]
```
**Subcommands:**
- [`subnet`](#avalanche-node-update-subnet): (ALPHA Warning) This command is currently in experimental mode.
The node update subnet command updates all nodes in a cluster with latest Subnet configuration and VM for custom VM.
You can check the updated subnet bootstrap status by calling avalanche node status `clusterName` --subnet `subnetName`
**Flags:**
```bash
-h, --help help for update
--config string config file (default is $HOME/.avalanche-cli/config.json)
--log-level string log level for the application (default "ERROR")
--skip-update-check skip check for new versions
```
#### update subnet
(ALPHA Warning) This command is currently in experimental mode.
The node update subnet command updates all nodes in a cluster with latest Subnet configuration and VM for custom VM.
You can check the updated subnet bootstrap status by calling avalanche node status `clusterName` --subnet `subnetName`
**Usage:**
```bash
avalanche node update subnet [subcommand] [flags]
```
**Flags:**
```bash
-h, --help help for subnet
--config string config file (default is $HOME/.avalanche-cli/config.json)
--log-level string log level for the application (default "ERROR")
--skip-update-check skip check for new versions
```
### upgrade
(ALPHA Warning) This command is currently in experimental mode.
The node update command suite provides a collection of commands for nodes to update
their avalanchego or VM version.
You can check the status after upgrade by calling avalanche node status
**Usage:**
```bash
avalanche node upgrade [subcommand] [flags]
```
**Flags:**
```bash
-h, --help help for upgrade
--config string config file (default is $HOME/.avalanche-cli/config.json)
--log-level string log level for the application (default "ERROR")
--skip-update-check skip check for new versions
```
### validate
(ALPHA Warning) This command is currently in experimental mode.
The node validate command suite provides a collection of commands for nodes to join
the Primary Network and Subnets as validators.
If any of the commands is run before the nodes are bootstrapped on the Primary Network, the command
will fail. You can check the bootstrap status by calling avalanche node status `clusterName`
**Usage:**
```bash
avalanche node validate [subcommand] [flags]
```
**Subcommands:**
- [`primary`](#avalanche-node-validate-primary): (ALPHA Warning) This command is currently in experimental mode.
The node validate primary command enables all nodes in a cluster to be validators of Primary
Network.
- [`subnet`](#avalanche-node-validate-subnet): (ALPHA Warning) This command is currently in experimental mode.
The node validate subnet command enables all nodes in a cluster to be validators of a Subnet.
If the command is run before the nodes are Primary Network validators, the command will first
make the nodes Primary Network validators before making them Subnet validators.
If The command is run before the nodes are bootstrapped on the Primary Network, the command will fail.
You can check the bootstrap status by calling avalanche node status `clusterName`
If The command is run before the nodes are synced to the subnet, the command will fail.
You can check the subnet sync status by calling avalanche node status `clusterName` --subnet `subnetName`
**Flags:**
```bash
-h, --help help for validate
--config string config file (default is $HOME/.avalanche-cli/config.json)
--log-level string log level for the application (default "ERROR")
--skip-update-check skip check for new versions
```
#### validate primary
(ALPHA Warning) This command is currently in experimental mode.
The node validate primary command enables all nodes in a cluster to be validators of Primary
Network.
**Usage:**
```bash
avalanche node validate primary [subcommand] [flags]
```
**Flags:**
```bash
-e, --ewoq use ewoq key [fuji/devnet only]
-h, --help help for primary
-k, --key string select the key to use [fuji only]
-g, --ledger use ledger instead of key (always true on mainnet, defaults to false on fuji/devnet)
--ledger-addrs strings use the given ledger addresses
--stake-amount uint how many AVAX to stake in the validator
--staking-period duration how long validator validates for after start time
--start-time string UTC start time when this validator starts validating, in 'YYYY-MM-DD HH:MM:SS' format
--config string config file (default is $HOME/.avalanche-cli/config.json)
--log-level string log level for the application (default "ERROR")
--skip-update-check skip check for new versions
```
#### validate subnet
(ALPHA Warning) This command is currently in experimental mode.
The node validate subnet command enables all nodes in a cluster to be validators of a Subnet.
If the command is run before the nodes are Primary Network validators, the command will first
make the nodes Primary Network validators before making them Subnet validators.
If The command is run before the nodes are bootstrapped on the Primary Network, the command will fail.
You can check the bootstrap status by calling avalanche node status `clusterName`
If The command is run before the nodes are synced to the subnet, the command will fail.
You can check the subnet sync status by calling avalanche node status `clusterName` --subnet `subnetName`
**Usage:**
```bash
avalanche node validate subnet [subcommand] [flags]
```
**Flags:**
```bash
--default-validator-params use default weight/start/duration params for subnet validator
-e, --ewoq use ewoq key [fuji/devnet only]
-h, --help help for subnet
-k, --key string select the key to use [fuji/devnet only]
-g, --ledger use ledger instead of key (always true on mainnet, defaults to false on fuji/devnet)
--ledger-addrs strings use the given ledger addresses
--no-checks do not check for bootstrapped status or healthy status
--no-validation-checks do not check if subnet is already synced or validated (default true)
--stake-amount uint how many AVAX to stake in the validator
--staking-period duration how long validator validates for after start time
--start-time string UTC start time when this validator starts validating, in 'YYYY-MM-DD HH:MM:SS' format
--validators strings validate subnet for the given comma separated list of validators. defaults to all cluster nodes
--config string config file (default is $HOME/.avalanche-cli/config.json)
--log-level string log level for the application (default "ERROR")
--skip-update-check skip check for new versions
```
### whitelist
(ALPHA Warning) The whitelist command suite provides a collection of tools for granting access to the cluster.
Command adds IP if --ip params provided to cloud security access rules allowing it to access all nodes in the cluster via ssh or http.
It also command adds SSH public key to all nodes in the cluster if --ssh params is there.
If no params provided it detects current user IP automaticaly and whitelists it
**Usage:**
```bash
avalanche node whitelist [subcommand] [flags]
```
**Flags:**
```bash
-y, --current-ip whitelist current host ip
-h, --help help for whitelist
--ip string ip address to whitelist
--ssh string ssh public key to whitelist
--config string config file (default is $HOME/.avalanche-cli/config.json)
--log-level string log level for the application (default "ERROR")
--skip-update-check skip check for new versions
```
## avalanche primary
The primary command suite provides a collection of tools for interacting with the
Primary Network
**Usage:**
```bash
avalanche primary [subcommand] [flags]
```
**Subcommands:**
- [`addValidator`](#avalanche-primary-addvalidator): The primary addValidator command adds a node as a validator
in the Primary Network
- [`describe`](#avalanche-primary-describe): The subnet describe command prints details of the primary network configuration to the console.
**Flags:**
```bash
-h, --help help for primary
--config string config file (default is $HOME/.avalanche-cli/config.json)
--log-level string log level for the application (default "ERROR")
--skip-update-check skip check for new versions
```
### addValidator
The primary addValidator command adds a node as a validator
in the Primary Network
**Usage:**
```bash
avalanche primary addValidator [subcommand] [flags]
```
**Flags:**
```bash
--cluster string operate on the given cluster
--delegation-fee uint32 set the delegation fee (20 000 is equivalent to 2%)
--devnet operate on a devnet network
--endpoint string use the given endpoint for network operations
-f, --fuji testnet operate on fuji (alias to testnet
-h, --help help for addValidator
-k, --key string select the key to use [fuji only]
-g, --ledger use ledger instead of key (always true on mainnet, defaults to false on fuji)
--ledger-addrs strings use the given ledger addresses
-m, --mainnet operate on mainnet
--nodeID string set the NodeID of the validator to add
--proof-of-possession string set the BLS proof of possession of the validator to add
--public-key string set the BLS public key of the validator to add
--staking-period duration how long this validator will be staking
--start-time string UTC start time when this validator starts validating, in 'YYYY-MM-DD HH:MM:SS' format
-t, --testnet fuji operate on testnet (alias to fuji)
--weight uint set the staking weight of the validator to add
--config string config file (default is $HOME/.avalanche-cli/config.json)
--log-level string log level for the application (default "ERROR")
--skip-update-check skip check for new versions
```
### describe
The subnet describe command prints details of the primary network configuration to the console.
**Usage:**
```bash
avalanche primary describe [subcommand] [flags]
```
**Flags:**
```bash
--cluster string operate on the given cluster
-h, --help help for describe
-l, --local operate on a local network
--config string config file (default is $HOME/.avalanche-cli/config.json)
--log-level string log level for the application (default "ERROR")
--skip-update-check skip check for new versions
```
## avalanche transaction
The transaction command suite provides all of the utilities required to sign multisig transactions.
**Usage:**
```bash
avalanche transaction [subcommand] [flags]
```
**Subcommands:**
- [`commit`](#avalanche-transaction-commit): The transaction commit command commits a transaction by submitting it to the P-Chain.
- [`sign`](#avalanche-transaction-sign): The transaction sign command signs a multisig transaction.
**Flags:**
```bash
-h, --help help for transaction
--config string config file (default is $HOME/.avalanche-cli/config.json)
--log-level string log level for the application (default "ERROR")
--skip-update-check skip check for new versions
```
### commit
The transaction commit command commits a transaction by submitting it to the P-Chain.
**Usage:**
```bash
avalanche transaction commit [subcommand] [flags]
```
**Flags:**
```bash
-h, --help help for commit
--input-tx-filepath string Path to the transaction signed by all signatories
--config string config file (default is $HOME/.avalanche-cli/config.json)
--log-level string log level for the application (default "ERROR")
--skip-update-check skip check for new versions
```
### sign
The transaction sign command signs a multisig transaction.
**Usage:**
```bash
avalanche transaction sign [subcommand] [flags]
```
**Flags:**
```bash
-h, --help help for sign
--input-tx-filepath string Path to the transaction file for signing
-k, --key string select the key to use [fuji only]
-g, --ledger use ledger instead of key (always true on mainnet, defaults to false on fuji)
--ledger-addrs strings use the given ledger addresses
--config string config file (default is $HOME/.avalanche-cli/config.json)
--log-level string log level for the application (default "ERROR")
--skip-update-check skip check for new versions
```
## avalanche update
Check if an update is available, and prompt the user to install it
**Usage:**
```bash
avalanche update [subcommand] [flags]
```
**Flags:**
```bash
-c, --confirm Assume yes for installation
-h, --help help for update
-v, --version version for update
--config string config file (default is $HOME/.avalanche-cli/config.json)
--log-level string log level for the application (default "ERROR")
--skip-update-check skip check for new versions
```
## avalanche validator
The validator command suite provides a collection of tools for managing validator
balance on P-Chain.
Validator's balance is used to pay for continuous fee to the P-Chain. When this Balance reaches 0,
the validator will be considered inactive and will no longer participate in validating the L1
**Usage:**
```bash
avalanche validator [subcommand] [flags]
```
**Subcommands:**
- [`getBalance`](#avalanche-validator-getbalance): This command gets the remaining validator P-Chain balance that is available to pay
P-Chain continuous fee
- [`increaseBalance`](#avalanche-validator-increasebalance): This command increases the validator P-Chain balance
- [`list`](#avalanche-validator-list): This command gets a list of the validators of the L1
**Flags:**
```bash
-h, --help help for validator
--config string config file (default is $HOME/.avalanche-cli/config.json)
--log-level string log level for the application (default "ERROR")
--skip-update-check skip check for new versions
```
### getBalance
This command gets the remaining validator P-Chain balance that is available to pay
P-Chain continuous fee
**Usage:**
```bash
avalanche validator getBalance [subcommand] [flags]
```
**Flags:**
```bash
--cluster string operate on the given cluster
--devnet operate on a devnet network
--endpoint string use the given endpoint for network operations
-f, --fuji testnet operate on fuji (alias to testnet
-h, --help help for getBalance
--l1 string name of L1
-l, --local operate on a local network
-m, --mainnet operate on mainnet
--node-id string node ID of the validator
-t, --testnet fuji operate on testnet (alias to fuji)
--validation-id string validation ID of the validator
--config string config file (default is $HOME/.avalanche-cli/config.json)
--log-level string log level for the application (default "ERROR")
--skip-update-check skip check for new versions
```
### increaseBalance
This command increases the validator P-Chain balance
**Usage:**
```bash
avalanche validator increaseBalance [subcommand] [flags]
```
**Flags:**
```bash
--balance float amount of AVAX to increase validator's balance by
--cluster string operate on the given cluster
--devnet operate on a devnet network
--endpoint string use the given endpoint for network operations
-f, --fuji testnet operate on fuji (alias to testnet
-h, --help help for increaseBalance
-k, --key string select the key to use [fuji/devnet deploy only]
--l1 string name of L1 (to increase balance of bootstrap validators only)
-l, --local operate on a local network
-m, --mainnet operate on mainnet
--node-id string node ID of the validator
-t, --testnet fuji operate on testnet (alias to fuji)
--validation-id string validationIDStr of the validator
--config string config file (default is $HOME/.avalanche-cli/config.json)
--log-level string log level for the application (default "ERROR")
--skip-update-check skip check for new versions
```
### list
This command gets a list of the validators of the L1
**Usage:**
```bash
avalanche validator list [subcommand] [flags]
```
**Flags:**
```bash
--cluster string operate on the given cluster
--devnet operate on a devnet network
--endpoint string use the given endpoint for network operations
-f, --fuji testnet operate on fuji (alias to testnet
-h, --help help for list
-l, --local operate on a local network
-m, --mainnet operate on mainnet
-t, --testnet fuji operate on testnet (alias to fuji)
--config string config file (default is $HOME/.avalanche-cli/config.json)
--log-level string log level for the application (default "ERROR")
--skip-update-check skip check for new versions
```
# Create Avalanche L1 (/docs/tooling/avalanche-cli/create-avalanche-l1)
---
title: Create Avalanche L1
description: This page demonstrates how to create an Avalanche L1 using Avalanche-CLI.
---
This tutorial walks you through the process of using Avalanche-CLI to create an Avalanche L1, deploy it to a local network, and connect to it with Core wallet.
The first step of learning Avalanche L1 development is learning to use [Avalanche-CLI](https://github.com/ava-labs/avalanche-cli).
Installation[](#installation "Direct link to heading")
-------------------------------------------------------
The fastest way to install the latest Avalanche-CLI binary is by running the install script:
```bash
curl -sSfL https://raw.githubusercontent.com/ava-labs/avalanche-cli/main/scripts/install.sh | sh -s
```
The binary installs inside the `~/bin` directory. If the directory doesn't exist, it will be created.
You can run all of the commands in this tutorial by calling `~/bin/avalanche`.
You can also add the command to your system path by running:
```bash
export PATH=~/bin:$PATH
```
To make this change permanent, add this line to your shell’s initialization file (e.g., `~/.bashrc` or `~/.zshrc`). For example:
```bash
echo 'export PATH=~/bin:$PATH' >> ~/.bashrc
source ~/.bashrc
```
Once you add it to your path, you should be able to call the program anywhere with just: `avalanche`
For more detailed installation instructions, see [Avalanche-CLI Installation](/docs/tooling/get-avalanche-cli).
Create Your Avalanche L1 Configuration[](#create-your-avalanche-l1-configuration "Direct link to heading")
-----------------------------------------------------------------------------------------------
This tutorial teaches you how to create an Ethereum Virtual Machine (EVM) based Avalanche L1. To do so, you use Subnet-EVM, Avalanche's L1 fork of the EVM. It supports airdrops, custom fee tokens, configurable gas parameters, and multiple stateful precompiles. To learn more, take a look at [Subnet-EVM](https://github.com/ava-labs/subnet-evm). The goal of your first command is to create a Subnet-EVM configuration.
The `avalanche-cli` command suite provides a collection of tools for developing and deploying Avalanche L1s.
The Creation Wizard walks you through the process of creating your Avalanche L1. To get started, first pick a name for your Avalanche L1. This tutorial uses `myblockchain`, but feel free to substitute that with any name you like. Once you've picked your name, run:
```bash
avalanche blockchain create myblockchain
```
The following sections walk through each question in the wizard.
### Choose Your VM
```bash
? Which Virtual Machine would you like to use?:
▸ Subnet-EVM
Custom VM
Explain the difference
```
Select `Subnet-EVM`.
### Choose Validator Manager
```text
? Which validator management type would you like to use in your blockchain?:
▸ Proof Of Authority
Proof Of Stake
Explain the difference
```
Select `Proof Of Authority`.
```text
? Which address do you want to enable as controller of ValidatorManager contract?:
▸ Get address from an existing stored key (created from avalanche key create or avalanche key import)
Custom
```
Select `Get address from an existing stored key`.
```text
? Which stored key should be used enable as controller of ValidatorManager contract?:
▸ ewoq
cli-awm-relayer
cli-teleporter-deployer
```
Select `ewoq`.
This key is used to manage (add/remove) the validator set.
Do not use EWOQ key in a testnet or production setup. The EWOQ private key is publicly exposed.
To learn more about different validator management types, see [PoA vs PoS](/docs/avalanche-l1s/validator-manager/poa-vs-pos).
### Choose Blockchain Configuration
```text
? Do you want to use default values for the Blockchain configuration?:
▸ I want to use defaults for a test environment
I want to use defaults for a production environment
I don't want to use default values
Explain the difference
```
Select `I want to use defaults for a test environment`.
This will automatically setup the configuration for a test environment, including an airdrop to the EWOQ key and Avalanche ICM.
### Enter Your Avalanche L1's ChainID
```text
✗ Chain ID:
```
Choose a positive integer for your EVM-style ChainID.
In production environments, this ChainID needs to be unique and not shared with any other chain. You can visit [chainlist](https://chainlist.org/) to verify that your selection is unique. Because this is a development Avalanche L1, feel free to pick any number. Stay away from well-known ChainIDs such as 1 (Ethereum) or 43114 (Avalanche C-Chain) as those may cause issues with other tools.
### Token Symbol
```text
✗ Token Symbol:
```
Enter a string to name your Avalanche L1's native token. The token symbol doesn't necessarily need to be unique. Example token symbols are AVAX, JOE, and BTC.
### Wrapping Up
If all worked successfully, the command prints:
```bash
✓ Successfully created blockchain configuration
```
To view the Genesis configuration, use the following command:
```bash
avalanche blockchain describe myblockchain --genesis
```
You've successfully created your first Avalanche L1 configuration. Now it's time to deploy it.
# Installation (/docs/tooling/avalanche-cli/get-avalanche-cli)
---
title: Installation
description: Instructions for installing and setting up the Avalanche-CLI.
---
## Compatibility
Avalanche-CLI runs on Linux and Mac. Windows is currently not supported.
## Instructions
To download a binary for the latest release, run:
```bash
curl -sSfL https://raw.githubusercontent.com/ava-labs/avalanche-cli/main/scripts/install.sh | sh -s
```
The script installs the binary inside the `~/bin` directory. If the directory doesn't exist, it will be created.
## Adding Avalanche-CLI to Your PATH
To call the `avalanche` binary from anywhere, you'll need to add it to your system path. If you installed the binary into the default location, you can run the following snippet to add it to your path.
To add it to your path permanently, add an export command to your shell initialization script. If you run `bash`, use `.bashrc`. If you run `zsh`, use `.zshrc`.
For example:
```bash
export PATH=~/bin:$PATH >> .bashrc
```
## Checking Your Installation
You can test your installation by running `avalanche --version`. The tool should print the running version.
## Updating
To update your installation, you need to delete your current binary and download the latest version using the preceding steps.
## Building from Source
The source code is available in this [GitHub repository](https://github.com/ava-labs/avalanche-cli).
After you've cloned the repository, checkout the tag you'd like to run. You can compile the code by running `./scripts/build.sh` from the top level directory.
The build script names the binary `./bin/avalanche`.
# Avalanche-CLI Overview (/docs/tooling/avalanche-cli)
---
title: Avalanche-CLI Overview
description: Build, deploy, and manage Avalanche L1s with the Avalanche-CLI
---
The Avalanche-CLI is a powerful command-line tool that streamlines the process of building, deploying, and managing Avalanche L1 blockchains (formerly known as Subnets).
## Key Features
- **Create & Deploy L1s**: Quickly create and deploy new Avalanche L1 blockchains to local, testnet, or mainnet environments
- **VM Management**: Deploy L1s with Subnet-EVM or custom Virtual Machines
- **Node Operations**: Run and manage validator nodes across different cloud providers
- **Cross-Chain Messaging**: Set up Teleporter for cross-chain communication
- **Transaction Management**: Handle native token transfers and P-Chain operations
## Getting Started
To get started with Avalanche-CLI:
1. [Install Avalanche-CLI](/docs/tooling/avalanche-cli/get-avalanche-cli) on your system
2. Review the [CLI Commands Reference](/docs/tooling/avalanche-cli/cli-commands) for available commands
3. Follow the guide to [Create an Avalanche L1](/docs/tooling/avalanche-cli/create-avalanche-l1)
## Quick Links
Get Avalanche-CLI installed on your system
Learn how to create your first Avalanche L1
Deploy L1s to various environments
Complete reference for all CLI commands
## Common Use Cases
### Local Development
Deploy and test your L1 locally before moving to testnet or mainnet.
### Production Deployment
Deploy L1s to Fuji testnet for testing, then to mainnet for production use.
### Validator Management
Add and remove validators, manage staking, and monitor node health.
### Cross-Chain Integration
Enable cross-chain messaging between your L1 and other chains using Teleporter.
## Support
- [GitHub Repository](https://github.com/ava-labs/avalanche-cli)
- [Discord Community](https://chat.avalabs.org/)
- [Documentation](https://docs.avax.network/)
# Data Visualization (/docs/tooling/avalanche-postman/data-visualization)
---
title: Data Visualization
description: Data visualization for Avalanche APIs using Postman
---
Data visualization is available for a number of API calls whose responses are transformed and presented in tabular format for easy reference.
Please check out [Installing Postman Collection](/docs/tooling/avalanche-postman/index) and [Making API Calls](/docs/tooling/avalanche-postman/making-api-calls) beforehand, as this guide assumes that the user has already gone through these steps.
Data visualizations are available for following API calls:
### C-Chain[](#c-chain "Direct link to heading")
- [`eth_baseFee`](/docs/api-reference/c-chain/api#eth_basefee)
- [`eth_blockNumber`](https://www.quicknode.com/docs/ethereum/eth_blockNumber)
- [`eth_chainId`](https://www.quicknode.com/docs/ethereum/eth_chainId)
- [`eth_getBalance`](https://www.quicknode.com/docs/ethereum/eth_getBalance)
- [`eth_getBlockByHash`](https://www.quicknode.com/docs/ethereum/eth_getBlockByHash)
- [`eth_getBlockByNumber`](https://www.quicknode.com/docs/ethereum/eth_getBlockByNumber)
- [`eth_getTransactionByHash`](https://www.quicknode.com/docs/ethereum/eth_getTransactionByHash)
- [`eth_getTransactionReceipt`](https://www.quicknode.com/docs/ethereum/eth_getTransactionReceipt)
- [`avax.getAtomicTx`](/docs/api-reference/c-chain/api#avaxgetatomictx)
### P-Chain[](#p-chain "Direct link to heading")
- [`platform.getCurrentValidators`](/docs/api-reference/p-chain/api#platformgetcurrentvalidators)
### X-Chain[](#x-chain "Direct link to heading")
- [`avm.getAssetDescription`](/docs/api-reference/x-chain/api#avmgetassetdescription)
- [`avm.getBlock`](/docs/api-reference/x-chain/api#avmgetblock)
- [`avm.getBlockByHeight`](/docs/api-reference/x-chain/api#avmgetblockbyheight)
- [`avm.getTx`](/docs/api-reference/x-chain/api#avmgettx)
Data Visualization Features[](#data-visualization-features "Direct link to heading")
-------------------------------------------------------------------------------------
- The response output is displayed in tabular format, each data category having a different color.
- Unix timestamps are converted to date and time.

- Hexadecimal to decimal conversions.

- Native token amounts shown as AVAX and/or gwei and wei.

- The name of the transaction type added besides the transaction type ID.

- Percentages added for the amount of gas used. This percent represents what percentage of gas was used our of the `gasLimit`.

- Convert the output for atomic transactions from hexadecimal to user readable.
Please note that this only works for C-Chain Mainnet, not Fuji.
How to Visualize Responses[](#how-to-visualize-responses "Direct link to heading")
-----------------------------------------------------------------------------------
1. After [installing Postman](/docs/tooling/avalanche-postman/add-postman-collection#postman-installation) and importing the [Avalanche collection](/docs/tooling/avalanche-postman/add-postman-collection#collection-import), choose an API to make the call.
2. Make the call.
3. Click on the **Visualize** tab.
4. Now all data from the output is displayed in tabular format.
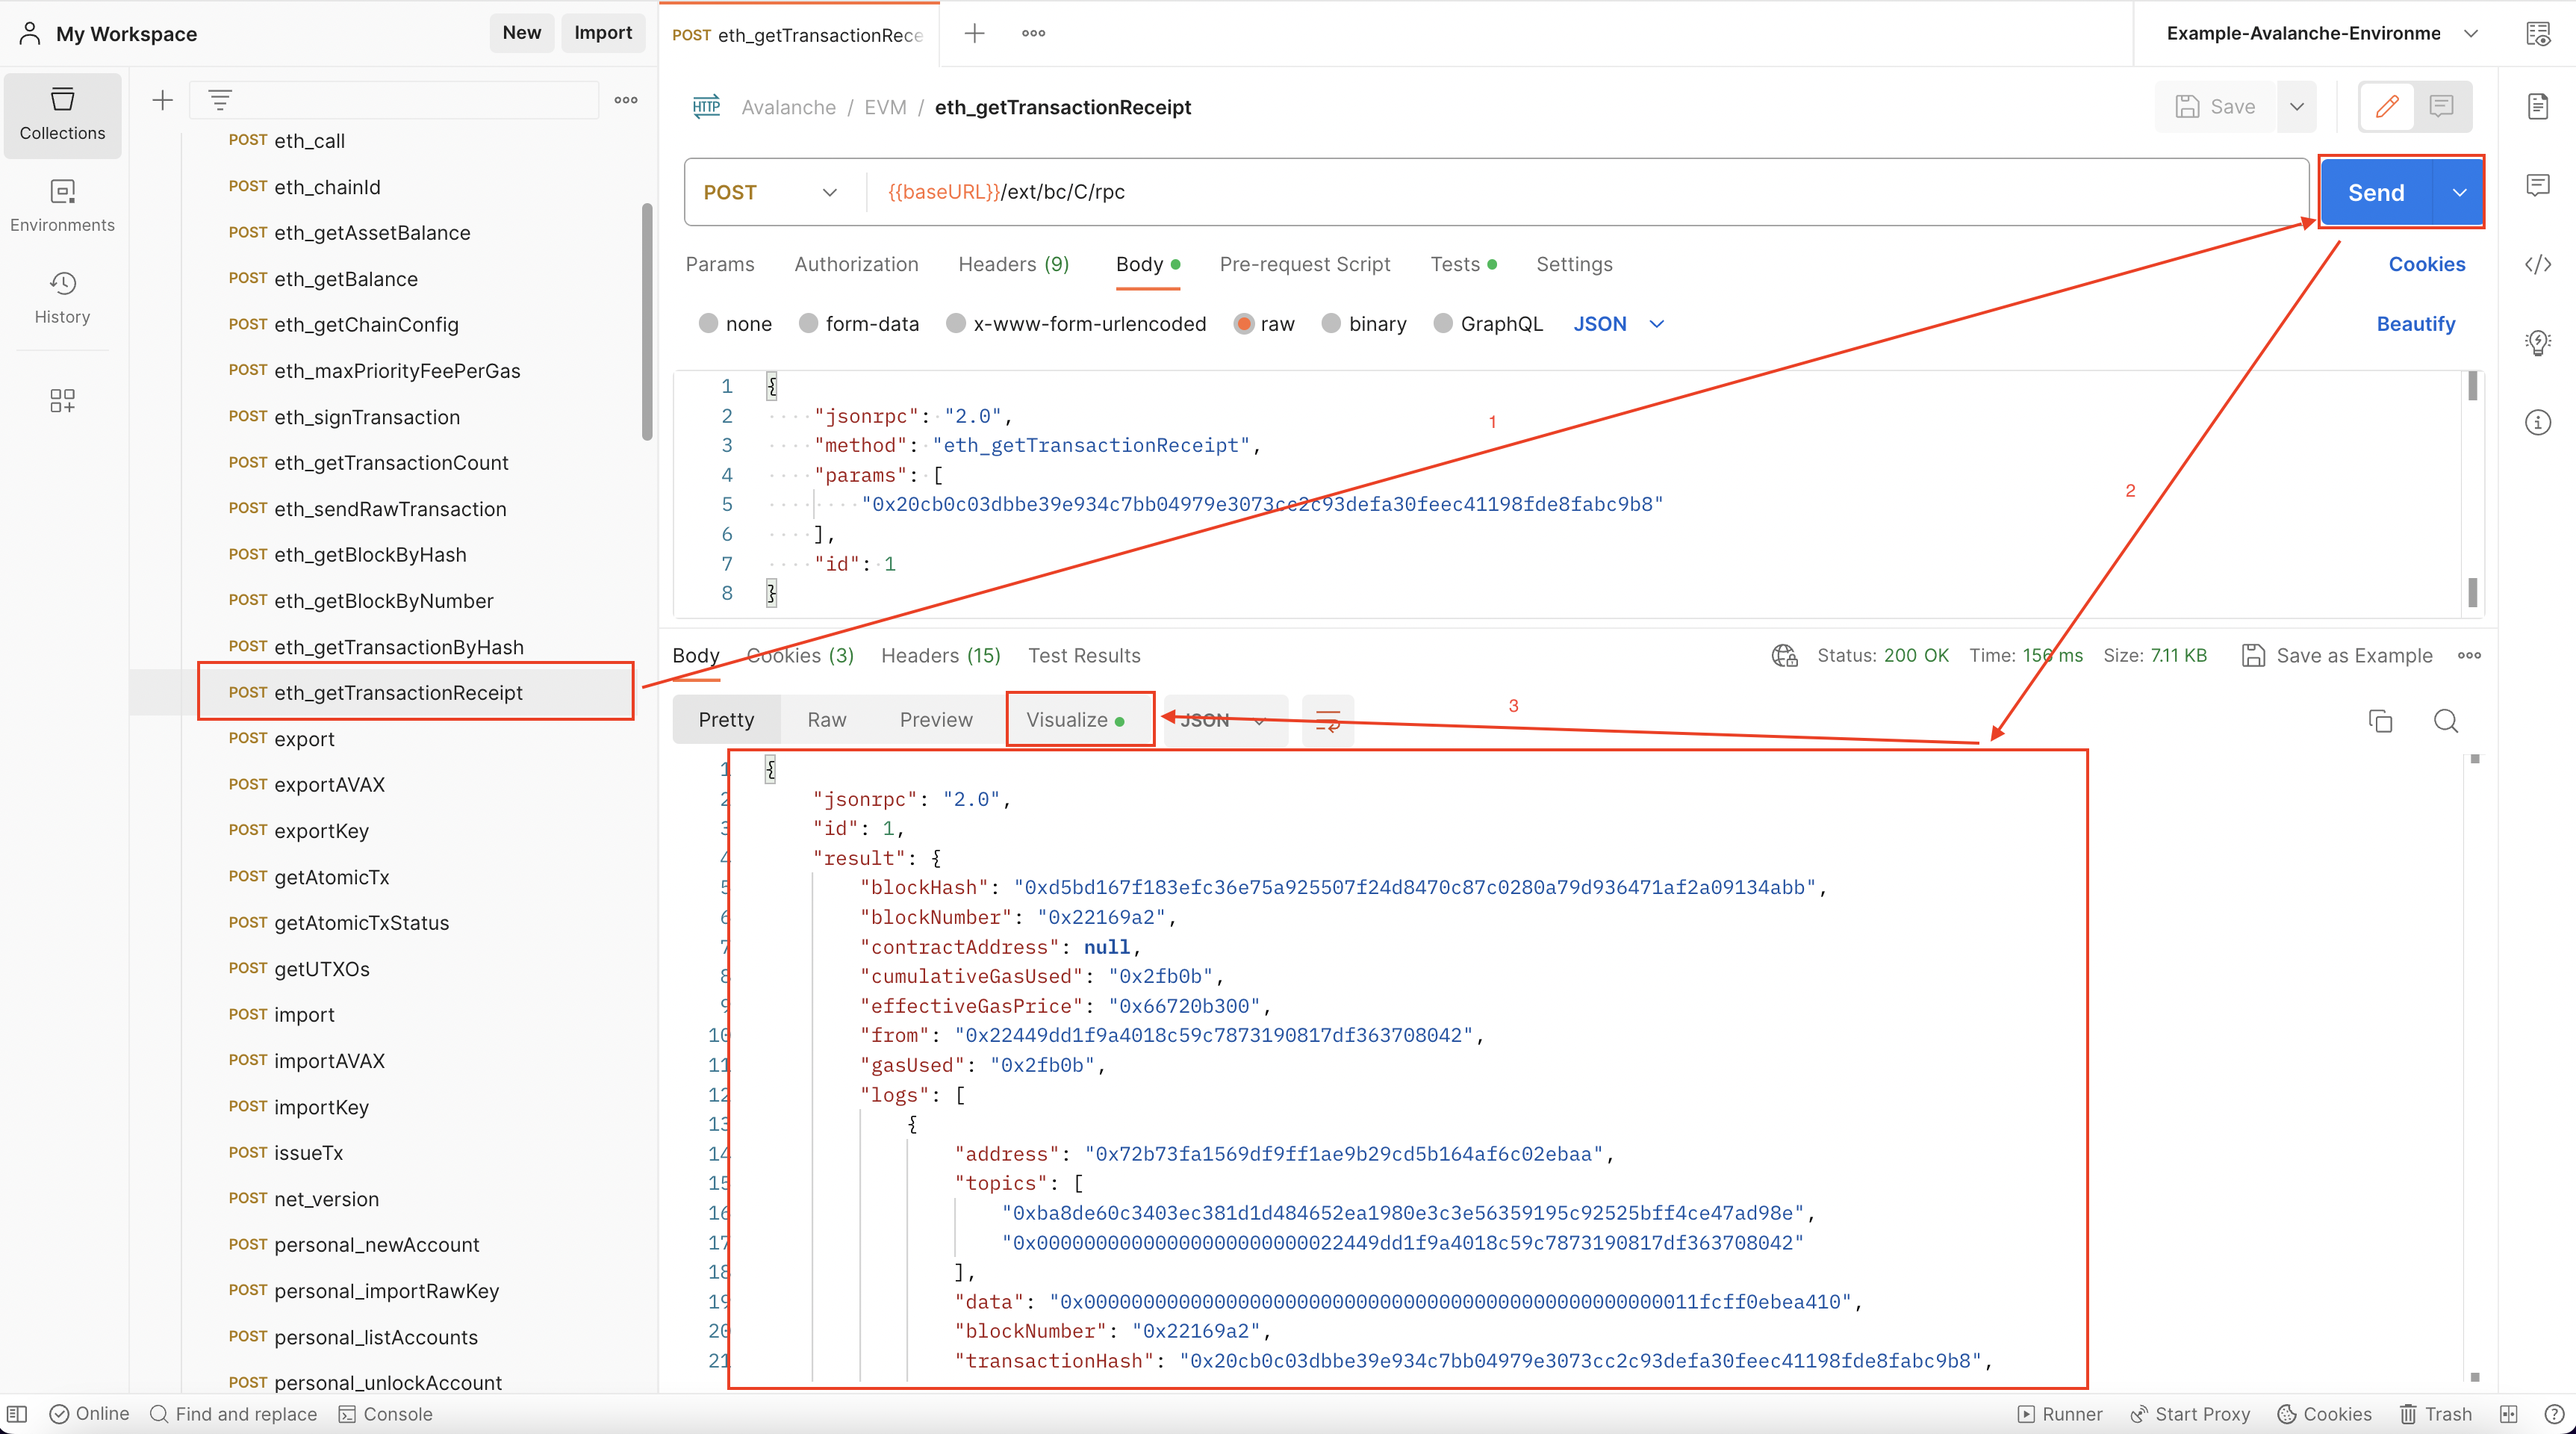 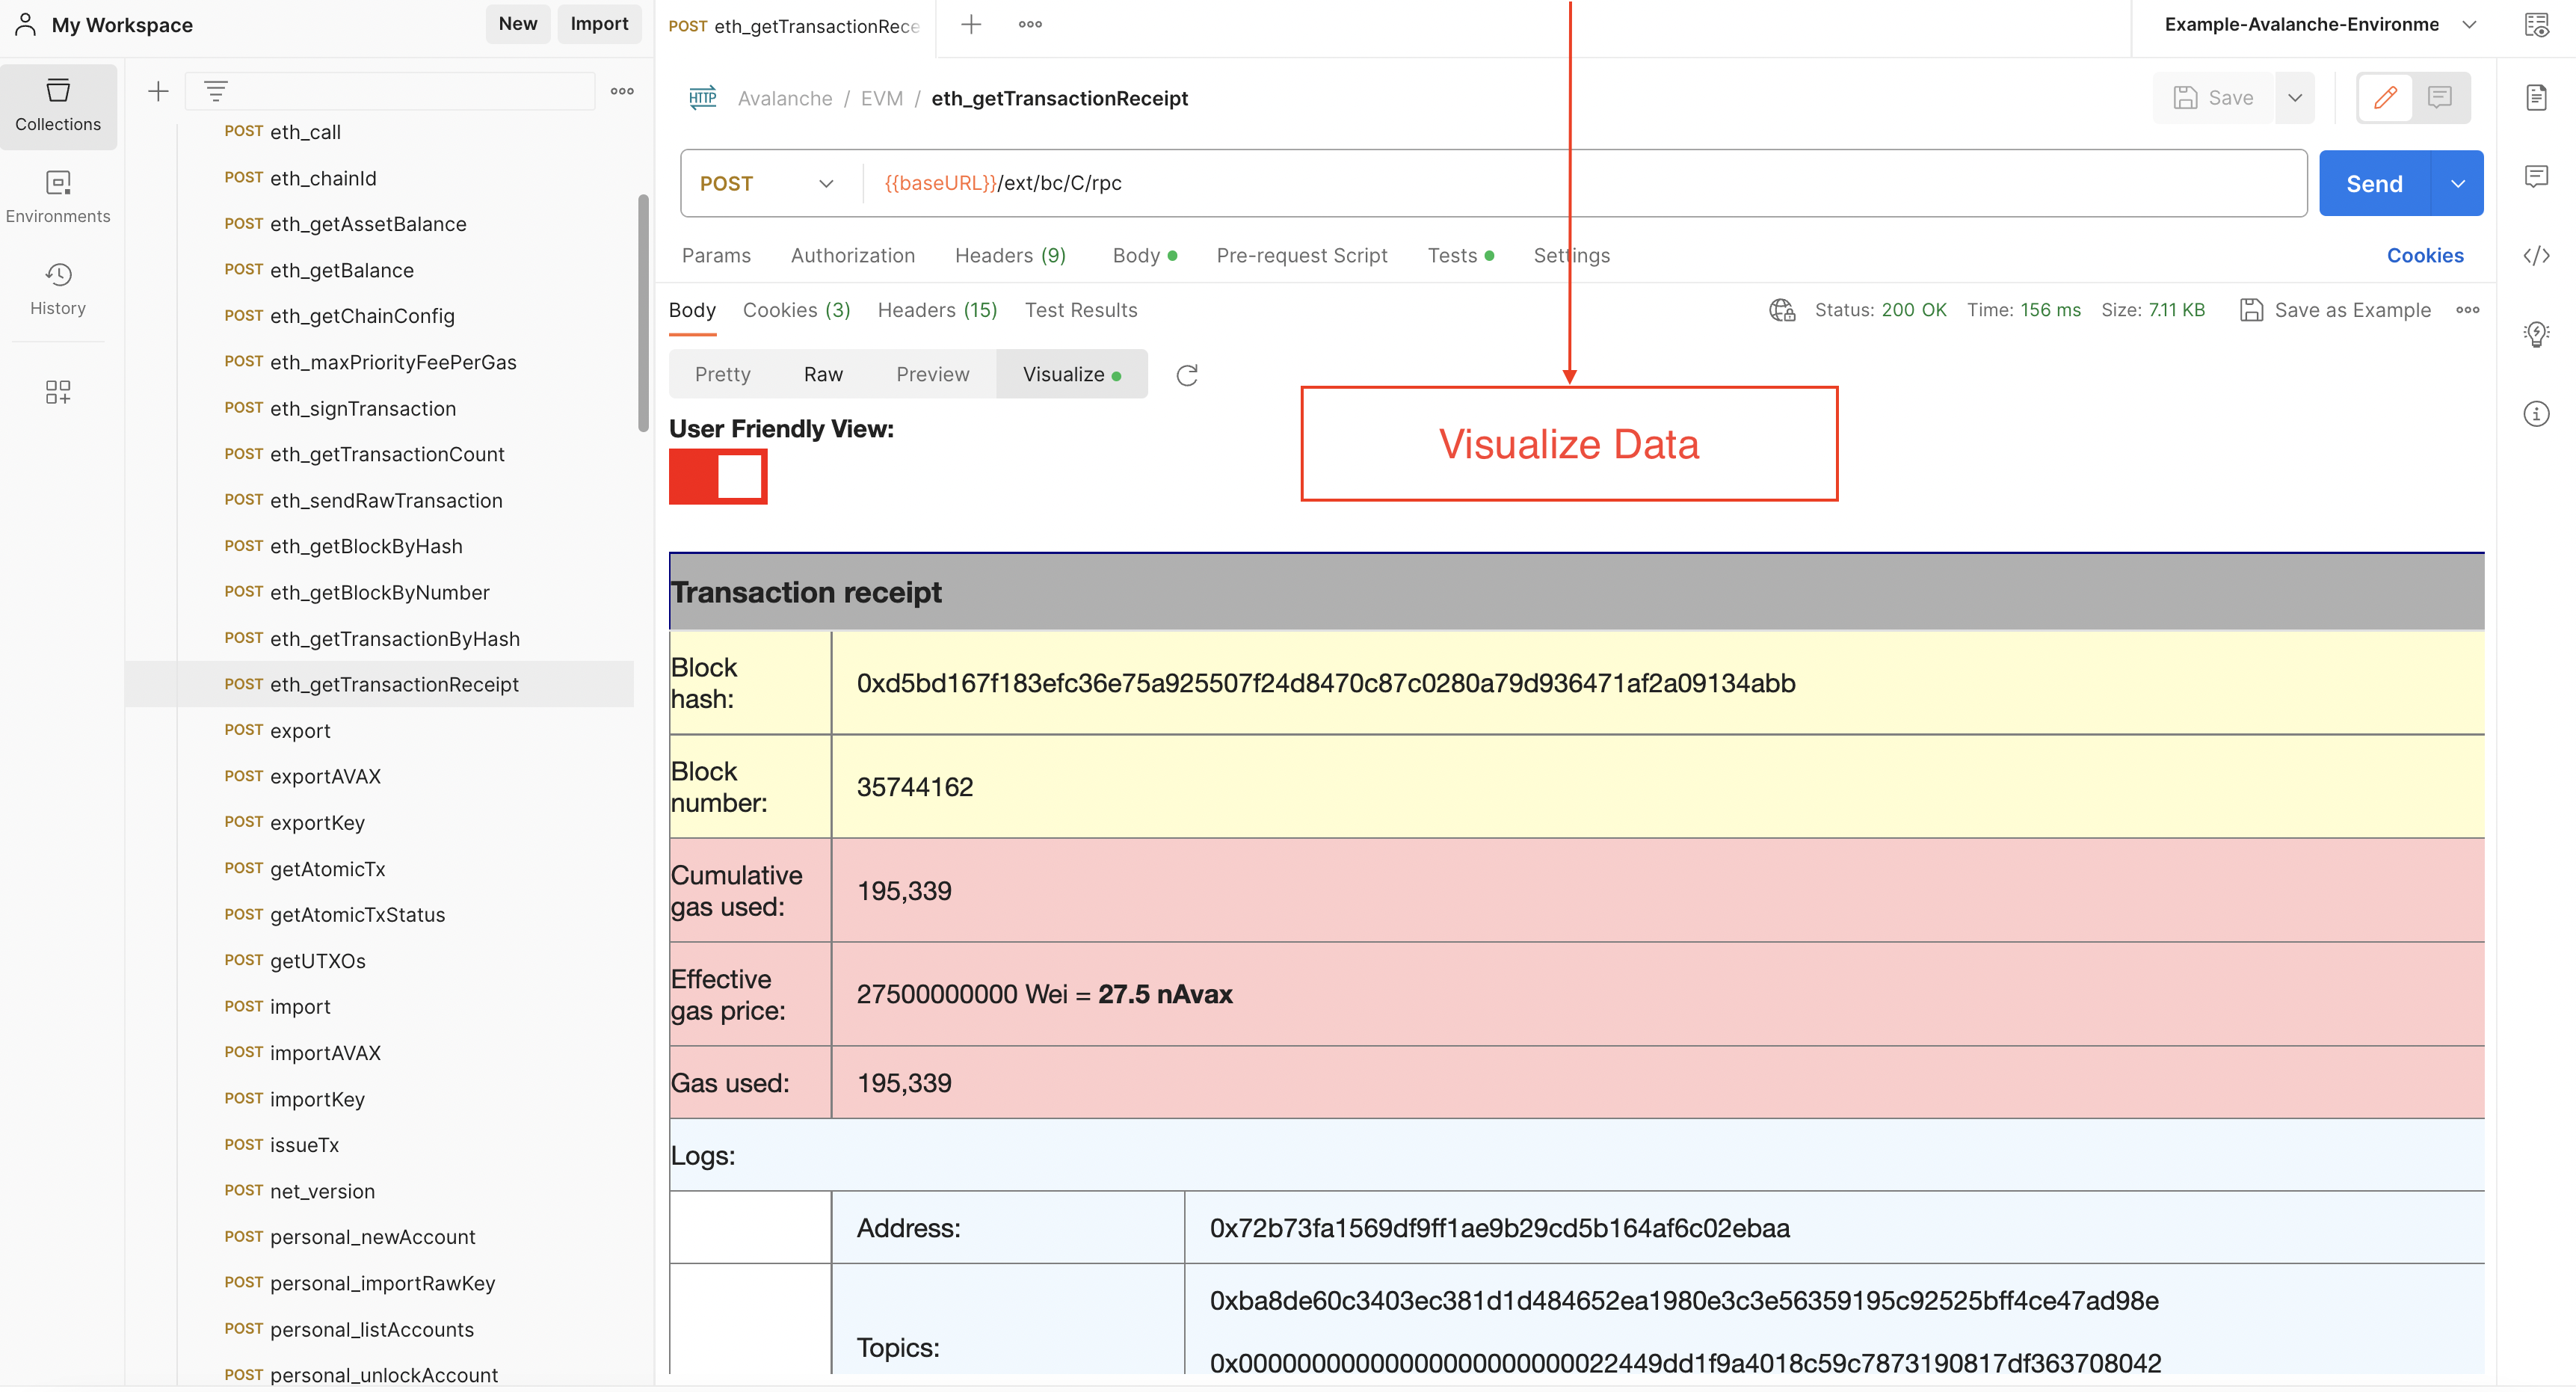
Examples[](#examples "Direct link to heading")
-----------------------------------------------
### `eth_getTransactionByHash`[](#eth_gettransactionbyhash "Direct link to heading")
### `avm.getBlock`[](#avmgetblock "Direct link to heading")
### `platform.getCurrentValidators`[](#platformgetcurrentvalidators "Direct link to heading")
### `avax.getAtomicTx`[](#avaxgetatomictx "Direct link to heading")
### `eth_getBalance`[](#eth_getbalance "Direct link to heading")
# Installing Postman Collection (/docs/tooling/avalanche-postman)
---
title: Installing Postman Collection
description: Installing Postman collection for Avalanche APIs
---
We have made a Postman collection for Avalanche, that includes all the public API calls that are available on an [AvalancheGo instance](https://github.com/ava-labs/avalanchego/releases/), including environment variables, allowing developers to quickly issue commands to a node and see the response, without having to copy and paste long and complicated `curl` commands.
[Link to GitHub](https://github.com/ava-labs/avalanche-postman-collection/)
What Is Postman?[](#what-is-postman "Direct link to heading")
--------------------------------------------------------------
Postman is a free tool used by developers to quickly and easily send REST, SOAP, and GraphQL requests and test APIs. It is available as both an online tool and an application for Linux, MacOS and Windows. Postman allows you to quickly issue API calls and see the responses in a nicely formatted, searchable form.
Along with the API collection, there is also the example Avalanche environment for Postman, that defines common variables such as IP address of the node, Avalanche addresses and similar common elements of the queries, so you don't have to enter them multiple times.
Combined, they will allow you to easily keep tabs on an Avalanche node, check on its state and do quick queries to find out details about its operation.
Setup[](#setup "Direct link to heading")
-----------------------------------------
### Postman Installation[](#postman-installation "Direct link to heading")
Postman can be installed locally or used as a web app. We recommend installing the application, as it simplifies operation. You can download Postman from its [website](https://www.postman.com/downloads/). It is recommended that you sign up using your email address as then your workspace can be easily backed up and shared between the web app and the app installed on your computer.
When you run Postman for the first time, it will prompt you to create an account or log in. Again, it is not necessary, but recommended.
### Collection Import[](#collection-import "Direct link to heading")
Select `Create workspace` from Workspaces tab and follow the prompts to create a new workspace. This will be where the rest of the work will be done.

We're ready to import the collection. On the top-left corner of the Workspaces tab select `Import` and switch to `Link` tab.

There, in the URL input field paste the link below to the collection:
```bash
https://raw.githubusercontent.com/ava-labs/avalanche-postman-collection/master/Avalanche.postman_collection.json
```
Postman will recognize the format of the file content and offer to import the file as a collection. Complete the import. Now you will have Avalanche collection in your Workspace.
### Environment Import[](#environment-import "Direct link to heading")
Next, we have to import the environment variables. Again, on the top-left corner of the Workspaces tab select `Import` and switch to `Link` tab. This time, paste the link below to the environment JSON:
```bash
https://raw.githubusercontent.com/ava-labs/avalanche-postman-collection/master/Example-Avalanche-Environment.postman_environment.json
```
Postman will recognize the format of the file:
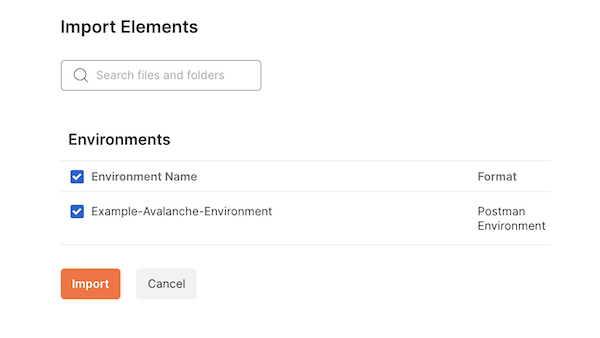
Import it to your workspace. Now, we will need to edit that environment to suit the actual parameters of your particular installation. These are the parameters that differ from the defaults in the imported file.
Select the Environments tab, choose the Avalanche environment which was just added. You can directly edit any values here:
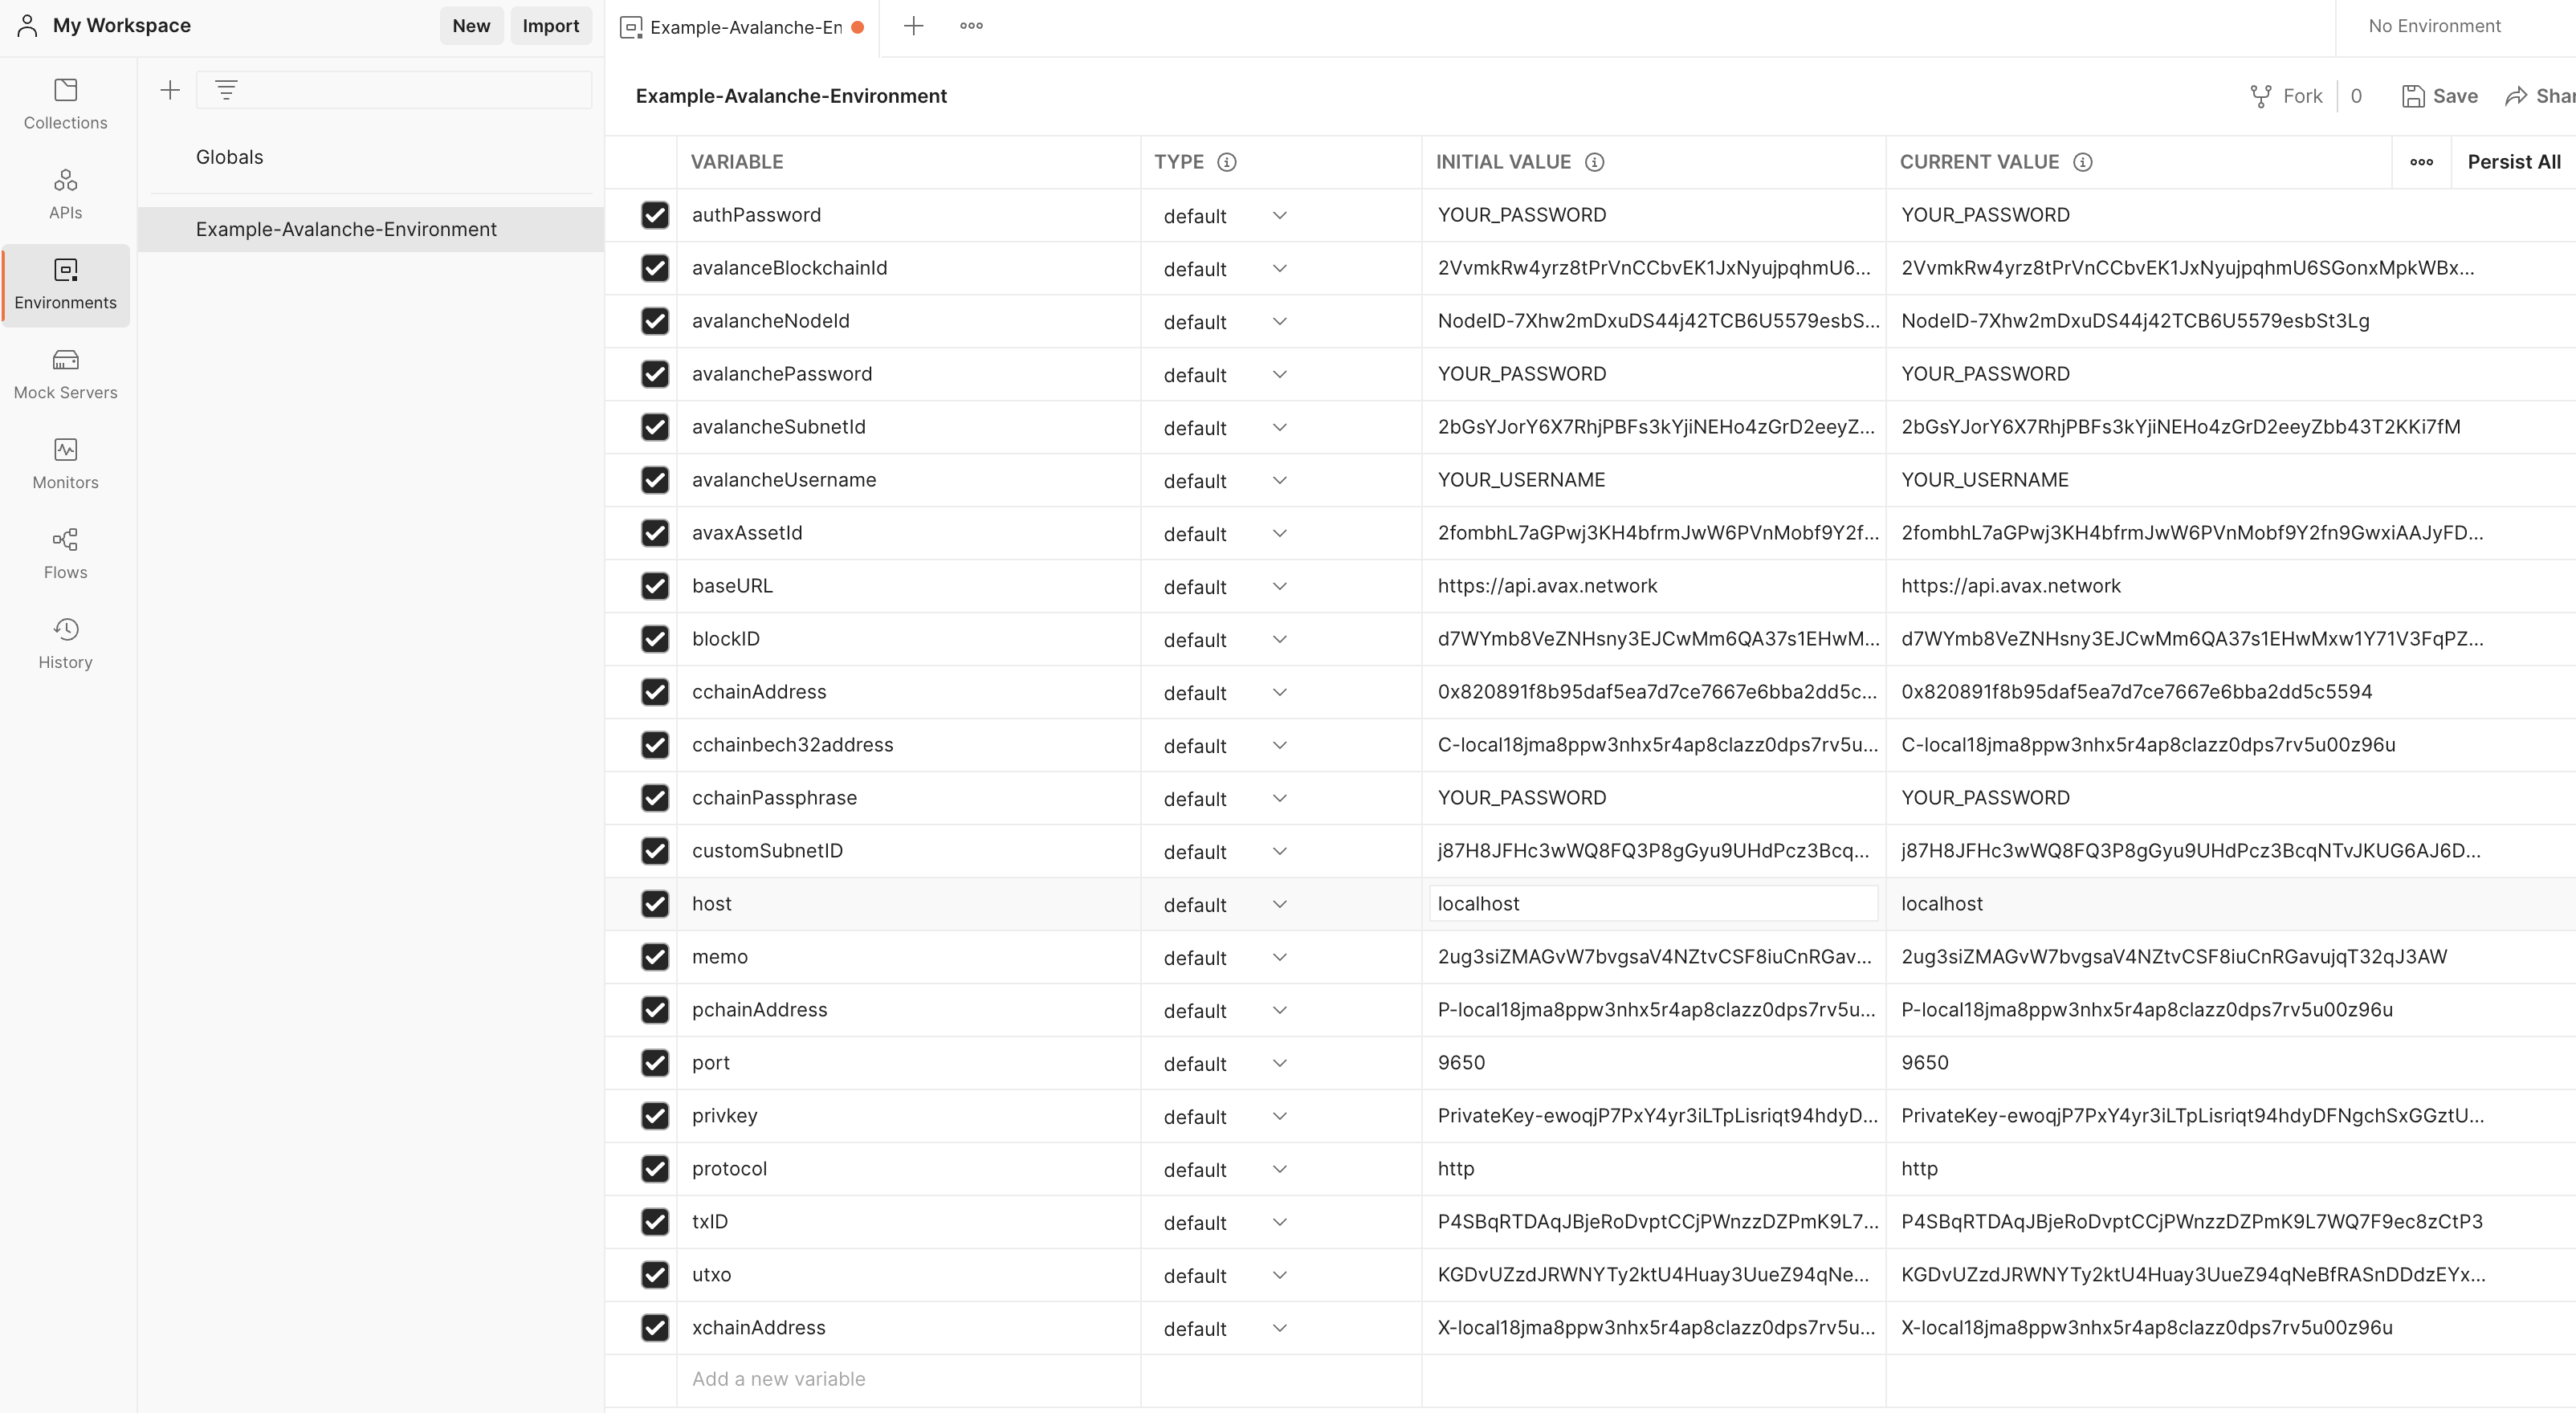
As a minimum, you will need to change the IP address of your node, which is the value of the `host` variable. Change it to the IP of your node (change both the `initial` and `current` values). Also, if your node is not running on the same machine where you installed Postman, make sure your node is accepting the connections on the API port from the outside by checking the appropriate [command line option](/docs/nodes/configure/configs-flags#http-server).
Now we sorted everything out, and we're ready to query the node.
Conclusion[](#conclusion "Direct link to heading")
---------------------------------------------------
If you have completed the tutorial, you are now able to quickly [issue API calls](/docs/tooling/avalanche-postman/making-api-calls) to your node without messing with the curl commands in the terminal. This allows you to quickly see the state of your node, track changes or double-check the health or liveness of your node.
Contributing[](#contributing "Direct link to heading")
-------------------------------------------------------
We're hoping to continuously keep this collection up-to-date with the [Avalanche APIs](/docs/api-reference/p-chain/api). If you're able to help improve the Avalanche Postman Collection in any way, first create a feature branch by branching off of `master`, next make the improvements on your feature branch and lastly create a [pull request](https://github.com/ava-labs/builders-hub/pulls) to merge your work back in to `master`.
If you have any other questions or suggestions, come [talk to us](https://chat.avalabs.org/).
# Making API Calls (/docs/tooling/avalanche-postman/making-api-calls)
---
title: Making API Calls
description: Making API calls using Postman
---
After [installing Postman Collection](/docs/tooling/avalanche-postman/index) and importing the [Avalanche collection](/docs/tooling/avalanche-postman/index#collection-import), you can choose an API to make the call.
You should also make sure the URL is the correct one for the call. This URL consists of the base URL and the endpoint:
- The base URL is set by an environment variable called `baseURL`, and it is by default Avalanche's [public API](/docs/tooling/rpc-providers#mainnet-rpc---public-api-server). If you need to make a local API call, simply change the URL to localhost. This can be done by changing the value of the `baseURL` variable or changing the URL directly on the call tab. Check out the [RPC providers](/docs/tooling/rpc-providers) to see all public URLs.
- The API endpoint depends on which API is used. Please check out [our APIs](/docs/api-reference/c-chain/api) to find the proper endpoint.
The last step is to add the needed parameters for the call. For example, if a user wants to fetch data about a certain transaction, the transaction hash is needed. For fetching data about a block, depending on the call used, the block hash or number will be required.
After clicking the **Send** button, if the call is successfully, the output will be displayed in the **Body** tab.
Data visualization is available for a number of methods. Learn how to use it with the help of [this](/docs/tooling/avalanche-postman/data-visualization) guide.
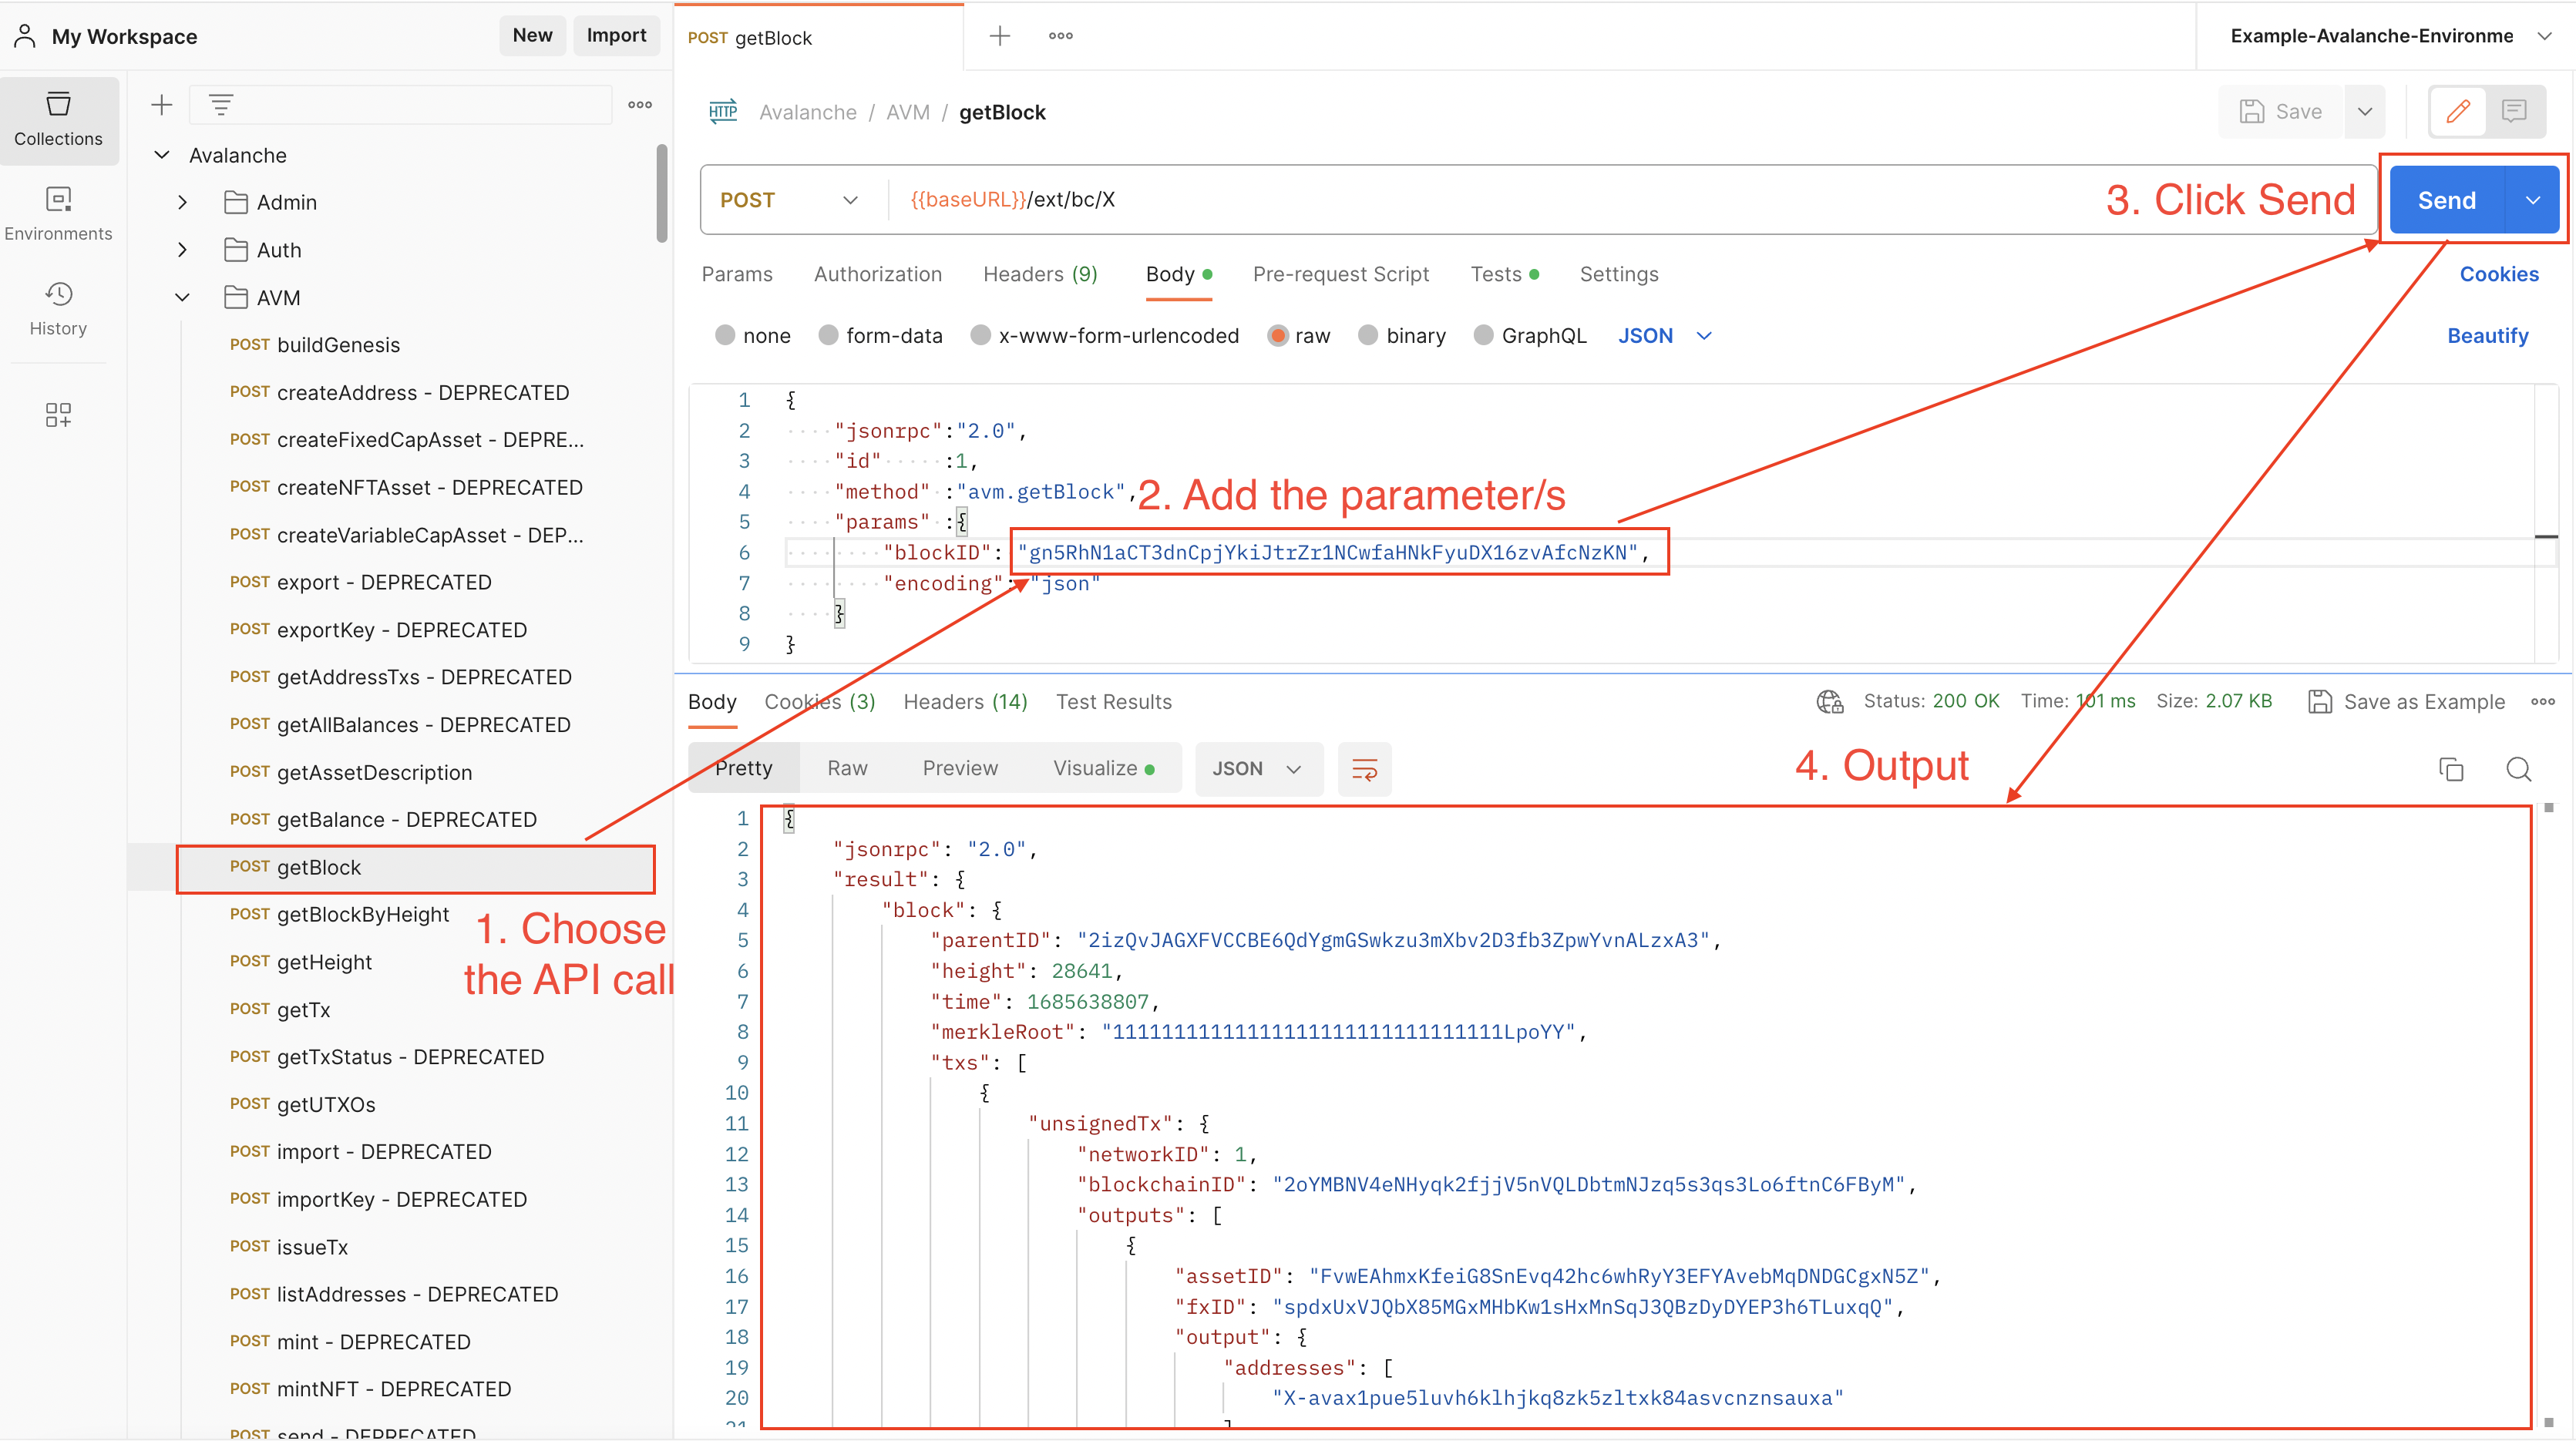
Examples[](#examples "Direct link to heading")
-----------------------------------------------
### C-Chain Public API Call[](#c-chain-public-api-call "Direct link to heading")
Fetching data about a C-Chain transaction using `eth_getTransactionByHash`.
### X-Chain Public API Call[](#x-chain-public-api-call "Direct link to heading")
Fetching data about an X-Chain block using `avm.getBlock`.
### P-Chain Public API Call[](#p-chain-public-api-call "Direct link to heading")
Getting the current P-Chain height using `platform.getHeight`.
### API Call Using Variables[](#api-call-using-variables "Direct link to heading")
Let's say we want fetch data about this `0x20cb0c03dbbe39e934c7bb04979e3073cc2c93defa30feec41198fde8fabc9b8` C-Chain transaction using both:
- `eth_getTransactionReceipt`
- `eth_getTransactionByHash`
We can set up an environment variable with the transaction hash as value and use it on both calls.
Find out more about variables [here](/docs/tooling/avalanche-postman/variables).
# Variable Types (/docs/tooling/avalanche-postman/variables)
---
title: Variable Types
description: Variable types for Avalanche APIs using Postman
---
Variables at different scopes are supported by Postman, as it follows:
- **Global variables**: A global variable can be used with every collection. Basically, it allows user to access data between collections.
- **Collection variables**: They are available for a certain collection and are independent of an environment.
- **Environment variables**: An environment allows you to use a set of variables, which are called environment variables. Every collection can use an environment at a time, but the same environment can be used with multiple collections. This type of variables make the most sense to use with the Avalanche Postman collection, therefore an environment file with preset variables is provided
- **Data variables**: Provided by external CSV and JSON files.
- **Local variables**: Temporary variables that can be used in a script. For example, the returned block number from querying a transaction can be a local variable. It exists only for that request, and it will change when fetching data for another transaction hash.
There are two types of variables:
- **Default type**: Every variable is automatically assigned this type when created.
- **Secret type**: Masks variable's value. It is used to store sensitive data.
Only default variables are used in the Avalanche Environment file. To learn more about using the secret type of variables, please checkout the [Postman documentation](https://learning.postman.com/docs/sending-requests/variables/#variable-types).
The [environment variables](/docs/tooling/avalanche-postman/index#environment-import) can be used to ease the process of making an API call. A variable contains the preset value of an API parameter, therefore it can be used in multiple places without having to add the value manually.
How to Use Variables[](#how-to-use-variables "Direct link to heading")
-----------------------------------------------------------------------
Let's say we want to use both `eth_getTransactionByHash` and `eth_getTransctionReceipt` for a transaction with the following hash: `0x631dc45342a47d360915ea0d193fc317777f8061fe57b4a3e790e49d26960202`. We can set a variable which contains the transaction hash, and then use it on both API calls. Then, when wanting to fetch data about another transaction, the variable can be updated and the new transaction hash will be used again on both calls.
Below are examples on how to set the transaction hash as variable of each scope.
### Set a Global Variable[](#set-a-global-variable "Direct link to heading")
Go to Environments

Select Globals

Click on the Add a new variable area
Add the variable name and value. Make sure to use quotes.
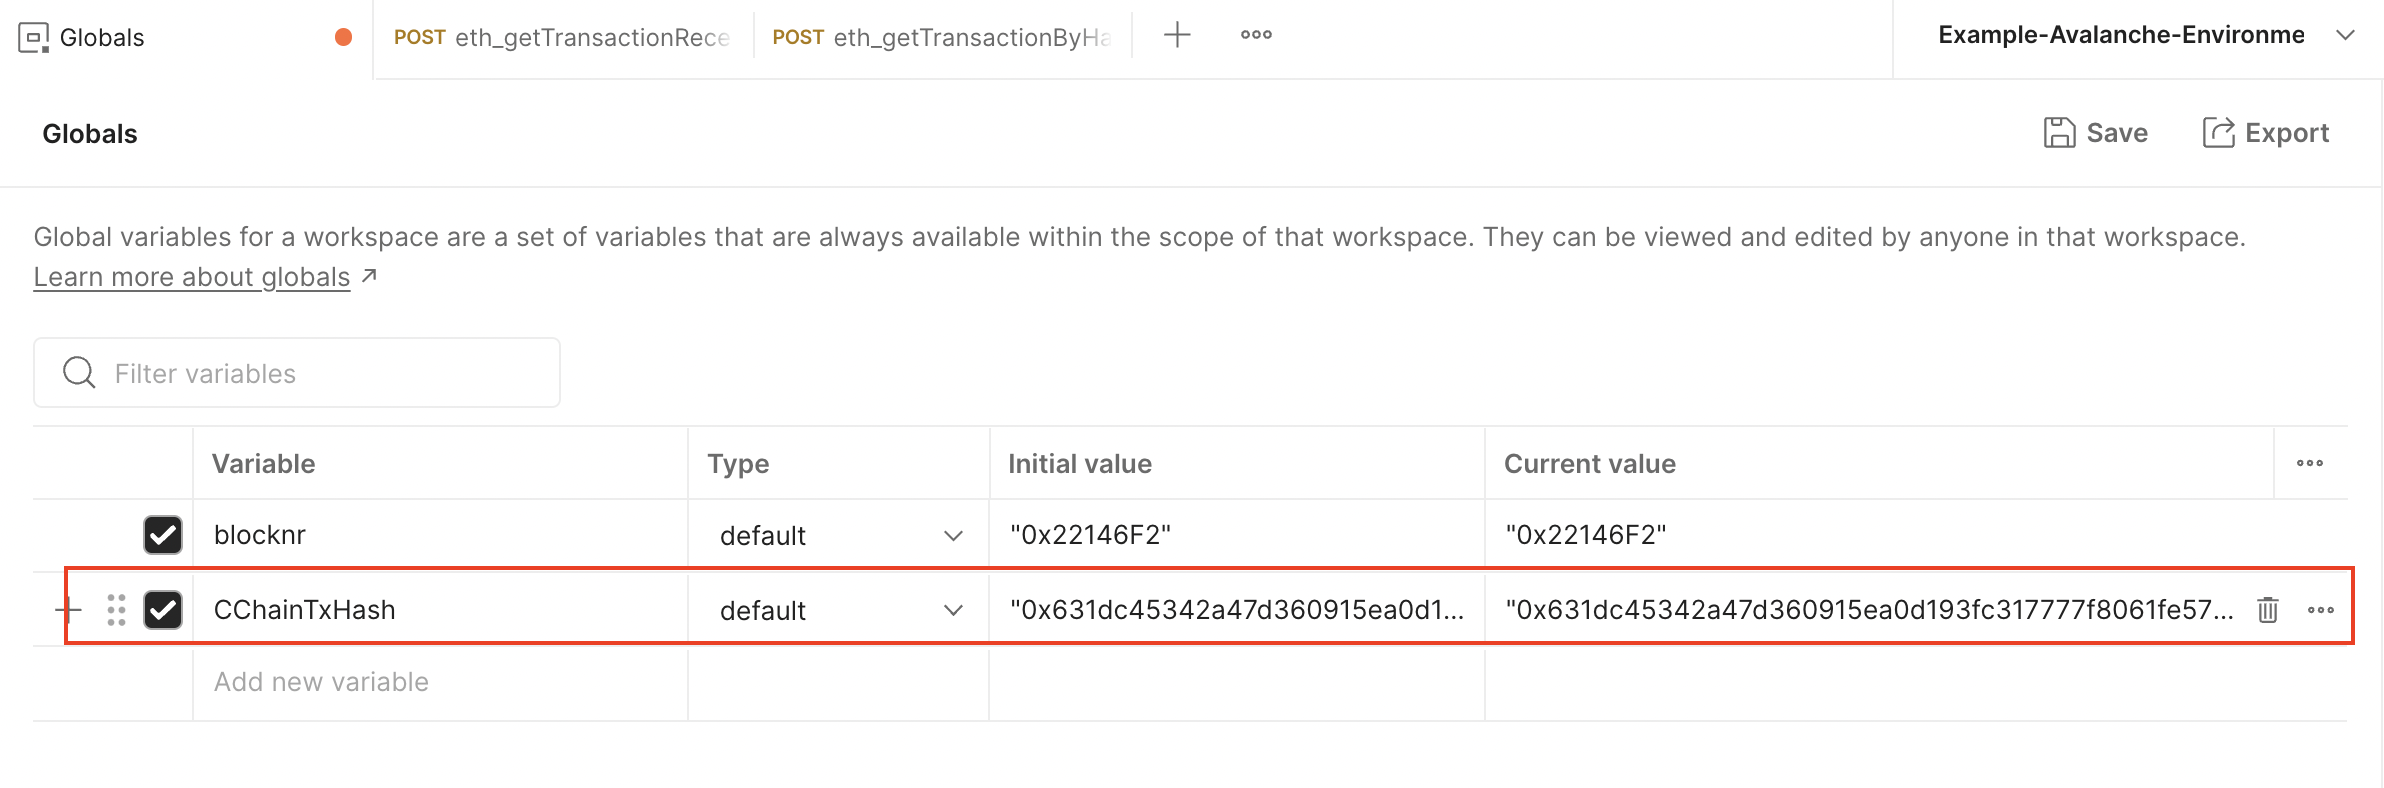
Click Save
Now it can be used on any call from any collection
### Set a Collection Variable[](#set-a-collection-variable "Direct link to heading")
Click on the three dots next to the Avalanche collection and select Edit
Go to the Variables tab
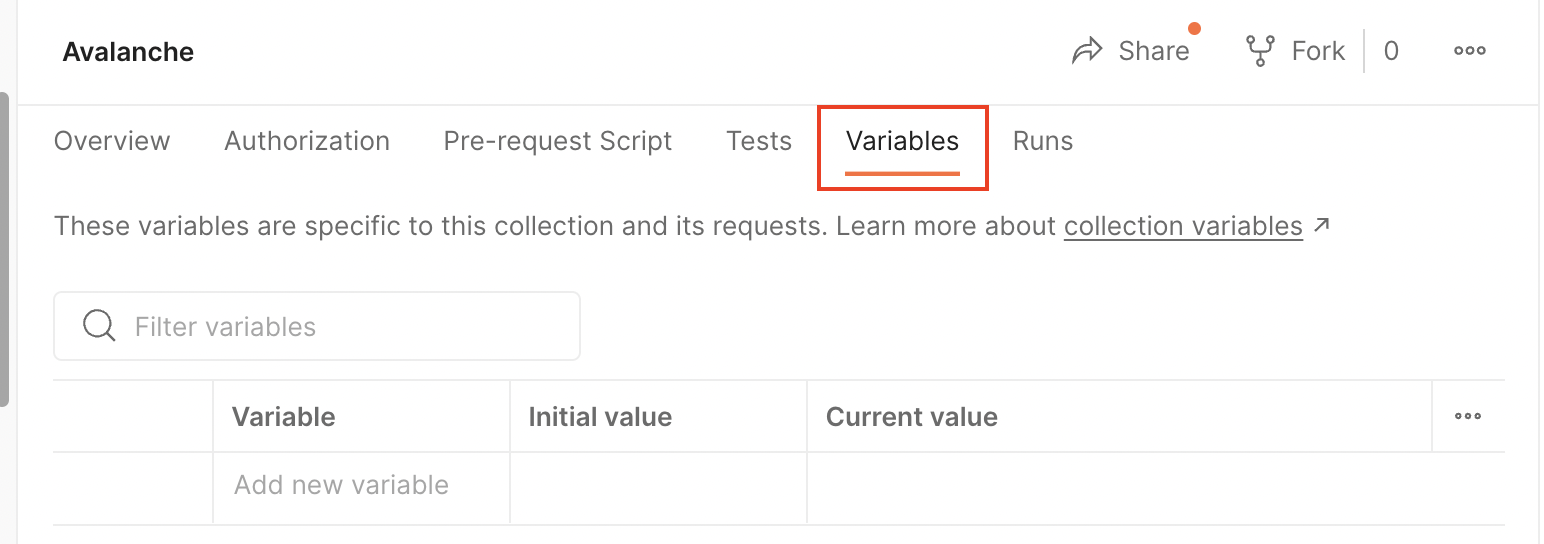
Click on the Add a new variable area
Add the variable name and value. Make sure to use quotes.

Click Save
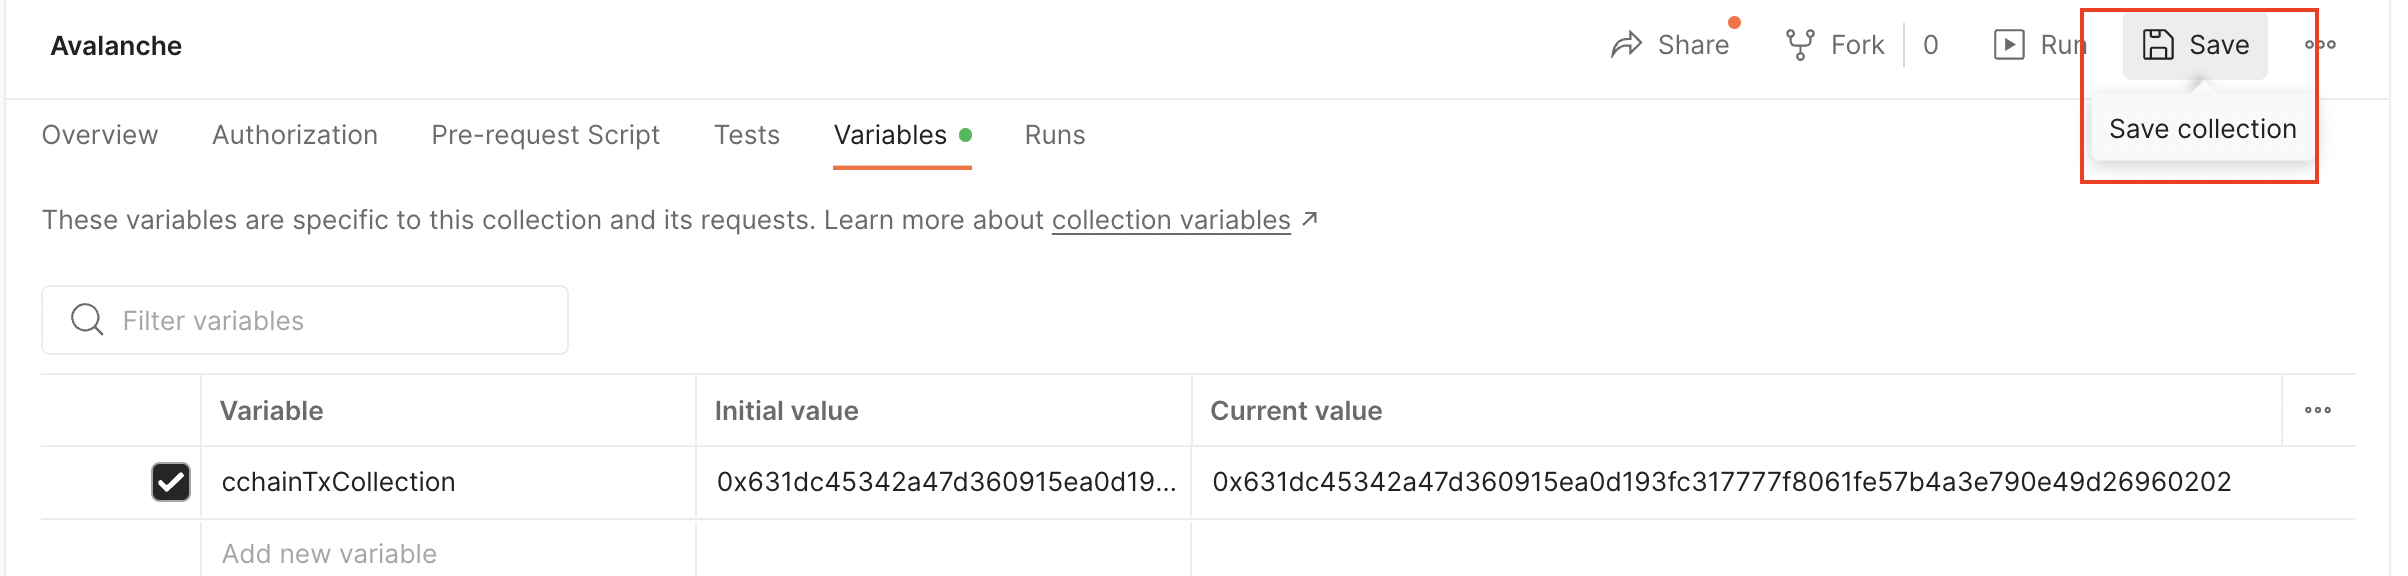
Now it can be used on any call from this collection
### Set an Environment Variable[](#set-an-environment-variable "Direct link to heading")
Go to Environments
Select an environment. In this case, it is Example-Avalanche-Environment.
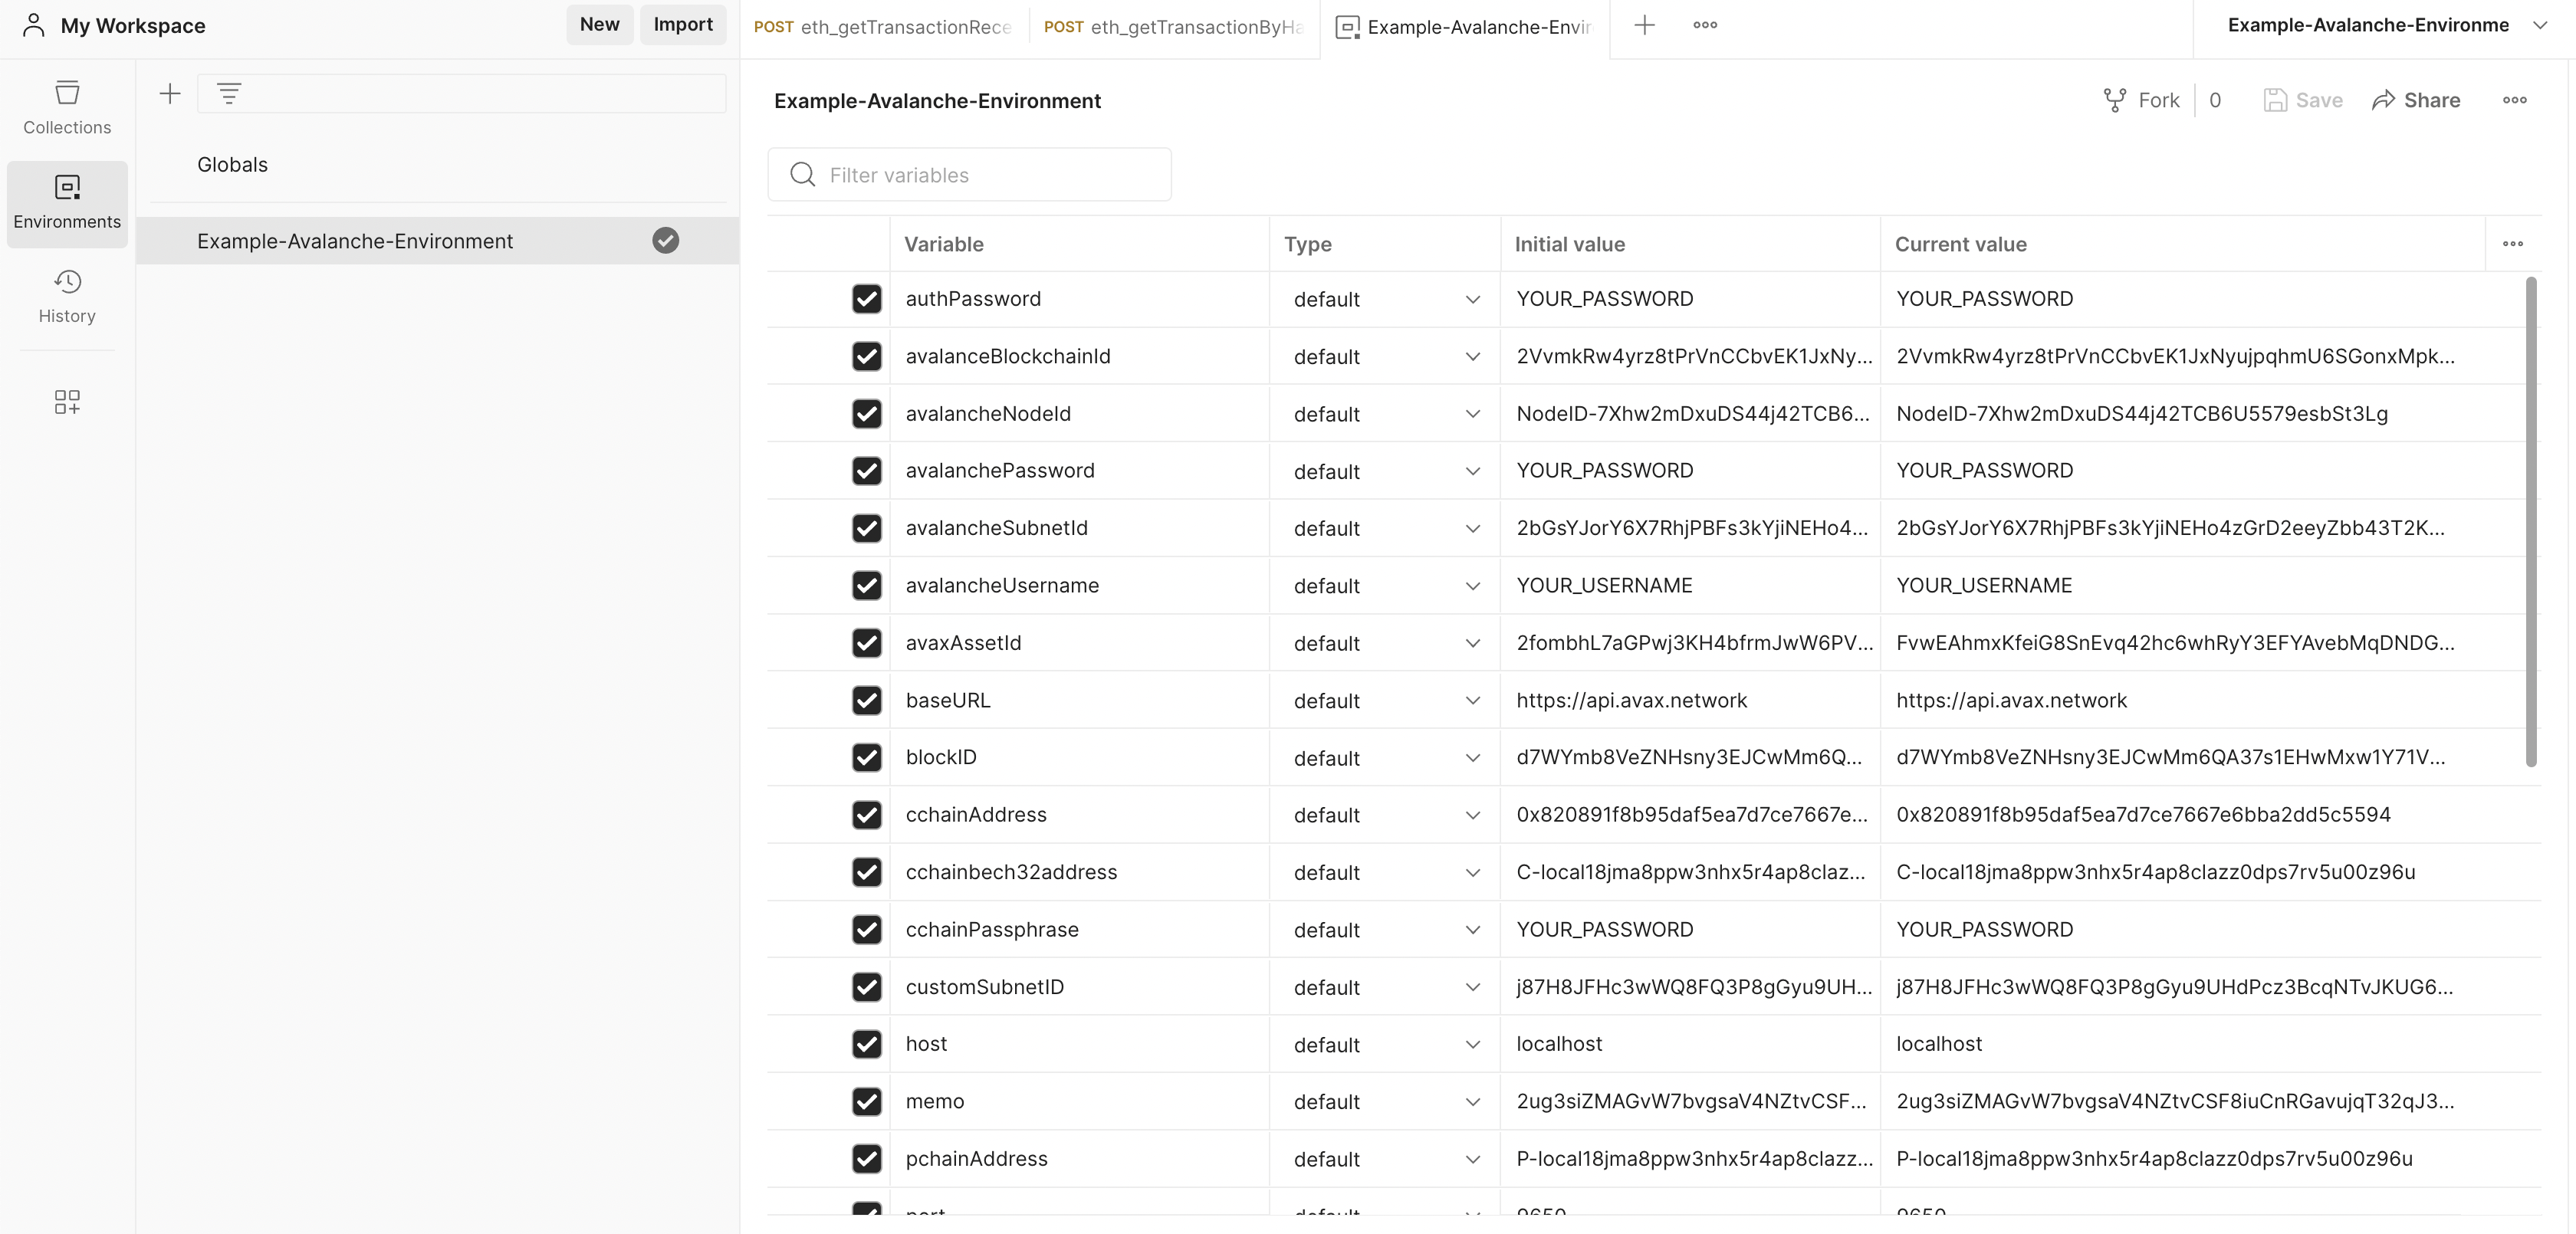
Scroll down until you find the Add a new variable area and click on it.
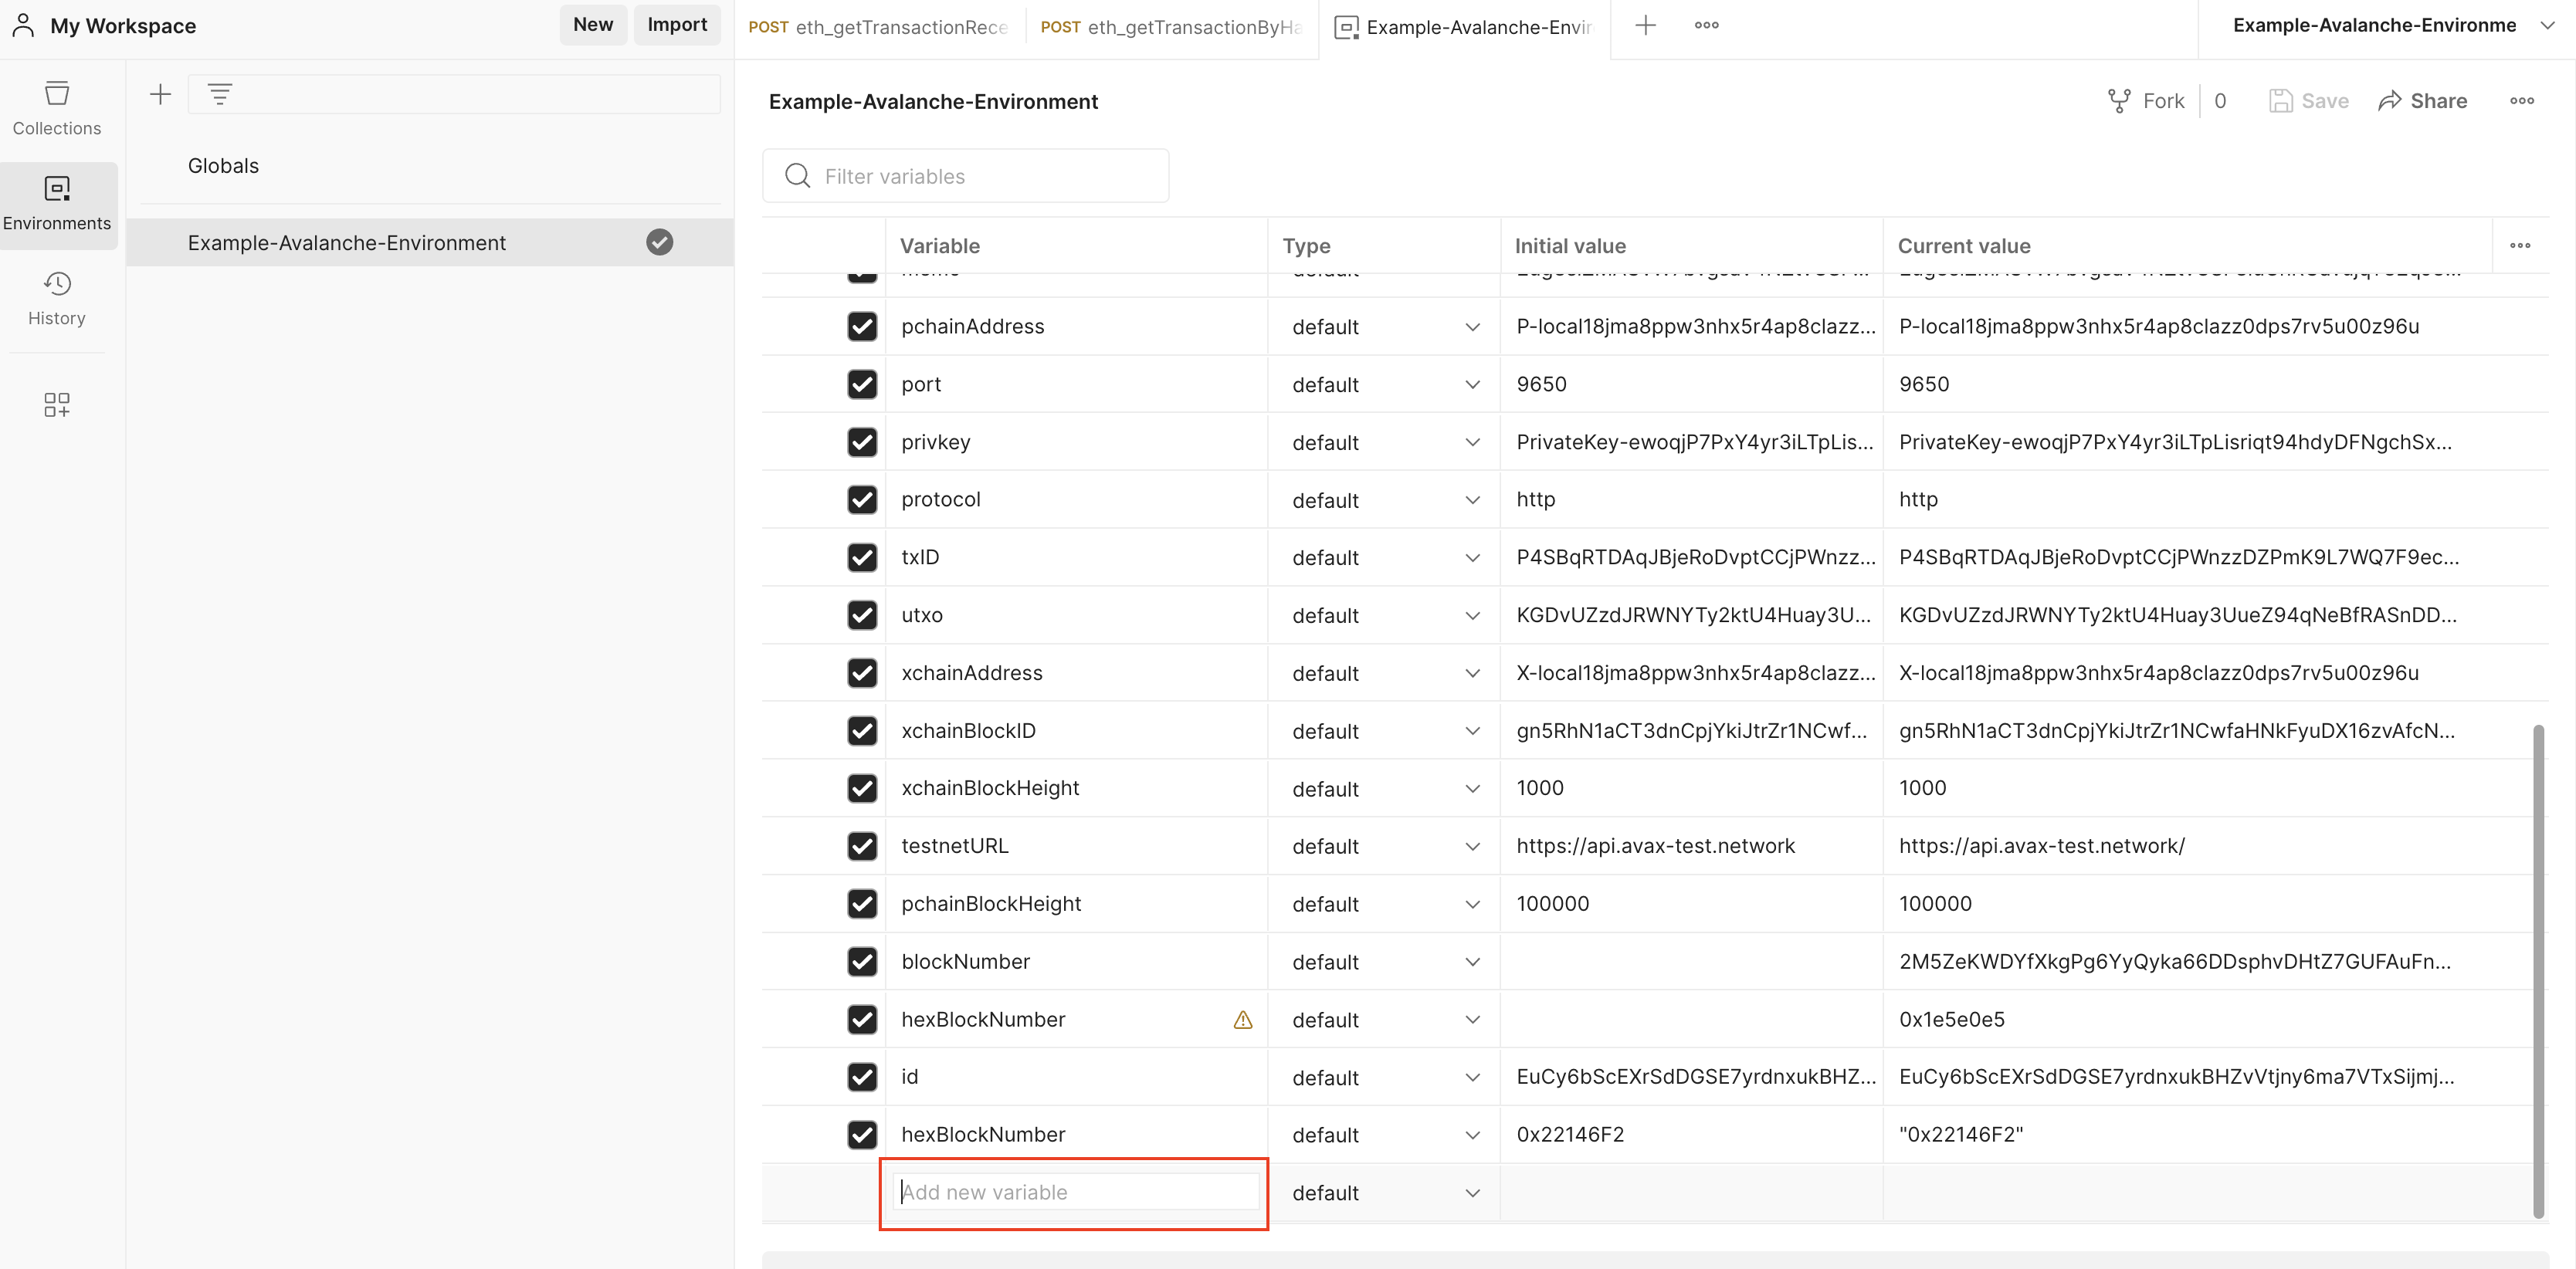
Add the variable name and value. Make sure to use quotes.

Click Save.
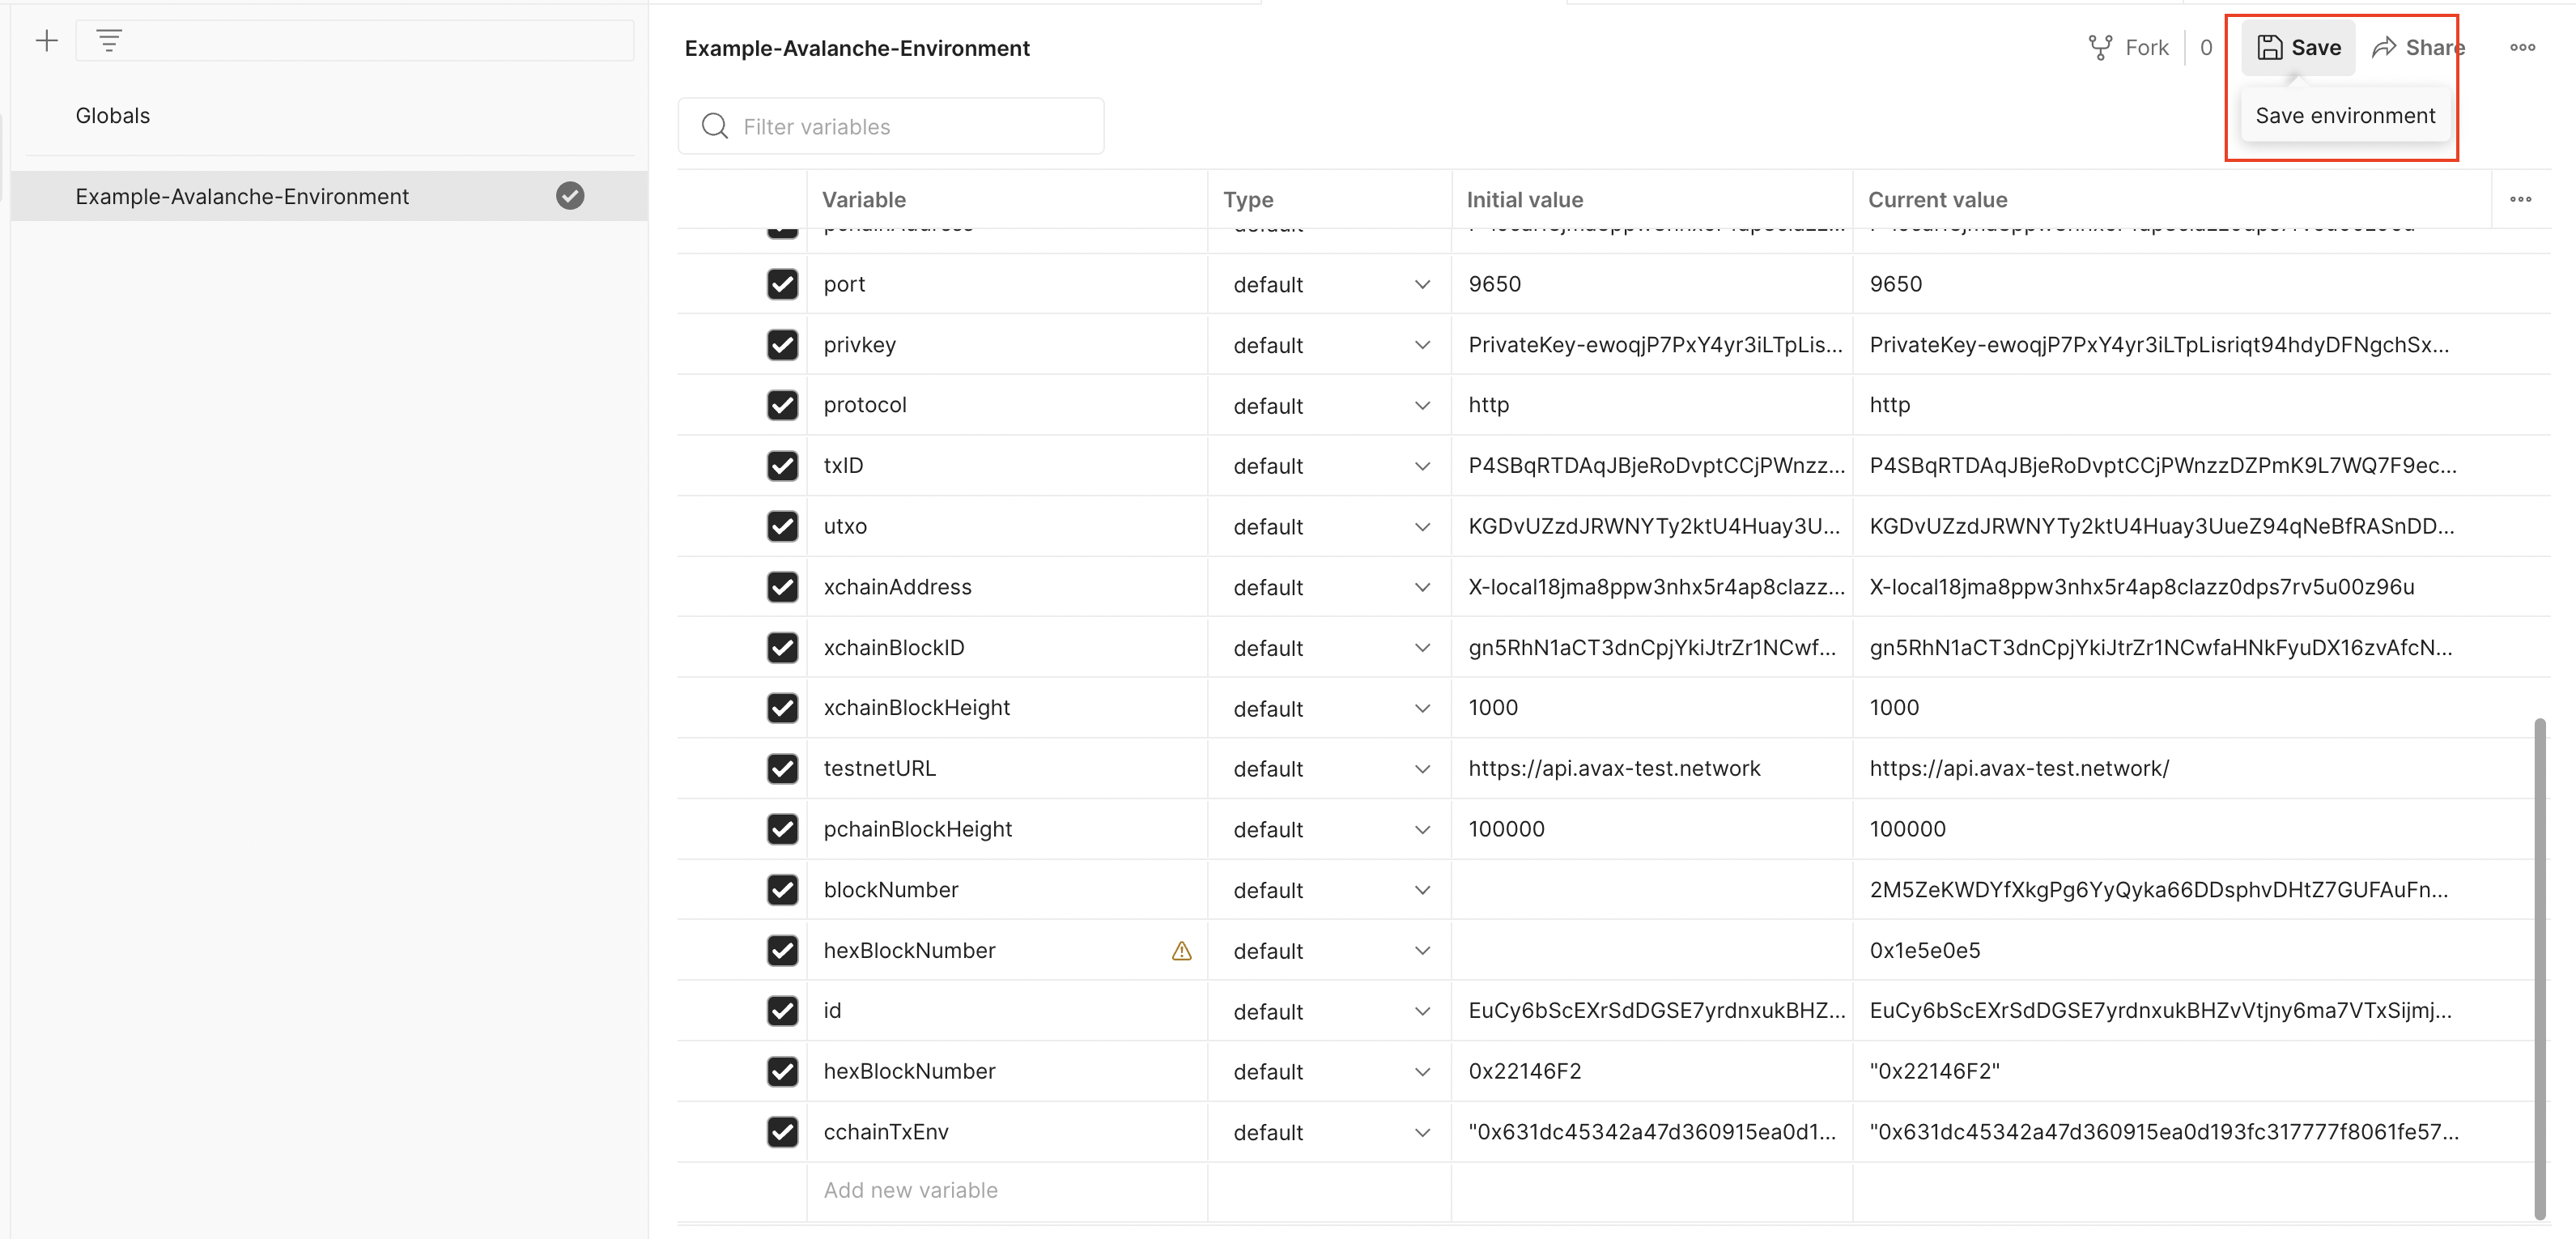
The variable is available now for any call collection that uses this environment.
### Set a Data Variable[](#set-a-data-variable "Direct link to heading")
Please check out [this guide](https://www.softwaretestinghelp.com/postman-variables/#5_Data) and [this video](https://www.youtube.com/watch?v=9wl_UQtRLw4) on how to use data variables.
### Set a Local Variable[](#set-a-local-variable "Direct link to heading")
Please check out [this guide](https://www.softwaretestinghelp.com/postman-variables/#4_Local) and [this video](https://www.youtube.com/watch?v=gOF7Oc0sXmE) on how to use local variables.
# Overview (/docs/tooling/avalanche-sdk)
---
title: Overview
description: Build applications and interact with Avalanche networks programmatically
icon: Rocket
---
The **Avalanche SDK for TypeScript** is a modular suite of tools designed for building powerful applications on the Avalanche ecosystem. Whether you're building DeFi applications, NFT platforms, or cross-chain bridges, our SDKs provide everything you need.
 ### Core Capabilities
* **Direct Chain Access** - RPC calls, wallet integration, and transaction management.
* **Indexed Data & Metrics** - Access Glacier Data API & Metrics API with type safety.
* **Interchain Messaging** - Build cross-L1 applications with ICM/Teleporter.
**Developer Preview**: This suite of SDKs is currently in beta and is subject to change. Use in production at your own risk.
We'd love to hear about your experience! **Please share your feedback here.**
Check out the code, contribute, or report issues. The Avalanche SDK TypeScript is fully open source.
## Which SDK Should I Use?
Choose the right SDK based on your specific needs:
| SDK Package | Description |
| :--------------------------------------------------------------------------- | :--------------------------------------------------------------- |
| [`@avalanche-sdk/client`](/avalanche-sdk/client-sdk/getting-started) | Direct blockchain interaction - transactions, wallets, RPC calls |
| [`@avalanche-sdk/chainkit`](/avalanche-sdk/chainkit-sdk/getting-started) | Complete suite: Data, Metrics and Webhooks API |
| [`@avalanche-sdk/interchain`](/avalanche-sdk/interchain-sdk/getting-started) | Send messages between Avalanche L1s using ICM/Teleporter |
## Quick Start
```bash theme={null}
npm install @avalanche-sdk/client
```
```bash theme={null}
yarn add @avalanche-sdk/client
```
```bash theme={null}
pnpm add @avalanche-sdk/client
```
### Basic Example
```typescript theme={null}
import { createClient } from '@avalanche-sdk/client';
// Initialize the client
const client = createClient({
network: 'mainnet'
});
// Get balance
const balance = await client.getBalance({
address: '0x...',
chainId: 43114
});
console.log('Balance:', balance);
```
## Available SDKs
### Client SDK
The main Avalanche client SDK for interacting with Avalanche nodes and building blockchain applications.
**Key Features:**
* **Complete API coverage** for P-Chain, X-Chain, and C-Chain.
* **Full viem compatibility** - anything you can do with viem works here.
* **TypeScript-first design** with full type safety.
* **Smart contract interactions** with first-class APIs.
* **Wallet integration** and transaction management.
* **Cross-chain transfers** between X, P and C chains.
**Common Use Cases:**
* Retrieve balances and UTXOs for addresses
* Build, sign, and issue transactions to any chain
* Add validators and delegators
* Create subnets and blockchains.
* Convert subnets to L1s.
Learn how to integrate blockchain functionality into your application
### ChainKit SDK
Combined SDK with full typed coverage of Avalanche Data (Glacier) and Metrics APIs.
**Key Features:**
* **Full endpoint coverage** for Glacier Data API and Metrics API
* **Strongly-typed models** with automatic TypeScript inference
* **Built-in pagination** helpers and automatic retries/backoff
* **High-level helpers** for transactions, blocks, addresses, tokens, NFTs
* **Metrics insights** including network health, validator stats, throughput
* **Webhook support** with payload shapes and signature verification
**API Endpoints:**
* Glacier API: [https://glacier-api.avax.network/api](https://glacier-api.avax.network/api)
* Metrics API: [https://metrics.avax.network/api](https://metrics.avax.network/api)
Access comprehensive blockchain data and analytics
### Interchain SDK
SDK for building cross-L1 applications and bridges.
**Key Features:**
* **Type-safe ICM client** for sending cross-chain messages
* **Seamless wallet integration** with existing wallet clients
* **Built-in support** for Avalanche C-Chain and custom subnets
* **Message tracking** and delivery confirmation
* **Gas estimation** for cross-chain operations
**Use Cases:**
* Cross-chain token bridges
* Multi-L1 governance systems
* Interchain data oracles
* Cross-subnet liquidity pools
Build powerful cross-chain applications
## Support
### Community & Help
* Discord - Get real-time help in the #avalanche-sdk channel
* Telegram - Join discussions
* Twitter - Stay updated
### Feedback Sessions
* Book a Google Meet Feedback Session - Schedule a 1-on-1 session to share your feedback and suggestions
### Issue Tracking
* Report a Bug
* Request a Feature
* View All Issues
### Direct Support
* Technical Issues: GitHub Issues
* Security Issues: [security@avalabs.org](mailto:security@avalabs.org)
* General Inquiries: [data-platform@avalabs.org](mailto:data-platform@avalabs.org)
# C-Chain API (/docs/rpcs/c-chain/api)
---
title: "C-Chain API"
description: "This page is an overview of the C-Chain API associated with AvalancheGo."
edit_url: https://github.com/ava-labs/coreth/edit/master/plugin/evm/api.md
---
Ethereum has its own notion of `networkID` and `chainID`. These have no relationship to Avalanche's view of networkID and chainID and are purely internal to the [C-Chain](https://github.com/docs/quick-start/primary-network#c-chain). On Mainnet, the C-Chain uses `1` and `43114` for these values. On the Fuji Testnet, it uses `1` and `43113` for these values. `networkID` and `chainID` can also be obtained using the `net_version` and `eth_chainId` methods.
## Ethereum APIs
### Endpoints
#### JSON-RPC Endpoints
To interact with C-Chain via the JSON-RPC endpoint:
```sh
/ext/bc/C/rpc
```
To interact with other instances of the EVM via the JSON-RPC endpoint:
```sh
/ext/bc/blockchainID/rpc
```
where `blockchainID` is the ID of the blockchain running the EVM.
#### WebSocket Endpoints
On the [public API node](https://github.com/docs/tooling/rpc-providers), it only supports C-Chain
websocket API calls for API methods that don't exist on the C-Chain's HTTP API
To interact with C-Chain via the websocket endpoint:
```sh
/ext/bc/C/ws
```
For example, to interact with the C-Chain's Ethereum APIs via websocket on localhost, you can use:
```sh
ws://127.0.0.1:9650/ext/bc/C/ws
```
} >
On localhost, use `ws://`. When using the [Public API](https://github.com/docs/tooling/rpc-providers) or another
host that supports encryption, use `wss://`.
To interact with other instances of the EVM via the websocket endpoint:
```sh
/ext/bc/blockchainID/ws
```
where `blockchainID` is the ID of the blockchain running the EVM.
### Standard Ethereum APIs
Avalanche offers an API interface identical to Geth's API except that it only supports the following
services:
- `web3_`
- `net_`
- `eth_`
- `personal_`
- `txpool_`
- `debug_` (note: this is turned off on the public API node.)
You can interact with these services the same exact way you'd interact with Geth (see exceptions below). See the
[Ethereum Wiki's JSON-RPC Documentation](https://ethereum.org/en/developers/docs/apis/json-rpc/)
and [Geth's JSON-RPC Documentation](https://geth.ethereum.org/docs/rpc/server)
for a full description of this API.
For batched requests on the [public API node](https://github.com/docs/tooling/rpc-providers) , the maximum
number of items is 40.
#### Exceptions
Starting with release [`v0.12.2`](https://github.com/ava-labs/avalanchego/releases/tag/v1.12.2), `eth_getProof` has a different behavior compared to geth:
- On archival nodes (nodes with`pruning-enabled` set to `false`), queries for state proofs older than 24 hours preceding the last accepted block will be rejected by default. This can be adjusted with `historical-proof-query-window`, which defines the number of blocks before the last accepted block that can be queried for state proofs. Set this option to `0` to accept a state query for any block number.
- On pruning nodes (nodes with `pruning-enabled` set to `true`), queries for state proofs outside the 32 block window after the last accepted block are always rejected.
### Avalanche - Ethereum APIs
In addition to the standard Ethereum APIs, Avalanche offers `eth_baseFee`,
`eth_maxPriorityFeePerGas`, and `eth_getChainConfig`.
They use the same endpoint as standard Ethereum APIs:
```sh
/ext/bc/C/rpc
```
#### `eth_baseFee`
Get the base fee for the next block.
**Signature:**
```sh
eth_baseFee() -> {}
```
`result` is the hex value of the base fee for the next block.
**Example Call:**
```sh
curl -X POST --data '{
"jsonrpc":"2.0",
"id" :1,
"method" :"eth_baseFee",
"params" :[]
}' -H 'content-type:application/json;' 127.0.0.1:9650/ext/bc/C/rpc
```
**Example Response:**
```json
{
"jsonrpc": "2.0",
"id": 1,
"result": "0x34630b8a00"
}
```
#### `eth_maxPriorityFeePerGas`
Get the priority fee needed to be included in a block.
**Signature:**
```sh
eth_maxPriorityFeePerGas() -> {}
```
`result` is hex value of the priority fee needed to be included in a block.
**Example Call:**
```sh
curl -X POST --data '{
"jsonrpc":"2.0",
"id" :1,
"method" :"eth_maxPriorityFeePerGas",
"params" :[]
}' -H 'content-type:application/json;' 127.0.0.1:9650/ext/bc/C/rpc
```
**Example Response:**
```json
{
"jsonrpc": "2.0",
"id": 1,
"result": "0x2540be400"
}
```
For more information on dynamic fees see the [C-Chain section of the transaction fee
documentation](https://github.com/docs/api-reference/guides/txn-fees#c-chain-fees).
## Admin APIs
The Admin API provides administrative functionality for the EVM.
### Endpoint
```sh
/ext/bc/C/admin
```
### Methods
#### `admin_startCPUProfiler`
Starts a CPU profile that writes to the specified file.
**Signature:**
```sh
admin_startCPUProfiler() -> {}
```
**Example Call:**
```sh
curl -X POST --data '{
"jsonrpc":"2.0",
"id" :1,
"method" :"admin_startCPUProfiler",
"params" :[]
}' -H 'content-type:application/json;' 127.0.0.1:9650/ext/bc/C/admin
```
#### `admin_stopCPUProfiler`
Stops the CPU profile.
**Signature:**
```sh
admin_stopCPUProfiler() -> {}
```
**Example Call:**
```sh
curl -X POST --data '{
"jsonrpc":"2.0",
"id" :1,
"method" :"admin_stopCPUProfiler",
"params" :[]
}' -H 'content-type:application/json;' 127.0.0.1:9650/ext/bc/C/admin
```
#### `admin_memoryProfile`
Runs a memory profile writing to the specified file.
**Signature:**
```sh
admin_memoryProfile() -> {}
```
**Example Call:**
```sh
curl -X POST --data '{
"jsonrpc":"2.0",
"id" :1,
"method" :"admin_memoryProfile",
"params" :[]
}' -H 'content-type:application/json;' 127.0.0.1:9650/ext/bc/C/admin
```
#### `admin_lockProfile`
Runs a mutex profile writing to the specified file.
**Signature:**
```sh
admin_lockProfile() -> {}
```
**Example Call:**
```sh
curl -X POST --data '{
"jsonrpc":"2.0",
"id" :1,
"method" :"admin_lockProfile",
"params" :[]
}' -H 'content-type:application/json;' 127.0.0.1:9650/ext/bc/C/admin
```
#### `admin_setLogLevel`
Sets the log level for the EVM.
**Signature:**
```sh
admin_setLogLevel({
level: string
}) -> {}
```
**Example Call:**
```sh
curl -X POST --data '{
"jsonrpc":"2.0",
"id" :1,
"method" :"admin_setLogLevel",
"params" :[{
"level": "debug"
}]
}' -H 'content-type:application/json;' 127.0.0.1:9650/ext/bc/C/admin
```
#### `admin_getVMConfig`
Returns the current VM configuration.
**Signature:**
```sh
admin_getVMConfig() -> {
config: {
// VM configuration fields
}
}
```
**Example Call:**
```sh
curl -X POST --data '{
"jsonrpc":"2.0",
"id" :1,
"method" :"admin_getVMConfig",
"params" :[]
}' -H 'content-type:application/json;' 127.0.0.1:9650/ext/bc/C/admin
```
## Avalanche-Specific APIs
### Endpoint
```sh
/ext/bc/C/avax
```
### Methods
#### `avax.getUTXOs`
Gets all UTXOs for the specified addresses.
**Signature:**
```sh
avax.getUTXOs({
addresses: [string],
sourceChain: string,
startIndex: {
address: string,
utxo: string
},
limit: number,
encoding: string
}) -> {
utxos: [string],
endIndex: {
address: string,
utxo: string
},
numFetched: number,
encoding: string
}
```
**Example Call:**
```sh
curl -X POST --data '{
"jsonrpc":"2.0",
"id" :1,
"method" :"avax.getUTXOs",
"params" :[{
"addresses": ["X-avax1..."],
"sourceChain": "X",
"limit": 100,
"encoding": "hex"
}]
}' -H 'content-type:application/json;' 127.0.0.1:9650/ext/bc/C/avax
```
#### `avax.issueTx`
Issues a transaction to the network.
**Signature:**
```sh
avax.issueTx({
tx: string,
encoding: string
}) -> {
txID: string
}
```
**Example Call:**
```sh
curl -X POST --data '{
"jsonrpc":"2.0",
"id" :1,
"method" :"avax.issueTx",
"params" :[{
"tx": "0x...",
"encoding": "hex"
}]
}' -H 'content-type:application/json;' 127.0.0.1:9650/ext/bc/C/avax
```
#### `avax.getAtomicTxStatus`
Returns the status of the specified atomic transaction.
**Signature:**
```sh
avax.getAtomicTxStatus({
txID: string
}) -> {
status: string,
blockHeight: number (optional)
}
```
**Example Call:**
```sh
curl -X POST --data '{
"jsonrpc":"2.0",
"id" :1,
"method" :"avax.getAtomicTxStatus",
"params" :[{
"txID": "2QouvNW..."
}]
}' -H 'content-type:application/json;' 127.0.0.1:9650/ext/bc/C/avax
```
#### `avax.getAtomicTx`
Returns the specified atomic transaction.
**Signature:**
```sh
avax.getAtomicTx({
txID: string,
encoding: string
}) -> {
tx: string,
encoding: string,
blockHeight: number (optional)
}
```
**Example Call:**
```sh
curl -X POST --data '{
"jsonrpc":"2.0",
"id" :1,
"method" :"avax.getAtomicTx",
"params" :[{
"txID": "2QouvNW...",
"encoding": "hex"
}]
}' -H 'content-type:application/json;' 127.0.0.1:9650/ext/bc/C/avax
```
#### `avax.version`
Returns the version of the VM.
**Signature:**
```sh
avax.version() -> {
version: string
}
```
**Example Call:**
```sh
curl -X POST --data '{
"jsonrpc":"2.0",
"id" :1,
"method" :"avax.version",
"params" :[]
}' -H 'content-type:application/json;' 127.0.0.1:9650/ext/bc/C/avax
```
# AvalancheGo C-Chain RPC (/docs/rpcs/c-chain)
---
title: "AvalancheGo C-Chain RPC"
description: "This page is an overview of the C-Chain RPC associated with AvalancheGo."
edit_url: https://github.com/ava-labs/coreth/edit/master/plugin/evm/api.md
---
Ethereum has its own notion of `networkID` and `chainID`. These have no relationship to Avalanche's view of networkID and chainID and are purely internal to the [C-Chain](https://github.com/docs/quick-start/primary-network#c-chain). On Mainnet, the C-Chain uses `1` and `43114` for these values. On the Fuji Testnet, it uses `1` and `43113` for these values. `networkID` and `chainID` can also be obtained using the `net_version` and `eth_chainId` methods.
## Ethereum APIs
### Endpoints
#### JSON-RPC Endpoints
To interact with C-Chain via the JSON-RPC endpoint:
```sh
/ext/bc/C/rpc
```
To interact with other instances of the EVM via the JSON-RPC endpoint:
```sh
/ext/bc/blockchainID/rpc
```
where `blockchainID` is the ID of the blockchain running the EVM.
#### WebSocket Endpoints
On the [public API node](https://github.com/docs/tooling/rpc-providers), it only supports C-Chain
websocket API calls for API methods that don't exist on the C-Chain's HTTP API
To interact with C-Chain via the websocket endpoint:
```sh
/ext/bc/C/ws
```
For example, to interact with the C-Chain's Ethereum APIs via websocket on localhost, you can use:
```sh
ws://127.0.0.1:9650/ext/bc/C/ws
```
} >
On localhost, use `ws://`. When using the [Public API](https://github.com/docs/tooling/rpc-providers) or another
host that supports encryption, use `wss://`.
To interact with other instances of the EVM via the websocket endpoint:
```sh
/ext/bc/blockchainID/ws
```
where `blockchainID` is the ID of the blockchain running the EVM.
### Standard Ethereum APIs
Avalanche offers an API interface identical to Geth's API except that it only supports the following
services:
- `web3_`
- `net_`
- `eth_`
- `personal_`
- `txpool_`
- `debug_` (note: this is turned off on the public API node.)
You can interact with these services the same exact way you'd interact with Geth (see exceptions below). See the
[Ethereum Wiki's JSON-RPC Documentation](https://ethereum.org/en/developers/docs/apis/json-rpc/)
and [Geth's JSON-RPC Documentation](https://geth.ethereum.org/docs/rpc/server)
for a full description of this API.
For batched requests on the [public API node](https://github.com/docs/tooling/rpc-providers) , the maximum
number of items is 40.
#### Exceptions
Starting with release [`v0.12.2`](https://github.com/ava-labs/avalanchego/releases/tag/v1.12.2), `eth_getProof` has a different behavior compared to geth:
- On archival nodes (nodes with`pruning-enabled` set to `false`), queries for state proofs older than 24 hours preceding the last accepted block will be rejected by default. This can be adjusted with `historical-proof-query-window`, which defines the number of blocks before the last accepted block that can be queried for state proofs. Set this option to `0` to accept a state query for any block number.
- On pruning nodes (nodes with `pruning-enabled` set to `true`), queries for state proofs outside the 32 block window after the last accepted block are always rejected.
### Avalanche - Ethereum APIs
In addition to the standard Ethereum APIs, Avalanche offers `eth_baseFee`,
`eth_maxPriorityFeePerGas`, and `eth_getChainConfig`.
They use the same endpoint as standard Ethereum APIs:
```sh
/ext/bc/C/rpc
```
#### `eth_baseFee`
Get the base fee for the next block.
**Signature:**
```sh
eth_baseFee() -> {}
```
`result` is the hex value of the base fee for the next block.
**Example Call:**
```sh
curl -X POST --data '{
"jsonrpc":"2.0",
"id" :1,
"method" :"eth_baseFee",
"params" :[]
}' -H 'content-type:application/json;' 127.0.0.1:9650/ext/bc/C/rpc
```
**Example Response:**
```json
{
"jsonrpc": "2.0",
"id": 1,
"result": "0x34630b8a00"
}
```
#### `eth_maxPriorityFeePerGas`
Get the priority fee needed to be included in a block.
**Signature:**
```sh
eth_maxPriorityFeePerGas() -> {}
```
`result` is hex value of the estimated priority fee needed to be included in a block.
**Example Call:**
```sh
curl -X POST --data '{
"jsonrpc":"2.0",
"id" :1,
"method" :"eth_maxPriorityFeePerGas",
"params" :[]
}' -H 'content-type:application/json;' 127.0.0.1:9650/ext/bc/C/rpc
```
**Example Response:**
```json
{
"jsonrpc": "2.0",
"id": 1,
"result": "0x2540be400"
}
```
For more information on dynamic fees see the [C-Chain section of the transaction fee
documentation](https://github.com/docs/api-reference/guides/txn-fees#c-chain-fees).
## Admin APIs
The Admin API provides administrative functionality for the EVM.
### Endpoint
```sh
/ext/bc/C/admin
```
### Methods
#### `admin_startCPUProfiler`
Starts a CPU profile that writes to the specified file.
**Signature:**
```sh
admin_startCPUProfiler() -> {}
```
**Example Call:**
```sh
curl -X POST --data '{
"jsonrpc":"2.0",
"id" :1,
"method" :"admin_startCPUProfiler",
"params" :[]
}' -H 'content-type:application/json;' 127.0.0.1:9650/ext/bc/C/admin
```
#### `admin_stopCPUProfiler`
Stops the CPU profile.
**Signature:**
```sh
admin_stopCPUProfiler() -> {}
```
**Example Call:**
```sh
curl -X POST --data '{
"jsonrpc":"2.0",
"id" :1,
"method" :"admin_stopCPUProfiler",
"params" :[]
}' -H 'content-type:application/json;' 127.0.0.1:9650/ext/bc/C/admin
```
#### `admin_memoryProfile`
Runs a memory profile writing to the specified file.
**Signature:**
```sh
admin_memoryProfile() -> {}
```
**Example Call:**
```sh
curl -X POST --data '{
"jsonrpc":"2.0",
"id" :1,
"method" :"admin_memoryProfile",
"params" :[]
}' -H 'content-type:application/json;' 127.0.0.1:9650/ext/bc/C/admin
```
#### `admin_lockProfile`
Runs a mutex profile writing to the specified file.
**Signature:**
```sh
admin_lockProfile() -> {}
```
**Example Call:**
```sh
curl -X POST --data '{
"jsonrpc":"2.0",
"id" :1,
"method" :"admin_lockProfile",
"params" :[]
}' -H 'content-type:application/json;' 127.0.0.1:9650/ext/bc/C/admin
```
#### `admin_setLogLevel`
Sets the log level for the EVM.
**Signature:**
```sh
admin_setLogLevel({
level: string
}) -> {}
```
**Example Call:**
```sh
curl -X POST --data '{
"jsonrpc":"2.0",
"id" :1,
"method" :"admin_setLogLevel",
"params" :[{
"level": "debug"
}]
}' -H 'content-type:application/json;' 127.0.0.1:9650/ext/bc/C/admin
```
#### `admin_getVMConfig`
Returns the current VM configuration.
**Signature:**
```sh
admin_getVMConfig() -> {
config: {
// VM configuration fields
}
}
```
**Example Call:**
```sh
curl -X POST --data '{
"jsonrpc":"2.0",
"id" :1,
"method" :"admin_getVMConfig",
"params" :[]
}' -H 'content-type:application/json;' 127.0.0.1:9650/ext/bc/C/admin
```
## Avalanche-Specific APIs
### Endpoint
```sh
/ext/bc/C/avax
```
### Methods
#### `avax.getUTXOs`
Gets all UTXOs for the specified addresses.
**Signature:**
```sh
avax.getUTXOs({
addresses: [string],
sourceChain: string,
startIndex: {
address: string,
utxo: string
},
limit: number,
encoding: string
}) -> {
utxos: [string],
endIndex: {
address: string,
utxo: string
},
numFetched: number,
encoding: string
}
```
**Example Call:**
```sh
curl -X POST --data '{
"jsonrpc":"2.0",
"id" :1,
"method" :"avax.getUTXOs",
"params" :[{
"addresses": ["X-avax1..."],
"sourceChain": "X",
"limit": 100,
"encoding": "hex"
}]
}' -H 'content-type:application/json;' 127.0.0.1:9650/ext/bc/C/avax
```
#### `avax.issueTx`
Issues a transaction to the network.
**Signature:**
```sh
avax.issueTx({
tx: string,
encoding: string
}) -> {
txID: string
}
```
**Example Call:**
```sh
curl -X POST --data '{
"jsonrpc":"2.0",
"id" :1,
"method" :"avax.issueTx",
"params" :[{
"tx": "0x...",
"encoding": "hex"
}]
}' -H 'content-type:application/json;' 127.0.0.1:9650/ext/bc/C/avax
```
#### `avax.getAtomicTxStatus`
Returns the status of the specified atomic transaction.
**Signature:**
```sh
avax.getAtomicTxStatus({
txID: string
}) -> {
status: string,
blockHeight: number (optional)
}
```
**Example Call:**
```sh
curl -X POST --data '{
"jsonrpc":"2.0",
"id" :1,
"method" :"avax.getAtomicTxStatus",
"params" :[{
"txID": "2QouvNW..."
}]
}' -H 'content-type:application/json;' 127.0.0.1:9650/ext/bc/C/avax
```
#### `avax.getAtomicTx`
Returns the specified atomic transaction.
**Signature:**
```sh
avax.getAtomicTx({
txID: string,
encoding: string
}) -> {
tx: string,
encoding: string,
blockHeight: number (optional)
}
```
**Example Call:**
```sh
curl -X POST --data '{
"jsonrpc":"2.0",
"id" :1,
"method" :"avax.getAtomicTx",
"params" :[{
"txID": "2QouvNW...",
"encoding": "hex"
}]
}' -H 'content-type:application/json;' 127.0.0.1:9650/ext/bc/C/avax
```
#### `avax.version`
Returns the version of the VM.
**Signature:**
```sh
avax.version() -> {
version: string
}
```
**Example Call:**
```sh
curl -X POST --data '{
"jsonrpc":"2.0",
"id" :1,
"method" :"avax.version",
"params" :[]
}' -H 'content-type:application/json;' 127.0.0.1:9650/ext/bc/C/avax
```
# Transaction Format (/docs/rpcs/c-chain/txn-format)
---
title: Transaction Format
---
This page is meant to be the single source of truth for how we serialize atomic
transactions in `Coreth`. This document uses the [primitive serialization](/docs/api-reference/standards/serialization-primitives) format for packing and
[secp256k1](/docs/api-reference/standards/cryptographic-primitives#cryptography-in-the-avalanche-virtual-machine)
for cryptographic user identification.
## Codec ID
Some data is prepended with a codec ID (unt16) that denotes how the data should
be deserialized. Right now, the only valid codec ID is 0 (`0x00 0x00`).
## Inputs
Inputs to Coreth Atomic Transactions are either an `EVMInput` from this chain or
a `TransferableInput` (which contains a `SECP256K1TransferInput`) from another
chain. The `EVMInput` will be used in `ExportTx` to spend funds from this chain,
while the `TransferableInput` will be used to import atomic UTXOs from another
chain.
## EVM Input
Input type that specifies an EVM account to deduct the funds from as part of an `ExportTx`.
### What EVM Input Contains
An EVM Input contains an `address`, `amount`, `assetID`, and `nonce`.
- **`Address`** is the EVM address from which to transfer funds.
- **`Amount`** is the amount of the asset to be transferred (specified in nAVAX
for AVAX and the smallest denomination for all other assets).
- **`AssetID`** is the ID of the asset to transfer.
- **`Nonce`** is the nonce of the EVM account exporting funds.
### Gantt EVM Input Specification
```text
+----------+----------+-------------------------+
| address : [20]byte | 20 bytes |
+----------+----------+-------------------------+
| amount : uint64 | 08 bytes |
+----------+----------+-------------------------+
| asset_id : [32]byte | 32 bytes |
+----------+----------+-------------------------+
| nonce : uint64 | 08 bytes |
+----------+----------+-------------------------+
| 68 bytes |
+-------------------------+
```
### Proto EVM Input Specification
```text
message {
bytes address = 1; // 20 bytes
uint64 amount = 2; // 08 bytes
bytes assetID = 3; // 32 bytes
uint64 nonce = 4; // 08 bytes
}
```
### EVM Input Example
Let's make an EVM Input:
- `Address: 0x8db97c7cece249c2b98bdc0226cc4c2a57bf52fc`
- `Amount: 2000000`
- `AssetID: 0x000102030405060708090a0b0c0d0e0f101112131415161718191a1b1c1d1e1f`
- `Nonce: 0`
```text
[
Address <- 0x8db97c7cece249c2b98bdc0226cc4c2a57bf52fc,
Amount <- 0x00000000001e8480
AssetID <- 0xdbcf890f77f49b96857648b72b77f9f82937f28a68704af05da0dc12ba53f2db
Nonce <- 0x0000000000000000
]
=
[
// address:
0x8d, 0xb9, 0x7c, 0x7c, 0xec, 0xe2, 0x49, 0xc2,
0xb9, 0x8b, 0xdc, 0x02, 0x26, 0xcc, 0x4c, 0x2a,
0x57, 0xbf, 0x52, 0xfc,
// amount:
0x00, 0x00, 0x00, 0x00, 0x00, 0x1e, 0x84, 0x80,
// assetID:
0xdb, 0xcf, 0x89, 0x0f, 0x77, 0xf4, 0x9b, 0x96,
0x85, 0x76, 0x48, 0xb7, 0x2b, 0x77, 0xf9, 0xf8,
0x29, 0x37, 0xf2, 0x8a, 0x68, 0x70, 0x4a, 0xf0,
0x5d, 0xa0, 0xdc, 0x12, 0xba, 0x53, 0xf2, 0xdb,
// nonce:
0x00, 0x00, 0x00, 0x00, 0x00, 0x00, 0x00, 0x00,
]
```
## Transferable Input
Transferable Input wraps a `SECP256K1TransferInput`. Transferable inputs
describe a specific UTXO with a provided transfer input.
### What Transferable Input Contains
A transferable input contains a `TxID`, `UTXOIndex` `AssetID` and an `Input`.
- **`TxID`** is a 32-byte array that defines which transaction this input is consuming an output from.
- **`UTXOIndex`** is an int that defines which utxo this input is consuming in the specified transaction.
- **`AssetID`** is a 32-byte array that defines which asset this input references.
- **`Input`** is a `SECP256K1TransferInput`, as defined below.
### Gantt Transferable Input Specification
```text
+------------+----------+------------------------+
| tx_id : [32]byte | 32 bytes |
+------------+----------+------------------------+
| utxo_index : int | 04 bytes |
+------------+----------+------------------------+
| asset_id : [32]byte | 32 bytes |
+------------+----------+------------------------+
| input : Input | size(input) bytes |
+------------+----------+------------------------+
| 68 + size(input) bytes |
+------------------------+
```
### Proto Transferable Input Specification
```text
message TransferableInput {
bytes tx_id = 1; // 32 bytes
uint32 utxo_index = 2; // 04 bytes
bytes asset_id = 3; // 32 bytes
Input input = 4; // size(input)
}
```
### Transferable Input Example
Let's make a transferable input:
- `TxID: 0x6613a40dcdd8d22ea4aa99a4c84349056317cf550b6685e045e459954f258e59`
- `UTXOIndex: 1`
- `AssetID: 0xdbcf890f77f49b96857648b72b77f9f82937f28a68704af05da0dc12ba53f2db`
- `Input: "Example SECP256K1 Transfer Input from below"`
```text
[
TxID <- 0x6613a40dcdd8d22ea4aa99a4c84349056317cf550b6685e045e459954f258e59
UTXOIndex <- 0x00000001
AssetID <- 0xdbcf890f77f49b96857648b72b77f9f82937f28a68704af05da0dc12ba53f2db
Input <- 0x0000000500000000075bcd15000000020000000700000003
]
=
[
// txID:
0x66, 0x13, 0xa4, 0x0d, 0xcd, 0xd8, 0xd2, 0x2e,
0xa4, 0xaa, 0x99, 0xa4, 0xc8, 0x43, 0x49, 0x05,
0x63, 0x17, 0xcf, 0x55, 0x0b, 0x66, 0x85, 0xe0,
0x45, 0xe4, 0x59, 0x95, 0x4f, 0x25, 0x8e, 0x59,
// utxoIndex:
0x00, 0x00, 0x00, 0x01,
// assetID:
0xdb, 0xcf, 0x89, 0x0f, 0x77, 0xf4, 0x9b, 0x96,
0x85, 0x76, 0x48, 0xb7, 0x2b, 0x77, 0xf9, 0xf8,
0x29, 0x37, 0xf2, 0x8a, 0x68, 0x70, 0x4a, 0xf0,
0x5d, 0xa0, 0xdc, 0x12, 0xba, 0x53, 0xf2, 0xdb,
// input:
0x00, 0x00, 0x00, 0x05, 0x00, 0x00, 0x00, 0x74,
0x6a, 0x52, 0x88, 0x00, 0x00, 0x00, 0x00, 0x01,
0x00, 0x00, 0x00, 0x00,
]
```
## SECP256K1 Transfer Input
A
[secp256k1](/docs/api-reference/standards/cryptographic-primitives#cryptography-in-the-avalanche-virtual-machine)
transfer input allows for spending an unspent secp256k1 transfer output.
### What SECP256K1 Transfer Input Contains
A secp256k1 transfer input contains an `Amount` and `AddressIndices`.
- **`TypeID`** is the ID for this input type. It is `0x00000005`.
- **`Amount`** is a long that specifies the quantity that this input should be
consuming from the UTXO. Must be positive. Must be equal to the amount
specified in the UTXO.
- **`AddressIndices`** is a list of unique ints that define the private keys
that are being used to spend the UTXO. Each UTXO has an array of addresses
that can spend the UTXO. Each int represents the index in this address array
that will sign this transaction. The array must be sorted low to high.
### Gantt SECP256K1 Transfer Input Specification
```text
+-------------------------+-------------------------------------+
| type_id : int | 4 bytes |
+-----------------+-------+-------------------------------------+
| amount : long | 8 bytes |
+-----------------+-------+-------------------------------------+
| address_indices : []int | 4 + 4 * len(address_indices) bytes |
+-----------------+-------+-------------------------------------+
| 16 + 4 * len(address_indices) bytes |
+-------------------------------------+
```
### Proto SECP256K1 Transfer Input Specification
```text
message SECP256K1TransferInput {
uint32 typeID = 1; // 04 bytes
uint64 amount = 2; // 08 bytes
repeated uint32 address_indices = 3; // 04 bytes + 04 bytes * len(address_indices)
}
```
### SECP256K1 Transfer Input Example
Let's make a payment input with:
- **`TypeId`**: 5
- **`Amount`**: 500000000000
- **`AddressIndices`**: \[0\]
```text
[
TypeID <- 0x00000005
Amount <- 500000000000 = 0x000000746a528800,
AddressIndices <- [0x00000000]
]
=
[
// type id:
0x00, 0x00, 0x00, 0x05,
// amount:
0x00, 0x00, 0x00, 0x74, 0x6a, 0x52, 0x88, 0x00,
// length:
0x00, 0x00, 0x00, 0x01,
// sig[0]
0x00, 0x00, 0x00, 0x00,
]
```
## Outputs
Outputs to Coreth Atomic Transactions are either an `EVMOutput` to be added to
the balance of an address on this chain or a `TransferableOutput` (which
contains a `SECP256K1TransferOutput`) to be moved to another chain.
The EVM Output will be used in `ImportTx` to add funds to this chain, while the
`TransferableOutput` will be used to export atomic UTXOs to another chain.
## EVM Output
Output type specifying a state change to be applied to an EVM account as part of an `ImportTx`.
### What EVM Output Contains
An EVM Output contains an `address`, `amount`, and `assetID`.
- **`Address`** is the EVM address that will receive the funds.
- **`Amount`** is the amount of the asset to be transferred (specified in nAVAX
for AVAX and the smallest denomination for all other assets).
- **`AssetID`** is the ID of the asset to transfer.
### Gantt EVM Output Specification
```text
+----------+----------+-------------------------+
| address : [20]byte | 20 bytes |
+----------+----------+-------------------------+
| amount : uin64 | 08 bytes |
+----------+----------+-------------------------+
| asset_id : [32]byte | 32 bytes |
+----------+----------+-------------------------+
| 60 bytes |
+-------------------------+
```
### Proto EVM Output Specification
```text
message {
bytes address = 1; // 20 bytes
uint64 amount = 2; // 08 bytes
bytes assetID = 3; // 32 bytes
}
```
### EVM Output Example
Let's make an EVM Output:
- `Address: 0x0eb5ccb85c29009b6060decb353a38ea3b52cd20`
- `Amount: 500000000000`
- `AssetID: 0xdbcf890f77f49b96857648b72b77f9f82937f28a68704af05da0dc12ba53f2db`
```text
[
Address <- 0x0eb5ccb85c29009b6060decb353a38ea3b52cd20,
Amount <- 0x000000746a528800
AssetID <- 0xdbcf890f77f49b96857648b72b77f9f82937f28a68704af05da0dc12ba53f2db
]
=
[
// address:
0xc3, 0x34, 0x41, 0x28, 0xe0, 0x60, 0x12, 0x8e,
0xde, 0x35, 0x23, 0xa2, 0x4a, 0x46, 0x1c, 0x89,
0x43, 0xab, 0x08, 0x59,
// amount:
0x00, 0x00, 0x00, 0x74, 0x6a, 0x52, 0x88, 0x00,
// assetID:
0xdb, 0xcf, 0x89, 0x0f, 0x77, 0xf4, 0x9b, 0x96,
0x85, 0x76, 0x48, 0xb7, 0x2b, 0x77, 0xf9, 0xf8,
0x29, 0x37, 0xf2, 0x8a, 0x68, 0x70, 0x4a, 0xf0,
0x5d, 0xa0, 0xdc, 0x12, 0xba, 0x53, 0xf2, 0xdb,
]
```
## Transferable Output
Transferable outputs wrap a `SECP256K1TransferOutput` with an asset ID.
### What Transferable Output Contains
A transferable output contains an `AssetID` and an `Output` which is a `SECP256K1TransferOutput`.
- **`AssetID`** is a 32-byte array that defines which asset this output references.
- **`Output`** is a `SECP256K1TransferOutput` as defined below.
### Gantt Transferable Output Specification
```text
+----------+----------+-------------------------+
| asset_id : [32]byte | 32 bytes |
+----------+----------+-------------------------+
| output : Output | size(output) bytes |
+----------+----------+-------------------------+
| 32 + size(output) bytes |
+-------------------------+
```
### Proto Transferable Output Specification
```text
message TransferableOutput {
bytes asset_id = 1; // 32 bytes
Output output = 2; // size(output)
}
```
### Transferable Output Example
Let's make a transferable output:
- `AssetID: 0xdbcf890f77f49b96857648b72b77f9f82937f28a68704af05da0dc12ba53f2db`
- `Output: "Example SECP256K1 Transfer Output from below"`
```text
[
AssetID <- 0xdbcf890f77f49b96857648b72b77f9f82937f28a68704af05da0dc12ba53f2db
Output <- 0x000000070000000000003039000000000000d431000000010000000251025c61fbcfc078f69334f834be6dd26d55a955c3344128e060128ede3523a24a461c8943ab0859,
]
=
[
// assetID:
0xdb, 0xcf, 0x89, 0x0f, 0x77, 0xf4, 0x9b, 0x96,
0x85, 0x76, 0x48, 0xb7, 0x2b, 0x77, 0xf9, 0xf8,
0x29, 0x37, 0xf2, 0x8a, 0x68, 0x70, 0x4a, 0xf0,
0x5d, 0xa0, 0xdc, 0x12, 0xba, 0x53, 0xf2, 0xdb,
// output:
0xdb, 0xcf, 0x89, 0x0f, 0x77, 0xf4, 0x9b, 0x96,
0x85, 0x76, 0x48, 0xb7, 0x2b, 0x77, 0xf9, 0xf8,
0x29, 0x37, 0xf2, 0x8a, 0x68, 0x70, 0x4a, 0xf0,
0x5d, 0xa0, 0xdc, 0x12, 0xba, 0x53, 0xf2, 0xdb,
0x00, 0x00, 0x00, 0x07, 0x00, 0x00, 0x00, 0x00,
0x00, 0x0f, 0x42, 0x40, 0x00, 0x00, 0x00, 0x00,
0x00, 0x00, 0x00, 0x00, 0x00, 0x00, 0x00, 0x01,
0x00, 0x00, 0x00, 0x01, 0x66, 0xf9, 0x0d, 0xb6,
0x13, 0x7a, 0x78, 0xf7, 0x6b, 0x36, 0x93, 0xf7,
0xf2, 0xbc, 0x50, 0x79, 0x56, 0xda, 0xe5, 0x63,
]
```
## SECP256K1 Transfer Output
A
[secp256k1](/docs/api-reference/standards/cryptographic-primitives#cryptography-in-the-avalanche-virtual-machine)
transfer output allows for sending a quantity of an asset to a collection of
addresses after a specified Unix time.
### What SECP256K1 Transfer Output Contains
A secp256k1 transfer output contains a `TypeID`, `Amount`, `Locktime`, `Threshold`, and `Addresses`.
- **`TypeID`** is the ID for this output type. It is `0x00000007`.
- **`Amount`** is a long that specifies the quantity of the asset that this output owns. Must be positive.
- **`Locktime`** is a long that contains the Unix timestamp that this output can
be spent after. The Unix timestamp is specific to the second.
- **`Threshold`** is an int that names the number of unique signatures required
to spend the output. Must be less than or equal to the length of
**`Addresses`**. If **`Addresses`** is empty, must be 0.
- **`Addresses`** is a list of unique addresses that correspond to the private
keys that can be used to spend this output. Addresses must be sorted
lexicographically.
### Gantt SECP256K1 Transfer Output Specification
```text
+-----------+------------+--------------------------------+
| type_id : int | 4 bytes |
+-----------+------------+--------------------------------+
| amount : long | 8 bytes |
+-----------+------------+--------------------------------+
| locktime : long | 8 bytes |
+-----------+------------+--------------------------------+
| threshold : int | 4 bytes |
+-----------+------------+--------------------------------+
| addresses : [][20]byte | 4 + 20 * len(addresses) bytes |
+-----------+------------+--------------------------------+
| 28 + 20 * len(addresses) bytes |
+--------------------------------+
```
### Proto SECP256K1 Transfer Output Specification
```text
message SECP256K1TransferOutput {
uint32 typeID = 1; // 04 bytes
uint64 amount = 2; // 08 bytes
uint64 locktime = 3; // 08 bytes
uint32 threshold = 4; // 04 bytes
repeated bytes addresses = 5; // 04 bytes + 20 bytes * len(addresses)
}
```
### SECP256K1 Transfer Output Example
Let's make a secp256k1 transfer output with:
- **`TypeID`**: 7
- **`Amount`**: 1000000
- **`Locktime`**: 0
- **`Threshold`**: 1
- **`Addresses`**:
- 0x66f90db6137a78f76b3693f7f2bc507956dae563
```text
[
TypeID <- 0x00000007
Amount <- 0x00000000000f4240
Locktime <- 0x0000000000000000
Threshold <- 0x00000001
Addresses <- [
0x66f90db6137a78f76b3693f7f2bc507956dae563
]
]
=
[
// typeID:
0x00, 0x00, 0x00, 0x07,
// amount:
0x00, 0x00, 0x00, 0x00, 0x00, 0x0f, 0x42, 0x40,
// locktime:
0x00, 0x00, 0x00, 0x00, 0x00, 0x00, 0x00, 0x00,
// threshold:
0x00, 0x00, 0x00, 0x01,
// number of addresses:
0x00, 0x00, 0x00, 0x01,
// addrs[0]:
0x66, 0xf9, 0x0d, 0xb6, 0x13, 0x7a, 0x78, 0xf7,
0x6b, 0x36, 0x93, 0xf7, 0xf2, 0xbc, 0x50, 0x79,
0x56, 0xda, 0xe5, 0x63,
]
```
## Atomic Transactions
Atomic Transactions are used to move funds between chains. There are two types `ImportTx` and `ExportTx`.
## ExportTx
ExportTx is a transaction to export funds from Coreth to a different chain.
### What ExportTx Contains
An ExportTx contains an `typeID`, `networkID`, `blockchainID`, `destinationChain`, `inputs`, and `exportedOutputs`.
- **`typeID`** is an int that the type for an ExportTx. The typeID for an exportTx is 1.
- **`networkID`** is an int that defines which Avalanche network this
transaction is meant to be issued to. This could refer to Mainnet, Fuji, etc.
and is different than the EVM's network ID.
- **`blockchainID`** is a 32-byte array that defines which blockchain this transaction was issued to.
- **`destinationChain`** is a 32-byte array that defines which blockchain this
transaction exports funds to.
- **`inputs`** is an array of EVM Inputs to fund the ExportTx.
- **`exportedOutputs`** is an array of TransferableOutputs to be transferred to `destinationChain`.
### Gantt ExportTx Specification
```text
+---------------------+----------------------+-------------------------------------------------+
| typeID : int | 04 bytes |
+---------------------+----------------------+-------------------------------------------------+
| networkID : int | 04 bytes |
+---------------------+----------------------+-------------------------------------------------+
| blockchainID : [32]byte | 32 bytes |
+---------------------+----------------------+-------------------------------------------------+
| destinationChain : [32]byte | 32 bytes |
+---------------------+----------------------+-------------------------------------------------+
| inputs : []EvmInput | 4 + size(inputs) bytes |
+---------------------+----------------------+-------------------------------------------------+
| exportedOutputs : []TransferableOutput | 4 + size(exportedOutputs) bytes |
+----------+----------+----------------------+-------------------------------------------------+
| 80 + size(inputs) + size(exportedOutputs) bytes |
+-------------------------------------------------+
```
### ExportTx Example
Let's make an EVM Output:
- **`TypeID`**: `1`
- **`NetworkID`**: `12345`
- **`BlockchainID`**: `0x91060eabfb5a571720109b5896e5ff00010a1cfe6b103d585e6ebf27b97a1735`
- **`DestinationChain`**: `0xd891ad56056d9c01f18f43f58b5c784ad07a4a49cf3d1f11623804b5cba2c6bf`
- **`Inputs`**:
- `"Example EVMInput as defined above"`
- **`Exportedoutputs`**:
- `"Example TransferableOutput as defined above"`
```text
[
TypeID <- 0x00000001
NetworkID <- 0x00003039
BlockchainID <- 0x91060eabfb5a571720109b5896e5ff00010a1cfe6b103d585e6ebf27b97a1735
DestinationChain <- 0xd891ad56056d9c01f18f43f58b5c784ad07a4a49cf3d1f11623804b5cba2c6bf
Inputs <- [
0xc3344128e060128ede3523a24a461c8943ab08590000000000003039000102030405060708090a0b0c0d0e0f101112131415161718191a1b1c1d1e1f0000000000000001
]
ExportedOutputs <- [
0xdbcf890f77f49b96857648b72b77f9f82937f28a68704af05da0dc12ba53f2dbdbcf890f77f49b96857648b72b77f9f82937f28a68704af05da0dc12ba53f2db0000000700000000000f42400000000000000000000000010000000166f90db6137a78f76b3693f7f2bc507956dae563
]
]
=
[
// typeID:
0x00, 0x00, 0x00, 0x01,
// networkID:
0x00, 0x00, 0x00, 0x04,
// blockchainID:
0x91, 0x06, 0x0e, 0xab, 0xfb, 0x5a, 0x57, 0x17,
0x20, 0x10, 0x9b, 0x58, 0x96, 0xe5, 0xff, 0x00,
0x01, 0x0a, 0x1c, 0xfe, 0x6b, 0x10, 0x3d, 0x58,
0x5e, 0x6e, 0xbf, 0x27, 0xb9, 0x7a, 0x17, 0x35,
// destination_chain:
0xd8, 0x91, 0xad, 0x56, 0x05, 0x6d, 0x9c, 0x01,
0xf1, 0x8f, 0x43, 0xf5, 0x8b, 0x5c, 0x78, 0x4a,
0xd0, 0x7a, 0x4a, 0x49, 0xcf, 0x3d, 0x1f, 0x11,
0x62, 0x38, 0x04, 0xb5, 0xcb, 0xa2, 0xc6, 0xbf,
// inputs[] count:
0x00, 0x00, 0x00, 0x01,
// inputs[0]
0x8d, 0xb9, 0x7c, 0x7c, 0xec, 0xe2, 0x49, 0xc2,
0xb9, 0x8b, 0xdc, 0x02, 0x26, 0xcc, 0x4c, 0x2a,
0x57, 0xbf, 0x52, 0xfc, 0x00, 0x00, 0x00, 0x00,
0x00, 0x1e, 0x84, 0x80, 0xdb, 0xcf, 0x89, 0x0f,
0x77, 0xf4, 0x9b, 0x96, 0x85, 0x76, 0x48, 0xb7,
0x2b, 0x77, 0xf9, 0xf8, 0x29, 0x37, 0xf2, 0x8a,
0x68, 0x70, 0x4a, 0xf0, 0x5d, 0xa0, 0xdc, 0x12,
0xba, 0x53, 0xf2, 0xdb, 0x00, 0x00, 0x00, 0x00,
0x00, 0x00, 0x00, 0x00,
// exportedOutputs[] count
0x00, 0x00, 0x00, 0x01,
// exportedOutputs[0]
0xdb, 0xcf, 0x89, 0x0f, 0x77, 0xf4, 0x9b, 0x96,
0x85, 0x76, 0x48, 0xb7, 0x2b, 0x77, 0xf9, 0xf8,
0x29, 0x37, 0xf2, 0x8a, 0x68, 0x70, 0x4a, 0xf0,
0x5d, 0xa0, 0xdc, 0x12, 0xba, 0x53, 0xf2, 0xdb,
0x00, 0x00, 0x00, 0x07, 0x00, 0x00, 0x00, 0x00,
0x00, 0x0f, 0x42, 0x40, 0x00, 0x00, 0x00, 0x00,
0x00, 0x00, 0x00, 0x00, 0x00, 0x00, 0x00, 0x01,
0x00, 0x00, 0x00, 0x01, 0x66, 0xf9, 0x0d, 0xb6,
0x13, 0x7a, 0x78, 0xf7, 0x6b, 0x36, 0x93, 0xf7,
0xf2, 0xbc, 0x50, 0x79, 0x56, 0xda, 0xe5, 0x63,
]
```
## ImportTx
ImportTx is a transaction to import funds to Coreth from another chain.
### What ImportTx Contains
An ImportTx contains an `typeID`, `networkID`, `blockchainID`,
`destinationChain`, `importedInputs`, and `Outs`.
- **`typeID`** is an int that the type for an ImportTx. The typeID for an `ImportTx` is 0.
- **`networkID`** is an int that defines which Avalanche network this
transaction is meant to be issued to. This could refer to Mainnet, Fuji, etc.
and is different than the EVM's network ID.
- **`blockchainID`** is a 32-byte array that defines which blockchain this transaction was issued to.
- **`sourceChain`** is a 32-byte array that defines which blockchain from which to import funds.
- **`importedInputs`** is an array of TransferableInputs to fund the ImportTx.
- **`Outs`** is an array of EVM Outputs to be imported to this chain.
### Gantt ImportTx Specification
```text
+---------------------+----------------------+-------------------------------------------------+
| typeID : int | 04 bytes |
+---------------------+----------------------+-------------------------------------------------+
| networkID : int | 04 bytes |
+---------------------+----------------------+-------------------------------------------------+
| blockchainID : [32]byte | 32 bytes |
+---------------------+----------------------+-------------------------------------------------+
| sourceChain : [32]byte | 32 bytes |
+---------------------+----------------------+-------------------------------------------------+
| importedInputs : []TransferableInput | 4 + size(importedInputs) bytes |
+---------------------+----------------------+-------------------------------------------------+
| outs : []EVMOutput | 4 + size(outs) bytes |
+----------+----------+----------------------+-------------------------------------------------+
| 80 + size(importedInputs) + size(outs) bytes |
+-------------------------------------------------+
```
### ImportTx Example
Let's make an ImportTx:
- **`TypeID`**: `0`
- **`NetworkID`**: `12345`
- **`BlockchainID`**: `0x91060eabfb5a571720109b5896e5ff00010a1cfe6b103d585e6ebf27b97a1735`
- **`SourceChain`**: `0xd891ad56056d9c01f18f43f58b5c784ad07a4a49cf3d1f11623804b5cba2c6bf`
- **`ImportedInputs`**:
- `"Example TransferableInput as defined above"`
- **`Outs`**:
- `"Example EVMOutput as defined above"`
```text
[
TypeID <- 0x00000000
NetworkID <- 0x00003039
BlockchainID <- 0x91060eabfb5a571720109b5896e5ff00010a1cfe6b103d585e6ebf27b97a1735
SourceChain <- 0xd891ad56056d9c01f18f43f58b5c784ad07a4a49cf3d1f11623804b5cba2c6bf
ImportedInputs <- [
0x6613a40dcdd8d22ea4aa99a4c84349056317cf550b6685e045e459954f258e5900000001dbcf890f77f49b96857648b72b77f9f82937f28a68704af05da0dc12ba53f2db00000005000000746a5288000000000100000000
]
Outs <- [
0x0eb5ccb85c29009b6060decb353a38ea3b52cd20000000746a528800dbcf890f77f49b96857648b72b77f9f82937f28a68704af05da0dc12ba53f2db
]
]
=
[
// typeID:
0x00, 0x00, 0x00, 0x00,
// networkID:
0x00, 0x00, 0x00, 0x04,
// blockchainID:
0x91, 0x06, 0x0e, 0xab, 0xfb, 0x5a, 0x57, 0x17,
0x20, 0x10, 0x9b, 0x58, 0x96, 0xe5, 0xff, 0x00,
0x01, 0x0a, 0x1c, 0xfe, 0x6b, 0x10, 0x3d, 0x58,
0x5e, 0x6e, 0xbf, 0x27, 0xb9, 0x7a, 0x17, 0x35,
// sourceChain:
0xd8, 0x91, 0xad, 0x56, 0x05, 0x6d, 0x9c, 0x01,
0xf1, 0x8f, 0x43, 0xf5, 0x8b, 0x5c, 0x78, 0x4a,
0xd0, 0x7a, 0x4a, 0x49, 0xcf, 0x3d, 0x1f, 0x11,
0x62, 0x38, 0x04, 0xb5, 0xcb, 0xa2, 0xc6, 0xbf,
// importedInputs[] count:
0x00, 0x00, 0x00, 0x01,
// importedInputs[0]
0x66, 0x13, 0xa4, 0x0d, 0xcd, 0xd8, 0xd2, 0x2e,
0xa4, 0xaa, 0x99, 0xa4, 0xc8, 0x43, 0x49, 0x05,
0x63, 0x17, 0xcf, 0x55, 0x0b, 0x66, 0x85, 0xe0,
0x45, 0xe4, 0x59, 0x95, 0x4f, 0x25, 0x8e, 0x59,
0x00, 0x00, 0x00, 0x01, 0xdb, 0xcf, 0x89, 0x0f,
0x77, 0xf4, 0x9b, 0x96, 0x85, 0x76, 0x48, 0xb7,
0x2b, 0x77, 0xf9, 0xf8, 0x29, 0x37, 0xf2, 0x8a,
0x68, 0x70, 0x4a, 0xf0, 0x5d, 0xa0, 0xdc, 0x12,
0xba, 0x53, 0xf2, 0xdb, 0x00, 0x00, 0x00, 0x05,
0x00, 0x00, 0x00, 0x74, 0x6a, 0x52, 0x88, 0x00,
0x00, 0x00, 0x00, 0x01, 0x00, 0x00, 0x00, 0x00,
// outs[] count
0x00, 0x00, 0x00, 0x01,
// outs[0]
0x0e, 0xb5, 0xcc, 0xb8, 0x5c, 0x29, 0x00, 0x9b,
0x60, 0x60, 0xde, 0xcb, 0x35, 0x3a, 0x38, 0xea,
0x3b, 0x52, 0xcd, 0x20, 0x00, 0x00, 0x00, 0x74,
0x6a, 0x52, 0x88, 0x00, 0xdb, 0xcf, 0x89, 0x0f,
0x77, 0xf4, 0x9b, 0x96, 0x85, 0x76, 0x48, 0xb7,
0x2b, 0x77, 0xf9, 0xf8, 0x29, 0x37, 0xf2, 0x8a,
0x68, 0x70, 0x4a, 0xf0, 0x5d, 0xa0, 0xdc, 0x12,
0xba, 0x53, 0xf2, 0xdb,
]
```
## Credentials
Credentials have one possible type: `SECP256K1Credential`. Each credential is
paired with an Input. The order of the credentials match the order of the
inputs.
## SECP256K1 Credential
A
[secp256k1](/docs/api-reference/standards/cryptographic-primitives#cryptography-in-the-avalanche-virtual-machine)
credential contains a list of 65-byte recoverable signatures.
### What SECP256K1 Credential Contains
- **`TypeID`** is the ID for this type. It is `0x00000009`.
- **`Signatures`** is an array of 65-byte recoverable signatures. The order of
the signatures must match the input's signature indices.
### Gantt SECP256K1 Credential Specification
```text
+------------------------------+---------------------------------+
| type_id : int | 4 bytes |
+-----------------+------------+---------------------------------+
| signatures : [][65]byte | 4 + 65 * len(signatures) bytes |
+-----------------+------------+---------------------------------+
| 8 + 65 * len(signatures) bytes |
+---------------------------------+
```
### Proto SECP256K1 Credential Specification
```text
message SECP256K1Credential {
uint32 typeID = 1; // 4 bytes
repeated bytes signatures = 2; // 4 bytes + 65 bytes * len(signatures)
}
```
### SECP256K1 Credential Example
Let's make a payment input with:
- **`TypeID`**: 9
- **`signatures`**:
- `0x0acccf47a820549a84428440e2421975138790e41be262f7197f3d93faa26cc8741060d743ffaf025782c8c86b862d2b9febebe7d352f0b4591afbd1a737f8a30010199dbf`
```text
[
TypeID <- 0x00000009
Signatures <- [
0x0acccf47a820549a84428440e2421975138790e41be262f7197f3d93faa26cc8741060d743ffaf025782c8c86b862d2b9febebe7d352f0b4591afbd1a737f8a30010199dbf,
]
]
=
[
// Type ID
0x00, 0x00, 0x00, 0x09,
// length:
0x00, 0x00, 0x00, 0x01,
// sig[0]
0x0a, 0xcc, 0xcf, 0x47, 0xa8, 0x20, 0x54, 0x9a,
0x84, 0x42, 0x84, 0x40, 0xe2, 0x42, 0x19, 0x75,
0x13, 0x87, 0x90, 0xe4, 0x1b, 0xe2, 0x62, 0xf7,
0x19, 0x7f, 0x3d, 0x93, 0xfa, 0xa2, 0x6c, 0xc8,
0x74, 0x10, 0x60, 0xd7, 0x43, 0xff, 0xaf, 0x02,
0x57, 0x82, 0xc8, 0xc8, 0x6b, 0x86, 0x2d, 0x2b,
0x9f, 0xeb, 0xeb, 0xe7, 0xd3, 0x52, 0xf0, 0xb4,
0x59, 0x1a, 0xfb, 0xd1, 0xa7, 0x37, 0xf8, 0xa3,
0x00, 0x10, 0x19, 0x9d, 0xbf,
]
```
## Signed Transaction
A signed transaction contains an unsigned `AtomicTx` and credentials.
### What Signed Transaction Contains
A signed transaction contains a `CodecID`, `AtomicTx`, and `Credentials`.
- **`CodecID`** The only current valid codec id is `00 00`.
- **`AtomicTx`** is an atomic transaction, as described above.
- **`Credentials`** is an array of credentials. Each credential corresponds to
the input at the same index in the AtomicTx
### Gantt Signed Transaction Specification
```text
+---------------------+--------------+------------------------------------------------+
| codec_id : uint16 | 2 bytes |
+---------------------+--------------+------------------------------------------------+
| atomic_tx : AtomicTx | size(atomic_tx) bytes |
+---------------------+--------------+------------------------------------------------+
| credentials : []Credential | 4 + size(credentials) bytes |
+---------------------+--------------+------------------------------------------------+
| 6 + size(atomic_tx) + len(credentials) bytes |
+------------------------------------------------+
```
### Proto Signed Transaction Specification
```text
message Tx {
uint16 codec_id = 1; // 2 bytes
AtomicTx atomic_tx = 2; // size(atomic_tx)
repeated Credential credentials = 3; // 4 bytes + size(credentials)
}
```
### Signed Transaction Example
Let's make a signed transaction that uses the unsigned transaction and credential from the previous examples.
- **`CodecID`**: `0`
- **`UnsignedTx`**: `0x000000000000303991060eabfb5a571720109b5896e5ff00010a1cfe6b103d585e6ebf27b97a1735d891ad56056d9c01f18f43f58b5c784ad07a4a49cf3d1f11623804b5cba2c6bf000000016613a40dcdd8d22ea4aa99a4c84349056317cf550b6685e045e459954f258e5900000001dbcf890f77f49b96857648b72b77f9f82937f28a68704af05da0dc12ba53f2db00000005000000746a5288000000000100000000000000010eb5ccb85c29009b6060decb353a38ea3b52cd20000000746a528800dbcf890f77f49b96857648b72b77f9f82937f28a68704af05da0dc12ba53f2db`
- **`Credentials`**
`0x00000009000000010acccf47a820549a84428440e2421975138790e41be262f7197f3d93faa26cc8741060d743ffaf025782c8c86b862d2b9febebe7d352f0b4591afbd1a737f8a300`
```text
[
CodecID <- 0x0000
UnsignedAtomic Tx <- 0x0000000100000004ffffffffeeeeeeeeddddddddccccccccbbbbbbbbaaaaaaaa999999998888888800000001000102030405060708090a0b0c0d0e0f101112131415161718191a1b1c1d1e1f000000070000000000003039000000000000d431000000010000000251025c61fbcfc078f69334f834be6dd26d55a955c3344128e060128ede3523a24a461c8943ab085900000001f1e1d1c1b1a191817161514131211101f0e0d0c0b0a09080706050403020100000000005000102030405060708090a0b0c0d0e0f101112131415161718191a1b1c1d1e1f0000000500000000075bcd150000000200000007000000030000000400010203
Credentials <- [
0x00000009000000010acccf47a820549a84428440e2421975138790e41be262f7197f3d93faa26cc8741060d743ffaf025782c8c86b862d2b9febebe7d352f0b4591afbd1a737f8a300,
]
]
=
[
// Codec ID
0x00, 0x00,
// unsigned atomic transaction:
0x00, 0x00, 0x00, 0x00, 0x00, 0x00, 0x30, 0x39,
0x91, 0x06, 0x0e, 0xab, 0xfb, 0x5a, 0x57, 0x17,
0x20, 0x10, 0x9b, 0x58, 0x96, 0xe5, 0xff, 0x00,
0x01, 0x0a, 0x1c, 0xfe, 0x6b, 0x10, 0x3d, 0x58,
0x5e, 0x6e, 0xbf, 0x27, 0xb9, 0x7a, 0x17, 0x35,
0xd8, 0x91, 0xad, 0x56, 0x05, 0x6d, 0x9c, 0x01,
0xf1, 0x8f, 0x43, 0xf5, 0x8b, 0x5c, 0x78, 0x4a,
0xd0, 0x7a, 0x4a, 0x49, 0xcf, 0x3d, 0x1f, 0x11,
0x62, 0x38, 0x04, 0xb5, 0xcb, 0xa2, 0xc6, 0xbf,
0x00, 0x00, 0x00, 0x01, 0x66, 0x13, 0xa4, 0x0d,
0xcd, 0xd8, 0xd2, 0x2e, 0xa4, 0xaa, 0x99, 0xa4,
0xc8, 0x43, 0x49, 0x05, 0x63, 0x17, 0xcf, 0x55,
0x0b, 0x66, 0x85, 0xe0, 0x45, 0xe4, 0x59, 0x95,
0x4f, 0x25, 0x8e, 0x59, 0x00, 0x00, 0x00, 0x01,
0xdb, 0xcf, 0x89, 0x0f, 0x77, 0xf4, 0x9b, 0x96,
0x85, 0x76, 0x48, 0xb7, 0x2b, 0x77, 0xf9, 0xf8,
0x29, 0x37, 0xf2, 0x8a, 0x68, 0x70, 0x4a, 0xf0,
0x5d, 0xa0, 0xdc, 0x12, 0xba, 0x53, 0xf2, 0xdb,
0x00, 0x00, 0x00, 0x05, 0x00, 0x00, 0x00, 0x74,
0x6a, 0x52, 0x88, 0x00, 0x00, 0x00, 0x00, 0x01,
0x00, 0x00, 0x00, 0x00, 0x00, 0x00, 0x00, 0x01,
0x0e, 0xb5, 0xcc, 0xb8, 0x5c, 0x29, 0x00, 0x9b,
0x60, 0x60, 0xde, 0xcb, 0x35, 0x3a, 0x38, 0xea,
0x3b, 0x52, 0xcd, 0x20, 0x00, 0x00, 0x00, 0x74,
0x6a, 0x52, 0x88, 0x00, 0xdb, 0xcf, 0x89, 0x0f,
0x77, 0xf4, 0x9b, 0x96, 0x85, 0x76, 0x48, 0xb7,
0x2b, 0x77, 0xf9, 0xf8, 0x29, 0x37, 0xf2, 0x8a,
0x68, 0x70, 0x4a, 0xf0, 0x5d, 0xa0, 0xdc, 0x12,
0xba, 0x53, 0xf2, 0xdb,
// number of credentials:
0x00, 0x00, 0x00, 0x01,
// credential[0]:
0x00, 0x00, 0x00, 0x09, 0x00, 0x00, 0x00, 0x01,
0x0a, 0xcc, 0xcf, 0x47, 0xa8, 0x20, 0x54, 0x9a,
0x84, 0x42, 0x84, 0x40, 0xe2, 0x42, 0x19, 0x75,
0x13, 0x87, 0x90, 0xe4, 0x1b, 0xe2, 0x62, 0xf7,
0x19, 0x7f, 0x3d, 0x93, 0xfa, 0xa2, 0x6c, 0xc8,
0x74, 0x10, 0x60, 0xd7, 0x43, 0xff, 0xaf, 0x02,
0x57, 0x82, 0xc8, 0xc8, 0x6b, 0x86, 0x2d, 0x2b,
0x9f, 0xeb, 0xeb, 0xe7, 0xd3, 0x52, 0xf0, 0xb4,
0x59, 0x1a, 0xfb, 0xd1, 0xa7, 0x37, 0xf8, 0xa3,
0x00,
```
## UTXO
A UTXO is a standalone representation of a transaction output.
### What UTXO Contains
A UTXO contains a `CodecID`, `TxID`, `UTXOIndex`, `AssetID`, and `Output`.
- **`CodecID`** The only valid `CodecID` is `00 00`
- **`TxID`** is a 32-byte transaction ID. Transaction IDs are calculated by
taking sha256 of the bytes of the signed transaction.
- **`UTXOIndex`** is an int that specifies which output in the transaction
specified by **`TxID`** that this utxo was created by.
- **`AssetID`** is a 32-byte array that defines which asset this utxo references.
- **`Output`** is the output object that created this utxo. The serialization of
Outputs was defined above.
### Gantt UTXO Specification
```text
+--------------+----------+-------------------------+
| codec_id : uint16 | 2 bytes |
+--------------+----------+-------------------------+
| tx_id : [32]byte | 32 bytes |
+--------------+----------+-------------------------+
| output_index : int | 4 bytes |
+--------------+----------+-------------------------+
| asset_id : [32]byte | 32 bytes |
+--------------+----------+-------------------------+
| output : Output | size(output) bytes |
+--------------+----------+-------------------------+
| 70 + size(output) bytes |
+-------------------------+
```
### Proto UTXO Specification
```text
message Utxo {
uint16 codec_id = 1; // 02 bytes
bytes tx_id = 2; // 32 bytes
uint32 output_index = 3; // 04 bytes
bytes asset_id = 4; // 32 bytes
Output output = 5; // size(output)
}
```
### UTXO Example
Let's make a UTXO from the signed transaction created above:
- **`CodecID`**: `0`
- **`TxID`**: `0xf966750f438867c3c9828ddcdbe660e21ccdbb36a9276958f011ba472f75d4e7`
- **`UTXOIndex`**: 0 = 0x00000000
- **`AssetID`**: `0x000102030405060708090a0b0c0d0e0f101112131415161718191a1b1c1d1e1f`
- **`Output`**: `"Example EVMOutput as defined above"`
```text
[
CodecID <- 0x0000
TxID <- 0xf966750f438867c3c9828ddcdbe660e21ccdbb36a9276958f011ba472f75d4e7
UTXOIndex <- 0x00000000
AssetID <- 0x000102030405060708090a0b0c0d0e0f101112131415161718191a1b1c1d1e1f
Output <- 0x000000070000000000003039000000000000d431000000010000000251025c61fbcfc078f69334f834be6dd26d55a955c3344128e060128ede3523a24a461c8943ab0859
]
=
[
// Codec ID:
0x00, 0x00,
// txID:
0xf9, 0x66, 0x75, 0x0f, 0x43, 0x88, 0x67, 0xc3,
0xc9, 0x82, 0x8d, 0xdc, 0xdb, 0xe6, 0x60, 0xe2,
0x1c, 0xcd, 0xbb, 0x36, 0xa9, 0x27, 0x69, 0x58,
0xf0, 0x11, 0xba, 0x47, 0x2f, 0x75, 0xd4, 0xe7,
// utxo index:
0x00, 0x00, 0x00, 0x00,
// assetID:
0x00, 0x01, 0x02, 0x03, 0x04, 0x05, 0x06, 0x07,
0x08, 0x09, 0x0a, 0x0b, 0x0c, 0x0d, 0x0e, 0x0f,
0x10, 0x11, 0x12, 0x13, 0x14, 0x15, 0x16, 0x17,
0x18, 0x19, 0x1a, 0x1b, 0x1c, 0x1d, 0x1e, 0x1f,
// output:
0x00, 0x00, 0x00, 0x07, 0x00, 0x00, 0x00, 0x00,
0x00, 0x00, 0x30, 0x39, 0x00, 0x00, 0x00, 0x00,
0x00, 0x00, 0xd4, 0x31, 0x00, 0x00, 0x00, 0x01,
0x00, 0x00, 0x00, 0x02, 0x00, 0x01, 0x02, 0x03,
0x04, 0x05, 0x06, 0x07, 0x08, 0x09, 0x0a, 0x0b,
0x0c, 0x0d, 0x0e, 0x0f, 0x10, 0x11, 0x12, 0x13,
0x14, 0x15, 0x16, 0x17, 0x18, 0x19, 0x1a, 0x1b,
0x1c, 0x1d, 0x1e, 0x1f, 0x20, 0x21, 0x22, 0x23,
0x24, 0x25, 0x26, 0x27,
]
```
# Health RPC (/docs/rpcs/other/health-rpc)
---
title: "Health RPC"
description: "This page is an overview of the Health RPC associated with AvalancheGo."
edit_url: https://github.com/ava-labs/avalanchego/edit/master/api/health/service.md
---
The Health API can be used for measuring node health.
This API set is for a specific node; it is unavailable on the [public server](https://build.avax.network/docs/tooling/rpc-providers).
## Health Checks
The node periodically runs all health checks, including health checks for each chain.
The frequency at which health checks are run can be specified with the [\--health-check-frequency](https://build.avax.network/docs/nodes/configure/configs-flags) flag.
## Filterable Health Checks
The health checks that are run by the node are filterable. You can specify which health checks you want to see by using `tags` filters. Returned results will only include health checks that match the specified tags and global health checks like `network`, `database` etc. When filtered, the returned results will not show the full node health, but only a subset of filtered health checks. This means the node can still be unhealthy in unfiltered checks, even if the returned results show that the node is healthy. AvalancheGo supports using subnetIDs as tags.
## GET Request
To get an HTTP status code response that indicates the node's health, make a `GET` request. If the node is healthy, it will return a `200` status code. If the node is unhealthy, it will return a `503` status code. In-depth information about the node's health is included in the response body.
### Filtering
To filter GET health checks, add a `tag` query parameter to the request. The `tag` parameter is a string. For example, to filter health results by subnetID `29uVeLPJB1eQJkzRemU8g8wZDw5uJRqpab5U2mX9euieVwiEbL`, use the following query:
```sh
curl 'http://localhost:9650/ext/health?tag=29uVeLPJB1eQJkzRemU8g8wZDw5uJRqpab5U2mX9euieVwiEbL'
```
In this example returned results will contain global health checks and health checks that are related to subnetID `29uVeLPJB1eQJkzRemU8g8wZDw5uJRqpab5U2mX9euieVwiEbL`.
**Note**: This filtering can show healthy results even if the node is unhealthy in other Chains/Avalanche L1s.
In order to filter results by multiple tags, use multiple `tag` query parameters. For example, to filter health results by subnetID `29uVeLPJB1eQJkzRemU8g8wZDw5uJRqpab5U2mX9euieVwiEbL` and `28nrH5T2BMvNrWecFcV3mfccjs6axM1TVyqe79MCv2Mhs8kxiY` use the following query:
```sh
curl 'http://localhost:9650/ext/health?tag=29uVeLPJB1eQJkzRemU8g8wZDw5uJRqpab5U2mX9euieVwiEbL&tag=28nrH5T2BMvNrWecFcV3mfccjs6axM1TVyqe79MCv2Mhs8kxiY'
```
The returned results will include health checks for both subnetIDs as well as global health checks.
### Endpoints
The available endpoints for GET requests are:
- `/ext/health` returns a holistic report of the status of the node. **Most operators should monitor this status.**
- `/ext/health/health` is the same as `/ext/health`.
- `/ext/health/readiness` returns healthy once the node has finished initializing.
- `/ext/health/liveness` returns healthy once the endpoint is available.
## JSON RPC Request
### Format
This API uses the `json 2.0` RPC format. For more information on making JSON RPC calls, see [here](https://build.avax.network/docs/api-reference/guides/issuing-api-calls).
### Endpoint
### Methods
#### `health.health`
This method returns the last set of health check results.
**Example Call**:
```sh
curl -H 'Content-Type: application/json' --data '{
"jsonrpc":"2.0",
"id" :1,
"method" :"health.health",
"params": {
"tags": ["11111111111111111111111111111111LpoYY", "29uVeLPJB1eQJkzRemU8g8wZDw5uJRqpab5U2mX9euieVwiEbL"]
}
}' 'http://localhost:9650/ext/health'
```
**Example Response**:
```json
{
"jsonrpc": "2.0",
"result": {
"checks": {
"C": {
"message": {
"engine": {
"consensus": {
"lastAcceptedHeight": 31273749,
"lastAcceptedID": "2Y4gZGzQnu8UjnHod8j1BLewHFVEbzhULPNzqrSWEHkHNqDrYL",
"longestProcessingBlock": "0s",
"processingBlocks": 0
},
"vm": null
},
"networking": {
"percentConnected": 0.9999592612587486
}
},
"timestamp": "2024-03-26T19:44:45.2931-04:00",
"duration": 20375
},
"P": {
"message": {
"engine": {
"consensus": {
"lastAcceptedHeight": 142517,
"lastAcceptedID": "2e1FEPCBEkG2Q7WgyZh1v4nt3DXj1HDbDthyhxdq2Ltg3shSYq",
"longestProcessingBlock": "0s",
"processingBlocks": 0
},
"vm": null
},
"networking": {
"percentConnected": 0.9999592612587486
}
},
"timestamp": "2024-03-26T19:44:45.293115-04:00",
"duration": 8750
},
"X": {
"message": {
"engine": {
"consensus": {
"lastAcceptedHeight": 24464,
"lastAcceptedID": "XuFCsGaSw9cn7Vuz5e2fip4KvP46Xu53S8uDRxaC2QJmyYc3w",
"longestProcessingBlock": "0s",
"processingBlocks": 0
},
"vm": null
},
"networking": {
"percentConnected": 0.9999592612587486
}
},
"timestamp": "2024-03-26T19:44:45.29312-04:00",
"duration": 23291
},
"bootstrapped": {
"message": [],
"timestamp": "2024-03-26T19:44:45.293078-04:00",
"duration": 3375
},
"database": {
"timestamp": "2024-03-26T19:44:45.293102-04:00",
"duration": 1959
},
"diskspace": {
"message": {
"availableDiskBytes": 227332591616
},
"timestamp": "2024-03-26T19:44:45.293106-04:00",
"duration": 3042
},
"network": {
"message": {
"connectedPeers": 284,
"sendFailRate": 0,
"timeSinceLastMsgReceived": "293.098ms",
"timeSinceLastMsgSent": "293.098ms"
},
"timestamp": "2024-03-26T19:44:45.2931-04:00",
"duration": 2333
},
"router": {
"message": {
"longestRunningRequest": "66.90725ms",
"outstandingRequests": 3
},
"timestamp": "2024-03-26T19:44:45.293097-04:00",
"duration": 3542
}
},
"healthy": true
},
"id": 1
}
```
In this example response, every check has passed. So, the node is healthy.
**Response Explanation**:
- `checks` is a list of health check responses.
- A check response may include a `message` with additional context.
- A check response may include an `error` describing why the check failed.
- `timestamp` is the timestamp of the last health check.
- `duration` is the execution duration of the last health check, in nanoseconds.
- `contiguousFailures` is the number of times in a row this check failed.
- `timeOfFirstFailure` is the time this check first failed.
- `healthy` is true all the health checks are passing.
#### `health.readiness`
This method returns the last evaluation of the startup health check results.
**Example Call**:
```sh
curl -H 'Content-Type: application/json' --data '{
"jsonrpc":"2.0",
"id" :1,
"method" :"health.readiness",
"params": {
"tags": ["11111111111111111111111111111111LpoYY", "29uVeLPJB1eQJkzRemU8g8wZDw5uJRqpab5U2mX9euieVwiEbL"]
}
}' 'http://localhost:9650/ext/health'
```
**Example Response**:
```json
{
"jsonrpc": "2.0",
"result": {
"checks": {
"bootstrapped": {
"message": [],
"timestamp": "2024-03-26T20:02:45.299114-04:00",
"duration": 2834
}
},
"healthy": true
},
"id": 1
}
```
In this example response, every check has passed. So, the node has finished the startup process.
**Response Explanation**:
- `checks` is a list of health check responses.
- A check response may include a `message` with additional context.
- A check response may include an `error` describing why the check failed.
- `timestamp` is the timestamp of the last health check.
- `duration` is the execution duration of the last health check, in nanoseconds.
- `contiguousFailures` is the number of times in a row this check failed.
- `timeOfFirstFailure` is the time this check first failed.
- `healthy` is true all the health checks are passing.
#### `health.liveness`
This method returns healthy.
**Example Call**:
```sh
curl -H 'Content-Type: application/json' --data '{
"jsonrpc":"2.0",
"id" :1,
"method" :"health.liveness"
}' 'http://localhost:9650/ext/health'
```
**Example Response**:
```json
{
"jsonrpc": "2.0",
"result": {
"checks": {},
"healthy": true
},
"id": 1
}
```
In this example response, the node was able to handle the request and mark the service as healthy.
**Response Explanation**:
- `checks` is an empty list.
- `healthy` is true.
# Index RPC (/docs/rpcs/other/index-rpc)
---
title: "Index RPC"
description: "This page is an overview of the Index RPC associated with AvalancheGo."
edit_url: https://github.com/ava-labs/avalanchego/edit/master/indexer/service.md
---
AvalancheGo can be configured to run with an indexer. That is, it saves (indexes) every container (a block, vertex or transaction) it accepts on the X-Chain, P-Chain and C-Chain. To run AvalancheGo with indexing enabled, set command line flag [\--index-enabled](https://build.avax.network/docs/nodes/configure/configs-flags#--index-enabled-boolean) to true.
**AvalancheGo will only index containers that are accepted when running with `--index-enabled` set to true.** To ensure your node has a complete index, run a node with a fresh database and `--index-enabled` set to true. The node will accept every block, vertex and transaction in the network history during bootstrapping, ensuring your index is complete.
It is OK to turn off your node if it is running with indexing enabled. If it restarts with indexing still enabled, it will accept all containers that were accepted while it was offline. The indexer should never fail to index an accepted block, vertex or transaction.
Indexed containers (that is, accepted blocks, vertices and transactions) are timestamped with the time at which the node accepted that container. Note that if the container was indexed during bootstrapping, other nodes may have accepted the container much earlier. Every container indexed during bootstrapping will be timestamped with the time at which the node bootstrapped, not when it was first accepted by the network.
If `--index-enabled` is changed to `false` from `true`, AvalancheGo won't start as doing so would cause a previously complete index to become incomplete, unless the user explicitly says to do so with `--index-allow-incomplete`. This protects you from accidentally running with indexing disabled, after previously running with it enabled, which would result in an incomplete index.
This document shows how to query data from AvalancheGo's Index API. The Index API is only available when running with `--index-enabled`.
## Go Client
There is a Go implementation of an Index API client. See documentation [here](https://pkg.go.dev/github.com/ava-labs/avalanchego/indexer#Client). This client can be used inside a Go program to connect to an AvalancheGo node that is running with the Index API enabled and make calls to the Index API.
## Format
This API uses the `json 2.0` RPC format. For more information on making JSON RPC calls, see [here](https://build.avax.network/docs/api-reference/guides/issuing-api-calls).
## Endpoints
Each chain has one or more index. To see if a C-Chain block is accepted, for example, send an API call to the C-Chain block index. To see if an X-Chain vertex is accepted, for example, send an API call to the X-Chain vertex index.
### C-Chain Blocks
```
/ext/index/C/block
```
### P-Chain Blocks
```
/ext/index/P/block
```
### X-Chain Transactions
```
/ext/index/X/tx
```
### X-Chain Blocks
```
/ext/index/X/block
```
To ensure historical data can be accessed, the `/ext/index/X/vtx` is still accessible, even though it is no longer populated with chain data since the Cortina activation. If you are using `V1.10.0` or higher, you need to migrate to using the `/ext/index/X/block` endpoint.
## Methods
### `index.getContainerByID`
Get container by ID.
**Signature**:
```
index.getContainerByID({
id: string,
encoding: string
}) -> {
id: string,
bytes: string,
timestamp: string,
encoding: string,
index: string
}
```
**Request**:
- `id` is the container's ID
- `encoding` is `"hex"` only.
**Response**:
- `id` is the container's ID
- `bytes` is the byte representation of the container
- `timestamp` is the time at which this node accepted the container
- `encoding` is `"hex"` only.
- `index` is how many containers were accepted in this index before this one
**Example Call**:
```sh
curl --location --request POST 'localhost:9650/ext/index/X/tx' \
--header 'Content-Type: application/json' \
--data-raw '{
"jsonrpc": "2.0",
"method": "index.getContainerByID",
"params": {
"id": "6fXf5hncR8LXvwtM8iezFQBpK5cubV6y1dWgpJCcNyzGB1EzY",
"encoding":"hex"
},
"id": 1
}'
```
**Example Response**:
```json
{
"jsonrpc": "2.0",
"id": 1,
"result": {
"id": "6fXf5hncR8LXvwtM8iezFQBpK5cubV6y1dWgpJCcNyzGB1EzY",
"bytes": "0x00000000000400003039d891ad56056d9c01f18f43f58b5c784ad07a4a49cf3d1f11623804b5cba2c6bf00000001dbcf890f77f49b96857648b72b77f9f82937f28a68704af05da0dc12ba53f2db000000070429ccc5c5eb3b80000000000000000000000001000000013cb7d3842e8cee6a0ebd09f1fe884f6861e1b29c00000001dbcf890f77f49b96857648b72b77f9f82937f28a68704af05da0dc12ba53f2db00000001dbcf890f77f49b96857648b72b77f9f82937f28a68704af05da0dc12ba53f2db000000050429d069189e0000000000010000000000000000c85fc1980a77c5da78fe5486233fc09a769bb812bcb2cc548cf9495d046b3f1b00000001dbcf890f77f49b96857648b72b77f9f82937f28a68704af05da0dc12ba53f2db00000007000003a352a38240000000000000000000000001000000013cb7d3842e8cee6a0ebd09f1fe884f6861e1b29c0000000100000009000000011cdb75d4e0b0aeaba2ebc1ef208373fedc1ebbb498f8385ad6fb537211d1523a70d903b884da77d963d56f163191295589329b5710113234934d0fd59c01676b00b63d2108",
"timestamp": "2021-04-02T15:34:00.262979-07:00",
"encoding": "hex",
"index": "0"
}
}
```
### `index.getContainerByIndex`
Get container by index. The first container accepted is at index 0, the second is at index 1, etc.
**Signature**:
```
index.getContainerByIndex({
index: uint64,
encoding: string
}) -> {
id: string,
bytes: string,
timestamp: string,
encoding: string,
index: string
}
```
**Request**:
- `index` is how many containers were accepted in this index before this one
- `encoding` is `"hex"` only.
**Response**:
- `id` is the container's ID
- `bytes` is the byte representation of the container
- `timestamp` is the time at which this node accepted the container
- `index` is how many containers were accepted in this index before this one
- `encoding` is `"hex"` only.
**Example Call**:
```sh
curl --location --request POST 'localhost:9650/ext/index/X/tx' \
--header 'Content-Type: application/json' \
--data-raw '{
"jsonrpc": "2.0",
"method": "index.getContainerByIndex",
"params": {
"index":0,
"encoding": "hex"
},
"id": 1
}'
```
**Example Response**:
```json
{
"jsonrpc": "2.0",
"id": 1,
"result": {
"id": "6fXf5hncR8LXvwtM8iezFQBpK5cubV6y1dWgpJCcNyzGB1EzY",
"bytes": "0x00000000000400003039d891ad56056d9c01f18f43f58b5c784ad07a4a49cf3d1f11623804b5cba2c6bf00000001dbcf890f77f49b96857648b72b77f9f82937f28a68704af05da0dc12ba53f2db000000070429ccc5c5eb3b80000000000000000000000001000000013cb7d3842e8cee6a0ebd09f1fe884f6861e1b29c00000001dbcf890f77f49b96857648b72b77f9f82937f28a68704af05da0dc12ba53f2db00000001dbcf890f77f49b96857648b72b77f9f82937f28a68704af05da0dc12ba53f2db000000050429d069189e0000000000010000000000000000c85fc1980a77c5da78fe5486233fc09a769bb812bcb2cc548cf9495d046b3f1b00000001dbcf890f77f49b96857648b72b77f9f82937f28a68704af05da0dc12ba53f2db00000007000003a352a38240000000000000000000000001000000013cb7d3842e8cee6a0ebd09f1fe884f6861e1b29c0000000100000009000000011cdb75d4e0b0aeaba2ebc1ef208373fedc1ebbb498f8385ad6fb537211d1523a70d903b884da77d963d56f163191295589329b5710113234934d0fd59c01676b00b63d2108",
"timestamp": "2021-04-02T15:34:00.262979-07:00",
"encoding": "hex",
"index": "0"
}
}
```
### `index.getContainerRange`
Returns the transactions at index \[`startIndex`\], \[`startIndex+1`\], ... , \[`startIndex+n-1`\]
- If \[`n`\] == 0, returns an empty response (for example: null).
- If \[`startIndex`\] > the last accepted index, returns an error (unless the above apply.)
- If \[`n`\] > \[`MaxFetchedByRange`\], returns an error.
- If we run out of transactions, returns the ones fetched before running out.
- `numToFetch` must be in `[0,1024]`.
**Signature**:
```
index.getContainerRange({
startIndex: uint64,
numToFetch: uint64,
encoding: string
}) -> []{
id: string,
bytes: string,
timestamp: string,
encoding: string,
index: string
}
```
**Request**:
- `startIndex` is the beginning index
- `numToFetch` is the number of containers to fetch
- `encoding` is `"hex"` only.
**Response**:
- `id` is the container's ID
- `bytes` is the byte representation of the container
- `timestamp` is the time at which this node accepted the container
- `encoding` is `"hex"` only.
- `index` is how many containers were accepted in this index before this one
**Example Call**:
```sh
curl --location --request POST 'localhost:9650/ext/index/X/tx' \
--header 'Content-Type: application/json' \
--data-raw '{
"jsonrpc": "2.0",
"method": "index.getContainerRange",
"params": {
"startIndex":0,
"numToFetch":100,
"encoding": "hex"
},
"id": 1
}'
```
**Example Response**:
```json
{
"jsonrpc": "2.0",
"id": 1,
"result": [
{
"id": "6fXf5hncR8LXvwtM8iezFQBpK5cubV6y1dWgpJCcNyzGB1EzY",
"bytes": "0x00000000000400003039d891ad56056d9c01f18f43f58b5c784ad07a4a49cf3d1f11623804b5cba2c6bf00000001dbcf890f77f49b96857648b72b77f9f82937f28a68704af05da0dc12ba53f2db000000070429ccc5c5eb3b80000000000000000000000001000000013cb7d3842e8cee6a0ebd09f1fe884f6861e1b29c00000001dbcf890f77f49b96857648b72b77f9f82937f28a68704af05da0dc12ba53f2db00000001dbcf890f77f49b96857648b72b77f9f82937f28a68704af05da0dc12ba53f2db000000050429d069189e0000000000010000000000000000c85fc1980a77c5da78fe5486233fc09a769bb812bcb2cc548cf9495d046b3f1b00000001dbcf890f77f49b96857648b72b77f9f82937f28a68704af05da0dc12ba53f2db00000007000003a352a38240000000000000000000000001000000013cb7d3842e8cee6a0ebd09f1fe884f6861e1b29c0000000100000009000000011cdb75d4e0b0aeaba2ebc1ef208373fedc1ebbb498f8385ad6fb537211d1523a70d903b884da77d963d56f163191295589329b5710113234934d0fd59c01676b00b63d2108",
"timestamp": "2021-04-02T15:34:00.262979-07:00",
"encoding": "hex",
"index": "0"
}
]
}
```
### `index.getIndex`
Get a container's index.
**Signature**:
```
index.getIndex({
id: string,
encoding: string
}) -> {
index: string
}
```
**Request**:
- `id` is the ID of the container to fetch
- `encoding` is `"hex"` only.
**Response**:
- `index` is how many containers were accepted in this index before this one
**Example Call**:
```sh
curl --location --request POST 'localhost:9650/ext/index/X/tx' \
--header 'Content-Type: application/json' \
--data-raw '{
"jsonrpc": "2.0",
"method": "index.getIndex",
"params": {
"id":"6fXf5hncR8LXvwtM8iezFQBpK5cubV6y1dWgpJCcNyzGB1EzY",
"encoding": "hex"
},
"id": 1
}'
```
**Example Response**:
```json
{
"jsonrpc": "2.0",
"result": {
"index": "0"
},
"id": 1
}
```
### `index.getLastAccepted`
Get the most recently accepted container.
**Signature**:
```
index.getLastAccepted({
encoding:string
}) -> {
id: string,
bytes: string,
timestamp: string,
encoding: string,
index: string
}
```
**Request**:
- `encoding` is `"hex"` only.
**Response**:
- `id` is the container's ID
- `bytes` is the byte representation of the container
- `timestamp` is the time at which this node accepted the container
- `encoding` is `"hex"` only.
**Example Call**:
```sh
curl --location --request POST 'localhost:9650/ext/index/X/tx' \
--header 'Content-Type: application/json' \
--data-raw '{
"jsonrpc": "2.0",
"method": "index.getLastAccepted",
"params": {
"encoding": "hex"
},
"id": 1
}'
```
**Example Response**:
```json
{
"jsonrpc": "2.0",
"id": 1,
"result": {
"id": "6fXf5hncR8LXvwtM8iezFQBpK5cubV6y1dWgpJCcNyzGB1EzY",
"bytes": "0x00000000000400003039d891ad56056d9c01f18f43f58b5c784ad07a4a49cf3d1f11623804b5cba2c6bf00000001dbcf890f77f49b96857648b72b77f9f82937f28a68704af05da0dc12ba53f2db000000070429ccc5c5eb3b80000000000000000000000001000000013cb7d3842e8cee6a0ebd09f1fe884f6861e1b29c00000001dbcf890f77f49b96857648b72b77f9f82937f28a68704af05da0dc12ba53f2db00000001dbcf890f77f49b96857648b72b77f9f82937f28a68704af05da0dc12ba53f2db000000050429d069189e0000000000010000000000000000c85fc1980a77c5da78fe5486233fc09a769bb812bcb2cc548cf9495d046b3f1b00000001dbcf890f77f49b96857648b72b77f9f82937f28a68704af05da0dc12ba53f2db00000007000003a352a38240000000000000000000000001000000013cb7d3842e8cee6a0ebd09f1fe884f6861e1b29c0000000100000009000000011cdb75d4e0b0aeaba2ebc1ef208373fedc1ebbb498f8385ad6fb537211d1523a70d903b884da77d963d56f163191295589329b5710113234934d0fd59c01676b00b63d2108",
"timestamp": "2021-04-02T15:34:00.262979-07:00",
"encoding": "hex",
"index": "0"
}
}
```
### `index.isAccepted`
Returns true if the container is in this index.
**Signature**:
```
index.isAccepted({
id: string,
encoding: string
}) -> {
isAccepted: bool
}
```
**Request**:
- `id` is the ID of the container to fetch
- `encoding` is `"hex"` only.
**Response**:
- `isAccepted` displays if the container has been accepted
**Example Call**:
```sh
curl --location --request POST 'localhost:9650/ext/index/X/tx' \
--header 'Content-Type: application/json' \
--data-raw '{
"jsonrpc": "2.0",
"method": "index.isAccepted",
"params": {
"id":"6fXf5hncR8LXvwtM8iezFQBpK5cubV6y1dWgpJCcNyzGB1EzY",
"encoding": "hex"
},
"id": 1
}'
```
**Example Response**:
```json
{
"jsonrpc": "2.0",
"result": {
"isAccepted": true
},
"id": 1
}
```
## Example: Iterating Through X-Chain Transaction
Here is an example of how to iterate through all transactions on the X-Chain.
You can use the Index API to get the ID of every transaction that has been accepted on the X-Chain, and use the X-Chain API method `avm.getTx` to get a human-readable representation of the transaction.
To get an X-Chain transaction by its index (the order it was accepted in), use Index API method [index.getlastaccepted](#indexgetlastaccepted).
For example, to get the second transaction (note that `"index":1`) accepted on the X-Chain, do:
```sh
curl --location --request POST 'https://indexer-demo.avax.network/ext/index/X/tx' \
--header 'Content-Type: application/json' \
--data-raw '{
"jsonrpc": "2.0",
"method": "index.getContainerByIndex",
"params": {
"encoding":"hex",
"index":1
},
"id": 1
}'
```
This returns the ID of the second transaction accepted in the X-Chain's history. To get the third transaction on the X-Chain, use `"index":2`, and so on.
The above API call gives the response below:
```json
{
"jsonrpc": "2.0",
"result": {
"id": "ZGYTSU8w3zUP6VFseGC798vA2Vnxnfj6fz1QPfA9N93bhjJvo",
"bytes": "0x00000000000000000001ed5f38341e436e5d46e2bb00b45d62ae97d1b050c64bc634ae10626739e35c4b0000000221e67317cbc4be2aeb00677ad6462778a8f52274b9d605df2591b23027a87dff000000070000000129f6afc0000000000000000000000001000000017416792e228a765c65e2d76d28ab5a16d18c342f21e67317cbc4be2aeb00677ad6462778a8f52274b9d605df2591b23027a87dff0000000700000222afa575c00000000000000000000000010000000187d6a6dd3cd7740c8b13a410bea39b01fa83bb3e000000016f375c785edb28d52edb59b54035c96c198e9d80f5f5f5eee070592fe9465b8d0000000021e67317cbc4be2aeb00677ad6462778a8f52274b9d605df2591b23027a87dff0000000500000223d9ab67c0000000010000000000000000000000010000000900000001beb83d3d29f1247efb4a3a1141ab5c966f46f946f9c943b9bc19f858bd416d10060c23d5d9c7db3a0da23446b97cd9cf9f8e61df98e1b1692d764c84a686f5f801a8da6e40",
"timestamp": "2021-11-04T00:42:55.01643414Z",
"encoding": "hex",
"index": "1"
},
"id": 1
}
```
The ID of this transaction is `ZGYTSU8w3zUP6VFseGC798vA2Vnxnfj6fz1QPfA9N93bhjJvo`.
To get the transaction by its ID, use API method `avm.getTx`:
```sh
curl -X POST --data '{
"jsonrpc":"2.0",
"id" :1,
"method" :"avm.getTx",
"params" :{
"txID":"ZGYTSU8w3zUP6VFseGC798vA2Vnxnfj6fz1QPfA9N93bhjJvo",
"encoding": "json"
}
}' -H 'content-type:application/json;' https://api.avax.network/ext/bc/X
```
**Response**:
```json
{
"jsonrpc": "2.0",
"result": {
"tx": {
"unsignedTx": {
"networkID": 1,
"blockchainID": "2oYMBNV4eNHyqk2fjjV5nVQLDbtmNJzq5s3qs3Lo6ftnC6FByM",
"outputs": [
{
"assetID": "FvwEAhmxKfeiG8SnEvq42hc6whRyY3EFYAvebMqDNDGCgxN5Z",
"fxID": "spdxUxVJQbX85MGxMHbKw1sHxMnSqJ3QBzDyDYEP3h6TLuxqQ",
"output": {
"addresses": ["X-avax1wst8jt3z3fm9ce0z6akj3266zmgccdp03hjlaj"],
"amount": 4999000000,
"locktime": 0,
"threshold": 1
}
},
{
"assetID": "FvwEAhmxKfeiG8SnEvq42hc6whRyY3EFYAvebMqDNDGCgxN5Z",
"fxID": "spdxUxVJQbX85MGxMHbKw1sHxMnSqJ3QBzDyDYEP3h6TLuxqQ",
"output": {
"addresses": ["X-avax1slt2dhfu6a6qezcn5sgtagumq8ag8we75f84sw"],
"amount": 2347999000000,
"locktime": 0,
"threshold": 1
}
}
],
"inputs": [
{
"txID": "qysTYUMCWdsR3MctzyfXiSvoSf6evbeFGRLLzA4j2BjNXTknh",
"outputIndex": 0,
"assetID": "FvwEAhmxKfeiG8SnEvq42hc6whRyY3EFYAvebMqDNDGCgxN5Z",
"fxID": "spdxUxVJQbX85MGxMHbKw1sHxMnSqJ3QBzDyDYEP3h6TLuxqQ",
"input": {
"amount": 2352999000000,
"signatureIndices": [0]
}
}
],
"memo": "0x"
},
"credentials": [
{
"fxID": "spdxUxVJQbX85MGxMHbKw1sHxMnSqJ3QBzDyDYEP3h6TLuxqQ",
"credential": {
"signatures": [
"0xbeb83d3d29f1247efb4a3a1141ab5c966f46f946f9c943b9bc19f858bd416d10060c23d5d9c7db3a0da23446b97cd9cf9f8e61df98e1b1692d764c84a686f5f801"
]
}
}
]
},
"encoding": "json"
},
"id": 1
}
```
# Admin RPC (/docs/rpcs/other)
---
title: "Admin RPC"
description: "This page is an overview of the Admin RPC associated with AvalancheGo."
edit_url: https://github.com/ava-labs/avalanchego/edit/master/api/admin/service.md
---
The Admin API can be used for measuring node health and debugging.
The Admin API is disabled by default for security reasons. To run a node with the Admin API enabled, use [`config flag --api-admin-enabled=true`](https://build.avax.network/docs/nodes/configure/configs-flags#--api-admin-enabled-boolean).
This API set is for a specific node, it is unavailable on the [public server](https://build.avax.network/docs/tooling/rpc-providers).
## Format
This API uses the `json 2.0` RPC format. For details, see [here](https://build.avax.network/docs/api-reference/guides/issuing-api-calls).
## Endpoint
```
/ext/admin
```
## Methods
### `admin.alias`
Assign an API endpoint an alias, a different endpoint for the API. The original endpoint will still work. This change only affects this node; other nodes will not know about this alias.
**Signature**:
```
admin.alias({endpoint:string, alias:string}) -> {}
```
- `endpoint` is the original endpoint of the API. `endpoint` should only include the part of the endpoint after `/ext/`.
- The API being aliased can now be called at `ext/alias`.
- `alias` can be at most 512 characters.
**Example Call**:
```sh
curl -X POST --data '{
"jsonrpc":"2.0",
"id" :1,
"method" :"admin.alias",
"params": {
"alias":"myAlias",
"endpoint":"bc/X"
}
}' -H 'content-type:application/json;' 127.0.0.1:9650/ext/admin
```
**Example Response**:
```json
{
"jsonrpc": "2.0",
"id": 1,
"result": {}
}
```
Now, calls to the X-Chain can be made to either `/ext/bc/X` or, equivalently, to `/ext/myAlias`.
### `admin.aliasChain`
Give a blockchain an alias, a different name that can be used any place the blockchain's ID is used.
Aliasing a chain can also be done via the [Node API](https://build.avax.network/docs/nodes/configure/configs-flags#--chain-aliases-file-string).
Note that the alias is set for each chain on each node individually. In a multi-node Avalanche L1, the same alias should be configured on each node to use an alias across an Avalanche L1 successfully. Setting an alias for a chain on one node does not register that alias with other nodes automatically.
**Signature**:
```
admin.aliasChain(
{
chain:string,
alias:string
}
) -> {}
```
- `chain` is the blockchain's ID.
- `alias` can now be used in place of the blockchain's ID (in API endpoints, for example.)
**Example Call**:
```sh
curl -X POST --data '{
"jsonrpc":"2.0",
"id" :1,
"method" :"admin.aliasChain",
"params": {
"chain":"sV6o671RtkGBcno1FiaDbVcFv2sG5aVXMZYzKdP4VQAWmJQnM",
"alias":"myBlockchainAlias"
}
}' -H 'content-type:application/json;' 127.0.0.1:9650/ext/admin
```
**Example Response**:
```json
{
"jsonrpc": "2.0",
"id": 1,
"result": {}
}
```
Now, instead of interacting with the blockchain whose ID is `sV6o671RtkGBcno1FiaDbVcFv2sG5aVXMZYzKdP4VQAWmJQnM` by making API calls to `/ext/bc/sV6o671RtkGBcno1FiaDbVcFv2sG5aVXMZYzKdP4VQAWmJQnM`, one can also make calls to `ext/bc/myBlockchainAlias`.
### `admin.getChainAliases`
Returns the aliases of the chain
**Signature**:
```
admin.getChainAliases(
{
chain:string
}
) -> {aliases:string[]}
```
- `chain` is the blockchain's ID.
**Example Call**:
```sh
curl -X POST --data '{
"jsonrpc":"2.0",
"id" :1,
"method" :"admin.getChainAliases",
"params": {
"chain":"sV6o671RtkGBcno1FiaDbVcFv2sG5aVXMZYzKdP4VQAWmJQnM"
}
}' -H 'content-type:application/json;' 127.0.0.1:9650/ext/admin
```
**Example Response**:
```json
{
"jsonrpc": "2.0",
"result": {
"aliases": [
"X",
"avm",
"2eNy1mUFdmaxXNj1eQHUe7Np4gju9sJsEtWQ4MX3ToiNKuADed"
]
},
"id": 1
}
```
### `admin.getLoggerLevel`
Returns log and display levels of loggers.
**Signature**:
```
admin.getLoggerLevel(
{
loggerName:string // optional
}
) -> {
loggerLevels: {
loggerName: {
logLevel: string,
displayLevel: string
}
}
}
```
- `loggerName` is the name of the logger to be returned. This is an optional argument. If not specified, it returns all possible loggers.
**Example Call**:
```sh
curl -X POST --data '{
"jsonrpc":"2.0",
"id" :1,
"method" :"admin.getLoggerLevel",
"params": {
"loggerName": "C"
}
}' -H 'content-type:application/json;' 127.0.0.1:9650/ext/admin
```
**Example Response**:
```json
{
"jsonrpc": "2.0",
"result": {
"loggerLevels": {
"C": {
"logLevel": "DEBUG",
"displayLevel": "INFO"
}
}
},
"id": 1
}
```
### `admin.loadVMs`
Dynamically loads any virtual machines installed on the node as plugins. See [here](https://build.avax.network/docs/virtual-machines#installing-a-vm) for more information on how to install a virtual machine on a node.
**Signature**:
```
admin.loadVMs() -> {
newVMs: map[string][]string
failedVMs: map[string]string,
}
```
- `failedVMs` is only included in the response if at least one virtual machine fails to be loaded.
**Example Call**:
```sh
curl -X POST --data '{
"jsonrpc":"2.0",
"id" :1,
"method" :"admin.loadVMs",
"params" :{}
}' -H 'content-type:application/json;' 127.0.0.1:9650/ext/admin
```
**Example Response**:
```json
{
"jsonrpc": "2.0",
"result": {
"newVMs": {
"tGas3T58KzdjLHhBDMnH2TvrddhqTji5iZAMZ3RXs2NLpSnhH": ["foovm"]
},
"failedVMs": {
"rXJsCSEYXg2TehWxCEEGj6JU2PWKTkd6cBdNLjoe2SpsKD9cy": "error message"
}
},
"id": 1
}
```
### `admin.lockProfile`
Writes a profile of mutex statistics to `lock.profile`.
**Signature**:
```
admin.lockProfile() -> {}
```
**Example Call**:
```sh
curl -X POST --data '{
"jsonrpc":"2.0",
"id" :1,
"method" :"admin.lockProfile",
"params" :{}
}' -H 'content-type:application/json;' 127.0.0.1:9650/ext/admin
```
**Example Response**:
```json
{
"jsonrpc": "2.0",
"id": 1,
"result": {}
}
```
### `admin.memoryProfile`
Writes a memory profile of the to `mem.profile`.
**Signature**:
```
admin.memoryProfile() -> {}
```
**Example Call**:
```sh
curl -X POST --data '{
"jsonrpc":"2.0",
"id" :1,
"method" :"admin.memoryProfile",
"params" :{}
}' -H 'content-type:application/json;' 127.0.0.1:9650/ext/admin
```
**Example Response**:
```json
{
"jsonrpc": "2.0",
"id": 1,
"result": {}
}
```
### `admin.setLoggerLevel`
Sets log and display levels of loggers.
**Signature**:
```
admin.setLoggerLevel(
{
loggerName: string, // optional
logLevel: string, // optional
displayLevel: string, // optional
}
) -> {}
```
- `loggerName` is the logger's name to be changed. This is an optional parameter. If not specified, it changes all possible loggers.
- `logLevel` is the log level of written logs, can be omitted.
- `displayLevel` is the log level of displayed logs, can be omitted.
`logLevel` and `displayLevel` cannot be omitted at the same time.
**Example Call**:
```sh
curl -X POST --data '{
"jsonrpc":"2.0",
"id" :1,
"method" :"admin.setLoggerLevel",
"params": {
"loggerName": "C",
"logLevel": "DEBUG",
"displayLevel": "INFO"
}
}' -H 'content-type:application/json;' 127.0.0.1:9650/ext/admin
```
**Example Response**:
```json
{
"jsonrpc": "2.0",
"id": 1,
"result": {}
}
```
### `admin.startCPUProfiler`
Start profiling the CPU utilization of the node. To stop, call `admin.stopCPUProfiler`. On stop, writes the profile to `cpu.profile`.
**Signature**:
```
admin.startCPUProfiler() -> {}
```
**Example Call**:
```sh
curl -X POST --data '{
"jsonrpc":"2.0",
"id" :1,
"method" :"admin.startCPUProfiler",
"params" :{}
}' -H 'content-type:application/json;' 127.0.0.1:9650/ext/admin
```
**Example Response**:
```json
{
"jsonrpc": "2.0",
"id": 1,
"result": {}
}
```
### `admin.stopCPUProfiler`
Stop the CPU profile that was previously started.
**Signature**:
```
admin.stopCPUProfiler() -> {}
```
**Example Call**:
```sh
curl -X POST --data '{
"jsonrpc":"2.0",
"id" :1,
"method" :"admin.stopCPUProfiler"
}' -H 'content-type:application/json;' 127.0.0.1:9650/ext/admin
```
**Example Response**:
```json
{
"jsonrpc": "2.0",
"id": 1,
"result": {}
}
```
# Info RPC (/docs/rpcs/other/info-rpc)
---
title: "Info RPC"
description: "This page is an overview of the Info RPC associated with AvalancheGo."
edit_url: https://github.com/ava-labs/avalanchego/edit/master/api/info/service.md
---
The Info API can be used to access basic information about an Avalanche node.
## Format
This API uses the `json 2.0` RPC format. For more information on making JSON RPC calls, see [here](https://build.avax.network/docs/api-reference/guides/issuing-api-calls).
## Endpoint
```
/ext/info
```
## Methods
### `info.acps`
Returns peer preferences for Avalanche Community Proposals (ACPs)
**Signature**:
```
info.acps() -> {
acps: map[uint32]{
supportWeight: uint64
supporters: set[string]
objectWeight: uint64
objectors: set[string]
abstainWeight: uint64
}
}
```
**Example Call**:
```sh
curl -sX POST --data '{
"jsonrpc":"2.0",
"id" :1,
"method" :"info.acps",
"params" :{}
}' -H 'content-type:application/json;' 127.0.0.1:9650/ext/info
```
**Example Response**:
```json
{
"jsonrpc": "2.0",
"result": {
"acps": {
"23": {
"supportWeight": "0",
"supporters": [],
"objectWeight": "0",
"objectors": [],
"abstainWeight": "161147778098286584"
},
"24": {
"supportWeight": "0",
"supporters": [],
"objectWeight": "0",
"objectors": [],
"abstainWeight": "161147778098286584"
},
"25": {
"supportWeight": "0",
"supporters": [],
"objectWeight": "0",
"objectors": [],
"abstainWeight": "161147778098286584"
},
"30": {
"supportWeight": "0",
"supporters": [],
"objectWeight": "0",
"objectors": [],
"abstainWeight": "161147778098286584"
},
"31": {
"supportWeight": "0",
"supporters": [],
"objectWeight": "0",
"objectors": [],
"abstainWeight": "161147778098286584"
},
"41": {
"supportWeight": "0",
"supporters": [],
"objectWeight": "0",
"objectors": [],
"abstainWeight": "161147778098286584"
},
"62": {
"supportWeight": "0",
"supporters": [],
"objectWeight": "0",
"objectors": [],
"abstainWeight": "161147778098286584"
}
}
},
"id": 1
}
```
### `info.isBootstrapped`
Check whether a given chain is done bootstrapping
**Signature**:
```
info.isBootstrapped({chain: string}) -> {isBootstrapped: bool}
```
`chain` is the ID or alias of a chain.
**Example Call**:
```sh
curl -X POST --data '{
"jsonrpc":"2.0",
"id" :1,
"method" :"info.isBootstrapped",
"params": {
"chain":"X"
}
}' -H 'content-type:application/json;' 127.0.0.1:9650/ext/info
```
**Example Response**:
```json
{
"jsonrpc": "2.0",
"result": {
"isBootstrapped": true
},
"id": 1
}
```
### `info.getBlockchainID`
Given a blockchain's alias, get its ID. (See [`admin.aliasChain`](https://build.avax.network/docs/api-reference/admin-api#adminaliaschain).)
**Signature**:
```
info.getBlockchainID({alias:string}) -> {blockchainID:string}
```
**Example Call**:
```sh
curl -X POST --data '{
"jsonrpc":"2.0",
"id" :1,
"method" :"info.getBlockchainID",
"params": {
"alias":"X"
}
}' -H 'content-type:application/json;' 127.0.0.1:9650/ext/info
```
**Example Response**:
```json
{
"jsonrpc": "2.0",
"id": 1,
"result": {
"blockchainID": "sV6o671RtkGBcno1FiaDbVcFv2sG5aVXMZYzKdP4VQAWmJQnM"
}
}
```
### `info.getNetworkID`
Get the ID of the network this node is participating in.
**Signature**:
```
info.getNetworkID() -> { networkID: int }
```
**Example Call**:
```sh
curl -X POST --data '{
"jsonrpc":"2.0",
"id" :1,
"method" :"info.getNetworkID"
}' -H 'content-type:application/json;' 127.0.0.1:9650/ext/info
```
**Example Response**:
```json
{
"jsonrpc": "2.0",
"id": 1,
"result": {
"networkID": "2"
}
}
```
Network ID of 1 = Mainnet Network ID of 5 = Fuji (testnet)
### `info.getNetworkName`
Get the name of the network this node is participating in.
**Signature**:
```
info.getNetworkName() -> { networkName:string }
```
**Example Call**:
```sh
curl -X POST --data '{
"jsonrpc":"2.0",
"id" :1,
"method" :"info.getNetworkName"
}' -H 'content-type:application/json;' 127.0.0.1:9650/ext/info
```
**Example Response**:
```json
{
"jsonrpc": "2.0",
"id": 1,
"result": {
"networkName": "local"
}
}
```
### `info.getNodeID`
Get the ID, the BLS key, and the proof of possession(BLS signature) of this node.
This endpoint set is for a specific node, it is unavailable on the [public server](https://build.avax.network/docs/tooling/rpc-providers).
**Signature**:
```
info.getNodeID() -> {
nodeID: string,
nodePOP: {
publicKey: string,
proofOfPossession: string
}
}
```
- `nodeID` Node ID is the unique identifier of the node that you set to act as a validator on the Primary Network.
- `nodePOP` is this node's BLS key and proof of possession. Nodes must register a BLS key to act as a validator on the Primary Network. Your node's POP is logged on startup and is accessible over this endpoint.
- `publicKey` is the 48 byte hex representation of the BLS key.
- `proofOfPossession` is the 96 byte hex representation of the BLS signature.
**Example Call**:
```sh
curl -X POST --data '{
"jsonrpc":"2.0",
"id" :1,
"method" :"info.getNodeID"
}' -H 'content-type:application/json;' 127.0.0.1:9650/ext/info
```
**Example Response**:
```json
{
"jsonrpc": "2.0",
"result": {
"nodeID": "NodeID-5mb46qkSBj81k9g9e4VFjGGSbaaSLFRzD",
"nodePOP": {
"publicKey": "0x8f95423f7142d00a48e1014a3de8d28907d420dc33b3052a6dee03a3f2941a393c2351e354704ca66a3fc29870282e15",
"proofOfPossession": "0x86a3ab4c45cfe31cae34c1d06f212434ac71b1be6cfe046c80c162e057614a94a5bc9f1ded1a7029deb0ba4ca7c9b71411e293438691be79c2dbf19d1ca7c3eadb9c756246fc5de5b7b89511c7d7302ae051d9e03d7991138299b5ed6a570a98"
}
},
"id": 1
}
```
### `info.getNodeIP`
Get the IP of this node.
This endpoint set is for a specific node, it is unavailable on the [public server](https://build.avax.network/docs/tooling/rpc-providers).
**Signature**:
```
info.getNodeIP() -> {ip: string}
```
**Example Call**:
```sh
curl -X POST --data '{
"jsonrpc":"2.0",
"id" :1,
"method" :"info.getNodeIP"
}' -H 'content-type:application/json;' 127.0.0.1:9650/ext/info
```
**Example Response**:
```json
{
"jsonrpc": "2.0",
"result": {
"ip": "192.168.1.1:9651"
},
"id": 1
}
```
### `info.getNodeVersion`
Get the version of this node.
**Signature**:
```
info.getNodeVersion() -> {
version: string,
databaseVersion: string,
gitCommit: string,
vmVersions: map[string]string,
rpcProtocolVersion: string,
}
```
where:
- `version` is this node's version
- `databaseVersion` is the version of the database this node is using
- `gitCommit` is the Git commit that this node was built from
- `vmVersions` is map where each key/value pair is the name of a VM, and the version of that VM this node runs
- `rpcProtocolVersion` is the RPCChainVM protocol version
**Example Call**:
```sh
curl -X POST --data '{
"jsonrpc":"2.0",
"id" :1,
"method" :"info.getNodeVersion"
}' -H 'content-type:application/json;' 127.0.0.1:9650/ext/info
```
**Example Response**:
```json
{
"jsonrpc": "2.0",
"result": {
"version": "avalanche/1.9.1",
"databaseVersion": "v1.4.5",
"rpcProtocolVersion": "18",
"gitCommit": "79cd09ba728e1cecef40acd60702f0a2d41ea404",
"vmVersions": {
"avm": "v1.9.1",
"evm": "v0.11.1",
"platform": "v1.9.1"
}
},
"id": 1
}
```
### `info.getTxFee`
Deprecated as of [v1.12.2](https://github.com/ava-labs/avalanchego/releases/tag/v1.12.2).
Get the fees of the network.
**Signature**:
```
info.getTxFee() ->
{
txFee: uint64,
createAssetTxFee: uint64,
createSubnetTxFee: uint64,
transformSubnetTxFee: uint64,
createBlockchainTxFee: uint64,
addPrimaryNetworkValidatorFee: uint64,
addPrimaryNetworkDelegatorFee: uint64,
addSubnetValidatorFee: uint64,
addSubnetDelegatorFee: uint64
}
```
- `txFee` is the default fee for issuing X-Chain transactions.
- `createAssetTxFee` is the fee for issuing a `CreateAssetTx` on the X-Chain.
- `createSubnetTxFee` is no longer used.
- `transformSubnetTxFee` is no longer used.
- `createBlockchainTxFee` is no longer used.
- `addPrimaryNetworkValidatorFee` is no longer used.
- `addPrimaryNetworkDelegatorFee` is no longer used.
- `addSubnetValidatorFee` is no longer used.
- `addSubnetDelegatorFee` is no longer used.
All fees are denominated in nAVAX.
**Example Call**:
```sh
curl -X POST --data '{
"jsonrpc":"2.0",
"id" :1,
"method" :"info.getTxFee"
}' -H 'content-type:application/json;' 127.0.0.1:9650/ext/info
```
**Example Response**:
```json
{
"jsonrpc": "2.0",
"id": 1,
"result": {
"txFee": "1000000",
"createAssetTxFee": "10000000",
"createSubnetTxFee": "1000000000",
"transformSubnetTxFee": "10000000000",
"createBlockchainTxFee": "1000000000",
"addPrimaryNetworkValidatorFee": "0",
"addPrimaryNetworkDelegatorFee": "0",
"addSubnetValidatorFee": "1000000",
"addSubnetDelegatorFee": "1000000"
}
}
```
### `info.getVMs`
Get the virtual machines installed on this node.
This endpoint set is for a specific node, it is unavailable on the [public server](https://build.avax.network/docs/tooling/rpc-providers).
**Signature**:
```
info.getVMs() -> {
vms: map[string][]string
}
```
**Example Call**:
```sh
curl -X POST --data '{
"jsonrpc":"2.0",
"id" :1,
"method" :"info.getVMs",
"params" :{}
}' -H 'content-type:application/json;' 127.0.0.1:9650/ext/info
```
**Example Response**:
```json
{
"jsonrpc": "2.0",
"result": {
"vms": {
"jvYyfQTxGMJLuGWa55kdP2p2zSUYsQ5Raupu4TW34ZAUBAbtq": ["avm"],
"mgj786NP7uDwBCcq6YwThhaN8FLyybkCa4zBWTQbNgmK6k9A6": ["evm"],
"qd2U4HDWUvMrVUeTcCHp6xH3Qpnn1XbU5MDdnBoiifFqvgXwT": ["nftfx"],
"rWhpuQPF1kb72esV2momhMuTYGkEb1oL29pt2EBXWmSy4kxnT": ["platform"],
"rXJsCSEYXg2TehWxCEEGj6JU2PWKTkd6cBdNLjoe2SpsKD9cy": ["propertyfx"],
"spdxUxVJQbX85MGxMHbKw1sHxMnSqJ3QBzDyDYEP3h6TLuxqQ": ["secp256k1fx"]
}
},
"id": 1
}
```
### `info.peers`
Get a description of peer connections.
**Signature**:
```
info.peers({
nodeIDs: string[] // optional
}) ->
{
numPeers: int,
peers:[]{
ip: string,
publicIP: string,
nodeID: string,
version: string,
lastSent: string,
lastReceived: string,
benched: string[],
observedUptime: int,
}
}
```
- `nodeIDs` is an optional parameter to specify what NodeID's descriptions should be returned. If this parameter is left empty, descriptions for all active connections will be returned. If the node is not connected to a specified NodeID, it will be omitted from the response.
- `ip` is the remote IP of the peer.
- `publicIP` is the public IP of the peer.
- `nodeID` is the prefixed Node ID of the peer.
- `version` shows which version the peer runs on.
- `lastSent` is the timestamp of last message sent to the peer.
- `lastReceived` is the timestamp of last message received from the peer.
- `benched` shows chain IDs that the peer is currently benched on.
- `observedUptime` is this node's primary network uptime, observed by the peer.
**Example Call**:
```sh
curl -X POST --data '{
"jsonrpc":"2.0",
"id" :1,
"method" :"info.peers",
"params": {
"nodeIDs": []
}
}' -H 'content-type:application/json;' 127.0.0.1:9650/ext/info
```
**Example Response**:
```json
{
"jsonrpc": "2.0",
"id": 1,
"result": {
"numPeers": 3,
"peers": [
{
"ip": "206.189.137.87:9651",
"publicIP": "206.189.137.87:9651",
"nodeID": "NodeID-8PYXX47kqLDe2wD4oPbvRRchcnSzMA4J4",
"version": "avalanche/1.9.4",
"lastSent": "2020-06-01T15:23:02Z",
"lastReceived": "2020-06-01T15:22:57Z",
"benched": [],
"observedUptime": "99",
"trackedSubnets": [],
"benched": []
},
{
"ip": "158.255.67.151:9651",
"publicIP": "158.255.67.151:9651",
"nodeID": "NodeID-C14fr1n8EYNKyDfYixJ3rxSAVqTY3a8BP",
"version": "avalanche/1.9.4",
"lastSent": "2020-06-01T15:23:02Z",
"lastReceived": "2020-06-01T15:22:34Z",
"benched": [],
"observedUptime": "75",
"trackedSubnets": [
"29uVeLPJB1eQJkzRemU8g8wZDw5uJRqpab5U2mX9euieVwiEbL"
],
"benched": []
},
{
"ip": "83.42.13.44:9651",
"publicIP": "83.42.13.44:9651",
"nodeID": "NodeID-LPbcSMGJ4yocxYxvS2kBJ6umWeeFbctYZ",
"version": "avalanche/1.9.3",
"lastSent": "2020-06-01T15:23:02Z",
"lastReceived": "2020-06-01T15:22:55Z",
"benched": [],
"observedUptime": "95",
"trackedSubnets": [],
"benched": []
}
]
}
}
```
### `info.uptime`
Returns the network's observed uptime of this node. This is the only reliable source of data for your node's uptime. Other sources may be using data gathered with incomplete (limited) information.
**Signature**:
```
info.uptime() ->
{
rewardingStakePercentage: float64,
weightedAveragePercentage: float64
}
```
- `rewardingStakePercentage` is the percent of stake which thinks this node is above the uptime requirement.
- `weightedAveragePercentage` is the stake-weighted average of all observed uptimes for this node.
**Example Call**:
```sh
curl -X POST --data '{
"jsonrpc":"2.0",
"id" :1,
"method" :"info.uptime"
}' -H 'content-type:application/json;' 127.0.0.1:9650/ext/info
```
**Example Response**:
```json
{
"jsonrpc": "2.0",
"id": 1,
"result": {
"rewardingStakePercentage": "100.0000",
"weightedAveragePercentage": "99.0000"
}
}
```
#### Example Avalanche L1 Call
```sh
curl -X POST --data '{
"jsonrpc":"2.0",
"id" :1,
"method" :"info.uptime",
"params" :{
"subnetID":"29uVeLPJB1eQJkzRemU8g8wZDw5uJRqpab5U2mX9euieVwiEbL"
}
}' -H 'content-type:application/json;' 127.0.0.1:9650/ext/info
```
#### Example Avalanche L1 Response
```json
{
"jsonrpc": "2.0",
"id": 1,
"result": {
"rewardingStakePercentage": "74.0741",
"weightedAveragePercentage": "72.4074"
}
}
```
### `info.upgrades`
Returns the upgrade history and configuration of the network.
**Example Call**:
```sh
curl -X POST --data '{
"jsonrpc":"2.0",
"id" :1,
"method" :"info.upgrades"
}' -H 'content-type:application/json;' 127.0.0.1:9650/ext/info
```
**Example Response**:
```json
{
"jsonrpc": "2.0",
"result": {
"apricotPhase1Time": "2020-12-05T05:00:00Z",
"apricotPhase2Time": "2020-12-05T05:00:00Z",
"apricotPhase3Time": "2020-12-05T05:00:00Z",
"apricotPhase4Time": "2020-12-05T05:00:00Z",
"apricotPhase4MinPChainHeight": 0,
"apricotPhase5Time": "2020-12-05T05:00:00Z",
"apricotPhasePre6Time": "2020-12-05T05:00:00Z",
"apricotPhase6Time": "2020-12-05T05:00:00Z",
"apricotPhasePost6Time": "2020-12-05T05:00:00Z",
"banffTime": "2020-12-05T05:00:00Z",
"cortinaTime": "2020-12-05T05:00:00Z",
"cortinaXChainStopVertexID": "11111111111111111111111111111111LpoYY",
"durangoTime": "2020-12-05T05:00:00Z",
"etnaTime": "2024-10-09T20:00:00Z",
"fortunaTime": "9999-12-01T05:00:00Z",
"graniteTime": "9999-12-01T05:00:00Z"
},
"id": 1
}
```
# Metrics RPC (/docs/rpcs/other/metrics-rpc)
---
title: "Metrics RPC"
description: "This page is an overview of the Metrics RPC associated with AvalancheGo."
edit_url: https://github.com/ava-labs/avalanchego/edit/master/api/metrics/service.md
---
The Metrics API allows clients to get statistics about a node's health and performance.
This API set is for a specific node, it is unavailable on the [public server](https://build.avax.network/docs/tooling/rpc-providers).
## Endpoint
```
/ext/metrics
```
## Usage
To get the node metrics:
```sh
curl -X POST 127.0.0.1:9650/ext/metrics
```
## Format
This API produces Prometheus compatible metrics. See [here](https://prometheus.io/docs/instrumenting/exposition_formats) for information on Prometheus' formatting.
[Here](https://build.avax.network/docs/nodes/maintain/monitoring) is a tutorial that shows how to set up Prometheus and Grafana to monitor AvalancheGo node using the Metrics API.
# ProposerVM RPC (/docs/rpcs/other/proposervm-rpc)
---
title: "ProposerVM RPC"
description: "This page is an overview of the ProposerVM RPC associated with AvalancheGo."
edit_url: https://github.com/ava-labs/avalanchego/edit/master/vms/proposervm/service.md
---
# ProposerVM API
The ProposerVM API allows clients to fetch information about a chain's Snowman++ wrapper information.
## Endpoint
```text
/ext/bc/{blockchainID}/proposervm
```
## Format
This API uses the `JSON-RPC 2.0` RPC format.
## Methods
### `proposervm.getProposedHeight`
Returns this node's current proposer VM height.
**Signature:**
```
proposervm.getProposedHeight() ->
{
height: int,
}
```
**Example Call:**
```sh
curl -X POST --data '{
"jsonrpc": "2.0",
"method": "proposervm.getProposedHeight",
"params": {},
"id": 1
}' -H 'content-type:application/json;' 127.0.0.1:9650/ext/bc/P/proposervm
```
**Example Response:**
```json
{
"jsonrpc": "2.0",
"result": {
"height": "56"
},
"id": 1
}
```
### `proposervm.getCurrentEpoch`
Returns the current epoch information.
**Signature:**
```
proposervm.getCurrentEpoch() ->
{
number: int,
startTime: int,
pChainHeight: int
}
```
**Example Call:**
```sh
curl -X POST --data '{
"jsonrpc": "2.0",
"method": "proposervm.getCurrentEpoch",
"params": {},
"id": 1
}' -H 'content-type:application/json;' 127.0.0.1:9650/ext/bc/P/proposervm
```
**Example Response:**
```json
{
"jsonrpc": "2.0",
"result": {
"number": "56",
"startTime":"1755802182",
"pChainHeight": "21857141"
},
"id": 1
}
```
# AvalancheGo P-Chain RPC (/docs/rpcs/p-chain)
---
title: "AvalancheGo P-Chain RPC"
description: "This page is an overview of the P-Chain RPC associated with AvalancheGo."
edit_url: https://github.com/ava-labs/avalanchego/edit/master/vms/platformvm/service.md
---
The P-Chain API allows clients to interact with the [P-Chain](https://build.avax.network/docs/quick-start/primary-network#p-chain), which maintains Avalanche’s validator set and handles blockchain creation.
## Endpoint
```
/ext/bc/P
```
## Format
This API uses the `json 2.0` RPC format.
## Methods
### `platform.getBalance`
Deprecated as of [**v1.9.12**](https://github.com/ava-labs/avalanchego/releases/tag/v1.9.12).
Get the balance of AVAX controlled by a given address.
**Signature:**
```
platform.getBalance({
addresses: []string
}) -> {
balances: string -> int,
unlockeds: string -> int,
lockedStakeables: string -> int,
lockedNotStakeables: string -> int,
utxoIDs: []{
txID: string,
outputIndex: int
}
}
```
- `addresses` are the addresses to get the balance of.
- `balances` is a map from assetID to the total balance.
- `unlockeds` is a map from assetID to the unlocked balance.
- `lockedStakeables` is a map from assetID to the locked stakeable balance.
- `lockedNotStakeables` is a map from assetID to the locked and not stakeable balance.
- `utxoIDs` are the IDs of the UTXOs that reference `address`.
**Example Call:**
```sh
curl -X POST --data '{
"jsonrpc":"2.0",
"id" : 1,
"method" :"platform.getBalance",
"params" :{
"addresses":["P-custom18jma8ppw3nhx5r4ap8clazz0dps7rv5u9xde7p"]
}
}' -H 'content-type:application/json;' 127.0.0.1:9650/ext/bc/P
```
**Example Response:**
```json
{
"jsonrpc": "2.0",
"result": {
"balance": "30000000000000000",
"unlocked": "20000000000000000",
"lockedStakeable": "10000000000000000",
"lockedNotStakeable": "0",
"balances": {
"BUuypiq2wyuLMvyhzFXcPyxPMCgSp7eeDohhQRqTChoBjKziC": "30000000000000000"
},
"unlockeds": {
"BUuypiq2wyuLMvyhzFXcPyxPMCgSp7eeDohhQRqTChoBjKziC": "20000000000000000"
},
"lockedStakeables": {
"BUuypiq2wyuLMvyhzFXcPyxPMCgSp7eeDohhQRqTChoBjKziC": "10000000000000000"
},
"lockedNotStakeables": {},
"utxoIDs": [
{
"txID": "11111111111111111111111111111111LpoYY",
"outputIndex": 1
},
{
"txID": "11111111111111111111111111111111LpoYY",
"outputIndex": 0
}
]
},
"id": 1
}
```
### `platform.getBlock`
Get a block by its ID.
**Signature:**
```
platform.getBlock({
blockID: string
encoding: string // optional
}) -> {
block: string,
encoding: string
}
```
**Request:**
- `blockID` is the block ID. It should be in cb58 format.
- `encoding` is the encoding format to use. Can be either `hex` or `json`. Defaults to `hex`.
**Response:**
- `block` is the block encoded to `encoding`.
- `encoding` is the `encoding`.
#### Hex Example
**Example Call:**
```sh
curl -X POST --data '{
"jsonrpc": "2.0",
"method": "platform.getBlock",
"params": {
"blockID": "d7WYmb8VeZNHsny3EJCwMm6QA37s1EHwMxw1Y71V3FqPZ5EFG",
"encoding": "hex"
},
"id": 1
}' -H 'content-type:application/json;' 127.0.0.1:9650/ext/bc/P
```
**Example Response:**
```json
{
"jsonrpc": "2.0",
"result": {
"block": "0x00000000000309473dc99a0851a29174d84e522da8ccb1a56ac23f7b0ba79f80acce34cf576900000000000f4241000000010000001200000001000000000000000000000000000000000000000000000000000000000000000000000000000000011c4c57e1bcb3c567f9f03caa75563502d1a21393173c06d9d79ea247b20e24800000000021e67317cbc4be2aeb00677ad6462778a8f52274b9d605df2591b23027a87dff000000050000000338e0465f0000000100000000000000000427d4b22a2a78bcddd456742caf91b56badbff985ee19aef14573e7343fd6520000000121e67317cbc4be2aeb00677ad6462778a8f52274b9d605df2591b23027a87dff000000070000000338d1041f0000000000000000000000010000000195a4467dd8f939554ea4e6501c08294386938cbf000000010000000900000001c79711c4b48dcde205b63603efef7c61773a0eb47efb503fcebe40d21962b7c25ebd734057400a12cce9cf99aceec8462923d5d91fffe1cb908372281ed738580119286dde",
"encoding": "hex"
},
"id": 1
}
```
#### JSON Example
**Example Call:**
```sh
curl -X POST --data '{
"jsonrpc": "2.0",
"method": "platform.getBlock",
"params": {
"blockID": "d7WYmb8VeZNHsny3EJCwMm6QA37s1EHwMxw1Y71V3FqPZ5EFG",
"encoding": "json"
},
"id": 1
}' -H 'content-type:application/json;' 127.0.0.1:9650/ext/bc/P
```
**Example Response:**
```json
{
"jsonrpc": "2.0",
"result": {
"block": {
"parentID": "5615di9ytxujackzaXNrVuWQy5y8Yrt8chPCscMr5Ku9YxJ1S",
"height": 1000001,
"txs": [
{
"unsignedTx": {
"inputs": {
"networkID": 1,
"blockchainID": "11111111111111111111111111111111LpoYY",
"outputs": [],
"inputs": [
{
"txID": "DTqiagiMFdqbNQ62V2Gt1GddTVLkKUk2caGr4pyza9hTtsfta",
"outputIndex": 0,
"assetID": "FvwEAhmxKfeiG8SnEvq42hc6whRyY3EFYAvebMqDNDGCgxN5Z",
"fxID": "spdxUxVJQbX85MGxMHbKw1sHxMnSqJ3QBzDyDYEP3h6TLuxqQ",
"input": {
"amount": 13839124063,
"signatureIndices": [0]
}
}
],
"memo": "0x"
},
"destinationChain": "2q9e4r6Mu3U68nU1fYjgbR6JvwrRx36CohpAX5UQxse55x1Q5",
"exportedOutputs": [
{
"assetID": "FvwEAhmxKfeiG8SnEvq42hc6whRyY3EFYAvebMqDNDGCgxN5Z",
"fxID": "spdxUxVJQbX85MGxMHbKw1sHxMnSqJ3QBzDyDYEP3h6TLuxqQ",
"output": {
"addresses": [
"P-avax1jkjyvlwclyu42n4yuegpczpfgwrf8r9lyj0d3c"
],
"amount": 13838124063,
"locktime": 0,
"threshold": 1
}
}
]
},
"credentials": [
{
"signatures": [
"0xc79711c4b48dcde205b63603efef7c61773a0eb47efb503fcebe40d21962b7c25ebd734057400a12cce9cf99aceec8462923d5d91fffe1cb908372281ed7385801"
]
}
]
}
]
},
"encoding": "json"
},
"id": 1
}
```
### `platform.getBlockByHeight`
Get a block by its height.
**Signature:**
```
platform.getBlockByHeight({
height: int
encoding: string // optional
}) -> {
block: string,
encoding: string
}
```
**Request:**
- `height` is the block height.
- `encoding` is the encoding format to use. Can be either `hex` or `json`. Defaults to `hex`.
**Response:**
- `block` is the block encoded to `encoding`.
- `encoding` is the `encoding`.
#### Hex Example
**Example Call:**
```sh
curl -X POST --data '{
"jsonrpc": "2.0",
"method": "platform.getBlockByHeight",
"params": {
"height": 1000001,
"encoding": "hex"
},
"id": 1
}' -H 'content-type:application/json;' 127.0.0.1:9650/ext/bc/P
```
**Example Response:**
```json
{
"jsonrpc": "2.0",
"result": {
"block": "0x00000000000309473dc99a0851a29174d84e522da8ccb1a56ac23f7b0ba79f80acce34cf576900000000000f4241000000010000001200000001000000000000000000000000000000000000000000000000000000000000000000000000000000011c4c57e1bcb3c567f9f03caa75563502d1a21393173c06d9d79ea247b20e24800000000021e67317cbc4be2aeb00677ad6462778a8f52274b9d605df2591b23027a87dff000000050000000338e0465f0000000100000000000000000427d4b22a2a78bcddd456742caf91b56badbff985ee19aef14573e7343fd6520000000121e67317cbc4be2aeb00677ad6462778a8f52274b9d605df2591b23027a87dff000000070000000338d1041f0000000000000000000000010000000195a4467dd8f939554ea4e6501c08294386938cbf000000010000000900000001c79711c4b48dcde205b63603efef7c61773a0eb47efb503fcebe40d21962b7c25ebd734057400a12cce9cf99aceec8462923d5d91fffe1cb908372281ed738580119286dde",
"encoding": "hex"
},
"id": 1
}
```
#### JSON Example
**Example Call:**
```sh
curl -X POST --data '{
"jsonrpc": "2.0",
"method": "platform.getBlockByHeight",
"params": {
"height": 1000001,
"encoding": "json"
},
"id": 1
}' -H 'content-type:application/json;' 127.0.0.1:9650/ext/bc/P
```
**Example Response:**
```json
{
"jsonrpc": "2.0",
"result": {
"block": {
"parentID": "5615di9ytxujackzaXNrVuWQy5y8Yrt8chPCscMr5Ku9YxJ1S",
"height": 1000001,
"txs": [
{
"unsignedTx": {
"inputs": {
"networkID": 1,
"blockchainID": "11111111111111111111111111111111LpoYY",
"outputs": [],
"inputs": [
{
"txID": "DTqiagiMFdqbNQ62V2Gt1GddTVLkKUk2caGr4pyza9hTtsfta",
"outputIndex": 0,
"assetID": "FvwEAhmxKfeiG8SnEvq42hc6whRyY3EFYAvebMqDNDGCgxN5Z",
"fxID": "spdxUxVJQbX85MGxMHbKw1sHxMnSqJ3QBzDyDYEP3h6TLuxqQ",
"input": {
"amount": 13839124063,
"signatureIndices": [0]
}
}
],
"memo": "0x"
},
"destinationChain": "2q9e4r6Mu3U68nU1fYjgbR6JvwrRx36CohpAX5UQxse55x1Q5",
"exportedOutputs": [
{
"assetID": "FvwEAhmxKfeiG8SnEvq42hc6whRyY3EFYAvebMqDNDGCgxN5Z",
"fxID": "spdxUxVJQbX85MGxMHbKw1sHxMnSqJ3QBzDyDYEP3h6TLuxqQ",
"output": {
"addresses": [
"P-avax1jkjyvlwclyu42n4yuegpczpfgwrf8r9lyj0d3c"
],
"amount": 13838124063,
"locktime": 0,
"threshold": 1
}
}
]
},
"credentials": [
{
"signatures": [
"0xc79711c4b48dcde205b63603efef7c61773a0eb47efb503fcebe40d21962b7c25ebd734057400a12cce9cf99aceec8462923d5d91fffe1cb908372281ed7385801"
]
}
]
}
]
},
"encoding": "json"
},
"id": 1
}
```
### `platform.getBlockchains`
Deprecated as of [**v1.9.12**](https://github.com/ava-labs/avalanchego/releases/tag/v1.9.12).
Get all the blockchains that exist (excluding the P-Chain).
**Signature:**
```
platform.getBlockchains() ->
{
blockchains: []{
id: string,
name: string,
subnetID: string,
vmID: string
}
}
```
- `blockchains` is all of the blockchains that exists on the Avalanche network.
- `name` is the human-readable name of this blockchain.
- `id` is the blockchain’s ID.
- `subnetID` is the ID of the Subnet that validates this blockchain.
- `vmID` is the ID of the Virtual Machine the blockchain runs.
**Example Call:**
```sh
curl -X POST --data '{
"jsonrpc": "2.0",
"method": "platform.getBlockchains",
"params": {},
"id": 1
}' -H 'content-type:application/json;' 127.0.0.1:9650/ext/bc/P
```
**Example Response:**
```json
{
"jsonrpc": "2.0",
"result": {
"blockchains": [
{
"id": "2oYMBNV4eNHyqk2fjjV5nVQLDbtmNJzq5s3qs3Lo6ftnC6FByM",
"name": "X-Chain",
"subnetID": "11111111111111111111111111111111LpoYY",
"vmID": "jvYyfQTxGMJLuGWa55kdP2p2zSUYsQ5Raupu4TW34ZAUBAbtq"
},
{
"id": "2q9e4r6Mu3U68nU1fYjgbR6JvwrRx36CohpAX5UQxse55x1Q5",
"name": "C-Chain",
"subnetID": "11111111111111111111111111111111LpoYY",
"vmID": "mgj786NP7uDwBCcq6YwThhaN8FLyybkCa4zBWTQbNgmK6k9A6"
},
{
"id": "CqhF97NNugqYLiGaQJ2xckfmkEr8uNeGG5TQbyGcgnZ5ahQwa",
"name": "Simple DAG Payments",
"subnetID": "11111111111111111111111111111111LpoYY",
"vmID": "sqjdyTKUSrQs1YmKDTUbdUhdstSdtRTGRbUn8sqK8B6pkZkz1"
},
{
"id": "VcqKNBJsYanhVFxGyQE5CyNVYxL3ZFD7cnKptKWeVikJKQkjv",
"name": "Simple Chain Payments",
"subnetID": "11111111111111111111111111111111LpoYY",
"vmID": "sqjchUjzDqDfBPGjfQq2tXW1UCwZTyvzAWHsNzF2cb1eVHt6w"
},
{
"id": "2SMYrx4Dj6QqCEA3WjnUTYEFSnpqVTwyV3GPNgQqQZbBbFgoJX",
"name": "Simple Timestamp Server",
"subnetID": "11111111111111111111111111111111LpoYY",
"vmID": "tGas3T58KzdjLHhBDMnH2TvrddhqTji5iZAMZ3RXs2NLpSnhH"
},
{
"id": "KDYHHKjM4yTJTT8H8qPs5KXzE6gQH5TZrmP1qVr1P6qECj3XN",
"name": "My new timestamp",
"subnetID": "2bRCr6B4MiEfSjidDwxDpdCyviwnfUVqB2HGwhm947w9YYqb7r",
"vmID": "tGas3T58KzdjLHhBDMnH2TvrddhqTji5iZAMZ3RXs2NLpSnhH"
},
{
"id": "2TtHFqEAAJ6b33dromYMqfgavGPF3iCpdG3hwNMiart2aB5QHi",
"name": "My new AVM",
"subnetID": "2bRCr6B4MiEfSjidDwxDpdCyviwnfUVqB2HGwhm947w9YYqb7r",
"vmID": "jvYyfQTxGMJLuGWa55kdP2p2zSUYsQ5Raupu4TW34ZAUBAbtq"
}
]
},
"id": 1
}
```
### `platform.getBlockchainStatus`
Get the status of a blockchain.
**Signature:**
```
platform.getBlockchainStatus(
{
blockchainID: string
}
) -> {status: string}
```
`status` is one of:
- `Validating`: The blockchain is being validated by this node.
- `Created`: The blockchain exists but isn’t being validated by this node.
- `Preferred`: The blockchain was proposed to be created and is likely to be created but the
transaction isn’t yet accepted.
- `Syncing`: This node is participating in this blockchain as a non-validating node.
- `Unknown`: The blockchain either wasn’t proposed or the proposal to create it isn’t preferred. The
proposal may be resubmitted.
**Example Call:**
```sh
curl -X POST --data '{
"jsonrpc": "2.0",
"method": "platform.getBlockchainStatus",
"params":{
"blockchainID":"2NbS4dwGaf2p1MaXb65PrkZdXRwmSX4ZzGnUu7jm3aykgThuZE"
},
"id": 1
}' -H 'content-type:application/json;' 127.0.0.1:9650/ext/bc/P
```
**Example Response:**
```json
{
"jsonrpc": "2.0",
"result": {
"status": "Created"
},
"id": 1
}
```
### `platform.getCurrentSupply`
Returns an upper bound on amount of tokens that exist that can stake the requested Subnet. This is
an upper bound because it does not account for burnt tokens, including transaction fees.
**Signature:**
```
platform.getCurrentSupply ({
subnetID: string // optional
}) -> { supply: int }
```
- `supply` is an upper bound on the number of tokens that exist.
**Example Call:**
```sh
curl -X POST --data '{
"jsonrpc": "2.0",
"method": "platform.getCurrentSupply",
"params": {
"subnetID": "11111111111111111111111111111111LpoYY"
},
"id": 1
}' -H 'content-type:application/json;' 127.0.0.1:9650/ext/bc/P
```
**Example Response:**
```json
{
"jsonrpc": "2.0",
"result": {
"supply": "365865167637779183"
},
"id": 1
}
```
The response in this example indicates that AVAX’s supply is at most 365.865 million.
### `platform.getCurrentValidators`
List the current validators of the given Subnet.
**Signature:**
```
platform.getCurrentValidators({
subnetID: string, // optional
nodeIDs: string[], // optional
}) -> {
validators: []{
txID: string,
startTime: string,
endTime: string,
nodeID: string,
weight: string,
validationID: string,
publicKey: string,
remainingBalanceOwner: {
locktime: string,
threshold: string,
addresses: string[]
},
deactivationOwner: {
locktime: string,
threshold: string,
addresses: string[]
},
minNonce: string,
balance: string,
validationRewardOwner: {
locktime: string,
threshold: string,
addresses: string[]
},
delegationRewardOwner: {
locktime: string,
threshold: string,
addresses: string[]
},
potentialReward: string,
delegationFee: string,
uptime: string,
connected: bool,
signer: {
publicKey: string,
proofOfPosession: string
},
delegatorCount: string,
delegatorWeight: string,
delegators: []{
txID: string,
startTime: string,
endTime: string,
weight: string,
nodeID: string,
rewardOwner: {
locktime: string,
threshold: string,
addresses: string[]
},
potentialReward: string,
}
}
}
```
- `subnetID` is the Subnet whose current validators are returned. If omitted, returns the current
validators of the Primary Network.
- `nodeIDs` is a list of the NodeIDs of current validators to request. If omitted, all current
validators are returned. If a specified NodeID is not in the set of current validators, it will
not be included in the response.
- `validators` can include different fields based on the subnet type (L1, PoA Subnets, the Primary Network):
- `txID` is the validator transaction.
- `startTime` is the Unix time when the validator starts validating the Subnet.
- `endTime` is the Unix time when the validator stops validating the Subnet. Omitted if `subnetID` is a L1 Subnet.
- `nodeID` is the validator’s node ID.
- `weight` is the validator’s weight (stake) when sampling validators.
- `validationID` is the ID for L1 subnet validator registration transaction. Omitted if `subnetID` is not an L1 Subnet.
- `publicKey` is the compressed BLS public key of the validator. Omitted if `subnetID` is not an L1 Subnet.
- `remainingBalanceOwner` is an `OutputOwners` which includes a `locktime`, `threshold`, and an array of `addresses`. It specifies the owner that will receive any withdrawn balance. Omitted if `subnetID` is not an L1 Subnet.
- `deactivationOwner` is an `OutputOwners` which includes a `locktime`, `threshold`, and an array of `addresses`. It specifies the owner that can withdraw the balance. Omitted if `subnetID` is not an L1 Subnet.
- `minNonce` is minimum nonce that must be included in a `SetL1ValidatorWeightTx` for the transaction to be valid. Omitted if `subnetID` is not an L1 Subnet.
- `balance` is current remaining balance that can be used to pay for the validators continuous fee. Omitted if `subnetID` is not an L1 Subnet.
- `validationRewardOwner` is an `OutputOwners` output which includes `locktime`, `threshold` and
array of `addresses`. Specifies the owner of the potential reward earned from staking. Omitted
if `subnetID` is not the Primary Network.
- `delegationRewardOwner` is an `OutputOwners` output which includes `locktime`, `threshold` and
array of `addresses`. Specifies the owner of the potential reward earned from delegations. Omitted if `subnetID` is not the Primary Network.
- `potentialReward` is the potential reward earned from staking. Omitted if `subnetID` is not the Primary Network.
- `delegationFeeRate` is the percent fee this validator charges when others delegate stake to
them. Omitted if `subnetID` is not the Primary Network.
- `uptime` is the % of time the queried node has reported the peer as online and validating the
Subnet. Omitted if `subnetID` is not the Primary Network.
- `connected` is if the node is connected and tracks the Subnet. Omitted if `subnetID` is not the Primary Network.
- `signer` is the node's BLS public key and proof of possession. Omitted if the validator doesn't
have a BLS public key. Omitted if `subnetID` is not the Primary Network.
- `delegatorCount` is the number of delegators on this validator.
Omitted if `subnetID` is not the Primary Network.
- `delegatorWeight` is total weight of delegators on this validator.
Omitted if `subnetID` is not the Primary Network.
- `delegators` is the list of delegators to this validator. Omitted if `subnetID` is not the Primary Network. Omitted unless `nodeIDs` specifies a single NodeID.
- `txID` is the delegator transaction.
- `startTime` is the Unix time when the delegator started.
- `endTime` is the Unix time when the delegator stops.
- `weight` is the amount of nAVAX this delegator staked.
- `nodeID` is the validating node’s node ID.
- `rewardOwner` is an `OutputOwners` output which includes `locktime`, `threshold` and array of
`addresses`.
- `potentialReward` is the potential reward earned from staking
Note: An L1 Subnet can include both initial legacy PoA validators (before L1 conversion) and L1 validators. The response will include both types of validators.
**Example Call:**
```sh
curl -X POST --data '{
"jsonrpc": "2.0",
"method": "platform.getCurrentValidators",
"params": {
"nodeIDs": ["NodeID-5mb46qkSBj81k9g9e4VFjGGSbaaSLFRzD"]
},
"id": 1
}' -H 'content-type:application/json;' 127.0.0.1:9650/ext/bc/P
```
**Example Response (Primary Network):**
```json
{
"jsonrpc": "2.0",
"result": {
"validators": [
{
"txID": "2NNkpYTGfTFLSGXJcHtVv6drwVU2cczhmjK2uhvwDyxwsjzZMm",
"startTime": "1600368632",
"endTime": "1602960455",
"weight": "2000000000000",
"nodeID": "NodeID-5mb46qkSBj81k9g9e4VFjGGSbaaSLFRzD",
"validationRewardOwner": {
"locktime": "0",
"threshold": "1",
"addresses": ["P-avax18jma8ppw3nhx5r4ap8clazz0dps7rv5ukulre5"]
},
"delegationRewardOwner": {
"locktime": "0",
"threshold": "1",
"addresses": ["P-avax18jma8ppw3nhx5r4ap8clazz0dps7rv5ukulre5"]
},
"potentialReward": "117431493426",
"delegationFee": "10.0000",
"uptime": "0.0000",
"connected": false,
"delegatorCount": "1",
"delegatorWeight": "25000000000",
"delegators": [
{
"txID": "Bbai8nzGVcyn2VmeYcbS74zfjJLjDacGNVuzuvAQkHn1uWfoV",
"startTime": "1600368523",
"endTime": "1602960342",
"weight": "25000000000",
"nodeID": "NodeID-5mb46qkSBj81k9g9e4VFjGGSbaaSLFRzD",
"rewardOwner": {
"locktime": "0",
"threshold": "1",
"addresses": ["P-avax18jma8ppw3nhx5r4ap8clazz0dps7rv5ukulre5"]
},
"potentialReward": "11743144774"
}
]
}
]
},
"id": 1
}
```
**Example Response (L1):**
```json
{
"jsonrpc": "2.0",
"result": {
"validators": [
{
"validationID": "2wTscvX3JUsMbZHFRd9t8Ywz2q9j2BmETg8cTvgUHgawjbSvZX",
"nodeID": "NodeID-5mb46qkSBj81k9g9e4VFjGGSbaaSLFRzD",
"publicKey": "0x91951771ff32b1a985a4936592bce8512a986353c4c2eb5a0f12dbb76bda3a0a0c975e26413ff44c0ee9d8d689eff8ed",
"remainingBalanceOwner": {
"locktime": "0",
"threshold": "1",
"addresses": [
"P-fuji1ywzvrftfqexh5g6qa9zyrytj6pqdfetza2hqln"
]
},
"deactivationOwner": {
"locktime": "0",
"threshold": "1",
"addresses": [
"P-fuji1ywzvrftfqexh5g6qa9zyrytj6pqdfetza2hqln"
]
},
"startTime": "1734034648",
"weight": "20",
"minNonce": "0",
"balance": "8780477952"
}
]
},
"id": 1
}
```
### `platform.getFeeConfig`
Returns the dynamic fee configuration of the P-chain.
**Signature:**
```
platform.getFeeConfig() -> {
weights: []uint64,
maxCapacity: uint64,
maxPerSecond: uint64,
targetPerSecond: uint64,
minPrice: uint64,
excessConversionConstant: uint64
}
```
- `weights` to merge fee dimensions into a single gas value
- `maxCapacity` is the amount of gas the chain is allowed to store for future use
- `maxPerSecond` is the amount of gas the chain is allowed to consume per second
- `targetPerSecond` is the target amount of gas the chain should consume per second to keep fees stable
- `minPrice` is the minimum price per unit of gas
- `excessConversionConstant` is used to convert excess gas to a gas price
**Example Call:**
```sh
curl -X POST --data '{
"jsonrpc": "2.0",
"method": "platform.getFeeConfig",
"params": {},
"id": 1
}' -H 'content-type:application/json;' 127.0.0.1:9650/ext/bc/P
```
**Example Response:**
```json
{
"jsonrpc": "2.0",
"result": {
"weights": [1, 1000, 1000, 4],
"maxCapacity": 1000000,
"maxPerSecond": 100000,
"targetPerSecond": 50000,
"minPrice": 1,
"excessConversionConstant": 2164043
},
"id": 1
}
```
### `platform.getFeeState`
Returns the current fee state of the P-chain.
**Signature:**
```
platform.getFeeState() -> {
capacity: uint64,
excess: uint64,
price: uint64,
timestamp: string
}
```
**Example Call:**
```sh
curl -X POST --data '{
"jsonrpc": "2.0",
"method": "platform.getFeeState",
"params": {},
"id": 1
}' -H 'content-type:application/json;' 127.0.0.1:9650/ext/bc/P
```
**Example Response:**
```json
{
"jsonrpc": "2.0",
"result": {
"capacity": 973044,
"excess": 26956,
"price": 1,
"timestamp": "2024-12-16T17:19:07Z"
},
"id": 1
}
```
### `platform.getHeight`
Returns the height of the last accepted block.
**Signature:**
```
platform.getHeight() ->
{
height: int,
}
```
**Example Call:**
```sh
curl -X POST --data '{
"jsonrpc": "2.0",
"method": "platform.getHeight",
"params": {},
"id": 1
}' -H 'content-type:application/json;' 127.0.0.1:9650/ext/bc/P
```
**Example Response:**
```json
{
"jsonrpc": "2.0",
"result": {
"height": "56"
},
"id": 1
}
```
### `platform.getL1Validator`
Returns a current L1 validator.
**Signature:**
```
platform.getL1Validator({
validationID: string,
}) -> {
validationID: string,
subnetID: string,
nodeID: string,
publicKey: string,
remainingBalanceOwner: {
locktime: string,
threshold: string,
addresses: string[]
},
deactivationOwner: {
locktime: string,
threshold: string,
addresses: string[]
},
startTime: string,
weight: string,
minNonce: string,
balance: string,
height: string
}
```
- `validationID` is the ID for L1 subnet validator registration transaction.
- `subnetID` is the L1 this validator is validating.
- `nodeID` is the node ID of the validator.
- `publicKey` is the compressed BLS public key of the validator.
- `remainingBalanceOwner` is an `OutputOwners` which includes a `locktime`, `threshold`, and an array of `addresses`. It specifies the owner that will receive any withdrawn balance.
- `deactivationOwner` is an `OutputOwners` which includes a `locktime`, `threshold`, and an array of `addresses`. It specifies the owner that can withdraw the balance.
- `startTime` is the unix timestamp, in seconds, of when this validator was added to the validator set.
- `weight` is weight of this validator used for consensus voting and ICM.
- `minNonce` is minimum nonce that must be included in a `SetL1ValidatorWeightTx` for the transaction to be valid.
- `balance` is current remaining balance that can be used to pay for the validators continuous fee.
- `height` is height of the last accepted block.
**Example Call:**
```sh
curl -X POST --data '{
"jsonrpc": "2.0",
"method": "platform.getL1Validator",
"params": {
"validationID": ["9FAftNgNBrzHUMMApsSyV6RcFiL9UmCbvsCu28xdLV2mQ7CMo"]
},
"id": 1
}' -H 'content-type:application/json;' 127.0.0.1:9650/ext/bc/P
```
**Example Response:**
```json
{
"jsonrpc": "2.0",
"result": {
"subnetID": "2DeHa7Qb6sufPkmQcFWG2uCd4pBPv9WB6dkzroiMQhd1NSRtof",
"nodeID": "NodeID-7Xhw2mDxuDS44j42TCB6U5579esbSt3Lg",
"validationID": "9FAftNgNBrzHUMMApsSyV6RcFiL9UmCbvsCu28xdLV2mQ7CMo",
"publicKey": "0x900c9b119b5c82d781d4b49be78c3fc7ae65f2b435b7ed9e3a8b9a03e475edff86d8a64827fec8db23a6f236afbf127d",
"remainingBalanceOwner": {
"locktime": "0",
"threshold": "0",
"addresses": []
},
"deactivationOwner": {
"locktime": "0",
"threshold": "0",
"addresses": []
},
"startTime": "1731445206",
"weight": "49463",
"minNonce": "0",
"balance": "1000000000",
"height": "3"
},
"id": 1
}
```
### `platform.getProposedHeight`
Returns this node's current proposer VM height
**Signature:**
```
platform.getProposedHeight() ->
{
height: int,
}
```
**Example Call:**
```sh
curl -X POST --data '{
"jsonrpc": "2.0",
"method": "platform.getProposedHeight",
"params": {},
"id": 1
}' -H 'content-type:application/json;' 127.0.0.1:9650/ext/bc/P
```
**Example Response:**
```json
{
"jsonrpc": "2.0",
"result": {
"height": "56"
},
"id": 1
}
```
### `platform.getMinStake`
Get the minimum amount of tokens required to validate the requested Subnet and the minimum amount of
tokens that can be delegated.
**Signature:**
```
platform.getMinStake({
subnetID: string // optional
}) ->
{
minValidatorStake : uint64,
minDelegatorStake : uint64
}
```
**Example Call:**
```sh
curl -X POST --data '{
"jsonrpc":"2.0",
"id" :1,
"method" :"platform.getMinStake",
"params": {
"subnetID":"11111111111111111111111111111111LpoYY"
},
}' -H 'content-type:application/json;' 127.0.0.1:9650/ext/bc/P
```
**Example Response:**
```json
{
"jsonrpc": "2.0",
"result": {
"minValidatorStake": "2000000000000",
"minDelegatorStake": "25000000000"
},
"id": 1
}
```
### `platform.getRewardUTXOs`
Deprecated as of [**v1.9.12**](https://github.com/ava-labs/avalanchego/releases/tag/v1.9.12).
Returns the UTXOs that were rewarded after the provided transaction's staking or delegation period
ended.
**Signature:**
```
platform.getRewardUTXOs({
txID: string,
encoding: string // optional
}) -> {
numFetched: integer,
utxos: []string,
encoding: string
}
```
- `txID` is the ID of the staking or delegating transaction
- `numFetched` is the number of returned UTXOs
- `utxos` is an array of encoded reward UTXOs
- `encoding` specifies the format for the returned UTXOs. Can only be `hex` when a value is
provided.
**Example Call:**
```sh
curl -X POST --data '{
"jsonrpc": "2.0",
"method": "platform.getRewardUTXOs",
"params": {
"txID": "2nmH8LithVbdjaXsxVQCQfXtzN9hBbmebrsaEYnLM9T32Uy2Y5"
},
"id": 1
}' -H 'content-type:application/json;' 127.0.0.1:9650/ext/bc/P
```
**Example Response:**
```json
{
"jsonrpc": "2.0",
"result": {
"numFetched": "2",
"utxos": [
"0x0000a195046108a85e60f7a864bb567745a37f50c6af282103e47cc62f036cee404700000000345aa98e8a990f4101e2268fab4c4e1f731c8dfbcffa3a77978686e6390d624f000000070000000000000001000000000000000000000001000000018ba98dabaebcd83056799841cfbc567d8b10f216c1f01765",
"0x0000ae8b1b94444eed8de9a81b1222f00f1b4133330add23d8ac288bffa98b85271100000000345aa98e8a990f4101e2268fab4c4e1f731c8dfbcffa3a77978686e6390d624f000000070000000000000001000000000000000000000001000000018ba98dabaebcd83056799841cfbc567d8b10f216473d042a"
],
"encoding": "hex"
},
"id": 1
}
```
### `platform.getStake`
Deprecated as of [**v1.9.12**](https://github.com/ava-labs/avalanchego/releases/tag/v1.9.12).
Get the amount of nAVAX staked by a set of addresses. The amount returned does not include staking
rewards.
**Signature:**
```
platform.getStake({
addresses: []string,
validatorsOnly: true or false
}) ->
{
stakeds: string -> int,
stakedOutputs: []string,
encoding: string
}
```
- `addresses` are the addresses to get information about.
- `validatorsOnly` can be either `true` or `false`. If `true`, will skip checking delegators for stake.
- `stakeds` is a map from assetID to the amount staked by addresses provided.
- `stakedOutputs` are the string representation of staked outputs.
- `encoding` specifies the format for the returned outputs.
**Example Call:**
```sh
curl -X POST --data '{
"jsonrpc": "2.0",
"method": "platform.getStake",
"params": {
"addresses": [
"P-avax1pmgmagjcljjzuz2ve339dx82khm7q8getlegte"
],
"validatorsOnly": true
},
"id": 1
}
}' -H 'content-type:application/json;' 127.0.0.1:9650/ext/bc/P
```
**Example Response:**
```json
{
"jsonrpc": "2.0",
"result": {
"staked": "6500000000000",
"stakeds": {
"FvwEAhmxKfeiG8SnEvq42hc6whRyY3EFYAvebMqDNDGCgxN5Z": "6500000000000"
},
"stakedOutputs": [
"0x000021e67317cbc4be2aeb00677ad6462778a8f52274b9d605df2591b23027a87dff00000007000005e96630e800000000000000000000000001000000011f1c933f38da6ba0ba46f8c1b0a7040a9a991a80dd338ed1"
],
"encoding": "hex"
},
"id": 1
}
```
### `platform.getStakingAssetID`
Retrieve an assetID for a Subnet’s staking asset.
**Signature:**
```
platform.getStakingAssetID({
subnetID: string // optional
}) -> {
assetID: string
}
```
- `subnetID` is the Subnet whose assetID is requested.
- `assetID` is the assetID for a Subnet’s staking asset.
**Example Call:**
```sh
curl -X POST --data '{
"jsonrpc": "2.0",
"method": "platform.getStakingAssetID",
"params": {
"subnetID": "11111111111111111111111111111111LpoYY"
},
"id": 1
}' -H 'content-type:application/json;' 127.0.0.1:9650/ext/bc/P
```
**Example Response:**
```json
{
"jsonrpc": "2.0",
"result": {
"assetID": "2fombhL7aGPwj3KH4bfrmJwW6PVnMobf9Y2fn9GwxiAAJyFDbe"
},
"id": 1
}
```
The AssetID for AVAX differs depending on the network you are on.
Mainnet: FvwEAhmxKfeiG8SnEvq42hc6whRyY3EFYAvebMqDNDGCgxN5Z
Testnet: U8iRqJoiJm8xZHAacmvYyZVwqQx6uDNtQeP3CQ6fcgQk3JqnK
### `platform.getSubnet`
Get owners and info about the Subnet or L1.
**Signature:**
```
platform.getSubnet({
subnetID: string
}) ->
{
isPermissioned: bool,
controlKeys: []string,
threshold: string,
locktime: string,
subnetTransformationTxID: string,
conversionID: string,
managerChainID: string,
managerAddress: string
}
```
- `subnetID` is the ID of the Subnet to get information about. If omitted, fails.
- `threshold` signatures from addresses in `controlKeys` are needed to make changes to
a permissioned subnet. If the Subnet is not a PoA Subnet, then `threshold` will be `0` and `controlKeys`
will be empty.
- changes can not be made into the subnet until `locktime` is in the past.
- `subnetTransformationTxID` is the ID of the transaction that changed the subnet into an elastic one, if it exists.
- `conversionID` is the ID of the conversion from a permissioned Subnet into an L1, if it exists.
- `managerChainID` is the ChainID that has the ability to modify this L1s validator set, if it exists.
- `managerAddress` is the address that has the ability to modify this L1s validator set, if it exists.
**Example Call:**
```sh
curl -X POST --data '{
"jsonrpc": "2.0",
"method": "platform.getSubnet",
"params": {"subnetID":"Vz2ArUpigHt7fyE79uF3gAXvTPLJi2LGgZoMpgNPHowUZJxBb"},
"id": 1
}' -H 'content-type:application/json;' 127.0.0.1:9650/ext/bc/P
```
**Example Response:**
```json
{
"jsonrpc": "2.0",
"result": {
"isPermissioned": true,
"controlKeys": [
"P-fuji1ztvstx6naeg6aarfd047fzppdt8v4gsah88e0c",
"P-fuji193kvt4grqewv6ce2x59wnhydr88xwdgfcedyr3"
],
"threshold": "1",
"locktime": "0",
"subnetTransformationTxID": "11111111111111111111111111111111LpoYY",
"conversionID": "11111111111111111111111111111111LpoYY",
"managerChainID": "11111111111111111111111111111111LpoYY",
"managerAddress": null
},
"id": 1
}
```
### `platform.getSubnets`
Deprecated as of [**v1.9.12**](https://github.com/ava-labs/avalanchego/releases/tag/v1.9.12).
Get info about the Subnets.
**Signature:**
```
platform.getSubnets({
ids: []string
}) ->
{
subnets: []{
id: string,
controlKeys: []string,
threshold: string
}
}
```
- `ids` are the IDs of the Subnets to get information about. If omitted, gets information about all
Subnets.
- `id` is the Subnet’s ID.
- `threshold` signatures from addresses in `controlKeys` are needed to add a validator to the
Subnet. If the Subnet is not a PoA Subnet, then `threshold` will be `0` and `controlKeys` will be
empty.
**Example Call:**
```sh
curl -X POST --data '{
"jsonrpc": "2.0",
"method": "platform.getSubnets",
"params": {"ids":["hW8Ma7dLMA7o4xmJf3AXBbo17bXzE7xnThUd3ypM4VAWo1sNJ"]},
"id": 1
}' -H 'content-type:application/json;' 127.0.0.1:9650/ext/bc/P
```
**Example Response:**
```json
{
"jsonrpc": "2.0",
"result": {
"subnets": [
{
"id": "hW8Ma7dLMA7o4xmJf3AXBbo17bXzE7xnThUd3ypM4VAWo1sNJ",
"controlKeys": [
"KNjXsaA1sZsaKCD1cd85YXauDuxshTes2",
"Aiz4eEt5xv9t4NCnAWaQJFNz5ABqLtJkR"
],
"threshold": "2"
}
]
},
"id": 1
}
```
### `platform.getTimestamp`
Get the current P-Chain timestamp.
**Signature:**
```
platform.getTimestamp() -> {time: string}
```
**Example Call:**
```sh
curl -X POST --data '{
"jsonrpc": "2.0",
"method": "platform.getTimestamp",
"params": {},
"id": 1
}
}' -H 'content-type:application/json;' 127.0.0.1:9650/ext/bc/P
```
**Example Response:**
```json
{
"jsonrpc": "2.0",
"result": {
"timestamp": "2021-09-07T00:00:00-04:00"
},
"id": 1
}
```
### `platform.getTotalStake`
Get the total amount of tokens staked on the requested Subnet.
**Signature:**
```
platform.getTotalStake({
subnetID: string
}) -> {
stake: int
weight: int
}
```
#### Primary Network Example
**Example Call:**
```sh
curl -X POST --data '{
"jsonrpc": "2.0",
"method": "platform.getTotalStake",
"params": {
"subnetID": "11111111111111111111111111111111LpoYY"
},
"id": 1
}
}' -H 'content-type:application/json;' 127.0.0.1:9650/ext/bc/P
```
**Example Response:**
```json
{
"jsonrpc": "2.0",
"result": {
"stake": "279825917679866811",
"weight": "279825917679866811"
},
"id": 1
}
```
#### Subnet Example
**Example Call:**
```sh
curl -X POST --data '{
"jsonrpc": "2.0",
"method": "platform.getTotalStake",
"params": {
"subnetID": "2bRCr6B4MiEfSjidDwxDpdCyviwnfUVqB2HGwhm947w9YYqb7r",
},
"id": 1
}
}' -H 'content-type:application/json;' 127.0.0.1:9650/ext/P
```
**Example Response:**
```json
{
"jsonrpc": "2.0",
"result": {
"weight": "100000"
},
"id": 1
}
```
### `platform.getTx`
Gets a transaction by its ID.
Optional `encoding` parameter to specify the format for the returned transaction. Can be either
`hex` or `json`. Defaults to `hex`.
**Signature:**
```
platform.getTx({
txID: string,
encoding: string // optional
}) -> {
tx: string,
encoding: string,
}
```
**Example Call:**
```sh
curl -X POST --data '{
"jsonrpc": "2.0",
"method": "platform.getTx",
"params": {
"txID":"28KVjSw5h3XKGuNpJXWY74EdnGq4TUWvCgEtJPymgQTvudiugb",
"encoding": "json"
},
"id": 1
}' -H 'content-type:application/json;' 127.0.0.1:9650/ext/bc/P
```
**Example Response:**
```json
{
"jsonrpc": "2.0",
"result": {
"tx": {
"unsignedTx": {
"networkID": 1,
"blockchainID": "11111111111111111111111111111111LpoYY",
"outputs": [],
"inputs": [
{
"txID": "NXNJHKeaJyjjWVSq341t6LGQP5UNz796o1crpHPByv1TKp9ZP",
"outputIndex": 0,
"assetID": "FvwEAhmxKfeiG8SnEvq42hc6whRyY3EFYAvebMqDNDGCgxN5Z",
"fxID": "spdxUxVJQbX85MGxMHbKw1sHxMnSqJ3QBzDyDYEP3h6TLuxqQ",
"input": {
"amount": 20824279595,
"signatureIndices": [0]
}
},
{
"txID": "2ahK5SzD8iqi5KBqpKfxrnWtrEoVwQCqJsMoB9kvChCaHgAQC9",
"outputIndex": 1,
"assetID": "FvwEAhmxKfeiG8SnEvq42hc6whRyY3EFYAvebMqDNDGCgxN5Z",
"fxID": "spdxUxVJQbX85MGxMHbKw1sHxMnSqJ3QBzDyDYEP3h6TLuxqQ",
"input": {
"amount": 28119890783,
"signatureIndices": [0]
}
}
],
"memo": "0x",
"validator": {
"nodeID": "NodeID-VT3YhgFaWEzy4Ap937qMeNEDscCammzG",
"start": 1682945406,
"end": 1684155006,
"weight": 48944170378
},
"stake": [
{
"assetID": "FvwEAhmxKfeiG8SnEvq42hc6whRyY3EFYAvebMqDNDGCgxN5Z",
"fxID": "spdxUxVJQbX85MGxMHbKw1sHxMnSqJ3QBzDyDYEP3h6TLuxqQ",
"output": {
"addresses": ["P-avax1tnuesf6cqwnjw7fxjyk7lhch0vhf0v95wj5jvy"],
"amount": 48944170378,
"locktime": 0,
"threshold": 1
}
}
],
"rewardsOwner": {
"addresses": ["P-avax19zfygxaf59stehzedhxjesads0p5jdvfeedal0"],
"locktime": 0,
"threshold": 1
}
},
"credentials": [
{
"signatures": [
"0x6954e90b98437646fde0c1d54c12190fc23ae5e319c4d95dda56b53b4a23e43825251289cdc3728f1f1e0d48eac20e5c8f097baa9b49ea8a3cb6a41bb272d16601"
]
},
{
"signatures": [
"0x6954e90b98437646fde0c1d54c12190fc23ae5e319c4d95dda56b53b4a23e43825251289cdc3728f1f1e0d48eac20e5c8f097baa9b49ea8a3cb6a41bb272d16601"
]
}
],
"id": "28KVjSw5h3XKGuNpJXWY74EdnGq4TUWvCgEtJPymgQTvudiugb"
},
"encoding": "json"
},
"id": 1
}
```
### `platform.getTxStatus`
Gets a transaction’s status by its ID. If the transaction was dropped, response will include a
`reason` field with more information why the transaction was dropped.
**Signature:**
```
platform.getTxStatus({
txID: string
}) -> { status: string }
```
`status` is one of:
- `Committed`: The transaction is (or will be) accepted by every node
- `Processing`: The transaction is being voted on by this node
- `Dropped`: The transaction will never be accepted by any node in the network, check `reason` field
for more information
- `Unknown`: The transaction hasn’t been seen by this node
**Example Call:**
```sh
curl -X POST --data '{
"jsonrpc": "2.0",
"method": "platform.getTxStatus",
"params": {
"txID":"TAG9Ns1sa723mZy1GSoGqWipK6Mvpaj7CAswVJGM6MkVJDF9Q"
},
"id": 1
}' -H 'content-type:application/json;' 127.0.0.1:9650/ext/bc/P
```
**Example Response:**
```json
{
"jsonrpc": "2.0",
"result": {
"status": "Committed"
},
"id": 1
}
```
### `platform.getUTXOs`
Gets the UTXOs that reference a given set of addresses.
**Signature:**
```
platform.getUTXOs(
{
addresses: []string,
limit: int, // optional
startIndex: { // optional
address: string,
utxo: string
},
sourceChain: string, // optional
encoding: string, // optional
},
) ->
{
numFetched: int,
utxos: []string,
endIndex: {
address: string,
utxo: string
},
encoding: string,
}
```
- `utxos` is a list of UTXOs such that each UTXO references at least one address in `addresses`.
- At most `limit` UTXOs are returned. If `limit` is omitted or greater than 1024, it is set to 1024.
- This method supports pagination. `endIndex` denotes the last UTXO returned. To get the next set of
UTXOs, use the value of `endIndex` as `startIndex` in the next call.
- If `startIndex` is omitted, will fetch all UTXOs up to `limit`.
- When using pagination (that is when `startIndex` is provided), UTXOs are not guaranteed to be unique
across multiple calls. That is, a UTXO may appear in the result of the first call, and then again
in the second call.
- When using pagination, consistency is not guaranteed across multiple calls. That is, the UTXO set
of the addresses may have changed between calls.
- `encoding` specifies the format for the returned UTXOs. Can only be `hex` when a value is
provided.
#### **Example**
Suppose we want all UTXOs that reference at least one of
`P-avax18jma8ppw3nhx5r4ap8clazz0dps7rv5ukulre5` and `P-avax1d09qn852zcy03sfc9hay2llmn9hsgnw4tp3dv6`.
```sh
curl -X POST --data '{
"jsonrpc":"2.0",
"id" :1,
"method" :"platform.getUTXOs",
"params" :{
"addresses":["P-avax18jma8ppw3nhx5r4ap8clazz0dps7rv5ukulre5", "P-avax1d09qn852zcy03sfc9hay2llmn9hsgnw4tp3dv6"],
"limit":5,
"encoding": "hex"
}
}' -H 'content-type:application/json;' 127.0.0.1:9650/ext/bc/P
```
This gives response:
```json
{
"jsonrpc": "2.0",
"result": {
"numFetched": "5",
"utxos": [
"0x0000a195046108a85e60f7a864bb567745a37f50c6af282103e47cc62f036cee404700000000345aa98e8a990f4101e2268fab4c4e1f731c8dfbcffa3a77978686e6390d624f000000070000000000000001000000000000000000000001000000018ba98dabaebcd83056799841cfbc567d8b10f216c1f01765",
"0x0000ae8b1b94444eed8de9a81b1222f00f1b4133330add23d8ac288bffa98b85271100000000345aa98e8a990f4101e2268fab4c4e1f731c8dfbcffa3a77978686e6390d624f000000070000000000000001000000000000000000000001000000018ba98dabaebcd83056799841cfbc567d8b10f216473d042a",
"0x0000731ce04b1feefa9f4291d869adc30a33463f315491e164d89be7d6d2d7890cfc00000000345aa98e8a990f4101e2268fab4c4e1f731c8dfbcffa3a77978686e6390d624f000000070000000000000001000000000000000000000001000000018ba98dabaebcd83056799841cfbc567d8b10f21600dd3047",
"0x0000b462030cc4734f24c0bc224cf0d16ee452ea6b67615517caffead123ab4fbf1500000000345aa98e8a990f4101e2268fab4c4e1f731c8dfbcffa3a77978686e6390d624f000000070000000000000001000000000000000000000001000000018ba98dabaebcd83056799841cfbc567d8b10f216c71b387e",
"0x000054f6826c39bc957c0c6d44b70f961a994898999179cc32d21eb09c1908d7167b00000000345aa98e8a990f4101e2268fab4c4e1f731c8dfbcffa3a77978686e6390d624f000000070000000000000001000000000000000000000001000000018ba98dabaebcd83056799841cfbc567d8b10f2166290e79d"
],
"endIndex": {
"address": "P-avax18jma8ppw3nhx5r4ap8clazz0dps7rv5ukulre5",
"utxo": "kbUThAUfmBXUmRgTpgD6r3nLj7rJUGho6xyht5nouNNypH45j"
},
"encoding": "hex"
},
"id": 1
}
```
Since `numFetched` is the same as `limit`, we can tell that there may be more UTXOs that were not
fetched. We call the method again, this time with `startIndex`:
```sh
curl -X POST --data '{
"jsonrpc":"2.0",
"id" :1,
"method" :"platform.getUTXOs",
"params" :{
"addresses":["P-avax18jma8ppw3nhx5r4ap8clazz0dps7rv5ukulre5"],
"limit":5,
"startIndex": {
"address": "P-avax18jma8ppw3nhx5r4ap8clazz0dps7rv5ukulre5",
"utxo": "0x62fc816bb209857923770c286192ab1f9e3f11e4a7d4ba0943111c3bbfeb9e4a5ea72fae"
},
"encoding": "hex"
}
}' -H 'content-type:application/json;' 127.0.0.1:9650/ext/bc/P
```
This gives response:
```json
{
"jsonrpc": "2.0",
"result": {
"numFetched": "4",
"utxos": [
"0x000020e182dd51ee4dcd31909fddd75bb3438d9431f8e4efce86a88a684f5c7fa09300000000345aa98e8a990f4101e2268fab4c4e1f731c8dfbcffa3a77978686e6390d624f000000070000000000000001000000000000000000000001000000018ba98dabaebcd83056799841cfbc567d8b10f21662861d59",
"0x0000a71ba36c475c18eb65dc90f6e85c4fd4a462d51c5de3ac2cbddf47db4d99284e00000000345aa98e8a990f4101e2268fab4c4e1f731c8dfbcffa3a77978686e6390d624f000000070000000000000001000000000000000000000001000000018ba98dabaebcd83056799841cfbc567d8b10f21665f6f83f",
"0x0000925424f61cb13e0fbdecc66e1270de68de9667b85baa3fdc84741d048daa69fa00000000345aa98e8a990f4101e2268fab4c4e1f731c8dfbcffa3a77978686e6390d624f000000070000000000000001000000000000000000000001000000018ba98dabaebcd83056799841cfbc567d8b10f216afecf76a",
"0x000082f30327514f819da6009fad92b5dba24d27db01e29ad7541aa8e6b6b554615c00000000345aa98e8a990f4101e2268fab4c4e1f731c8dfbcffa3a77978686e6390d624f000000070000000000000001000000000000000000000001000000018ba98dabaebcd83056799841cfbc567d8b10f216779c2d59"
],
"endIndex": {
"address": "P-avax18jma8ppw3nhx5r4ap8clazz0dps7rv5ukulre5",
"utxo": "21jG2RfqyHUUgkTLe2tUp6ETGLriSDTW3th8JXFbPRNiSZ11jK"
},
"encoding": "hex"
},
"id": 1
}
```
Since `numFetched` is less than `limit`, we know that we are done fetching UTXOs and don’t need to
call this method again.
Suppose we want to fetch the UTXOs exported from the X Chain to the P Chain in order to build an
ImportTx. Then we need to call GetUTXOs with the `sourceChain` argument in order to retrieve the
atomic UTXOs:
```sh
curl -X POST --data '{
"jsonrpc":"2.0",
"id" :1,
"method" :"platform.getUTXOs",
"params" :{
"addresses":["P-avax18jma8ppw3nhx5r4ap8clazz0dps7rv5ukulre5"],
"sourceChain": "X",
"encoding": "hex"
}
}' -H 'content-type:application/json;' 127.0.0.1:9650/ext/bc/P
```
This gives response:
```json
{
"jsonrpc": "2.0",
"result": {
"numFetched": "1",
"utxos": [
"0x00001f989ffaf18a18a59bdfbf209342aa61c6a62a67e8639d02bb3c8ddab315c6fa0000000139c33a499ce4c33a3b09cdd2cfa01ae70dbf2d18b2d7d168524440e55d55008800000007000000746a528800000000000000000000000001000000013cb7d3842e8cee6a0ebd09f1fe884f6861e1b29cd704fe76"
],
"endIndex": {
"address": "P-avax18jma8ppw3nhx5r4ap8clazz0dps7rv5ukulre5",
"utxo": "S5UKgWoVpoGFyxfisebmmRf8WqC7ZwcmYwS7XaDVZqoaFcCwK"
},
"encoding": "hex"
},
"id": 1
}
```
### `platform.getValidatorsAt`
Get the validators and their weights of a Subnet or the Primary Network at a given P-Chain height.
**Signature:**
```
platform.getValidatorsAt(
{
height: [int|string],
subnetID: string, // optional
}
)
```
- `height` is the P-Chain height to get the validator set at, or the string literal "proposed"
to return the validator set at this node's ProposerVM height.
- `subnetID` is the Subnet ID to get the validator set of. If not given, gets validator set of the
Primary Network.
**Example Call:**
```bash
curl -X POST --data '{
"jsonrpc": "2.0",
"method": "platform.getValidatorsAt",
"params": {
"height":1
},
"id": 1
}' -H 'content-type:application/json;' 127.0.0.1:9650/ext/bc/P
```
**Example Response:**
```json
{
"jsonrpc": "2.0",
"result": {
"validators": {
"NodeID-7Xhw2mDxuDS44j42TCB6U5579esbSt3Lg": 2000000000000000,
"NodeID-GWPcbFJZFfZreETSoWjPimr846mXEKCtu": 2000000000000000,
"NodeID-MFrZFVCXPv5iCn6M9K6XduxGTYp891xXZ": 2000000000000000,
"NodeID-NFBbbJ4qCmNaCzeW7sxErhvWqvEQMnYcN": 2000000000000000,
"NodeID-P7oB2McjBGgW2NXXWVYjV8JEDFoW9xDE5": 2000000000000000
}
},
"id": 1
}
```
### `platform.getAllValidatorsAt`
Get the validators and their weights of all Subnets and the Primary Network at a given P-Chain height.
**Signature:**
```
platform.getAllValidatorsAt(
{
height: [int|string],
}
)
```
```bash
curl -X POST --data '{
"jsonrpc": "2.0",
"method": "platform.getAllValidatorsAt",
"params": {
"height":1
},
"id": 1
}' -H 'content-type:application/json;' 127.0.0.1:9650/ext/bc/P
```
**Example Response:**
```json
{
"jsonrpc": "2.0",
"result": {
"validatorSets": {
"11111111111111111111111111111111LpoYY": {
"validators": [
{
"publicKey": "0x8048109c3da13de0700f9f3590c3270bfc42277417f6d0cc84282947e1a1f8b4980fd3e3fe223acf0f56a5838890814a",
"weight": "2000000000000000",
"nodeIDs": [
"NodeID-P7oB2McjBGgW2NXXWVYjV8JEDFoW9xDE5"
]
},
{
"publicKey": "0xa058ff27a4c570664bfa28e34939368539a1340867951943d0f56fa8aac13bc09ff64f341acf8cc0cef74202c2d6f9c0",
"weight": "2000000000000000",
"nodeIDs": [
"NodeID-MFrZFVCXPv5iCn6M9K6XduxGTYp891xXZ"
]
},
{
"publicKey": "0xa10b6955a85684a0f5c94b8381f04506f1bee60625927d372323f78b3d30196cc56c8618c77eaf429298e74673d832c3",
"weight": "2000000000000000",
"nodeIDs": [
"NodeID-NFBbbJ4qCmNaCzeW7sxErhvWqvEQMnYcN"
]
},
{
"publicKey": "0xaccd61ceb90c61628aa0fa34acab27ecb08f6897e9ccad283578c278c52109f9e10e4f8bc31aa6d7905c4e1623de367e",
"weight": "2000000000000000",
"nodeIDs": [
"NodeID-GWPcbFJZFfZreETSoWjPimr846mXEKCtu"
]
},
{
"publicKey": "0x900c9b119b5c82d781d4b49be78c3fc7ae65f2b435b7ed9e3a8b9a03e475edff86d8a64827fec8db23a6f236afbf127d",
"weight": "2000000000000000",
"nodeIDs": [
"NodeID-7Xhw2mDxuDS44j42TCB6U5579esbSt3Lg"
]
}
],
"totalWeight": "10000000000000000"
}
}
},
"id": 1
}
```
- `height` is the P-Chain height to get the validator set at, or the string literal "proposed"
to return the validator set at this node's ProposerVM height.
**Example Call:**
### `platform.getValidatorFeeConfig`
Returns the validator fee configuration of the P-Chain.
**Signature:**
```
platform.getValidatorFeeConfig() -> {
capacity: uint64,
target: uint64,
minPrice: uint64,
excessConversionConstant: uint64
}
```
- `capacity` is the maximum number of L1 validators the chain is allowed to have at any given time
- `target` is the target number of L1 validators the chain should have to keep fees stable
- `minPrice` is the minimum price per L1 validator
- `excessConversionConstant` is used to convert excess L1 validators to a gas price
**Example Call:**
```sh
curl -X POST --data '{
"jsonrpc": "2.0",
"method": "platform.getValidatorFeeConfig",
"params": {},
"id": 1
}' -H 'content-type:application/json;' 127.0.0.1:9650/ext/bc/P
```
**Example Response:**
```json
{
"jsonrpc": "2.0",
"result": {
"capacity": 20000,
"target": 10000,
"targetPerSecond": 50000,
"minPrice": 512,
"excessConversionConstant": 1246488515
},
"id": 1
}
```
### `platform.getValidatorFeeState`
Returns the current validator fee state of the P-Chain.
**Signature:**
```
platform.getValidatorFeeState() -> {
excess: uint64,
price: uint64,
timestamp: string
}
```
**Example Call:**
```sh
curl -X POST --data '{
"jsonrpc": "2.0",
"method": "platform.getValidatorFeeState",
"params": {},
"id": 1
}' -H 'content-type:application/json;' 127.0.0.1:9650/ext/bc/P
```
**Example Response:**
```json
{
"jsonrpc": "2.0",
"result": {
"excess": 26956,
"price": 512,
"timestamp": "2024-12-16T17:19:07Z"
},
"id": 1
}
```
### `platform.issueTx`
Issue a transaction to the Platform Chain.
**Signature:**
```
platform.issueTx({
tx: string,
encoding: string, // optional
}) -> { txID: string }
```
- `tx` is the byte representation of a transaction.
- `encoding` specifies the encoding format for the transaction bytes. Can only be `hex` when a value
is provided.
- `txID` is the transaction’s ID.
**Example Call:**
```sh
curl -X POST --data '{
"jsonrpc": "2.0",
"method": "platform.issueTx",
"params": {
"tx":"0x00000009de31b4d8b22991d51aa6aa1fc733f23a851a8c9400000000000186a0000000005f041280000000005f9ca900000030390000000000000001fceda8f90fcb5d30614b99d79fc4baa29307762668f16eb0259a57c2d3b78c875c86ec2045792d4df2d926c40f829196e0bb97ee697af71f5b0a966dabff749634c8b729855e937715b0e44303fd1014daedc752006011b730",
"encoding": "hex"
},
"id": 1
}' -H 'content-type:application/json;' 127.0.0.1:9650/ext/bc/P
```
**Example Response:**
```json
{
"jsonrpc": "2.0",
"result": {
"txID": "G3BuH6ytQ2averrLxJJugjWZHTRubzCrUZEXoheG5JMqL5ccY"
},
"id": 1
}
```
### `platform.sampleValidators`
Sample validators from the specified Subnet.
**Signature:**
```
platform.sampleValidators(
{
size: int,
subnetID: string, // optional
}
) ->
{
validators: []string
}
```
- `size` is the number of validators to sample.
- `subnetID` is the Subnet to sampled from. If omitted, defaults to the Primary Network.
- Each element of `validators` is the ID of a validator.
**Example Call:**
```sh
curl -X POST --data '{
"jsonrpc":"2.0",
"id" :1,
"method" :"platform.sampleValidators",
"params" :{
"size":2
}
}' -H 'content-type:application/json;' 127.0.0.1:9650/ext/bc/P
```
**Example Response:**
```json
{
"jsonrpc": "2.0",
"id": 1,
"result": {
"validators": [
"NodeID-MFrZFVCXPv5iCn6M9K6XduxGTYp891xXZ",
"NodeID-NFBbbJ4qCmNaCzeW7sxErhvWqvEQMnYcN"
]
}
}
```
### `platform.validatedBy`
Get the Subnet that validates a given blockchain.
**Signature:**
```
platform.validatedBy(
{
blockchainID: string
}
) -> { subnetID: string }
```
- `blockchainID` is the blockchain’s ID.
- `subnetID` is the ID of the Subnet that validates the blockchain.
**Example Call:**
```sh
curl -X POST --data '{
"jsonrpc": "2.0",
"method": "platform.validatedBy",
"params": {
"blockchainID": "KDYHHKjM4yTJTT8H8qPs5KXzE6gQH5TZrmP1qVr1P6qECj3XN"
},
"id": 1
}' -H 'content-type:application/json;' 127.0.0.1:9650/ext/bc/P
```
**Example Response:**
```json
{
"jsonrpc": "2.0",
"result": {
"subnetID": "2bRCr6B4MiEfSjidDwxDpdCyviwnfUVqB2HGwhm947w9YYqb7r"
},
"id": 1
}
```
### `platform.validates`
Get the IDs of the blockchains a Subnet validates.
**Signature:**
```
platform.validates(
{
subnetID: string
}
) -> { blockchainIDs: []string }
```
- `subnetID` is the Subnet’s ID.
- Each element of `blockchainIDs` is the ID of a blockchain the Subnet validates.
**Example Call:**
```sh
curl -X POST --data '{
"jsonrpc": "2.0",
"method": "platform.validates",
"params": {
"subnetID":"2bRCr6B4MiEfSjidDwxDpdCyviwnfUVqB2HGwhm947w9YYqb7r"
},
"id": 1
}' -H 'content-type:application/json;' 127.0.0.1:9650/ext/bc/P
```
**Example Response:**
```json
{
"jsonrpc": "2.0",
"result": {
"blockchainIDs": [
"KDYHHKjM4yTJTT8H8qPs5KXzE6gQH5TZrmP1qVr1P6qECj3XN",
"2TtHFqEAAJ6b33dromYMqfgavGPF3iCpdG3hwNMiart2aB5QHi"
]
},
"id": 1
}
```
# Transaction Format (/docs/rpcs/p-chain/txn-format)
---
title: Transaction Format
---
This file is meant to be the single source of truth for how we serialize
transactions in Avalanche's Platform Virtual Machine, aka the `Platform Chain`
or `P-Chain`. This document uses the [primitive serialization](/docs/api-reference/standards/serialization-primitives) format for packing and
[secp256k1](/docs/api-reference/standards/cryptographic-primitives#secp256k1-addresses) for cryptographic
user identification.
## Codec ID
Some data is prepended with a codec ID (unt16) that denotes how the data should
be deserialized. Right now, the only valid codec ID is 0 (`0x00 0x00`).
## Proof of Possession
A BLS public key and a proof of possession of the key.
### What Proof of Possession Contains
- **PublicKey** is the 48 byte representation of the public key.
- **Signature** is the 96 byte signature by the private key over its public key.
### Proof of Possession Specification
```text
+------------+----------+-------------------------+
| public_key : [48]byte | 48 bytes |
+------------+----------+-------------------------+
| signature : [96]byte | 96 bytes |
+------------+----------+-------------------------+
| 144 bytes |
+-------------------------+
```
### Proof of Possession Specification
```text
message ProofOfPossession {
bytes public_key = 1; // 48 bytes
bytes signature = 2; // 96 bytes
}
```
### Proof of Possession Example
```text
// Public Key:
0x85, 0x02, 0x5b, 0xca, 0x6a, 0x30, 0x2d, 0xc6,
0x13, 0x38, 0xff, 0x49, 0xc8, 0xba, 0xa5, 0x72,
0xde, 0xd3, 0xe8, 0x6f, 0x37, 0x59, 0x30, 0x4c,
0x7f, 0x61, 0x8a, 0x2a, 0x25, 0x93, 0xc1, 0x87,
0xe0, 0x80, 0xa3, 0xcf, 0xde, 0xc9, 0x50, 0x40,
0x30, 0x9a, 0xd1, 0xf1, 0x58, 0x95, 0x30, 0x67,
// Signature:
0x8b, 0x1d, 0x61, 0x33, 0xd1, 0x7e, 0x34, 0x83,
0x22, 0x0a, 0xd9, 0x60, 0xb6, 0xfd, 0xe1, 0x1e,
0x4e, 0x12, 0x14, 0xa8, 0xce, 0x21, 0xef, 0x61,
0x62, 0x27, 0xe5, 0xd5, 0xee, 0xf0, 0x70, 0xd7,
0x50, 0x0e, 0x6f, 0x7d, 0x44, 0x52, 0xc5, 0xa7,
0x60, 0x62, 0x0c, 0xc0, 0x67, 0x95, 0xcb, 0xe2,
0x18, 0xe0, 0x72, 0xeb, 0xa7, 0x6d, 0x94, 0x78,
0x8d, 0x9d, 0x01, 0x17, 0x6c, 0xe4, 0xec, 0xad,
0xfb, 0x96, 0xb4, 0x7f, 0x94, 0x22, 0x81, 0x89,
0x4d, 0xdf, 0xad, 0xd1, 0xc1, 0x74, 0x3f, 0x7f,
0x54, 0x9f, 0x1d, 0x07, 0xd5, 0x9d, 0x55, 0x65,
0x59, 0x27, 0xf7, 0x2b, 0xc6, 0xbf, 0x7c, 0x12
```
## Transferable Output
Transferable outputs wrap an output with an asset ID.
### What Transferable Output Contains
A transferable output contains an `AssetID` and an `Output`.
- **`AssetID`** is a 32-byte array that defines which asset this output
references. The only valid `AssetID` is the AVAX `AssetID`.
- **`Output`** is an output, as defined below. For example, this can be a SECP256K1 transfer output.
### Gantt Transferable Output Specification
```text
+----------+----------+-------------------------+
| asset_id : [32]byte | 32 bytes |
+----------+----------+-------------------------+
| output : Output | size(output) bytes |
+----------+----------+-------------------------+
| 32 + size(output) bytes |
+-------------------------+
```
### Proto Transferable Output Specification
```text
message TransferableOutput {
bytes asset_id = 1; // 32 bytes
Output output = 2; // size(output)
}
```
### Transferable Output Example
Let's make a transferable output:
- `AssetID: 0x6870b7d66ac32540311379e5b5dbad28ec7eb8ddbfc8f4d67299ebb48475907a`
- `Output: "Example SECP256K1 Transfer Output from below"`
```text
[
AssetID <- 0x6870b7d66ac32540311379e5b5dbad28ec7eb8ddbfc8f4d67299ebb48475907a,
Output <- 0x0000000700000000ee5be5c000000000000000000000000100000001da2bee01be82ecc00c34f361eda8eb30fb5a715c,
]
=
[
// assetID:
0x68, 0x70, 0xb7, 0xd6, 0x6a, 0xc3, 0x25, 0x40,
0x31, 0x13, 0x79, 0xe5, 0xb5, 0xdb, 0xad, 0x28,
0xec, 0x7e, 0xb8, 0xdd, 0xbf, 0xc8, 0xf4, 0xd6,
0x72, 0x99, 0xeb, 0xb4, 0x84, 0x75, 0x90, 0x7a,
// output:
0x00, 0x00, 0x00, 0x07, 0x00, 0x00, 0x00, 0x00,
0xee, 0x5b, 0xe5, 0xc0, 0x00, 0x00, 0x00, 0x00,
0x00, 0x00, 0x00, 0x00, 0x00, 0x00, 0x00, 0x01,
0x00, 0x00, 0x00, 0x01, 0xda, 0x2b, 0xee, 0x01,
0xbe, 0x82, 0xec, 0xc0, 0x0c, 0x34, 0xf3, 0x61,
0xed, 0xa8, 0xeb, 0x30, 0xfb, 0x5a, 0x71, 0x5c,
]
```
## Transferable Input
Transferable inputs describe a specific UTXO with a provided transfer input.
### What Transferable Input Contains
A transferable input contains a `TxID`, `UTXOIndex` `AssetID` and an `Input`.
- **`TxID`** is a 32-byte array that defines which transaction this input is consuming an output from.
- **`UTXOIndex`** is an int that defines which utxo this input is consuming the specified transaction.
- **`AssetID`** is a 32-byte array that defines which asset this input
references. The only valid `AssetID` is the AVAX `AssetID`.
- **`Input`** is a transferable input object.
### Gantt Transferable Input Specification
```text
+------------+----------+------------------------+
| tx_id : [32]byte | 32 bytes |
+------------+----------+------------------------+
| utxo_index : int | 04 bytes |
+------------+----------+------------------------+
| asset_id : [32]byte | 32 bytes |
+------------+----------+------------------------+
| input : Input | size(input) bytes |
+------------+----------+------------------------+
| 68 + size(input) bytes |
+------------------------+
```
### Proto Transferable Input Specification
```text
message TransferableInput {
bytes tx_id = 1; // 32 bytes
uint32 utxo_index = 2; // 04 bytes
bytes asset_id = 3; // 32 bytes
Input input = 4; // size(input)
}
```
### Transferable Input Example
Let's make a transferable input:
- **`TxID`**: `0x0dfafbdf5c81f635c9257824ff21c8e3e6f7b632ac306e11446ee540d34711a15`
- **`UTXOIndex`**: `0`
- **`AssetID`**: `0x6870b7d66ac32540311379e5b5dbad28ec7eb8ddbfc8f4d67299ebb48475907a`
- **`Input`**: `"Example SECP256K1 Transfer Input from below"`
```text
[
TxID <- 0x0dfafbdf5c81f635c9257824ff21c8e3e6f7b632ac306e11446ee540d34711a15
UTXOIndex <- 0x00000001
AssetID <- 0x6870b7d66ac32540311379e5b5dbad28ec7eb8ddbfc8f4d67299ebb48475907a
Input <- 0x0000000500000000ee6b28000000000100000000
]
=
[
// txID:
0xdf, 0xaf, 0xbd, 0xf5, 0xc8, 0x1f, 0x63, 0x5c,
0x92, 0x57, 0x82, 0x4f, 0xf2, 0x1c, 0x8e, 0x3e,
0x6f, 0x7b, 0x63, 0x2a, 0xc3, 0x06, 0xe1, 0x14,
0x46, 0xee, 0x54, 0x0d, 0x34, 0x71, 0x1a, 0x15,
// utxoIndex:
0x00, 0x00, 0x00, 0x01,
// assetID:
0x68, 0x70, 0xb7, 0xd6, 0x6a, 0xc3, 0x25, 0x40,
0x31, 0x13, 0x79, 0xe5, 0xb5, 0xdb, 0xad, 0x28,
0xec, 0x7e, 0xb8, 0xdd, 0xbf, 0xc8, 0xf4, 0xd6,
0x72, 0x99, 0xeb, 0xb4, 0x84, 0x75, 0x90, 0x7a,
// input:
0x00, 0x00, 0x00, 0x05, 0x00, 0x00, 0x00, 0x00,
0xee, 0x6b, 0x28, 0x00, 0x00, 0x00, 0x00, 0x01,
0x00, 0x00, 0x00, 0x00
]
```
## Outputs
Outputs have two possible type: `SECP256K1TransferOutput`, `SECP256K1OutputOwners`.
## SECP256K1 Transfer Output
A [secp256k1](/docs/api-reference/standards/cryptographic-primitives#secp256k1-addresses) transfer output
allows for sending a quantity of an asset to a collection of addresses after a
specified Unix time. The only valid asset is AVAX.
### What SECP256K1 Transfer Output Contains
A secp256k1 transfer output contains a `TypeID`, `Amount`, `Locktime`, `Threshold`, and `Addresses`.
- **`TypeID`** is the ID for this output type. It is `0x00000007`.
- **`Amount`** is a long that specifies the quantity of the asset that this output owns. Must be positive.
- **`Locktime`** is a long that contains the Unix timestamp that this output can
be spent after. The Unix timestamp is specific to the second.
- **`Threshold`** is an int that names the number of unique signatures required
to spend the output. Must be less than or equal to the length of
**`Addresses`**. If **`Addresses`** is empty, must be 0.
- **`Addresses`** is a list of unique addresses that correspond to the private
keys that can be used to spend this output. Addresses must be sorted
lexicographically.
### Gantt SECP256K1 Transfer Output Specification
```text
+-----------+------------+--------------------------------+
| type_id : int | 4 bytes |
+-----------+------------+--------------------------------+
| amount : long | 8 bytes |
+-----------+------------+--------------------------------+
| locktime : long | 8 bytes |
+-----------+------------+--------------------------------+
| threshold : int | 4 bytes |
+-----------+------------+--------------------------------+
| addresses : [][20]byte | 4 + 20 * len(addresses) bytes |
+-----------+------------+--------------------------------+
| 28 + 20 * len(addresses) bytes |
+--------------------------------+
```
### Proto SECP256K1 Transfer Output Specification
```text
message SECP256K1TransferOutput {
uint32 type_id = 1; // 04 bytes
uint64 amount = 2; // 08 bytes
uint64 locktime = 3; // 08 bytes
uint32 threshold = 4; // 04 bytes
repeated bytes addresses = 5; // 04 bytes + 20 bytes * len(addresses)
}
```
### SECP256K1 Transfer Output Example
Let's make a secp256k1 transfer output with:
- **`TypeID`**: 7
- **`Amount`**: 3999000000
- **`Locktime`**: 0
- **`Threshold`**: 1
- **`Addresses`**:
- 0xda2bee01be82ecc00c34f361eda8eb30fb5a715c
```text
[
TypeID <- 0x00000007
Amount <- 0x00000000ee5be5c0
Locktime <- 0x0000000000000000
Threshold <- 0x00000001
Addresses <- [
0xda2bee01be82ecc00c34f361eda8eb30fb5a715c,
]
]
=
[
// type_id:
0x00, 0x00, 0x00, 0x07,
// amount:
0x00, 0x00, 0x00, 0x00, 0xee, 0x5b, 0xe5, 0xc0,
// locktime:
0x00, 0x00, 0x00, 0x00, 0x00, 0x00, 0x00, 0x00,
// threshold:
0x00, 0x00, 0x00, 0x01,
// number of addresses:
0x00, 0x00, 0x00, 0x01,
// addrs[0]:
0xda, 0x2b, 0xee, 0x01, 0xbe, 0x82, 0xec, 0xc0,
0x0c, 0x34, 0xf3, 0x61, 0xed, 0xa8, 0xeb, 0x30,
0xfb, 0x5a, 0x71, 0x5c,
]
```
## SECP256K1 Output Owners Output
A [secp256k1](/docs/api-reference/standards/cryptographic-primitives#secp256k1-addresses) output owners
output will receive the staking rewards when the lock up period ends.
### What SECP256K1 Output Owners Output Contains
A secp256k1 output owners output contains a `TypeID`, `Locktime`, `Threshold`, and `Addresses`.
- **`TypeID`** is the ID for this output type. It is `0x0000000b`.
- **`Locktime`** is a long that contains the Unix timestamp that this output can
be spent after. The Unix timestamp is specific to the second.
- **`Threshold`** is an int that names the number of unique signatures required
to spend the output. Must be less than or equal to the length of
**`Addresses`**. If **`Addresses`** is empty, must be 0.
- **`Addresses`** is a list of unique addresses that correspond to the private
keys that can be used to spend this output. Addresses must be sorted
lexicographically.
### Gantt SECP256K1 Output Owners Output Specification
```text
+-----------+------------+--------------------------------+
| type_id : int | 4 bytes |
+-----------+------------+--------------------------------+
| locktime : long | 8 bytes |
+-----------+------------+--------------------------------+
| threshold : int | 4 bytes |
+-----------+------------+--------------------------------+
| addresses : [][20]byte | 4 + 20 * len(addresses) bytes |
+-----------+------------+--------------------------------+
| 20 + 20 * len(addresses) bytes |
+--------------------------------+
```
### Proto SECP256K1 Output Owners Output Specification
```text
message SECP256K1OutputOwnersOutput {
uint32 type_id = 1; // 04 bytes
uint64 locktime = 2; // 08 bytes
uint32 threshold = 3; // 04 bytes
repeated bytes addresses = 4; // 04 bytes + 20 bytes * len(addresses)
}
```
### SECP256K1 Output Owners Output Example
Let's make a secp256k1 output owners output with:
- **`TypeID`**: 11
- **`Locktime`**: 0
- **`Threshold`**: 1
- **`Addresses`**:
- 0xda2bee01be82ecc00c34f361eda8eb30fb5a715c
```text
[
TypeID <- 0x0000000b
Locktime <- 0x0000000000000000
Threshold <- 0x00000001
Addresses <- [
0xda2bee01be82ecc00c34f361eda8eb30fb5a715c,
]
]
=
[
// type_id:
0x00, 0x00, 0x00, 0x0b,
// locktime:
0x00, 0x00, 0x00, 0x00, 0x00, 0x00, 0x00, 0x00,
// threshold:
0x00, 0x00, 0x00, 0x01,
// number of addresses:
0x00, 0x00, 0x00, 0x01,
// addrs[0]:
0xda, 0x2b, 0xee, 0x01, 0xbe, 0x82, 0xec, 0xc0,
0x0c, 0x34, 0xf3, 0x61, 0xed, 0xa8, 0xeb, 0x30,
0xfb, 0x5a, 0x71, 0x5c,
]
```
## Inputs
Inputs have one possible type: `SECP256K1TransferInput`.
## SECP256K1 Transfer Input
A [secp256k1](/docs/api-reference/standards/cryptographic-primitives#secp256k1-addresses) transfer input
allows for spending an unspent secp256k1 transfer output.
### What SECP256K1 Transfer Input Contains
A secp256k1 transfer input contains an `Amount` and `AddressIndices`.
- **`TypeID`** is the ID for this output type. It is `0x00000005`.
- **`Amount`** is a long that specifies the quantity that this input should be
consuming from the UTXO. Must be positive. Must be equal to the amount
specified in the UTXO.
- **`AddressIndices`** is a list of unique ints that define the private keys are
being used to spend the UTXO. Each UTXO has an array of addresses that can
spend the UTXO. Each int represents the index in this address array that will
sign this transaction. The array must be sorted low to high.
### Gantt SECP256K1 Transfer Input Specification
```text
+-------------------------+-------------------------------------+
| type_id : int | 4 bytes |
+-----------------+-------+-------------------------------------+
| amount : long | 8 bytes |
+-----------------+-------+-------------------------------------+
| address_indices : []int | 4 + 4 * len(address_indices) bytes |
+-----------------+-------+-------------------------------------+
| 16 + 4 * len(address_indices) bytes |
+-------------------------------------+
```
**Proto SECP256K1 Transfer Input Specification**
```text
message SECP256K1TransferInput {
uint32 type_id = 1; // 04 bytes
uint64 amount = 2; // 08 bytes
repeated uint32 address_indices = 3; // 04 bytes + 4 bytes * len(address_indices)
}
```
### SECP256K1 Transfer Input Example
Let's make a payment input with:
- **`TypeID`**: 5
- **`Amount`**: 4000000000
- **`AddressIndices`**: \[0\]
```text
[
TypeID <- 0x00000005
Amount <- 0x00000000ee6b2800,
AddressIndices <- [0x00000000]
]
=
[
// type_id:
0x00, 0x00, 0x00, 0x05,
// amount:
0x00, 0x00, 0x00, 0x00, 0xee, 0x6b, 0x28, 0x00,
// length:
0x00, 0x00, 0x00, 0x01,
// address_indices[0]
0x00, 0x00, 0x00, 0x00
]
```
## Unsigned Transactions
Unsigned transactions contain the full content of a transaction with only the
signatures missing. Unsigned transactions have six possible types:
`AddValidatorTx`, `AddSubnetValidatorTx`, `AddDelegatorTx`, `CreateSubnetTx`,
`ImportTx`, and `ExportTx`. They embed `BaseTx`, which contains common fields
and operations.
## Unsigned BaseTx
### What Base TX Contains
A base TX contains a `TypeID`, `NetworkID`, `BlockchainID`, `Outputs`, `Inputs`, and `Memo`.
- **`TypeID`** is the ID for this type. It is `0x00000000`.
- **`NetworkID`** is an int that defines which network this transaction is meant
to be issued to. This value is meant to support transaction routing and is not
designed for replay attack prevention.
- **`BlockchainID`** is a 32-byte array that defines which blockchain this
transaction was issued to. This is used for replay attack prevention for
transactions that could potentially be valid across network or blockchain.
- **`Outputs`** is an array of transferable output objects. Outputs must be
sorted lexicographically by their serialized representation. The total
quantity of the assets created in these outputs must be less than or equal to
the total quantity of each asset consumed in the inputs minus the transaction
fee.
- **`Inputs`** is an array of transferable input objects. Inputs must be sorted
and unique. Inputs are sorted first lexicographically by their **`TxID`** and
then by the **`UTXOIndex`** from low to high. If there are inputs that have
the same **`TxID`** and **`UTXOIndex`**, then the transaction is invalid as
this would result in a double spend.
- **`Memo`** Memo field contains arbitrary bytes, up to 256 bytes.
### Gantt Base TX Specification
```text
+---------------+----------------------+-----------------------------------------+
| type_id : int | 4 bytes |
+---------------+----------------------+-----------------------------------------+
| network_id : int | 4 bytes |
+---------------+----------------------+-----------------------------------------+
| blockchain_id : [32]byte | 32 bytes |
+---------------+----------------------+-----------------------------------------+
| outputs : []TransferableOutput | 4 + size(outputs) bytes |
+---------------+----------------------+-----------------------------------------+
| inputs : []TransferableInput | 4 + size(inputs) bytes |
+---------------+----------------------+-----------------------------------------+
| memo : [256]byte | 4 + size(memo) bytes |
+---------------+----------------------+-----------------------------------------+
| 52 + size(outputs) + size(inputs) + size(memo) bytes |
+------------------------------------------------------+
```
### Proto Base TX Specification
```text
message BaseTx {
uint32 type_id = 1; // 04 bytes
uint32 network_id = 2; // 04 bytes
bytes blockchain_id = 3; // 32 bytes
repeated Output outputs = 4; // 04 bytes + size(outs)
repeated Input inputs = 5; // 04 bytes + size(ins)
bytes memo = 6; // 04 bytes + size(memo)
}
```
### Base TX Example
Let's make a base TX that uses the inputs and outputs from the previous examples:
- **`TypeID`**: `0`
- **`NetworkID`**: `12345`
- **`BlockchainID`**: `0x000000000000000000000000000000000000000000000000000000000000000`
- **`Outputs`**:
- `"Example Transferable Output as defined above"`
- **`Inputs`**:
- `"Example Transferable Input as defined above"`
```text
[
TypeID <- 0x00000000
NetworkID <- 0x00003039
BlockchainID <- 0x000000000000000000000000000000000000000000000000000000000000000
Outputs <- [
0x6870b7d66ac32540311379e5b5dbad28ec7eb8ddbfc8f4d67299ebb48475907a0000000700000000ee5be5c000000000000000000000000100000001da2bee01be82ecc00c34f361eda8eb30fb5a715c
]
Inputs <- [
0xdfafbdf5c81f635c9257824ff21c8e3e6f7b632ac306e11446ee540d34711a15000000016870b7d66ac32540311379e5b5dbad28ec7eb8ddbfc8f4d67299ebb48475907a0000000500000000ee6b28000000000100000000
]
]
=
[
// type_id:
0x00, 0x00, 0x00, 0x00,
// networkID:
0x00, 0x00, 0x30, 0x39,
// blockchainID:
0x00, 0x00, 0x00, 0x00, 0x00, 0x00, 0x00, 0x00,
0x00, 0x00, 0x00, 0x00, 0x00, 0x00, 0x00, 0x00,
0x00, 0x00, 0x00, 0x00, 0x00, 0x00, 0x00, 0x00,
0x00, 0x00, 0x00, 0x00, 0x00, 0x00, 0x00, 0x00,
// number of outputs:
0x00, 0x00, 0x00, 0x01,
// transferable output:
0x68, 0x70, 0xb7, 0xd6, 0x6a, 0xc3, 0x25, 0x40,
0x31, 0x13, 0x79, 0xe5, 0xb5, 0xdb, 0xad, 0x28,
0xec, 0x7e, 0xb8, 0xdd, 0xbf, 0xc8, 0xf4, 0xd6,
0x72, 0x99, 0xeb, 0xb4, 0x84, 0x75, 0x90, 0x7a,
0x00, 0x00, 0x00, 0x07, 0x00, 0x00, 0x00, 0x00,
0xee, 0x5b, 0xe5, 0xc0, 0x00, 0x00, 0x00, 0x00,
0x00, 0x00, 0x00, 0x00, 0x00, 0x00, 0x00, 0x01,
0x00, 0x00, 0x00, 0x01, 0xda, 0x2b, 0xee, 0x01,
0xbe, 0x82, 0xec, 0xc0, 0x0c, 0x34, 0xf3, 0x61,
0xed, 0xa8, 0xeb, 0x30, 0xfb, 0x5a, 0x71, 0x5c,
// number of inputs:
0x00, 0x00, 0x00, 0x01,
// transferable input:
0xdf, 0xaf, 0xbd, 0xf5, 0xc8, 0x1f, 0x63, 0x5c,
0x92, 0x57, 0x82, 0x4f, 0xf2, 0x1c, 0x8e, 0x3e,
0x6f, 0x7b, 0x63, 0x2a, 0xc3, 0x06, 0xe1, 0x14,
0x46, 0xee, 0x54, 0x0d, 0x34, 0x71, 0x1a, 0x15,
0x00, 0x00, 0x00, 0x01,
0x68, 0x70, 0xb7, 0xd6, 0x6a, 0xc3, 0x25, 0x40,
0x31, 0x13, 0x79, 0xe5, 0xb5, 0xdb, 0xad, 0x28,
0xec, 0x7e, 0xb8, 0xdd, 0xbf, 0xc8, 0xf4, 0xd6,
0x72, 0x99, 0xeb, 0xb4, 0x84, 0x75, 0x90, 0x7a,
0x00, 0x00, 0x00, 0x05, 0x00, 0x00, 0x00, 0x00,
0xee, 0x6b, 0x28, 0x00, 0x00, 0x00, 0x00, 0x01,
0x00, 0x00, 0x00, 0x00,
// Memo length:
0x00, 0x00, 0x00, 0x00,
]
```
## Unsigned Add Validator TX
### What Unsigned Add Validator TX Contains
An unsigned add validator TX contains a `BaseTx`, `Validator`, `Stake`,
`RewardsOwner`, and `Shares`. The `TypeID` for this type is `0x0000000c`.
- **`BaseTx`**
- **`Validator`** Validator has a `NodeID`, `StartTime`, `EndTime`, and `Weight`
- **`NodeID`** is 20 bytes which is the node ID of the validator.
- **`StartTime`** is a long which is the Unix time when the validator starts validating.
- **`EndTime`** is a long which is the Unix time when the validator stops validating.
- **`Weight`** is a long which is the amount the validator stakes
- **`Stake`** Stake has `LockedOuts`
- **`LockedOuts`** An array of Transferable Outputs that are locked for the
duration of the staking period. At the end of the staking period, these
outputs are refunded to their respective addresses.
- **`RewardsOwner`** A `SECP256K1OutputOwners`
- **`Shares`** 10,000 times percentage of reward taken from delegators
### Gantt Unsigned Add Validator TX Specification
```text
+---------------+-----------------------+-----------------------------------------+
| base_tx : BaseTx | size(base_tx) bytes |
+---------------+-----------------------+-----------------------------------------+
| validator : Validator | 44 bytes |
+---------------+-----------------------+-----------------------------------------+
| stake : Stake | size(LockedOuts) bytes |
+---------------+-----------------------+-----------------------------------------+
| rewards_owner : SECP256K1OutputOwners | size(rewards_owner) bytes |
+---------------+-----------------------+-----------------------------------------+
| shares : Shares | 4 bytes |
+---------------+-----------------------+-----------------------------------------+
| 48 + size(stake) + size(rewards_owner) + size(base_tx) bytes |
+--------------------------------------------------------------+
```
### Proto Unsigned Add Validator TX Specification
```text
message AddValidatorTx {
BaseTx base_tx = 1; // size(base_tx)
Validator validator = 2; // 44 bytes
Stake stake = 3; // size(LockedOuts)
SECP256K1OutputOwners rewards_owner = 4; // size(rewards_owner)
uint32 shares = 5; // 04 bytes
}
```
### Unsigned Add Validator TX Example
Let's make an unsigned add validator TX that uses the inputs and outputs from the previous examples:
- **`BaseTx`**: `"Example BaseTx as defined above with ID set to 0c"`
- **`Validator`** Validator has a `NodeID`, `StartTime`, `EndTime`, and `Weight`
- **`NodeID`** is 20 bytes which is the node ID of the validator.
- **`StartTime`** is a long which is the Unix time when the validator starts validating.
- **`EndTime`** is a long which is the Unix time when the validator stops validating.
- **`Weight`** is a long which is the amount the validator stakes
- **`Stake`**: `0x0000000139c33a499ce4c33a3b09cdd2cfa01ae70dbf2d18b2d7d168524440e55d55008800000007000001d1a94a2000000000000000000000000001000000013cb7d3842e8cee6a0ebd09f1fe884f6861e1b29c`
- **`RewardsOwner`**: `0x0000000b00000000000000000000000100000001da2bee01be82ecc00c34f361eda8eb30fb5a715c`
- **`Shares`**: `0x00000064`
```text
[
BaseTx <- 0x0000000c000030390000000000000000000000000000000000000000000000000000000000000006870b7d66ac32540311379e5b5dbad28ec7eb8ddbfc8f4d67299ebb48475907a0000000700000000ee5be5c000000000000000000000000100000001da2bee01be82ecc00c34f361eda8eb30fb5a715cdfafbdf5c81f635c9257824ff21c8e3e6f7b632ac306e11446ee540d34711a15000000016870b7d66ac32540311379e5b5dbad28ec7eb8ddbfc8f4d67299ebb48475907a0000000500000000ee6b28000000000100000000
NodeID <- 0xe9094f73698002fd52c90819b457b9fbc866ab80
StarTime <- 0x000000005f21f31d
EndTime <- 0x000000005f497dc6
Weight <- 0x000000000000d431
Stake <- 0x0000000139c33a499ce4c33a3b09cdd2cfa01ae70dbf2d18b2d7d168524440e55d55008800000007000001d1a94a2000000000000000000000000001000000013cb7d3842e8cee6a0ebd09f1fe884f6861e1b29c
RewardsOwner <- 0x0000000b00000000000000000000000100000001da2bee01be82ecc00c34f361eda8eb30fb5a715c
Shares <- 0x00000064
]
=
[
// base tx:
0x00, 0x00, 0x00, 0x0c, 0x00, 0x00, 0x30, 0x39,
0x00, 0x00, 0x00, 0x00, 0x00, 0x00, 0x00, 0x00,
0x00, 0x00, 0x00, 0x00, 0x00, 0x00, 0x00, 0x00,
0x00, 0x00, 0x00, 0x00, 0x00, 0x00, 0x00, 0x00,
0x00, 0x00, 0x00, 0x00, 0x00, 0x00, 0x00, 0x00,
0x00, 0x00, 0x00, 0x01, 0x68, 0x70, 0xb7, 0xd6,
0x6a, 0xc3, 0x25, 0x40, 0x31, 0x13, 0x79, 0xe5,
0xb5, 0xdb, 0xad, 0x28, 0xec, 0x7e, 0xb8, 0xdd,
0xbf, 0xc8, 0xf4, 0xd6,
0x72, 0x99, 0xeb, 0xb4, 0x84, 0x75, 0x90, 0x7a,
0x00, 0x00, 0x00, 0x07, 0x00, 0x00, 0x00, 0x00,
0xee, 0x5b, 0xe5, 0xc0, 0x00, 0x00, 0x00, 0x00,
0x00, 0x00, 0x00, 0x00, 0x00, 0x00, 0x00, 0x01,
0x00, 0x00, 0x00, 0x01, 0xda, 0x2b, 0xee, 0x01,
0xbe, 0x82, 0xec, 0xc0, 0x0c, 0x34, 0xf3, 0x61,
0xed, 0xa8, 0xeb, 0x30, 0xfb, 0x5a, 0x71, 0x5c,
0x00, 0x00, 0x00, 0x01,
0xdf, 0xaf, 0xbd, 0xf5, 0xc8, 0x1f, 0x63, 0x5c,
0x92, 0x57, 0x82, 0x4f, 0xf2, 0x1c, 0x8e, 0x3e,
0x6f, 0x7b, 0x63, 0x2a, 0xc3, 0x06, 0xe1, 0x14,
0x46, 0xee, 0x54, 0x0d, 0x34, 0x71, 0x1a, 0x15,
0x00, 0x00, 0x00, 0x01,
0x68, 0x70, 0xb7, 0xd6, 0x6a, 0xc3, 0x25, 0x40,
0x31, 0x13, 0x79, 0xe5, 0xb5, 0xdb, 0xad, 0x28,
0xec, 0x7e, 0xb8, 0xdd, 0xbf, 0xc8, 0xf4, 0xd6,
0x72, 0x99, 0xeb, 0xb4, 0x84, 0x75, 0x90, 0x7a,
0x00, 0x00, 0x00, 0x05, 0x00, 0x00, 0x00, 0x00,
0xee, 0x6b, 0x28, 0x00, 0x00, 0x00, 0x00, 0x01,
0x00, 0x00, 0x00, 0x00,
0x00, 0x00, 0x00, 0x00,
// Node ID
0xe9, 0x09, 0x4f, 0x73, 0x69, 0x80, 0x02, 0xfd,
0x52, 0xc9, 0x08, 0x19, 0xb4, 0x57, 0xb9, 0xfb,
0xc8, 0x66, 0xab, 0x80,
// StartTime
0x00, 0x00, 0x00, 0x00, 0x5f, 0x21, 0xf3, 0x1d,
// EndTime
0x00, 0x00, 0x00, 0x00, 0x5f, 0x49, 0x7d, 0xc6,
// Weight
0x00, 0x00, 0x00, 0x00, 0x00, 0x00, 0xd4, 0x31,
// Stake
0x00, 0x00, 0x00, 0x01, 0x39, 0xc3, 0x3a, 0x49,
0x9c, 0xe4, 0xc3, 0x3a, 0x3b, 0x09, 0xcd, 0xd2,
0xcf, 0xa0, 0x1a, 0xe7, 0x0d, 0xbf, 0x2d, 0x18,
0xb2, 0xd7, 0xd1, 0x68, 0x52, 0x44, 0x40, 0xe5,
0x5d, 0x55, 0x00, 0x88, 0x00, 0x00, 0x00, 0x07,
0x00, 0x00, 0x01, 0xd1, 0xa9, 0x4a, 0x20, 0x00,
0x00, 0x00, 0x00, 0x00, 0x00, 0x00, 0x00, 0x00,
0x00, 0x00, 0x00, 0x01, 0x00, 0x00, 0x00, 0x01,
0x3c, 0xb7, 0xd3, 0x84, 0x2e, 0x8c, 0xee, 0x6a,
0x0e, 0xbd, 0x09, 0xf1, 0xfe, 0x88, 0x4f, 0x68,
0x61, 0xe1, 0xb2, 0x9c,
// RewardsOwner
0x00, 0x00, 0x00, 0x0b, 0x00, 0x00, 0x00, 0x00,
0x00, 0x00, 0x00, 0x00, 0x00, 0x00, 0x00, 0x01,
0x00, 0x00, 0x00, 0x01, 0xda, 0x2b, 0xee, 0x01,
0xbe, 0x82, 0xec, 0xc0, 0x0c, 0x34, 0xf3, 0x61,
0xed, 0xa8, 0xeb, 0x30, 0xfb, 0x5a, 0x71, 0x5c,
// Shares
0x00, 0x00, 0x00, 0x64,
]
```
## Unsigned Remove Avalanche L1 Validator TX
### What Unsigned Remove Avalanche L1 Validator TX Contains
An unsigned remove Avalanche L1 validator TX contains a `BaseTx`, `NodeID`,
`SubnetID`, and `SubnetAuth`. The `TypeID` for this type is 23 or `0x00000017`.
- **`BaseTx`**
- **`NodeID`** is the 20 byte node ID of the validator.
- **`SubnetID`** is the 32 byte Avalanche L1 ID (SubnetID) that the validator is being removed from.
- **`SubnetAuth`** contains `SigIndices` and has a type id of `0x0000000a`.
`SigIndices` is a list of unique ints that define the addresses signing the
control signature which proves that the issuer has the right to remove the
node from the Avalanche L1. The array must be sorted low to high.
### Gantt Unsigned Remove Avalanche L1 Validator TX Specification
```text
+---------------+----------------------+------------------------------------------------+
| base_tx : BaseTx | size(base_tx) bytes |
+---------------+----------------------+------------------------------------------------+
| node_id : [20]byte | 20 bytes |
+---------------+----------------------+------------------------------------------------+
| subnet_id : [32]byte | 32 bytes |
+---------------+----------------------+------------------------------------------------+
| sig_indices : SubnetAuth | 4 bytes + len(sig_indices) bytes |
+---------------+----------------------+------------------------------------------------+
| 56 + len(sig_indices) + size(base_tx) bytes |
+---------------------------------------------------------------------------------------+
```
### Proto Unsigned Remove Avalanche L1 Validator TX Specification
```text
message RemoveSubnetValidatorTx {
BaseTx base_tx = 1; // size(base_tx)
string node_id = 2; // 20 bytes
SubnetID subnet_id = 3; // 32 bytes
SubnetAuth subnet_auth = 4; // 04 bytes + len(sig_indices)
}
```
### Unsigned Remove Avalanche L1 Validator TX Example
Let's make an unsigned remove Avalanche L1 validator TX that uses the inputs and
outputs from the previous examples:
- **`BaseTx`**: `"Example BaseTx as defined above with ID set to 17"`
- **`NodeID`**: `0xe902a9a86640bfdb1cd0e36c0cc982b83e5765fa`
- **`SubnetID`**: `0x4a177205df5c29929d06db9d941f83d5ea985de302015e99252d16469a6610db`
- **`SubnetAuth`**: `0x0000000a0000000100000000`
```text
[
BaseTx <- 0x0000000000013d0ad12b8ee8928edf248ca91ca55600fb383f07c32bff1d6dec472b25cf59a700000000000000000000000
NodeID <- 0xe902a9a86640bfdb1cd0e36c0cc982b83e5765fa
SubnetID <- 0x4a177205df5c29929d06db9d941f83d5ea985de302015e99252d16469a6610db
SubnetAuth <- 0x0000000a0000000100000000
]
=
[
// BaseTx
0x00, 0x00, 0x00, 0x17, 0x00, 0x00, 0x30, 0x39,
0x3d, 0x0a, 0xd1, 0x2b, 0x8e, 0xe8, 0x92, 0x8e,
0xdf, 0x24, 0x8c, 0xa9, 0x1c, 0xa5, 0x56, 0x00,
0xfb, 0x38, 0x3f, 0x07, 0xc3, 0x2b, 0xff, 0x1d,
0x6d, 0xec, 0x47, 0x2b, 0x25, 0xcf, 0x59, 0xa7,
0x00, 0x00, 0x00, 0x00, 0x00, 0x00, 0x00, 0x00,
0x00, 0x00, 0x00, 0x00,
// NodeID
0xe9, 0x02, 0xa9, 0xa8, 0x66, 0x40, 0xbf, 0xdb,
0x1c, 0xd0, 0xe3, 0x6c, 0x0c, 0xc9, 0x82, 0xb8,
0x3e, 0x57, 0x65, 0xfa,
// SubnetID
0x4a, 0x17, 0x72, 0x05, 0xdf, 0x5c, 0x29, 0x92,
0x9d, 0x06, 0xdb, 0x9d, 0x94, 0x1f, 0x83, 0xd5,
0xea, 0x98, 0x5d, 0xe3, 0x02, 0x01, 0x5e, 0x99,
0x25, 0x2d, 0x16, 0x46, 0x9a, 0x66, 0x10, 0xdb,
// SubnetAuth
// SubnetAuth TypeID
0x00, 0x00, 0x00, 0x0a,
// SigIndices length
0x00, 0x00, 0x00, 0x01,
// SigIndices
0x00, 0x00, 0x00, 0x00,
]
```
## Unsigned Add Permissionless Validator TX
### What Unsigned Add Permissionless Validator TX Contains
An unsigned add permissionless validator TX contains a `BaseTx`, `Validator`,
`SubnetID`, `Signer`, `StakeOuts`, `ValidatorRewardsOwner`,
`DelegatorRewardsOwner`, and `DelegationShares`. The `TypeID` for this type is
25 or `0x00000019`.
- **`BaseTx`**
- **`Validator`** Validator has a `NodeID`, `StartTime`, `EndTime`, and `Weight`
- **`NodeID`** is the 20 byte node ID of the validator.
- **`StartTime`** is a long which is the Unix time when the validator starts validating.
- **`EndTime`** is a long which is the Unix time when the validator stops validating.
- **`Weight`** is a long which is the amount the validator stakes
- **`SubnetID`** is the 32 byte Avalanche L1 ID (SubnetID) of the Avalanche L1 this validator will validate.
- **`Signer`** If the [SubnetID] is the primary network, [Signer] is the type ID
28 (`0x1C`) followed by a [Proof of Possession](#proof-of-possession). If the
[SubnetID] is not the primary network, this value is the empty signer, whose
byte representation is only the type ID 27 (`0x1B`).
- **`StakeOuts`** An array of Transferable Outputs. Where to send staked tokens when done validating.
- **`ValidatorRewardsOwner`** Where to send validation rewards when done validating.
- **`DelegatorRewardsOwner`** Where to send delegation rewards when done validating.
- **`DelegationShares`** a short which is the fee this validator charges
delegators as a percentage, times 10,000 For example, if this validator has
DelegationShares=300,000 then they take 30% of rewards from delegators.
### Gantt Unsigned Add Permissionless Validator TX Specification
```text
+---------------+----------------------+------------------------------------------------+
| base_tx : BaseTx | size(base_tx) bytes |
+---------------+----------------------+------------------------------------------------+
| validator : Validator | 44 bytes |
+---------------+----------------------+------------------------------------------------+
| subnet_id : [32]byte | 32 bytes |
+---------------+----------------------+------------------------------------------------+
| signer : Signer | 144 bytes |
+---------------+----------------------+------------------------------------------------+
| stake_outs : []TransferOut | 4 + size(stake_outs) bytes |
+---------------+----------------------+------------------------------------------------+
| validator_rewards_owner : SECP256K1OutputOwners | size(validator_rewards_owner) bytes |
+---------------+----------------------+------------------------------------------------+
| delegator_rewards_owner : SECP256K1OutputOwners | size(delegator_rewards_owner) bytes |
+---------------+----------------------+------------------------------------------------+
| delegation_shares : uint32 | 4 bytes |
+---------------+----------------------+------------------------------------------------+
| 232 + size(base_tx) + size(stake_outs) + |
| size(validator_rewards_owner) + size(delegator_rewards_owner) bytes |
+---------------------------------------------------------------------------------------+
```
### Proto Unsigned Add Permissionless Validator TX Specification
```text
message AddPermissionlessValidatorTx {
BaseTx base_tx = 1; // size(base_tx)
Validator validator = 2; // 44 bytes
SubnetID subnet_id = 3; // 32 bytes
Signer signer = 4; // 148 bytes
repeated TransferOut stake_outs = 5; // 4 bytes + size(stake_outs)
SECP256K1OutputOwners validator_rewards_owner = 6; // size(validator_rewards_owner) bytes
SECP256K1OutputOwners delegator_rewards_owner = 7; // size(delegator_rewards_owner) bytes
uint32 delegation_shares = 8; // 4 bytes
}
```
### Unsigned Add Permissionless Validator TX Example
Let's make an unsigned add permissionless validator TX that uses the inputs and
outputs from the previous examples:
- **`BaseTx`**: `"Example BaseTx as defined above with ID set to 1a"`
- **`Validator`**: `0x5fa29ed4356903dac2364713c60f57d8472c7dda000000006397616e0000000063beee6e000001d1a94a2000`
- **`SubnetID`**: `0xf3086d7bfc35be1c68db664ba9ce61a2060126b0d6b4bfb09fd7a5fb7678cada`
- **`Signer`**: `0x0000001ca5af179e4188583893c2b99e1a8be27d90a9213cfbff1d75b74fe2bc9f3b072c2ded0863a9d9acd9033f223295810e429238e28d3c9b7f7212b63d746b2ae73a54fe08a3de61b132f2f89e9eeff97d4d7ca3a3c88986aa855cd36296fcfe8f02162d0258be494d267d4c5798bc081ab602ded90b0fc16d8a035e68ff5294794cb63ff1ee068fbfc2b4c8cd2d08ebf297`
- **`StakeOuts`**: `0x000000013d0ad12b8ee8928edf248ca91ca55600fb383f07c32bff1d6dec472b25cf59a700000007000001d1a94a20000000000000000000000000010000000133eeffc64785cf9d80e7731d9f31f67bd03c5cf0`
- **`ValidatorRewardsOwner`**: `0x0000000b0000000000000000000000010000000172f3eb9aeaf8283011ce6e437fdecd65eace8f52`
- **`DelegatorRewardsOwner`**: `0x0000000b00000000000000000000000100000001b2b91313ac487c222445254e26cd026d21f6f440`
- **`DelegationShares`**: `0x00004e20`
```text
[
BaseTx <- 0x0000001a00003039e902a9a86640bfdb1cd0e36c0cc982b83e5765fad5f6bbe6abdcce7b5ae7d7c700000000000000014a177205df5c29929d06db9d941f83d5ea985de302015e99252d16469a6610db000000003d0ad12b8ee8928edf248ca91ca55600fb383f07c32bff1d6dec472b25cf59a700000005000001d1a94a2000000000010000000000000000
Validator <- 0x5fa29ed4356903dac2364713c60f57d8472c7dda000000006397616e0000000063beee6e000001d1a94a2000
SubnetID <- 0xf3086d7bfc35be1c68db664ba9ce61a2060126b0d6b4bfb09fd7a5fb7678cada
Signer <- 0x0000001ca5af179e4188583893c2b99e1a8be27d90a9213cfbff1d75b74fe2bc9f3b072c2ded0863a9d9acd9033f223295810e429238e28d3c9b7f7212b63d746b2ae73a54fe08a3de61b132f2f89e9eeff97d4d7ca3a3c88986aa855cd36296fcfe8f02162d0258be494d267d4c5798bc081ab602ded90b0fc16d8a035e68ff5294794cb63ff1ee068fbfc2b4c8cd2d08ebf297
StakeOuts <- 0x000000013d0ad12b8ee8928edf248ca91ca55600fb383f07c32bff1d6dec472b25cf59a700000007000001d1a94a20000000000000000000000000010000000133eeffc64785cf9d80e7731d9f31f67bd03c5cf0
ValidatorRewardsOwner <- 0x0000000b0000000000000000000000010000000172f3eb9aeaf8283011ce6e437fdecd65eace8f52
DelegatorRewardsOwner <- 0x0000000b0000000000000000000000010000000172f3eb9aeaf8283011ce6e437fdecd65eace8f52
DelegationShares <- 0x00004e20
]
=
[
// BaseTx
0x00, 0x00, 0x00, 0x1a, 0x00, 0x00, 0x30, 0x39,
0xe9, 0x02, 0xa9, 0xa8, 0x66, 0x40, 0xbf, 0xdb,
0x1c, 0xd0, 0xe3, 0x6c, 0x0c, 0xc9, 0x82, 0xb8,
0x3e, 0x57, 0x65, 0xfa, 0xd5, 0xf6, 0xbb, 0xe6,
0xab, 0xdc, 0xce, 0x7b, 0x5a, 0xe7, 0xd7, 0xc7,
0x00, 0x00, 0x00, 0x00, 0x00, 0x00, 0x00, 0x01,
0x4a, 0x17, 0x72, 0x05, 0xdf, 0x5c, 0x29, 0x92,
0x9d, 0x06, 0xdb, 0x9d, 0x94, 0x1f, 0x83, 0xd5,
0xea, 0x98, 0x5d, 0xe3, 0x02, 0x01, 0x5e, 0x99,
0x25, 0x2d, 0x16, 0x46, 0x9a, 0x66, 0x10, 0xdb,
0x00, 0x00, 0x00, 0x00, 0x3d, 0x0a, 0xd1, 0x2b,
0x8e, 0xe8, 0x92, 0x8e, 0xdf, 0x24, 0x8c, 0xa9,
0x1c, 0xa5, 0x56, 0x00, 0xfb, 0x38, 0x3f, 0x07,
0xc3, 0x2b, 0xff, 0x1d, 0x6d, 0xec, 0x47, 0x2b,
0x25, 0xcf, 0x59, 0xa7, 0x00, 0x00, 0x00, 0x05,
0x00, 0x00, 0x01, 0xd1, 0xa9, 0x4a, 0x20, 0x00,
0x00, 0x00, 0x00, 0x01, 0x00, 0x00, 0x00, 0x00,
0x00, 0x00, 0x00, 0x00,
// Validator
// NodeID
0x5f, 0xa2, 0x9e, 0xd4, 0x35, 0x69, 0x03, 0xda,
0xc2, 0x36, 0x47, 0x13, 0xc6, 0x0f, 0x57, 0xd8,
0x47, 0x2c, 0x7d, 0xda, 0x
// Start time
0x00, 0x00, 0x00, 0x00, 0x63, 0x97, 0x61, 0x6e,
// End time
0x00, 0x00, 0x00, 0x00, 0x63, 0xbe, 0xee, 0x6e,
// Weight
0x00, 0x00, 0x01, 0xd1, 0xa9, 0x4a, 0x20, 0x00,
// SubnetID
0xf3, 0x08, 0x6d, 0x7b, 0xfc, 0x35, 0xbe, 0x1c,
0x68, 0xdb, 0x66, 0x4b, 0xa9, 0xce, 0x61, 0xa2,
0x06, 0x01, 0x26, 0xb0, 0xd6, 0xb4, 0xbf, 0xb0,
0x9f, 0xd7, 0xa5, 0xfb, 0x76, 0x78, 0xca, 0xda,
// Signer
// TypeID
0x00, 0x00, 0x00, 0x1c,
// Pub key
0xa5, 0xaf, 0x17, 0x9e, 0x41, 0x88, 0x58, 0x38,
0x93, 0xc2, 0xb9, 0x9e, 0x1a, 0x8b, 0xe2, 0x7d,
0x90, 0xa9, 0x21, 0x3c, 0xfb, 0xff, 0x1d, 0x75,
0xb7, 0x4f, 0xe2, 0xbc, 0x9f, 0x3b, 0x07, 0x2c,
0x2d, 0xed, 0x08, 0x63, 0xa9, 0xd9, 0xac, 0xd9,
0x03, 0x3f, 0x22, 0x32, 0x95, 0x81, 0x0e, 0x42,
// Sig
0x92, 0x38, 0xe2, 0x8d, 0x3c, 0x9b, 0x7f, 0x72,
0x12, 0xb6, 0x3d, 0x74, 0x6b, 0x2a, 0xe7, 0x3a,
0x54, 0xfe, 0x08, 0xa3, 0xde, 0x61, 0xb1, 0x32,
0xf2, 0xf8, 0x9e, 0x9e, 0xef, 0xf9, 0x7d, 0x4d,
0x7c, 0xa3, 0xa3, 0xc8, 0x89, 0x86, 0xaa, 0x85,
0x5c, 0xd3, 0x62, 0x96, 0xfc, 0xfe, 0x8f, 0x02,
0x16, 0x2d, 0x02, 0x58, 0xbe, 0x49, 0x4d, 0x26,
0x7d, 0x4c, 0x57, 0x98, 0xbc, 0x08, 0x1a, 0xb6,
0x02, 0xde, 0xd9, 0x0b, 0x0f, 0xc1, 0x6d, 0x8a,
0x03, 0x5e, 0x68, 0xff, 0x52, 0x94, 0x79, 0x4c,
0xb6, 0x3f, 0xf1, 0xee, 0x06, 0x8f, 0xbf, 0xc2,
0xb4, 0xc8, 0xcd, 0x2d, 0x08, 0xeb, 0xf2, 0x97,
// Stake outs
// Num stake outs
0x00, 0x00, 0x00, 0x01,
// AssetID
0x3d, 0x0a, 0xd1, 0x2b, 0x8e, 0xe8, 0x92, 0x8e,
0xdf, 0x24, 0x8c, 0xa9, 0x1c, 0xa5, 0x56, 0x00,
0xfb, 0x38, 0x3f, 0x07, 0xc3, 0x2b, 0xff, 0x1d,
0x6d, 0xec, 0x47, 0x2b, 0x25, 0xcf, 0x59, 0xa7,
// Output
// typeID
0x00, 0x00, 0x00, 0x07,
// Amount
0x00, 0x00, 0x01, 0xd1, 0xa9, 0x4a, 0x20, 0x00,
// Locktime
0x00, 0x00, 0x00, 0x00, 0x00, 0x00, 0x00, 0x00,
// Threshold
0x00, 0x00, 0x00, 0x01,
// Num addrs
0x00, 0x00, 0x00, 0x01,
// Addr 0
0x33, 0xee, 0xff, 0xc6, 0x47, 0x85, 0xcf, 0x9d,
0x80, 0xe7, 0x73, 0x1d, 0x9f, 0x31, 0xf6, 0x7b,
0xd0, 0x3c, 0x5c, 0xf0,
// Validator rewards owner
// TypeID
0x00, 0x00, 0x00, 0x0b,
// Locktime
0x00, 0x00, 0x00, 0x00, 0x00, 0x00, 0x00, 0x00,
// Threshold
0x00, 0x00, 0x00, 0x01,
// Num addrs
0x00, 0x00, 0x00, 0x01,
// Addr 0
0x72, 0xf3, 0xeb, 0x9a, 0xea, 0xf8, 0x28, 0x30,
0x11, 0xce, 0x6e, 0x43, 0x7f, 0xde, 0xcd, 0x65,
0xea, 0xce, 0x8f, 0x52,
// Delegator rewards owner
// TypeID
0x00, 0x00, 0x00, 0x0b,
// Locktime
0x00, 0x00, 0x00, 0x00, 0x00, 0x00, 0x00, 0x00,
// Threshold
0x00, 0x00, 0x00, 0x01,
// Num addrs
0x00, 0x00, 0x00, 0x01,
// Addr 0
0xb2, 0xb9, 0x13, 0x13, 0xac, 0x48, 0x7c, 0x22,
0x24, 0x45, 0x25, 0x4e, 0x26, 0xcd, 0x02, 0x6d,
0x21, 0xf6, 0xf4, 0x40,
// Delegation shares
0x00, 0x00, 0x4e, 0x20,
]
```
## Unsigned Add Permissionless Delegator TX
### What Unsigned Add Permissionless Delegator TX Contains
An unsigned add permissionless delegator TX contains a `BaseTx`, `Validator`,
`SubnetID`, `StakeOuts`, and `DelegatorRewardsOwner`. The `TypeID` for this type
is 26 or `0x0000001a`.
- **`BaseTx`**
- **`Validator`** Validator has a `NodeID`, `StartTime`, `EndTime`, and `Weight`
- **`NodeID`** is the 20 byte node ID of the validator.
- **`StartTime`** is a long which is the Unix time when the validator starts validating.
- **`EndTime`** is a long which is the Unix time when the validator stops validating.
- **`Weight`** is a long which is the amount the validator stakes
- **`SubnetID`** is the 32 byte Avalanche L1 ID (SubnetID) of the Avalanche L1 this delegation is on.
- **`StakeOuts`** An array of Transferable Outputs. Where to send staked tokens when done validating.
- **`DelegatorRewardsOwner`** Where to send staking rewards when done validating.
### Gantt Unsigned Add Permissionless Delegator TX Specification
```text
+---------------+----------------------+------------------------------------------------+
| base_tx : BaseTx | size(base_tx) bytes |
+---------------+----------------------+------------------------------------------------+
| validator : Validator | 44 bytes |
+---------------+----------------------+------------------------------------------------+
| subnet_id : [32]byte | 32 bytes |
+---------------+----------------------+------------------------------------------------+
| stake_outs : []TransferOut | 4 + size(stake_outs) bytes |
+---------------+----------------------+------------------------------------------------+
| delegator_rewards_owner : SECP256K1OutputOwners | size(delegator_rewards_owner) bytes |
+---------------+----------------------+------------------------------------------------+
| 80 + size(base_tx) + size(stake_outs) + size(delegator_rewards_owner) bytes |
+---------------------------------------------------------------------------------------+
```
### Proto Unsigned Add Permissionless Delegator TX Specification
```text
message AddPermissionlessDelegatorTx {
BaseTx base_tx = 1; // size(base_tx)
Validator validator = 2; // size(validator)
SubnetID subnet_id = 3; // 32 bytes
repeated TransferOut stake_outs = 4; // 4 bytes + size(stake_outs)
SECP256K1OutputOwners delegator_rewards_owner = 5; // size(delegator_rewards_owner) bytes
}
```
### Unsigned Add Permissionless Delegator TX Example
Let's make an unsigned add permissionless delegator TX that uses the inputs and
outputs from the previous examples:
- **`BaseTx`**: `"Example BaseTx as defined above with ID set to 1a"`
- **`Validator`**: `0x5fa29ed4356903dac2364713c60f57d8472c7dda00000000639761970000000063beee97000001d1a94a2000`
- **`SubnetID`**: `0xf3086d7bfc35be1c68db664ba9ce61a2060126b0d6b4bfb09fd7a5fb7678cada`
- **`StakeOuts`**: `0x000000013d0ad12b8ee8928edf248ca91ca55600fb383f07c32bff1d6dec472b25cf59a700000007000001d1a94a20000000000000000000000000010000000133eeffc64785cf9d80e7731d9f31f67bd03c5cf0`
- **`DelegatorRewardsOwner`**: `0x0000000b0000000000000000000000010000000172f3eb9aeaf8283011ce6e437fdecd65eace8f52`
```text
[
BaseTx <- 0x0000001a00003039e902a9a86640bfdb1cd0e36c0cc982b83e5765fad5f6bbe6abdcce7b5ae7d7c700000000000000014a177205df5c29929d06db9d941f83d5ea985de302015e99252d16469a6610db000000003d0ad12b8ee8928edf248ca91ca55600fb383f07c32bff1d6dec472b25cf59a700000005000001d1a94a2000000000010000000000000000
Validator <- 0x5fa29ed4356903dac2364713c60f57d8472c7dda00000000639761970000000063beee97000001d1a94a2000
SubnetID <- 0xf3086d7bfc35be1c68db664ba9ce61a2060126b0d6b4bfb09fd7a5fb7678cada
StakeOuts <- 0x000000013d0ad12b8ee8928edf248ca91ca55600fb383f07c32bff1d6dec472b25cf59a700000007000001d1a94a20000000000000000000000000010000000133eeffc64785cf9d80e7731d9f31f67bd03c5cf0
DelegatorRewardsOwner <- 0x0000000b0000000000000000000000010000000172f3eb9aeaf8283011ce6e437fdecd65eace8f52
]
=
[
// BaseTx
0x00, 0x00, 0x00, 0x1a, 0x00, 0x00, 0x30, 0x39,
0xe9, 0x02, 0xa9, 0xa8, 0x66, 0x40, 0xbf, 0xdb,
0x1c, 0xd0, 0xe3, 0x6c, 0x0c, 0xc9, 0x82, 0xb8,
0x3e, 0x57, 0x65, 0xfa, 0xd5, 0xf6, 0xbb, 0xe6,
0xab, 0xdc, 0xce, 0x7b, 0x5a, 0xe7, 0xd7, 0xc7,
0x00, 0x00, 0x00, 0x00, 0x00, 0x00, 0x00, 0x01,
0x4a, 0x17, 0x72, 0x05, 0xdf, 0x5c, 0x29, 0x92,
0x9d, 0x06, 0xdb, 0x9d, 0x94, 0x1f, 0x83, 0xd5,
0xea, 0x98, 0x5d, 0xe3, 0x02, 0x01, 0x5e, 0x99,
0x25, 0x2d, 0x16, 0x46, 0x9a, 0x66, 0x10, 0xdb,
0x00, 0x00, 0x00, 0x00, 0x3d, 0x0a, 0xd1, 0x2b,
0x8e, 0xe8, 0x92, 0x8e, 0xdf, 0x24, 0x8c, 0xa9,
0x1c, 0xa5, 0x56, 0x00, 0xfb, 0x38, 0x3f, 0x07,
0xc3, 0x2b, 0xff, 0x1d, 0x6d, 0xec, 0x47, 0x2b,
0x25, 0xcf, 0x59, 0xa7, 0x00, 0x00, 0x00, 0x05,
0x00, 0x00, 0x01, 0xd1, 0xa9, 0x4a, 0x20, 0x00,
0x00, 0x00, 0x00, 0x01, 0x00, 0x00, 0x00, 0x00,
0x00, 0x00, 0x00, 0x00,
// Validator
// NodeID
0x5f, 0xa2, 0x9e, 0xd4, 0x35, 0x69, 0x03, 0xda,
0xc2, 0x36, 0x47, 0x13, 0xc6, 0x0f, 0x57, 0xd8,
0x47, 0x2c, 0x7d, 0xda,
// Start time
0x00, 0x00, 0x00, 0x00, 0x63, 0x97, 0x61, 0x97,
// End time
0x00, 0x00, 0x00, 0x00, 0x63, 0xbe, 0xee, 0x97,
// Weight
0x00, 0x00, 0x01, 0xd1, 0xa9, 0x4a, 0x20, 0x00,
// Stake_outs
// Num stake outs
0x00, 0x00, 0x00, 0x01,
// Stake out 0
// AssetID
0x3d, 0x0a, 0xd1, 0x2b, 0x8e, 0xe8, 0x92, 0x8e,
0xdf, 0x24, 0x8c, 0xa9, 0x1c, 0xa5, 0x56, 0x00,
0xfb, 0x38, 0x3f, 0x07, 0xc3, 0x2b, 0xff, 0x1d,
0x6d, 0xec, 0x47, 0x2b, 0x25, 0xcf, 0x59, 0xa7,
// TypeID
0x00, 0x00, 0x00, 0x07,
// Amount
0x00, 0x00, 0x01, 0xd1, 0xa9, 0x4a, 0x20, 0x00,
// Locktime
0x00, 0x00, 0x00, 0x00, 0x00, 0x00, 0x00, 0x00,
// Threshold
0x00, 0x00, 0x00, 0x01,
// Num addrs
0x00, 0x00, 0x00, 0x01,
// Addr 0
0x33, 0xee, 0xff, 0xc6, 0x47, 0x85, 0xcf, 0x9d,
0x80, 0xe7, 0x73, 0x1d, 0x9f, 0x31, 0xf6, 0x7b,
0xd0, 0x3c, 0x5c, 0xf0,
// Delegator_rewards_owner
// TypeID
0x00, 0x00, 0x00, 0x0b,
// Locktime
0x00, 0x00, 0x00, 0x00, 0x00, 0x00, 0x00, 0x00,
// Threshold
0x00, 0x00, 0x00, 0x01,
// Num addrs
0x00, 0x00, 0x00, 0x01,
// Addr 0
0x72, 0xf3, 0xeb, 0x9a, 0xea, 0xf8, 0x28, 0x30,
0x11, 0xce, 0x6e, 0x43, 0x7f, 0xde, 0xcd, 0x65,
0xea, 0xce, 0x8f, 0x52,
]
```
## Unsigned Transform Avalanche L1 TX
> **Note:** This transaction type has been disabled post-activation of ACP-77 (Etna upgrade). The `TransformSubnetTx` is no longer accepted on the P-Chain after the activation of this upgrade.
Transforms a permissioned Avalanche L1 into a permissionless Avalanche L1. Must be signed by the Avalanche L1 owner.
### What Unsigned Transform Avalanche L1 TX Contains
An unsigned transform Avalanche L1 TX contains a `BaseTx`, `SubnetID`, `AssetID`,
`InitialSupply`, `MaximumSupply`, `MinConsumptionRate`, `MaxConsumptionRate`,
`MinValidatorStake`, `MaxValidatorStake`, `MinStakeDuration`,
`MaxStakeDuration`, `MinDelegationFee`, `MinDelegatorStake`,
`MaxValidatorWeightFactor`, `UptimeRequirement`, and `SubnetAuth`. The `TypeID`
for this type is 24 or `0x00000018`.
- **`BaseTx`**
- **`SubnetID`** a 32-byte Avalanche L1 ID of the Avalanche L1 to transform.
- **`AssetID`** is a 32-byte array that defines which asset to use when staking on the Avalanche L1.
- Restrictions
- Must not be the Empty ID
- Must not be the AVAX ID
- **`InitialSupply`** is a long which is the amount to initially specify as the current supply.
- Restrictions
- Must be > 0
- **`MaximumSupply`** is a long which is the amount to specify as the maximum token supply.
- Restrictions
- Must be >= [InitialSupply]
- **`MinConsumptionRate`** is a long which is the rate to allocate funds if the
validator's stake duration is 0.
- **`MaxConsumptionRate`** is a long which is the rate to allocate funds if the
validator's stake duration is equal to the minting period.
- Restrictions
- Must be `>=` [MinConsumptionRate]
- Must be `<=` [`reward.PercentDenominator`]
- **`MinValidatorStake`** is a long which the minimum amount of funds required to become a validator.
- Restrictions
- Must be `>` 0
- Must be `<=` [InitialSupply]
- **`MaxValidatorStake`** is a long which is the maximum amount of funds a
single validator can be allocated, including delegated funds.
- Restrictions:
- Must be `>=` [MinValidatorStake]
- Must be `<=` [MaximumSupply]
- **`MinStakeDuration`** is a short which is the minimum number of seconds a staker can stake for.
- Restrictions
- Must be `>` 0
- **`MaxStakeDuration`** is a short which is the maximum number of seconds a staker can stake for.
- Restrictions
- Must be `>=` [MinStakeDuration]
- Must be `<=` [GlobalMaxStakeDuration]
- **`MinDelegationFee`** is a short is the minimum percentage a validator must
charge a delegator for delegating.
- Restrictions
- Must be `<=` [`reward.PercentDenominator`]
- **`MinDelegatorStake`** is a short which is the minimum amount of funds required to become a delegator.
- Restrictions
- Must be `>` 0
- **`MaxValidatorWeightFactor`** is a byte which is the factor which calculates
the maximum amount of delegation a validator can receive. Note: a value of 1
effectively disables delegation.
- Restrictions
- Must be `>` 0
- **`UptimeRequirement`** is a short which is the minimum percentage a validator
must be online and responsive to receive a reward.
- Restrictions
- Must be `<=` [`reward.PercentDenominator`]
- **`SubnetAuth`** contains `SigIndices` and has a type id of `0x0000000a`.
`SigIndices` is a list of unique ints that define the addresses signing the
control signature to authorizes this transformation. The array must be sorted
low to high.
### Gantt Unsigned Transform Avalanche L1 TX Specification
```text
+----------------------+------------------+----------------------------------+
| base_tx : BaseTx | size(base_tx) bytes |
+----------------------+------------------+----------------------------------+
| subnet_id : [32]byte | 32 bytes |
+----------------------+------------------+----------------------------------+
| asset_id : [32]byte | 32 bytes |
+----------------------+------------------+----------------------------------+
| initial_supply : long | 8 bytes |
+----------------------+------------------+----------------------------------+
| maximum_supply : long | 8 bytes |
+----------------------+------------------+----------------------------------+
| min_consumption_rate : long | 8 bytes |
+----------------------+------------------+----------------------------------+
| max_consumption_rate : long | 8 bytes |
+----------------------+------------------+----------------------------------+
| min_validator_stake : long | 8 bytes |
+----------------------+------------------+----------------------------------+
| max_validator_stake : long | 8 bytes |
+----------------------+------------------+----------------------------------+
| min_stake_duration : short | 4 bytes |
+----------------------+------------------+----------------------------------+
| max_stake_duration : short | 4 bytes |
+----------------------+------------------+----------------------------------+
| min_delegation_fee : short | 4 bytes |
+----------------------+------------------+----------------------------------+
| min_delegator_stake : long | 8 bytes |
+----------------------+------------------+----------------------------------+
| max_validator_weight_factor : byte | 1 byte |
+----------------------+------------------+----------------------------------+
| uptime_requirement : short | 4 bytes |
+----------------------+------------------+----------------------------------+
| subnet_auth : SubnetAuth | 4 bytes + len(sig_indices) bytes |
+----------------------+------------------+----------------------------------+
| 141 + size(base_tx) + len(sig_indices) bytes |
+----------------------------------------------------------------------------+
```
### Proto Unsigned Transform Avalanche L1 TX Specification
```text
message TransformSubnetTx {
BaseTx base_tx = 1; // size(base_tx)
SubnetID subnet_id = 2; // 32 bytes
bytes asset_id = 3; // 32 bytes
uint64 initial_supply = 4; // 08 bytes
uint64 maximum_supply = 5; // 08 bytes
uint64 min_consumption_rate = 6; // 08 bytes
uint64 max_consumption_rate = 7; // 08 bytes
uint64 min_validator_stake = 8; // 08 bytes
uint64 max_validator_stake = 9; // 08 bytes
uint32 min_stake_duration = 10; // 04 bytes
uint32 max_stake_duration = 11; // 04 bytes
uint32 min_delegation_fee = 12; // 04 bytes
uint32 min_delegator_stake = 13; // 08 bytes
byte max_validator_weight_factor = 14; // 01 byte
uint32 uptime_requirement = 15; // 04 bytes
SubnetAuth subnet_auth = 16; // 04 bytes + len(sig_indices)
}
```
### Unsigned Transform Avalanche L1 TX Example
Let's make an unsigned transform Avalanche L1 TX that uses the inputs and outputs from the previous examples:
- **`BaseTx`**: `"Example BaseTx as defined above with ID set to 18"`
- **`SubnetID`**: `0x5fa29ed4356903dac2364713c60f57d8472c7dda4a5e08d88a88ad8ea71aed60`
- **`AssetID`**: `0xf3086d7bfc35be1c68db664ba9ce61a2060126b0d6b4bfb09fd7a5fb7678cada`
- **`InitialSupply`**: `0x000000e8d4a51000`
- **`MaximumSupply`**: `0x000009184e72a000`
- **`MinConsumptionRate`**: `0x0000000000000001`
- **`MaxConsumptionRate`**: `0x000000000000000a`
- **`MinValidatorStake`**: `0x000000174876e800`
- **`MaxValidatorStake`**: `0x000001d1a94a2000`
- **`MinStakeDuration`**: `0x00015180`
- **`MaxStakeDuration`**: `0x01e13380`
- **`MinDelegationFee`**: `0x00002710`
- **`MinDelegatorStake`**: `0x000000174876e800`
- **`MaxValidatorWeightFactor`**: `0x05`
- **`UptimeRequirement`**: `0x000c3500`
- **`SubnetAuth`**:
- **`TypeID`**: `0x0000000a`
- **`SigIndices`**: `0x00000000`
```text
[
BaseTx <- 0000001800003039e902a9a86640bfdb1cd0e36c0cc982b83e5765fad5f6bbe6abdcce7b5ae7d7c700000000000000014a177205df5c29929d06db9d941f83d5ea985de302015e99252d16469a6610db000000003d0ad12b8ee8928edf248ca91ca55600fb383f07c32bff1d6dec472b25cf59a70000000500000000000f4240000000010000000000000000
SubnetID <- 0x5fa29ed4356903dac2364713c60f57d8472c7dda4a5e08d88a88ad8ea71aed60
AssetID <- 0xf3086d7bfc35be1c68db664ba9ce61a2060126b0d6b4bfb09fd7a5fb7678cada
InitialSupply <- 0x000000e8d4a51000
MaximumSupply <- 0x000009184e72a000
MinConsumptionRate <- 0x0000000000000001
MaxConsumptionRate <- 0x000000000000000a
MinValidatorStake <- 0x000000174876e800
MaxValidatorStake <- 0x000001d1a94a2000
MinStakeDuration <- 0x00015180
MaxStakeDuration <- 0x01e13380
MinDelegationFee <- 0x00002710
MinDelegatorStake <- 0x000000174876e800
MaxValidatorWeightFactor <- 0x05
UptimeRequirement <- 0x000c3500
SubnetAuth <- 0x0000000a0000000100000000
]
=
[
// BaseTx:
0x00, 0x00, 0x00, 0x01, 0x00, 0x00, 0x30, 0x39,
0xe9, 0x02, 0xa9, 0xa8, 0x66, 0x40, 0xbf, 0xdb,
0x1c, 0xd0, 0xe3, 0x6c, 0x0c, 0xc9, 0x82, 0xb8,
0x3e, 0x57, 0x65, 0xfa, 0xd5, 0xf6, 0xbb, 0xe6,
0xab, 0xdc, 0xce, 0x7b, 0x5a, 0xe7, 0xd7, 0xc7,
0x00, 0x00, 0x00, 0x00, 0x00, 0x00, 0x00, 0x01,
0x4a, 0x17, 0x72, 0x05, 0xdf, 0x5c, 0x29, 0x92,
0x9d, 0x06, 0xdb, 0x9d, 0x94, 0x1f, 0x83, 0xd5,
0xea, 0x98, 0x5d, 0xe3, 0x02, 0x01, 0x5e, 0x99,
0x25, 0x2d, 0x16, 0x46, 0x9a, 0x66, 0x10, 0xdb,
0x00, 0x00, 0x00, 0x00, 0x3d, 0x0a, 0xd1, 0x2b,
0x8e, 0xe8, 0x92, 0x8e, 0xdf, 0x24, 0x8c, 0xa9,
0x1c, 0xa5, 0x56, 0x00, 0xfb, 0x38, 0x3f, 0x07,
0xc3, 0x2b, 0xff, 0x1d, 0x6d, 0xec, 0x47, 0x2b,
0x25, 0xcf, 0x59, 0xa7, 0x00, 0x00, 0x00, 0x05,
0x00, 0x00, 0x00, 0x00, 0x00, 0x0f, 0x42, 0x40,
0x00, 0x00, 0x00, 0x01, 0x00, 0x00, 0x00, 0x00,
0x00, 0x00, 0x00, 0x00, 0x5f, 0xa2, 0x9e, 0xd4,
0x35, 0x69, 0x03, 0xda, 0xc2, 0x36, 0x47, 0x13,
0xc6, 0x0f, 0x57, 0xd8, 0x47, 0x2c, 0x7d, 0xda,
0x4a, 0x5e, 0x08, 0xd8, 0x8a, 0x88, 0xad, 0x8e,
0xa7, 0x1a, 0xed, 0x60, 0xf3, 0x08, 0x6d, 0x7b,
0xfc, 0x35, 0xbe, 0x1c, 0x68, 0xdb, 0x66, 0x4b,
0xa9, 0xce, 0x61, 0xa2, 0x06, 0x01, 0x26, 0xb0,
0xd6, 0xb4, 0xbf, 0xb0, 0x9f, 0xd7, 0xa5, 0xfb,
0x76, 0x78, 0xca, 0xda, 0x00, 0x00, 0x00, 0xe8,
0xd4, 0xa5, 0x10, 0x00, 0x00, 0x00, 0x09, 0x18,
0x4e, 0x72, 0xa0, 0x00, 0x00, 0x00, 0x00, 0x00,
0x00, 0x00, 0x00, 0x01, 0x00, 0x00, 0x00, 0x00,
0x00, 0x00, 0x00, 0x0a, 0x00, 0x00, 0x00, 0x17,
0x48, 0x76, 0xe8, 0x00, 0x00, 0x00, 0x01, 0xd1,
0xa9, 0x4a, 0x20, 0x00, 0x00, 0x01, 0x51, 0x80,
0x01, 0xe1, 0x33, 0x80, 0x00, 0x00, 0x27, 0x10,
0x00, 0x00, 0x00, 0x17, 0x48, 0x76, 0xe8, 0x00,
0x05, 0x00, 0x0c, 0x35, 0x00, 0x00, 0x00, 0x00,
0x0a, 0x00, 0x00, 0x00, 0x01, 0x00, 0x00, 0x00,
0x00,
// SubnetID
0x5f, 0xa2, 0x9e, 0xd4, 0x35, 0x69, 0x03, 0xda,
0xc2, 0x36, 0x47, 0x13, 0xc6, 0x0f, 0x57, 0xd8,
0x47, 0x2c, 0x7d, 0xda, 0x4a, 0x5e, 0x08, 0xd8,
0x8a, 0x88, 0xad, 0x8e, 0xa7, 0x1a, 0xed, 0x60,
// AssetID
0xf3, 0x08, 0x6d, 0x7b, 0xfc, 0x35, 0xbe, 0x1c,
0x68, 0xdb, 0x66, 0x4b, 0xa9, 0xce, 0x61, 0xa2,
0x06, 0x01, 0x26, 0xb0, 0xd6, 0xb4, 0xbf, 0xb0,
0x9f, 0xd7, 0xa5, 0xfb, 0x76, 0x78, 0xca, 0xda,
// InitialSupply
0x00, 0x00, 0x00, 0xe8, 0xd4, 0xa5, 0x10, 0x00,
// MaximumSupply
0x00, 0x00, 0x09, 0x18, 0x4e, 0x72, 0xa0, 0x00,
// MinConsumptionRate
0x00, 0x00, 0x00, 0x00, 0x00, 0x00, 0x00, 0x01,
// MaxConsumptionRate
0x00, 0x00, 0x00, 0x00, 0x00, 0x00, 0x00, 0x0a,
// MinValidatorStake
0x00, 0x00, 0x00, 0x17, 0x48, 0x76, 0xe8, 0x00,
// MaxValidatorStake
0x00, 0x00, 0x01, 0xd1, 0xa9, 0x4a, 0x20, 0x00,
// MinStakeDuration
0x00, 0x01, 0x51, 0x80,
// MaxStakeDuration
0x01, 0xe1, 0x33, 0x80,
// MinDelegationFee
0x00, 0x00, 0x27, 0x10,
// MinDelegatorStake
0x00, 0x00, 0x00, 0x17, 0x48, 0x76, 0xe8, 0x00,
// MaxValidatorWeightFactor
0x05,
// UptimeRequirement
0x00, 0x0c, 0x35, 0x00,
```
// SubnetAuth
```
// SubnetAuth TypeID
0x00, 0x00, 0x00, 0x0a,
// SigIndices length
0x00, 0x00, 0x00, 0x01,
// SigIndices
0x00, 0x00, 0x00, 0x00,
]
```
## Unsigned Add Avalanche L1 Validator TX
### What Unsigned Add Avalanche L1 Validator TX Contains
An unsigned add Avalanche L1 validator TX contains a `BaseTx`, `Validator`,
`SubnetID`, and `SubnetAuth`. The `TypeID` for this type is `0x0000000d`.
- **`BaseTx`**
- **`Validator`** Validator has a `NodeID`, `StartTime`, `EndTime`, and `Weight`
- **`NodeID`** is the 20 byte node ID of the validator.
- **`StartTime`** is a long which is the Unix time when the validator starts validating.
- **`EndTime`** is a long which is the Unix time when the validator stops validating.
- **`Weight`** is a long which is the amount the validator stakes
- **`SubnetID`** is the 32 byte Avalanche L1 ID to add the validator to.
- **`SubnetAuth`** contains `SigIndices` and has a type id of `0x0000000a`.
`SigIndices` is a list of unique ints that define the addresses signing the
control signature to add a validator to an Avalanche L1. The array must be sorted low
to high.
### Gantt Unsigned Add Avalanche L1 Validator TX Specification
```text
+---------------+----------------------+-----------------------------------------+
| base_tx : BaseTx | size(base_tx) bytes |
+---------------+----------------------+-----------------------------------------+
| validator : Validator | 44 bytes |
+---------------+----------------------+-----------------------------------------+
| subnet_id : [32]byte | 32 bytes |
+---------------+----------------------+-----------------------------------------+
| subnet_auth : SubnetAuth | 4 bytes + len(sig_indices) bytes |
+---------------+----------------------+-----------------------------------------+
| 80 + len(sig_indices) + size(base_tx) bytes |
+---------------------------------------------+
```
### Proto Unsigned Add Avalanche L1 Validator TX Specification
```text
message AddSubnetValidatorTx {
BaseTx base_tx = 1; // size(base_tx)
Validator validator = 2; // size(validator)
SubnetID subnet_id = 3; // 32 bytes
SubnetAuth subnet_auth = 4; // 04 bytes + len(sig_indices)
}
```
### Unsigned Add Avalanche L1 Validator TX Example
Let's make an unsigned add Avalanche L1 validator TX that uses the inputs and outputs from the previous examples:
- **`BaseTx`**: `"Example BaseTx as defined above with ID set to 0d"`
- **`NodeID`**: `0xe9094f73698002fd52c90819b457b9fbc866ab80`
- **`StarTime`**: `0x000000005f21f31d`
- **`EndTime`**: `0x000000005f497dc6`
- **`Weight`**: `0x000000000000d431`
- **`SubnetID`**: `0x58b1092871db85bc752742054e2e8be0adf8166ec1f0f0769f4779f14c71d7eb`
- **`SubnetAuth`**:
- **`TypeID`**: `0x0000000a`
- **`SigIndices`**: `0x00000000`
```text
[
BaseTx <- 0x0000000d000030390000000000000000000000000000000000000000000000000000000000000006870b7d66ac32540311379e5b5dbad28ec7eb8ddbfc8f4d67299ebb48475907a0000000700000000ee5be5c000000000000000000000000100000001da2bee01be82ecc00c34f361eda8eb30fb5a715cdfafbdf5c81f635c9257824ff21c8e3e6f7b632ac306e11446ee540d34711a15000000016870b7d66ac32540311379e5b5dbad28ec7eb8ddbfc8f4d67299ebb48475907a0000000500000000ee6b28000000000100000000
NodeID <- 0xe9094f73698002fd52c90819b457b9fbc866ab80
StarTime <- 0x000000005f21f31d
EndTime <- 0x000000005f497dc6
Weight <- 0x000000000000d431
SubnetID <- 0x58b1092871db85bc752742054e2e8be0adf8166ec1f0f0769f4779f14c71d7eb
SubnetAuth TypeID <- 0x0000000a
SubnetAuth <- 0x00000000
]
=
[
// base tx:
0x00, 0x00, 0x00, 0x0d,
0x00, 0x00, 0x30, 0x39,
0x00, 0x00, 0x00, 0x00, 0x00, 0x00, 0x00, 0x00,
0x00, 0x00, 0x00, 0x00, 0x00, 0x00, 0x00, 0x00,
0x00, 0x00, 0x00, 0x00, 0x00, 0x00, 0x00, 0x00,
0x00, 0x00, 0x00, 0x00, 0x00, 0x00, 0x00, 0x00,
0x00, 0x00, 0x00, 0x01,
0x68, 0x70, 0xb7, 0xd6, 0x6a, 0xc3, 0x25, 0x40,
0x31, 0x13, 0x79, 0xe5, 0xb5, 0xdb, 0xad, 0x28,
0xec, 0x7e, 0xb8, 0xdd, 0xbf, 0xc8, 0xf4, 0xd6,
0x72, 0x99, 0xeb, 0xb4, 0x84, 0x75, 0x90, 0x7a,
0x00, 0x00, 0x00, 0x07, 0x00, 0x00, 0x00, 0x00,
0xee, 0x5b, 0xe5, 0xc0, 0x00, 0x00, 0x00, 0x00,
0x00, 0x00, 0x00, 0x00, 0x00, 0x00, 0x00, 0x01,
0x00, 0x00, 0x00, 0x01, 0xda, 0x2b, 0xee, 0x01,
0xbe, 0x82, 0xec, 0xc0, 0x0c, 0x34, 0xf3, 0x61,
0xed, 0xa8, 0xeb, 0x30, 0xfb, 0x5a, 0x71, 0x5c,
0x00, 0x00, 0x00, 0x01,
0xdf, 0xaf, 0xbd, 0xf5, 0xc8, 0x1f, 0x63, 0x5c,
0x92, 0x57, 0x82, 0x4f, 0xf2, 0x1c, 0x8e, 0x3e,
0x6f, 0x7b, 0x63, 0x2a, 0xc3, 0x06, 0xe1, 0x14,
0x46, 0xee, 0x54, 0x0d, 0x34, 0x71, 0x1a, 0x15,
0x00, 0x00, 0x00, 0x01,
0x68, 0x70, 0xb7, 0xd6, 0x6a, 0xc3, 0x25, 0x40,
0x31, 0x13, 0x79, 0xe5, 0xb5, 0xdb, 0xad, 0x28,
0xec, 0x7e, 0xb8, 0xdd, 0xbf, 0xc8, 0xf4, 0xd6,
0x72, 0x99, 0xeb, 0xb4, 0x84, 0x75, 0x90, 0x7a,
0x00, 0x00, 0x00, 0x05, 0x00, 0x00, 0x00, 0x00,
0xee, 0x6b, 0x28, 0x00, 0x00, 0x00, 0x00, 0x01,
0x00, 0x00, 0x00, 0x00,
0x00, 0x00, 0x00, 0x00,
// Node ID
0xe9, 0x09, 0x4f, 0x73, 0x69, 0x80, 0x02, 0xfd,
0x52, 0xc9, 0x08, 0x19, 0xb4, 0x57, 0xb9, 0xfb,
0xc8, 0x66, 0xab, 0x80,
// StartTime
0x00, 0x00, 0x00, 0x00, 0x5f, 0x21, 0xf3, 0x1d,
// EndTime
0x00, 0x00, 0x00, 0x00, 0x5f, 0x49, 0x7d, 0xc6,
// Weight
0x00, 0x00, 0x00, 0x00, 0x00, 0x00, 0xd4, 0x31,
// SubnetID
0x58, 0xb1, 0x09, 0x28, 0x71, 0xdb, 0x85, 0xbc,
0x75, 0x27, 0x42, 0x05, 0x4e, 0x2e, 0x8b, 0xe0,
0xad, 0xf8, 0x16, 0x6e, 0xc1, 0xf0, 0xf0, 0x76,
0x9f, 0x47, 0x79, 0xf1, 0x4c, 0x71, 0xd7, 0xeb,
// SubnetAuth
// SubnetAuth TypeID
0x00, 0x00, 0x00, 0x0a,
// SigIndices length
0x00, 0x00, 0x00, 0x01,
// SigIndices
0x00, 0x00, 0x00, 0x00,
]
```
## Unsigned Add Delegator TX
### What Unsigned Add Delegator TX Contains
An unsigned add delegator TX contains a `BaseTx`, `Validator`, `Stake`, and
`RewardsOwner`. The `TypeID` for this type is `0x0000000e`.
- **`BaseTx`**
- **`Validator`** Validator has a `NodeID`, `StartTime`, `EndTime`, and `Weight`
- **`NodeID`** is 20 bytes which is the node ID of the delegatee.
- **`StartTime`** is a long which is the Unix time when the delegator starts delegating.
- **`EndTime`** is a long which is the Unix time when the delegator stops
delegating (and staked AVAX is returned).
- **`Weight`** is a long which is the amount the delegator stakes
- **`Stake`** Stake has `LockedOuts`
- **`LockedOuts`** An array of Transferable Outputs that are locked for the
duration of the staking period. At the end of the staking period, these
outputs are refunded to their respective addresses.
- **`RewardsOwner`** An `SECP256K1OutputOwners`
### Gantt Unsigned Add Delegator TX Specification
```text
+---------------+-----------------------+-----------------------------------------+
| base_tx : BaseTx | size(base_tx) bytes |
+---------------+-----------------------+-----------------------------------------+
| validator : Validator | 44 bytes |
+---------------+-----------------------+-----------------------------------------+
| stake : Stake | size(LockedOuts) bytes |
+---------------+-----------------------+-----------------------------------------+
| rewards_owner : SECP256K1OutputOwners | size(rewards_owner) bytes |
+---------------+-----------------------+-----------------------------------------+
| 44 + size(stake) + size(rewards_owner) + size(base_tx) bytes |
+-----------------------------------------------------------------+
```
### Proto Unsigned Add Delegator TX Specification
```text
message AddDelegatorTx {
BaseTx base_tx = 1; // size(base_tx)
Validator validator = 2; // 44 bytes
Stake stake = 3; // size(LockedOuts)
SECP256K1OutputOwners rewards_owner = 4; // size(rewards_owner)
}
```
### Unsigned Add Delegator TX Example
Let's make an unsigned add delegator TX that uses the inputs and outputs from the previous examples:
- **`BaseTx`**: `"Example BaseTx as defined above with ID set to 0e"`
- **`NodeID`**: `0xe9094f73698002fd52c90819b457b9fbc866ab80`
- **`StarTime`**: `0x000000005f21f31d`
- **`EndTime`**: `0x000000005f497dc6`
- **`Weight`**: `0x000000000000d431`
- **`Stake`**: `0x0000000139c33a499ce4c33a3b09cdd2cfa01ae70dbf2d18b2d7d168524440e55d55008800000007000001d1a94a2000000000000000000000000001000000013cb7d3842e8cee6a0ebd09f1fe884f6861e1b29c`
- **`RewardsOwner`**: `0x0000000b00000000000000000000000100000001da2bee01be82ecc00c34f361eda8eb30fb5a715c`
```text
[
BaseTx <- 0x0000000e000030390000000000000000000000000000000000000000000000000000000000000006870b7d66ac32540311379e5b5dbad28ec7eb8ddbfc8f4d67299ebb48475907a0000000700000000ee5be5c000000000000000000000000100000001da2bee01be82ecc00c34f361eda8eb30fb5a715cdfafbdf5c81f635c9257824ff21c8e3e6f7b632ac306e11446ee540d34711a15000000016870b7d66ac32540311379e5b5dbad28ec7eb8ddbfc8f4d67299ebb48475907a0000000500000000ee6b28000000000100000000
NodeID <- 0xe9094f73698002fd52c90819b457b9fbc866ab80
StarTime <- 0x000000005f21f31d
EndTime <- 0x000000005f497dc6
Weight <- 0x000000000000d431
Stake <- 0x0000000139c33a499ce4c33a3b09cdd2cfa01ae70dbf2d18b2d7d168524440e55d55008800000007000001d1a94a2000000000000000000000000001000000013cb7d3842e8cee6a0ebd09f1fe884f6861e1b29c
RewardsOwner <- 0x0000000b00000000000000000000000100000001da2bee01be82ecc00c34f361eda8eb30fb5a715c
]
=
[
// base tx:
0x00, 0x00, 0x00, 0x0e, 0x00, 0x00, 0x30, 0x39,
0x00, 0x00, 0x00, 0x00, 0x00, 0x00, 0x00, 0x00,
0x00, 0x00, 0x00, 0x00, 0x00, 0x00, 0x00, 0x00,
0x00, 0x00, 0x00, 0x00, 0x00, 0x00, 0x00, 0x00,
0x00, 0x00, 0x00, 0x00, 0x00, 0x00, 0x00, 0x00,
0x00, 0x00, 0x00, 0x01,
0x68, 0x70, 0xb7, 0xd6, 0x6a, 0xc3, 0x25, 0x40,
0x31, 0x13, 0x79, 0xe5, 0xb5, 0xdb, 0xad, 0x28,
0xec, 0x7e, 0xb8, 0xdd, 0xbf, 0xc8, 0xf4, 0xd6,
0x72, 0x99, 0xeb, 0xb4, 0x84, 0x75, 0x90, 0x7a,
0x00, 0x00, 0x00, 0x07, 0x00, 0x00, 0x00, 0x00,
0xee, 0x5b, 0xe5, 0xc0, 0x00, 0x00, 0x00, 0x00,
0x00, 0x00, 0x00, 0x00, 0x00, 0x00, 0x00, 0x01,
0x00, 0x00, 0x00, 0x01, 0xda, 0x2b, 0xee, 0x01,
0xbe, 0x82, 0xec, 0xc0, 0x0c, 0x34, 0xf3, 0x61,
0xed, 0xa8, 0xeb, 0x30, 0xfb, 0x5a, 0x71, 0x5c,
0x00, 0x00, 0x00, 0x01,
0xdf, 0xaf, 0xbd, 0xf5, 0xc8, 0x1f, 0x63, 0x5c,
0x92, 0x57, 0x82, 0x4f, 0xf2, 0x1c, 0x8e, 0x3e,
0x6f, 0x7b, 0x63, 0x2a, 0xc3, 0x06, 0xe1, 0x14,
0x46, 0xee, 0x54, 0x0d, 0x34, 0x71, 0x1a, 0x15,
0x00, 0x00, 0x00, 0x01,
0x68, 0x70, 0xb7, 0xd6, 0x6a, 0xc3, 0x25, 0x40,
0x31, 0x13, 0x79, 0xe5, 0xb5, 0xdb, 0xad, 0x28,
0xec, 0x7e, 0xb8, 0xdd, 0xbf, 0xc8, 0xf4, 0xd6,
0x72, 0x99, 0xeb, 0xb4, 0x84, 0x75, 0x90, 0x7a,
0x00, 0x00, 0x00, 0x05, 0x00, 0x00, 0x00, 0x00,
0xee, 0x6b, 0x28, 0x00, 0x00, 0x00, 0x00, 0x01,
0x00, 0x00, 0x00, 0x00,
0x00, 0x00, 0x00, 0x00,
// Node ID
0xe9, 0x09, 0x4f, 0x73, 0x69, 0x80, 0x02, 0xfd,
0x52, 0xc9, 0x08, 0x19, 0xb4, 0x57, 0xb9, 0xfb,
0xc8, 0x66, 0xab, 0x80,
// StartTime
0x00, 0x00, 0x00, 0x00, 0x5f, 0x21, 0xf3, 0x1d,
// EndTime
0x00, 0x00, 0x00, 0x00, 0x5f, 0x49, 0x7d, 0xc6,
// Weight
0x00, 0x00, 0x00, 0x00, 0x00, 0x00, 0xd4, 0x31,
// Stake
0x00, 0x00, 0x00, 0x01, 0x39, 0xc3, 0x3a, 0x49,
0x9c, 0xe4, 0xc3, 0x3a, 0x3b, 0x09, 0xcd, 0xd2,
0xcf, 0xa0, 0x1a, 0xe7, 0x0d, 0xbf, 0x2d, 0x18,
0xb2, 0xd7, 0xd1, 0x68, 0x52, 0x44, 0x40, 0xe5,
0x5d, 0x55, 0x00, 0x88, 0x00, 0x00, 0x00, 0x07,
0x00, 0x00, 0x01, 0xd1, 0xa9, 0x4a, 0x20, 0x00,
0x00, 0x00, 0x00, 0x00, 0x00, 0x00, 0x00, 0x00,
0x00, 0x00, 0x00, 0x01, 0x00, 0x00, 0x00, 0x01,
0x3c, 0xb7, 0xd3, 0x84, 0x2e, 0x8c, 0xee, 0x6a,
0x0e, 0xbd, 0x09, 0xf1, 0xfe, 0x88, 0x4f, 0x68,
0x61, 0xe1, 0xb2, 0x9c,
// RewardsOwner
0x00, 0x00, 0x00, 0x0b, 0x00, 0x00, 0x00, 0x00,
0x00, 0x00, 0x00, 0x00, 0x00, 0x00, 0x00, 0x01,
0x00, 0x00, 0x00, 0x01, 0xda, 0x2b, 0xee, 0x01,
0xbe, 0x82, 0xec, 0xc0, 0x0c, 0x34, 0xf3, 0x61,
0xed, 0xa8, 0xeb, 0x30, 0xfb, 0x5a, 0x71, 0x5c,
]
```
## Unsigned Create Chain TX
### What Unsigned Create Chain TX Contains
An unsigned create chain TX contains a `BaseTx`, `SubnetID`, `ChainName`,
`VMID`, `FxIDs`, `GenesisData` and `SubnetAuth`. The `TypeID` for this type is
`0x0000000f`.
- **`BaseTx`**
- **`SubnetID`** ID of the Avalanche L1 that validates this blockchain
- **`ChainName`** A human readable name for the chain; need not be unique
- **`VMID`** ID of the VM running on the new chain
- **`FxIDs`** IDs of the feature extensions running on the new chain
- **`GenesisData`** Byte representation of genesis state of the new chain
- **`SubnetAuth`** Authorizes this blockchain to be added to this Avalanche L1
### Gantt Unsigned Create Chain TX Specification
```text
+--------------+-------------+------------------------------------------+
| base_tx : BaseTx | size(base_tx) bytes |
+--------------+-------------+------------------------------------------+
| subnet_id : SubnetID | 32 bytes |
+--------------+-------------+------------------------------------------+
| chain_name : ChainName | 2 + len(chain_name) bytes |
+--------------+-------------+------------------------------------------+
| vm_id : VMID | 32 bytes |
+--------------+-------------+------------------------------------------+
| fx_ids : FxIDs | 4 + size(fx_ids) bytes |
+--------------+-------------+------------------------------------------+
| genesis_data : GenesisData | 4 + size(genesis_data) bytes |
+--------------+-------------+------------------------------------------+
| subnet_auth : SubnetAuth | size(subnet_auth) bytes |
+--------------+-------------+------------------------------------------+
| 74 + size(base_tx) + size(chain_name) + size(fx_ids) + |
| size(genesis_data) + size(subnet_auth) bytes |
+--------------+--------------------------------------------------------+
```
### Proto Unsigned Create Chain TX Specification
```text
message CreateChainTx {
BaseTx base_tx = 1; // size(base_tx)
SubnetID subnet_id = 2; // 32 bytes
ChainName chain_name = 3; // 2 + len(chain_name) bytes
VMID vm_id = 4; // 32 bytes
FxIDs fx_ids = 5; // 4 + size(fx_ids) bytes
GenesisData genesis_data = 6 // 4 + size(genesis_data) bytes
SubnetAuth subnet_auth = 7; // size(subnet_auth) bytes
}
```
### Unsigned Create Chain TX Example
Let's make an unsigned create chain TX that uses the inputs and outputs from the previous examples:
- **`BaseTx`**: `"Example BaseTx as defined above with ID set to 0f"`
- **`SubnetID`**: `24tZhrm8j8GCJRE9PomW8FaeqbgGS4UAQjJnqqn8pq5NwYSYV1`
- **`ChainName`**: `EPIC AVM`
- **`VMID`**: `avm`
- **`FxIDs`**: [`secp256k1fx`]
- **`GenesisData`**: `11111DdZMhYXUZiFV9FNpfpTSQroysXhzWicG954YAKfkrk3bCEzLVY7gun1eAmAwMiQzVhtGpdR6dnPVcfhBE7brzkJ1r4wzi3dgA8G9Jwc4WpZ6Uh4Dr9aTdw7sFA5cpvCAVBsx6Xf3CB82jwH1gjPZ3WQnnCSKr2reoLtam6TfyYRra5xxXSkZcUm6BaJMW4fKzNP58uyExajPYKZvT5LrQ7MPJ9Fp7ebmYSzXg7YYauNARj`
- **`SubnetAuth`**: `0x0000000a0000000100000000`
```text
[
BaseTx <- 0x0000000f000030390000000000000000000000000000000000000000000000000000000000000006870b7d66ac32540311379e5b5dbad28ec7eb8ddbfc8f4d67299ebb48475907a0000000700000000ee5be5c000000000000000000000000100000001da2bee01be82ecc00c34f361eda8eb30fb5a715cdfafbdf5c81f635c9257824ff21c8e3e6f7b632ac306e11446ee540d34711a15000000016870b7d66ac32540311379e5b5dbad28ec7eb8ddbfc8f4d67299ebb48475907a0000000500000000ee6b28000000000100000000
SubnetID <- 0x8c86d07cd60218661863e0116552dccd5bd84c564bd29d7181dbddd5ec616104
ChainName <- 0x455049432041564d
VMID <- 0x61766d0000000000000000000000000000000000000000000000000000000000
FxIDs <- 0x736563703235366b316678000000000000000000000000000000000000000000
GenesisData <- 0x000000000001000e4173736574416c6961735465737400000539000000000000000000000000000000000000000000000000000000000000000000000000000000000000001b66726f6d20736e6f77666c616b6520746f206176616c616e636865000a54657374204173736574000454455354000000000100000000000000010000000700000000000001fb000000000000000000000001000000013cb7d3842e8cee6a0ebd09f1fe884f6861e1b29c
SubnetAuth <- 0x0000000a0000000100000000
]
=
[
// base tx
0x00, 0x00, 0x00, 0x0f,
0x00, 0x00, 0x30, 0x39, 0x00, 0x00, 0x00, 0x00,
0x00, 0x00, 0x00, 0x00, 0x00, 0x00, 0x00, 0x00,
0x00, 0x00, 0x00, 0x00, 0x00, 0x00, 0x00, 0x00,
0x00, 0x00, 0x00, 0x00, 0x00, 0x00, 0x00, 0x00,
0x00, 0x00, 0x00, 0x00, 0x00, 0x00, 0x00, 0x01,
0x39, 0xc3, 0x3a, 0x49, 0x9c, 0xe4, 0xc3, 0x3a,
0x3b, 0x09, 0xcd, 0xd2, 0xcf, 0xa0, 0x1a, 0xe7,
0x0d, 0xbf, 0x2d, 0x18, 0xb2, 0xd7, 0xd1, 0x68,
0x52, 0x44, 0x40, 0xe5, 0x5d, 0x55, 0x00, 0x88,
0x00, 0x00, 0x00, 0x07, 0x00, 0x00, 0x12, 0x30,
0x9c, 0xd5, 0xfd, 0xc0, 0x00, 0x00, 0x00, 0x00,
0x00, 0x00, 0x00, 0x00, 0x00, 0x00, 0x00, 0x01,
0x00, 0x00, 0x00, 0x01, 0x3c, 0xb7, 0xd3, 0x84,
0x2e, 0x8c, 0xee, 0x6a, 0x0e, 0xbd, 0x09, 0xf1,
0xfe, 0x88, 0x4f, 0x68, 0x61, 0xe1, 0xb2, 0x9c,
0x00, 0x00, 0x00, 0x00, 0x00, 0x00, 0x00, 0x00,
// end base tx
// Subnet id
0x8c, 0x86, 0xd0, 0x7c, 0xd6, 0x02, 0x18, 0x66,
0x18, 0x63, 0xe0, 0x11, 0x65, 0x52, 0xdc, 0xcd,
0x5b, 0xd8, 0x4c, 0x56, 0x4b, 0xd2, 0x9d, 0x71,
0x81, 0xdb, 0xdd, 0xd5, 0xec, 0x61, 0x61, 0x04,
// chain name length
0x00, 0x08,
// chain name
0x45, 0x50, 0x49, 0x43, 0x20, 0x41, 0x56, 0x4d,
// vm id
0x61, 0x76, 0x6d, 0x00, 0x00, 0x00, 0x00, 0x00,
0x00, 0x00, 0x00, 0x00, 0x00, 0x00, 0x00, 0x00,
0x00, 0x00, 0x00, 0x00, 0x00, 0x00, 0x00, 0x00,
0x00, 0x00, 0x00, 0x00, 0x00, 0x00, 0x00, 0x00,
// fxids
// num fxids
0x00, 0x00, 0x00, 0x01,
// fxid
0x73, 0x65, 0x63, 0x70, 0x32, 0x35, 0x36, 0x6b,
0x31, 0x66, 0x78, 0x00, 0x00, 0x00, 0x00, 0x00,
0x00, 0x00, 0x00, 0x00, 0x00, 0x00, 0x00, 0x00,
0x00, 0x00, 0x00, 0x00, 0x00, 0x00, 0x00, 0x00,
// genesis data len
0x00, 0x00, 0x00, 0xb0,
// genesis data
0x00, 0x00, 0x00, 0x00, 0x00, 0x01, 0x00, 0x0e,
0x41, 0x73, 0x73, 0x65, 0x74, 0x41, 0x6c, 0x69,
0x61, 0x73, 0x54, 0x65, 0x73, 0x74, 0x00, 0x00,
0x05, 0x39, 0x00, 0x00, 0x00, 0x00, 0x00, 0x00,
0x00, 0x00, 0x00, 0x00, 0x00, 0x00, 0x00, 0x00,
0x00, 0x00, 0x00, 0x00, 0x00, 0x00, 0x00, 0x00,
0x00, 0x00, 0x00, 0x00, 0x00, 0x00, 0x00, 0x00,
0x00, 0x00, 0x00, 0x00, 0x00, 0x00, 0x00, 0x00,
0x00, 0x00, 0x00, 0x00, 0x00, 0x1b, 0x66, 0x72,
0x6f, 0x6d, 0x20, 0x73, 0x6e, 0x6f, 0x77, 0x66,
0x6c, 0x61, 0x6b, 0x65, 0x20, 0x74, 0x6f, 0x20,
0x61, 0x76, 0x61, 0x6c, 0x61, 0x6e, 0x63, 0x68,
0x65, 0x00, 0x0a, 0x54, 0x65, 0x73, 0x74, 0x20,
0x41, 0x73, 0x73, 0x65, 0x74, 0x00, 0x04, 0x54,
0x45, 0x53, 0x54, 0x00, 0x00, 0x00, 0x00, 0x01,
0x00, 0x00, 0x00, 0x00, 0x00, 0x00, 0x00, 0x01,
0x00, 0x00, 0x00, 0x07, 0x00, 0x00, 0x00, 0x00,
0x00, 0x00, 0x01, 0xfb, 0x00, 0x00, 0x00, 0x00,
0x00, 0x00, 0x00, 0x00, 0x00, 0x00, 0x00, 0x01,
0x00, 0x00, 0x00, 0x01, 0x3c, 0xb7, 0xd3, 0x84,
0x2e, 0x8c, 0xee, 0x6a, 0x0e, 0xbd, 0x09, 0xf1,
0xfe, 0x88, 0x4f, 0x68, 0x61, 0xe1, 0xb2, 0x9c,
// type id (Subnet Auth)
0x00, 0x00, 0x00, 0x0a,
// num address indices
0x00, 0x00, 0x00, 0x01,
// address index
0x00, 0x00, 0x00, 0x00,
]
```
## Unsigned Create Avalanche L1 TX
### What Unsigned Create Avalanche L1 TX Contains
An unsigned create Avalanche L1 TX contains a `BaseTx`, and `RewardsOwner`. The `TypeID` for this type is `0x00000010`.
- **`BaseTx`**
- **`RewardsOwner`** A `SECP256K1OutputOwners`
### Gantt Unsigned Create Avalanche L1 TX Specification
```text
+-----------------+-----------------------|---------------------------------+
| base_tx : BaseTx | size(base_tx) bytes |
+-----------------+-----------------------+--------------------------------+
| rewards_owner : SECP256K1OutputOwners | size(rewards_owner) bytes |
+-----------------+-----------------------+---------------------------------+
| size(rewards_owner) + size(base_tx) bytes |
+-------------------------------------------+
```
### Proto Unsigned Create Avalanche L1 TX Specification
```text
message CreateSubnetTx {
BaseTx base_tx = 1; // size(base_tx)
SECP256K1OutputOwners rewards_owner = 2; // size(rewards_owner)
}
```
### Unsigned Create Avalanche L1 TX Example
Let's make an unsigned create Avalanche L1 TX that uses the inputs from the previous examples:
- **`BaseTx`**: "Example BaseTx as defined above but with TypeID set to 16"
- **`RewardsOwner`**:
- **`TypeId`**: 11
- **`Locktime`**: 0
- **`Threshold`**: 1
- **`Addresses`**: \[ 0xda2bee01be82ecc00c34f361eda8eb30fb5a715c \]
```text
[
BaseTx <- 0x00000010000030390000000000000000000000000000000000000000000000000000000000000006870b7d66ac32540311379e5b5dbad28ec7eb8ddbfc8f4d67299ebb48475907a0000000700000000ee5be5c000000000000000000000000100000001da2bee01be82ecc00c34f361eda8eb30fb5a715cdfafbdf5c81f635c9257824ff21c8e3e6f7b632ac306e11446ee540d34711a15000000016870b7d66ac32540311379e5b5dbad28ec7eb8ddbfc8f4d67299ebb48475907a0000000500000000ee6b28000000000100000000
RewardsOwner <-
TypeID <- 0x0000000b
Locktime <- 0x0000000000000000
Threshold <- 0x00000001
Addresses <- [
0xda2bee01be82ecc00c34f361eda8eb30fb5a715c,
]
]
=
[
// base tx:
0x00, 0x00, 0x00, 0x10,
0x00, 0x00, 0x30, 0x39, 0x00, 0x00, 0x00, 0x00,
0x00, 0x00, 0x00, 0x00, 0x00, 0x00, 0x00, 0x00,
0x00, 0x00, 0x00, 0x00, 0x00, 0x00, 0x00, 0x00,
0x00, 0x00, 0x00, 0x00, 0x00, 0x00, 0x00, 0x00,
0x00, 0x00, 0x00, 0x00, 0x00, 0x00, 0x00, 0x01,
0x39, 0xc3, 0x3a, 0x49, 0x9c, 0xe4, 0xc3, 0x3a,
0x3b, 0x09, 0xcd, 0xd2, 0xcf, 0xa0, 0x1a, 0xe7,
0x0d, 0xbf, 0x2d, 0x18, 0xb2, 0xd7, 0xd1, 0x68,
0x52, 0x44, 0x40, 0xe5, 0x5d, 0x55, 0x00, 0x88,
0x00, 0x00, 0x00, 0x07, 0x00, 0x00, 0x12, 0x30,
0x9c, 0xd5, 0xfd, 0xc0, 0x00, 0x00, 0x00, 0x00,
0x00, 0x00, 0x00, 0x00, 0x00, 0x00, 0x00, 0x01,
0x00, 0x00, 0x00, 0x01, 0x3c, 0xb7, 0xd3, 0x84,
0x2e, 0x8c, 0xee, 0x6a, 0x0e, 0xbd, 0x09, 0xf1,
0xfe, 0x88, 0x4f, 0x68, 0x61, 0xe1, 0xb2, 0x9c,
0x00, 0x00, 0x00, 0x00, 0x00, 0x00, 0x00, 0x00,
// RewardsOwner type id
0x00, 0x00, 0x00, 0x0b,
// locktime:
0x00, 0x00, 0x00, 0x00, 0x00, 0x00, 0x00, 0x00,
// threshold:
0x00, 0x00, 0x00, 0x01,
// number of addresses:
0x00, 0x00, 0x00, 0x01,
// addrs[0]:
0xda, 0x2b, 0xee, 0x01,
0xbe, 0x82, 0xec, 0xc0, 0x0c, 0x34, 0xf3, 0x61,
0xed, 0xa8, 0xeb, 0x30, 0xfb, 0x5a, 0x71, 0x5c
]
```
## Unsigned Import TX
### What Unsigned Import TX Contains
An unsigned import TX contains a `BaseTx`, `SourceChain`, and `Ins`. The `TypeID` for this type is `0x00000011`.
- **`BaseTx`**
- **`SourceChain`** is a 32-byte source blockchain ID.
- **`Ins`** is a variable length array of Transferable Inputs.
### Gantt Unsigned Import TX Specification
```text
+-----------------+--------------|---------------------------------+
| base_tx : BaseTx | size(base_tx) bytes |
+-----------------+--------------+---------------------------------+
| source_chain : [32]byte | 32 bytes |
+-----------------+--------------+---------------------------------+
| ins : []TransferIn | 4 + size(ins) bytes |
+-----------------+--------------+---------------------------------+
| 36 + size(ins) + size(base_tx) bytes |
+--------------------------------------+
```
### Proto Unsigned Import TX Specification
```text
message ImportTx {
BaseTx base_tx = 1; // size(base_tx)
bytes source_chain = 2; // 32 bytes
repeated TransferIn ins = 3; // 4 bytes + size(ins)
}
```
### Unsigned Import TX Example
Let's make an unsigned import TX that uses the inputs from the previous examples:
- **`BaseTx`**: "Example BaseTx as defined above with TypeID set to 17"
- **`SourceChain`**:
- **`Ins`**: "Example SECP256K1 Transfer Input as defined above"
```text
[
BaseTx <- 0x00000011000030390000000000000000000000000000000000000000000000000000000000000006870b7d66ac32540311379e5b5dbad28ec7eb8ddbfc8f4d67299ebb48475907a0000000700000000ee5be5c000000000000000000000000100000001da2bee01be82ecc00c34f361eda8eb30fb5a715cdfafbdf5c81f635c9257824ff21c8e3e6f7b632ac306e11446ee540d34711a15000000016870b7d66ac32540311379e5b5dbad28ec7eb8ddbfc8f4d67299ebb48475907a0000000500000000ee6b28000000000100000000
SourceChain <- 0x787cd3243c002e9bf5bbbaea8a42a16c1a19cc105047c66996807cbf16acee10
Ins <- [
// input:
]
]
=
[
// base tx:
0x00, 0x00, 0x00, 0x11,
0x00, 0x00, 0x30, 0x39, 0x00, 0x00, 0x00, 0x00,
0x00, 0x00, 0x00, 0x00, 0x00, 0x00, 0x00, 0x00,
0x00, 0x00, 0x00, 0x00, 0x00, 0x00, 0x00, 0x00,
0x00, 0x00, 0x00, 0x00, 0x00, 0x00, 0x00, 0x00,
0x00, 0x00, 0x00, 0x00, 0x00, 0x00, 0x00, 0x01,
0x39, 0xc3, 0x3a, 0x49, 0x9c, 0xe4, 0xc3, 0x3a,
0x3b, 0x09, 0xcd, 0xd2, 0xcf, 0xa0, 0x1a, 0xe7,
0x0d, 0xbf, 0x2d, 0x18, 0xb2, 0xd7, 0xd1, 0x68,
0x52, 0x44, 0x40, 0xe5, 0x5d, 0x55, 0x00, 0x88,
0x00, 0x00, 0x00, 0x07, 0x00, 0x00, 0x12, 0x30,
0x9c, 0xd5, 0xfd, 0xc0, 0x00, 0x00, 0x00, 0x00,
0x00, 0x00, 0x00, 0x00, 0x00, 0x00, 0x00, 0x01,
0x00, 0x00, 0x00, 0x01, 0x3c, 0xb7, 0xd3, 0x84,
0x2e, 0x8c, 0xee, 0x6a, 0x0e, 0xbd, 0x09, 0xf1,
0xfe, 0x88, 0x4f, 0x68, 0x61, 0xe1, 0xb2, 0x9c,
0x00, 0x00, 0x00, 0x00, 0x00, 0x00, 0x00, 0x00,
// sourceChain
0x78, 0x7c, 0xd3, 0x24, 0x3c, 0x00, 0x2e, 0x9b,
0xf5, 0xbb, 0xba, 0xea, 0x8a, 0x42, 0xa1, 0x6c,
0x1a, 0x19, 0xcc, 0x10, 0x50, 0x47, 0xc6, 0x69,
0x96, 0x80, 0x7c, 0xbf, 0x16, 0xac, 0xee, 0x10,
// input count:
0x00, 0x00, 0x00, 0x01,
// txID:
0xf1, 0xe1, 0xd1, 0xc1, 0xb1, 0xa1, 0x91, 0x81,
0x71, 0x61, 0x51, 0x41, 0x31, 0x21, 0x11, 0x01,
0xf0, 0xe0, 0xd0, 0xc0, 0xb0, 0xa0, 0x90, 0x80,
0x70, 0x60, 0x50, 0x40, 0x30, 0x20, 0x10, 0x00,
// utxoIndex:
0x00, 0x00, 0x00, 0x05,
// assetID:
0x00, 0x01, 0x02, 0x03, 0x04, 0x05, 0x06, 0x07,
0x08, 0x09, 0x0a, 0x0b, 0x0c, 0x0d, 0x0e, 0x0f,
0x10, 0x11, 0x12, 0x13, 0x14, 0x15, 0x16, 0x17,
0x18, 0x19, 0x1a, 0x1b, 0x1c, 0x1d, 0x1e, 0x1f,
// input:
0x00, 0x00, 0x00, 0x05, 0x00, 0x00, 0x00, 0x00,
0xee, 0x6b, 0x28, 0x00, 0x00, 0x00, 0x00, 0x01,
0x00, 0x00, 0x00, 0x00,
]
```
## Unsigned Export TX
### What Unsigned Export TX Contains
An unsigned export TX contains a `BaseTx`, `DestinationChain`, and `Outs`. The
`TypeID` for this type is `0x00000012`.
- **`DestinationChain`** is the 32 byte ID of the chain where the funds are being exported to.
- **`Outs`** is a variable length array of Transferable Outputs.
### Gantt Unsigned Export TX Specification
```text
+-------------------+---------------+--------------------------------------+
| base_tx : BaseTx | size(base_tx) bytes |
+-------------------+---------------+--------------------------------------+
| destination_chain : [32]byte | 32 bytes |
+-------------------+---------------+--------------------------------------+
| outs : []TransferOut | 4 + size(outs) bytes |
+-------------------+---------------+--------------------------------------+
| 36 + size(outs) + size(base_tx) bytes |
+---------------------------------------+
```
### Proto Unsigned Export TX Specification
```text
message ExportTx {
BaseTx base_tx = 1; // size(base_tx)
bytes destination_chain = 2; // 32 bytes
repeated TransferOut outs = 3; // 4 bytes + size(outs)
}
```
### Unsigned Export TX Example
Let's make an unsigned export TX that uses the outputs from the previous examples:
- `BaseTx`: "Example BaseTx as defined above" with `TypeID` set to 18
- `DestinationChain`: `0x0000000000000000000000000000000000000000000000000000000000000000`
- `Outs`: "Example SECP256K1 Transfer Output as defined above"
```text
[
BaseTx <- 0x00000012000030390000000000000000000000000000000000000000000000000000000000000006870b7d66ac32540311379e5b5dbad28ec7eb8ddbfc8f4d67299ebb48475907a0000000700000000ee5be5c000000000000000000000000100000001da2bee01be82ecc00c34f361eda8eb30fb5a715cdfafbdf5c81f635c9257824ff21c8e3e6f7b632ac306e11446ee540d34711a15000000016870b7d66ac32540311379e5b5dbad28ec7eb8ddbfc8f4d67299ebb48475907a0000000500000000ee6b28000000000100000000
DestinationChain <- 0x0000000000000000000000000000000000000000000000000000000000000000
Outs <- [
000102030405060708090a0b0c0d0e0f101112131415161718191a1b1c1d1e1f000000070000000000003039000000000000d431000000010000000251025c61fbcfc078f69334f834be6dd26d55a955c3344128e060128ede3523a24a461c8943ab0859,
]
]
=
[
// base tx:
0x00, 0x00, 0x00, 0x12
0x00, 0x00, 0x00, 0x04, 0xff, 0xff, 0xff, 0xff,
0xee, 0xee, 0xee, 0xee, 0xdd, 0xdd, 0xdd, 0xdd,
0xcc, 0xcc, 0xcc, 0xcc, 0xbb, 0xbb, 0xbb, 0xbb,
0xaa, 0xaa, 0xaa, 0xaa, 0x99, 0x99, 0x99, 0x99,
0x88, 0x88, 0x88, 0x88, 0x00, 0x00, 0x00, 0x01,
0x00, 0x01, 0x02, 0x03, 0x04, 0x05, 0x06, 0x07,
0x08, 0x09, 0x0a, 0x0b, 0x0c, 0x0d, 0x0e, 0x0f,
0x10, 0x11, 0x12, 0x13, 0x14, 0x15, 0x16, 0x17,
0x18, 0x19, 0x1a, 0x1b, 0x1c, 0x1d, 0x1e, 0x1f,
0x00, 0x00, 0x00, 0x07, 0x00, 0x00, 0x00, 0x00,
0x00, 0x00, 0x30, 0x39, 0x00, 0x00, 0x00, 0x00,
0x00, 0x00, 0xd4, 0x31, 0x00, 0x00, 0x00, 0x01,
0x00, 0x00, 0x00, 0x02, 0x51, 0x02, 0x5c, 0x61,
0xfb, 0xcf, 0xc0, 0x78, 0xf6, 0x93, 0x34, 0xf8,
0x34, 0xbe, 0x6d, 0xd2, 0x6d, 0x55, 0xa9, 0x55,
0xc3, 0x34, 0x41, 0x28, 0xe0, 0x60, 0x12, 0x8e,
0xde, 0x35, 0x23, 0xa2, 0x4a, 0x46, 0x1c, 0x89,
0x43, 0xab, 0x08, 0x59, 0x00, 0x00, 0x00, 0x01,
0xf1, 0xe1, 0xd1, 0xc1, 0xb1, 0xa1, 0x91, 0x81,
0x71, 0x61, 0x51, 0x41, 0x31, 0x21, 0x11, 0x01,
0xf0, 0xe0, 0xd0, 0xc0, 0xb0, 0xa0, 0x90, 0x80,
0x70, 0x60, 0x50, 0x40, 0x30, 0x20, 0x10, 0x00,
0x00, 0x00, 0x00, 0x05, 0x00, 0x01, 0x02, 0x03,
0x04, 0x05, 0x06, 0x07, 0x08, 0x09, 0x0a, 0x0b,
0x0c, 0x0d, 0x0e, 0x0f, 0x10, 0x11, 0x12, 0x13,
0x14, 0x15, 0x16, 0x17, 0x18, 0x19, 0x1a, 0x1b,
0x1c, 0x1d, 0x1e, 0x1f, 0x00, 0x00, 0x00, 0x05,
0x00, 0x00, 0x00, 0x00, 0x07, 0x5b, 0xcd, 0x15,
0x00, 0x00, 0x00, 0x02, 0x00, 0x00, 0x00, 0x07,
0x00, 0x00, 0x00, 0x03, 0x00, 0x00, 0x00, 0x04,
0x00, 0x01, 0x02, 0x03
// destination_chain:
0x00, 0x00, 0x00, 0x00, 0x00, 0x00, 0x00, 0x00,
0x00, 0x00, 0x00, 0x00, 0x00, 0x00, 0x00, 0x00,
0x00, 0x00, 0x00, 0x00, 0x00, 0x00, 0x00, 0x00,
0x00, 0x00, 0x00, 0x00, 0x00, 0x00, 0x00, 0x00,
// outs[] count:
0x00, 0x00, 0x00, 0x01,
// assetID:
0x00, 0x01, 0x02, 0x03, 0x04, 0x05, 0x06, 0x07,
0x08, 0x09, 0x0a, 0x0b, 0x0c, 0x0d, 0x0e, 0x0f,
0x10, 0x11, 0x12, 0x13, 0x14, 0x15, 0x16, 0x17,
0x18, 0x19, 0x1a, 0x1b, 0x1c, 0x1d, 0x1e, 0x1f,
// output:
0x00, 0x00, 0x00, 0x07,
0x00, 0x00, 0x00, 0x00, 0x00, 0x00, 0x30, 0x39,
0x00, 0x00, 0x00, 0x00, 0x00, 0x00, 0xd4, 0x31,
0x00, 0x00, 0x00, 0x01, 0x00, 0x00, 0x00, 0x02,
0x51, 0x02, 0x5c, 0x61, 0xfb, 0xcf, 0xc0, 0x78,
0xf6, 0x93, 0x34, 0xf8, 0x34, 0xbe, 0x6d, 0xd2,
0x6d, 0x55, 0xa9, 0x55, 0xc3, 0x34, 0x41, 0x28,
0xe0, 0x60, 0x12, 0x8e, 0xde, 0x35, 0x23, 0xa2,
0x4a, 0x46, 0x1c, 0x89, 0x43, 0xab, 0x08, 0x59,
]
```
## Credentials
Credentials have one possible types: `SECP256K1Credential`. Each credential is
paired with an Input or Operation. The order of the credentials match the order
of the inputs or operations.
## SECP256K1 Credential
A [secp256k1](/docs/api-reference/standards/cryptographic-primitives#secp256k1-addresses) credential
contains a list of 65-byte recoverable signatures.
### What SECP256K1 Credential Contains
- **`TypeID`** is the ID for this type. It is `0x00000009`.
- **`Signatures`** is an array of 65-byte recoverable signatures. The order of
the signatures must match the input's signature indices.
### Gantt SECP256K1 Credential Specification
```text
+------------------------------+---------------------------------+
| type_id : int | 4 bytes |
+-----------------+------------+---------------------------------+
| signatures : [][65]byte | 4 + 65 * len(signatures) bytes |
+-----------------+------------+---------------------------------+
| 8 + 65 * len(signatures) bytes |
+---------------------------------+
```
### Proto SECP256K1 Credential Specification
```text
message SECP256K1Credential {
uint32 TypeID = 1; // 4 bytes
repeated bytes signatures = 2; // 4 bytes + 65 bytes * len(signatures)
}
```
### SECP256K1 Credential Example
Let's make a payment input with:
- **`signatures`**:
- `0x000102030405060708090a0b0c0d0e0f101112131415161718191a1b1c1e1d1f202122232425262728292a2b2c2e2d2f303132333435363738393a3b3c3d3e3f00`
- `0x404142434445464748494a4b4c4d4e4f505152535455565758595a5b5c5e5d5f606162636465666768696a6b6c6e6d6f707172737475767778797a7b7c7d7e7f00`
```text
[
Signatures <- [
0x000102030405060708090a0b0c0d0e0f101112131415161718191a1b1c1e1d1f202122232425262728292a2b2c2e2d2f303132333435363738393a3b3c3d3e3f00,
0x404142434445464748494a4b4c4d4e4f505152535455565758595a5b5c5e5d5f606162636465666768696a6b6c6e6d6f707172737475767778797a7b7c7d7e7f00,
]
]
=
[
// Type ID
0x00, 0x00, 0x00, 0x09,
// length:
0x00, 0x00, 0x00, 0x02,
// sig[0]
0x00, 0x01, 0x02, 0x03, 0x04, 0x05, 0x06, 0x07,
0x08, 0x09, 0x0a, 0x0b, 0x0c, 0x0d, 0x0e, 0x0f,
0x10, 0x11, 0x12, 0x13, 0x14, 0x15, 0x16, 0x17,
0x18, 0x19, 0x1a, 0x1b, 0x1c, 0x1e, 0x1d, 0x1f,
0x20, 0x21, 0x22, 0x23, 0x24, 0x25, 0x26, 0x27,
0x28, 0x29, 0x2a, 0x2b, 0x2c, 0x2e, 0x2d, 0x2f,
0x30, 0x31, 0x32, 0x33, 0x34, 0x35, 0x36, 0x37,
0x38, 0x39, 0x3a, 0x3b, 0x3c, 0x3d, 0x3e, 0x3f,
0x00,
// sig[1]
0x40, 0x41, 0x42, 0x43, 0x44, 0x45, 0x46, 0x47,
0x48, 0x49, 0x4a, 0x4b, 0x4c, 0x4d, 0x4e, 0x4f,
0x50, 0x51, 0x52, 0x53, 0x54, 0x55, 0x56, 0x57,
0x58, 0x59, 0x5a, 0x5b, 0x5c, 0x5e, 0x5d, 0x5f,
0x60, 0x61, 0x62, 0x63, 0x64, 0x65, 0x66, 0x67,
0x68, 0x69, 0x6a, 0x6b, 0x6c, 0x6e, 0x6d, 0x6f,
0x70, 0x71, 0x72, 0x73, 0x74, 0x75, 0x76, 0x77,
0x78, 0x79, 0x7a, 0x7b, 0x7c, 0x7d, 0x7e, 0x7f,
0x00,
]
```
## Signed Transaction
A signed transaction is an unsigned transaction with the addition of an array of credentials.
### What Signed Transaction Contains
A signed transaction contains a `CodecID`, `UnsignedTx`, and `Credentials`.
- **`CodecID`** The only current valid codec id is `00 00`.
- **`UnsignedTx`** is an unsigned transaction, as described above.
- **`Credentials`** is an array of credentials. Each credential will be paired
with the input in the same index at this credential.
### Gantt Signed Transaction Specification
```text
+---------------------+--------------+------------------------------------------------+
| codec_id : uint16 | 2 bytes |
+---------------------+--------------+------------------------------------------------+
| unsigned_tx : UnsignedTx | size(unsigned_tx) bytes |
+---------------------+--------------+------------------------------------------------+
| credentials : []Credential | 4 + size(credentials) bytes |
+---------------------+--------------+------------------------------------------------+
| 6 + size(unsigned_tx) + len(credentials) bytes |
+------------------------------------------------+
```
### Proto Signed Transaction Specification
```text
message Tx {
uint32 codec_id = 1; // 2 bytes
UnsignedTx unsigned_tx = 2; // size(unsigned_tx)
repeated Credential credentials = 3; // 4 bytes + size(credentials)
}
```
### Signed Transaction Example
Let's make a signed transaction that uses the unsigned transaction and credential from the previous examples.
- **`CodecID`**: `0`
- **`UnsignedTx`**: `0x0000000100000003ffffffffeeeeeeeeddddddddccccccccbbbbbbbbaaaaaaaa999999998888888800000001000102030405060708090a0b0c0d0e0f101112131415161718191a1b1c1d1e1f000000070000000000003039000000000000d431000000010000000251025c61fbcfc078f69334f834be6dd26d55a955c3344128e060128ede3523a24a461c8943ab085900000001f1e1d1c1b1a191817161514131211101f0e0d0c0b0a09080706050403020100000000005000102030405060708090a0b0c0d0e0f101112131415161718191a1b1c1d1e1f0000000500000000075bcd150000000200000003000000070000000400010203`
- **`Credentials`** `0x0000000900000002000102030405060708090a0b0c0d0e0f101112131415161718191a1b1c1e1d1f202122232425262728292a2b2c2e2d2f303132333435363738393a3b3c3d3e3f00404142434445464748494a4b4c4d4e4f505152535455565758595a5b5c5e5d5f606162636465666768696a6b6c6e6d6f707172737475767778797a7b7c7d7e7f00`
```text
[
CodecID <- 0x0000
UnsignedTx <- 0x0000000100000003ffffffffeeeeeeeeddddddddccccccccbbbbbbbbaaaaaaaa999999998888888800000001000102030405060708090a0b0c0d0e0f101112131415161718191a1b1c1d1e1f000000070000000000003039000000000000d431000000010000000251025c61fbcfc078f69334f834be6dd26d55a955c3344128e060128ede3523a24a461c8943ab085900000001f1e1d1c1b1a191817161514131211101f0e0d0c0b0a09080706050403020100000000005000102030405060708090a0b0c0d0e0f101112131415161718191a1b1c1d1e1f0000000500000000075bcd150000000200000003000000070000000400010203
Credentials <- [
0x0000000900000002000102030405060708090a0b0c0d0e0f101112131415161718191a1b1c1e1d1f202122232425262728292a2b2c2e2d2f303132333435363738393a3b3c3d3e3f00404142434445464748494a4b4c4d4e4f505152535455565758595a5b5c5e5d5f606162636465666768696a6b6c6e6d6f707172737475767778797a7b7c7d7e7f00,
]
]
=
[
// Codec ID
0x00, 0x00,
// unsigned transaction:
0x00, 0x00, 0x00, 0x01, 0x00, 0x00, 0x00, 0x03,
0xff, 0xff, 0xff, 0xff, 0xee, 0xee, 0xee, 0xee,
0xdd, 0xdd, 0xdd, 0xdd, 0xcc, 0xcc, 0xcc, 0xcc,
0xbb, 0xbb, 0xbb, 0xbb, 0xaa, 0xaa, 0xaa, 0xaa,
0x99, 0x99, 0x99, 0x99, 0x88, 0x88, 0x88, 0x88,
0x00, 0x00, 0x00, 0x01, 0x00, 0x01, 0x02, 0x03,
0x04, 0x05, 0x06, 0x07, 0x08, 0x09, 0x0a, 0x0b,
0x0c, 0x0d, 0x0e, 0x0f, 0x10, 0x11, 0x12, 0x13,
0x14, 0x15, 0x16, 0x17, 0x18, 0x19, 0x1a, 0x1b,
0x1c, 0x1d, 0x1e, 0x1f, 0x00, 0x00, 0x00, 0x07,
0x00, 0x00, 0x00, 0x00, 0x00, 0x00, 0x30, 0x39,
0x00, 0x00, 0x00, 0x00, 0x00, 0x00, 0xd4, 0x31,
0x00, 0x00, 0x00, 0x01, 0x00, 0x00, 0x00, 0x02,
0x51, 0x02, 0x5c, 0x61, 0xfb, 0xcf, 0xc0, 0x78,
0xf6, 0x93, 0x34, 0xf8, 0x34, 0xbe, 0x6d, 0xd2,
0x6d, 0x55, 0xa9, 0x55, 0xc3, 0x34, 0x41, 0x28,
0xe0, 0x60, 0x12, 0x8e, 0xde, 0x35, 0x23, 0xa2,
0x4a, 0x46, 0x1c, 0x89, 0x43, 0xab, 0x08, 0x59,
0x00, 0x00, 0x00, 0x01, 0xf1, 0xe1, 0xd1, 0xc1,
0xb1, 0xa1, 0x91, 0x81, 0x71, 0x61, 0x51, 0x41,
0x31, 0x21, 0x11, 0x01, 0xf0, 0xe0, 0xd0, 0xc0,
0xb0, 0xa0, 0x90, 0x80, 0x70, 0x60, 0x50, 0x40,
0x30, 0x20, 0x10, 0x00, 0x00, 0x00, 0x00, 0x05,
0x00, 0x01, 0x02, 0x03, 0x04, 0x05, 0x06, 0x07,
0x08, 0x09, 0x0a, 0x0b, 0x0c, 0x0d, 0x0e, 0x0f,
0x10, 0x11, 0x12, 0x13, 0x14, 0x15, 0x16, 0x17,
0x18, 0x19, 0x1a, 0x1b, 0x1c, 0x1d, 0x1e, 0x1f,
0x00, 0x00, 0x00, 0x05, 0x00, 0x00, 0x00, 0x00,
0x07, 0x5b, 0xcd, 0x15, 0x00, 0x00, 0x00, 0x02,
0x00, 0x00, 0x00, 0x03, 0x00, 0x00, 0x00, 0x07,
0x00, 0x00, 0x00, 0x04, 0x00, 0x01, 0x02, 0x03
// number of credentials:
0x00, 0x00, 0x00, 0x01,
// credential[0]:
0x00, 0x00, 0x00, 0x09, 0x00, 0x00, 0x00, 0x02,
0x00, 0x01, 0x02, 0x03, 0x04, 0x05, 0x06, 0x07,
0x08, 0x09, 0x0a, 0x0b, 0x0c, 0x0d, 0x0e, 0x0f,
0x10, 0x11, 0x12, 0x13, 0x14, 0x15, 0x16, 0x17,
0x18, 0x19, 0x1a, 0x1b, 0x1c, 0x1e, 0x1d, 0x1f,
0x20, 0x21, 0x22, 0x23, 0x24, 0x25, 0x26, 0x27,
0x28, 0x29, 0x2a, 0x2b, 0x2c, 0x2e, 0x2d, 0x2f,
0x30, 0x31, 0x32, 0x33, 0x34, 0x35, 0x36, 0x37,
0x38, 0x39, 0x3a, 0x3b, 0x3c, 0x3d, 0x3e, 0x3f,
0x00, 0x40, 0x41, 0x42, 0x43, 0x44, 0x45, 0x46,
0x47, 0x48, 0x49, 0x4a, 0x4b, 0x4c, 0x4d, 0x4e,
0x4f, 0x50, 0x51, 0x52, 0x53, 0x54, 0x55, 0x56,
0x57, 0x58, 0x59, 0x5a, 0x5b, 0x5c, 0x5e, 0x5d,
0x5f, 0x60, 0x61, 0x62, 0x63, 0x64, 0x65, 0x66,
0x67, 0x68, 0x69, 0x6a, 0x6b, 0x6c, 0x6e, 0x6d,
0x6f, 0x70, 0x71, 0x72, 0x73, 0x74, 0x75, 0x76,
0x77, 0x78, 0x79, 0x7a, 0x7b, 0x7c, 0x7d, 0x7e,
0x7f, 0x00,
]
```
## UTXO
A UTXO is a standalone representation of a transaction output.
### What UTXO Contains
A UTXO contains a `CodecID`, `TxID`, `UTXOIndex`, and `Output`.
- **`CodecID`** The only current valid codec id is `00 00`.
- **`TxID`** is a 32-byte transaction ID. Transaction IDs are calculated by
taking sha256 of the bytes of the signed transaction.
- **`UTXOIndex`** is an int that specifies which output in the transaction
specified by **`TxID`** that this utxo was created by.
- **`AssetID`** is a 32-byte array that defines which asset this utxo
references.
- **`Output`** is the output object that created this utxo. The serialization of
Outputs was defined above.
#### Gantt UTXO Specification
```text
+--------------+----------+-------------------------+
| codec_id : uint16 | 2 bytes |
+--------------+----------+-------------------------+
| tx_id : [32]byte | 32 bytes |
+--------------+----------+-------------------------+
| output_index : int | 4 bytes |
+--------------+----------+-------------------------+
| asset_id : [32]byte | 32 bytes |
+--------------+----------+-------------------------+
| output : Output | size(output) bytes |
+--------------+----------+-------------------------+
| 70 + size(output) bytes |
+-------------------------+
```
### Proto UTXO Specification
```text
message Utxo {
uint32 codec_id = 1; // 02 bytes
bytes tx_id = 2; // 32 bytes
uint32 output_index = 3; // 04 bytes
bytes asset_id = 4; // 32 bytes
Output output = 5; // size(output)
}
```
### UTXO Example
Let's make a UTXO from the signed transaction created above:
- **`CodecID`**: `0`
- **`TxID`**: `0xf966750f438867c3c9828ddcdbe660e21ccdbb36a9276958f011ba472f75d4e7`
- **`UTXOIndex`**: 0x00000000
- **`AssetID`**: `0x000102030405060708090a0b0c0d0e0f101112131415161718191a1b1c1d1e1f`
- **`Output`**: `"Example SECP256K1 Transferable Output as defined above"`
```text
[
CodecID <- 0x0000
TxID <- 0xf966750f438867c3c9828ddcdbe660e21ccdbb36a9276958f011ba472f75d4e7
UTXOIndex <- 0x00000000
AssetID <- 0x000102030405060708090a0b0c0d0e0f101112131415161718191a1b1c1d1e1f
Output <- 0x000000070000000000003039000000000000d431000000010000000251025c61fbcfc078f69334f834be6dd26d55a955c3344128e060128ede3523a24a461c8943ab0859
]
=
[
// Codec ID:
0x00, 0x00,
// txID:
0xf9, 0x66, 0x75, 0x0f, 0x43, 0x88, 0x67, 0xc3,
0xc9, 0x82, 0x8d, 0xdc, 0xdb, 0xe6, 0x60, 0xe2,
0x1c, 0xcd, 0xbb, 0x36, 0xa9, 0x27, 0x69, 0x58,
0xf0, 0x11, 0xba, 0x47, 0x2f, 0x75, 0xd4, 0xe7,
// utxo index:
0x00, 0x00, 0x00, 0x00,
// assetID:
0x00, 0x01, 0x02, 0x03, 0x04, 0x05, 0x06, 0x07,
0x08, 0x09, 0x0a, 0x0b, 0x0c, 0x0d, 0x0e, 0x0f,
0x10, 0x11, 0x12, 0x13, 0x14, 0x15, 0x16, 0x17,
0x18, 0x19, 0x1a, 0x1b, 0x1c, 0x1d, 0x1e, 0x1f,
// output:
0x00, 0x00, 0x00, 0x07, 0x00, 0x00, 0x00, 0x00,
0x00, 0x00, 0x30, 0x39, 0x00, 0x00, 0x00, 0x00,
0x00, 0x00, 0xd4, 0x31, 0x00, 0x00, 0x00, 0x01,
0x00, 0x00, 0x00, 0x02, 0x00, 0x01, 0x02, 0x03,
0x04, 0x05, 0x06, 0x07, 0x08, 0x09, 0x0a, 0x0b,
0x0c, 0x0d, 0x0e, 0x0f, 0x10, 0x11, 0x12, 0x13,
0x14, 0x15, 0x16, 0x17, 0x18, 0x19, 0x1a, 0x1b,
0x1c, 0x1d, 0x1e, 0x1f, 0x20, 0x21, 0x22, 0x23,
0x24, 0x25, 0x26, 0x27,
]
```
## StakeableLockIn
A StakeableLockIn is a staked and locked input. The StakeableLockIn can only
fund StakeableLockOuts with the same address until its lock time has passed.
### What StakeableLockIn Contains
A StakeableLockIn contains a `TypeID`, `Locktime` and `TransferableIn`.
- **`TypeID`** is the ID for this output type. It is `0x00000015`.
- **`Locktime`** is a long that contains the Unix timestamp before which the
input can be consumed only to stake. The Unix timestamp is specific to the
second.
- **`TransferableIn`** is a transferable input object.
### Gantt StakeableLockIn Specification
```text
+-----------------+-------------------+--------------------------------+
| type_id : int | 4 bytes |
+-----------------+-------------------+--------------------------------+
| locktime : long | 8 bytes |
+-----------------+-------------------+--------------------------------+
| transferable_in : TransferableInput | size(transferable_in) |
+-----------------+-------------------+--------------------------------+
| 12 + size(transferable_in) bytes |
+----------------------------------+
```
### Proto StakeableLockIn Specification
```text
message StakeableLockIn {
uint32 type_id = 1; // 04 bytes
uint64 locktime = 2; // 08 bytes
TransferableInput transferable_in = 3; // size(transferable_in)
}
```
### StakeableLockIn Example
Let's make a StakeableLockIn with:
- **`TypeID`**: 21
- **`Locktime`**: 54321
- **`TransferableIn`**: "Example SECP256K1 Transfer Input as defined above"
```text
[
TypeID <- 0x00000015
Locktime <- 0x000000000000d431
TransferableIn <- [
f1e1d1c1b1a191817161514131211101f0e0d0c0b0a09080706050403020100000000005000102030405060708090a0b0c0d0e0f101112131415161718191a1b1c1d1e1f0000000500000000075bcd150000000100000000,
]
]
=
[
// type_id:
0x00, 0x00, 0x00, 0x15,
// locktime:
0x00, 0x00, 0x00, 0x00, 0x00, 0x00, 0xd4, 0x31,
// transferable_in
0xf1, 0xe1, 0xd1, 0xc1, 0xb1, 0xa1, 0x91, 0x81,
0x71, 0x61, 0x51, 0x41, 0x31, 0x21, 0x11, 0x01,
0xf0, 0xe0, 0xd0, 0xc0, 0xb0, 0xa0, 0x90, 0x80,
0x70, 0x60, 0x50, 0x40, 0x30, 0x20, 0x10, 0x00,
0x00, 0x00, 0x00, 0x05,
0x00, 0x01, 0x02, 0x03, 0x04, 0x05, 0x06, 0x07,
0x08, 0x09, 0x0a, 0x0b, 0x0c, 0x0d, 0x0e, 0x0f,
0x10, 0x11, 0x12, 0x13, 0x14, 0x15, 0x16, 0x17,
0x18, 0x19, 0x1a, 0x1b, 0x1c, 0x1d, 0x1e, 0x1f,
0x00, 0x00, 0x00, 0x05, 0x00, 0x00, 0x00, 0x00,
0x07, 0x5b, 0xcd, 0x15, 0x00, 0x00, 0x00, 0x01,
0x00, 0x00, 0x00, 0x00,
]
```
## StakeableLockOut
A StakeableLockOut is an output that is locked until its lock time, but can be staked in the meantime.
### What StakeableLockOut Contains
A StakeableLockOut contains a `TypeID`, `Locktime` and `TransferableOut`.
- **`TypeID`** is the ID for this output type. It is `0x00000016`.
- **`Locktime`** is a long that contains the Unix timestamp before which the
output can be consumed only to stake. The Unix timestamp is specific to the
second.
- **`transferableout`**: "Example SECP256K1 Transfer Output as defined above"
### Gantt StakeableLockOut Specification
```text
+------------------+--------------------+--------------------------------+
| type_id : int | 4 bytes |
+------------------+--------------------+--------------------------------+
| locktime : long | 8 bytes |
+------------------+--------------------+--------------------------------+
| transferable_out : TransferableOutput | size(transferable_out) |
+------------------+--------------------+--------------------------------+
| 12 + size(transferable_out) bytes |
+-----------------------------------+
```
### Proto StakeableLockOut Specification
```text
message StakeableLockOut {
uint32 type_id = 1; // 04 bytes
uint64 locktime = 2; // 08 bytes
TransferableOutput transferable_out = 3; // size(transferable_out)
}
```
### StakeableLockOut Example
Let's make a stakeablelockout with:
- **`TypeID`**: 22
- **`Locktime`**: 54321
- **`TransferableOutput`**: `"Example SECP256K1 Transfer Output from above"`
```text
[
TypeID <- 0x00000016
Locktime <- 0x000000000000d431
TransferableOutput <- 0x000000070000000000003039000000000000d431000000010000000251025c61fbcfc078f69334f834be6dd26d55a955c3344128e060128ede3523a24a461c8943ab0859,
]
=
[
// type_id:
0x00, 0x00, 0x00, 0x16,
// locktime:
0x00, 0x00, 0x00, 0x00, 0x00, 0x00, 0xd4, 0x31,
// transferable_out
0x00, 0x00, 0x00, 0x07, 0x00, 0x00, 0x00, 0x00,
0x00, 0x00, 0x30, 0x39, 0x00, 0x00, 0x00, 0x00,
0x00, 0x00, 0xd4, 0x31, 0x00, 0x00, 0x00, 0x01,
0x00, 0x00, 0x00, 0x02, 0x51, 0x02, 0x5c, 0x61,
0xfb, 0xcf, 0xc0, 0x78, 0xf6, 0x93, 0x34, 0xf8,
0x34, 0xbe, 0x6d, 0xd2, 0x6d, 0x55, 0xa9, 0x55,
0xc3, 0x34, 0x41, 0x28, 0xe0, 0x60, 0x12, 0x8e,
0xde, 0x35, 0x23, 0xa2, 0x4a, 0x46, 0x1c, 0x89,
0x43, 0xab, 0x08, 0x59,
]
```
## Avalanche L1 Auth
### What Avalanche L1 Auth Contains
Specifies the addresses whose signatures will be provided to demonstrate that
the owners of an Avalanche L1 approve something.
- **`TypeID`** is the ID for this type. It is `0x0000000a`.
- **`AddressIndices`** defines which addresses' signatures will be attached to
this transaction. AddressIndices[i] is the index in an Avalanche L1 owner list that
corresponds to the signature at index i in the signature list. Must be sorted
low to high and not have duplicates.
### Gantt Avalanche L1 Auth Specification
```text
+-----------------+------------------+-------------------------------------+
| type_id : int | 4 bytes |
+-----------------+------------------+-------------------------------------+
| address_indices : []int | 4 + 4*len(address_indices) bytes |
+-----------------+------------------+-------------------------------------+
| 8 + 4*len(address_indices) bytes |
+-----------------+--------------------------------------------------------+
```
### Proto Avalanche L1 Auth Specification
```text
message SubnetAuth {
uint32 type_id = 1; // 04 bytes
repeated AddressIndex address_indices = 2; // 04 + 4*len(address_indices) bytes
}
```
### Avalanche L1 Auth Example
Let's make an Avalanche L1 auth:
- **`TypeID`**: `10`
- **`AddressIndices`**: [`0`]
```text
[
TypeID <- 0x0000000a
AddressIndices <- [
0x00000000
]
]
=
[
// type id
0x00, 0x00, 00x0, 0x0a,
// num address indices
0x00, 0x00, 0x00, 0x01,
// address index 1
0x00, 0x00, 0x00, 0x00
]
```
## Validator
A validator verifies transactions on a blockchain.
### What Validator Contains
A validator contains `NodeID`, `Start`, `End`, and `Wght`
- **`NodeID`** is the ID of the validator
- **`Start`** Unix time this validator starts validating
- **`End`** Unix time this validator stops validating
- **`Wght`** Weight of this validator used when sampling
### Gantt Validator Specification
```text
+------------------+----------+
| node_id : string | 20 bytes |
+------------------+----------+
| start : uint64 | 8 bytes |
+------------------+----------+
| end : uint64 | 8 bytes |
+------------------+----------+
| wght : uint64 | 8 bytes |
+------------------+----------+
| | 44 bytes |
+------------------+----------+
```
### Proto Validator Specification
```text
message Validator {
string node_id = 1; // 20 bytes
uint64 start = 2; // 08 bytes
uint64 end = 3; // 08 bytes
uint64 wght = 4; // 08 bytes
}
```
### Validator Example
Let's make a validator:
- **`NodeID`**: `"NodeID-GWPcbFJZFfZreETSoWjPimr846mXEKCtu"`
- **`Start`**: `1643068824`
- **`End`**: `1644364767`
- **`Wght`**: `20`
```text
[
NodeID <- 0xaa18d3991cf637aa6c162f5e95cf163f69cd8291
Start <- 0x61ef3d98
End <- 0x620303df
Wght <- 0x14
]
=
[
// node id
0xaa, 0x18, 0xd3, 0x99, 0x1c, 0xf6, 0x37,
0xaa, 0x6c, 0x16, 0x2f, 0x5e, 0x95, 0xcf,
0x16, 0x3f, 0x69, 0xcd, 0x82, 0x91,
// start
0x61, 0xef, 0x3d, 0x98,
// end
0x62, 0x03, 0x03, 0xdf,
// wght
0x14,
]
```
## Rewards Owner
Where to send staking rewards when done validating
### What Rewards Owner Contains
A rewards owner contains a `TypeID`, `Locktime`, `Threshold`, and `Addresses`.
- **`TypeID`** is the ID for this validator. It is `0x0000000b`.
- **`Locktime`** is a long that contains the Unix timestamp that this output can
be spent after. The Unix timestamp is specific to the second.
- **`Threshold`** is an int that names the number of unique signatures required
to spend the output. Must be less than or equal to the length of
**`Addresses`**. If **`Addresses`** is empty, must be 0.
- **`Addresses`** is a list of unique addresses that correspond to the private
keys that can be used to spend this output. Addresses must be sorted
lexicographically.
### Gantt Rewards Owner Specification
```text
+------------------------+-------------------------------+
| type_id : int | 4 bytes |
+------------------------+-------------------------------+
| locktime : long | 8 bytes |
+------------------------+-------------------------------+
| threshold : int | 4 bytes |
+------------------------+-------------------------------+
| addresses : [][20]byte | 4 + 20 * len(addresses) bytes |
+------------------------+-------------------------------+
| | 40 bytes |
+------------------------+-------------------------------+
```
### Proto Rewards Owner Specification
```text
message RewardsOwner {
string type_id = 1; // 4 bytes
uint64 locktime = 2; // 08 bytes
uint32 threshold = 3; // 04 bytes
repeated bytes addresses = 4; // 04 bytes + 20 bytes * len(addresses)
}
```
### Rewards Owner Example
Let's make a rewards owner:
- **`TypeID`**: `11`
- **`Locktime`**: `54321`
- **`Threshold`**: `1`
- **`Addresses`**:
- `0x51025c61fbcfc078f69334f834be6dd26d55a955`
- `0xc3344128e060128ede3523a24a461c8943ab0859`
```text
[
TypeID <- 0x0000000b
Locktime <- 0x000000000000d431
Threshold <- 0x00000001
Addresses <- [
0x51025c61fbcfc078f69334f834be6dd26d55a955,
0xc3344128e060128ede3523a24a461c8943ab0859,
]
]
=
[
// type id
0x00, 0x00, 0x00, 0x0b,
// locktime
0x00, 0x00, 0x00, 0x00, 0x00, 0x00, 0xd4, 0x31,
// threshold:
0x00, 0x00, 0x00, 0x01,
// number of addresses:
0x00, 0x00, 0x00, 0x02,
// addrs[0]:
0x51, 0x02, 0x5c, 0x61, 0xfb, 0xcf, 0xc0, 0x78,
0xf6, 0x93, 0x34, 0xf8, 0x34, 0xbe, 0x6d, 0xd2,
0x6d, 0x55, 0xa9, 0x55,
// addrs[1]:
0xc3, 0x34, 0x41, 0x28, 0xe0, 0x60, 0x12, 0x8e,
0xde, 0x35, 0x23, 0xa2, 0x4a, 0x46, 0x1c, 0x89,
0x43, 0xab, 0x08, 0x59,
]
```
## Unsigned Convert Subnet To L1 TX
### What Unsigned Convert Subnet To L1 TX Contains
An unsigned convert subnet to L1 TX contains a `BaseTx`, `Subnet`, `ChainID`, `Address`, `Validators`, and `SubnetAuth`. The `TypeID` for this type is `0x00000030`.
- **`BaseTx`**
- **`Subnet`** ID of the Subnet to transform into an L1. Must not be the Primary Network ID.
- **`ChainID`** BlockchainID where the validator manager lives.
- **`Address`** Address of the validator manager.
- **`Validators`** Initial continuous-fee-paying validators for the L1.
- **`SubnetAuth`** Authorizes this conversion. Must be signed by the Subnet's owner.
### Gantt Unsigned Convert Subnet To L1 TX Specification
```text
+------------+------------------+----------------------------------+
| base_tx : BaseTx | size(base_tx) bytes |
+------------+------------------+----------------------------------+
| subnet : [32]byte | 32 bytes |
+------------+------------------+----------------------------------+
| chain_id : [32]byte | 32 bytes |
+------------+------------------+----------------------------------+
| address : []byte | 4 + len(address) bytes |
+------------+------------------+----------------------------------+
| validators : []L1Validator | 4 + size(validators) bytes |
+------------+------------------+----------------------------------+
| subnet_auth: SubnetAuth | 4 bytes + len(sig_indices) bytes |
+------------+------------------+----------------------------------+
| 76 + size(base_tx) + len(address) + size(validators) + len(sig_indices) bytes |
+----------------------------------------------------------------------------+
```
### Proto Unsigned Convert Subnet To L1 TX Specification
```text
message ConvertSubnetToL1Tx {
BaseTx base_tx = 1; // size(base_tx)
SubnetID subnet = 2; // 32 bytes
ChainID chain_id = 3; // 32 bytes
bytes address = 4; // 4 + len(address) bytes
repeated L1Validator validators = 5; // 4 + size(validators) bytes
SubnetAuth subnet_auth = 6; // 4 bytes + len(sig_indices)
}
```
## Unsigned Register L1 Validator TX
### What Unsigned Register L1 Validator TX Contains
An unsigned register L1 validator TX contains a `BaseTx`, `Balance`, `Signer` and `Message`. The `TypeID` for this type is `0x00000031`.
- **`BaseTx`**
- **`Balance`** is the amount of AVAX being provided for fees, where `Balance <= sum($AVAX inputs) - sum($AVAX outputs) - TxFee`.
- **`Signer`** is a BLS signature proving ownership of the BLS public key specified in the Message for this validator.
- **`Message`** is a RegisterL1ValidatorMessage payload delivered as a Warp Message.
### Gantt Unsigned Register L1 Validator TX Specification
```text
+------------+------------------+----------------------------------+
| base_tx : BaseTx | size(base_tx) bytes |
+------------+------------------+----------------------------------+
| balance : uint64 | 8 bytes |
+------------+------------------+----------------------------------+
| signer : [96]byte | 96 bytes |
+------------+------------------+----------------------------------+
| message : WarpMessage | size(message) bytes |
+------------+------------------+----------------------------------+
| 104 + size(base_tx) + size(message) bytes |
+------------------------------------------------------------------+
```
### Proto Unsigned Register L1 Validator TX Specification
```text
message RegisterL1ValidatorTx {
BaseTx base_tx = 1; // size(base_tx)
uint64 balance = 2; // 8 bytes
bytes signer = 3; // 96 bytes
WarpMessage message = 4; // size(message) bytes
}
```
## Unsigned Set L1 Validator Weight TX
### What Unsigned Set L1 Validator Weight TX Contains
An unsigned set L1 validator weight TX contains a `BaseTx` and `Message`. The `TypeID` for this type is `0x00000032`.
- **`BaseTx`**
- **`Message`** An L1ValidatorWeightMessage payload delivered as a Warp Message. Contains the validationID, nonce, and new weight for a validator.
### Gantt Unsigned Set L1 Validator Weight TX Specification
```text
+------------+------------------+----------------------------------+
| base_tx : BaseTx | size(base_tx) bytes |
+------------+------------------+----------------------------------+
| message : WarpMessage | size(message) bytes |
+------------+------------------+----------------------------------+
| size(base_tx) + size(message) bytes |
+------------------------------------------------------------------+
```
### Proto Unsigned Set L1 Validator Weight TX Specification
```text
message SetL1ValidatorWeightTx {
BaseTx base_tx = 1; // size(base_tx)
WarpMessage message = 2; // size(message) bytes
}
```
## Unsigned Disable L1 Validator TX
### What Unsigned Disable L1 Validator TX Contains
An unsigned disable L1 validator TX contains a `BaseTx`, `ValidationID` and `DisableAuth`. The `TypeID` for this type is `0x00000033`.
- **`BaseTx`**
- **`ValidationID`** ID corresponding to the validator to be disabled.
- **`DisableAuth`** Authorizes this validator to be disabled. Must be signed by the DisableOwner specified when the validator was added.
### Gantt Unsigned Disable L1 Validator TX Specification
```text
+----------------+------------------+----------------------------------+
| base_tx : BaseTx | size(base_tx) bytes |
+----------------+------------------+----------------------------------+
| validation_id : [32]byte | 32 bytes |
+----------------+------------------+----------------------------------+
| disable_auth : Verifiable | size(disable_auth) bytes |
+----------------+------------------+----------------------------------+
| 32 + size(base_tx) + size(disable_auth) bytes |
+----------------------------------------------------------------------+
```
### Proto Unsigned Disable L1 Validator TX Specification
```text
message DisableL1ValidatorTx {
BaseTx base_tx = 1; // size(base_tx)
bytes validation_id = 2; // 32 bytes
Verifiable disable_auth = 3; // size(disable_auth) bytes
}
```
## Unsigned Increase L1 Validator Balance TX
### What Unsigned Increase L1 Validator Balance TX Contains
An unsigned increase L1 validator balance TX contains a `BaseTx`, `ValidationID` and `Balance`. The `TypeID` for this type is `0x00000034`.
- **`BaseTx`**
- **`ValidationID`** ID corresponding to the validator.
- **`Balance`** Additional AVAX amount to add to the validator's balance where `Balance <= sum($AVAX inputs) - sum($AVAX outputs) - TxFee`.
### Gantt Unsigned Increase L1 Validator Balance TX Specification
```text
+----------------+------------------+----------------------------------+
| base_tx : BaseTx | size(base_tx) bytes |
+----------------+------------------+----------------------------------+
| validation_id : [32]byte | 32 bytes |
+----------------+------------------+----------------------------------+
| balance : uint64 | 8 bytes |
+----------------+------------------+----------------------------------+
| 40 + size(base_tx) bytes |
+----------------------------------------------------------------------+
```
### Proto Unsigned Increase L1 Validator Balance TX Specification
```text
message IncreaseL1ValidatorBalanceTx {
BaseTx base_tx = 1; // size(base_tx)
bytes validation_id = 2; // 32 bytes
uint64 balance = 3; // 8 bytes
}
```
# Subnet-EVM RPC (/docs/rpcs/subnet-evm)
---
title: "Subnet-EVM RPC"
description: "This page describes the RPC endpoints available for Subnet-EVM based blockchains."
edit_url: https://github.com/ava-labs/subnet-evm/edit/master/plugin/evm/service.md
---
[Subnet-EVM](https://github.com/ava-labs/subnet-evm) APIs are identical to
[Coreth](https://build.avax.network/docs/api-reference/c-chain/api) C-Chain APIs, except Avalanche Specific APIs
starting with `avax`. Subnet-EVM also supports standard Ethereum APIs as well. For more
information about Coreth APIs see [GitHub](https://github.com/ava-labs/coreth).
Subnet-EVM has some additional APIs that are not available in Coreth.
## `eth_feeConfig`
Subnet-EVM comes with an API request for getting fee config at a specific block. You can use this
API to check your activated fee config.
**Signature:**
```bash
eth_feeConfig([blk BlkNrOrHash]) -> {feeConfig: json}
```
- `blk` is the block number or hash at which to retrieve the fee config. Defaults to the latest block if omitted.
**Example Call:**
```bash
curl -X POST --data '{
"jsonrpc": "2.0",
"method": "eth_feeConfig",
"params": [
"latest"
],
"id": 1
}' -H 'content-type:application/json;' 127.0.0.1:9650/ext/bc/2ebCneCbwthjQ1rYT41nhd7M76Hc6YmosMAQrTFhBq8qeqh6tt/rpc
```
**Example Response:**
```json
{
"jsonrpc": "2.0",
"id": 1,
"result": {
"feeConfig": {
"gasLimit": 15000000,
"targetBlockRate": 2,
"minBaseFee": 33000000000,
"targetGas": 15000000,
"baseFeeChangeDenominator": 36,
"minBlockGasCost": 0,
"maxBlockGasCost": 1000000,
"blockGasCostStep": 200000
},
"lastChangedAt": 0
}
}
```
## `eth_getChainConfig`
`eth_getChainConfig` returns the Chain Config of the blockchain. This API is enabled by default with
`internal-blockchain` namespace.
This API exists on the C-Chain as well, but in addition to the normal Chain Config returned by the
C-Chain `eth_getChainConfig` on `subnet-evm` additionally returns the upgrade config, which specifies
network upgrades activated after the genesis. **Signature:**
```bash
eth_getChainConfig({}) -> {chainConfig: json}
```
**Example Call:**
```bash
curl -X POST --data '{
"jsonrpc":"2.0",
"id" :1,
"method" :"eth_getChainConfig",
"params" :[]
}' -H 'content-type:application/json;' 127.0.0.1:9650/ext/bc/Nvqcm33CX2XABS62iZsAcVUkavfnzp1Sc5k413wn5Nrf7Qjt7/rpc
```
**Example Response:**
```json
{
"jsonrpc": "2.0",
"id": 1,
"result": {
"chainId": 43214,
"feeConfig": {
"gasLimit": 8000000,
"targetBlockRate": 2,
"minBaseFee": 33000000000,
"targetGas": 15000000,
"baseFeeChangeDenominator": 36,
"minBlockGasCost": 0,
"maxBlockGasCost": 1000000,
"blockGasCostStep": 200000
},
"allowFeeRecipients": true,
"homesteadBlock": 0,
"eip150Block": 0,
"eip150Hash": "0x2086799aeebeae135c246c65021c82b4e15a2c451340993aacfd2751886514f0",
"eip155Block": 0,
"eip158Block": 0,
"byzantiumBlock": 0,
"constantinopleBlock": 0,
"petersburgBlock": 0,
"istanbulBlock": 0,
"muirGlacierBlock": 0,
"subnetEVMTimestamp": 0,
"contractDeployerAllowListConfig": {
"adminAddresses": ["0x8db97c7cece249c2b98bdc0226cc4c2a57bf52fc"],
"blockTimestamp": 0
},
"contractNativeMinterConfig": {
"adminAddresses": ["0x8db97c7cece249c2b98bdc0226cc4c2a57bf52fc"],
"blockTimestamp": 0
},
"feeManagerConfig": {
"adminAddresses": ["0x8db97c7cece249c2b98bdc0226cc4c2a57bf52fc"],
"blockTimestamp": 0
},
"upgrades": {
"precompileUpgrades": [
{
"feeManagerConfig": {
"adminAddresses": null,
"blockTimestamp": 1661541259,
"disable": true
}
},
{
"feeManagerConfig": {
"adminAddresses": null,
"blockTimestamp": 1661541269
}
}
]
}
}
}
```
## `eth_getActivePrecompilesAt`
**DEPRECATED—instead use** [`eth_getActiveRulesAt`](#eth_getactiveprecompilesat).
`eth_getActivePrecompilesAt` returns activated precompiles at a specific timestamp. If no
timestamp is provided it returns the latest block timestamp. This API is enabled by default with
`internal-blockchain` namespace.
**Signature:**
```bash
eth_getActivePrecompilesAt([timestamp uint]) -> {precompiles: []Precompile}
```
- `timestamp` specifies the timestamp to show the precompiles active at this time. If omitted it shows precompiles activated at the latest block timestamp.
**Example Call:**
```bash
curl -X POST --data '{
"jsonrpc": "2.0",
"method": "eth_getActivePrecompilesAt",
"params": [],
"id": 1
}' -H 'content-type:application/json;' 127.0.0.1:9650/ext/bc/Nvqcm33CX2XABS62iZsAcVUkavfnzp1Sc5k413wn5Nrf7Qjt7/rpc
```
**Example Response:**
```json
{
"jsonrpc": "2.0",
"id": 1,
"result": {
"contractDeployerAllowListConfig": {
"adminAddresses": ["0x8db97c7cece249c2b98bdc0226cc4c2a57bf52fc"],
"blockTimestamp": 0
},
"contractNativeMinterConfig": {
"adminAddresses": ["0x8db97c7cece249c2b98bdc0226cc4c2a57bf52fc"],
"blockTimestamp": 0
},
"feeManagerConfig": {
"adminAddresses": ["0x8db97c7cece249c2b98bdc0226cc4c2a57bf52fc"],
"blockTimestamp": 0
}
}
}
```
## `eth_getActiveRulesAt`
`eth_getActiveRulesAt` returns activated rules (precompiles, upgrades) at a specific timestamp. If no
timestamp is provided it returns the latest block timestamp. This API is enabled by default with
`internal-blockchain` namespace.
**Signature:**
```bash
eth_getActiveRulesAt([timestamp uint]) -> {rules: json}
```
- `timestamp` specifies the timestamp to show the rules active at this time. If omitted it shows rules activated at the latest block timestamp.
**Example Call:**
```bash
curl -X POST --data '{
"jsonrpc": "2.0",
"method": "eth_getActiveRulesAt",
"params": [],
"id": 1
}' -H 'content-type:application/json;' 127.0.0.1:9650/ext/bc/Nvqcm33CX2XABS62iZsAcVUkavfnzp1Sc5k413wn5Nrf7Qjt7/rpc
```
**Example Response:**
```json
{
"jsonrpc": "2.0",
"id": 1,
"result": {
"ethRules": {
"IsHomestead": true,
"IsEIP150": true,
"IsEIP155": true,
"IsEIP158": true,
"IsByzantium": true,
"IsConstantinople": true,
"IsPetersburg": true,
"IsIstanbul": true,
"IsCancun": true
},
"avalancheRules": {
"IsSubnetEVM": true,
"IsDurango": true,
"IsEtna": true
},
"precompiles": {
"contractNativeMinterConfig": {
"timestamp": 0
},
"rewardManagerConfig": {
"timestamp": 1712918700
},
"warpConfig": {
"timestamp": 1714158045
}
}
}
}
```
## `validators.getCurrentValidators`
This API retrieves the list of current validators for the Subnet/L1. It provides detailed information about each validator, including their ID, status, weight, connection, and uptime.
URL: `http:///ext/bc//validators`
**Signature:**
```bash
validators.getCurrentValidators({nodeIDs: []string}) -> {validators: []Validator}
```
- `nodeIDs` is an optional parameter that specifies the node IDs of the validators to retrieve. If omitted, all validators are returned.
**Example Call:**
```bash
curl -X POST --data '{
"jsonrpc": "2.0",
"method": "validators.getCurrentValidators",
"params": {
"nodeIDs": []
},
"id": 1
}' -H 'content-type:application/json;' 127.0.0.1:9650/ext/bc/C49rHzk3vLr1w9Z8sY7scrZ69TU4WcD2pRS6ZyzaSn9xA2U9F/validators
```
**Example Response:**
```json
{
"jsonrpc": "2.0",
"result": {
"validators": [
{
"validationID": "nESqWkcNXihfdZESS2idWbFETMzatmkoTCktjxG1qryaQXfS6",
"nodeID": "NodeID-P7oB2McjBGgW2NXXWVYjV8JEDFoW9xDE5",
"weight": 20,
"startTimestamp": 1732025492,
"isActive": true,
"isL1Validator": false,
"isConnected": true,
"uptimeSeconds": 36,
"uptimePercentage": 100
}
]
},
"id": 1
}
```
**Response Fields:**
- `validationID`: (string) Unique identifier for the validation. This returns validation ID for L1s, AddSubnetValidator txID for Subnets.
- `nodeID`: (string) Node identifier for the validator.
- `weight`: (integer) The weight of the validator, often representing stake.
- `startTimestamp`: (integer) UNIX timestamp for when validation started.
- `isActive`: (boolean) Indicates if the validator is active. This returns true if this is L1 validator and has enough continuous subnet staking fees in P-Chain. It always returns true for subnet validators.
- `isL1Validator`: (boolean) Indicates if the validator is a L1 validator or a subnet validator.
- `isConnected`: (boolean) Indicates if the validator node is currently connected to the callee node.
- `uptimeSeconds`: (integer) The number of seconds the validator has been online.
- `uptimePercentage`: (float) The percentage of time the validator has been online.
# X-Chain API (/docs/rpcs/x-chain/api)
---
title: "X-Chain API"
description: "This page is an overview of the X-Chain API associated with AvalancheGo."
edit_url: https://github.com/ava-labs/avalanchego/edit/master/vms/avm/service.md
---
The [X-Chain](https://build.avax.network/docs/quick-start/primary-network#x-chain),
Avalanche's native platform for creating and trading assets, is an instance of the Avalanche Virtual
Machine (AVM). This API allows clients to create and trade assets on the X-Chain and other instances
of the AVM.
## Format
This API uses the `json 2.0` RPC format. For more information on making JSON RPC calls, see
[here](https://build.avax.network/docs/api-reference/guides/issuing-api-calls).
## Endpoints
`/ext/bc/X` to interact with the X-Chain.
`/ext/bc/blockchainID` to interact with other AVM instances, where `blockchainID` is the ID of a
blockchain running the AVM.
## Methods
### `avm.getAllBalances`
Deprecated as of [**v1.9.12**](https://github.com/ava-labs/avalanchego/releases/tag/v1.9.12).
Get the balances of all assets controlled by a given address.
**Signature:**
```sh
avm.getAllBalances({address:string}) -> {
balances: []{
asset: string,
balance: int
}
}
```
**Example Call:**
```sh
curl -X POST --data '{
"jsonrpc":"2.0",
"id" : 1,
"method" :"avm.getAllBalances",
"params" :{
"address":"X-avax1c79e0dd0susp7dc8udq34jgk2yvve7hapvdyht"
}
}' -H 'content-type:application/json;' 127.0.0.1:9650/ext/bc/X
```
**Example Response:**
```json
{
"jsonrpc": "2.0",
"result": {
"balances": [
{
"asset": "AVAX",
"balance": "102"
},
{
"asset": "2sdnziCz37Jov3QSNMXcFRGFJ1tgauaj6L7qfk7yUcRPfQMC79",
"balance": "10000"
}
]
},
"id": 1
}
```
### `avm.getAssetDescription`
Get information about an asset.
**Signature:**
```sh
avm.getAssetDescription({assetID: string}) -> {
assetId: string,
name: string,
symbol: string,
denomination: int
}
```
- `assetID` is the id of the asset for which the information is requested.
- `name` is the asset’s human-readable, not necessarily unique name.
- `symbol` is the asset’s symbol.
- `denomination` determines how balances of this asset are displayed by user interfaces. If
denomination is 0, 100 units of this asset are displayed as 100. If denomination is 1, 100 units
of this asset are displayed as 10.0. If denomination is 2, 100 units of this asset are displays as
.100, etc.
The AssetID for AVAX differs depending on the network you are on.
Mainnet: FvwEAhmxKfeiG8SnEvq42hc6whRyY3EFYAvebMqDNDGCgxN5Z
Testnet: U8iRqJoiJm8xZHAacmvYyZVwqQx6uDNtQeP3CQ6fcgQk3JqnK
For finding the `assetID` of other assets, this [info] might be useful.
Also, `avm.getUTXOs` returns the `assetID` in its output.
**Example Call:**
```sh
curl -X POST --data '{
"jsonrpc":"2.0",
"id" :1,
"method" :"avm.getAssetDescription",
"params" :{
"assetID" :"FvwEAhmxKfeiG8SnEvq42hc6whRyY3EFYAvebMqDNDGCgxN5Z"
}
}' -H 'content-type:application/json;' 127.0.0.1:9650/ext/bc/X
```
**Example Response:**
```json
{
"jsonrpc": "2.0",
"result": {
"assetID": "FvwEAhmxKfeiG8SnEvq42hc6whRyY3EFYAvebMqDNDGCgxN5Z",
"name": "Avalanche",
"symbol": "AVAX",
"denomination": "9"
},
"id": 1
}`
```
### `avm.getBalance`
Deprecated as of [**v1.9.12**](https://github.com/ava-labs/avalanchego/releases/tag/v1.9.12).
Get the balance of an asset controlled by a given address.
**Signature:**
```sh
avm.getBalance({
address: string,
assetID: string
}) -> {balance: int}
```
- `address` owner of the asset
- `assetID` id of the asset for which the balance is requested
**Example Call:**
```sh
curl -X POST --data '{
"jsonrpc":"2.0",
"id" : 1,
"method" :"avm.getBalance",
"params" :{
"address":"X-avax18jma8ppw3nhx5r4ap8clazz0dps7rv5ukulre5",
"assetID": "2pYGetDWyKdHxpFxh2LHeoLNCH6H5vxxCxHQtFnnFaYxLsqtHC"
}
}' -H 'content-type:application/json;' 127.0.0.1:9650/ext/bc/X
```
**Example Response:**
```json
{
"jsonrpc": "2.0",
"id": 1,
"result": {
"balance": "299999999999900",
"utxoIDs": [
{
"txID": "WPQdyLNqHfiEKp4zcCpayRHYDVYuh1hqs9c1RqgZXS4VPgdvo",
"outputIndex": 1
}
]
}
}
```
### `avm.getBlock`
Returns the block with the given id.
**Signature:**
```sh
avm.getBlock({
blockID: string
encoding: string // optional
}) -> {
block: string,
encoding: string
}
```
**Request:**
- `blockID` is the block ID. It should be in cb58 format.
- `encoding` is the encoding format to use. Can be either `hex` or `json`. Defaults to `hex`.
**Response:**
- `block` is the transaction encoded to `encoding`.
- `encoding` is the `encoding`.
#### Hex Example
**Example Call:**
```sh
curl -X POST --data '{
"jsonrpc": "2.0",
"method": "avm.getBlock",
"params": {
"blockID": "tXJ4xwmR8soHE6DzRNMQPtiwQvuYsHn6eLLBzo2moDqBquqy6",
"encoding": "hex"
},
"id": 1
}' -H 'content-type:application/json;' 127.0.0.1:9650/ext/bc/X
```
**Example Response:**
```json
{
"jsonrpc": "2.0",
"result": {
"block": "0x00000000002000000000641ad33ede17f652512193721df87994f783ec806bb5640c39ee73676caffcc3215e0651000000000049a80a000000010000000e0000000100000000000000000000000000000000000000000000000000000000000000000000000121e67317cbc4be2aeb00677ad6462778a8f52274b9d605df2591b23027a87dff000000070000002e1a2a3910000000000000000000000001000000015cf998275803a7277926912defdf177b2e97b0b400000001e0d825c5069a7336671dd27eaa5c7851d2cf449e7e1cdc469c5c9e5a953955950000000021e67317cbc4be2aeb00677ad6462778a8f52274b9d605df2591b23027a87dff000000050000008908223b680000000100000000000000005e45d02fcc9e585544008f1df7ae5c94bf7f0f2600000000641ad3b600000000642d48b60000005aedf802580000000121e67317cbc4be2aeb00677ad6462778a8f52274b9d605df2591b23027a87dff000000070000005aedf80258000000000000000000000001000000015cf998275803a7277926912defdf177b2e97b0b40000000b000000000000000000000001000000012892441ba9a160bcdc596dcd2cc3ad83c3493589000000010000000900000001adf2237a5fe2dfd906265e8e14274aa7a7b2ee60c66213110598ba34fb4824d74f7760321c0c8fb1e8d3c5e86909248e48a7ae02e641da5559351693a8a1939800286d4fa2",
"encoding": "hex"
},
"id": 1
}
```
### `avm.getBlockByHeight`
Returns block at the given height.
**Signature:**
```sh
avm.getBlockByHeight({
height: string
encoding: string // optional
}) -> {
block: string,
encoding: string
}
```
**Request:**
- `blockHeight` is the block height. It should be in `string` format.
- `encoding` is the encoding format to use. Can be either `hex` or `json`. Defaults to `hex`.
**Response:**
- `block` is the transaction encoded to `encoding`.
- `encoding` is the `encoding`.
#### Hex Example
**Example Call:**
```sh
curl -X POST --data '{
"jsonrpc": "2.0",
"method": "avm.getBlockByHeight",
"params": {
"height": "275686313486",
"encoding": "hex"
},
"id": 1
}' -H 'content-type:application/json;' 127.0.0.1:9650/ext/bc/X
```
**Example Response:**
```json
{
"jsonrpc": "2.0",
"result": {
"block": "0x00000000002000000000642f6739d4efcdd07e4d4919a7fc2020b8a0f081dd64c262aaace5a6dad22be0b55fec0700000000004db9e100000001000000110000000100000000000000000000000000000000000000000000000000000000000000000000000121e67317cbc4be2aeb00677ad6462778a8f52274b9d605df2591b23027a87dff000000070000005c6ece390000000000000000000000000100000001930ab7bf5018bfc6f9435c8b15ba2fe1e619c0230000000000000000ed5f38341e436e5d46e2bb00b45d62ae97d1b050c64bc634ae10626739e35c4b00000001c6dda861341665c3b555b46227fb5e56dc0a870c5482809349f04b00348af2a80000000021e67317cbc4be2aeb00677ad6462778a8f52274b9d605df2591b23027a87dff000000050000005c6edd7b40000000010000000000000001000000090000000178688f4d5055bd8733801f9b52793da885bef424c90526c18e4dd97f7514bf6f0c3d2a0e9a5ea8b761bc41902eb4902c34ef034c4d18c3db7c83c64ffeadd93600731676de",
"encoding": "hex"
},
"id": 1
}
```
### `avm.getHeight`
Returns the height of the last accepted block.
**Signature:**
```sh
avm.getHeight() ->
{
height: uint64,
}
```
**Example Call:**
```sh
curl -X POST --data '{
"jsonrpc": "2.0",
"method": "avm.getHeight",
"params": {},
"id": 1
}' -H 'content-type:application/json;' 127.0.0.1:9650/ext/bc/X
```
**Example Response:**
```json
{
"jsonrpc": "2.0",
"result": {
"height": "5094088"
},
"id": 1
}
```
### `avm.getTx`
Returns the specified transaction. The `encoding` parameter sets the format of the returned
transaction. Can be either `"hex"` or `"json"`. Defaults to `"hex"`.
**Signature:**
```sh
avm.getTx({
txID: string,
encoding: string, //optional
}) -> {
tx: string,
encoding: string,
}
```
**Example Call:**
```sh
curl -X POST --data '{
"jsonrpc":"2.0",
"id" :1,
"method" :"avm.getTx",
"params" :{
"txID":"2oJCbb8pfdxEHAf9A8CdN4Afj9VSR3xzyzNkf8tDv7aM1sfNFL",
"encoding": "json"
}
}' -H 'content-type:application/json;' 127.0.0.1:9650/ext/bc/X
```
**Example Response:**
```json
{
"jsonrpc": "2.0",
"result": {
"tx": {
"unsignedTx": {
"networkID": 1,
"blockchainID": "2oYMBNV4eNHyqk2fjjV5nVQLDbtmNJzq5s3qs3Lo6ftnC6FByM",
"outputs": [],
"inputs": [
{
"txID": "2jbZUvi6nHy3Pgmk8xcMpSg5cW6epkPqdKkHSCweb4eRXtq4k9",
"outputIndex": 1,
"assetID": "FvwEAhmxKfeiG8SnEvq42hc6whRyY3EFYAvebMqDNDGCgxN5Z",
"fxID": "spdxUxVJQbX85MGxMHbKw1sHxMnSqJ3QBzDyDYEP3h6TLuxqQ",
"input": {
"amount": 2570382395,
"signatureIndices": [0]
}
}
],
"memo": "0x",
"destinationChain": "11111111111111111111111111111111LpoYY",
"exportedOutputs": [
{
"assetID": "FvwEAhmxKfeiG8SnEvq42hc6whRyY3EFYAvebMqDNDGCgxN5Z",
"fxID": "spdxUxVJQbX85MGxMHbKw1sHxMnSqJ3QBzDyDYEP3h6TLuxqQ",
"output": {
"addresses": ["X-avax1tnuesf6cqwnjw7fxjyk7lhch0vhf0v95wj5jvy"],
"amount": 2569382395,
"locktime": 0,
"threshold": 1
}
}
]
},
"credentials": [
{
"fxID": "spdxUxVJQbX85MGxMHbKw1sHxMnSqJ3QBzDyDYEP3h6TLuxqQ",
"credential": {
"signatures": [
"0x46ebcbcfbee3ece1fd15015204045cf3cb77f42c48d0201fc150341f91f086f177cfca8894ca9b4a0c55d6950218e4ea8c01d5c4aefb85cd7264b47bd57d224400"
]
}
}
],
"id": "2oJCbb8pfdxEHAf9A8CdN4Afj9VSR3xzyzNkf8tDv7aM1sfNFL"
},
"encoding": "json"
},
"id": 1
}
```
Where:
- `credentials` is a list of this transaction's credentials. Each credential proves that this
transaction's creator is allowed to consume one of this transaction's inputs. Each credential is a
list of signatures.
- `unsignedTx` is the non-signature portion of the transaction.
- `networkID` is the ID of the network this transaction happened on. (Avalanche Mainnet is `1`.)
- `blockchainID` is the ID of the blockchain this transaction happened on. (Avalanche Mainnet
X-Chain is `2oYMBNV4eNHyqk2fjjV5nVQLDbtmNJzq5s3qs3Lo6ftnC6FByM`.)
- Each element of `outputs` is an output (UTXO) of this transaction that is not being exported to
another chain.
- Each element of `inputs` is an input of this transaction which has not been imported from another
chain.
- Import Transactions have additional fields `sourceChain` and `importedInputs`, which specify the
blockchain ID that assets are being imported from, and the inputs that are being imported.
- Export Transactions have additional fields `destinationChain` and `exportedOutputs`, which specify
the blockchain ID that assets are being exported to, and the UTXOs that are being exported.
An output contains:
- `assetID`: The ID of the asset being transferred. (The Mainnet Avax ID is
`FvwEAhmxKfeiG8SnEvq42hc6whRyY3EFYAvebMqDNDGCgxN5Z`.)
- `fxID`: The ID of the FX this output uses.
- `output`: The FX-specific contents of this output.
Most outputs use the secp256k1 FX, look like this:
```json
{
"assetID": "FvwEAhmxKfeiG8SnEvq42hc6whRyY3EFYAvebMqDNDGCgxN5Z",
"fxID": "spdxUxVJQbX85MGxMHbKw1sHxMnSqJ3QBzDyDYEP3h6TLuxqQ",
"output": {
"addresses": ["X-avax126rd3w35xwkmj8670zvf7y5r8k36qa9z9803wm"],
"amount": 1530084210,
"locktime": 0,
"threshold": 1
}
}
```
The above output can be consumed after Unix time `locktime` by a transaction that has signatures
from `threshold` of the addresses in `addresses`.
### `avm.getTxFee`
Get the fees of the network.
**Signature**:
```
avm.getTxFee() ->
{
txFee: uint64,
createAssetTxFee: uint64,
}
```
- `txFee` is the default fee for making transactions.
- `createAssetTxFee` is the fee for creating a new asset.
All fees are denominated in nAVAX.
**Example Call**:
```sh
curl -X POST --data '{
"jsonrpc":"2.0",
"id" : 1,
"method" :"avm.getTxFee",
}' -H 'content-type:application/json;' 127.0.0.1:9650/ext/bc/X
```
**Example Response**:
```json
{
"jsonrpc": "2.0",
"result": {
"txFee": "1000000",
"createAssetTxFee": "10000000"
}
}
```
### `avm.getTxStatus`
Deprecated as of **v1.10.0**.
Get the status of a transaction sent to the network.
**Signature:**
```sh
avm.getTxStatus({txID: string}) -> {status: string}
```
`status` is one of:
- `Accepted`: The transaction is (or will be) accepted by every node
- `Processing`: The transaction is being voted on by this node
- `Rejected`: The transaction will never be accepted by any node in the network
- `Unknown`: The transaction hasn’t been seen by this node
**Example Call:**
```sh
curl -X POST --data '{
"jsonrpc":"2.0",
"id" :1,
"method" :"avm.getTxStatus",
"params" :{
"txID":"2QouvFWUbjuySRxeX5xMbNCuAaKWfbk5FeEa2JmoF85RKLk2dD"
}
}' -H 'content-type:application/json;' 127.0.0.1:9650/ext/bc/X
```
**Example Response:**
```json
{
"jsonrpc": "2.0",
"id": 1,
"result": {
"status": "Accepted"
}
}
```
### `avm.getUTXOs`
Gets the UTXOs that reference a given address. If `sourceChain` is specified, then it will retrieve
the atomic UTXOs exported from that chain to the X Chain.
**Signature:**
```sh
avm.getUTXOs({
addresses: []string,
limit: int, //optional
startIndex: { //optional
address: string,
utxo: string
},
sourceChain: string, //optional
encoding: string //optional
}) -> {
numFetched: int,
utxos: []string,
endIndex: {
address: string,
utxo: string
},
sourceChain: string, //optional
encoding: string
}
```
- `utxos` is a list of UTXOs such that each UTXO references at least one address in `addresses`.
- At most `limit` UTXOs are returned. If `limit` is omitted or greater than 1024, it is set to 1024.
- This method supports pagination. `endIndex` denotes the last UTXO returned. To get the next set of
UTXOs, use the value of `endIndex` as `startIndex` in the next call.
- If `startIndex` is omitted, will fetch all UTXOs up to `limit`.
- When using pagination (when `startIndex` is provided), UTXOs are not guaranteed to be unique
across multiple calls. That is, a UTXO may appear in the result of the first call, and then again
in the second call.
- When using pagination, consistency is not guaranteed across multiple calls. That is, the UTXO set
of the addresses may have changed between calls.
- `encoding` sets the format for the returned UTXOs. Can only be `hex` when a value is provided.
#### **Example**
Suppose we want all UTXOs that reference at least one of
`X-avax18jma8ppw3nhx5r4ap8clazz0dps7rv5ukulre5` and `X-avax1d09qn852zcy03sfc9hay2llmn9hsgnw4tp3dv6`.
```sh
curl -X POST --data '{
"jsonrpc":"2.0",
"id" :1,
"method" :"avm.getUTXOs",
"params" :{
"addresses":["X-avax18jma8ppw3nhx5r4ap8clazz0dps7rv5ukulre5", "X-avax1d09qn852zcy03sfc9hay2llmn9hsgnw4tp3dv6"],
"limit":5,
"encoding": "hex"
}
}' -H 'content-type:application/json;' 127.0.0.1:9650/ext/bc/X
```
This gives response:
```json
{
"jsonrpc": "2.0",
"result": {
"numFetched": "5",
"utxos": [
"0x0000a195046108a85e60f7a864bb567745a37f50c6af282103e47cc62f036cee404700000000345aa98e8a990f4101e2268fab4c4e1f731c8dfbcffa3a77978686e6390d624f000000070000000000000001000000000000000000000001000000018ba98dabaebcd83056799841cfbc567d8b10f216c1f01765",
"0x0000ae8b1b94444eed8de9a81b1222f00f1b4133330add23d8ac288bffa98b85271100000000345aa98e8a990f4101e2268fab4c4e1f731c8dfbcffa3a77978686e6390d624f000000070000000000000001000000000000000000000001000000018ba98dabaebcd83056799841cfbc567d8b10f216473d042a",
"0x0000731ce04b1feefa9f4291d869adc30a33463f315491e164d89be7d6d2d7890cfc00000000345aa98e8a990f4101e2268fab4c4e1f731c8dfbcffa3a77978686e6390d624f000000070000000000000001000000000000000000000001000000018ba98dabaebcd83056799841cfbc567d8b10f21600dd3047",
"0x0000b462030cc4734f24c0bc224cf0d16ee452ea6b67615517caffead123ab4fbf1500000000345aa98e8a990f4101e2268fab4c4e1f731c8dfbcffa3a77978686e6390d624f000000070000000000000001000000000000000000000001000000018ba98dabaebcd83056799841cfbc567d8b10f216c71b387e",
"0x000054f6826c39bc957c0c6d44b70f961a994898999179cc32d21eb09c1908d7167b00000000345aa98e8a990f4101e2268fab4c4e1f731c8dfbcffa3a77978686e6390d624f000000070000000000000001000000000000000000000001000000018ba98dabaebcd83056799841cfbc567d8b10f2166290e79d"
],
"endIndex": {
"address": "X-avax18jma8ppw3nhx5r4ap8clazz0dps7rv5ukulre5",
"utxo": "kbUThAUfmBXUmRgTpgD6r3nLj7rJUGho6xyht5nouNNypH45j"
},
"encoding": "hex"
},
"id": 1
}
```
Since `numFetched` is the same as `limit`, we can tell that there may be more UTXOs that were not
fetched. We call the method again, this time with `startIndex`:
```sh
curl -X POST --data '{
"jsonrpc":"2.0",
"id" :2,
"method" :"avm.getUTXOs",
"params" :{
"addresses":["X-avax18jma8ppw3nhx5r4ap8clazz0dps7rv5ukulre5"],
"limit":5,
"startIndex": {
"address": "X-avax18jma8ppw3nhx5r4ap8clazz0dps7rv5ukulre5",
"utxo": "kbUThAUfmBXUmRgTpgD6r3nLj7rJUGho6xyht5nouNNypH45j"
},
"encoding": "hex"
}
}' -H 'content-type:application/json;' 127.0.0.1:9650/ext/bc/X
```
This gives response:
```json
{
"jsonrpc": "2.0",
"result": {
"numFetched": "4",
"utxos": [
"0x000020e182dd51ee4dcd31909fddd75bb3438d9431f8e4efce86a88a684f5c7fa09300000000345aa98e8a990f4101e2268fab4c4e1f731c8dfbcffa3a77978686e6390d624f000000070000000000000001000000000000000000000001000000018ba98dabaebcd83056799841cfbc567d8b10f21662861d59",
"0x0000a71ba36c475c18eb65dc90f6e85c4fd4a462d51c5de3ac2cbddf47db4d99284e00000000345aa98e8a990f4101e2268fab4c4e1f731c8dfbcffa3a77978686e6390d624f000000070000000000000001000000000000000000000001000000018ba98dabaebcd83056799841cfbc567d8b10f21665f6f83f",
"0x0000925424f61cb13e0fbdecc66e1270de68de9667b85baa3fdc84741d048daa69fa00000000345aa98e8a990f4101e2268fab4c4e1f731c8dfbcffa3a77978686e6390d624f000000070000000000000001000000000000000000000001000000018ba98dabaebcd83056799841cfbc567d8b10f216afecf76a",
"0x000082f30327514f819da6009fad92b5dba24d27db01e29ad7541aa8e6b6b554615c00000000345aa98e8a990f4101e2268fab4c4e1f731c8dfbcffa3a77978686e6390d624f000000070000000000000001000000000000000000000001000000018ba98dabaebcd83056799841cfbc567d8b10f216779c2d59"
],
"endIndex": {
"address": "X-avax18jma8ppw3nhx5r4ap8clazz0dps7rv5ukulre5",
"utxo": "21jG2RfqyHUUgkTLe2tUp6ETGLriSDTW3th8JXFbPRNiSZ11jK"
},
"encoding": "hex"
},
"id": 1
}
```
Since `numFetched` is less than `limit`, we know that we are done fetching UTXOs and don’t need to
call this method again.
Suppose we want to fetch the UTXOs exported from the P Chain to the X Chain in order to build an
ImportTx. Then we need to call GetUTXOs with the `sourceChain` argument in order to retrieve the
atomic UTXOs:
```sh
curl -X POST --data '{
"jsonrpc":"2.0",
"id" :1,
"method" :"avm.getUTXOs",
"params" :{
"addresses":["X-avax18jma8ppw3nhx5r4ap8clazz0dps7rv5ukulre5", "X-avax1d09qn852zcy03sfc9hay2llmn9hsgnw4tp3dv6"],
"limit":5,
"sourceChain": "P",
"encoding": "hex"
}
}' -H 'content-type:application/json;' 127.0.0.1:9650/ext/bc/X
```
This gives response:
```json
{
"jsonrpc": "2.0",
"result": {
"numFetched": "1",
"utxos": [
"0x00001f989ffaf18a18a59bdfbf209342aa61c6a62a67e8639d02bb3c8ddab315c6fa0000000039c33a499ce4c33a3b09cdd2cfa01ae70dbf2d18b2d7d168524440e55d550088000000070011c304cd7eb5c0000000000000000000000001000000013cb7d3842e8cee6a0ebd09f1fe884f6861e1b29c83497819"
],
"endIndex": {
"address": "X-avax18jma8ppw3nhx5r4ap8clazz0dps7rv5ukulre5",
"utxo": "2Sz2XwRYqUHwPeiKoRnZ6ht88YqzAF1SQjMYZQQaB5wBFkAqST"
},
"encoding": "hex"
},
"id": 1
}
```
### `avm.issueTx`
Send a signed transaction to the network. `encoding` specifies the format of the signed transaction.
Can only be `hex` when a value is provided.
**Signature:**
```sh
avm.issueTx({
tx: string,
encoding: string, //optional
}) -> {
txID: string
}
```
**Example Call:**
```sh
curl -X POST --data '{
"jsonrpc":"2.0",
"id" : 1,
"method" :"avm.issueTx",
"params" :{
"tx":"0x00000009de31b4d8b22991d51aa6aa1fc733f23a851a8c9400000000000186a0000000005f041280000000005f9ca900000030390000000000000001fceda8f90fcb5d30614b99d79fc4baa29307762668f16eb0259a57c2d3b78c875c86ec2045792d4df2d926c40f829196e0bb97ee697af71f5b0a966dabff749634c8b729855e937715b0e44303fd1014daedc752006011b730",
"encoding": "hex"
}
}' -H 'content-type:application/json;' 127.0.0.1:9650/ext/bc/X
```
**Example Response:**
```json
{
"jsonrpc": "2.0",
"id": 1,
"result": {
"txID": "NUPLwbt2hsYxpQg4H2o451hmTWQ4JZx2zMzM4SinwtHgAdX1JLPHXvWSXEnpecStLj"
}
}
```
### `wallet.issueTx`
Send a signed transaction to the network and assume the TX will be accepted. `encoding` specifies
the format of the signed transaction. Can only be `hex` when a value is provided.
This call is made to the wallet API endpoint:
`/ext/bc/X/wallet`
:::caution
Endpoint deprecated as of [**v1.9.12**](https://github.com/ava-labs/avalanchego/releases/tag/v1.9.12).
:::
**Signature:**
```sh
wallet.issueTx({
tx: string,
encoding: string, //optional
}) -> {
txID: string
}
```
**Example Call:**
```sh
curl -X POST --data '{
"jsonrpc":"2.0",
"id" : 1,
"method" :"wallet.issueTx",
"params" :{
"tx":"0x00000009de31b4d8b22991d51aa6aa1fc733f23a851a8c9400000000000186a0000000005f041280000000005f9ca900000030390000000000000001fceda8f90fcb5d30614b99d79fc4baa29307762668f16eb0259a57c2d3b78c875c86ec2045792d4df2d926c40f829196e0bb97ee697af71f5b0a966dabff749634c8b729855e937715b0e44303fd1014daedc752006011b730",
"encoding": "hex"
}
}' -H 'content-type:application/json;' 127.0.0.1:9650/ext/bc/X/wallet
```
**Example Response:**
```json
{
"jsonrpc": "2.0",
"id": 1,
"result": {
"txID": "NUPLwbt2hsYxpQg4H2o451hmTWQ4JZx2zMzM4SinwtHgAdX1JLPHXvWSXEnpecStLj"
}
}
```
# AvalancheGo X-Chain RPC (/docs/rpcs/x-chain)
---
title: "AvalancheGo X-Chain RPC"
description: "This page is an overview of the X-Chain RPC associated with AvalancheGo."
edit_url: https://github.com/ava-labs/avalanchego/edit/master/vms/avm/service.md
---
The [X-Chain](https://build.avax.network/docs/quick-start/primary-network#x-chain),
Avalanche's native platform for creating and trading assets, is an instance of the Avalanche Virtual
Machine (AVM). This API allows clients to create and trade assets on the X-Chain and other instances
of the AVM.
## Format
This API uses the `json 2.0` RPC format. For more information on making JSON RPC calls, see
[here](https://build.avax.network/docs/api-reference/guides/issuing-api-calls).
## Endpoints
`/ext/bc/X` to interact with the X-Chain.
`/ext/bc/blockchainID` to interact with other AVM instances, where `blockchainID` is the ID of a
blockchain running the AVM.
## Methods
### `avm.getAllBalances`
Deprecated as of [**v1.9.12**](https://github.com/ava-labs/avalanchego/releases/tag/v1.9.12).
Get the balances of all assets controlled by a given address.
**Signature:**
```sh
avm.getAllBalances({address:string}) -> {
balances: []{
asset: string,
balance: int
}
}
```
**Example Call:**
```sh
curl -X POST --data '{
"jsonrpc":"2.0",
"id" : 1,
"method" :"avm.getAllBalances",
"params" :{
"address":"X-avax1c79e0dd0susp7dc8udq34jgk2yvve7hapvdyht"
}
}' -H 'content-type:application/json;' 127.0.0.1:9650/ext/bc/X
```
**Example Response:**
```json
{
"jsonrpc": "2.0",
"result": {
"balances": [
{
"asset": "AVAX",
"balance": "102"
},
{
"asset": "2sdnziCz37Jov3QSNMXcFRGFJ1tgauaj6L7qfk7yUcRPfQMC79",
"balance": "10000"
}
]
},
"id": 1
}
```
### `avm.getAssetDescription`
Get information about an asset.
**Signature:**
```sh
avm.getAssetDescription({assetID: string}) -> {
assetId: string,
name: string,
symbol: string,
denomination: int
}
```
- `assetID` is the id of the asset for which the information is requested.
- `name` is the asset’s human-readable, not necessarily unique name.
- `symbol` is the asset’s symbol.
- `denomination` determines how balances of this asset are displayed by user interfaces. If
denomination is 0, 100 units of this asset are displayed as 100. If denomination is 1, 100 units
of this asset are displayed as 10.0. If denomination is 2, 100 units of this asset are displays as
.100, etc.
The AssetID for AVAX differs depending on the network you are on.
Mainnet: FvwEAhmxKfeiG8SnEvq42hc6whRyY3EFYAvebMqDNDGCgxN5Z
Testnet: U8iRqJoiJm8xZHAacmvYyZVwqQx6uDNtQeP3CQ6fcgQk3JqnK
For finding the `assetID` of other assets, this [info] might be useful.
Also, `avm.getUTXOs` returns the `assetID` in its output.
**Example Call:**
```sh
curl -X POST --data '{
"jsonrpc":"2.0",
"id" :1,
"method" :"avm.getAssetDescription",
"params" :{
"assetID" :"FvwEAhmxKfeiG8SnEvq42hc6whRyY3EFYAvebMqDNDGCgxN5Z"
}
}' -H 'content-type:application/json;' 127.0.0.1:9650/ext/bc/X
```
**Example Response:**
```json
{
"jsonrpc": "2.0",
"result": {
"assetID": "FvwEAhmxKfeiG8SnEvq42hc6whRyY3EFYAvebMqDNDGCgxN5Z",
"name": "Avalanche",
"symbol": "AVAX",
"denomination": "9"
},
"id": 1
}`
```
### `avm.getBalance`
Deprecated as of [**v1.9.12**](https://github.com/ava-labs/avalanchego/releases/tag/v1.9.12).
Get the balance of an asset controlled by a given address.
**Signature:**
```sh
avm.getBalance({
address: string,
assetID: string
}) -> {balance: int}
```
- `address` owner of the asset
- `assetID` id of the asset for which the balance is requested
**Example Call:**
```sh
curl -X POST --data '{
"jsonrpc":"2.0",
"id" : 1,
"method" :"avm.getBalance",
"params" :{
"address":"X-avax18jma8ppw3nhx5r4ap8clazz0dps7rv5ukulre5",
"assetID": "2pYGetDWyKdHxpFxh2LHeoLNCH6H5vxxCxHQtFnnFaYxLsqtHC"
}
}' -H 'content-type:application/json;' 127.0.0.1:9650/ext/bc/X
```
**Example Response:**
```json
{
"jsonrpc": "2.0",
"id": 1,
"result": {
"balance": "299999999999900",
"utxoIDs": [
{
"txID": "WPQdyLNqHfiEKp4zcCpayRHYDVYuh1hqs9c1RqgZXS4VPgdvo",
"outputIndex": 1
}
]
}
}
```
### `avm.getBlock`
Returns the block with the given id.
**Signature:**
```sh
avm.getBlock({
blockID: string
encoding: string // optional
}) -> {
block: string,
encoding: string
}
```
**Request:**
- `blockID` is the block ID. It should be in cb58 format.
- `encoding` is the encoding format to use. Can be either `hex` or `json`. Defaults to `hex`.
**Response:**
- `block` is the transaction encoded to `encoding`.
- `encoding` is the `encoding`.
#### Hex Example
**Example Call:**
```sh
curl -X POST --data '{
"jsonrpc": "2.0",
"method": "avm.getBlock",
"params": {
"blockID": "tXJ4xwmR8soHE6DzRNMQPtiwQvuYsHn6eLLBzo2moDqBquqy6",
"encoding": "hex"
},
"id": 1
}' -H 'content-type:application/json;' 127.0.0.1:9650/ext/bc/X
```
**Example Response:**
```json
{
"jsonrpc": "2.0",
"result": {
"block": "0x00000000002000000000641ad33ede17f652512193721df87994f783ec806bb5640c39ee73676caffcc3215e0651000000000049a80a000000010000000e0000000100000000000000000000000000000000000000000000000000000000000000000000000121e67317cbc4be2aeb00677ad6462778a8f52274b9d605df2591b23027a87dff000000070000002e1a2a3910000000000000000000000001000000015cf998275803a7277926912defdf177b2e97b0b400000001e0d825c5069a7336671dd27eaa5c7851d2cf449e7e1cdc469c5c9e5a953955950000000021e67317cbc4be2aeb00677ad6462778a8f52274b9d605df2591b23027a87dff000000050000008908223b680000000100000000000000005e45d02fcc9e585544008f1df7ae5c94bf7f0f2600000000641ad3b600000000642d48b60000005aedf802580000000121e67317cbc4be2aeb00677ad6462778a8f52274b9d605df2591b23027a87dff000000070000005aedf80258000000000000000000000001000000015cf998275803a7277926912defdf177b2e97b0b40000000b000000000000000000000001000000012892441ba9a160bcdc596dcd2cc3ad83c3493589000000010000000900000001adf2237a5fe2dfd906265e8e14274aa7a7b2ee60c66213110598ba34fb4824d74f7760321c0c8fb1e8d3c5e86909248e48a7ae02e641da5559351693a8a1939800286d4fa2",
"encoding": "hex"
},
"id": 1
}
```
### `avm.getBlockByHeight`
Returns block at the given height.
**Signature:**
```sh
avm.getBlockByHeight({
height: string
encoding: string // optional
}) -> {
block: string,
encoding: string
}
```
**Request:**
- `blockHeight` is the block height. It should be in `string` format.
- `encoding` is the encoding format to use. Can be either `hex` or `json`. Defaults to `hex`.
**Response:**
- `block` is the transaction encoded to `encoding`.
- `encoding` is the `encoding`.
#### Hex Example
**Example Call:**
```sh
curl -X POST --data '{
"jsonrpc": "2.0",
"method": "avm.getBlockByHeight",
"params": {
"height": "275686313486",
"encoding": "hex"
},
"id": 1
}' -H 'content-type:application/json;' 127.0.0.1:9650/ext/bc/X
```
**Example Response:**
```json
{
"jsonrpc": "2.0",
"result": {
"block": "0x00000000002000000000642f6739d4efcdd07e4d4919a7fc2020b8a0f081dd64c262aaace5a6dad22be0b55fec0700000000004db9e100000001000000110000000100000000000000000000000000000000000000000000000000000000000000000000000121e67317cbc4be2aeb00677ad6462778a8f52274b9d605df2591b23027a87dff000000070000005c6ece390000000000000000000000000100000001930ab7bf5018bfc6f9435c8b15ba2fe1e619c0230000000000000000ed5f38341e436e5d46e2bb00b45d62ae97d1b050c64bc634ae10626739e35c4b00000001c6dda861341665c3b555b46227fb5e56dc0a870c5482809349f04b00348af2a80000000021e67317cbc4be2aeb00677ad6462778a8f52274b9d605df2591b23027a87dff000000050000005c6edd7b40000000010000000000000001000000090000000178688f4d5055bd8733801f9b52793da885bef424c90526c18e4dd97f7514bf6f0c3d2a0e9a5ea8b761bc41902eb4902c34ef034c4d18c3db7c83c64ffeadd93600731676de",
"encoding": "hex"
},
"id": 1
}
```
### `avm.getHeight`
Returns the height of the last accepted block.
**Signature:**
```sh
avm.getHeight() ->
{
height: uint64,
}
```
**Example Call:**
```sh
curl -X POST --data '{
"jsonrpc": "2.0",
"method": "avm.getHeight",
"params": {},
"id": 1
}' -H 'content-type:application/json;' 127.0.0.1:9650/ext/bc/X
```
**Example Response:**
```json
{
"jsonrpc": "2.0",
"result": {
"height": "5094088"
},
"id": 1
}
```
### `avm.getTx`
Returns the specified transaction. The `encoding` parameter sets the format of the returned
transaction. Can be either `"hex"` or `"json"`. Defaults to `"hex"`.
**Signature:**
```sh
avm.getTx({
txID: string,
encoding: string, //optional
}) -> {
tx: string,
encoding: string,
}
```
**Example Call:**
```sh
curl -X POST --data '{
"jsonrpc":"2.0",
"id" :1,
"method" :"avm.getTx",
"params" :{
"txID":"2oJCbb8pfdxEHAf9A8CdN4Afj9VSR3xzyzNkf8tDv7aM1sfNFL",
"encoding": "json"
}
}' -H 'content-type:application/json;' 127.0.0.1:9650/ext/bc/X
```
**Example Response:**
```json
{
"jsonrpc": "2.0",
"result": {
"tx": {
"unsignedTx": {
"networkID": 1,
"blockchainID": "2oYMBNV4eNHyqk2fjjV5nVQLDbtmNJzq5s3qs3Lo6ftnC6FByM",
"outputs": [],
"inputs": [
{
"txID": "2jbZUvi6nHy3Pgmk8xcMpSg5cW6epkPqdKkHSCweb4eRXtq4k9",
"outputIndex": 1,
"assetID": "FvwEAhmxKfeiG8SnEvq42hc6whRyY3EFYAvebMqDNDGCgxN5Z",
"fxID": "spdxUxVJQbX85MGxMHbKw1sHxMnSqJ3QBzDyDYEP3h6TLuxqQ",
"input": {
"amount": 2570382395,
"signatureIndices": [0]
}
}
],
"memo": "0x",
"destinationChain": "11111111111111111111111111111111LpoYY",
"exportedOutputs": [
{
"assetID": "FvwEAhmxKfeiG8SnEvq42hc6whRyY3EFYAvebMqDNDGCgxN5Z",
"fxID": "spdxUxVJQbX85MGxMHbKw1sHxMnSqJ3QBzDyDYEP3h6TLuxqQ",
"output": {
"addresses": ["X-avax1tnuesf6cqwnjw7fxjyk7lhch0vhf0v95wj5jvy"],
"amount": 2569382395,
"locktime": 0,
"threshold": 1
}
}
]
},
"credentials": [
{
"fxID": "spdxUxVJQbX85MGxMHbKw1sHxMnSqJ3QBzDyDYEP3h6TLuxqQ",
"credential": {
"signatures": [
"0x46ebcbcfbee3ece1fd15015204045cf3cb77f42c48d0201fc150341f91f086f177cfca8894ca9b4a0c55d6950218e4ea8c01d5c4aefb85cd7264b47bd57d224400"
]
}
}
],
"id": "2oJCbb8pfdxEHAf9A8CdN4Afj9VSR3xzyzNkf8tDv7aM1sfNFL"
},
"encoding": "json"
},
"id": 1
}
```
Where:
- `credentials` is a list of this transaction's credentials. Each credential proves that this
transaction's creator is allowed to consume one of this transaction's inputs. Each credential is a
list of signatures.
- `unsignedTx` is the non-signature portion of the transaction.
- `networkID` is the ID of the network this transaction happened on. (Avalanche Mainnet is `1`.)
- `blockchainID` is the ID of the blockchain this transaction happened on. (Avalanche Mainnet
X-Chain is `2oYMBNV4eNHyqk2fjjV5nVQLDbtmNJzq5s3qs3Lo6ftnC6FByM`.)
- Each element of `outputs` is an output (UTXO) of this transaction that is not being exported to
another chain.
- Each element of `inputs` is an input of this transaction which has not been imported from another
chain.
- Import Transactions have additional fields `sourceChain` and `importedInputs`, which specify the
blockchain ID that assets are being imported from, and the inputs that are being imported.
- Export Transactions have additional fields `destinationChain` and `exportedOutputs`, which specify
the blockchain ID that assets are being exported to, and the UTXOs that are being exported.
An output contains:
- `assetID`: The ID of the asset being transferred. (The Mainnet Avax ID is
`FvwEAhmxKfeiG8SnEvq42hc6whRyY3EFYAvebMqDNDGCgxN5Z`.)
- `fxID`: The ID of the FX this output uses.
- `output`: The FX-specific contents of this output.
Most outputs use the secp256k1 FX, look like this:
```json
{
"assetID": "FvwEAhmxKfeiG8SnEvq42hc6whRyY3EFYAvebMqDNDGCgxN5Z",
"fxID": "spdxUxVJQbX85MGxMHbKw1sHxMnSqJ3QBzDyDYEP3h6TLuxqQ",
"output": {
"addresses": ["X-avax126rd3w35xwkmj8670zvf7y5r8k36qa9z9803wm"],
"amount": 1530084210,
"locktime": 0,
"threshold": 1
}
}
```
The above output can be consumed after Unix time `locktime` by a transaction that has signatures
from `threshold` of the addresses in `addresses`.
### `avm.getTxFee`
Get the fees of the network.
**Signature**:
```
avm.getTxFee() ->
{
txFee: uint64,
createAssetTxFee: uint64,
}
```
- `txFee` is the default fee for making transactions.
- `createAssetTxFee` is the fee for creating a new asset.
All fees are denominated in nAVAX.
**Example Call**:
```sh
curl -X POST --data '{
"jsonrpc":"2.0",
"id" : 1,
"method" :"avm.getTxFee",
}' -H 'content-type:application/json;' 127.0.0.1:9650/ext/bc/X
```
**Example Response**:
```json
{
"jsonrpc": "2.0",
"result": {
"txFee": "1000000",
"createAssetTxFee": "10000000"
}
}
```
### `avm.getTxStatus`
Deprecated as of **v1.10.0**.
Get the status of a transaction sent to the network.
**Signature:**
```sh
avm.getTxStatus({txID: string}) -> {status: string}
```
`status` is one of:
- `Accepted`: The transaction is (or will be) accepted by every node
- `Processing`: The transaction is being voted on by this node
- `Rejected`: The transaction will never be accepted by any node in the network
- `Unknown`: The transaction hasn’t been seen by this node
**Example Call:**
```sh
curl -X POST --data '{
"jsonrpc":"2.0",
"id" :1,
"method" :"avm.getTxStatus",
"params" :{
"txID":"2QouvFWUbjuySRxeX5xMbNCuAaKWfbk5FeEa2JmoF85RKLk2dD"
}
}' -H 'content-type:application/json;' 127.0.0.1:9650/ext/bc/X
```
**Example Response:**
```json
{
"jsonrpc": "2.0",
"id": 1,
"result": {
"status": "Accepted"
}
}
```
### `avm.getUTXOs`
Gets the UTXOs that reference a given address. If `sourceChain` is specified, then it will retrieve
the atomic UTXOs exported from that chain to the X Chain.
**Signature:**
```sh
avm.getUTXOs({
addresses: []string,
limit: int, //optional
startIndex: { //optional
address: string,
utxo: string
},
sourceChain: string, //optional
encoding: string //optional
}) -> {
numFetched: int,
utxos: []string,
endIndex: {
address: string,
utxo: string
},
sourceChain: string, //optional
encoding: string
}
```
- `utxos` is a list of UTXOs such that each UTXO references at least one address in `addresses`.
- At most `limit` UTXOs are returned. If `limit` is omitted or greater than 1024, it is set to 1024.
- This method supports pagination. `endIndex` denotes the last UTXO returned. To get the next set of
UTXOs, use the value of `endIndex` as `startIndex` in the next call.
- If `startIndex` is omitted, will fetch all UTXOs up to `limit`.
- When using pagination (when `startIndex` is provided), UTXOs are not guaranteed to be unique
across multiple calls. That is, a UTXO may appear in the result of the first call, and then again
in the second call.
- When using pagination, consistency is not guaranteed across multiple calls. That is, the UTXO set
of the addresses may have changed between calls.
- `encoding` sets the format for the returned UTXOs. Can only be `hex` when a value is provided.
#### **Example**
Suppose we want all UTXOs that reference at least one of
`X-avax18jma8ppw3nhx5r4ap8clazz0dps7rv5ukulre5` and `X-avax1d09qn852zcy03sfc9hay2llmn9hsgnw4tp3dv6`.
```sh
curl -X POST --data '{
"jsonrpc":"2.0",
"id" :1,
"method" :"avm.getUTXOs",
"params" :{
"addresses":["X-avax18jma8ppw3nhx5r4ap8clazz0dps7rv5ukulre5", "X-avax1d09qn852zcy03sfc9hay2llmn9hsgnw4tp3dv6"],
"limit":5,
"encoding": "hex"
}
}' -H 'content-type:application/json;' 127.0.0.1:9650/ext/bc/X
```
This gives response:
```json
{
"jsonrpc": "2.0",
"result": {
"numFetched": "5",
"utxos": [
"0x0000a195046108a85e60f7a864bb567745a37f50c6af282103e47cc62f036cee404700000000345aa98e8a990f4101e2268fab4c4e1f731c8dfbcffa3a77978686e6390d624f000000070000000000000001000000000000000000000001000000018ba98dabaebcd83056799841cfbc567d8b10f216c1f01765",
"0x0000ae8b1b94444eed8de9a81b1222f00f1b4133330add23d8ac288bffa98b85271100000000345aa98e8a990f4101e2268fab4c4e1f731c8dfbcffa3a77978686e6390d624f000000070000000000000001000000000000000000000001000000018ba98dabaebcd83056799841cfbc567d8b10f216473d042a",
"0x0000731ce04b1feefa9f4291d869adc30a33463f315491e164d89be7d6d2d7890cfc00000000345aa98e8a990f4101e2268fab4c4e1f731c8dfbcffa3a77978686e6390d624f000000070000000000000001000000000000000000000001000000018ba98dabaebcd83056799841cfbc567d8b10f21600dd3047",
"0x0000b462030cc4734f24c0bc224cf0d16ee452ea6b67615517caffead123ab4fbf1500000000345aa98e8a990f4101e2268fab4c4e1f731c8dfbcffa3a77978686e6390d624f000000070000000000000001000000000000000000000001000000018ba98dabaebcd83056799841cfbc567d8b10f216c71b387e",
"0x000054f6826c39bc957c0c6d44b70f961a994898999179cc32d21eb09c1908d7167b00000000345aa98e8a990f4101e2268fab4c4e1f731c8dfbcffa3a77978686e6390d624f000000070000000000000001000000000000000000000001000000018ba98dabaebcd83056799841cfbc567d8b10f2166290e79d"
],
"endIndex": {
"address": "X-avax18jma8ppw3nhx5r4ap8clazz0dps7rv5ukulre5",
"utxo": "kbUThAUfmBXUmRgTpgD6r3nLj7rJUGho6xyht5nouNNypH45j"
},
"encoding": "hex"
},
"id": 1
}
```
Since `numFetched` is the same as `limit`, we can tell that there may be more UTXOs that were not
fetched. We call the method again, this time with `startIndex`:
```sh
curl -X POST --data '{
"jsonrpc":"2.0",
"id" :2,
"method" :"avm.getUTXOs",
"params" :{
"addresses":["X-avax18jma8ppw3nhx5r4ap8clazz0dps7rv5ukulre5"],
"limit":5,
"startIndex": {
"address": "X-avax18jma8ppw3nhx5r4ap8clazz0dps7rv5ukulre5",
"utxo": "kbUThAUfmBXUmRgTpgD6r3nLj7rJUGho6xyht5nouNNypH45j"
},
"encoding": "hex"
}
}' -H 'content-type:application/json;' 127.0.0.1:9650/ext/bc/X
```
This gives response:
```json
{
"jsonrpc": "2.0",
"result": {
"numFetched": "4",
"utxos": [
"0x000020e182dd51ee4dcd31909fddd75bb3438d9431f8e4efce86a88a684f5c7fa09300000000345aa98e8a990f4101e2268fab4c4e1f731c8dfbcffa3a77978686e6390d624f000000070000000000000001000000000000000000000001000000018ba98dabaebcd83056799841cfbc567d8b10f21662861d59",
"0x0000a71ba36c475c18eb65dc90f6e85c4fd4a462d51c5de3ac2cbddf47db4d99284e00000000345aa98e8a990f4101e2268fab4c4e1f731c8dfbcffa3a77978686e6390d624f000000070000000000000001000000000000000000000001000000018ba98dabaebcd83056799841cfbc567d8b10f21665f6f83f",
"0x0000925424f61cb13e0fbdecc66e1270de68de9667b85baa3fdc84741d048daa69fa00000000345aa98e8a990f4101e2268fab4c4e1f731c8dfbcffa3a77978686e6390d624f000000070000000000000001000000000000000000000001000000018ba98dabaebcd83056799841cfbc567d8b10f216afecf76a",
"0x000082f30327514f819da6009fad92b5dba24d27db01e29ad7541aa8e6b6b554615c00000000345aa98e8a990f4101e2268fab4c4e1f731c8dfbcffa3a77978686e6390d624f000000070000000000000001000000000000000000000001000000018ba98dabaebcd83056799841cfbc567d8b10f216779c2d59"
],
"endIndex": {
"address": "X-avax18jma8ppw3nhx5r4ap8clazz0dps7rv5ukulre5",
"utxo": "21jG2RfqyHUUgkTLe2tUp6ETGLriSDTW3th8JXFbPRNiSZ11jK"
},
"encoding": "hex"
},
"id": 1
}
```
Since `numFetched` is less than `limit`, we know that we are done fetching UTXOs and don’t need to
call this method again.
Suppose we want to fetch the UTXOs exported from the P Chain to the X Chain in order to build an
ImportTx. Then we need to call GetUTXOs with the `sourceChain` argument in order to retrieve the
atomic UTXOs:
```sh
curl -X POST --data '{
"jsonrpc":"2.0",
"id" :1,
"method" :"avm.getUTXOs",
"params" :{
"addresses":["X-avax18jma8ppw3nhx5r4ap8clazz0dps7rv5ukulre5", "X-avax1d09qn852zcy03sfc9hay2llmn9hsgnw4tp3dv6"],
"limit":5,
"sourceChain": "P",
"encoding": "hex"
}
}' -H 'content-type:application/json;' 127.0.0.1:9650/ext/bc/X
```
This gives response:
```json
{
"jsonrpc": "2.0",
"result": {
"numFetched": "1",
"utxos": [
"0x00001f989ffaf18a18a59bdfbf209342aa61c6a62a67e8639d02bb3c8ddab315c6fa0000000039c33a499ce4c33a3b09cdd2cfa01ae70dbf2d18b2d7d168524440e55d550088000000070011c304cd7eb5c0000000000000000000000001000000013cb7d3842e8cee6a0ebd09f1fe884f6861e1b29c83497819"
],
"endIndex": {
"address": "X-avax18jma8ppw3nhx5r4ap8clazz0dps7rv5ukulre5",
"utxo": "2Sz2XwRYqUHwPeiKoRnZ6ht88YqzAF1SQjMYZQQaB5wBFkAqST"
},
"encoding": "hex"
},
"id": 1
}
```
### `avm.issueTx`
Send a signed transaction to the network. `encoding` specifies the format of the signed transaction.
Can only be `hex` when a value is provided.
**Signature:**
```sh
avm.issueTx({
tx: string,
encoding: string, //optional
}) -> {
txID: string
}
```
**Example Call:**
```sh
curl -X POST --data '{
"jsonrpc":"2.0",
"id" : 1,
"method" :"avm.issueTx",
"params" :{
"tx":"0x00000009de31b4d8b22991d51aa6aa1fc733f23a851a8c9400000000000186a0000000005f041280000000005f9ca900000030390000000000000001fceda8f90fcb5d30614b99d79fc4baa29307762668f16eb0259a57c2d3b78c875c86ec2045792d4df2d926c40f829196e0bb97ee697af71f5b0a966dabff749634c8b729855e937715b0e44303fd1014daedc752006011b730",
"encoding": "hex"
}
}' -H 'content-type:application/json;' 127.0.0.1:9650/ext/bc/X
```
**Example Response:**
```json
{
"jsonrpc": "2.0",
"id": 1,
"result": {
"txID": "NUPLwbt2hsYxpQg4H2o451hmTWQ4JZx2zMzM4SinwtHgAdX1JLPHXvWSXEnpecStLj"
}
}
```
### `wallet.issueTx`
Send a signed transaction to the network and assume the TX will be accepted. `encoding` specifies
the format of the signed transaction. Can only be `hex` when a value is provided.
This call is made to the wallet API endpoint:
`/ext/bc/X/wallet`
:::caution
Endpoint deprecated as of [**v1.9.12**](https://github.com/ava-labs/avalanchego/releases/tag/v1.9.12).
:::
**Signature:**
```sh
wallet.issueTx({
tx: string,
encoding: string, //optional
}) -> {
txID: string
}
```
**Example Call:**
```sh
curl -X POST --data '{
"jsonrpc":"2.0",
"id" : 1,
"method" :"wallet.issueTx",
"params" :{
"tx":"0x00000009de31b4d8b22991d51aa6aa1fc733f23a851a8c9400000000000186a0000000005f041280000000005f9ca900000030390000000000000001fceda8f90fcb5d30614b99d79fc4baa29307762668f16eb0259a57c2d3b78c875c86ec2045792d4df2d926c40f829196e0bb97ee697af71f5b0a966dabff749634c8b729855e937715b0e44303fd1014daedc752006011b730",
"encoding": "hex"
}
}' -H 'content-type:application/json;' 127.0.0.1:9650/ext/bc/X/wallet
```
**Example Response:**
```json
{
"jsonrpc": "2.0",
"id": 1,
"result": {
"txID": "NUPLwbt2hsYxpQg4H2o451hmTWQ4JZx2zMzM4SinwtHgAdX1JLPHXvWSXEnpecStLj"
}
}
```
# X-Chain RPC (/docs/rpcs/x-chain/rpc)
---
title: "X-Chain RPC"
description: "This page is an overview of the X-Chain RPC associated with AvalancheGo."
edit_url: https://github.com/ava-labs/avalanchego/edit/master/vms/avm/service.md
---
The [X-Chain](https://build.avax.network/docs/quick-start/primary-network#x-chain),
Avalanche's native platform for creating and trading assets, is an instance of the Avalanche Virtual
Machine (AVM). This API allows clients to create and trade assets on the X-Chain and other instances
of the AVM.
## Format
This API uses the `json 2.0` RPC format. For more information on making JSON RPC calls, see
[here](https://build.avax.network/docs/api-reference/guides/issuing-api-calls).
## Endpoints
`/ext/bc/X` to interact with the X-Chain.
`/ext/bc/blockchainID` to interact with other AVM instances, where `blockchainID` is the ID of a
blockchain running the AVM.
## Methods
### `avm.getAllBalances`
Deprecated as of [**v1.9.12**](https://github.com/ava-labs/avalanchego/releases/tag/v1.9.12).
Get the balances of all assets controlled by a given address.
**Signature:**
```sh
avm.getAllBalances({address:string}) -> {
balances: []{
asset: string,
balance: int
}
}
```
**Example Call:**
```sh
curl -X POST --data '{
"jsonrpc":"2.0",
"id" : 1,
"method" :"avm.getAllBalances",
"params" :{
"address":"X-avax1c79e0dd0susp7dc8udq34jgk2yvve7hapvdyht"
}
}' -H 'content-type:application/json;' 127.0.0.1:9650/ext/bc/X
```
**Example Response:**
```json
{
"jsonrpc": "2.0",
"result": {
"balances": [
{
"asset": "AVAX",
"balance": "102"
},
{
"asset": "2sdnziCz37Jov3QSNMXcFRGFJ1tgauaj6L7qfk7yUcRPfQMC79",
"balance": "10000"
}
]
},
"id": 1
}
```
### `avm.getAssetDescription`
Get information about an asset.
**Signature:**
```sh
avm.getAssetDescription({assetID: string}) -> {
assetId: string,
name: string,
symbol: string,
denomination: int
}
```
- `assetID` is the id of the asset for which the information is requested.
- `name` is the asset’s human-readable, not necessarily unique name.
- `symbol` is the asset’s symbol.
- `denomination` determines how balances of this asset are displayed by user interfaces. If
denomination is 0, 100 units of this asset are displayed as 100. If denomination is 1, 100 units
of this asset are displayed as 10.0. If denomination is 2, 100 units of this asset are displays as
.100, etc.
The AssetID for AVAX differs depending on the network you are on.
Mainnet: FvwEAhmxKfeiG8SnEvq42hc6whRyY3EFYAvebMqDNDGCgxN5Z
Testnet: U8iRqJoiJm8xZHAacmvYyZVwqQx6uDNtQeP3CQ6fcgQk3JqnK
For finding the `assetID` of other assets, this [info] might be useful.
Also, `avm.getUTXOs` returns the `assetID` in its output.
**Example Call:**
```sh
curl -X POST --data '{
"jsonrpc":"2.0",
"id" :1,
"method" :"avm.getAssetDescription",
"params" :{
"assetID" :"FvwEAhmxKfeiG8SnEvq42hc6whRyY3EFYAvebMqDNDGCgxN5Z"
}
}' -H 'content-type:application/json;' 127.0.0.1:9650/ext/bc/X
```
**Example Response:**
```json
{
"jsonrpc": "2.0",
"result": {
"assetID": "FvwEAhmxKfeiG8SnEvq42hc6whRyY3EFYAvebMqDNDGCgxN5Z",
"name": "Avalanche",
"symbol": "AVAX",
"denomination": "9"
},
"id": 1
}`
```
### `avm.getBalance`
Deprecated as of [**v1.9.12**](https://github.com/ava-labs/avalanchego/releases/tag/v1.9.12).
Get the balance of an asset controlled by a given address.
**Signature:**
```sh
avm.getBalance({
address: string,
assetID: string
}) -> {balance: int}
```
- `address` owner of the asset
- `assetID` id of the asset for which the balance is requested
**Example Call:**
```sh
curl -X POST --data '{
"jsonrpc":"2.0",
"id" : 1,
"method" :"avm.getBalance",
"params" :{
"address":"X-avax18jma8ppw3nhx5r4ap8clazz0dps7rv5ukulre5",
"assetID": "2pYGetDWyKdHxpFxh2LHeoLNCH6H5vxxCxHQtFnnFaYxLsqtHC"
}
}' -H 'content-type:application/json;' 127.0.0.1:9650/ext/bc/X
```
**Example Response:**
```json
{
"jsonrpc": "2.0",
"id": 1,
"result": {
"balance": "299999999999900",
"utxoIDs": [
{
"txID": "WPQdyLNqHfiEKp4zcCpayRHYDVYuh1hqs9c1RqgZXS4VPgdvo",
"outputIndex": 1
}
]
}
}
```
### `avm.getBlock`
Returns the block with the given id.
**Signature:**
```sh
avm.getBlock({
blockID: string
encoding: string // optional
}) -> {
block: string,
encoding: string
}
```
**Request:**
- `blockID` is the block ID. It should be in cb58 format.
- `encoding` is the encoding format to use. Can be either `hex` or `json`. Defaults to `hex`.
**Response:**
- `block` is the transaction encoded to `encoding`.
- `encoding` is the `encoding`.
#### Hex Example
**Example Call:**
```sh
curl -X POST --data '{
"jsonrpc": "2.0",
"method": "avm.getBlock",
"params": {
"blockID": "tXJ4xwmR8soHE6DzRNMQPtiwQvuYsHn6eLLBzo2moDqBquqy6",
"encoding": "hex"
},
"id": 1
}' -H 'content-type:application/json;' 127.0.0.1:9650/ext/bc/X
```
**Example Response:**
```json
{
"jsonrpc": "2.0",
"result": {
"block": "0x00000000002000000000641ad33ede17f652512193721df87994f783ec806bb5640c39ee73676caffcc3215e0651000000000049a80a000000010000000e0000000100000000000000000000000000000000000000000000000000000000000000000000000121e67317cbc4be2aeb00677ad6462778a8f52274b9d605df2591b23027a87dff000000070000002e1a2a3910000000000000000000000001000000015cf998275803a7277926912defdf177b2e97b0b400000001e0d825c5069a7336671dd27eaa5c7851d2cf449e7e1cdc469c5c9e5a953955950000000021e67317cbc4be2aeb00677ad6462778a8f52274b9d605df2591b23027a87dff000000050000008908223b680000000100000000000000005e45d02fcc9e585544008f1df7ae5c94bf7f0f2600000000641ad3b600000000642d48b60000005aedf802580000000121e67317cbc4be2aeb00677ad6462778a8f52274b9d605df2591b23027a87dff000000070000005aedf80258000000000000000000000001000000015cf998275803a7277926912defdf177b2e97b0b40000000b000000000000000000000001000000012892441ba9a160bcdc596dcd2cc3ad83c3493589000000010000000900000001adf2237a5fe2dfd906265e8e14274aa7a7b2ee60c66213110598ba34fb4824d74f7760321c0c8fb1e8d3c5e86909248e48a7ae02e641da5559351693a8a1939800286d4fa2",
"encoding": "hex"
},
"id": 1
}
```
### `avm.getBlockByHeight`
Returns block at the given height.
**Signature:**
```sh
avm.getBlockByHeight({
height: string
encoding: string // optional
}) -> {
block: string,
encoding: string
}
```
**Request:**
- `blockHeight` is the block height. It should be in `string` format.
- `encoding` is the encoding format to use. Can be either `hex` or `json`. Defaults to `hex`.
**Response:**
- `block` is the transaction encoded to `encoding`.
- `encoding` is the `encoding`.
#### Hex Example
**Example Call:**
```sh
curl -X POST --data '{
"jsonrpc": "2.0",
"method": "avm.getBlockByHeight",
"params": {
"height": "275686313486",
"encoding": "hex"
},
"id": 1
}' -H 'content-type:application/json;' 127.0.0.1:9650/ext/bc/X
```
**Example Response:**
```json
{
"jsonrpc": "2.0",
"result": {
"block": "0x00000000002000000000642f6739d4efcdd07e4d4919a7fc2020b8a0f081dd64c262aaace5a6dad22be0b55fec0700000000004db9e100000001000000110000000100000000000000000000000000000000000000000000000000000000000000000000000121e67317cbc4be2aeb00677ad6462778a8f52274b9d605df2591b23027a87dff000000070000005c6ece390000000000000000000000000100000001930ab7bf5018bfc6f9435c8b15ba2fe1e619c0230000000000000000ed5f38341e436e5d46e2bb00b45d62ae97d1b050c64bc634ae10626739e35c4b00000001c6dda861341665c3b555b46227fb5e56dc0a870c5482809349f04b00348af2a80000000021e67317cbc4be2aeb00677ad6462778a8f52274b9d605df2591b23027a87dff000000050000005c6edd7b40000000010000000000000001000000090000000178688f4d5055bd8733801f9b52793da885bef424c90526c18e4dd97f7514bf6f0c3d2a0e9a5ea8b761bc41902eb4902c34ef034c4d18c3db7c83c64ffeadd93600731676de",
"encoding": "hex"
},
"id": 1
}
```
### `avm.getHeight`
Returns the height of the last accepted block.
**Signature:**
```sh
avm.getHeight() ->
{
height: uint64,
}
```
**Example Call:**
```sh
curl -X POST --data '{
"jsonrpc": "2.0",
"method": "avm.getHeight",
"params": {},
"id": 1
}' -H 'content-type:application/json;' 127.0.0.1:9650/ext/bc/X
```
**Example Response:**
```json
{
"jsonrpc": "2.0",
"result": {
"height": "5094088"
},
"id": 1
}
```
### `avm.getTx`
Returns the specified transaction. The `encoding` parameter sets the format of the returned
transaction. Can be either `"hex"` or `"json"`. Defaults to `"hex"`.
**Signature:**
```sh
avm.getTx({
txID: string,
encoding: string, //optional
}) -> {
tx: string,
encoding: string,
}
```
**Example Call:**
```sh
curl -X POST --data '{
"jsonrpc":"2.0",
"id" :1,
"method" :"avm.getTx",
"params" :{
"txID":"2oJCbb8pfdxEHAf9A8CdN4Afj9VSR3xzyzNkf8tDv7aM1sfNFL",
"encoding": "json"
}
}' -H 'content-type:application/json;' 127.0.0.1:9650/ext/bc/X
```
**Example Response:**
```json
{
"jsonrpc": "2.0",
"result": {
"tx": {
"unsignedTx": {
"networkID": 1,
"blockchainID": "2oYMBNV4eNHyqk2fjjV5nVQLDbtmNJzq5s3qs3Lo6ftnC6FByM",
"outputs": [],
"inputs": [
{
"txID": "2jbZUvi6nHy3Pgmk8xcMpSg5cW6epkPqdKkHSCweb4eRXtq4k9",
"outputIndex": 1,
"assetID": "FvwEAhmxKfeiG8SnEvq42hc6whRyY3EFYAvebMqDNDGCgxN5Z",
"fxID": "spdxUxVJQbX85MGxMHbKw1sHxMnSqJ3QBzDyDYEP3h6TLuxqQ",
"input": {
"amount": 2570382395,
"signatureIndices": [0]
}
}
],
"memo": "0x",
"destinationChain": "11111111111111111111111111111111LpoYY",
"exportedOutputs": [
{
"assetID": "FvwEAhmxKfeiG8SnEvq42hc6whRyY3EFYAvebMqDNDGCgxN5Z",
"fxID": "spdxUxVJQbX85MGxMHbKw1sHxMnSqJ3QBzDyDYEP3h6TLuxqQ",
"output": {
"addresses": ["X-avax1tnuesf6cqwnjw7fxjyk7lhch0vhf0v95wj5jvy"],
"amount": 2569382395,
"locktime": 0,
"threshold": 1
}
}
]
},
"credentials": [
{
"fxID": "spdxUxVJQbX85MGxMHbKw1sHxMnSqJ3QBzDyDYEP3h6TLuxqQ",
"credential": {
"signatures": [
"0x46ebcbcfbee3ece1fd15015204045cf3cb77f42c48d0201fc150341f91f086f177cfca8894ca9b4a0c55d6950218e4ea8c01d5c4aefb85cd7264b47bd57d224400"
]
}
}
],
"id": "2oJCbb8pfdxEHAf9A8CdN4Afj9VSR3xzyzNkf8tDv7aM1sfNFL"
},
"encoding": "json"
},
"id": 1
}
```
Where:
- `credentials` is a list of this transaction's credentials. Each credential proves that this
transaction's creator is allowed to consume one of this transaction's inputs. Each credential is a
list of signatures.
- `unsignedTx` is the non-signature portion of the transaction.
- `networkID` is the ID of the network this transaction happened on. (Avalanche Mainnet is `1`.)
- `blockchainID` is the ID of the blockchain this transaction happened on. (Avalanche Mainnet
X-Chain is `2oYMBNV4eNHyqk2fjjV5nVQLDbtmNJzq5s3qs3Lo6ftnC6FByM`.)
- Each element of `outputs` is an output (UTXO) of this transaction that is not being exported to
another chain.
- Each element of `inputs` is an input of this transaction which has not been imported from another
chain.
- Import Transactions have additional fields `sourceChain` and `importedInputs`, which specify the
blockchain ID that assets are being imported from, and the inputs that are being imported.
- Export Transactions have additional fields `destinationChain` and `exportedOutputs`, which specify
the blockchain ID that assets are being exported to, and the UTXOs that are being exported.
An output contains:
- `assetID`: The ID of the asset being transferred. (The Mainnet Avax ID is
`FvwEAhmxKfeiG8SnEvq42hc6whRyY3EFYAvebMqDNDGCgxN5Z`.)
- `fxID`: The ID of the FX this output uses.
- `output`: The FX-specific contents of this output.
Most outputs use the secp256k1 FX, look like this:
```json
{
"assetID": "FvwEAhmxKfeiG8SnEvq42hc6whRyY3EFYAvebMqDNDGCgxN5Z",
"fxID": "spdxUxVJQbX85MGxMHbKw1sHxMnSqJ3QBzDyDYEP3h6TLuxqQ",
"output": {
"addresses": ["X-avax126rd3w35xwkmj8670zvf7y5r8k36qa9z9803wm"],
"amount": 1530084210,
"locktime": 0,
"threshold": 1
}
}
```
The above output can be consumed after Unix time `locktime` by a transaction that has signatures
from `threshold` of the addresses in `addresses`.
### `avm.getTxFee`
Get the fees of the network.
**Signature**:
```
avm.getTxFee() ->
{
txFee: uint64,
createAssetTxFee: uint64,
}
```
- `txFee` is the default fee for making transactions.
- `createAssetTxFee` is the fee for creating a new asset.
All fees are denominated in nAVAX.
**Example Call**:
```sh
curl -X POST --data '{
"jsonrpc":"2.0",
"id" : 1,
"method" :"avm.getTxFee",
}' -H 'content-type:application/json;' 127.0.0.1:9650/ext/bc/X
```
**Example Response**:
```json
{
"jsonrpc": "2.0",
"result": {
"txFee": "1000000",
"createAssetTxFee": "10000000"
}
}
```
### `avm.getTxStatus`
Deprecated as of **v1.10.0**.
Get the status of a transaction sent to the network.
**Signature:**
```sh
avm.getTxStatus({txID: string}) -> {status: string}
```
`status` is one of:
- `Accepted`: The transaction is (or will be) accepted by every node
- `Processing`: The transaction is being voted on by this node
- `Rejected`: The transaction will never be accepted by any node in the network
- `Unknown`: The transaction hasn’t been seen by this node
**Example Call:**
```sh
curl -X POST --data '{
"jsonrpc":"2.0",
"id" :1,
"method" :"avm.getTxStatus",
"params" :{
"txID":"2QouvFWUbjuySRxeX5xMbNCuAaKWfbk5FeEa2JmoF85RKLk2dD"
}
}' -H 'content-type:application/json;' 127.0.0.1:9650/ext/bc/X
```
**Example Response:**
```json
{
"jsonrpc": "2.0",
"id": 1,
"result": {
"status": "Accepted"
}
}
```
### `avm.getUTXOs`
Gets the UTXOs that reference a given address. If `sourceChain` is specified, then it will retrieve
the atomic UTXOs exported from that chain to the X Chain.
**Signature:**
```sh
avm.getUTXOs({
addresses: []string,
limit: int, //optional
startIndex: { //optional
address: string,
utxo: string
},
sourceChain: string, //optional
encoding: string //optional
}) -> {
numFetched: int,
utxos: []string,
endIndex: {
address: string,
utxo: string
},
sourceChain: string, //optional
encoding: string
}
```
- `utxos` is a list of UTXOs such that each UTXO references at least one address in `addresses`.
- At most `limit` UTXOs are returned. If `limit` is omitted or greater than 1024, it is set to 1024.
- This method supports pagination. `endIndex` denotes the last UTXO returned. To get the next set of
UTXOs, use the value of `endIndex` as `startIndex` in the next call.
- If `startIndex` is omitted, will fetch all UTXOs up to `limit`.
- When using pagination (when `startIndex` is provided), UTXOs are not guaranteed to be unique
across multiple calls. That is, a UTXO may appear in the result of the first call, and then again
in the second call.
- When using pagination, consistency is not guaranteed across multiple calls. That is, the UTXO set
of the addresses may have changed between calls.
- `encoding` sets the format for the returned UTXOs. Can only be `hex` when a value is provided.
#### **Example**
Suppose we want all UTXOs that reference at least one of
`X-avax18jma8ppw3nhx5r4ap8clazz0dps7rv5ukulre5` and `X-avax1d09qn852zcy03sfc9hay2llmn9hsgnw4tp3dv6`.
```sh
curl -X POST --data '{
"jsonrpc":"2.0",
"id" :1,
"method" :"avm.getUTXOs",
"params" :{
"addresses":["X-avax18jma8ppw3nhx5r4ap8clazz0dps7rv5ukulre5", "X-avax1d09qn852zcy03sfc9hay2llmn9hsgnw4tp3dv6"],
"limit":5,
"encoding": "hex"
}
}' -H 'content-type:application/json;' 127.0.0.1:9650/ext/bc/X
```
This gives response:
```json
{
"jsonrpc": "2.0",
"result": {
"numFetched": "5",
"utxos": [
"0x0000a195046108a85e60f7a864bb567745a37f50c6af282103e47cc62f036cee404700000000345aa98e8a990f4101e2268fab4c4e1f731c8dfbcffa3a77978686e6390d624f000000070000000000000001000000000000000000000001000000018ba98dabaebcd83056799841cfbc567d8b10f216c1f01765",
"0x0000ae8b1b94444eed8de9a81b1222f00f1b4133330add23d8ac288bffa98b85271100000000345aa98e8a990f4101e2268fab4c4e1f731c8dfbcffa3a77978686e6390d624f000000070000000000000001000000000000000000000001000000018ba98dabaebcd83056799841cfbc567d8b10f216473d042a",
"0x0000731ce04b1feefa9f4291d869adc30a33463f315491e164d89be7d6d2d7890cfc00000000345aa98e8a990f4101e2268fab4c4e1f731c8dfbcffa3a77978686e6390d624f000000070000000000000001000000000000000000000001000000018ba98dabaebcd83056799841cfbc567d8b10f21600dd3047",
"0x0000b462030cc4734f24c0bc224cf0d16ee452ea6b67615517caffead123ab4fbf1500000000345aa98e8a990f4101e2268fab4c4e1f731c8dfbcffa3a77978686e6390d624f000000070000000000000001000000000000000000000001000000018ba98dabaebcd83056799841cfbc567d8b10f216c71b387e",
"0x000054f6826c39bc957c0c6d44b70f961a994898999179cc32d21eb09c1908d7167b00000000345aa98e8a990f4101e2268fab4c4e1f731c8dfbcffa3a77978686e6390d624f000000070000000000000001000000000000000000000001000000018ba98dabaebcd83056799841cfbc567d8b10f2166290e79d"
],
"endIndex": {
"address": "X-avax18jma8ppw3nhx5r4ap8clazz0dps7rv5ukulre5",
"utxo": "kbUThAUfmBXUmRgTpgD6r3nLj7rJUGho6xyht5nouNNypH45j"
},
"encoding": "hex"
},
"id": 1
}
```
Since `numFetched` is the same as `limit`, we can tell that there may be more UTXOs that were not
fetched. We call the method again, this time with `startIndex`:
```sh
curl -X POST --data '{
"jsonrpc":"2.0",
"id" :2,
"method" :"avm.getUTXOs",
"params" :{
"addresses":["X-avax18jma8ppw3nhx5r4ap8clazz0dps7rv5ukulre5"],
"limit":5,
"startIndex": {
"address": "X-avax18jma8ppw3nhx5r4ap8clazz0dps7rv5ukulre5",
"utxo": "kbUThAUfmBXUmRgTpgD6r3nLj7rJUGho6xyht5nouNNypH45j"
},
"encoding": "hex"
}
}' -H 'content-type:application/json;' 127.0.0.1:9650/ext/bc/X
```
This gives response:
```json
{
"jsonrpc": "2.0",
"result": {
"numFetched": "4",
"utxos": [
"0x000020e182dd51ee4dcd31909fddd75bb3438d9431f8e4efce86a88a684f5c7fa09300000000345aa98e8a990f4101e2268fab4c4e1f731c8dfbcffa3a77978686e6390d624f000000070000000000000001000000000000000000000001000000018ba98dabaebcd83056799841cfbc567d8b10f21662861d59",
"0x0000a71ba36c475c18eb65dc90f6e85c4fd4a462d51c5de3ac2cbddf47db4d99284e00000000345aa98e8a990f4101e2268fab4c4e1f731c8dfbcffa3a77978686e6390d624f000000070000000000000001000000000000000000000001000000018ba98dabaebcd83056799841cfbc567d8b10f21665f6f83f",
"0x0000925424f61cb13e0fbdecc66e1270de68de9667b85baa3fdc84741d048daa69fa00000000345aa98e8a990f4101e2268fab4c4e1f731c8dfbcffa3a77978686e6390d624f000000070000000000000001000000000000000000000001000000018ba98dabaebcd83056799841cfbc567d8b10f216afecf76a",
"0x000082f30327514f819da6009fad92b5dba24d27db01e29ad7541aa8e6b6b554615c00000000345aa98e8a990f4101e2268fab4c4e1f731c8dfbcffa3a77978686e6390d624f000000070000000000000001000000000000000000000001000000018ba98dabaebcd83056799841cfbc567d8b10f216779c2d59"
],
"endIndex": {
"address": "X-avax18jma8ppw3nhx5r4ap8clazz0dps7rv5ukulre5",
"utxo": "21jG2RfqyHUUgkTLe2tUp6ETGLriSDTW3th8JXFbPRNiSZ11jK"
},
"encoding": "hex"
},
"id": 1
}
```
Since `numFetched` is less than `limit`, we know that we are done fetching UTXOs and don’t need to
call this method again.
Suppose we want to fetch the UTXOs exported from the P Chain to the X Chain in order to build an
ImportTx. Then we need to call GetUTXOs with the `sourceChain` argument in order to retrieve the
atomic UTXOs:
```sh
curl -X POST --data '{
"jsonrpc":"2.0",
"id" :1,
"method" :"avm.getUTXOs",
"params" :{
"addresses":["X-avax18jma8ppw3nhx5r4ap8clazz0dps7rv5ukulre5", "X-avax1d09qn852zcy03sfc9hay2llmn9hsgnw4tp3dv6"],
"limit":5,
"sourceChain": "P",
"encoding": "hex"
}
}' -H 'content-type:application/json;' 127.0.0.1:9650/ext/bc/X
```
This gives response:
```json
{
"jsonrpc": "2.0",
"result": {
"numFetched": "1",
"utxos": [
"0x00001f989ffaf18a18a59bdfbf209342aa61c6a62a67e8639d02bb3c8ddab315c6fa0000000039c33a499ce4c33a3b09cdd2cfa01ae70dbf2d18b2d7d168524440e55d550088000000070011c304cd7eb5c0000000000000000000000001000000013cb7d3842e8cee6a0ebd09f1fe884f6861e1b29c83497819"
],
"endIndex": {
"address": "X-avax18jma8ppw3nhx5r4ap8clazz0dps7rv5ukulre5",
"utxo": "2Sz2XwRYqUHwPeiKoRnZ6ht88YqzAF1SQjMYZQQaB5wBFkAqST"
},
"encoding": "hex"
},
"id": 1
}
```
### `avm.issueTx`
Send a signed transaction to the network. `encoding` specifies the format of the signed transaction.
Can only be `hex` when a value is provided.
**Signature:**
```sh
avm.issueTx({
tx: string,
encoding: string, //optional
}) -> {
txID: string
}
```
**Example Call:**
```sh
curl -X POST --data '{
"jsonrpc":"2.0",
"id" : 1,
"method" :"avm.issueTx",
"params" :{
"tx":"0x00000009de31b4d8b22991d51aa6aa1fc733f23a851a8c9400000000000186a0000000005f041280000000005f9ca900000030390000000000000001fceda8f90fcb5d30614b99d79fc4baa29307762668f16eb0259a57c2d3b78c875c86ec2045792d4df2d926c40f829196e0bb97ee697af71f5b0a966dabff749634c8b729855e937715b0e44303fd1014daedc752006011b730",
"encoding": "hex"
}
}' -H 'content-type:application/json;' 127.0.0.1:9650/ext/bc/X
```
**Example Response:**
```json
{
"jsonrpc": "2.0",
"id": 1,
"result": {
"txID": "NUPLwbt2hsYxpQg4H2o451hmTWQ4JZx2zMzM4SinwtHgAdX1JLPHXvWSXEnpecStLj"
}
}
```
### `wallet.issueTx`
Send a signed transaction to the network and assume the TX will be accepted. `encoding` specifies
the format of the signed transaction. Can only be `hex` when a value is provided.
This call is made to the wallet API endpoint:
`/ext/bc/X/wallet`
:::caution
Endpoint deprecated as of [**v1.9.12**](https://github.com/ava-labs/avalanchego/releases/tag/v1.9.12).
:::
**Signature:**
```sh
wallet.issueTx({
tx: string,
encoding: string, //optional
}) -> {
txID: string
}
```
**Example Call:**
```sh
curl -X POST --data '{
"jsonrpc":"2.0",
"id" : 1,
"method" :"wallet.issueTx",
"params" :{
"tx":"0x00000009de31b4d8b22991d51aa6aa1fc733f23a851a8c9400000000000186a0000000005f041280000000005f9ca900000030390000000000000001fceda8f90fcb5d30614b99d79fc4baa29307762668f16eb0259a57c2d3b78c875c86ec2045792d4df2d926c40f829196e0bb97ee697af71f5b0a966dabff749634c8b729855e937715b0e44303fd1014daedc752006011b730",
"encoding": "hex"
}
}' -H 'content-type:application/json;' 127.0.0.1:9650/ext/bc/X/wallet
```
**Example Response:**
```json
{
"jsonrpc": "2.0",
"id": 1,
"result": {
"txID": "NUPLwbt2hsYxpQg4H2o451hmTWQ4JZx2zMzM4SinwtHgAdX1JLPHXvWSXEnpecStLj"
}
}
```
# Transaction Format (/docs/rpcs/x-chain/txn-format)
---
title: Transaction Format
---
This file is meant to be the single source of truth for how we serialize
transactions in the Avalanche Virtual Machine (AVM). This document uses the
[primitive serialization](/docs/api-reference/standards/serialization-primitives) format for packing and
[secp256k1](/docs/api-reference/standards/cryptographic-primitives#secp256k1-addresses) for cryptographic
user identification.
## Codec ID
Some data is prepended with a codec ID (unt16) that denotes how the data should
be deserialized. Right now, the only valid codec ID is 0 (`0x00 0x00`).
## Transferable Output
Transferable outputs wrap an output with an asset ID.
### What Transferable Output Contains
A transferable output contains an `AssetID` and an [`Output`](/docs/api-reference/x-chain/txn-format#outputs).
- **`AssetID`** is a 32-byte array that defines which asset this output references.
- **`Output`** is an output, as defined
[below](/docs/api-reference/x-chain/txn-format#outputs). Outputs have four possible types:
[`SECP256K1TransferOutput`](/docs/api-reference/x-chain/txn-format#secp256k1-transfer-output),
[`SECP256K1MintOutput`](/docs/api-reference/x-chain/txn-format#secp256k1-mint-output),
[`NFTTransferOutput`](/docs/api-reference/x-chain/txn-format#nft-transfer-output)
and [`NFTMintOutput`](/docs/api-reference/x-chain/txn-format#nft-mint-output).
### Gantt Transferable Output Specification
```text
+----------+----------+-------------------------+
| asset_id : [32]byte | 32 bytes |
+----------+----------+-------------------------+
| output : Output | size(output) bytes |
+----------+----------+-------------------------+
| 32 + size(output) bytes |
+-------------------------+
```
### Proto Transferable Output Specification
```text
message TransferableOutput {
bytes asset_id = 1; // 32 bytes
Output output = 2; // size(output)
}
```
### Transferable Output Example
Let's make a transferable output:
- `AssetID`: `0x000102030405060708090a0b0c0d0e0f101112131415161718191a1b1c1d1e1f`
- `Output`: `"Example SECP256K1 Transfer Output from below"`
```text
[
AssetID <- 0x000102030405060708090a0b0c0d0e0f101112131415161718191a1b1c1d1e1f
Output <- 0x000000070000000000003039000000000000d431000000010000000251025c61fbcfc078f69334f834be6dd26d55a955c3344128e060128ede3523a24a461c8943ab0859,
]
=
[
// assetID:
0x00, 0x01, 0x02, 0x03, 0x04, 0x05, 0x06, 0x07,
0x08, 0x09, 0x0a, 0x0b, 0x0c, 0x0d, 0x0e, 0x0f,
0x10, 0x11, 0x12, 0x13, 0x14, 0x15, 0x16, 0x17,
0x18, 0x19, 0x1a, 0x1b, 0x1c, 0x1d, 0x1e, 0x1f,
// output:
0x00, 0x00, 0x00, 0x07, 0x00, 0x00, 0x00, 0x00,
0x00, 0x00, 0x30, 0x39, 0x00, 0x00, 0x00, 0x00,
0x00, 0x00, 0xd4, 0x31, 0x00, 0x00, 0x00, 0x01,
0x00, 0x00, 0x00, 0x02, 0x51, 0x02, 0x5c, 0x61,
0xfb, 0xcf, 0xc0, 0x78, 0xf6, 0x93, 0x34, 0xf8,
0x34, 0xbe, 0x6d, 0xd2, 0x6d, 0x55, 0xa9, 0x55,
0xc3, 0x34, 0x41, 0x28, 0xe0, 0x60, 0x12, 0x8e,
0xde, 0x35, 0x23, 0xa2, 0x4a, 0x46, 0x1c, 0x89,
0x43, 0xab, 0x08, 0x59,
]
```
## Transferable Input
Transferable inputs describe a specific UTXO with a provided transfer input.
### What Transferable Input Contains
A transferable input contains a `TxID`, `UTXOIndex` `AssetID` and an `Input`.
- **`TxID`** is a 32-byte array that defines which transaction this input is
consuming an output from. Transaction IDs are calculated by taking sha256 of
the bytes of the signed transaction.
- **`UTXOIndex`** is an int that defines which UTXO this input is consuming in the specified transaction.
- **`AssetID`** is a 32-byte array that defines which asset this input references.
- **`Input`** is an input, as defined below. This can currently only be a [SECP256K1 transfer input](/docs/api-reference/x-chain/txn-format#secp256k1-transfer-input)
### Gantt Transferable Input Specification
```text
+------------+----------+------------------------+
| tx_id : [32]byte | 32 bytes |
+------------+----------+------------------------+
| utxo_index : int | 04 bytes |
+------------+----------+------------------------+
| asset_id : [32]byte | 32 bytes |
+------------+----------+------------------------+
| input : Input | size(input) bytes |
+------------+----------+------------------------+
| 68 + size(input) bytes |
+------------------------+
```
### Proto Transferable Input Specification
```text
message TransferableInput {
bytes tx_id = 1; // 32 bytes
uint32 utxo_index = 2; // 04 bytes
bytes asset_id = 3; // 32 bytes
Input input = 4; // size(input)
}
```
### Transferable Input Example
Let's make a transferable input:
- `TxID`: `0xf1e1d1c1b1a191817161514131211101f0e0d0c0b0a090807060504030201000`
- `UTXOIndex`: `5`
- `AssetID`: `0x000102030405060708090a0b0c0d0e0f101112131415161718191a1b1c1d1e1f`
- `Input`: `"Example SECP256K1 Transfer Input from below"`
```text
[
TxID <- 0xf1e1d1c1b1a191817161514131211101f0e0d0c0b0a090807060504030201000
UTXOIndex <- 0x00000005
AssetID <- 0x000102030405060708090a0b0c0d0e0f101112131415161718191a1b1c1d1e1f
Input <- 0x0000000500000000075bcd15000000020000000700000003
]
=
[
// txID:
0xf1, 0xe1, 0xd1, 0xc1, 0xb1, 0xa1, 0x91, 0x81,
0x71, 0x61, 0x51, 0x41, 0x31, 0x21, 0x11, 0x01,
0xf0, 0xe0, 0xd0, 0xc0, 0xb0, 0xa0, 0x90, 0x80,
0x70, 0x60, 0x50, 0x40, 0x30, 0x20, 0x10, 0x00,
// utxoIndex:
0x00, 0x00, 0x00, 0x05,
// assetID:
0x00, 0x01, 0x02, 0x03, 0x04, 0x05, 0x06, 0x07,
0x08, 0x09, 0x0a, 0x0b, 0x0c, 0x0d, 0x0e, 0x0f,
0x10, 0x11, 0x12, 0x13, 0x14, 0x15, 0x16, 0x17,
0x18, 0x19, 0x1a, 0x1b, 0x1c, 0x1d, 0x1e, 0x1f,
// input:
0x00, 0x00, 0x00, 0x05, 0x00, 0x00, 0x00, 0x00,
0x07, 0x5b, 0xcd, 0x15, 0x00, 0x00, 0x00, 0x02,
0x00, 0x00, 0x00, 0x03, 0x00, 0x00, 0x00, 0x07
]
```
## Transferable Op
Transferable operations describe a set of UTXOs with a provided transfer
operation. Only one Asset ID is able to be referenced per operation.
### What Transferable Op Contains
A transferable operation contains an `AssetID`, `UTXOIDs`, and a `TransferOp`.
- **`AssetID`** is a 32-byte array that defines which asset this operation changes.
- **`UTXOIDs`** is an array of TxID-OutputIndex tuples. This array must be
sorted in lexicographical order.
- **`TransferOp`** is a [transferable operation object](/docs/api-reference/x-chain/txn-format#operations).
### Gantt Transferable Op Specification
```text
+-------------+------------+------------------------------+
| asset_id : [32]byte | 32 bytes |
+-------------+------------+------------------------------+
| utxo_ids : []UTXOID | 4 + 36 * len(utxo_ids) bytes |
+-------------+------------+------------------------------+
| transfer_op : TransferOp | size(transfer_op) bytes |
+-------------+------------+------------------------------+
| 36 + 36 * len(utxo_ids) |
| + size(transfer_op) bytes |
+------------------------------+
```
### Proto Transferable Op Specification
```text
message UTXOID {
bytes tx_id = 1; // 32 bytes
uint32 utxo_index = 2; // 04 bytes
}
message TransferableOp {
bytes asset_id = 1; // 32 bytes
repeated UTXOID utxo_ids = 2; // 4 + 36 * len(utxo_ids) bytes
TransferOp transfer_op = 3; // size(transfer_op)
}
```
### Transferable Op Example
Let's make a transferable operation:
- `AssetID`: `0x000102030405060708090a0b0c0d0e0f101112131415161718191a1b1c1d1e1f`
- `UTXOIDs`:
- `UTXOID`:
- `TxID`: `0xf1e1d1c1b1a191817161514131211101f0e0d0c0b0a090807060504030201000`
- `UTXOIndex`: `5`
- `Op`: `"Example Transfer Op from below"`
```text
[
AssetID <- 0x000102030405060708090a0b0c0d0e0f101112131415161718191a1b1c1d1e1f
UTXOIDs <- [
{
TxID:0xf1e1d1c1b1a191817161514131211101f0e0d0c0b0a090807060504030201000
UTXOIndex:5
}
]
Op <- 0x0000000d0000000200000003000000070000303900000003431100000000010000000251025c61fbcfc078f69334f834be6dd26d55a955c3344128e060128ede3523a24a461c8943ab0859
]
=
[
// assetID:
0x00, 0x01, 0x02, 0x03, 0x04, 0x05, 0x06, 0x07,
0x08, 0x09, 0x0a, 0x0b, 0x0c, 0x0d, 0x0e, 0x0f,
0x10, 0x11, 0x12, 0x13, 0x14, 0x15, 0x16, 0x17,
0x18, 0x19, 0x1a, 0x1b, 0x1c, 0x1d, 0x1e, 0x1f,
// number of utxoIDs:
0x00, 0x00, 0x00, 0x01,
// txID:
0xf1, 0xe1, 0xd1, 0xc1, 0xb1, 0xa1, 0x91, 0x81,
0x71, 0x61, 0x51, 0x41, 0x31, 0x21, 0x11, 0x01,
0xf0, 0xe0, 0xd0, 0xc0, 0xb0, 0xa0, 0x90, 0x80,
0x70, 0x60, 0x50, 0x40, 0x30, 0x20, 0x10, 0x00,
// utxoIndex:
0x00, 0x00, 0x00, 0x05,
// op:
0x00, 0x00, 0x00, 0x0d, 0x00, 0x00, 0x00, 0x02,
0x00, 0x00, 0x00, 0x03, 0x00, 0x00, 0x00, 0x07,
0x00, 0x00, 0x30, 0x39, 0x00, 0x00, 0x00, 0x03,
0x43, 0x11, 0x00, 0x00, 0x00, 0x00, 0x01, 0x00,
0x00, 0x00, 0x02, 0x51, 0x02, 0x5c, 0x61, 0xfb,
0xcf, 0xc0, 0x78, 0xf6, 0x93, 0x34, 0xf8, 0x34,
0xbe, 0x6d, 0xd2, 0x6d, 0x55, 0xa9, 0x55, 0xc3,
0x34, 0x41, 0x28, 0xe0, 0x60, 0x12, 0x8e, 0xde,
0x35, 0x23, 0xa2, 0x4a, 0x46, 0x1c, 0x89, 0x43,
0xab, 0x08, 0x59,
]
```
## Outputs
Outputs have four possible types:
[`SECP256K1TransferOutput`](/docs/api-reference/x-chain/txn-format#secp256k1-transfer-output),
[`SECP256K1MintOutput`](/docs/api-reference/x-chain/txn-format#secp256k1-mint-output),
[`NFTTransferOutput`](/docs/api-reference/x-chain/txn-format#nft-transfer-output) and
[`NFTMintOutput`](/docs/api-reference/x-chain/txn-format#nft-mint-output).
## SECP256K1 Mint Output
A [secp256k1](/docs/api-reference/standards/cryptographic-primitives#secp256k1-addresses) mint output is
an output that is owned by a collection of addresses.
### What SECP256K1 Mint Output Contains
A secp256k1 Mint output contains a `TypeID`, `Locktime`, `Threshold`, and `Addresses`.
- **`TypeID`** is the ID for this output type. It is `0x00000006`.
- **`Locktime`** is a long that contains the Unix timestamp that this output can
be spent after. The Unix timestamp is specific to the second.
- **`Threshold`** is an int that names the number of unique signatures required
to spend the output. Must be less than or equal to the length of
**`Addresses`**. If **`Addresses`** is empty, must be 0.
- **`Addresses`** is a list of unique addresses that correspond to the private
keys that can be used to spend this output. Addresses must be sorted
lexicographically.
### Gantt SECP256K1 Mint Output Specification
```text
+-----------+------------+--------------------------------+
| type_id : int | 4 bytes |
+-----------+------------+--------------------------------+
| locktime : long | 8 bytes |
+-----------+------------+--------------------------------+
| threshold : int | 4 bytes |
+-----------+------------+--------------------------------+
| addresses : [][20]byte | 4 + 20 * len(addresses) bytes |
+-----------+------------+--------------------------------+
| 20 + 20 * len(addresses) bytes |
+--------------------------------+
```
### Proto SECP256K1 Mint Output Specification
```text
message SECP256K1MintOutput {
uint32 typeID = 1; // 04 bytes
uint64 locktime = 2; // 08 bytes
uint32 threshold = 3; // 04 bytes
repeated bytes addresses = 4; // 04 bytes + 20 bytes * len(addresses)
}
```
### SECP256K1 Mint Output Example
Let's make a SECP256K1 mint output with:
- **`TypeID`**: `6`
- **`Locktime`**: `54321`
- **`Threshold`**: `1`
- **`Addresses`**:
- `0x51025c61fbcfc078f69334f834be6dd26d55a955`
- `0xc3344128e060128ede3523a24a461c8943ab0859`
```text
[
TypeID <- 0x00000006
Locktime <- 0x000000000000d431
Threshold <- 0x00000001
Addresses <- [
0x51025c61fbcfc078f69334f834be6dd26d55a955,
0xc3344128e060128ede3523a24a461c8943ab0859,
]
]
=
[
// typeID:
0x00, 0x00, 0x00, 0x06,
// locktime:
0x00, 0x00, 0x00, 0x00, 0x00, 0x00, 0xd4, 0x31,
// threshold:
0x00, 0x00, 0x00, 0x01,
// number of addresses:
0x00, 0x00, 0x00, 0x02,
// addrs[0]:
0x51, 0x02, 0x5c, 0x61, 0xfb, 0xcf, 0xc0, 0x78,
0xf6, 0x93, 0x34, 0xf8, 0x34, 0xbe, 0x6d, 0xd2,
0x6d, 0x55, 0xa9, 0x55,
// addrs[1]:
0xc3, 0x34, 0x41, 0x28, 0xe0, 0x60, 0x12, 0x8e,
0xde, 0x35, 0x23, 0xa2, 0x4a, 0x46, 0x1c, 0x89,
0x43, 0xab, 0x08, 0x59,
]
```
## SECP256K1 Transfer Output
A [secp256k1](/docs/api-reference/standards/cryptographic-primitives#secp256k1-addresses) transfer output
allows for sending a quantity of an asset to a collection of addresses after a
specified Unix time.
### What SECP256K1 Transfer Output Contains
A secp256k1 transfer output contains a `TypeID`, `Amount`, `Locktime`, `Threshold`, and `Addresses`.
- **`TypeID`** is the ID for this output type. It is `0x00000007`.
- **`Amount`** is a long that specifies the quantity of the asset that this output owns. Must be positive.
- **`Locktime`** is a long that contains the Unix timestamp that this output can
be spent after. The Unix timestamp is specific to the second.
- **`Threshold`** is an int that names the number of unique signatures required
to spend the output. Must be less than or equal to the length of
**`Addresses`**. If **`Addresses`** is empty, must be 0.
- **`Addresses`** is a list of unique addresses that correspond to the private
keys that can be used to spend this output. Addresses must be sorted
lexicographically.
### Gantt SECP256K1 Transfer Output Specification
```text
+-----------+------------+--------------------------------+
| type_id : int | 4 bytes |
+-----------+------------+--------------------------------+
| amount : long | 8 bytes |
+-----------+------------+--------------------------------+
| locktime : long | 8 bytes |
+-----------+------------+--------------------------------+
| threshold : int | 4 bytes |
+-----------+------------+--------------------------------+
| addresses : [][20]byte | 4 + 20 * len(addresses) bytes |
+-----------+------------+--------------------------------+
| 28 + 20 * len(addresses) bytes |
+--------------------------------+
```
### Proto SECP256K1 Transfer Output Specification
```text
message SECP256K1TransferOutput {
uint32 typeID = 1; // 04 bytes
uint64 amount = 2; // 08 bytes
uint64 locktime = 3; // 08 bytes
uint32 threshold = 4; // 04 bytes
repeated bytes addresses = 5; // 04 bytes + 20 bytes * len(addresses)
}
```
### SECP256K1 Transfer Output Example
Let's make a secp256k1 transfer output with:
- **`TypeID`**: `7`
- **`Amount`**: `12345`
- **`Locktime`**: `54321`
- **`Threshold`**: `1`
- **`Addresses`**:
- `0x51025c61fbcfc078f69334f834be6dd26d55a955`
- `0xc3344128e060128ede3523a24a461c8943ab0859`
```text
[
TypeID <- 0x00000007
Amount <- 0x0000000000003039
Locktime <- 0x000000000000d431
Threshold <- 0x00000001
Addresses <- [
0x51025c61fbcfc078f69334f834be6dd26d55a955,
0xc3344128e060128ede3523a24a461c8943ab0859,
]
]
=
[
// typeID:
0x00, 0x00, 0x00, 0x07,
// amount:
0x00, 0x00, 0x00, 0x00, 0x00, 0x00, 0x30, 0x39,
// locktime:
0x00, 0x00, 0x00, 0x00, 0x00, 0x00, 0xd4, 0x31,
// threshold:
0x00, 0x00, 0x00, 0x01,
// number of addresses:
0x00, 0x00, 0x00, 0x02,
// addrs[0]:
0x51, 0x02, 0x5c, 0x61, 0xfb, 0xcf, 0xc0, 0x78,
0xf6, 0x93, 0x34, 0xf8, 0x34, 0xbe, 0x6d, 0xd2,
0x6d, 0x55, 0xa9, 0x55,
// addrs[1]:
0xc3, 0x34, 0x41, 0x28, 0xe0, 0x60, 0x12, 0x8e,
0xde, 0x35, 0x23, 0xa2, 0x4a, 0x46, 0x1c, 0x89,
0x43, 0xab, 0x08, 0x59,
]
```
## NFT Mint Output
An NFT mint output is an NFT that is owned by a collection of addresses.
### What NFT Mint Output Contains
An NFT Mint output contains a `TypeID`, `GroupID`, `Locktime`, `Threshold`, and `Addresses`.
- **`TypeID`** is the ID for this output type. It is `0x0000000a`.
- **`GroupID`** is an int that specifies the group this NFT is issued to.
- **`Locktime`** is a long that contains the Unix timestamp that this output can
be spent after. The Unix timestamp is specific to the second.
- **`Threshold`** is an int that names the number of unique signatures required
to spend the output. Must be less than or equal to the length of
**`Addresses`**. If **`Addresses`** is empty, must be 0.
- **`Addresses`** is a list of unique addresses that correspond to the private
keys that can be used to spend this output. Addresses must be sorted
lexicographically.
### Gantt NFT Mint Output Specification
```text
+-----------+------------+--------------------------------+
| type_id : int | 4 bytes |
+-----------+------------+--------------------------------+
| group_id : int | 4 bytes |
+-----------+------------+--------------------------------+
| locktime : long | 8 bytes |
+-----------+------------+--------------------------------+
| threshold : int | 4 bytes |
+-----------+------------+--------------------------------+
| addresses : [][20]byte | 4 + 20 * len(addresses) bytes |
+-----------+------------+--------------------------------+
| 24 + 20 * len(addresses) bytes |
+--------------------------------+
```
### Proto NFT Mint Output Specification
```text
message NFTMintOutput {
uint32 typeID = 1; // 04 bytes
uint32 group_id = 2; // 04 bytes
uint64 locktime = 3; // 08 bytes
uint32 threshold = 4; // 04 bytes
repeated bytes addresses = 5; // 04 bytes + 20 bytes * len(addresses)
}
```
### NFT Mint Output Example
Let's make an NFT mint output with:
- **`TypeID`**: `10`
- **`GroupID`**: `12345`
- **`Locktime`**: `54321`
- **`Threshold`**: `1`
- **`Addresses`**:
- `0x51025c61fbcfc078f69334f834be6dd26d55a955`
- `0xc3344128e060128ede3523a24a461c8943ab0859`
```text
[
TypeID <- 0x0000000a
GroupID <- 0x00003039
Locktime <- 0x000000000000d431
Threshold <- 0x00000001
Addresses <- [
0x51025c61fbcfc078f69334f834be6dd26d55a955,
0xc3344128e060128ede3523a24a461c8943ab0859,
]
]
=
[
// TypeID
0x00, 0x00, 0x00, 0x0a,
// groupID:
0x00, 0x00, 0x30, 0x39,
// locktime:
0x00, 0x00, 0x00, 0x00, 0x00, 0x00, 0xd4, 0x31,
// threshold:
0x00, 0x00, 0x00, 0x01,
// number of addresses:
0x00, 0x00, 0x00, 0x02,
// addrs[0]:
0x51, 0x02, 0x5c, 0x61, 0xfb, 0xcf, 0xc0, 0x78,
0xf6, 0x93, 0x34, 0xf8, 0x34, 0xbe, 0x6d, 0xd2,
0x6d, 0x55, 0xa9, 0x55,
// addrs[1]:
0xc3, 0x34, 0x41, 0x28, 0xe0, 0x60, 0x12, 0x8e,
0xde, 0x35, 0x23, 0xa2, 0x4a, 0x46, 0x1c, 0x89,
0x43, 0xab, 0x08, 0x59,
]
```
## NFT Transfer Output
An NFT transfer output is an NFT that is owned by a collection of addresses.
### What NFT Transfer Output Contains
An NFT transfer output contains a `TypeID`, `GroupID`, `Payload`, `Locktime`, `Threshold`, and `Addresses`.
- **`TypeID`** is the ID for this output type. It is `0x0000000b`.
- **`GroupID`** is an int that specifies the group this NFT was issued with.
- **`Payload`** is an arbitrary string of bytes no long longer than 1024 bytes.
- **`Locktime`** is a long that contains the Unix timestamp that this output can
be spent after. The Unix timestamp is specific to the second.
- **`Threshold`** is an int that names the number of unique signatures required
to spend the output. Must be less than or equal to the length of
**`Addresses`**. If **`Addresses`** is empty, must be 0.
- **`Addresses`** is a list of unique addresses that correspond to the private
keys that can be used to spend this output. Addresses must be sorted
lexicographically.
### Gantt NFT Transfer Output Specification
```text
+-----------+------------+-------------------------------+
| type_id : int | 4 bytes |
+-----------+------------+-------------------------------+
| group_id : int | 4 bytes |
+-----------+------------+-------------------------------+
| payload : []byte | 4 + len(payload) bytes |
+-----------+------------+-------------------------------+
| locktime : long | 8 bytes |
+-----------+------------+-------------------------------+
| threshold : int | 4 bytes |
+-----------+------------+-------------------------------+
| addresses : [][20]byte | 4 + 20 * len(addresses) bytes |
+-----------+------------+-------------------------------+
| 28 + len(payload) |
| + 20 * len(addresses) bytes |
+-------------------------------+
```
### Proto NFT Transfer Output Specification
```text
message NFTTransferOutput {
uint32 typeID = 1; // 04 bytes
uint32 group_id = 2; // 04 bytes
bytes payload = 3; // 04 bytes + len(payload)
uint64 locktime = 4 // 08 bytes
uint32 threshold = 5; // 04 bytes
repeated bytes addresses = 6; // 04 bytes + 20 bytes * len(addresses)
}
```
### NFT Transfer Output Example
Let's make an NFT transfer output with:
- **`TypeID`**: `11`
- **`GroupID`**: `12345`
- **`Payload`**: `NFT Payload`
- **`Locktime`**: `54321`
- **`Threshold`**: `1`
- **`Addresses`**:
- `0x51025c61fbcfc078f69334f834be6dd26d55a955`
- `0xc3344128e060128ede3523a24a461c8943ab0859`
```text
[
TypeID <- 0x0000000b
GroupID <- 0x00003039
Payload <- 0x4e4654205061796c6f6164
Locktime <- 0x000000000000d431
Threshold <- 0x00000001
Addresses <- [
0x51025c61fbcfc078f69334f834be6dd26d55a955,
0xc3344128e060128ede3523a24a461c8943ab0859,
]
]
=
[
// TypeID:
0x00, 0x00, 0x00, 0x0b,
// groupID:
0x00, 0x00, 0x30, 0x39,
// length of payload:
0x00, 0x00, 0x00, 0x0b,
// payload:
0x4e, 0x46, 0x54, 0x20, 0x50, 0x61, 0x79, 0x6c,
0x6f, 0x61, 0x64,
// locktime:
0x00, 0x00, 0x00, 0x00, 0x00, 0x00, 0xd4, 0x31,
// threshold:
0x00, 0x00, 0x00, 0x01,
// number of addresses:
0x00, 0x00, 0x00, 0x02,
// addrs[0]:
0x51, 0x02, 0x5c, 0x61, 0xfb, 0xcf, 0xc0, 0x78,
0xf6, 0x93, 0x34, 0xf8, 0x34, 0xbe, 0x6d, 0xd2,
0x6d, 0x55, 0xa9, 0x55,
// addrs[1]:
0xc3, 0x34, 0x41, 0x28, 0xe0, 0x60, 0x12, 0x8e,
0xde, 0x35, 0x23, 0xa2, 0x4a, 0x46, 0x1c, 0x89,
0x43, 0xab, 0x08, 0x59,
]
```
## Inputs
Inputs have one possible type: `SECP256K1TransferInput`.
## SECP256K1 Transfer Input
A [secp256k1](/docs/api-reference/standards/cryptographic-primitives#secp256k1-addresses) transfer input
allows for spending an unspent secp256k1 transfer output.
### What SECP256K1 Transfer Input Contains
A secp256k1 transfer input contains an `Amount` and `AddressIndices`.
- **`TypeID`** is the ID for this input type. It is `0x00000005`.
- **`Amount`** is a long that specifies the quantity that this input should be
consuming from the UTXO. Must be positive. Must be equal to the amount
specified in the UTXO.
- **`AddressIndices`** is a list of unique ints that define the private keys
that are being used to spend the UTXO. Each UTXO has an array of addresses
that can spend the UTXO. Each int represents the index in this address array
that will sign this transaction. The array must be sorted low to high.
### Gantt SECP256K1 Transfer Input Specification
```text
+-------------------------+-------------------------------------+
| type_id : int | 4 bytes |
+-----------------+-------+-------------------------------------+
| amount : long | 8 bytes |
+-----------------+-------+-------------------------------------+
| address_indices : []int | 4 + 4 * len(address_indices) bytes |
+-----------------+-------+-------------------------------------+
| 16 + 4 * len(address_indices) bytes |
+-------------------------------------+
```
### Proto SECP256K1 Transfer Input Specification
```text
message SECP256K1TransferInput {
uint32 typeID = 1; // 04 bytes
uint64 amount = 2; // 08 bytes
repeated uint32 address_indices = 3; // 04 bytes + 04 bytes * len(address_indices)
}
```
### SECP256K1 Transfer Input Example
Let's make a payment input with:
- **`TypeId`**: `5`
- **`Amount`**: `123456789`
- **`AddressIndices`**: \[`3`,`7`\]
```text
[
TypeID <- 0x00000005
Amount <- 123456789 = 0x00000000075bcd15,
AddressIndices <- [0x00000003, 0x00000007]
]
=
[
// type id:
0x00, 0x00, 0x00, 0x05,
// amount:
0x00, 0x00, 0x00, 0x00, 0x07, 0x5b, 0xcd, 0x15,
// length:
0x00, 0x00, 0x00, 0x02,
// sig[0]
0x00, 0x00, 0x00, 0x03,
// sig[1]
0x00, 0x00, 0x00, 0x07,
]
```
## Operations
Operations have three possible types: `SECP256K1MintOperation`, `NFTMintOp`, and `NFTTransferOp`.
## SECP256K1 Mint Operation
A [secp256k1](/docs/api-reference/standards/cryptographic-primitives#secp256k1-addresses) mint operation
consumes a SECP256K1 mint output, creates a new mint output and sends a transfer
output to a new set of owners.
### What SECP256K1 Mint Operation Contains
A secp256k1 Mint operation contains a `TypeID`, `AddressIndices`, `MintOutput`, and `TransferOutput`.
- **`TypeID`** is the ID for this output type. It is `0x00000008`.
- **`AddressIndices`** is a list of unique ints that define the private keys
that are being used to spend the
[UTXO](/docs/api-reference/x-chain/txn-format#utxo). Each UTXO has an array of
addresses that can spend the UTXO. Each int represents the index in this
address array that will sign this transaction. The array must be sorted low to
high.
- **`MintOutput`** is a [SECP256K1 Mint output](/docs/api-reference/x-chain/txn-format#secp256k1-mint-output).
- **`TransferOutput`** is a [SECP256K1 Transfer output](/docs/api-reference/x-chain/txn-format#secp256k1-transfer-output).
### Gantt SECP256K1 Mint Operation Specification
```text
+----------------------------------+------------------------------------+
| type_id : int | 4 bytes |
+----------------------------------+------------------------------------+
| address_indices : []int | 4 + 4 * len(address_indices) bytes |
+----------------------------------+------------------------------------+
| mint_output : MintOutput | size(mint_output) bytes |
+----------------------------------+------------------------------------+
| transfer_output : TransferOutput | size(transfer_output) bytes |
+----------------------------------+------------------------------------+
| 8 + 4 * len(address_indices) |
| + size(mint_output) |
| + size(transfer_output) bytes |
+------------------------------------+
```
### Proto SECP256K1 Mint Operation Specification
```text
message SECP256K1MintOperation {
uint32 typeID = 1; // 4 bytes
repeated uint32 address_indices = 2; // 04 bytes + 04 bytes * len(address_indices)
MintOutput mint_output = 3; // size(mint_output
TransferOutput transfer_output = 4; // size(transfer_output)
}
```
### SECP256K1 Mint Operation Example
Let's make a [secp256k1](/docs/api-reference/standards/cryptographic-primitives#secp256k1-addresses) mint
operation with:
- **`TypeId`**: `8`
- **`AddressIndices`**:
- `0x00000003`
- `0x00000007`
- **`MintOutput`**: `"Example SECP256K1 Mint Output from above"`
- **`TransferOutput`**: `"Example SECP256K1 Transfer Output from above"`
```text
[
TypeID <- 0x00000008
AddressIndices <- [0x00000003, 0x00000007]
MintOutput <- 0x00000006000000000000d431000000010000000251025c61fbcfc078f69334f834be6dd26d55a955c3344128e060128ede3523a24a461c89
TransferOutput <- 0x000000070000000000003039000000000000d431000000010000000251025c61fbcfc078f69334f834be6dd26d55a955c3344128e060128ede3523a24a461c8943ab0859
]
=
[
// typeID
0x00, 0x00, 0x00, 0x08,
// number of address_indices:
0x00, 0x00, 0x00, 0x02,
// address_indices[0]:
0x00, 0x00, 0x00, 0x03,
// address_indices[1]:
0x00, 0x00, 0x00, 0x07,
// mint output
0x00, 0x00, 0x00, 0x06, 0x00, 0x00, 0x00, 0x00,
0x00, 0x00, 0xd4, 0x31, 0x00, 0x00, 0x00, 0x01,
0x00, 0x00, 0x00, 0x02, 0x51, 0x02, 0x5c, 0x61,
0xfb, 0xcf, 0xc0, 0x78, 0xf6, 0x93, 0x34, 0xf8,
0x34, 0xbe, 0x6d, 0xd2, 0x6d, 0x55, 0xa9, 0x55,
0xc3, 0x34, 0x41, 0x28, 0xe0, 0x60, 0x12, 0x8e,
0xde, 0x35, 0x23, 0xa2, 0x4a, 0x46, 0x1c, 0x89,
0x43, 0xab, 0x08, 0x59,
// transfer output
0x00, 0x00, 0x00, 0x07, 0x00, 0x00, 0x00, 0x00,
0x00, 0x00, 0x30, 0x39, 0x00, 0x00, 0x00, 0x00,
0x00, 0x00, 0xd4, 0x31, 0x00, 0x00, 0x00, 0x01,
0x00, 0x00, 0x00, 0x02, 0x51, 0x02, 0x5c, 0x61,
0xfb, 0xcf, 0xc0, 0x78, 0xf6, 0x93, 0x34, 0xf8,
0x34, 0xbe, 0x6d, 0xd2, 0x6d, 0x55, 0xa9, 0x55,
0xc3, 0x34, 0x41, 0x28, 0xe0, 0x60, 0x12, 0x8e,
0xde, 0x35, 0x23, 0xa2, 0x4a, 0x46, 0x1c, 0x89,
0x43, 0xab, 0x08, 0x59,
]
```
## NFT Mint Op
An NFT mint operation consumes an NFT mint output and sends an unspent output to a new set of owners.
### What NFT Mint Op Contains
An NFT mint operation contains a `TypeID`, `AddressIndices`, `GroupID`, `Payload`, and `Output` of addresses.
- **`TypeID`** is the ID for this operation type. It is `0x0000000c`.
- **`AddressIndices`** is a list of unique ints that define the private keys
that are being used to spend the UTXO. Each UTXO has an array of addresses
that can spend the UTXO. Each int represents the index in this address array
that will sign this transaction. The array must be sorted low to high.
- **`GroupID`** is an int that specifies the group this NFT is issued to.
- **`Payload`** is an arbitrary string of bytes no longer than 1024 bytes.
- **`Output`** is not a `TransferableOutput`, but rather is a lock time,
threshold, and an array of unique addresses that correspond to the private
keys that can be used to spend this output. Addresses must be sorted
lexicographically.
### Gantt NFT Mint Op Specification
```text
+------------------------------+------------------------------------+
| type_id : int | 4 bytes |
+-----------------+------------+------------------------------------+
| address_indices : []int | 4 + 4 * len(address_indices) bytes |
+-----------------+------------+------------------------------------+
| group_id : int | 4 bytes |
+-----------------+------------+------------------------------------+
| payload : []byte | 4 + len(payload) bytes |
+-----------------+------------+------------------------------------+
| outputs : []Output | 4 + size(outputs) bytes |
+-----------------+------------+------------------------------------+
| 20 + |
| 4 * len(address_indices) + |
| len(payload) + |
| size(outputs) bytes |
+------------------------------------+
```
### Proto NFT Mint Op Specification
```text
message NFTMintOp {
uint32 typeID = 1; // 04 bytes
repeated uint32 address_indices = 2; // 04 bytes + 04 bytes * len(address_indices)
uint32 group_id = 3; // 04 bytes
bytes payload = 4; // 04 bytes + len(payload)
repeated bytes outputs = 5; // 04 bytes + size(outputs)
}
```
### NFT Mint Op Example
Let's make an NFT mint operation with:
- **`TypeId`**: `12`
- **`AddressIndices`**:
- `0x00000003`
- `0x00000007`
- **`GroupID`**: `12345`
- **`Payload`**: `0x431100`
- **`Locktime`**: `54321`
- **`Threshold`**: `1`
- **`Addresses`**:
- `0xc3344128e060128ede3523a24a461c8943ab0859`
```text
[
TypeID <- 0x0000000c
AddressIndices <- [
0x00000003,
0x00000007,
]
GroupID <- 0x00003039
Payload <- 0x431100
Locktime <- 0x000000000000d431
Threshold <- 0x00000001
Addresses <- [
0xc3344128e060128ede3523a24a461c8943ab0859
]
]
=
[
// Type ID
0x00, 0x00, 0x00, 0x0c,
// number of address indices:
0x00, 0x00, 0x00, 0x02,
// address index 0:
0x00, 0x00, 0x00, 0x03,
// address index 1:
0x00, 0x00, 0x00, 0x07,
// groupID:
0x00, 0x00, 0x30, 0x39,
// length of payload:
0x00, 0x00, 0x00, 0x03,
// payload:
0x43, 0x11, 0x00,
// number of outputs:
0x00, 0x00, 0x00, 0x01,
// outputs[0]
// locktime:
0x00, 0x00, 0x00, 0x00, 0x00, 0x00, 0xd4, 0x31,
// threshold:
0x00, 0x00, 0x00, 0x01,
// number of addresses:
0x00, 0x00, 0x00, 0x01,
// addrs[0]:
0xc3, 0x34, 0x41, 0x28, 0xe0, 0x60, 0x12, 0x8e,
0xde, 0x35, 0x23, 0xa2, 0x4a, 0x46, 0x1c, 0x89,
0x43, 0xab, 0x08, 0x59,
]
```
## NFT Transfer Op
An NFT transfer operation sends an unspent NFT transfer output to a new set of owners.
### What NFT Transfer Op Contains
An NFT transfer operation contains a `TypeID`, `AddressIndices` and an untyped `NFTTransferOutput`.
- **`TypeID`** is the ID for this output type. It is `0x0000000d`.
- **`AddressIndices`** is a list of unique ints that define the private keys
that are being used to spend the UTXO. Each UTXO has an array of addresses
that can spend the UTXO. Each int represents the index in this address array
that will sign this transaction. The array must be sorted low to high.
- **`NFTTransferOutput`** is the output of this operation and must be an [NFT Transfer Output](/docs/api-reference/x-chain/txn-format#nft-transfer-output). This
output doesn't have the **`TypeId`**, because the type is known by the context
of being in this operation.
### Gantt NFT Transfer Op Specification
```text
+------------------------------+------------------------------------+
| type_id : int | 4 bytes |
+-----------------+------------+------------------------------------+
| address_indices : []int | 4 + 4 * len(address_indices) bytes |
+-----------------+------------+------------------------------------+
| group_id : int | 4 bytes |
+-----------------+------------+------------------------------------+
| payload : []byte | 4 + len(payload) bytes |
+-----------------+------------+------------------------------------+
| locktime : long | 8 bytes |
+-----------+------------+------------------------------------------+
| threshold : int | 4 bytes |
+-----------------+------------+------------------------------------+
| addresses : [][20]byte | 4 + 20 * len(addresses) bytes |
+-----------------+------------+------------------------------------+
| 36 + len(payload) |
| + 4 * len(address_indices) |
| + 20 * len(addresses) bytes |
+------------------------------------+
```
### Proto NFT Transfer Op Specification
```text
message NFTTransferOp {
uint32 typeID = 1; // 04 bytes
repeated uint32 address_indices = 2; // 04 bytes + 04 bytes * len(address_indices)
uint32 group_id = 3; // 04 bytes
bytes payload = 4; // 04 bytes + len(payload)
uint64 locktime = 5; // 08 bytes
uint32 threshold = 6; // 04 bytes
repeated bytes addresses = 7; // 04 bytes + 20 bytes * len(addresses)
}
```
### NFT Transfer Op Example
Let's make an NFT transfer operation with:
- **`TypeID`**: `13`
- **`AddressIndices`**:
- `0x00000007`
- `0x00000003`
- **`GroupID`**: `12345`
- **`Payload`**: `0x431100`
- **`Locktime`**: `54321`
- **`Threshold`**: `1`
- **`Addresses`**:
- `0xc3344128e060128ede3523a24a461c8943ab0859`
- `0x51025c61fbcfc078f69334f834be6dd26d55a955`
```text
[
TypeID <- 0x0000000d
AddressIndices <- [
0x00000007,
0x00000003,
]
GroupID <- 0x00003039
Payload <- 0x431100
Locktime <- 0x000000000000d431
Threshold <- 00000001
Addresses <- [
0x51025c61fbcfc078f69334f834be6dd26d55a955,
0xc3344128e060128ede3523a24a461c8943ab0859,
]
]
=
[
// Type ID
0x00, 0x00, 0x00, 0x0d,
// number of address indices:
0x00, 0x00, 0x00, 0x02,
// address index 0:
0x00, 0x00, 0x00, 0x07,
// address index 1:
0x00, 0x00, 0x00, 0x03,
// groupID:
0x00, 0x00, 0x30, 0x39,
// length of payload:
0x00, 0x00, 0x00, 0x03,
// payload:
0x43, 0x11, 0x00,
// locktime:
0x00, 0x00, 0x00, 0x00, 0x00, 0x00, 0xd4, 0x31,
// threshold:
0x00, 0x00, 0x00, 0x01,
// number of addresses:
0x00, 0x00, 0x00, 0x02,
// addrs[0]:
0x51, 0x02, 0x5c, 0x61, 0xfb, 0xcf, 0xc0, 0x78,
0xf6, 0x93, 0x34, 0xf8, 0x34, 0xbe, 0x6d, 0xd2,
0x6d, 0x55, 0xa9, 0x55,
// addrs[1]:
0xc3, 0x34, 0x41, 0x28, 0xe0, 0x60, 0x12, 0x8e,
0xde, 0x35, 0x23, 0xa2, 0x4a, 0x46, 0x1c, 0x89,
0x43, 0xab, 0x08, 0x59,
]
```
## Initial State
Initial state describes the initial state of an asset when it is created. It
contains the ID of the feature extension that the asset uses, and a variable
length array of outputs that denote the genesis UTXO set of the asset.
### What Initial State Contains
Initial state contains a `FxID` and an array of `Output`.
- **`FxID`** is an int that defines which feature extension this state is part
of. For SECP256K1 assets, this is `0x00000000`. For NFT assets, this is
`0x00000001`.
- **`Outputs`** is a variable length array of
[outputs](/docs/api-reference/x-chain/txn-format#outputs), as defined above.
### Gantt Initial State Specification
```text
+---------------+----------+-------------------------------+
| fx_id : int | 4 bytes |
+---------------+----------+-------------------------------+
| outputs : []Output | 4 + size(outputs) bytes |
+---------------+----------+-------------------------------+
| 8 + size(outputs) bytes |
+-------------------------------+
```
### Proto Initial State Specification
```text
message InitialState {
uint32 fx_id = 1; // 04 bytes
repeated Output outputs = 2; // 04 + size(outputs) bytes
}
```
### Initial State Example
Let's make an initial state:
- `FxID`: `0x00000000`
- `InitialState`: `["Example SECP256K1 Transfer Output from above"]`
```text
[
FxID <- 0x00000000
InitialState <- [
0x000000070000000000003039000000000000d431000000010000000251025c61fbcfc078f69334f834be6dd26d55a955c3344128e060128ede3523a24a461c8943ab0859,
]
]
=
[
// fxID:
0x00, 0x00, 0x00, 0x00,
// num outputs:
0x00, 0x00, 0x00, 0x01,
// output:
0x00, 0x00, 0x00, 0x07, 0x00, 0x00, 0x00, 0x00,
0x00, 0x00, 0x30, 0x39, 0x00, 0x00, 0x00, 0x00,
0x00, 0x00, 0xd4, 0x31, 0x00, 0x00, 0x00, 0x01,
0x00, 0x00, 0x00, 0x02, 0x51, 0x02, 0x5c, 0x61,
0xfb, 0xcf, 0xc0, 0x78, 0xf6, 0x93, 0x34, 0xf8,
0x34, 0xbe, 0x6d, 0xd2, 0x6d, 0x55, 0xa9, 0x55,
0xc3, 0x34, 0x41, 0x28, 0xe0, 0x60, 0x12, 0x8e,
0xde, 0x35, 0x23, 0xa2, 0x4a, 0x46, 0x1c, 0x89,
0x43, 0xab, 0x08, 0x59,
]
```
## Credentials
Credentials have two possible types: `SECP256K1Credential`, and `NFTCredential`.
Each credential is paired with an Input or Operation. The order of the
credentials match the order of the inputs or operations.
## SECP256K1 Credential
A [secp256k1](/docs/api-reference/standards/cryptographic-primitives#secp256k1-addresses) credential
contains a list of 65-byte recoverable signatures.
### What SECP256K1 Credential Contains
- **`TypeID`** is the ID for this type. It is `0x00000009`.
- **`Signatures`** is an array of 65-byte recoverable signatures. The order of
the signatures must match the input's signature indices.
### Gantt SECP256K1 Credential Specification
```text
+------------------------------+---------------------------------+
| type_id : int | 4 bytes |
+-----------------+------------+---------------------------------+
| signatures : [][65]byte | 4 + 65 * len(signatures) bytes |
+-----------------+------------+---------------------------------+
| 8 + 65 * len(signatures) bytes |
+---------------------------------+
```
### Proto SECP256K1 Credential Specification
```text
message SECP256K1Credential {
uint32 typeID = 1; // 4 bytes
repeated bytes signatures = 2; // 4 bytes + 65 bytes * len(signatures)
}
```
### SECP256K1 Credential Example
Let's make a payment input with:
- **`TypeID`**: `9`
- **`signatures`**:
- `0x000102030405060708090a0b0c0d0e0f101112131415161718191a1b1c1e1d1f202122232425262728292a2b2c2e2d2f303132333435363738393a3b3c3d3e3f00`
- `0x404142434445464748494a4b4c4d4e4f505152535455565758595a5b5c5e5d5f606162636465666768696a6b6c6e6d6f707172737475767778797a7b7c7d7e7f00`
```text
[
TypeID <- 0x00000009
Signatures <- [
0x000102030405060708090a0b0c0d0e0f101112131415161718191a1b1c1e1d1f202122232425262728292a2b2c2e2d2f303132333435363738393a3b3c3d3e3f00,
0x404142434445464748494a4b4c4d4e4f505152535455565758595a5b5c5e5d5f606162636465666768696a6b6c6e6d6f707172737475767778797a7b7c7d7e7f00,
]
]
=
[
// Type ID
0x00, 0x00, 0x00, 0x09,
// length:
0x00, 0x00, 0x00, 0x02,
// sig[0]
0x00, 0x01, 0x02, 0x03, 0x04, 0x05, 0x06, 0x07,
0x08, 0x09, 0x0a, 0x0b, 0x0c, 0x0d, 0x0e, 0x0f,
0x10, 0x11, 0x12, 0x13, 0x14, 0x15, 0x16, 0x17,
0x18, 0x19, 0x1a, 0x1b, 0x1c, 0x1e, 0x1d, 0x1f,
0x20, 0x21, 0x22, 0x23, 0x24, 0x25, 0x26, 0x27,
0x28, 0x29, 0x2a, 0x2b, 0x2c, 0x2e, 0x2d, 0x2f,
0x30, 0x31, 0x32, 0x33, 0x34, 0x35, 0x36, 0x37,
0x38, 0x39, 0x3a, 0x3b, 0x3c, 0x3d, 0x3e, 0x3f,
0x00,
// sig[1]
0x40, 0x41, 0x42, 0x43, 0x44, 0x45, 0x46, 0x47,
0x48, 0x49, 0x4a, 0x4b, 0x4c, 0x4d, 0x4e, 0x4f,
0x50, 0x51, 0x52, 0x53, 0x54, 0x55, 0x56, 0x57,
0x58, 0x59, 0x5a, 0x5b, 0x5c, 0x5e, 0x5d, 0x5f,
0x60, 0x61, 0x62, 0x63, 0x64, 0x65, 0x66, 0x67,
0x68, 0x69, 0x6a, 0x6b, 0x6c, 0x6e, 0x6d, 0x6f,
0x70, 0x71, 0x72, 0x73, 0x74, 0x75, 0x76, 0x77,
0x78, 0x79, 0x7a, 0x7b, 0x7c, 0x7d, 0x7e, 0x7f,
0x00,
]
```
## NFT Credential
An NFT credential is the same as an [secp256k1 credential](/docs/api-reference/x-chain/txn-format#secp256k1-credential) with a
different TypeID. The TypeID for an NFT credential is `0x0000000e`.
## Unsigned Transactions
Unsigned transactions contain the full content of a transaction with only the
signatures missing. Unsigned transactions have four possible types:
[`CreateAssetTx`](/docs/api-reference/x-chain/txn-format#what-unsigned-create-asset-tx-contains),
[`OperationTx`](/docs/api-reference/x-chain/txn-format#what-unsigned-operation-tx-contains),
[`ImportTx`](/docs/api-reference/x-chain/txn-format#what-unsigned-import-tx-contains),
and
[`ExportTx`](/docs/api-reference/x-chain/txn-format#what-unsigned-export-tx-contains).
They all embed
[`BaseTx`](/docs/api-reference/x-chain/txn-format#what-base-tx-contains), which
contains common fields and operations.
## Unsigned BaseTx
### What Base TX Contains
A base TX contains a `TypeID`, `NetworkID`, `BlockchainID`, `Outputs`, `Inputs`, and `Memo`.
- **`TypeID`** is the ID for this type. It is `0x00000000`.
- **`NetworkID`** is an int that defines which network this transaction is meant
to be issued to. This value is meant to support transaction routing and is not
designed for replay attack prevention.
- **`BlockchainID`** is a 32-byte array that defines which blockchain this
transaction was issued to. This is used for replay attack prevention for
transactions that could potentially be valid across network or blockchain.
- **`Outputs`** is an array of [transferable output objects](/docs/api-reference/x-chain/txn-format#transferable-output). Outputs must
be sorted lexicographically by their serialized representation. The total
quantity of the assets created in these outputs must be less than or equal to
the total quantity of each asset consumed in the inputs minus the transaction
fee.
- **`Inputs`** is an array of [transferable input objects](/docs/api-reference/x-chain/txn-format#transferable-input). Inputs must be
sorted and unique. Inputs are sorted first lexicographically by their
**`TxID`** and then by the **`UTXOIndex`** from low to high. If there are
inputs that have the same **`TxID`** and **`UTXOIndex`**, then the transaction
is invalid as this would result in a double spend.
- **`Memo`** Memo field contains arbitrary bytes, up to 256 bytes.
### Gantt Base TX Specification
```text
+--------------------------------------+-----------------------------------------+
| type_id : int | 4 bytes |
+---------------+----------------------+-----------------------------------------+
| network_id : int | 4 bytes |
+---------------+----------------------+-----------------------------------------+
| blockchain_id : [32]byte | 32 bytes |
+---------------+----------------------+-----------------------------------------+
| outputs : []TransferableOutput | 4 + size(outputs) bytes |
+---------------+----------------------+-----------------------------------------+
| inputs : []TransferableInput | 4 + size(inputs) bytes |
+---------------+----------------------+-----------------------------------------+
| memo : [256]byte | 4 + size(memo) bytes |
+---------------+----------------------+-----------------------------------------+
| 52 + size(outputs) + size(inputs) + size(memo) bytes |
+------------------------------------------------------+
```
### Proto Base TX Specification
```text
message BaseTx {
uint32 typeID = 1; // 04 bytes
uint32 network_id = 2; // 04 bytes
bytes blockchain_id = 3; // 32 bytes
repeated Output outputs = 4; // 04 bytes + size(outs)
repeated Input inputs = 5; // 04 bytes + size(ins)
bytes memo = 6; // 04 bytes + size(memo)
}
```
### Base TX Example
Let's make an base TX that uses the inputs and outputs from the previous examples:
- **`TypeID`**: `0`
- **`NetworkID`**: `4`
- **`BlockchainID`**: `0xffffffffeeeeeeeeddddddddcccccccbbbbbbbbaaaaaaaa9999999988888888`
- **`Outputs`**:
- `"Example Transferable Output as defined above"`
- **`Inputs`**:
- `"Example Transferable Input as defined above"`
- **`Memo`**: `0x00010203`
```text
[
TypeID <- 0x00000000
NetworkID <- 0x00000004
BlockchainID <- 0xffffffffeeeeeeeeddddddddcccccccbbbbbbbbaaaaaaaa9999999988888888
Outputs <- [
0x000102030405060708090a0b0c0d0e0f101112131415161718191a1b1c1d1e1f000000070000000000003039000000000000d431000000010000000251025c61fbcfc078f69334f834be6dd26d55a955c3344128e060128ede3523a24a461c8943ab0859
]
Inputs <- [
0xf1e1d1c1b1a191817161514131211101f0e0d0c0b0a09080706050403020100000000005000102030405060708090a0b0c0d0e0f101112131415161718191a1b1c1d1e1f0000000500000000075bcd15000000020000000700000003
]
Memo <- 0x00010203
]
=
[
// typeID
0x00, 0x00, 0x00, 0x00,
// networkID:
0x00, 0x00, 0x00, 0x04,
// blockchainID:
0xff, 0xff, 0xff, 0xff, 0xee, 0xee, 0xee, 0xee,
0xdd, 0xdd, 0xdd, 0xdd, 0xcc, 0xcc, 0xcc, 0xcc,
0xbb, 0xbb, 0xbb, 0xbb, 0xaa, 0xaa, 0xaa, 0xaa,
0x99, 0x99, 0x99, 0x99, 0x88, 0x88, 0x88, 0x88,
// number of outputs:
0x00, 0x00, 0x00, 0x01,
// transferable output:
0x00, 0x01, 0x02, 0x03, 0x04, 0x05, 0x06, 0x07,
0x08, 0x09, 0x0a, 0x0b, 0x0c, 0x0d, 0x0e, 0x0f,
0x10, 0x11, 0x12, 0x13, 0x14, 0x15, 0x16, 0x17,
0x18, 0x19, 0x1a, 0x1b, 0x1c, 0x1d, 0x1e, 0x1f,
0x00, 0x00, 0x00, 0x07, 0x00, 0x00, 0x00, 0x00,
0x00, 0x00, 0x30, 0x39, 0x00, 0x00, 0x00, 0x00,
0x00, 0x00, 0xd4, 0x31, 0x00, 0x00, 0x00, 0x01,
0x00, 0x00, 0x00, 0x02, 0x51, 0x02, 0x5c, 0x61,
0xfb, 0xcf, 0xc0, 0x78, 0xf6, 0x93, 0x34, 0xf8,
0x34, 0xbe, 0x6d, 0xd2, 0x6d, 0x55, 0xa9, 0x55,
0xc3, 0x34, 0x41, 0x28, 0xe0, 0x60, 0x12, 0x8e,
0xde, 0x35, 0x23, 0xa2, 0x4a, 0x46, 0x1c, 0x89,
0x43, 0xab, 0x08, 0x59,
// number of inputs:
0x00, 0x00, 0x00, 0x01,
// transferable input:
0xf1, 0xe1, 0xd1, 0xc1, 0xb1, 0xa1, 0x91, 0x81,
0x71, 0x61, 0x51, 0x41, 0x31, 0x21, 0x11, 0x01,
0xf0, 0xe0, 0xd0, 0xc0, 0xb0, 0xa0, 0x90, 0x80,
0x70, 0x60, 0x50, 0x40, 0x30, 0x20, 0x10, 0x00,
0x00, 0x00, 0x00, 0x05, 0x00, 0x01, 0x02, 0x03,
0x04, 0x05, 0x06, 0x07, 0x08, 0x09, 0x0a, 0x0b,
0x0c, 0x0d, 0x0e, 0x0f, 0x10, 0x11, 0x12, 0x13,
0x14, 0x15, 0x16, 0x17, 0x18, 0x19, 0x1a, 0x1b,
0x1c, 0x1d, 0x1e, 0x1f, 0x00, 0x00, 0x00, 0x05,
0x00, 0x00, 0x00, 0x00, 0x07, 0x5b, 0xcd, 0x15,
0x00, 0x00, 0x00, 0x02, 0x00, 0x00, 0x00, 0x07,
0x00, 0x00, 0x00, 0x03,
// Memo length:
0x00, 0x00, 0x00, 0x04,
// Memo:
0x00, 0x01, 0x02, 0x03,
]
```
## Unsigned CreateAssetTx
### What Unsigned Create Asset TX Contains
An unsigned create asset TX contains a `BaseTx`, `Name`, `Symbol`,
`Denomination`, and `InitialStates`. The `TypeID` is `0x00000001`.
- **`BaseTx`**
- **`Name`** is a human readable string that defines the name of the asset this
transaction will create. The name is not guaranteed to be unique. The name
must consist of only printable ASCII characters and must be no longer than 128
characters.
- **`Symbol`** is a human readable string that defines the symbol of the asset
this transaction will create. The symbol is not guaranteed to be unique. The
symbol must consist of only printable ASCII characters and must be no longer
than 4 characters.
- **`Denomination`** is a byte that defines the divisibility of the asset this
transaction will create. For example, the AVAX token is divisible into
billionths. Therefore, the denomination of the AVAX token is 9. The
denomination must be no more than 32.
- **`InitialStates`** is a variable length array that defines the feature
extensions this asset supports, and the [initial state](/docs/api-reference/x-chain/txn-format#initial-state) of those feature
extensions.
### Gantt Unsigned Create Asset TX Specification
```text
+----------------+----------------+--------------------------------------+
| base_tx : BaseTx | size(base_tx) bytes |
+----------------+----------------+--------------------------------------+
| name : string | 2 + len(name) bytes |
+----------------+----------------+--------------------------------------+
| symbol : string | 2 + len(symbol) bytes |
+----------------+----------------+--------------------------------------+
| denomination : byte | 1 bytes |
+----------------+----------------+--------------------------------------+
| initial_states : []InitialState | 4 + size(initial_states) bytes |
+----------------+----------------+--------------------------------------+
| size(base_tx) + size(initial_states) |
| + 9 + len(name) + len(symbol) bytes |
+--------------------------------------+
```
### Proto Unsigned Create Asset TX Specification
```text
message CreateAssetTx {
BaseTx base_tx = 1; // size(base_tx)
string name = 2; // 2 bytes + len(name)
name symbol = 3; // 2 bytes + len(symbol)
uint8 denomination = 4; // 1 bytes
repeated InitialState initial_states = 5; // 4 bytes + size(initial_states)
}
```
### Unsigned Create Asset TX Example
Let's make an unsigned base TX that uses the inputs and outputs from the previous examples:
- `BaseTx`: `"Example BaseTx as defined above with ID set to 1"`
- `Name`: `Volatility Index`
- `Symbol`: `VIX`
- `Denomination`: `2`
- **`InitialStates`**:
- `"Example Initial State as defined above"`
```text
[
BaseTx <- 0x0000000100000004ffffffffeeeeeeeeddddddddccccccccbbbbbbbbaaaaaaaa999999998888888800000001000102030405060708090a0b0c0d0e0f101112131415161718191a1b1c1d1e1f000000070000000000003039000000000000d431000000010000000251025c61fbcfc078f69334f834be6dd26d55a955c3344128e060128ede3523a24a461c8943ab085900000001f1e1d1c1b1a191817161514131211101f0e0d0c0b0a09080706050403020100000000005000102030405060708090a0b0c0d0e0f101112131415161718191a1b1c1d1e1f0000000500000000075bcd150000000200000007000000030000000400010203
Name <- 0x0010566f6c6174696c69747920496e646578
Symbol <- 0x0003564958
Denomination <- 0x02
InitialStates <- [
0x0000000000000001000000070000000000003039000000000000d431000000010000000251025c61fbcfc078f69334f834be6dd26d55a955c3344128e060128ede3523a24a461c8943ab0859,
]
]
=
[
// base tx:
0x00, 0x00, 0x00, 0x01, 0x00, 0x00, 0x00, 0x04,
0xff, 0xff, 0xff, 0xff, 0xee, 0xee, 0xee, 0xee,
0xdd, 0xdd, 0xdd, 0xdd,
0xcc, 0xcc, 0xcc, 0xcc, 0xbb, 0xbb, 0xbb, 0xbb,
0xaa, 0xaa, 0xaa, 0xaa, 0x99, 0x99, 0x99, 0x99,
0x88, 0x88, 0x88, 0x88, 0x00, 0x00, 0x00, 0x01,
0x00, 0x01, 0x02, 0x03, 0x04, 0x05, 0x06, 0x07,
0x08, 0x09, 0x0a, 0x0b, 0x0c, 0x0d, 0x0e, 0x0f,
0x10, 0x11, 0x12, 0x13, 0x14, 0x15, 0x16, 0x17,
0x18, 0x19, 0x1a, 0x1b, 0x1c, 0x1d, 0x1e, 0x1f,
0x00, 0x00, 0x00, 0x07, 0x00, 0x00, 0x00, 0x00,
0x00, 0x00, 0x30, 0x39, 0x00, 0x00, 0x00, 0x00,
0x00, 0x00, 0xd4, 0x31, 0x00, 0x00, 0x00, 0x01,
0x00, 0x00, 0x00, 0x02, 0x51, 0x02, 0x5c, 0x61,
0xfb, 0xcf, 0xc0, 0x78, 0xf6, 0x93, 0x34, 0xf8,
0x34, 0xbe, 0x6d, 0xd2, 0x6d, 0x55, 0xa9, 0x55,
0xc3, 0x34, 0x41, 0x28, 0xe0, 0x60, 0x12, 0x8e,
0xde, 0x35, 0x23, 0xa2, 0x4a, 0x46, 0x1c, 0x89,
0x43, 0xab, 0x08, 0x59, 0x00, 0x00, 0x00, 0x01,
0xf1, 0xe1, 0xd1, 0xc1, 0xb1, 0xa1, 0x91, 0x81,
0x71, 0x61, 0x51, 0x41, 0x31, 0x21, 0x11, 0x01,
0xf0, 0xe0, 0xd0, 0xc0, 0xb0, 0xa0, 0x90, 0x80,
0x70, 0x60, 0x50, 0x40, 0x30, 0x20, 0x10, 0x00,
0x00, 0x00, 0x00, 0x05, 0x00, 0x01, 0x02, 0x03,
0x04, 0x05, 0x06, 0x07, 0x08, 0x09, 0x0a, 0x0b,
0x0c, 0x0d, 0x0e, 0x0f, 0x10, 0x11, 0x12, 0x13,
0x14, 0x15, 0x16, 0x17, 0x18, 0x19, 0x1a, 0x1b,
0x1c, 0x1d, 0x1e, 0x1f, 0x00, 0x00, 0x00, 0x05,
0x00, 0x00, 0x00, 0x00, 0x07, 0x5b, 0xcd, 0x15,
0x00, 0x00, 0x00, 0x02, 0x00, 0x00, 0x00, 0x07,
0x00, 0x00, 0x00, 0x03, 0x00, 0x00, 0x00, 0x04,
0x00, 0x01, 0x02, 0x03
// name:
0x00, 0x10, 0x56, 0x6f, 0x6c, 0x61, 0x74, 0x69,
0x6c, 0x69, 0x74, 0x79, 0x20, 0x49, 0x6e, 0x64,
0x65, 0x78,
// symbol length:
0x00, 0x03,
// symbol:
0x56, 0x49, 0x58,
// denomination:
0x02,
// number of InitialStates:
0x00, 0x00, 0x00, 0x01,
// InitialStates[0]:
0x00, 0x00, 0x00, 0x00, 0x00, 0x00, 0x00, 0x01,
0x00, 0x00, 0x00, 0x07, 0x00, 0x00, 0x00, 0x00,
0x00, 0x00, 0x30, 0x39, 0x00, 0x00, 0x00, 0x00,
0x00, 0x00, 0xd4, 0x31, 0x00, 0x00, 0x00, 0x01,
0x00, 0x00, 0x00, 0x02, 0x51, 0x02, 0x5c, 0x61,
0xfb, 0xcf, 0xc0, 0x78, 0xf6, 0x93, 0x34, 0xf8,
0x34, 0xbe, 0x6d, 0xd2, 0x6d, 0x55, 0xa9, 0x55,
0xc3, 0x34, 0x41, 0x28, 0xe0, 0x60, 0x12, 0x8e,
0xde, 0x35, 0x23, 0xa2, 0x4a, 0x46, 0x1c, 0x89,
0x43, 0xab, 0x08, 0x59,
]
```
## Unsigned OperationTx
### What Unsigned Operation TX Contains
An unsigned operation TX contains a `BaseTx`, and `Ops`. The `TypeID` for this type is `0x00000002`.
- **`BaseTx`**
- **`Ops`** is a variable-length array of [Transferable Ops](/docs/api-reference/x-chain/txn-format#transferable-op).
### Gantt Unsigned Operation TX Specification
```text
+---------+------------------+-------------------------------------+
| base_tx : BaseTx | size(base_tx) bytes |
+---------+------------------+-------------------------------------+
| ops : []TransferableOp | 4 + size(ops) bytes |
+---------+------------------+-------------------------------------+
| 4 + size(ops) + size(base_tx) bytes |
+-------------------------------------+
```
### Proto Unsigned Operation TX Specification
```text
message OperationTx {
BaseTx base_tx = 1; // size(base_tx)
repeated TransferOp ops = 2; // 4 bytes + size(ops)
}
```
### Unsigned Operation TX Example
Let's make an unsigned operation TX that uses the inputs and outputs from the previous examples:
- `BaseTx`: `"Example BaseTx above" with TypeID set to 2`
- **`Ops`**: \[`"Example Transferable Op as defined above"`\]
```text
[
BaseTx <- 0x0000000200000004ffffffffeeeeeeeeddddddddccccccccbbbbbbbbaaaaaaaa999999998888888800000001000102030405060708090a0b0c0d0e0f101112131415161718191a1b1c1d1e1f000000070000000000003039000000000000d431000000010000000251025c61fbcfc078f69334f834be6dd26d55a955c3344128e060128ede3523a24a461c8943ab085900000001f1e1d1c1b1a191817161514131211101f0e0d0c0b0a09080706050403020100000000005000102030405060708090a0b0c0d0e0f101112131415161718191a1b1c1d1e1f0000000500000000075bcd150000000200000007000000030000000400010203
Ops <- [
0x000102030405060708090a0b0c0d0e0f101112131415161718191a1b1c1d1e1f00000001f1e1d1c1b1a191817161514131211101f0e0d0c0b0a090807060504030201000000000050000000d0000000200000003000000070000303900000003431100000000010000000251025c61fbcfc078f69334f834be6dd26d55a955c3344128e060128ede3523a24a461c8943ab0859,
]
]
=
[
// base tx:
0x00, 0x00, 0x00, 0x02,
0x00, 0x00, 0x00, 0x04, 0xff, 0xff, 0xff, 0xff,
0xee, 0xee, 0xee, 0xee, 0xdd, 0xdd, 0xdd, 0xdd,
0xcc, 0xcc, 0xcc, 0xcc, 0xbb, 0xbb, 0xbb, 0xbb,
0xaa, 0xaa, 0xaa, 0xaa, 0x99, 0x99, 0x99, 0x99,
0x88, 0x88, 0x88, 0x88, 0x00, 0x00, 0x00, 0x01,
0x00, 0x01, 0x02, 0x03, 0x04, 0x05, 0x06, 0x07,
0x08, 0x09, 0x0a, 0x0b, 0x0c, 0x0d, 0x0e, 0x0f,
0x10, 0x11, 0x12, 0x13, 0x14, 0x15, 0x16, 0x17,
0x18, 0x19, 0x1a, 0x1b, 0x1c, 0x1d, 0x1e, 0x1f,
0x00, 0x00, 0x00, 0x07, 0x00, 0x00, 0x00, 0x00,
0x00, 0x00, 0x30, 0x39, 0x00, 0x00, 0x00, 0x00,
0x00, 0x00, 0xd4, 0x31, 0x00, 0x00, 0x00, 0x01,
0x00, 0x00, 0x00, 0x02, 0x51, 0x02, 0x5c, 0x61,
0xfb, 0xcf, 0xc0, 0x78, 0xf6, 0x93, 0x34, 0xf8,
0x34, 0xbe, 0x6d, 0xd2, 0x6d, 0x55, 0xa9, 0x55,
0xc3, 0x34, 0x41, 0x28, 0xe0, 0x60, 0x12, 0x8e,
0xde, 0x35, 0x23, 0xa2, 0x4a, 0x46, 0x1c, 0x89,
0x43, 0xab, 0x08, 0x59, 0x00, 0x00, 0x00, 0x01,
0xf1, 0xe1, 0xd1, 0xc1, 0xb1, 0xa1, 0x91, 0x81,
0x71, 0x61, 0x51, 0x41, 0x31, 0x21, 0x11, 0x01,
0xf0, 0xe0, 0xd0, 0xc0, 0xb0, 0xa0, 0x90, 0x80,
0x70, 0x60, 0x50, 0x40, 0x30, 0x20, 0x10, 0x00,
0x00, 0x00, 0x00, 0x05, 0x00, 0x01, 0x02, 0x03,
0x04, 0x05, 0x06, 0x07, 0x08, 0x09, 0x0a, 0x0b,
0x0c, 0x0d, 0x0e, 0x0f, 0x10, 0x11, 0x12, 0x13,
0x14, 0x15, 0x16, 0x17, 0x18, 0x19, 0x1a, 0x1b,
0x1c, 0x1d, 0x1e, 0x1f, 0x00, 0x00, 0x00, 0x05,
0x00, 0x00, 0x00, 0x00, 0x07, 0x5b, 0xcd, 0x15,
0x00, 0x00, 0x00, 0x02, 0x00, 0x00, 0x00, 0x07,
0x00, 0x00, 0x00, 0x03, 0x00, 0x00, 0x00, 0x04,
0x00, 0x01, 0x02, 0x03
// number of operations:
0x00, 0x00, 0x00, 0x01,
// transfer operation:
0x00, 0x01, 0x02, 0x03, 0x04, 0x05, 0x06, 0x07,
0x08, 0x09, 0x0a, 0x0b, 0x0c, 0x0d, 0x0e, 0x0f,
0x10, 0x11, 0x12, 0x13, 0x14, 0x15, 0x16, 0x17,
0x18, 0x19, 0x1a, 0x1b, 0x1c, 0x1d, 0x1e, 0x1f,
0x00, 0x00, 0x00, 0x01, 0xf1, 0xe1, 0xd1, 0xc1,
0xb1, 0xa1, 0x91, 0x81, 0x71, 0x61, 0x51, 0x41,
0x31, 0x21, 0x11, 0x01, 0xf0, 0xe0, 0xd0, 0xc0,
0xb0, 0xa0, 0x90, 0x80, 0x70, 0x60, 0x50, 0x40,
0x30, 0x20, 0x10, 0x00, 0x00, 0x00, 0x00, 0x05,
0x00, 0x00, 0x00, 0x0d, 0x00, 0x00, 0x00, 0x02,
0x00, 0x00, 0x00, 0x03, 0x00, 0x00, 0x00, 0x07,
0x00, 0x00, 0x30, 0x39, 0x00, 0x00, 0x00, 0x03,
0x43, 0x11, 0x00, 0x00, 0x00, 0x00, 0x01, 0x00,
0x00, 0x00, 0x02, 0x51, 0x02, 0x5c, 0x61, 0xfb,
0xcf, 0xc0, 0x78, 0xf6, 0x93, 0x34, 0xf8, 0x34,
0xbe, 0x6d, 0xd2, 0x6d, 0x55, 0xa9, 0x55, 0xc3,
0x34, 0x41, 0x28, 0xe0, 0x60, 0x12, 0x8e, 0xde,
0x35, 0x23, 0xa2, 0x4a, 0x46, 0x1c, 0x89, 0x43,
0xab, 0x08, 0x59,
]
```
## Unsigned ImportTx
### What Unsigned Import TX Contains
An unsigned import TX contains a `BaseTx`, `SourceChain` and `Ins`. \* The `TypeID`for this type is `0x00000003`.
- **`BaseTx`**
- **`SourceChain`** is a 32-byte source blockchain ID.
- **`Ins`** is a variable length array of [Transferable Inputs](/docs/api-reference/x-chain/txn-format#transferable-input).
### Gantt Unsigned Import TX Specification
```text
+---------+----------------------+-----------------------------+
| base_tx : BaseTx | size(base_tx) bytes |
+-----------------+--------------+-----------------------------+
| source_chain : [32]byte | 32 bytes |
+---------+----------------------+-----------------------------+
| ins : []TransferIn | 4 + size(ins) bytes |
+---------+----------------------+-----------------------------+
| 36 + size(ins) + size(base_tx) bytes |
+--------------------------------------+
```
### Proto Unsigned Import TX Specification
```text
message ImportTx {
BaseTx base_tx = 1; // size(base_tx)
bytes source_chain = 2; // 32 bytes
repeated TransferIn ins = 3; // 4 bytes + size(ins)
}
```
### Unsigned Import TX Example
Let's make an unsigned import TX that uses the inputs from the previous examples:
- `BaseTx`: `"Example BaseTx as defined above"`, but with `TypeID` set to `3`
- `SourceChain`: `0x0000000000000000000000000000000000000000000000000000000000000000`
- `Ins`: `"Example SECP256K1 Transfer Input as defined above"`
```text
[
BaseTx <- 0x0000000300000004ffffffffeeeeeeeeddddddddccccccccbbbbbbbbaaaaaaaa999999998888888800000001000102030405060708090a0b0c0d0e0f101112131415161718191a1b1c1d1e1f000000070000000000003039000000000000d431000000010000000251025c61fbcfc078f69334f834be6dd26d55a955c3344128e060128ede3523a24a461c8943ab085900000001f1e1d1c1b1a191817161514131211101f0e0d0c0b0a09080706050403020100000000005000102030405060708090a0b0c0d0e0f101112131415161718191a1b1c1d1e1f0000000500000000075bcd150000000200000007000000030000000400010203
SourceChain <- 0x0000000000000000000000000000000000000000000000000000000000000000
Ins <- [
f1e1d1c1b1a191817161514131211101f0e0d0c0b0a09080706050403020100000000005000102030405060708090a0b0c0d0e0f101112131415161718191a1b1c1d1e1f0000000500000000075bcd15000000020000000300000007,
]
]
=
[
// base tx:
0x00, 0x00, 0x00, 0x03,
0x00, 0x00, 0x00, 0x04, 0xff, 0xff, 0xff, 0xff,
0xee, 0xee, 0xee, 0xee, 0xdd, 0xdd, 0xdd, 0xdd,
0xcc, 0xcc, 0xcc, 0xcc, 0xbb, 0xbb, 0xbb, 0xbb,
0xaa, 0xaa, 0xaa, 0xaa, 0x99, 0x99, 0x99, 0x99,
0x88, 0x88, 0x88, 0x88, 0x00, 0x00, 0x00, 0x01,
0x00, 0x01, 0x02, 0x03, 0x04, 0x05, 0x06, 0x07,
0x08, 0x09, 0x0a, 0x0b, 0x0c, 0x0d, 0x0e, 0x0f,
0x10, 0x11, 0x12, 0x13, 0x14, 0x15, 0x16, 0x17,
0x18, 0x19, 0x1a, 0x1b, 0x1c, 0x1d, 0x1e, 0x1f,
0x00, 0x00, 0x00, 0x07, 0x00, 0x00, 0x00, 0x00,
0x00, 0x00, 0x30, 0x39, 0x00, 0x00, 0x00, 0x00,
0x00, 0x00, 0xd4, 0x31, 0x00, 0x00, 0x00, 0x01,
0x00, 0x00, 0x00, 0x02, 0x51, 0x02, 0x5c, 0x61,
0xfb, 0xcf, 0xc0, 0x78, 0xf6, 0x93, 0x34, 0xf8,
0x34, 0xbe, 0x6d, 0xd2, 0x6d, 0x55, 0xa9, 0x55,
0xc3, 0x34, 0x41, 0x28, 0xe0, 0x60, 0x12, 0x8e,
0xde, 0x35, 0x23, 0xa2, 0x4a, 0x46, 0x1c, 0x89,
0x43, 0xab, 0x08, 0x59, 0x00, 0x00, 0x00, 0x01,
0xf1, 0xe1, 0xd1, 0xc1, 0xb1, 0xa1, 0x91, 0x81,
0x71, 0x61, 0x51, 0x41, 0x31, 0x21, 0x11, 0x01,
0xf0, 0xe0, 0xd0, 0xc0, 0xb0, 0xa0, 0x90, 0x80,
0x70, 0x60, 0x50, 0x40, 0x30, 0x20, 0x10, 0x00,
0x00, 0x00, 0x00, 0x05, 0x00, 0x01, 0x02, 0x03,
0x04, 0x05, 0x06, 0x07, 0x08, 0x09, 0x0a, 0x0b,
0x0c, 0x0d, 0x0e, 0x0f, 0x10, 0x11, 0x12, 0x13,
0x14, 0x15, 0x16, 0x17, 0x18, 0x19, 0x1a, 0x1b,
0x1c, 0x1d, 0x1e, 0x1f, 0x00, 0x00, 0x00, 0x05,
0x00, 0x00, 0x00, 0x00, 0x07, 0x5b, 0xcd, 0x15,
0x00, 0x00, 0x00, 0x02, 0x00, 0x00, 0x00, 0x07,
0x00, 0x00, 0x00, 0x03, 0x00, 0x00, 0x00, 0x04,
0x00, 0x01, 0x02, 0x03
// source chain:
0x00, 0x00, 0x00, 0x00, 0x00, 0x00, 0x00, 0x00,
0x00, 0x00, 0x00, 0x00, 0x00, 0x00, 0x00, 0x00,
0x00, 0x00, 0x00, 0x00, 0x00, 0x00, 0x00, 0x00,
0x00, 0x00, 0x00, 0x00, 0x00, 0x00, 0x00, 0x00,
// input count:
0x00, 0x00, 0x00, 0x01,
// txID:
0xf1, 0xe1, 0xd1, 0xc1, 0xb1, 0xa1, 0x91, 0x81,
0x71, 0x61, 0x51, 0x41, 0x31, 0x21, 0x11, 0x01,
0xf0, 0xe0, 0xd0, 0xc0, 0xb0, 0xa0, 0x90, 0x80,
0x70, 0x60, 0x50, 0x40, 0x30, 0x20, 0x10, 0x00,
// utxoIndex:
0x00, 0x00, 0x00, 0x05,
// assetID:
0x00, 0x01, 0x02, 0x03, 0x04, 0x05, 0x06, 0x07,
0x08, 0x09, 0x0a, 0x0b, 0x0c, 0x0d, 0x0e, 0x0f,
0x10, 0x11, 0x12, 0x13, 0x14, 0x15, 0x16, 0x17,
0x18, 0x19, 0x1a, 0x1b, 0x1c, 0x1d, 0x1e, 0x1f,
// input:
0x00, 0x00, 0x00, 0x05, 0x00, 0x00, 0x00, 0x00,
0x07, 0x5b, 0xcd, 0x15, 0x00, 0x00, 0x00, 0x02,
0x00, 0x00, 0x00, 0x03, 0x00, 0x00, 0x00, 0x07,
]
```
## Unsigned ExportTx
### What Unsigned Export TX Contains
An unsigned export TX contains a `BaseTx`, `DestinationChain`, and `Outs`. The
`TypeID` for this type is `0x00000004`.
- **`DestinationChain`** is the 32 byte ID of the chain where the funds are being exported to.
- **`Outs`** is a variable length array of [Transferable Outputs](/docs/api-reference/x-chain/txn-format#transferable-output).
### Gantt Unsigned Export TX Specification
```text
+-------------------+---------------+--------------------------------------+
| base_tx : BaseTx | size(base_tx) bytes |
+-------------------+---------------+--------------------------------------+
| destination_chain : [32]byte | 32 bytes |
+-------------------+---------------+--------------------------------------+
| outs : []TransferOut | 4 + size(outs) bytes |
+-------------------+---------------+--------------------------------------+
| 36 + size(outs) + size(base_tx) bytes |
+---------------------------------------+
```
### Proto Unsigned Export TX Specification
```text
message ExportTx {
BaseTx base_tx = 1; // size(base_tx)
bytes destination_chain = 2; // 32 bytes
repeated TransferOut outs = 3; // 4 bytes + size(outs)
}
```
### Unsigned Export TX Example
Let's make an unsigned export TX that uses the outputs from the previous examples:
- `BaseTx`: `"Example BaseTx as defined above"`, but with `TypeID` set to `4`
- `DestinationChain`: `0x0000000000000000000000000000000000000000000000000000000000000000`
- `Outs`: `"Example SECP256K1 Transfer Output as defined above"`
```text
[
BaseTx <- 0x0000000400000004ffffffffeeeeeeeeddddddddccccccccbbbbbbbbaaaaaaaa999999998888888800000001000102030405060708090a0b0c0d0e0f101112131415161718191a1b1c1d1e1f000000070000000000003039000000000000d431000000010000000251025c61fbcfc078f69334f834be6dd26d55a955c3344128e060128ede3523a24a461c8943ab085900000001f1e1d1c1b1a191817161514131211101f0e0d0c0b0a09080706050403020100000000005000102030405060708090a0b0c0d0e0f101112131415161718191a1b1c1d1e1f0000000500000000075bcd150000000200000007000000030000000400010203
DestinationChain <- 0x0000000000000000000000000000000000000000000000000000000000000000
Outs <- [
000102030405060708090a0b0c0d0e0f101112131415161718191a1b1c1d1e1f000000070000000000003039000000000000d431000000010000000251025c61fbcfc078f69334f834be6dd26d55a955c3344128e060128ede3523a24a461c8943ab0859,
]
]
=
[
// base tx:
0x00, 0x00, 0x00, 0x04
0x00, 0x00, 0x00, 0x04, 0xff, 0xff, 0xff, 0xff,
0xee, 0xee, 0xee, 0xee, 0xdd, 0xdd, 0xdd, 0xdd,
0xcc, 0xcc, 0xcc, 0xcc, 0xbb, 0xbb, 0xbb, 0xbb,
0xaa, 0xaa, 0xaa, 0xaa, 0x99, 0x99, 0x99, 0x99,
0x88, 0x88, 0x88, 0x88, 0x00, 0x00, 0x00, 0x01,
0x00, 0x01, 0x02, 0x03, 0x04, 0x05, 0x06, 0x07,
0x08, 0x09, 0x0a, 0x0b, 0x0c, 0x0d, 0x0e, 0x0f,
0x10, 0x11, 0x12, 0x13, 0x14, 0x15, 0x16, 0x17,
0x18, 0x19, 0x1a, 0x1b, 0x1c, 0x1d, 0x1e, 0x1f,
0x00, 0x00, 0x00, 0x07, 0x00, 0x00, 0x00, 0x00,
0x00, 0x00, 0x30, 0x39, 0x00, 0x00, 0x00, 0x00,
0x00, 0x00, 0xd4, 0x31, 0x00, 0x00, 0x00, 0x01,
0x00, 0x00, 0x00, 0x02, 0x51, 0x02, 0x5c, 0x61,
0xfb, 0xcf, 0xc0, 0x78, 0xf6, 0x93, 0x34, 0xf8,
0x34, 0xbe, 0x6d, 0xd2, 0x6d, 0x55, 0xa9, 0x55,
0xc3, 0x34, 0x41, 0x28, 0xe0, 0x60, 0x12, 0x8e,
0xde, 0x35, 0x23, 0xa2, 0x4a, 0x46, 0x1c, 0x89,
0x43, 0xab, 0x08, 0x59, 0x00, 0x00, 0x00, 0x01,
0xf1, 0xe1, 0xd1, 0xc1, 0xb1, 0xa1, 0x91, 0x81,
0x71, 0x61, 0x51, 0x41, 0x31, 0x21, 0x11, 0x01,
0xf0, 0xe0, 0xd0, 0xc0, 0xb0, 0xa0, 0x90, 0x80,
0x70, 0x60, 0x50, 0x40, 0x30, 0x20, 0x10, 0x00,
0x00, 0x00, 0x00, 0x05, 0x00, 0x01, 0x02, 0x03,
0x04, 0x05, 0x06, 0x07, 0x08, 0x09, 0x0a, 0x0b,
0x0c, 0x0d, 0x0e, 0x0f, 0x10, 0x11, 0x12, 0x13,
0x14, 0x15, 0x16, 0x17, 0x18, 0x19, 0x1a, 0x1b,
0x1c, 0x1d, 0x1e, 0x1f, 0x00, 0x00, 0x00, 0x05,
0x00, 0x00, 0x00, 0x00, 0x07, 0x5b, 0xcd, 0x15,
0x00, 0x00, 0x00, 0x02, 0x00, 0x00, 0x00, 0x07,
0x00, 0x00, 0x00, 0x03, 0x00, 0x00, 0x00, 0x04,
0x00, 0x01, 0x02, 0x03
// destination_chain:
0x00, 0x00, 0x00, 0x00, 0x00, 0x00, 0x00, 0x00,
0x00, 0x00, 0x00, 0x00, 0x00, 0x00, 0x00, 0x00,
0x00, 0x00, 0x00, 0x00, 0x00, 0x00, 0x00, 0x00,
0x00, 0x00, 0x00, 0x00, 0x00, 0x00, 0x00, 0x00,
// outs[] count:
0x00, 0x00, 0x00, 0x01,
// assetID:
0x00, 0x01, 0x02, 0x03, 0x04, 0x05, 0x06, 0x07,
0x08, 0x09, 0x0a, 0x0b, 0x0c, 0x0d, 0x0e, 0x0f,
0x10, 0x11, 0x12, 0x13, 0x14, 0x15, 0x16, 0x17,
0x18, 0x19, 0x1a, 0x1b, 0x1c, 0x1d, 0x1e, 0x1f,
// output:
0x00, 0x00, 0x00, 0x07,
0x00, 0x00, 0x00, 0x00, 0x00, 0x00, 0x30, 0x39,
0x00, 0x00, 0x00, 0x00, 0x00, 0x00, 0xd4, 0x31,
0x00, 0x00, 0x00, 0x01, 0x00, 0x00, 0x00, 0x02,
0x51, 0x02, 0x5c, 0x61, 0xfb, 0xcf, 0xc0, 0x78,
0xf6, 0x93, 0x34, 0xf8, 0x34, 0xbe, 0x6d, 0xd2,
0x6d, 0x55, 0xa9, 0x55, 0xc3, 0x34, 0x41, 0x28,
0xe0, 0x60, 0x12, 0x8e, 0xde, 0x35, 0x23, 0xa2,
0x4a, 0x46, 0x1c, 0x89, 0x43, 0xab, 0x08, 0x59,
]
```
## Signed Transaction
A signed transaction is an unsigned transaction with the addition of an array of [credentials](/docs/api-reference/x-chain/txn-format#credentials).
### What Signed Transaction Contains
A signed transaction contains a `CodecID`, `UnsignedTx`, and `Credentials`.
- **`CodecID`** The only current valid codec id is `00 00`.
- **`UnsignedTx`** is an unsigned transaction, as described above.
- **`Credentials`** is an array of
[credentials](/docs/api-reference/x-chain/txn-format#credentials). Each credential
will be paired with the input in the same index at this credential.
### Gantt Signed Transaction Specification
```text
+---------------------+--------------+------------------------------------------------+
| codec_id : uint16 | 2 bytes |
+---------------------+--------------+------------------------------------------------+
| unsigned_tx : UnsignedTx | size(unsigned_tx) bytes |
+---------------------+--------------+------------------------------------------------+
| credentials : []Credential | 4 + size(credentials) bytes |
+---------------------+--------------+------------------------------------------------+
| 6 + size(unsigned_tx) + len(credentials) bytes |
+------------------------------------------------+
```
### Proto Signed Transaction Specification
```text
message Tx {
uint16 codec_id = 1; // 2 bytes
UnsignedTx unsigned_tx = 2; // size(unsigned_tx)
repeated Credential credentials = 3; // 4 bytes + size(credentials)
}
```
### Signed Transaction Example
Let's make a signed transaction that uses the unsigned transaction and
credentials from the previous examples.
- **`CodecID`**: `0`
- **`UnsignedTx`**: `0x0000000100000004ffffffffeeeeeeeeddddddddccccccccbbbbbbbbaaaaaaaa999999998888888800000001000102030405060708090a0b0c0d0e0f101112131415161718191a1b1c1d1e1f000000070000000000003039000000000000d431000000010000000251025c61fbcfc078f69334f834be6dd26d55a955c3344128e060128ede3523a24a461c8943ab085900000001f1e1d1c1b1a191817161514131211101f0e0d0c0b0a09080706050403020100000000005000102030405060708090a0b0c0d0e0f101112131415161718191a1b1c1d1e1f0000000500000000075bcd150000000200000007000000030000000400010203`
- **`Credentials`** `0x0000000900000002000102030405060708090a0b0c0d0e0f101112131415161718191a1b1c1e1d1f202122232425262728292a2b2c2e2d2f303132333435363738393a3b3c3d3e3f00404142434445464748494a4b4c4d4e4f505152535455565758595a5b5c5e5d5f606162636465666768696a6b6c6e6d6f707172737475767778797a7b7c7d7e7f00`
```text
[
CodecID <- 0x0000
UnsignedTx <- 0x0000000100000004ffffffffeeeeeeeeddddddddccccccccbbbbbbbbaaaaaaaa999999998888888800000001000102030405060708090a0b0c0d0e0f101112131415161718191a1b1c1d1e1f000000070000000000003039000000000000d431000000010000000251025c61fbcfc078f69334f834be6dd26d55a955c3344128e060128ede3523a24a461c8943ab085900000001f1e1d1c1b1a191817161514131211101f0e0d0c0b0a09080706050403020100000000005000102030405060708090a0b0c0d0e0f101112131415161718191a1b1c1d1e1f0000000500000000075bcd150000000200000007000000030000000400010203
Credentials <- [
0x0000000900000002000102030405060708090a0b0c0d0e0f101112131415161718191a1b1c1e1d1f202122232425262728292a2b2c2e2d2f303132333435363738393a3b3c3d3e3f00404142434445464748494a4b4c4d4e4f505152535455565758595a5b5c5e5d5f606162636465666768696a6b6c6e6d6f707172737475767778797a7b7c7d7e7f00,
]
]
=
[
// Codec ID
0x00, 0x00,
// unsigned transaction:
0x00, 0x00, 0x00, 0x01, 0x00, 0x00, 0x00, 0x04,
0xff, 0xff, 0xff, 0xff, 0xee, 0xee, 0xee, 0xee,
0xdd, 0xdd, 0xdd, 0xdd, 0xcc, 0xcc, 0xcc, 0xcc,
0xbb, 0xbb, 0xbb, 0xbb, 0xaa, 0xaa, 0xaa, 0xaa,
0x99, 0x99, 0x99, 0x99, 0x88, 0x88, 0x88, 0x88,
0x00, 0x00, 0x00, 0x01, 0x00, 0x01, 0x02, 0x03,
0x04, 0x05, 0x06, 0x07, 0x08, 0x09, 0x0a, 0x0b,
0x0c, 0x0d, 0x0e, 0x0f, 0x10, 0x11, 0x12, 0x13,
0x14, 0x15, 0x16, 0x17, 0x18, 0x19, 0x1a, 0x1b,
0x1c, 0x1d, 0x1e, 0x1f, 0x00, 0x00, 0x00, 0x07,
0x00, 0x00, 0x00, 0x00, 0x00, 0x00, 0x30, 0x39,
0x00, 0x00, 0x00, 0x00, 0x00, 0x00, 0xd4, 0x31,
0x00, 0x00, 0x00, 0x01, 0x00, 0x00, 0x00, 0x02,
0x51, 0x02, 0x5c, 0x61, 0xfb, 0xcf, 0xc0, 0x78,
0xf6, 0x93, 0x34, 0xf8, 0x34, 0xbe, 0x6d, 0xd2,
0x6d, 0x55, 0xa9, 0x55, 0xc3, 0x34, 0x41, 0x28,
0xe0, 0x60, 0x12, 0x8e, 0xde, 0x35, 0x23, 0xa2,
0x4a, 0x46, 0x1c, 0x89, 0x43, 0xab, 0x08, 0x59,
0x00, 0x00, 0x00, 0x01, 0xf1, 0xe1, 0xd1, 0xc1,
0xb1, 0xa1, 0x91, 0x81, 0x71, 0x61, 0x51, 0x41,
0x31, 0x21, 0x11, 0x01, 0xf0, 0xe0, 0xd0, 0xc0,
0xb0, 0xa0, 0x90, 0x80, 0x70, 0x60, 0x50, 0x40,
0x30, 0x20, 0x10, 0x00, 0x00, 0x00, 0x00, 0x05,
0x00, 0x01, 0x02, 0x03, 0x04, 0x05, 0x06, 0x07,
0x08, 0x09, 0x0a, 0x0b, 0x0c, 0x0d, 0x0e, 0x0f,
0x10, 0x11, 0x12, 0x13, 0x14, 0x15, 0x16, 0x17,
0x18, 0x19, 0x1a, 0x1b, 0x1c, 0x1d, 0x1e, 0x1f,
0x00, 0x00, 0x00, 0x05, 0x00, 0x00, 0x00, 0x00,
0x07, 0x5b, 0xcd, 0x15, 0x00, 0x00, 0x00, 0x02,
0x00, 0x00, 0x00, 0x07, 0x00, 0x00, 0x00, 0x03,
0x00, 0x00, 0x00, 0x04, 0x00, 0x01, 0x02, 0x03
// number of credentials:
0x00, 0x00, 0x00, 0x01,
// credential[0]:
0x00, 0x00, 0x00, 0x09, 0x00, 0x00, 0x00, 0x02,
0x00, 0x01, 0x02, 0x03, 0x04, 0x05, 0x06, 0x07,
0x08, 0x09, 0x0a, 0x0b, 0x0c, 0x0d, 0x0e, 0x0f,
0x10, 0x11, 0x12, 0x13, 0x14, 0x15, 0x16, 0x17,
0x18, 0x19, 0x1a, 0x1b, 0x1c, 0x1e, 0x1d, 0x1f,
0x20, 0x21, 0x22, 0x23, 0x24, 0x25, 0x26, 0x27,
0x28, 0x29, 0x2a, 0x2b, 0x2c, 0x2e, 0x2d, 0x2f,
0x30, 0x31, 0x32, 0x33, 0x34, 0x35, 0x36, 0x37,
0x38, 0x39, 0x3a, 0x3b, 0x3c, 0x3d, 0x3e, 0x3f,
0x00, 0x40, 0x41, 0x42, 0x43, 0x44, 0x45, 0x46,
0x47, 0x48, 0x49, 0x4a, 0x4b, 0x4c, 0x4d, 0x4e,
0x4f, 0x50, 0x51, 0x52, 0x53, 0x54, 0x55, 0x56,
0x57, 0x58, 0x59, 0x5a, 0x5b, 0x5c, 0x5e, 0x5d,
0x5f, 0x60, 0x61, 0x62, 0x63, 0x64, 0x65, 0x66,
0x67, 0x68, 0x69, 0x6a, 0x6b, 0x6c, 0x6e, 0x6d,
0x6f, 0x70, 0x71, 0x72, 0x73, 0x74, 0x75, 0x76,
0x77, 0x78, 0x79, 0x7a, 0x7b, 0x7c, 0x7d, 0x7e,
0x7f, 0x00,
```
## UTXO
A UTXO is a standalone representation of a transaction output.
### What UTXO Contains
A UTXO contains a `CodecID`, `TxID`, `UTXOIndex`, `AssetID`, and `Output`.
- **`CodecID`** The only valid `CodecID` is `00 00`
- **`TxID`** is a 32-byte transaction ID. Transaction IDs are calculated by
taking sha256 of the bytes of the signed transaction.
- **`UTXOIndex`** is an int that specifies which output in the transaction
specified by **`TxID`** that this UTXO was created by.
- **`AssetID`** is a 32-byte array that defines which asset this UTXO
references.
- **`Output`** is the output object that created this UTXO. The serialization of
Outputs was defined above. Valid output types are [SECP Mint Output](/docs/api-reference/x-chain/txn-format#secp256k1-mint-output), [SECP Transfer Output](/docs/api-reference/x-chain/txn-format#secp256k1-transfer-output),
[NFT Mint Output](/docs/api-reference/x-chain/txn-format#nft-mint-output), [NFT Transfer Output](/docs/api-reference/x-chain/txn-format#nft-transfer-output).
### Gantt UTXO Specification
```text
+--------------+----------+-------------------------+
| codec_id : uint16 | 2 bytes |
+--------------+----------+-------------------------+
| tx_id : [32]byte | 32 bytes |
+--------------+----------+-------------------------+
| output_index : int | 4 bytes |
+--------------+----------+-------------------------+
| asset_id : [32]byte | 32 bytes |
+--------------+----------+-------------------------+
| output : Output | size(output) bytes |
+--------------+----------+-------------------------+
| 70 + size(output) bytes |
+-------------------------+
```
### Proto UTXO Specification
```text
message Utxo {
uint16 codec_id = 1; // 02 bytes
bytes tx_id = 2; // 32 bytes
uint32 output_index = 3; // 04 bytes
bytes asset_id = 4; // 32 bytes
Output output = 5; // size(output)
}
```
### UTXO Examples
Let's make a UTXO with a SECP Mint Output:
- **`CodecID`**: `0`
- **`TxID`**: `0x47c92ed62d18e3cccda512f60a0d5b1e939b6ab73fb2d011e5e306e79bd0448f`
- **`UTXOIndex`**: `0` = `0x00000001`
- **`AssetID`**: `0x47c92ed62d18e3cccda512f60a0d5b1e939b6ab73fb2d011e5e306e79bd0448f`
- **`Output`**: `0x00000006000000000000000000000001000000013cb7d3842e8cee6a0ebd09f1fe884f6861e1b29c6276aa2a`
```text
[
CodecID <- 0x0000
TxID <- 0x47c92ed62d18e3cccda512f60a0d5b1e939b6ab73fb2d011e5e306e79bd0448f
UTXOIndex <- 0x00000001
AssetID <- 0x47c92ed62d18e3cccda512f60a0d5b1e939b6ab73fb2d011e5e306e79bd0448f
Output <- 00000006000000000000000000000001000000013cb7d3842e8cee6a0ebd09f1fe884f6861e1b29c6276aa2a
]
=
[
// codecID:
0x00, 0x00,
// txID:
0x47, 0xc9, 0x2e, 0xd6, 0x2d, 0x18, 0xe3, 0xcc,
0xcd, 0xa5, 0x12, 0xf6, 0x0a, 0x0d, 0x5b, 0x1e,
0x93, 0x9b, 0x6a, 0xb7, 0x3f, 0xb2, 0xd0, 0x11,
0xe5, 0xe3, 0x06, 0xe7, 0x9b, 0xd0, 0x44, 0x8f,
// utxo index:
0x00, 0x00, 0x00, 0x01,
// assetID:
0x47, 0xc9, 0x2e, 0xd6, 0x2d, 0x18, 0xe3, 0xcc,
0xcd, 0xa5, 0x12, 0xf6, 0x0a, 0x0d, 0x5b, 0x1e,
0x93, 0x9b, 0x6a, 0xb7, 0x3f, 0xb2, 0xd0, 0x11,
0xe5, 0xe3, 0x06, 0xe7, 0x9b, 0xd0, 0x44, 0x8f,
// secp mint output:
0x00, 0x00, 0x00, 0x06, 0x00, 0x00, 0x00, 0x00,
0x00, 0x00, 0x00, 0x00, 0x00, 0x00, 0x00, 0x01,
0x00, 0x00, 0x00, 0x01, 0x3c, 0xb7, 0xd3, 0x84,
0x2e, 0x8c, 0xee, 0x6a, 0x0e, 0xbd, 0x09, 0xf1,
0xfe, 0x88, 0x4f, 0x68, 0x61, 0xe1, 0xb2, 0x9c,
0x62, 0x76, 0xaa, 0x2a,
]
```
Let's make a UTXO with a SECP Transfer Output from the signed transaction created above:
- **`CodecID`**: `0`
- **`TxID`**: `0xf966750f438867c3c9828ddcdbe660e21ccdbb36a9276958f011ba472f75d4e7`
- **`UTXOIndex`**: `0` = `0x00000000`
- **`AssetID`**: `0x000102030405060708090a0b0c0d0e0f101112131415161718191a1b1c1d1e1f`
- **`Output`**: `"Example SECP256K1 Transferable Output as defined above"`
```text
[
CodecID <- 0x0000
TxID <- 0xf966750f438867c3c9828ddcdbe660e21ccdbb36a9276958f011ba472f75d4e7
UTXOIndex <- 0x00000000
AssetID <- 0x000102030405060708090a0b0c0d0e0f101112131415161718191a1b1c1d1e1f
Output <- 0x000000070000000000003039000000000000d431000000010000000251025c61fbcfc078f69334f834be6dd26d55a955c3344128e060128ede3523a24a461c8943ab0859
]
=
[
// codecID:
0x00, 0x00,
// txID:
0xf9, 0x66, 0x75, 0x0f, 0x43, 0x88, 0x67, 0xc3,
0xc9, 0x82, 0x8d, 0xdc, 0xdb, 0xe6, 0x60, 0xe2,
0x1c, 0xcd, 0xbb, 0x36, 0xa9, 0x27, 0x69, 0x58,
0xf0, 0x11, 0xba, 0x47, 0x2f, 0x75, 0xd4, 0xe7,
// utxo index:
0x00, 0x00, 0x00, 0x00,
// assetID:
0x00, 0x01, 0x02, 0x03, 0x04, 0x05, 0x06, 0x07,
0x08, 0x09, 0x0a, 0x0b, 0x0c, 0x0d, 0x0e, 0x0f,
0x10, 0x11, 0x12, 0x13, 0x14, 0x15, 0x16, 0x17,
0x18, 0x19, 0x1a, 0x1b, 0x1c, 0x1d, 0x1e, 0x1f,
// secp transfer output:
0x00, 0x00, 0x00, 0x07, 0x00, 0x00, 0x00, 0x00,
0x00, 0x00, 0x30, 0x39, 0x00, 0x00, 0x00, 0x00,
0x00, 0x00, 0xd4, 0x31, 0x00, 0x00, 0x00, 0x01,
0x00, 0x00, 0x00, 0x02, 0x00, 0x01, 0x02, 0x03,
0x04, 0x05, 0x06, 0x07, 0x08, 0x09, 0x0a, 0x0b,
0x0c, 0x0d, 0x0e, 0x0f, 0x10, 0x11, 0x12, 0x13,
0x14, 0x15, 0x16, 0x17, 0x18, 0x19, 0x1a, 0x1b,
0x1c, 0x1d, 0x1e, 0x1f, 0x20, 0x21, 0x22, 0x23,
0x24, 0x25, 0x26, 0x27,
]
```
Let's make a UTXO with an NFT Mint Output:
- **`CodecID`**: `0`
- **`TxID`**: `0x03c686efe8d80c519f356929f6da945f7ff90378f0044bb0e1a5d6c1ad06bae7`
- **`UTXOIndex`**: `0` = `0x00000001`
- **`AssetID`**: `0x03c686efe8d80c519f356929f6da945f7ff90378f0044bb0e1a5d6c1ad06bae7`
- **`Output`**: `0x0000000a00000000000000000000000000000001000000013cb7d3842e8cee6a0ebd09f1fe884f6861e1b29c6276aa2a`
```text
[
CodecID <- 0x0000
TxID <- 0x03c686efe8d80c519f356929f6da945f7ff90378f0044bb0e1a5d6c1ad06bae7
UTXOIndex <- 0x00000001
AssetID <- 0x03c686efe8d80c519f356929f6da945f7ff90378f0044bb0e1a5d6c1ad06bae7
Output <- 0000000a00000000000000000000000000000001000000013cb7d3842e8cee6a0ebd09f1fe884f6861e1b29c6276aa2a
]
=
[
// codecID:
0x00, 0x00,
// txID:
0x03, 0xc6, 0x86, 0xef, 0xe8, 0xd8, 0x0c, 0x51,
0x9f, 0x35, 0x69, 0x29, 0xf6, 0xda, 0x94, 0x5f,
0x7f, 0xf9, 0x03, 0x78, 0xf0, 0x04, 0x4b, 0xb0,
0xe1, 0xa5, 0xd6, 0xc1, 0xad, 0x06, 0xba, 0xe7,
// utxo index:
0x00, 0x00, 0x00, 0x01,
// assetID:
0x03, 0xc6, 0x86, 0xef, 0xe8, 0xd8, 0x0c, 0x51,
0x9f, 0x35, 0x69, 0x29, 0xf6, 0xda, 0x94, 0x5f,
0x7f, 0xf9, 0x03, 0x78, 0xf0, 0x04, 0x4b, 0xb0,
0xe1, 0xa5, 0xd6, 0xc1, 0xad, 0x06, 0xba, 0xe7,
// nft mint output:
0x00, 0x00, 0x00, 0x0a, 0x00, 0x00, 0x00, 0x00,
0x00, 0x00, 0x00, 0x00, 0x00, 0x00, 0x00, 0x00,
0x00, 0x00, 0x00, 0x01, 0x00, 0x00, 0x00, 0x01,
0x3c, 0xb7, 0xd3, 0x84, 0x2e, 0x8c, 0xee, 0x6a,
0x0e, 0xbd, 0x09, 0xf1, 0xfe, 0x88, 0x4f, 0x68,
0x61, 0xe1, 0xb2, 0x9c, 0x62, 0x76, 0xaa, 0x2a,
]
```
Let's make a UTXO with an NFT Transfer Output:
- **`CodecID`**: `0`
- **`TxID`**: `0xa68f794a7de7bdfc5db7ba5b73654304731dd586bbf4a6d7b05be6e49de2f936`
- **`UTXOIndex`**: `0` = `0x00000001`
- **`AssetID`**: `0x03c686efe8d80c519f356929f6da945f7ff90378f0044bb0e1a5d6c1ad06bae7`
- **`Output`**: `0x0000000b000000000000000b4e4654205061796c6f6164000000000000000000000001000000013cb7d3842e8cee6a0ebd09f1fe884f6861e1b29c6276aa2a`
```text
[
CodecID <- 0x0000
TxID <- 0xa68f794a7de7bdfc5db7ba5b73654304731dd586bbf4a6d7b05be6e49de2f936
UTXOIndex <- 0x00000001
AssetID <- 0x03c686efe8d80c519f356929f6da945f7ff90378f0044bb0e1a5d6c1ad06bae7
Output <- 0000000b000000000000000b4e4654205061796c6f6164000000000000000000000001000000013cb7d3842e8cee6a0ebd09f1fe884f6861e1b29c6276aa2a
]
=
[
// codecID:
0x00, 0x00,
// txID:
0xa6, 0x8f, 0x79, 0x4a, 0x7d, 0xe7, 0xbd, 0xfc,
0x5d, 0xb7, 0xba, 0x5b, 0x73, 0x65, 0x43, 0x04,
0x73, 0x1d, 0xd5, 0x86, 0xbb, 0xf4, 0xa6, 0xd7,
0xb0, 0x5b, 0xe6, 0xe4, 0x9d, 0xe2, 0xf9, 0x36,
// utxo index:
0x00, 0x00, 0x00, 0x01,
// assetID:
0x03, 0xc6, 0x86, 0xef, 0xe8, 0xd8, 0x0c, 0x51,
0x9f, 0x35, 0x69, 0x29, 0xf6, 0xda, 0x94, 0x5f,
0x7f, 0xf9, 0x03, 0x78, 0xf0, 0x04, 0x4b, 0xb0,
0xe1, 0xa5, 0xd6, 0xc1, 0xad, 0x06, 0xba, 0xe7,
// nft transfer output:
0x00, 0x00, 0x00, 0x0b, 0x00, 0x00, 0x00, 0x00,
0x00, 0x00, 0x00, 0x0b, 0x4e, 0x46, 0x54, 0x20,
0x50, 0x61, 0x79, 0x6c, 0x6f, 0x61, 0x64, 0x00,
0x00, 0x00, 0x00, 0x00, 0x00, 0x00, 0x00, 0x00,
0x00, 0x00, 0x01, 0x00, 0x00, 0x00, 0x01, 0x3c,
0xb7, 0xd3, 0x84, 0x2e, 0x8c, 0xee, 0x6a, 0x0e,
0xbd, 0x09, 0xf1, 0xfe, 0x88, 0x4f, 0x68, 0x61,
0xe1, 0xb2, 0x9c, 0x62, 0x76, 0xaa, 0x2a,
]
```
## GenesisAsset
An asset to be issued in an instance of the AVM's Genesis
### What GenesisAsset Contains
An instance of a GenesisAsset contains an `Alias`, `NetworkID`, `BlockchainID`,
`Outputs`, `Inputs`, `Memo`, `Name`, `Symbol`, `Denomination`, and
`InitialStates`.
- **`Alias`** is the alias for this asset.
- **`NetworkID`** defines which network this transaction is meant to be issued
to. This value is meant to support transaction routing and is not designed for
replay attack prevention.
- **`BlockchainID`** is the ID (32-byte array) that defines which blockchain
this transaction was issued to. This is used for replay attack prevention for
transactions that could potentially be valid across network or blockchain.
- **`Outputs`** is an array of [transferable output objects](/docs/api-reference/x-chain/txn-format#transferable-output). Outputs must
be sorted lexicographically by their serialized representation. The total
quantity of the assets created in these outputs must be less than or equal to
the total quantity of each asset consumed in the inputs minus the transaction
fee.
- **`Inputs`** is an array of [transferable input objects](/docs/api-reference/x-chain/txn-format#transferable-input). Inputs must be
sorted and unique. Inputs are sorted first lexicographically by their
**`TxID`** and then by the **`UTXOIndex`** from low to high. If there are
inputs that have the same **`TxID`** and **`UTXOIndex`**, then the transaction
is invalid as this would result in a double spend.
- **`Memo`** is a memo field that contains arbitrary bytes, up to 256 bytes.
- **`Name`** is a human readable string that defines the name of the asset this
transaction will create. The name is not guaranteed to be unique. The name
must consist of only printable ASCII characters and must be no longer than 128
characters.
- **`Symbol`** is a human readable string that defines the symbol of the asset
this transaction will create. The symbol is not guaranteed to be unique. The
symbol must consist of only printable ASCII characters and must be no longer
than 4 characters.
- **`Denomination`** is a byte that defines the divisibility of the asset this
transaction will create. For example, the AVAX token is divisible into
billionths. Therefore, the denomination of the AVAX token is 9. The
denomination must be no more than 32.
- **`InitialStates`** is a variable length array that defines the feature
extensions this asset supports, and the [initial state](/docs/api-reference/x-chain/txn-format#initial-state) of those feature
extensions.
### Gantt GenesisAsset Specification
````text
+----------------+----------------------+--------------------------------+
| alias : string | 2 + len(alias) bytes |
+----------------+----------------------+--------------------------------+
| network_id : int | 4 bytes |
+----------------+----------------------+--------------------------------+
| blockchain_id : [32]byte | 32 bytes |
+----------------+----------------------+--------------------------------+
| outputs : []TransferableOutput | 4 + size(outputs) bytes |
+----------------+----------------------+--------------------------------+
| inputs : []TransferableInput | 4 + size(inputs) bytes |
+----------------+----------------------+--------------------------------+
| memo : [256]byte | 4 + size(memo) bytes |
+----------------+----------------------+--------------------------------+
| name : string | 2 + len(name) bytes |
+----------------+----------------------+--------------------------------+
| symbol : string | 2 + len(symbol) bytes |
+----------------+----------------------+--------------------------------+
| denomination : byte | 1 bytes |
+----------------+----------------------+--------------------------------+
| initial_states : []InitialState | 4 + size(initial_states) bytes |
+----------------+----------------------+--------------------------------+
| 59 + size(alias) + size(outputs) + size(inputs) + size(memo) |
| + len(name) + len(symbol) + size(initial_states) bytes |
+------------------------------------------------------------------------+
### Proto GenesisAsset Specification
```text
message GenesisAsset {
string alias = 1; // 2 bytes + len(alias)
uint32 network_id = 2; // 04 bytes
bytes blockchain_id = 3; // 32 bytes
repeated Output outputs = 4; // 04 bytes + size(outputs)
repeated Input inputs = 5; // 04 bytes + size(inputs)
bytes memo = 6; // 04 bytes + size(memo)
string name = 7; // 2 bytes + len(name)
name symbol = 8; // 2 bytes + len(symbol)
uint8 denomination = 9; // 1 bytes
repeated InitialState initial_states = 10; // 4 bytes + size(initial_states)
}
````
### GenesisAsset Example
Let's make a GenesisAsset:
- **`Alias`**: `asset1`
- **`NetworkID`**: `12345`
- **`BlockchainID`**: `0x0000000000000000000000000000000000000000000000000000000000000000`
- **`Outputs`**: \[\]
- **`Inputs`**: \[\]
- **`Memo`**: `2Zc54v4ek37TEwu4LiV3j41PUMRd6acDDU3ZCVSxE7X`
- **`Name`**: `asset1`
- **`Symbol`**: `MFCA`
- **`Denomination`**: `1`
- **`InitialStates`**:
- `"Example Initial State as defined above"`
```text
[
Alias <- 0x617373657431
NetworkID <- 0x00003039
BlockchainID <- 0x0000000000000000000000000000000000000000000000000000000000000000
Outputs <- []
Inputs <- []
Memo <- 0x66x726f6d20736e6f77666c616b6520746f206176616c616e636865
Name <- 0x617373657431
Symbol <- 0x66x726f6d20736e6f77666c616b6520746f206176616c616e636865
Denomination <- 0x66x726f6d20736e6f77666c616b6520746f206176616c616e636865
InitialStates <- [
0x0000000000000001000000070000000000003039000000000000d431000000010000000251025c61fbcfc078f69334f834be6dd26d55a955c3344128e060128ede3523a24a461c8943ab0859
]
]
=
[
// asset alias len:
0x00, 0x06,
// asset alias:
0x61, 0x73, 0x73, 0x65, 0x74, 0x31,
// network_id:
0x00, 0x00, 0x30, 0x39,
// blockchain_id:
0x00, 0x00, 0x00, 0x00, 0x00, 0x00, 0x00, 0x00, 0x00, 0x00,
0x00, 0x00, 0x00, 0x00, 0x00, 0x00, 0x00, 0x00, 0x00, 0x00,
0x00, 0x00, 0x00, 0x00, 0x00, 0x00, 0x00, 0x00, 0x00, 0x00, 0x00, 0x00,
// output_len:
0x00, 0x00, 0x00, 0x00,
// input_len:
0x00, 0x00, 0x00, 0x00,
// memo_len:
0x00, 0x00, 0x00, 0x1b,
// memo:
0x66, 0x72, 0x6f, 0x6d, 0x20, 0x73, 0x6e, 0x6f, 0x77, 0x66, 0x6c, 0x61,
0x6b, 0x65, 0x20, 0x74, 0x6f, 0x20, 0x61, 0x76, 0x61, 0x6c, 0x61, 0x6e, 0x63, 0x68, 0x65,
// asset_name_len:
0x00, 0x0f,
// asset_name:
0x6d, 0x79, 0x46, 0x69, 0x78, 0x65, 0x64, 0x43, 0x61, 0x70, 0x41, 0x73, 0x73, 0x65, 0x74,
// symbol_len:
0x00, 0x04,
// symbol:
0x4d, 0x46, 0x43, 0x41,
// denomination:
0x07,
// number of InitialStates:
0x00, 0x00, 0x00, 0x01,
// InitialStates[0]:
0x00, 0x00, 0x00, 0x00, 0x00, 0x00, 0x00, 0x01,
0x00, 0x00, 0x00, 0x07, 0x00, 0x00, 0x00, 0x00,
0x00, 0x00, 0x30, 0x39, 0x00, 0x00, 0x00, 0x00,
0x00, 0x00, 0xd4, 0x31, 0x00, 0x00, 0x00, 0x01,
0x00, 0x00, 0x00, 0x02, 0x51, 0x02, 0x5c, 0x61,
0xfb, 0xcf, 0xc0, 0x78, 0xf6, 0x93, 0x34, 0xf8,
0x34, 0xbe, 0x6d, 0xd2, 0x6d, 0x55, 0xa9, 0x55,
0xc3, 0x34, 0x41, 0x28, 0xe0, 0x60, 0x12, 0x8e,
0xde, 0x35, 0x23, 0xa2, 0x4a, 0x46, 0x1c, 0x89,
0x43, 0xab, 0x08, 0x59,
]
```
# Background and Requirements (/docs/virtual-machines/custom-precompiles/background-requirements)
---
title: Background and Requirements
description: Learn about the background and requirements for customizing Ethereum Virtual Machine.
---
This is a brief overview of what this tutorial will cover.
- Write a Solidity interface
- Generate the precompile template
- Implement the precompile functions in Golang
- Write and run tests
Stateful precompiles are [alpha software](https://en.wikipedia.org/wiki/Software_release_life_cycle#Alpha). Build at your own risk.
In this tutorial, we used a branch based on Subnet-EVM version `v0.5.2`. You can find the branch [here](https://github.com/ava-labs/subnet-evm/tree/helloworld-official-tutorial-v2). The code in this branch is the same as Subnet-EVM except for the `precompile/contracts/helloworld` directory. The directory contains the code for the `HelloWorld` precompile. We will be using this precompile as an example to learn how to write a stateful precompile. The code in this branch can become outdated. You should always use the latest version of Subnet-EVM when you develop your own precompile.
## Precompile-EVM
Subnet-EVM precompiles can be registered from an external repo. This allows developer to build their precompiles without maintaining a fork of Subnet-EVM. The precompiles are then registered in the Subnet-EVM at build time.
The difference between using Subnet-EVM and Precompile-EVM is that with Subnet-EVM you can change EVM internals to interact with your precompiles. Such as changing fee structure, adding new opcodes, changing how to build a block, etc. With Precompile-EVM you can only add new stateful precompiles that can interact with the StateDB. Precompiles built with Precompile-EVM are still very powerful because it can directly access to the state and modify it.
There is a template repo for how to build a precompile with this way called [Precompile-EVM](https://github.com/ava-labs/precompile-evm). Both Subnet-EVM and Precompile-EVM share similar directory structures and common codes.
You can reference the Precompile-EVM PR that adds Hello World precompile [here](https://github.com/ava-labs/precompile-evm/pull/12).
## Requirements
This tutorial assumes familiarity with Golang and JavaScript.
Additionally, users should be deeply familiar with the EVM in order to understand its invariants since adding a Stateful Precompile modifies the EVM itself.
Here are some recommended resources to learn the ins and outs of the EVM:
- [The Ethereum Virtual Machine](https://github.com/ethereumbook/ethereumbook/blob/develop/13evm.asciidoc)
- [Precompiles in Solidity](https://medium.com/@rbkhmrcr/precompiles-solidity-e5d29bd428c4)
- [Deconstructing a Smart Contract](https://blog.openzeppelin.com/deconstructing-a-solidity-contract-part-i-introduction-832efd2d7737/)
- [Layout of State Variables in Storage](https://docs.soliditylang.org/en/v0.8.10/internals/layout_in_storage.html)
- [Layout in Memory](https://docs.soliditylang.org/en/v0.8.10/internals/layout_in_memory.html)
- [Layout of Call Data](https://docs.soliditylang.org/en/v0.8.10/internals/layout_in_calldata.html)
- [Contract ABI Specification](https://docs.soliditylang.org/en/v0.8.10/abi-spec.html)
- [Customizing the EVM with Stateful Precompiles](https://medium.com/avalancheavax/customizing-the-evm-with-stateful-precompiles-f44a34f39efd)
Please install the following before getting started.
First, install the latest version of Go. Follow the instructions [here](https://go.dev/doc/install). You can verify by running `go version`.
Set the `$GOPATH` environment variable properly for Go to look for Go Workspaces. Please read [this](https://go.dev/doc/gopath_code) for details. You can verify by running `echo $GOPATH`.
See [here](https://github.com/golang/go/wiki/SettingGOPATH) for instructions on setting the GOPATH based on system configurations.
As a few things will be installed into `$GOPATH/bin`, please make sure that `$GOPATH/bin` is in your `$PATH`, otherwise, you may get an error running the commands below. To do that, run the command: `export PATH=$PATH:$GOROOT/bin:$GOPATH/bin`
Download the following prerequisites into your `$GOPATH`:
- Git Clone the repository (Subnet-EVM or Precompile-EVM)
- Git Clone [AvalancheGo](https://github.com/ava-labs/avalanchego) repository
- Install [Avalanche Network Runner](/docs/tooling/avalanche-network-runner/introduction)
- Install [solc](https://github.com/ethereum/solc-js#usage-on-the-command-line)
- Install [Node.js and NPM](https://nodejs.org/en/download) For easy copy paste, use the below commands:
```bash
cd $GOPATH
mkdir -p src/github.com/ava-labs
cd src/github.com/ava-labs
```
Clone the repository:
```bash
git clone git@github.com:ava-labs/subnet-evm.git
```
Then run the following commands:
```bash
git clone git@github.com:ava-labs/avalanchego.git
curl -sSfL https://raw.githubusercontent.com/ava-labs/avalanche-network-runner/main/scripts/install.sh | sh -s
npm install -g solc
```
```bash
git clone git@github.com:ava-labs/precompile-evm.git
```
Alternatively you can use it as a template repo from github.
Then run the following commands:
```bash
git clone git@github.com:ava-labs/avalanchego.git
curl -sSfL https://raw.githubusercontent.com/ava-labs/avalanche-network-runner/main/scripts/install.sh | sh -s
npm install -g solc
```
## Complete Code
You can inspect example pull request for the complete code.
[Subnet-EVM Hello World Pull Request](https://github.com/ava-labs/subnet-evm/pull/565/)
[Precompile-EVM Hello World Pull Request](https://github.com/ava-labs/precompile-evm/pull/12/)
For a full-fledged example, you can also check out the [Reward Manager Precompile](https://github.com/ava-labs/subnet-evm/blob/helloworld-official-tutorial-v2/precompile/contracts/rewardmanager/).
# Generating Your Precompile (/docs/virtual-machines/custom-precompiles/create-precompile)
---
title: Generating Your Precompile
description: In this section, we will go over the process for automatically generating the template code which you can configure accordingly for your stateful precompile.
---
First, we must create the Solidity interface that we want our precompile to implement. This will be the HelloWorld Interface. It will have two simple functions, `sayHello()`, `setGreeting()` and an event `GreetingChanged`. These two functions will demonstrate the getting and setting respectively of a value stored in the precompile's state space.
The `sayHello()` function is a `view` function, meaning it does not modify the state of the precompile and returns a string result. The `setGreeting()` function is a state changer function, meaning it modifies the state of the precompile. The `HelloWorld` interface inherits `IAllowList` interface to use the allow list functionality.
For this tutorial, we will be working in a new branch in Subnet-EVM/Precompile-EVM repo.
```bash
cd $GOPATH/src/github.com/ava-labs/subnet-evm
```
We will start off in this directory `./contracts/`:
```bash
cd contracts/
```
Create a new file called `IHelloWorld.sol` and copy and paste the below code:
```solidity title="contracts/IHelloWorld.sol"
// (c) 2022-2023, Ava Labs, Inc. All rights reserved.
// See the file LICENSE for licensing terms.
// SPDX-License-Identifier: MIT
pragma solidity >=0.8.0;
import "./IAllowList.sol";
interface IHelloWorld is IAllowList {
event GreetingChanged(
address indexed sender,
string oldGreeting,
string newGreeting
);
// sayHello returns the stored greeting string
function sayHello() external view returns (string calldata result);
// setGreeting stores the greeting string
function setGreeting(string calldata response) external;
}
```
Now we have an interface that our precompile can implement! Let's create an [ABI](https://docs.soliditylang.org/en/v0.8.13/abi-spec.html#contract-abi-specification) of our Solidity interface.
In the same directory, let's run:
```bash
solc --abi ./contracts/interfaces/IHelloWorld.sol -o ./abis
```
This generates the ABI code under `./abis/contracts_interfaces_IHelloWorld_sol_IHelloWorld.abi`.
```
[
{
"anonymous": false,
"inputs": [
{
"indexed": true,
"internalType": "address",
"name": "sender",
"type": "address"
},
{
"indexed": false,
"internalType": "string",
"name": "oldGreeting",
"type": "string"
},
{
"indexed": false,
"internalType": "string",
"name": "newGreeting",
"type": "string"
}
],
"name": "GreetingChanged",
"type": "event"
},
{
"anonymous": false,
"inputs": [
{
"indexed": true,
"internalType": "uint256",
"name": "role",
"type": "uint256"
},
{
"indexed": true,
"internalType": "address",
"name": "account",
"type": "address"
},
{
"indexed": true,
"internalType": "address",
"name": "sender",
"type": "address"
},
{
"indexed": false,
"internalType": "uint256",
"name": "oldRole",
"type": "uint256"
}
],
"name": "RoleSet",
"type": "event"
},
{
"inputs": [
{ "internalType": "address", "name": "addr", "type": "address" }
],
"name": "readAllowList",
"outputs": [
{ "internalType": "uint256", "name": "role", "type": "uint256" }
],
"stateMutability": "view",
"type": "function"
},
{
"inputs": [],
"name": "sayHello",
"outputs": [
{ "internalType": "string", "name": "result", "type": "string" }
],
"stateMutability": "view",
"type": "function"
},
{
"inputs": [
{ "internalType": "address", "name": "addr", "type": "address" }
],
"name": "setAdmin",
"outputs": [],
"stateMutability": "nonpayable",
"type": "function"
},
{
"inputs": [
{ "internalType": "address", "name": "addr", "type": "address" }
],
"name": "setEnabled",
"outputs": [],
"stateMutability": "nonpayable",
"type": "function"
},
{
"inputs": [
{ "internalType": "string", "name": "response", "type": "string" }
],
"name": "setGreeting",
"outputs": [],
"stateMutability": "nonpayable",
"type": "function"
},
{
"inputs": [
{ "internalType": "address", "name": "addr", "type": "address" }
],
"name": "setManager",
"outputs": [],
"stateMutability": "nonpayable",
"type": "function"
},
{
"inputs": [
{ "internalType": "address", "name": "addr", "type": "address" }
],
"name": "setNone",
"outputs": [],
"stateMutability": "nonpayable",
"type": "function"
}
]
```
As you can see the ABI also contains the `IAllowList` interface functions. This is because the `IHelloWorld` interface inherits from the `IAllowList` interface.
Note: The ABI must have named outputs in order to generate the precompile template.
Now that we have an ABI for the precompile gen tool to interact with, we can run the following command to generate our HelloWorld precompile files!
Let's go back to the root of the repository and run the PrecompileGen script helper:
```bash
cd ..
```
Both of these Subnet-EVM and Precompile-EVM have the same `generate_precompile.sh` script. The one in Precompile-EVM installs the script from Subnet-EVM and runs it.
```bash
./scripts/generate_precompile.sh --help
# output
Using branch: precompile-tutorial
NAME:
precompilegen - subnet-evm precompile generator tool
USAGE:
main [global options] command [command options] [arguments...]
VERSION:
1.10.26-stable
COMMANDS:
help, h Shows a list of commands or help for one command
GLOBAL OPTIONS:
--abi value
Path to the contract ABI json to generate, - for STDIN
--out value
Output folder for the generated precompile files, - for STDOUT (default =
./precompile/contracts/{pkg}). Test files won't be generated if STDOUT is used
--pkg value
Go package name to generate the precompile into (default = {type})
--type value
Struct name for the precompile (default = {abi file name})
MISC
--help, -h (default: false)
show help
--version, -v (default: false)
print the version
COPYRIGHT:
Copyright 2013-2022 The go-ethereum Authors
```
Now let's generate the precompile template files!
```bash
cd $GOPATH/src/github.com/ava-labs/precompile-evm
```
We will start off in this directory `./contracts/`:
```bash
cd contracts/
```
For Precompile-EVM interfaces and other contracts in Subnet-EVM can be accessible through `@avalabs/subnet-evm-contracts` package. This is already added to the `package.json` file. You can install it by running `npm install`. In order to import `IAllowList` interface, you can use the following import statement:
```solidity
import "@avalabs/subnet-evm-contracts/contracts/interfaces/IAllowList.sol";
```
The full file looks like this:
```solidity
// SPDX-License-Identifier: MIT
pragma solidity >=0.8.0;
import "@avalabs/subnet-evm-contracts/contracts/interfaces/IAllowList.sol";
interface IHelloWorld is IAllowList {
event GreetingChanged(
address indexed sender,
string oldGreeting,
string newGreeting
);
// sayHello returns the stored greeting string
function sayHello() external view returns (string calldata result);
// setGreeting stores the greeting string
function setGreeting(string calldata response) external;
}
```
Now we have an interface that our precompile can implement! Let's create an ABI of our Solidity interface.
In Precompile-EVM we import contracts from `@avalabs/subnet-evm-contracts` package. In order to generate the ABI in Precompile-EVM we need to include the `node_modules` folder to find imported contracts with following flags:
- `--abi`: ABI specification of the contracts.
- `--base-path path`: Use the given path as the root of the source tree instead of the root of the filesystem.
- `--include-path path`: Make an additional source directory available to the default import callback. Use this option if you want to import contracts whose location is not fixed in relation to your main source tree; for example third-party libraries installed using a package manager. Can be used multiple times. Can only be used if base path has a non-empty value.
- `--output-dir path`: If given, creates one file per output component and contract/file at the specified directory.
- `--overwrite`: Overwrite existing files (used together with` --output-dir`).
```bash
solc --abi ./contracts/interfaces/IHelloWorld.sol -o ./abis --base-path . --include-path ./node_modules
```
This generates the ABI code under `./abis/contracts_interfaces_IHelloWorld_sol_IHelloWorld.abi`.
```
[
{
"anonymous": false,
"inputs": [
{
"indexed": true,
"internalType": "address",
"name": "sender",
"type": "address"
},
{
"indexed": false,
"internalType": "string",
"name": "oldGreeting",
"type": "string"
},
{
"indexed": false,
"internalType": "string",
"name": "newGreeting",
"type": "string"
}
],
"name": "GreetingChanged",
"type": "event"
},
{
"anonymous": false,
"inputs": [
{
"indexed": true,
"internalType": "uint256",
"name": "role",
"type": "uint256"
},
{
"indexed": true,
"internalType": "address",
"name": "account",
"type": "address"
},
{
"indexed": true,
"internalType": "address",
"name": "sender",
"type": "address"
},
{
"indexed": false,
"internalType": "uint256",
"name": "oldRole",
"type": "uint256"
}
],
"name": "RoleSet",
"type": "event"
},
{
"inputs": [
{ "internalType": "address", "name": "addr", "type": "address" }
],
"name": "readAllowList",
"outputs": [
{ "internalType": "uint256", "name": "role", "type": "uint256" }
],
"stateMutability": "view",
"type": "function"
},
{
"inputs": [],
"name": "sayHello",
"outputs": [
{ "internalType": "string", "name": "result", "type": "string" }
],
"stateMutability": "view",
"type": "function"
},
{
"inputs": [
{ "internalType": "address", "name": "addr", "type": "address" }
],
"name": "setAdmin",
"outputs": [],
"stateMutability": "nonpayable",
"type": "function"
},
{
"inputs": [
{ "internalType": "address", "name": "addr", "type": "address" }
],
"name": "setEnabled",
"outputs": [],
"stateMutability": "nonpayable",
"type": "function"
},
{
"inputs": [
{ "internalType": "string", "name": "response", "type": "string" }
],
"name": "setGreeting",
"outputs": [],
"stateMutability": "nonpayable",
"type": "function"
},
{
"inputs": [
{ "internalType": "address", "name": "addr", "type": "address" }
],
"name": "setManager",
"outputs": [],
"stateMutability": "nonpayable",
"type": "function"
},
{
"inputs": [
{ "internalType": "address", "name": "addr", "type": "address" }
],
"name": "setNone",
"outputs": [],
"stateMutability": "nonpayable",
"type": "function"
}
]
```
As you can see the ABI also contains the `IAllowList` interface functions. This is because the `IHelloWorld` interface inherits from the `IAllowList` interface.
Note: The ABI must have named outputs in order to generate the precompile template.
Now that we have an ABI for the precompile gen tool to interact with, we can run the following command to generate our HelloWorld precompile files!
Let's go back to the root of the repository and run the PrecompileGen script helper:
```bash
cd ..
```
Both of these Subnet-EVM and Precompile-EVM have the same generate_precompile.sh script. The one in Precompile-EVM installs the script from Subnet-EVM and runs it.
```bash
./scripts/generate_precompile.sh --help
# output
Using branch: precompile-tutorial
NAME:
precompilegen - subnet-evm precompile generator tool
USAGE:
main [global options] command [command options] [arguments...]
VERSION:
1.10.26-stable
COMMANDS:
help, h Shows a list of commands or help for one command
GLOBAL OPTIONS:
--abi value
Path to the contract ABI json to generate, - for STDIN
--out value
Output folder for the generated precompile files, - for STDOUT (default =
./precompile/contracts/{pkg}). Test files won't be generated if STDOUT is used
--pkg value
Go package name to generate the precompile into (default = {type})
--type value
Struct name for the precompile (default = {abi file name})
MISC
--help, -h (default: false)
show help
--version, -v (default: false)
print the version
COPYRIGHT:
Copyright 2013-2022 The go-ethereum Authors
```
Now let's generate the precompile template files!
In Subnet-EVM precompile implementations reside under the `./precompile/contracts` directory. Let's generate our precompile template in the `./precompile/contracts/helloworld` directory, where `helloworld` is the name of the Go package we want to generate the precompile into.
```bash
./scripts/generate_precompile.sh --abi ./contracts/abis/contracts_interfaces_IHelloWorld_sol_IHelloWorld.abi --type HelloWorld --pkg helloworld
```
This generates a precompile template files `contract.go`, `contract.abi`, `config.go`, `module.go`, `event.go` and `README.md` files. `README.md` explains general guidelines for precompile development. You should carefully read this file before modifying the precompile template.
```
There are some must-be-done changes waiting in the generated file. Each area requiring you to add your code is marked with CUSTOM CODE to make them easy to find and modify.
Additionally there are other files you need to edit to activate your precompile.
These areas are highlighted with comments "ADD YOUR PRECOMPILE HERE".
For testing take a look at other precompile tests in contract_test.go and config_test.go in other precompile folders.
General guidelines for precompile development:
1- Set a suitable config key in generated module.go. E.g: "yourPrecompileConfig"
2- Read the comment and set a suitable contract address in generated module.go. E.g:
ContractAddress = common.HexToAddress("ASUITABLEHEXADDRESS")
3- It is recommended to only modify code in the highlighted areas marked with "CUSTOM CODE STARTS HERE". Typically, custom codes are required in only those areas.
Modifying code outside of these areas should be done with caution and with a deep understanding of how these changes may impact the EVM.
4- If you have any event defined in your precompile, review the generated event.go file and set your event gas costs. You should also emit your event in your function in the contract.go file.
5- Set gas costs in generated contract.go
6- Force import your precompile package in precompile/registry/registry.go
7- Add your config unit tests under generated package config_test.go
8- Add your contract unit tests under generated package contract_test.go
9- Additionally you can add a full-fledged VM test for your precompile under plugin/vm/vm_test.go. See existing precompile tests for examples.
10- Add your solidity interface and test contract to contracts/contracts
11- Write solidity contract tests for your precompile in contracts/contracts/test
12- Write TypeScript DS-Test counterparts for your solidity tests in contracts/test
13- Create your genesis with your precompile enabled in tests/precompile/genesis/
14- Create e2e test for your solidity test in tests/precompile/solidity/suites.go
15- Run your e2e precompile Solidity tests with './scripts/run_ginkgo.sh`
```
Let's follow these steps and create our HelloWorld precompile.
For Precompile-EVM we don't need to put files under a deep directory structure. We can just generate the precompile template under its own directory via `--out ./helloworld` flag.
```bash
./scripts/generate_precompile.sh --abi ./contracts/abis/contracts_interfaces_IHelloWorld_sol_IHelloWorld.abi --type HelloWorld --pkg helloworld --out ./helloworld
```
This generates a precompile template files `contract.go`, `contract.abi`, `config.go`, `module.go`, `event.go` and `README.md` files. `README.md` explains general guidelines for precompile development. You should carefully read this file before modifying the precompile template.
```
There are some must-be-done changes waiting in the generated file. Each area requiring you to add your code is marked with CUSTOM CODE to make them easy to find and modify.
Additionally there are other files you need to edit to activate your precompile.
These areas are highlighted with comments "ADD YOUR PRECOMPILE HERE".
For testing take a look at other precompile tests in contract_test.go and config_test.go in other precompile folders.
General guidelines for precompile development:
1- Set a suitable config key in generated module.go. E.g: "yourPrecompileConfig"
2- Read the comment and set a suitable contract address in generated module.go. E.g:
ContractAddress = common.HexToAddress("ASUITABLEHEXADDRESS")
3- It is recommended to only modify code in the highlighted areas marked with "CUSTOM CODE STARTS HERE". Typically, custom codes are required in only those areas.
Modifying code outside of these areas should be done with caution and with a deep understanding of how these changes may impact the EVM.
4- If you have any event defined in your precompile, review the generated event.go file and set your event gas costs. You should also emit your event in your function in the contract.go file.
5- Set gas costs in generated contract.go
6- Force import your precompile package in precompile/registry/registry.go
7- Add your config unit tests under generated package config_test.go
8- Add your contract unit tests under generated package contract_test.go
9- Additionally you can add a full-fledged VM test for your precompile under plugin/vm/vm_test.go. See existing precompile tests for examples.
10- Add your solidity interface and test contract to contracts/contracts
11- Write solidity contract tests for your precompile in contracts/contracts/test
12- Write TypeScript DS-Test counterparts for your solidity tests in contracts/test
13- Create your genesis with your precompile enabled in tests/precompile/genesis/
14- Create e2e test for your solidity test in tests/precompile/solidity/suites.go
15- Run your e2e precompile Solidity tests with './scripts/run_ginkgo.sh`
```
Let's follow these steps and create our HelloWorld precompile!
# Defining Your Precompile (/docs/virtual-machines/custom-precompiles/defining-precompile)
---
title: Defining Your Precompile
description: Now that we have autogenerated the template code required for our precompile, let's actually write the logic for the precompile itself.
---
## Setting Config Key
Let's jump to `helloworld/module.go` file first. This file contains the module definition for our precompile. You can see the `ConfigKey` is set to some default value of `helloWorldConfig`. This key should be unique to the precompile.
This config key determines which JSON key to use when reading the precompile's config from the JSON upgrade/genesis file. In this case, the config key is `helloWorldConfig` and the JSON config should look like this:
```json
{
"helloWorldConfig": {
"blockTimestamp": 0
...
}
}
```
## Setting Contract Address
In the `helloworld/module.go` you can see the `ContractAddress` is set to some default value. This should be changed to a suitable address for your precompile. The address should be unique to the precompile. There is a registry of precompile addresses under [`precompile/registry/registry.go`](https://github.com/ava-labs/subnet-evm/blob/helloworld-official-tutorial-v2/precompile/registry/registry.go).
A list of addresses is specified in the comments under this file. Modify the default value to be the next user available stateful precompile address. For forks of Subnet-EVM or Precompile-EVM, users should start at `0x0300000000000000000000000000000000000000` to ensure that their own modifications do not conflict with stateful precompiles that may be added to Subnet-EVM in the future. You should pick an address that is not already taken.
```go title="helloworld/module.go"
// This list is kept just for reference. The actual addresses defined in respective packages of precompiles.
// Note: it is important that none of these addresses conflict with each other or any other precompiles
// in core/vm/contracts.go.
// The first stateful precompiles were added in coreth to support nativeAssetCall and nativeAssetBalance. New stateful precompiles
// originating in coreth will continue at this prefix, so we reserve this range in subnet-evm so that they can be migrated into
// subnet-evm without issue.
// These start at the address: 0x0100000000000000000000000000000000000000 and will increment by 1.
// Optional precompiles implemented in subnet-evm start at 0x0200000000000000000000000000000000000000 and will increment by 1
// from here to reduce the risk of conflicts.
// For forks of subnet-evm, users should start at 0x0300000000000000000000000000000000000000 to ensure
// that their own modifications do not conflict with stateful precompiles that may be added to subnet-evm
// in the future.
// ContractDeployerAllowListAddress = common.HexToAddress("0x0200000000000000000000000000000000000000")
// ContractNativeMinterAddress = common.HexToAddress("0x0200000000000000000000000000000000000001")
// TxAllowListAddress = common.HexToAddress("0x0200000000000000000000000000000000000002")
// FeeManagerAddress = common.HexToAddress("0x0200000000000000000000000000000000000003")
// RewardManagerAddress = common.HexToAddress("0x0200000000000000000000000000000000000004")
// HelloWorldAddress = common.HexToAddress("0x0300000000000000000000000000000000000000")
// ADD YOUR PRECOMPILE HERE
// {YourPrecompile}Address = common.HexToAddress("0x03000000000000000000000000000000000000??")
```
Don't forget to update the actual variable `ContractAddress` in `module.go` to the address you chose. It should look like this:
```go title="helloworld/module.go"
// ContractAddress is the defined address of the precompile contract.
// This should be unique across all precompile contracts.
// See params/precompile_modules.go for registered precompile contracts and more information.
var ContractAddress = common.HexToAddress("0x0300000000000000000000000000000000000000")
```
Now when Subnet-EVM sees the `helloworld.ContractAddress` as input when executing [`CALL`](https://github.com/ava-labs/subnet-evm/blob/helloworld-official-tutorial-v2/core/vm/evm.go#L251), [`CALLCODE`](https://github.com/ava-labs/subnet-evm/blob/helloworld-official-tutorial-v2/core/vm/evm.go#L341), [`DELEGATECALL`](https://github.com/ava-labs/subnet-evm/blob/helloworld-official-tutorial-v2/core/vm/evm.go#L392), [`STATICCALL`](https://github.com/ava-labs/subnet-evm/blob/helloworld-official-tutorial-v2/core/vm/evm.go#L435), it can run the precompile if the precompile is enabled.
## Adding Custom Code
Search (`CTRL F`) throughout the file with `CUSTOM CODE STARTS HERE` to find the areas in the precompile package that you need to modify. You should start with the reference imports code block.
### Module File
The module file contains fundamental information about the precompile. This includes the key for the precompile, the address of the precompile, and a configurator. This file is located at [`./precompile/helloworld/module.go`](https://github.com/ava-labs/subnet-evm/blob/helloworld-official-tutorial-v2/precompile/contracts/helloworld/module.go) for Subnet-EVM and [./helloworld/module.go](https://github.com/ava-labs/precompile-evm/blob/hello-world-example/helloworld/module.go) for Precompile-EVM.
This file defines the module for the precompile. The module is used to register the precompile to the precompile registry. The precompile registry is used to read configs and enable the precompile. Registration is done in the `init()` function of the module file. `MakeConfig()` is used to create a new instance for the precompile config. This will be used in custom Unmarshal/Marshal logic. You don't need to override these functions.
#### Configure()
Module file contains a `configurator` which implements the `contract.Configurator` interface. This interface includes a `Configure()` function used to configure the precompile and set the initial state of the precompile. This function is called when the precompile is enabled. This is typically used to read from a given config in upgrade/genesis JSON and sets the initial state of the precompile accordingly. This function also calls `AllowListConfig.Configure()` to invoke AllowList configuration as the last step. You should keep it as it is if you want to use AllowList. You can modify this function for your custom logic. You can circle back to this function later after you have finalized the implementation of the precompile config.
### Config File
The config file contains the config for the precompile. This file is located at [`./precompile/helloworld/config.go`](https://github.com/ava-labs/subnet-evm/blob/helloworld-official-tutorial-v2/precompile/contracts/helloworld/config.go) for Subnet-EVM and [./helloworld/config.go](https://github.com/ava-labs/precompile-evm/blob/hello-world-example/helloworld/config.go) for Precompile-EVM. This file contains the `Config` struct, which implements `precompileconfig.Config` interface. It has some embedded structs like `precompileconfig.Upgrade`. `Upgrade` is used to enable upgrades for the precompile. It contains the `BlockTimestamp` and `Disable` to enable/disable upgrades. `BlockTimestamp` is the timestamp of the block when the upgrade will be activated. `Disable` is used to disable the upgrade. If you use `AllowList` for the precompile, there is also `allowlist.AllowListConfig` embedded in the `Config` struct. `AllowListConfig` is used to specify initial roles for specified addresses. If you have any custom fields in your precompile config, you can add them here. These custom fields will be read from upgrade/genesis JSON and set in the precompile config.
```go title="precompile/helloworld/config.go"
// Config implements the precompileconfig.Config interface and
// adds specific configuration for HelloWorld.
type Config struct {
allowlist.AllowListConfig
precompileconfig.Upgrade
}
```
#### Verify()
`Verify()` is called on startup and an error is treated as fatal. Generated code contains a call to `AllowListConfig.Verify()` to verify the `AllowListConfig`. You can leave that as is and start adding your own custom verify code after that.
We can leave this function as is right now because there is no invalid custom configuration for the `Config`.
```go title="precompile/helloworld/config.go"
// Verify tries to verify Config and returns an error accordingly.
func (c *Config) Verify() error {
// Verify AllowList first
if err := c.AllowListConfig.Verify(); err != nil {
return err
}
// CUSTOM CODE STARTS HERE
// Add your own custom verify code for Config here
// and return an error accordingly
return nil
}
```
#### Equal()
Next, we see is `Equal()`. This function determines if two precompile configs are equal. This is used to determine if the precompile needs to be upgraded. There is some default code that is generated for checking `Upgrade` and `AllowListConfig` equality.
```go title="precompile/helloworld/config.go"
// Equal returns true if [s] is a [*Config] and it has been configured identical to [c].
func (c *Config) Equal(s precompileconfig.Config) bool {
// typecast before comparison
other, ok := (s).(*Config)
if !ok {
return false
}
// CUSTOM CODE STARTS HERE
// modify this boolean accordingly with your custom Config, to check if [other] and the current [c] are equal
// if Config contains only Upgrade and AllowListConfig you can skip modifying it.
equals := c.Upgrade.Equal(&other.Upgrade) && c.AllowListConfig.Equal(&other.AllowListConfig)
return equals
}
```
We can leave this function as is since we check `Upgrade` and `AllowListConfig` for equality which are the only fields that `Config` struct has.
### Modify Configure()
We can now circle back to `Configure()` in `module.go` as we finished implementing `Config` struct. This function configures the `state` with the initial configuration at`blockTimestamp` when the precompile is enabled.
In the HelloWorld example, we want to set up a default key-value mapping in the state where the key is `storageKey` and the value is `Hello World!`. The `StateDB` allows us to store a key-value mapping of 32-byte hashes. The below code snippet can be copied and pasted to overwrite the default `Configure()` code.
```go title="precompile/helloworld/module.go"
const defaultGreeting = "Hello World!"
// Configure configures [state] with the given [cfg] precompileconfig.
// This function is called by the EVM once per precompile contract activation.
// You can use this function to set up your precompile contract's initial state,
// by using the [cfg] config and [state] stateDB.
func (*configurator) Configure(chainConfig contract.ChainConfig, cfg precompileconfig.Config, state contract.StateDB, _ contract.BlockContext) error {
config, ok := cfg.(*Config)
if !ok {
return fmt.Errorf("incorrect config %T: %v", config, config)
}
// CUSTOM CODE STARTS HERE
// This will be called in the first block where HelloWorld stateful precompile is enabled.
// 1) If BlockTimestamp is nil, this will not be called
// 2) If BlockTimestamp is 0, this will be called while setting up the genesis block
// 3) If BlockTimestamp is 1000, this will be called while processing the first block
// whose timestamp is >= 1000
//
// Set the initial value under [common.BytesToHash([]byte("storageKey")] to "Hello World!"
StoreGreeting(state, defaultGreeting)
// AllowList is activated for this precompile. Configuring allowlist addresses here.
return config.AllowListConfig.Configure(state, ContractAddress)
}
```
### Event File
The event file contains the events that the precompile can emit. This file is located at [`./precompile/helloworld/event.go`](https://github.com/ava-labs/subnet-evm/blob/helloworld-official-tutorial-v2/precompile/contracts/helloworld/event.go) for Subnet-EVM and [./helloworld/event.go](https://github.com/ava-labs/precompile-evm/blob/hello-world-example/helloworld/event.go) for Precompile-EVM. The file begins with a comment about events and how they can be emitted:
```go title="precompile/helloworld/event.go"
/* NOTE: Events can only be emitted in state-changing functions. So you cannot use events in read-only (view) functions.
Events are generally emitted at the end of a state-changing function with AddLog method of the StateDB. The AddLog method takes 4 arguments:
1. Address of the contract that emitted the event.
2. Topic hashes of the event.
3. Encoded non-indexed data of the event.
4. Block number at which the event was emitted.
The first argument is the address of the contract that emitted the event.
Topics can be at most 4 elements, the first topic is the hash of the event signature and the rest are the indexed event arguments. There can be at most 3 indexed arguments.
Topics cannot be fully unpacked into their original values since they're 32-bytes hashes.
The non-indexed arguments are encoded using the ABI encoding scheme. The non-indexed arguments can be unpacked into their original values.
Before packing the event, you need to calculate the gas cost of the event. The gas cost of an event is the base gas cost + the gas cost of the topics + the gas cost of the non-indexed data.
See Get{EvetName}EventGasCost functions for more details.
You can use the following code to emit an event in your state-changing precompile functions (generated packer might be different):*/
topics, data, err := PackMyEvent(
topic1,
topic2,
data1,
data2,
)
if err != nil {
return nil, remainingGas, err
}
accessibleState.GetStateDB().AddLog(&types.Log{
Address: ContractAddress,
Topics: topics,
Data: data,
BlockNumber: accessibleState.GetBlockContext().Number().Uint64(),
})
```
```go title="precompile/helloworld/event.go"
/* NOTE: Events can only be emitted in state-changing functions. So you cannot use events in read-only (view) functions.
Events are generally emitted at the end of a state-changing function with AddLog method of the StateDB. The AddLog method takes 4 arguments:
1. Address of the contract that emitted the event.
2. Topic hashes of the event.
3. Encoded non-indexed data of the event.
4. Block number at which the event was emitted.
The first argument is the address of the contract that emitted the event.
Topics can be at most 4 elements, the first topic is the hash of the event signature and the rest are the indexed event arguments. There can be at most 3 indexed arguments.
Topics cannot be fully unpacked into their original values since they're 32-bytes hashes.
The non-indexed arguments are encoded using the ABI encoding scheme. The non-indexed arguments can be unpacked into their original values.
Before packing the event, you need to calculate the gas cost of the event. The gas cost of an event is the base gas cost + the gas cost of the topics + the gas cost of the non-indexed data.
See Get{EvetName}EventGasCost functions for more details.
You can use the following code to emit an event in your state-changing precompile functions (generated packer might be different):*/
topics, data, err := PackMyEvent(
topic1,
topic2,
data1,
data2,
)
if err != nil {
return nil, remainingGas, err
}
accessibleState.GetStateDB().AddLog(
ContractAddress,
topics,
data,
accessibleState.GetBlockContext().Number().Uint64(),
)
```
In this file you should set your event's gas cost and implement the `Get{EventName}EventGasCost` function. This function should take the data you want to emit and calculate the gas cost. In this example we defined our event as follow, and plan to emit it in the `setGreeting` function:
```go
event GreetingChanged(address indexed sender, string oldGreeting, string newGreeting);
```
We used arbitrary strings as non-indexed event data, remind that each emitted event is stored on chain, thus charging right amount is critical. We calculated gas cost according to the length of the string to make sure we're charging right amount of gas. If you're sure that you're dealing with a fixed length data, you can use a fixed gas cost for your event. We will show how events can be emitted under the Contract File section.
### Contract File
The contract file contains the functions of the precompile contract that will be called by the EVM. The file is located at [`./precompile/helloworld/contract.go`](https://github.com/ava-labs/subnet-evm/blob/helloworld-official-tutorial-v2/precompile/contracts/helloworld/contract.go) for Subnet-EVM and [./helloworld/contract.go](https://github.com/ava-labs/precompile-evm/blob/hello-world-example/helloworld/contract.go) for Precompile-EVM. Since we use `IAllowList` interface there will be auto-generated code for `AllowList` functions like below:
```go title="precompile/helloworld/contract.go"
// GetHelloWorldAllowListStatus returns the role of [address] for the HelloWorld list.
func GetHelloWorldAllowListStatus(stateDB contract.StateDB, address common.Address) allowlist.Role {
return allowlist.GetAllowListStatus(stateDB, ContractAddress, address)
}
// SetHelloWorldAllowListStatus sets the permissions of [address] to [role] for the
// HelloWorld list. Assumes [role] has already been verified as valid.
// This stores the [role] in the contract storage with address [ContractAddress]
// and [address] hash. It means that any reusage of the [address] key for different value
// conflicts with the same slot [role] is stored.
// Precompile implementations must use a different key than [address] for their storage.
func SetHelloWorldAllowListStatus(stateDB contract.StateDB, address common.Address, role allowlist.Role) {
allowlist.SetAllowListRole(stateDB, ContractAddress, address, role)
}
```
These will be helpful to use AllowList precompile helper in our functions.
#### Packers and Unpackers
There are also auto-generated Packers and Unpackers for the ABI. These will be used in `sayHello` and `setGreeting` functions to comfort the ABI. These functions are auto-generated and will be used in necessary places accordingly. You don't need to worry about how to deal with them, but it's good to know what they are.
Note: There were few changes to precompile packers with Durango. In this example we assumed that the HelloWorld precompile contract has been deployed before Durango. We need to activate this condition only after Durango. If this is a new precompile and never deployed before Durango, you can activate it immediately by removing the if condition.
Each input to a precompile contract function has it's own `Unpacker` function as follows (if deployed before Durango):
```go title="precompile/helloworld/contract.go"
// UnpackSetGreetingInput attempts to unpack [input] into the string type argument
// assumes that [input] does not include selector (omits first 4 func signature bytes)
// if [useStrictMode] is true, it will return an error if the length of [input] is not [common.HashLength]
func UnpackSetGreetingInput(input []byte, useStrictMode bool) (string, error) {
// Initially we had this check to ensure that the input was the correct length.
// However solidity does not always pack the input to the correct length, and allows
// for extra padding bytes to be added to the end of the input. Therefore, we have removed
// this check with the Durango. We still need to keep this check for backwards compatibility.
if useStrictMode && len(input) > common.HashLength {
return "", ErrInputExceedsLimit
}
res, err := HelloWorldABI.UnpackInput("setGreeting", input, useStrictMode)
if err != nil {
return "", err
}
unpacked := *abi.ConvertType(res[0], new(string)).(*string)
return unpacked, nil
}
```
If this is a new precompile that will be deployed after Durango, you can skip strict mode handling and use false:
```go title="precompile/helloworld/contract.go"
func UnpackSetGreetingInput(input []byte) (string, error) {
res, err := HelloWorldABI.UnpackInput("setGreeting", input, false)
if err != nil {
return "", err
}
unpacked := *abi.ConvertType(res[0], new(string)).(*string)
return unpacked, nil
}
```
The ABI is a binary format and the input to the precompile contract function is a byte array. The `Unpacker` function converts this input to a more easy-to-use format so that we can use it in our function.
Similarly, there is a `Packer` function for each output of a precompile contract function as follows:
```go title="precompile/helloworld/contract.go"
// PackSayHelloOutput attempts to pack given result of type string
// to conform the ABI outputs.
func PackSayHelloOutput(result string) ([]byte, error) {
return HelloWorldABI.PackOutput("sayHello", result)
}
```
This function converts the output of the function to a byte array that conforms to the ABI and can be returned to the EVM as a result.
#### Modify sayHello()
The next place to modify is in our `sayHello()` function. In a previous step, we created the `IHelloWorld.sol` interface with two functions `sayHello()` and `setGreeting()`. We finally get to implement them here. If any contract calls these functions from the interface, the below function gets executed. This function is a simple getter function.
In `Configure()` we set up a mapping with the key as `storageKey` and the value as `Hello World!`. In this function, we will be returning whatever value is at `storageKey`. The below code snippet can be copied and pasted to overwrite the default `setGreeting` code.
First, we add a helper function to get the greeting value from the stateDB, this will be helpful when we test our contract. We will use the `storageKeyHash` to store the value in the Contract's reserved storage in the stateDB.
```go title="precompile/helloworld/contract.go"
var (
// storageKeyHash is the hash of the storage key "storageKey" in the contract storage.
// This is used to store the value of the greeting in the contract storage.
// It is important to use a unique key here to avoid conflicts with other storage keys
// like addresses, AllowList, etc.
storageKeyHash = common.BytesToHash([]byte("storageKey"))
)
// GetGreeting returns the value of the storage key "storageKey" in the contract storage,
// with leading zeroes trimmed.
// This function is mostly used for tests.
func GetGreeting(stateDB contract.StateDB) string {
// Get the value set at recipient
value := stateDB.GetState(ContractAddress, storageKeyHash)
return string(common.TrimLeftZeroes(value.Bytes()))
}
```
Now we can modify the `sayHello` function to return the stored value.
```go title="precompile/helloworld/contract.go"
func sayHello(accessibleState contract.AccessibleState, caller common.Address, addr common.Address, input []byte, suppliedGas uint64, readOnly bool) (ret []byte, remainingGas uint64, err error) {
if remainingGas, err = contract.DeductGas(suppliedGas, SayHelloGasCost); err != nil {
return nil, 0, err
}
// CUSTOM CODE STARTS HERE
// Get the current state
currentState := accessibleState.GetStateDB()
// Get the value set at recipient
value := GetGreeting(currentState)
packedOutput, err := PackSayHelloOutput(value)
if err != nil {
return nil, remainingGas, err
}
// Return the packed output and the remaining gas
return packedOutput, remainingGas, nil
}
```
#### Modify setGreeting()
`setGreeting()` function is a simple setter function. It takes in `input` and we will set that as the value in the state mapping with the key as `storageKey`. It also checks if the VM running the precompile is in read-only mode. If it is, it returns an error. At the end of a successful execution, it will emit `GreetingChanged` event.
There is also a generated `AllowList` code in that function. This generated code checks if the caller address is eligible to perform this state-changing operation. If not, it returns an error.
Let's add the helper function to set the greeting value in the stateDB, this will be helpful when we test our contract.
```go title="precompile/helloworld/contract.go"
// StoreGreeting sets the value of the storage key "storageKey" in the contract storage.
func StoreGreeting(stateDB contract.StateDB, input string) {
inputPadded := common.LeftPadBytes([]byte(input), common.HashLength)
inputHash := common.BytesToHash(inputPadded)
stateDB.SetState(ContractAddress, storageKeyHash, inputHash)
}
```
The below code snippet can be copied and pasted to overwrite the default `setGreeting()` code.
```go title="precompile/helloworld/contract.go"
func setGreeting(accessibleState contract.AccessibleState, caller common.Address, addr common.Address, input []byte, suppliedGas uint64, readOnly bool) (ret []byte, remainingGas uint64, err error) {
if remainingGas, err = contract.DeductGas(suppliedGas, SetGreetingGasCost); err != nil {
return nil, 0, err
}
if readOnly {
return nil, remainingGas, vmerrs.ErrWriteProtection
}
// do not use strict mode after Durango
useStrictMode := !contract.IsDurangoActivated(accessibleState)
// attempts to unpack [input] into the arguments to the SetGreetingInput.
// Assumes that [input] does not include selector
// You can use unpacked [inputStruct] variable in your code
inputStruct, err := UnpackSetGreetingInput(input, useStrictMode)
if err != nil {
return nil, remainingGas, err
}
// Allow list is enabled and SetGreeting is a state-changer function.
// This part of the code restricts the function to be called only by enabled/admin addresses in the allow list.
// You can modify/delete this code if you don't want this function to be restricted by the allow list.
stateDB := accessibleState.GetStateDB()
// Verify that the caller is in the allow list and therefore has the right to call this function.
callerStatus := allowlist.GetAllowListStatus(stateDB, ContractAddress, caller)
if !callerStatus.IsEnabled() {
return nil, remainingGas, fmt.Errorf("%w: %s", ErrCannotSetGreeting, caller)
}
// allow list code ends here.
// CUSTOM CODE STARTS HERE
// With Durango, you can emit an event in your state-changing precompile functions.
// Note: If you have been using the precompile before Durango, you should activate it only after Durango.
// Activating this code before Durango will result in a consensus failure.
// If this is a new precompile and never deployed before Durango, you can activate it immediately by removing
// the if condition.
// We will first read the old greeting. So we should charge the gas for reading the storage.
if remainingGas, err = contract.DeductGas(remainingGas, contract.ReadGasCostPerSlot); err != nil {
return nil, 0, err
}
oldGreeting := GetGreeting(stateDB)
eventData := GreetingChangedEventData{
OldGreeting: oldGreeting,
NewGreeting: inputStruct,
}
topics, data, err := PackGreetingChangedEvent(caller, eventData)
if err != nil {
return nil, remainingGas, err
}
// Charge the gas for emitting the event.
eventGasCost := GetGreetingChangedEventGasCost(eventData)
if remainingGas, err = contract.DeductGas(remainingGas, eventGasCost); err != nil {
return nil, 0, err
}
// Emit the event
stateDB.AddLog(&types.Log{
Address: ContractAddress,
Topics: topics,
Data: data,
BlockNumber: accessibleState.GetBlockContext().Number().Uint64(),
})
// setGreeting is the execution function
// "SetGreeting(name string)" and sets the storageKey
// in the string returned by hello world
StoreGreeting(stateDB, inputStruct)
// This function does not return an output, leave this one as is
packedOutput := []byte{}
// Return the packed output and the remaining gas
return packedOutput, remainingGas, nil
}
```
Precompile events introduced with Durango. In this example we assumed that the `HelloWorld` precompile contract has been deployed before Durango.
If this is a new precompile and it will be deployed after Durango, you can activate it immediately by removing the Durango if condition (`contract.IsDurangoActivated(accessibleState)`).
### Setting Gas Costs
Setting gas costs for functions is very important and should be done carefully. If the gas costs are set too low, then functions can be abused and can cause DoS attacks. If the gas costs are set too high, then the contract will be too expensive to run.
Subnet-EVM has some predefined gas costs for write and read operations in [`precompile/contract/utils.go`](https://github.com/ava-labs/subnet-evm/blob/helloworld-official-tutorial-v2/precompile/contract/utils.go#L19-L20). In order to provide a baseline for gas costs, we have set the following gas costs.
```go title="precompile/contract/utils.go"
// Gas costs for stateful precompiles
const (
WriteGasCostPerSlot = 20_000
ReadGasCostPerSlot = 5_000
)
```
- `WriteGasCostPerSlot` is the cost of one write such as modifying a state storage slot.
- `ReadGasCostPerSlot` is the cost of reading a state storage slot.
This should be in your gas cost estimations based on how many times the precompile function does a read or a write. For example, if the precompile modifies the state slot of its precompile address twice then the gas cost for that function would be `40_000`. However, if the precompile does additional operations and requires more computational power, then you should increase the gas costs accordingly.
On top of these gas costs, we also have to account for the gas costs of AllowList gas costs. These are the gas costs of reading and writing permissions for addresses in AllowList. These are defined under Subnet-EVM's [`precompile/allowlist/allowlist.go`](https://github.com/ava-labs/subnet-evm/blob/helloworld-official-tutorial-v2/precompile/allowlist/allowlist.go#L28-L29).
By default, these are added to the default gas costs of the state-change functions (SetGreeting) of the precompile. Meaning that these functions will cost an additional `ReadAllowListGasCost` in order to read permissions from the storage. If you don't plan to read permissions from the storage then you can omit these.
Now going back to our `/helloworld/contract.go`, we can modify our precompile function gas costs. Please search (`CTRL F`) `SET A GAS COST HERE` to locate the default gas cost code.
```go title="helloworld/contract.go"
SayHelloGasCost uint64 = 0 // SET A GAS COST HERE
SetGreetingGasCost uint64 = 0 + allowlist.ReadAllowListGasCost // SET A GAS COST HERE
```
We get and set our greeting with `sayHello()` and `setGreeting()` in one slot respectively so we can define the gas costs as follows. We also read permissions from the AllowList in `setGreeting()` so we keep `allowlist.ReadAllowListGasCost`.
```go title="helloworld/contract.go"
SayHelloGasCost uint64 = contract.ReadGasCostPerSlot
SetGreetingGasCost uint64 = contract.WriteGasCostPerSlot + allowlist.ReadAllowListGasCost
```
## Registering Your Precompile
We should register our precompile package to the Subnet-EVM to be discovered by other packages. Our `Module` file contains an `init()` function that registers our precompile. `init()` is called when the package is imported. We should register our precompile in a common package so that it can be imported by other packages.
For Subnet-EVM we have a precompile registry under [`/precompile/registry/registry.go`](https://github.com/ava-labs/subnet-evm/blob/helloworld-official-tutorial-v2/precompile/registry/registry.go). This registry force-imports precompiles from other packages, for example:
```go title="precompile/registry/registry.go"
// Force imports of each precompile to ensure each precompile's init function runs and registers itself
// with the registry.
import (
_ "github.com/ava-labs/subnet-evm/precompile/contracts/deployerallowlist"
_ "github.com/ava-labs/subnet-evm/precompile/contracts/nativeminter"
_ "github.com/ava-labs/subnet-evm/precompile/contracts/txallowlist"
_ "github.com/ava-labs/subnet-evm/precompile/contracts/feemanager"
_ "github.com/ava-labs/subnet-evm/precompile/contracts/rewardmanager"
_ "github.com/ava-labs/subnet-evm/precompile/contracts/helloworld"
// ADD YOUR PRECOMPILE HERE
// _ "github.com/ava-labs/subnet-evm/precompile/contracts/yourprecompile"
)
```
The registry itself also force-imported by the [\`/plugin/evm/vm.go](https://github.com/ava-labs/subnet-evm/blob/helloworld-official-tutorial-v2/plugin/evm/vm.go#L50). This ensures that the registry is imported and the precompiles are registered.
For Precompile-EVM there is a `plugin/main.go` file in Precompile-EVM that orchestrates this precompile registration.
```go title="plugin/main.go"
// (c) 2019-2023, Ava Labs, Inc. All rights reserved.
// See the file LICENSE for licensing terms.
package main
import (
"fmt"
"github.com/ava-labs/avalanchego/version"
"github.com/ava-labs/subnet-evm/plugin/evm"
"github.com/ava-labs/subnet-evm/plugin/runner"
// Each precompile generated by the precompilegen tool has a self-registering init function
// that registers the precompile with the subnet-evm. Importing the precompile package here
// will cause the precompile to be registered with the subnet-evm.
_ "github.com/ava-labs/precompile-evm/helloworld"
// ADD YOUR PRECOMPILE HERE
//_ "github.com/ava-labs/precompile-evm/{yourprecompilepkg}"
)
```
# Writing Test Cases (/docs/virtual-machines/custom-precompiles/defining-test-cases)
---
title: Writing Test Cases
description: In this section, we will go over the different ways we can write test cases for our stateful precompile.
---
## Adding Config Tests
Precompile generation tool generates skeletons for unit tests as well. Generated config tests will be under [`./precompile/contracts/helloworld/config_test.go`](https://github.com/ava-labs/subnet-evm/blob/helloworld-official-tutorial-v2/precompile/contracts/helloworld/config_test.go) for Subnet-EVM and [`./helloworld/config_test.go`](https://github.com/ava-labs/precompile-evm/blob/hello-world-example/helloworld/config_test.go) for Precompile-EVM. There are mainly two functions we need to test: `Verify` and `Equal`. `Verify` checks if the precompile is configured correctly. `Equal` checks if the precompile is equal to another precompile. Generated `Verify` tests contain a valid case.
You can add more invalid cases depending on your implementation. `Equal` tests generate some invalid cases to test different timestamps, types, and AllowList cases. You can check each `config_test.go` files for other precompiles under the Subnet-EVM's [`./precompile/contracts`](https://github.com/ava-labs/subnet-evm/blob/helloworld-official-tutorial-v2/precompile/contracts/) directory for more examples.
## Adding Contract Tests
The tool also generates contract tests to make sure our precompile is working correctly. Generated tests include cases to test allow list capabilities, gas costs, and calling functions in read-only mode. You can check other `contract_test.go` files in the `/precompile/contracts`. Hello World contract tests will be under [`./precompile/contracts/helloworld/contract_test.go`](https://github.com/ava-labs/subnet-evm/blob/helloworld-official-tutorial-v2/precompile/contracts/helloworld/contract_test.go) for Subnet-EVM and [`./helloworld/contract_test.go`](https://github.com/ava-labs/precompile-evm/blob/hello-world-example/helloworld/contract_test.go) for Precompile-EVM.
We will also add more test to cover functionalities of `sayHello()` and `setGreeting()`. Contract tests are defined in a standard structure that each test can customize to their needs. The test structure is as follows:
```go
// PrecompileTest is a test case for a precompile
type PrecompileTest struct {
// Caller is the address of the precompile caller
Caller common.Address
// Input the raw input bytes to the precompile
Input []byte
// InputFn is a function that returns the raw input bytes to the precompile
// If specified, Input will be ignored.
InputFn func(t *testing.T) []byte
// SuppliedGas is the amount of gas supplied to the precompile
SuppliedGas uint64
// ReadOnly is whether the precompile should be called in read only
// mode. If true, the precompile should not modify the state.
ReadOnly bool
// Config is the config to use for the precompile
// It should be the same precompile config that is used in the
// precompile's configurator.
// If nil, Configure will not be called.
Config precompileconfig.Config
// BeforeHook is called before the precompile is called.
BeforeHook func(t *testing.T, state contract.StateDB)
// AfterHook is called after the precompile is called.
AfterHook func(t *testing.T, state contract.StateDB)
// ExpectedRes is the expected raw byte result returned by the precompile
ExpectedRes []byte
// ExpectedErr is the expected error returned by the precompile
ExpectedErr string
// BlockNumber is the block number to use for the precompile's block context
BlockNumber int64
}
```
Each test can populate the fields of the `PrecompileTest` struct to customize the test. This test uses an AllowList helper function `allowlist.RunPrecompileWithAllowListTests(t, Module, state.NewTestStateDB, tests)` which can run all specified tests plus AllowList test suites. If you don't plan to use AllowList, you can directly run them as follows:
```go
for name, test := range tests {
t.Run(name, func(t *testing.T) {
test.Run(t, module, newStateDB(t))
})
}
```
## Adding VM Tests (Optional)
This is only applicable for direct Subnet-EVM forks as test files are not directly exported in Golang. If you use Precompile-EVM you can skip this step.
VM tests are tests that run the precompile by calling it through the Subnet-EVM. These are the most comprehensive tests that we can run. If your precompile modifies how the Subnet-EVM works, for example changing blockchain rules, you should add a VM test. For example, you can take a look at the `TestRewardManagerPrecompileSetRewardAddress` function in [here](https://github.com/ava-labs/subnet-evm/blob/helloworld-official-tutorial-v2/plugin/evm/vm_test.go#L2772).
For this Hello World example, we don't modify any Subnet-EVM rules, so we don't need to add any VM tests.
## Adding Solidity Test Contracts
Let's add our test contract to `./contracts/contracts`. This smart contract lets us interact with our precompile! We cast the `HelloWorld` precompile address to the `IHelloWorld` interface. In doing so, `helloWorld` is now a contract of type `IHelloWorld` and when we call any functions on that contract, we will be redirected to the HelloWorld precompile address.
The below code snippet can be copied and pasted into a new file called `ExampleHelloWorld.sol`:
```go
//SPDX-License-Identifier: MIT
pragma solidity ^0.8.0;
import "./IHelloWorld.sol";
// ExampleHelloWorld shows how the HelloWorld precompile can be used in a smart contract.
contract ExampleHelloWorld {
address constant HELLO_WORLD_ADDRESS =
0x0300000000000000000000000000000000000000;
IHelloWorld helloWorld = IHelloWorld(HELLO_WORLD_ADDRESS);
function sayHello() public view returns (string memory) {
return helloWorld.sayHello();
}
function setGreeting(string calldata greeting) public {
helloWorld.setGreeting(greeting);
}
}
```
Hello World Precompile is a different contract than ExampleHelloWorld and has a different address. Since the precompile uses AllowList for a permissioned access, any call to the precompile including from ExampleHelloWorld will be denied unless the caller is added to the AllowList.
Please note that this contract is simply a wrapper and is calling the precompile functions. The reason why we add another example smart contract is to have a simpler stateless tests.
For the test contract we write our test in `./contracts/test/ExampleHelloWorldTest.sol`.
```solidity
//SPDX-License-Identifier: MIT
pragma solidity ^0.8.0;
import "../ExampleHelloWorld.sol";
import "../interfaces/IHelloWorld.sol";
import "./AllowListTest.sol";
contract ExampleHelloWorldTest is AllowListTest {
IHelloWorld helloWorld = IHelloWorld(HELLO_WORLD_ADDRESS);
function step_getDefaultHelloWorld() public {
ExampleHelloWorld example = new ExampleHelloWorld();
address exampleAddress = address(example);
assertRole(helloWorld.readAllowList(exampleAddress), AllowList.Role.None);
assertEq(example.sayHello(), "Hello World!");
}
function step_doesNotSetGreetingBeforeEnabled() public {
ExampleHelloWorld example = new ExampleHelloWorld();
address exampleAddress = address(example);
assertRole(helloWorld.readAllowList(exampleAddress), AllowList.Role.None);
try example.setGreeting("testing") {
assertTrue(false, "setGreeting should fail");
} catch {}
}
function step_setAndGetGreeting() public {
ExampleHelloWorld example = new ExampleHelloWorld();
address exampleAddress = address(example);
assertRole(helloWorld.readAllowList(exampleAddress), AllowList.Role.None);
helloWorld.setEnabled(exampleAddress);
assertRole(
helloWorld.readAllowList(exampleAddress),
AllowList.Role.Enabled
);
string memory greeting = "testgreeting";
example.setGreeting(greeting);
assertEq(example.sayHello(), greeting);
}
}
```
For Precompile-EVM, you should import AllowListTest with `@avalabs/subnet-evm-contracts` NPM package:
```solidity
//SPDX-License-Identifier: MIT
pragma solidity ^0.8.0;
import "../ExampleHelloWorld.sol";
import "../interfaces/IHelloWorld.sol";
import "@avalabs/subnet-evm-contracts/contracts/test/AllowListTest.sol";
contract ExampleHelloWorldTest is AllowListTest {
IHelloWorld helloWorld = IHelloWorld(HELLO_WORLD_ADDRESS);
function step_getDefaultHelloWorld() public {
ExampleHelloWorld example = new ExampleHelloWorld();
address exampleAddress = address(example);
assertRole(helloWorld.readAllowList(exampleAddress), AllowList.Role.None);
assertEq(example.sayHello(), "Hello World!");
}
function step_doesNotSetGreetingBeforeEnabled() public {
ExampleHelloWorld example = new ExampleHelloWorld();
address exampleAddress = address(example);
assertRole(helloWorld.readAllowList(exampleAddress), AllowList.Role.None);
try example.setGreeting("testing") {
assertTrue(false, "setGreeting should fail");
} catch {}
}
function step_setAndGetGreeting() public {
ExampleHelloWorld example = new ExampleHelloWorld();
address exampleAddress = address(example);
assertRole(helloWorld.readAllowList(exampleAddress), AllowList.Role.None);
helloWorld.setEnabled(exampleAddress);
assertRole(
helloWorld.readAllowList(exampleAddress),
AllowList.Role.Enabled
);
string memory greeting = "testgreeting";
example.setGreeting(greeting);
assertEq(example.sayHello(), greeting);
}
}
```
## Adding DS-Test Case
We can now trigger this test contract via `hardhat` tests. The test script uses Subnet-EVM's `test` framework test in `./contracts/test`. You can find more information about the test framework [here](https://github.com/ava-labs/subnet-evm/blob/helloworld-official-tutorial-v2/contracts/test/utils.ts). We also can test the events emitted by the precompile. The test script looks like this:
The test script looks like this:
```go
// (c) 2019-2022, Ava Labs, Inc. All rights reserved.
// See the file LICENSE for licensing terms.
import { expect } from "chai";
import { SignerWithAddress } from "@nomiclabs/hardhat-ethers/signers";
import { Contract } from "ethers";
import { ethers } from "hardhat";
import { test } from "./utils";
// make sure this is always an admin for hello world precompile
const ADMIN_ADDRESS = "0x8db97C7cEcE249c2b98bDC0226Cc4C2A57BF52FC";
const HELLO_WORLD_ADDRESS = "0x0300000000000000000000000000000000000000";
describe("ExampleHelloWorldTest", function () {
this.timeout("30s");
beforeEach("Setup DS-Test contract", async function () {
const signer = await ethers.getSigner(ADMIN_ADDRESS);
const helloWorldPromise = ethers.getContractAt(
"IHelloWorld",
HELLO_WORLD_ADDRESS,
signer
);
return ethers
.getContractFactory("ExampleHelloWorldTest", { signer })
.then((factory) => factory.deploy())
.then((contract) => {
this.testContract = contract;
return contract.deployed().then(() => contract);
})
.then(() => Promise.all([helloWorldPromise]))
.then(([helloWorld]) => helloWorld.setAdmin(this.testContract.address))
.then((tx) => tx.wait());
});
test("should gets default hello world", ["step_getDefaultHelloWorld"]);
test(
"should not set greeting before enabled",
"step_doesNotSetGreetingBeforeEnabled"
);
test(
"should set and get greeting with enabled account",
"step_setAndGetGreeting"
);
});
describe("IHelloWorld events", function () {
let owner: SignerWithAddress;
let contract: Contract;
let defaultGreeting = "Hello, World!";
before(async function () {
owner = await ethers.getSigner(ADMIN_ADDRESS);
contract = await ethers.getContractAt(
"IHelloWorld",
HELLO_WORLD_ADDRESS,
owner
);
// reset greeting
let tx = await contract.setGreeting(defaultGreeting);
await tx.wait();
});
it("should emit GreetingChanged event", async function () {
let newGreeting = "helloprecompile";
await expect(contract.setGreeting(newGreeting))
.to.emit(contract, "GreetingChanged")
.withArgs(
owner.address,
// old greeting
defaultGreeting,
// new greeting
newGreeting
);
});
});
```
The test script looks like this:
```go
// (c) 2019-2022, Ava Labs, Inc. All rights reserved.
// See the file LICENSE for licensing terms.
import { expect } from "chai";
import { SignerWithAddress } from "@nomiclabs/hardhat-ethers/signers";
import { Contract } from "ethers";
import { ethers } from "hardhat";
import { test } from "@avalabs/subnet-evm-contracts";
// make sure this is always an admin for hello world precompile
const ADMIN_ADDRESS = "0x8db97C7cEcE249c2b98bDC0226Cc4C2A57BF52FC";
const HELLO_WORLD_ADDRESS = "0x0300000000000000000000000000000000000000";
describe("ExampleHelloWorldTest", function () {
this.timeout("30s");
beforeEach("Setup DS-Test contract", async function () {
const signer = await ethers.getSigner(ADMIN_ADDRESS);
const helloWorldPromise = ethers.getContractAt(
"IHelloWorld",
HELLO_WORLD_ADDRESS,
signer
);
return ethers
.getContractFactory("ExampleHelloWorldTest", { signer })
.then((factory) => factory.deploy())
.then((contract) => {
this.testContract = contract;
return contract.deployed().then(() => contract);
})
.then(() => Promise.all([helloWorldPromise]))
.then(([helloWorld]) => helloWorld.setAdmin(this.testContract.address))
.then((tx) => tx.wait());
});
test("should gets default hello world", ["step_getDefaultHelloWorld"]);
test(
"should not set greeting before enabled",
"step_doesNotSetGreetingBeforeEnabled"
);
test(
"should set and get greeting with enabled account",
"step_setAndGetGreeting"
);
});
describe("IHelloWorld events", function () {
let owner: SignerWithAddress;
let contract: Contract;
let defaultGreeting = "Hello, World!";
before(async function () {
owner = await ethers.getSigner(ADMIN_ADDRESS);
contract = await ethers.getContractAt(
"IHelloWorld",
HELLO_WORLD_ADDRESS,
owner
);
// reset greeting
let tx = await contract.setGreeting(defaultGreeting);
await tx.wait();
});
it("should emit GreetingChanged event", async function () {
let newGreeting = "helloprecompile";
await expect(contract.setGreeting(newGreeting))
.to.emit(contract, "GreetingChanged")
.withArgs(
owner.address,
// old greeting
defaultGreeting,
// new greeting
newGreeting
);
});
});
```
# Executing Test Cases (/docs/virtual-machines/custom-precompiles/executing-test-cases)
---
title: Executing Test Cases
description: In this section, we will go over how to be able to execute the test cases you wrote in the last section.
---
## Adding the Test Genesis File
To run our e2e contract tests, we will need to create an Avalanche L1 that has the `Hello World` precompile activated, so we will copy and paste the below genesis file into: `/tests/precompile/genesis/hello_world.json`.
Note: it's important that this has the same name as the HardHat test file we created previously.
```json
{
"config": {
"chainId": 99999,
"homesteadBlock": 0,
"eip150Block": 0,
"eip150Hash": "0x2086799aeebeae135c246c65021c82b4e15a2c451340993aacfd2751886514f0",
"eip155Block": 0,
"eip158Block": 0,
"byzantiumBlock": 0,
"constantinopleBlock": 0,
"petersburgBlock": 0,
"istanbulBlock": 0,
"muirGlacierBlock": 0,
"feeConfig": {
"gasLimit": 20000000,
"minBaseFee": 1000000000,
"targetGas": 100000000,
"baseFeeChangeDenominator": 48,
"minBlockGasCost": 0,
"maxBlockGasCost": 10000000,
"targetBlockRate": 2,
"blockGasCostStep": 500000
},
"helloWorldConfig": {
"blockTimestamp": 0,
"adminAddresses": ["0x8db97C7cEcE249c2b98bDC0226Cc4C2A57BF52FC"]
}
},
"alloc": {
"8db97C7cEcE249c2b98bDC0226Cc4C2A57BF52FC": {
"balance": "0x52B7D2DCC80CD2E4000000"
},
"0x0Fa8EA536Be85F32724D57A37758761B86416123": {
"balance": "0x52B7D2DCC80CD2E4000000"
}
},
"nonce": "0x0",
"timestamp": "0x66321C34",
"extraData": "0x00",
"gasLimit": "0x1312D00",
"difficulty": "0x0",
"mixHash": "0x0000000000000000000000000000000000000000000000000000000000000000",
"coinbase": "0x0000000000000000000000000000000000000000",
"number": "0x0",
"gasUsed": "0x0",
"parentHash": "0x0000000000000000000000000000000000000000000000000000000000000000"
}
```
Adding this to our genesis enables our HelloWorld precompile at the genesis block (0th block), with `0x8db97C7cEcE249c2b98bDC0226Cc4C2A57BF52FC` as the admin address.
```json
{
"helloWorldConfig": {
"blockTimestamp": 0,
"adminAddresses": ["0x8db97C7cEcE249c2b98bDC0226Cc4C2A57BF52FC"]
}
}
```
## Declaring the HardHat E2E Test
Now that we have declared the HardHat test and corresponding `genesis.json` file. The last step to running the e2e test is to declare the new test in `/tests/precompile/solidity/suites.go`.
At the bottom of the file you will see the following code commented out:
```go title="suites.go"
// ADD YOUR PRECOMPILE HERE
/*
ginkgo.It("your precompile", ginkgo.Label("Precompile"), ginkgo.Label("YourPrecompile"), func() {
ctx, cancel := context.WithTimeout(context.Background(), time.Minute)
defer cancel()
// Specify the name shared by the genesis file in ./tests/precompile/genesis/{your_precompile}.json
// and the test file in ./contracts/tests/{your_precompile}.ts
blockchainID := subnetsSuite.GetBlockchainID("{your_precompile}")
runDefaultHardhatTests(ctx, blockchainID, "{your_precompile}")
*/
```
`runDefaultHardhatTests` will run the default Hardhat test command and use the default genesis path. If you want to use a different test command and genesis path than the defaults, you can use the `utils.CreateSubnet` and `utils.RunTestCMD`. See how they were used with default params [here](https://github.com/ava-labs/subnet-evm/blob/helloworld-official-tutorial-v2/tests/utils/subnet.go#L113)
You should copy and paste the ginkgo `It` node and update from `{your_precompile}` to `hello_world`. The string passed in to `utils.RunDefaultHardhatTests(ctx, "your_precompile")` will be used to find both the HardHat test file to execute and the genesis file, which is why you need to use the same name for both.
After modifying the `It` node, it should look like the following (you can copy and paste this directly if you prefer):
```go
ginkgo.It("hello world", ginkgo.Label("Precompile"), ginkgo.Label("HelloWorld"), func() {
ctx, cancel := context.WithTimeout(context.Background(), time.Minute)
defer cancel()
blockchainID := subnetsSuite.GetBlockchainID("hello_world")
runDefaultHardhatTests(ctx, blockchainID, "hello_world")
})
```
Now that we've set up the new ginkgo test, we can run the ginkgo test that we want by using the `GINKGO_LABEL_FILTER`. This environment variable is passed as a flag to Ginkgo in `./scripts/run_ginkgo.sh` and restricts what tests will run to only the tests with a matching label.
## Running E2E Tests
Before we start testing, we will need to build the AvalancheGo binary and the custom Subnet-EVM binary.
Precompile-EVM bundles Subnet-EVM and runs it under the hood in the [`plugins/main.go`](https://github.com/ava-labs/precompile-evm/blob/hello-world-example/plugin/main.go#L24). Meaning that Precompile-EVM binary works the same way as Subnet-EVM binary. Precompile-EVM repo has also same scripts and the build process as Subnet-EVM. Following steps also apply to Precompile-EVM.
You should have cloned [AvalancheGo](https://github.com/ava-labs/avalanchego) within your `$GOPATH` in the [Background and Requirements](/docs/virtual-machines/custom-precompiles/background-requirements) section, so you can build AvalancheGo with the following command:
```bash
cd $GOPATH/src/github.com/ava-labs/avalanchego
./scripts/build.sh
```
Once you've built AvalancheGo, you can confirm that it was successful by printing the version:
```bash
./build/avalanchego --version
```
This should print something like the following (if you are running AvalancheGo v1.9.7):
```bash
avalanchego/1.11.0 [database=v1.4.5, rpcchainvm=33, commit=c60f7d2dd10c87f57382885b59d6fb2c763eded7, go=1.21.7]
```
This path will be used later as the environment variable `AVALANCHEGO_EXEC_PATH` in the network runner.
Please note that the RPCChainVM version of AvalancheGo and Subnet-EVM must match.
Once we've built AvalancheGo, we can navigate back to the repo and build the binary:
```bash
cd $GOPATH/src/github.com/ava-labs/subnet-evm
./scripts/build.sh
```
This will build the Subnet-EVM binary and place it in AvalancheGo's `build/plugins` directory by default at the file path: `$GOPATH/src/github.com/ava-labs/avalanchego/build/plugins/srEXiWaHuhNyGwPUi444Tu47ZEDwxTWrbQiuD7FmgSAQ6X7Dy`
To confirm that the Subnet-EVM binary is compatible with AvalancheGo, you can run the same version command and confirm the RPCChainVM version matches:
```bash
$GOPATH/src/github.com/ava-labs/avalanchego/build/plugins/srEXiWaHuhNyGwPUi444Tu47ZEDwxTWrbQiuD7FmgSAQ6X7Dy --version
```
This should give similar output:
```bash
Subnet-EVM/v0.6.1 [AvalancheGo=v1.11.1, rpcchainvm=33]
```
```bash
cd $GOPATH/src/github.com/ava-labs/precompile-evm
./scripts/build.sh
```
This will build the Precompile-EVM binary and place it in AvalancheGo's `build/plugins` directory by default at the file path: `$GOPATH/src/github.com/ava-labs/avalanchego/build/plugins/srEXiWaHuhNyGwPUi444Tu47ZEDwxTWrbQiuD7FmgSAQ6X7Dy`
To confirm that the Precompile-EVM binary is compatible with AvalancheGo, you can run the same version command and confirm the RPCChainVM version matches:
```bash
$GOPATH/src/github.com/ava-labs/avalanchego/build/plugins/srEXiWaHuhNyGwPUi444Tu47ZEDwxTWrbQiuD7FmgSAQ6X7Dy --version
```
This should give similar output:
```bash
Precompile-EVM/v0.2.0 Subnet-EVM/v0.6.1 [AvalancheGo=v1.11.1, rpcchainvm=33]
```
If the RPCChainVM Protocol version printed out does not match the one used in AvalancheGo then Subnet-EVM will not be able to talk to AvalancheGo and the blockchain will not start. You can find the compatibility table for AvalancheGo and Subnet-EVM [here](https://github.com/ava-labs/subnet-evm#avalanchego-compatibility).
The `build/plugins` directory will later be used as the `AVALANCHEGO_PLUGIN_PATH`.
### Running Ginkgo Tests
To run ONLY the HelloWorld precompile test, run the command:
```bash
cd $GOPATH/src/github.com/ava-labs/subnet-evm
```
```bash
cd $GOPATH/src/github.com/ava-labs/precompile-evm
```
use `GINKGO_LABEL_FILTER` env var to filter the test:
```bash
GINKGO_LABEL_FILTER=HelloWorld ./scripts/run_ginkgo.sh
```
You will first see the node starting up in the `BeforeSuite` section of the precompile test:
```bash
GINKGO_LABEL_FILTER=HelloWorld ./scripts/run_ginkgo.sh
# output
Using branch: hello-world-tutorial-walkthrough
building precompile.test
# github.com/ava-labs/subnet-evm/tests/precompile.test
ld: warning: could not create compact unwind for _blst_sha256_block_data_order: does not use RBP or RSP based frame
Compiled precompile.test
# github.com/ava-labs/subnet-evm/tests/load.test
ld: warning: could not create compact unwind for _blst_sha256_block_data_order: does not use RBP or RSP based frame
Compiled load.test
Running Suite: subnet-evm precompile ginkgo test suite - /Users/avalabs/go/src/github.com/ava-labs/subnet-evm
===================================================================================================================
Random Seed: 1674833631
Will run 1 of 7 specs
------------------------------
[BeforeSuite]
/Users/avalabs/go/src/github.com/ava-labs/subnet-evm/tests/precompile/precompile_test.go:31
> Enter [BeforeSuite] TOP-LEVEL - /Users/avalabs/go/src/github.com/ava-labs/subnet-evm/tests/precompile/precompile_test.go:31 @ 01/27/23 10:33:51.001
INFO [01-27|10:33:51.002] Starting AvalancheGo node wd=/Users/avalabs/go/src/github.com/ava-labs/subnet-evm
INFO [01-27|10:33:51.002] Executing cmd="./scripts/run.sh "
[streaming output] Using branch: hello-world-tutorial-walkthrough
...
[BeforeSuite] PASSED [15.002 seconds]
```
After the `BeforeSuite` completes successfully, it will skip all but the `HelloWorld` labeled precompile test:
```bash
S [SKIPPED]
[Precompiles]
/Users/avalabs/go/src/github.com/ava-labs/subnet-evm/tests/precompile/solidity/suites.go:26
contract native minter [Precompile, ContractNativeMinter]
/Users/avalabs/go/src/github.com/ava-labs/subnet-evm/tests/precompile/solidity/suites.go:29
------------------------------
S [SKIPPED]
[Precompiles]
/Users/avalabs/go/src/github.com/ava-labs/subnet-evm/tests/precompile/solidity/suites.go:26
tx allow list [Precompile, TxAllowList]
/Users/avalabs/go/src/github.com/ava-labs/subnet-evm/tests/precompile/solidity/suites.go:36
------------------------------
...
Combined output:
Compiling 2 files with 0.8.0
Compilation finished successfully
ExampleHelloWorldTest
✓ should gets default hello world (4057ms)
✓ should not set greeting before enabled (4067ms)
✓ should set and get greeting with enabled account (4074ms)
3 passing (33s)
< Exit [It] hello world - /Users/avalabs/go/src/github.com/ava-labs/subnet-evm/tests/precompile/solidity/suites.go:64 @ 01/27/23 10:34:17.484 (11.48s)
• [11.480 seconds]
------------------------------
```
Finally, you will see the load test being skipped as well:
```bash
Running Suite: subnet-evm small load simulator test suite - /Users/avalabs/go/src/github.com/ava-labs/subnet-evm
======================================================================================================================
Random Seed: 1674833658
Will run 0 of 1 specs
S [SKIPPED]
[Load Simulator]
/Users/avalabs/go/src/github.com/ava-labs/subnet-evm/tests/load/load_test.go:49
basic subnet load test [load]
/Users/avalabs/go/src/github.com/ava-labs/subnet-evm/tests/load/load_test.go:50
------------------------------
Ran 0 of 1 Specs in 0.000 seconds
SUCCESS! -- 0 Passed | 0 Failed | 0 Pending | 1 Skipped
PASS
```
Looks like the tests are passing!
If your tests failed, please retrace your steps. Most likely the error is that the precompile was not enabled and some code is missing. Try running `npm install` in the contracts directory to ensure that hardhat and other packages are installed.
You may also use the [official tutorial implementation](https://github.com/ava-labs/subnet-evm/tree/helloworld-official-tutorial-v2) to double-check your work as well.
# Custom Precompiles (/docs/virtual-machines/custom-precompiles)
---
title: Custom Precompiles
description: In this tutorial, we are going to walk through how we can generate a stateful precompile from scratch. Before we start, let's brush up on what a precompile is, what a stateful precompile is, and why this is extremely useful.
---
## Background
### Precompiled Contracts
Ethereum uses precompiles to efficiently implement cryptographic primitives within the EVM instead of re-implementing the same primitives in Solidity. The following precompiles are currently included: ecrecover, sha256, blake2f, ripemd-160, Bn256Add, Bn256Mul, Bn256Pairing, the identity function, and modular exponentiation.
We can see these [precompile](https://github.com/ethereum/go-ethereum/blob/v1.11.1/core/vm/contracts.go#L82) mappings from address to function here in the Ethereum VM:
```go
// PrecompiledContractsBerlin contains the default set of pre-compiled Ethereum
// contracts used in the Berlin release.
var PrecompiledContractsBerlin = map[common.Address]PrecompiledContract{
common.BytesToAddress([]byte{1}): &ecrecover{},
common.BytesToAddress([]byte{2}): &sha256hash{},
common.BytesToAddress([]byte{3}): &ripemd160hash{},
common.BytesToAddress([]byte{4}): &dataCopy{},
common.BytesToAddress([]byte{5}): &bigModExp{eip2565: true},
common.BytesToAddress([]byte{6}): &bn256AddIstanbul{},
common.BytesToAddress([]byte{7}): &bn256ScalarMulIstanbul{},
common.BytesToAddress([]byte{8}): &bn256PairingIstanbul{},
common.BytesToAddress([]byte{9}): &blake2F{},
}
```
These precompile addresses start from `0x0000000000000000000000000000000000000001` and increment by 1.
A [precompile](https://github.com/ava-labs/subnet-evm/blob/helloworld-official-tutorial-v2/core/vm/contracts.go#L54-L57) follows this interface:
```go
// PrecompiledContract is the basic interface for native Go contracts. The implementation
// requires a deterministic gas count based on the input size of the Run method of the
// contract.
type PrecompiledContract interface {
RequiredGas(input []byte) uint64 // RequiredPrice calculates the contract gas use
Run(input []byte) ([]byte, error) // Run runs the precompiled contract
}
```
Here is an example of the [sha256 precompile](https://github.com/ava-labs/subnet-evm/blob/helloworld-official-tutorial-v2/core/vm/contracts.go#L237-L250) function.
```go
type sha256hash struct{}
// RequiredGas returns the gas required to execute the pre-compiled contract.
//
// This method does not require any overflow checking as the input size gas costs
// required for anything significant is so high it's impossible to pay for.
func (c *sha256hash) RequiredGas(input []byte) uint64 {
return uint64(len(input)+31)/32*params.Sha256PerWordGas + params.Sha256BaseGas
}
func (c *sha256hash) Run(input []byte) ([]byte, error) {
h := sha256.Sum256(input)
return h[:], nil
}
```
The CALL opcode (CALL, STATICCALL, DELEGATECALL, and CALLCODE) allows us to invoke this precompile.
The function signature of CALL in the EVM is as follows:
```go
Call(
caller ContractRef,
addr common.Address,
input []byte,
gas uint64,
value *big.Int,
)(ret []byte, leftOverGas uint64, err error)
```
Precompiles are a shortcut to execute a function implemented by the EVM itself, rather than an actual contract. A precompile is associated with a fixed address defined in the EVM. There is no byte code associated with that address.
When a precompile is called, the EVM checks if the input address is a precompile address, and if so it executes the precompile. Otherwise, it loads the smart contract at the input address and runs it on the EVM interpreter with the specified input data.
### Stateful Precompiled Contracts
A stateful precompile builds on a precompile in that it adds state access. Stateful precompiles are not available in the default EVM, and are specific to Avalanche EVMs such as [Coreth](https://github.com/ava-labs/coreth) and [Subnet-EVM](https://github.com/ava-labs/subnet-evm).
A stateful precompile follows this [interface](https://github.com/ava-labs/subnet-evm/blob/helloworld-official-tutorial-v2/precompile/contract/interfaces.go#L17-L20):
```go
// StatefulPrecompiledContract is the interface for executing a precompiled contract
type StatefulPrecompiledContract interface {
// Run executes the precompiled contract.
Run(accessibleState PrecompileAccessibleState,
caller common.Address,
addr common.Address,
input []byte,
suppliedGas uint64,
readOnly bool)
(ret []byte, remainingGas uint64, err error)
}
```
A stateful precompile injects state access through the `PrecompileAccessibleState` interface to provide access to the EVM state including the ability to modify balances and read/write storage.
This way we can provide even more customization of the EVM through Stateful Precompiles than we can with the original precompile interface!
### AllowList
The AllowList enables a precompile to enforce permissions on addresses. The AllowList is not a contract itself, but a helper structure to provide a control mechanism for wrapping contracts. It provides an `AllowListConfig` to the precompile so that it can take an initial configuration from genesis/upgrade. It also provides functions to set/read the permissions. In this tutorial, we used `IAllowList` interface to provide permission control to the `HelloWorld` precompile. `IAllowList` is defined in Subnet-EVM under [`./contracts/contracts/interfaces/IAllowList.sol`](https://github.com/ava-labs/subnet-evm/blob/helloworld-official-tutorial-v2/contracts/contracts/interfaces/IAllowList.sol). The interface is as follows:
```go
//SPDX-License-Identifier: MIT
pragma solidity ^0.8.0;
interface IAllowList {
event RoleSet(
uint256 indexed role,
address indexed account,
address indexed sender,
uint256 oldRole
);
// Set [addr] to have the admin role over the precompile contract.
function setAdmin(address addr) external;
// Set [addr] to be enabled on the precompile contract.
function setEnabled(address addr) external;
// Set [addr] to have the manager role over the precompile contract.
function setManager(address addr) external;
// Set [addr] to have no role for the precompile contract.
function setNone(address addr) external;
// Read the status of [addr].
function readAllowList(address addr) external view returns (uint256 role);
}
```
You can find more information about the AllowList interface [here](/docs/avalanche-l1s/upgrade/customize-avalanche-l1#allowlist-interface).
# Deploying Your Precompile (/docs/virtual-machines/custom-precompiles/precompile-deployment)
---
title: Deploying Your Precompile
description: Now that we have defined our precompile, let's deploy it to a local network.
---
We made it! Everything works in our Ginkgo tests, and now we want to spin up a local network with the Hello World precompile activated.
Start the server in a terminal in a new tab using avalanche-network-runner. Please check out [this link](/docs/tooling/avalanche-network-runner/introduction) for more information on Avalanche Network Runner, how to download it, and how to use it. The server will be in "listening" mode waiting for API calls.
We will start the server from the Subnet-EVM directory so that we can use a relative file path to the genesis JSON file:
```bash
cd $GOPATH/src/github.com/ava-labs/subnet-evm
```
```bash
cd $GOPATH/src/github.com/ava-labs/precompile-evm
```
Then run ANR:
```bash
avalanche-network-runner server \
--log-level debug \
--port=":8080" \
--grpc-gateway-port=":8081"
```
Since we already compiled AvalancheGo and Subnet-EVM/Precompile-EVM in a previous step, we should have the AvalancheGo and Subnet-EVM binaries ready to go.
We can now set the following paths. `AVALANCHEGO_EXEC_PATH` points to the latest AvalancheGo binary we have just built. `AVALANCHEGO_PLUGIN_PATH` points to the plugins path which should have the Subnet-EVM binary we have just built:
```bash
export AVALANCHEGO_EXEC_PATH="${GOPATH}/src/github.com/ava-labs/avalanchego/build/avalanchego"
export AVALANCHEGO_PLUGIN_PATH="${HOME}/.avalanchego/plugins"
```
The following command will "issue requests" to the server we just spun up. We can use avalanche-network-runner to spin up some nodes that run the latest version of Subnet-EVM:
```bash
avalanche-network-runner control start \
--log-level debug \
--endpoint="0.0.0.0:8080" \
--number-of-nodes=5 \
--avalanchego-path ${AVALANCHEGO_EXEC_PATH} \
--plugin-dir ${AVALANCHEGO_PLUGIN_PATH} \
--blockchain-specs '[{"vm_name": "subnetevm", "genesis": "./tests/precompile/genesis/hello_world.json"}]'
```
We can look at the server terminal tab and see it booting up the local network. If the network startup is successful then you should see something like this:
```bash
[blockchain RPC for "srEXiWaHuhNyGwPUi444Tu47ZEDwxTWrbQiuD7FmgSAQ6X7Dy"] "http://127.0.0.1:9650/ext/bc/2jDWMrF9yKK8gZfJaaaSfACKeMasiNgHmuZip5mWxUfhKaYoEU"
[blockchain RPC for "srEXiWaHuhNyGwPUi444Tu47ZEDwxTWrbQiuD7FmgSAQ6X7Dy"] "http://127.0.0.1:9652/ext/bc/2jDWMrF9yKK8gZfJaaaSfACKeMasiNgHmuZip5mWxUfhKaYoEU"
[blockchain RPC for "srEXiWaHuhNyGwPUi444Tu47ZEDwxTWrbQiuD7FmgSAQ6X7Dy"] "http://127.0.0.1:9654/ext/bc/2jDWMrF9yKK8gZfJaaaSfACKeMasiNgHmuZip5mWxUfhKaYoEU"
[blockchain RPC for "srEXiWaHuhNyGwPUi444Tu47ZEDwxTWrbQiuD7FmgSAQ6X7Dy"] "http://127.0.0.1:9656/ext/bc/2jDWMrF9yKK8gZfJaaaSfACKeMasiNgHmuZip5mWxUfhKaYoEU"
[blockchain RPC for "srEXiWaHuhNyGwPUi444Tu47ZEDwxTWrbQiuD7FmgSAQ6X7Dy"] "http://127.0.0.1:9658/ext/bc/2jDWMrF9yKK8gZfJaaaSfACKeMasiNgHmuZip5mWxUfhKaYoEU"
```
This shows the extension to the API server on AvalancheGo that's specific to the Subnet-EVM Blockchain instance. To interact with it, you will want to append the `/rpc` extension, which will supply the standard Ethereum API calls.
For example, you can use the RPC URL: `http://127.0.0.1:9650/ext/bc/2jDWMrF9yKK8gZfJaaaSfACKeMasiNgHmuZip5mWxUfhKaYoEU/rpc`
## Maintenance
You should always keep your fork up to date with the latest changes in the official Subnet-EVM repo. If you have forked the Subnet-EVM repo, there could be conflicts and you may need to manually resolve them.
If you used Precompile-EVM, you can update your repo by bumping Subnet-EVM versions in [`go.mod`](https://github.com/ava-labs/precompile-evm/blob/hello-world-example/go.mod#L7) and [`version.sh`](https://github.com/ava-labs/precompile-evm/blob/hello-world-example/scripts/versions.sh#L4)
## Conclusion
We have now created a stateful precompile from scratch with the precompile generation tool. We hope you had fun and learned a little more about the Subnet-EVM. Now that you have created a simple stateful precompile, we urge you to create one of your own.
If you have an idea for a stateful precompile that may be useful to the community, feel free to create a fork of [Subnet-EVM](https://github.com/ava-labs/subnet-evm) and create a pull request.
# Complex Golang VM (/docs/virtual-machines/golang-vms/complex-golang-vm)
---
title: Complex Golang VM
description: In this tutorial, we'll walk through how to build a virtual machine by referencing the BlobVM.
---
The [BlobVM](https://github.com/ava-labs/blobvm) is a virtual machine that can be used to implement a decentralized key-value store. A blob (shorthand for "binary large object") is an arbitrary piece of data.
BlobVM stores a key-value pair by breaking it apart into multiple chunks stored with their hashes as their keys in the blockchain. A root key-value pair has references to these chunks for lookups. By default, the maximum chunk size is set to 200 KiB.
## Components
A VM defines how a blockchain should be built. A block is populated with a set of transactions which mutate the state of the blockchain when executed. When a block with a set of transactions is applied to a given state, a state transition occurs by executing all of the transactions in the block in-order and applying it to the previous block of the blockchain. By executing a series of blocks chronologically, anyone can verify and reconstruct the state of the blockchain at an arbitrary point in time.
The BlobVM repository has a few components to handle the lifecycle of tasks from a transaction being issued to a block being accepted across the network:
- **Transaction**: A state transition
- **Mempool**: Stores pending transactions that haven't been finalized yet
- **Network**: Propagates transactions from the mempool other nodes in the network
- **Block**: Defines the block format, how to verify it, and how it should be accepted or rejected across the network
- **Block Builder**: Builds blocks by including transactions from the mempool
- **Virtual Machine**: Application-level logic. Implements the VM interface needed to interact with Avalanche consensus and defines the blueprint for the blockchain.
- **Service**: Exposes APIs so users can interact with the VM
- **Factory**: Used to initialize the VM
## Lifecycle of a Transaction
A VM will often times expose a set of APIs so users can interact with the it. In the blockchain, blocks can contain a set of transactions which mutate the blockchain's state. Let's dive into the lifecycle of a transaction from its issuance to its finalization on the blockchain.
- A user makes an API request to `service.IssueRawTx` to issue their transaction. This API will deserialize the user's transaction and forward it to the VM
- The transaction is submitted to the VM which is then added to the VM's mempool
- The VM asynchronously periodically gossips new transactions in its mempool to other nodes in the network so they can learn about them
- The VM sends the Avalanche consensus engine a message to indicate that it has transactions in the mempool that are ready to be built into a block
- The VM proposes the block with to consensus
- Consensus verifies that the block is valid and well-formed
- Consensus gets the network to vote on whether the block should be accepted or rejected. If a block is rejected, its transactions are reclaimed by the mempool so they can be included in a future block. If a block is accepted, it's finalized by writing it to the blockchain.
## Coding the Virtual Machine
We'll dive into a few of the packages that are in the The BlobVM repository to learn more about how they work:
1. [`vm`](https://github.com/ava-labs/blobvm/tree/master/vm)
- `block_builder.go`
- `chain_vm.go`
- `network.go`
- `service.go`
- `vm.go`
2. [`chain`](https://github.com/ava-labs/blobvm/tree/master/chain)
- `unsigned_tx.go`
- `base_tx.go`
- `transfer_tx.go`
- `set_tx.go`
- `tx.go`
- `block.go`
- `mempool.go`
- `storage.go`
- `builder.go`
3. [`mempool`](https://github.com/ava-labs/blobvm/tree/master/mempool)
- `mempool.go`
### Transactions
The state the blockchain can only be mutated by getting the network to accept a signed transaction. A signed transaction contains the transaction to be executed alongside the signature of the issuer. The signature is required to cryptographically verify the sender's identity. A VM can define an arbitrary amount of unique transactions types to support different operations on the blockchain. The BlobVM implements two different transactions types:
- [TransferTx](https://github.com/ava-labs/blobvm/blob/master/chain/transfer_tx.go) - Transfers coins between accounts.
- [SetTx](https://github.com/ava-labs/blobvm/blob/master/chain/set_tx.go) - Stores a key-value pair on the blockchain.
#### UnsignedTransaction
All transactions in the BlobVM implement the common [`UnsignedTransaction`](https://github.com/ava-labs/blobvm/blob/master/chain/unsigned_tx.go) interface, which exposes shared functionality for all transaction types.
```go
type UnsignedTransaction interface {
Copy() UnsignedTransaction
GetBlockID() ids.ID
GetMagic() uint64
GetPrice() uint64
SetBlockID(ids.ID)
SetMagic(uint64)
SetPrice(uint64)
FeeUnits(*Genesis) uint64 // number of units to mine tx
LoadUnits(*Genesis) uint64 // units that should impact fee rate
ExecuteBase(*Genesis) error
Execute(*TransactionContext) error
TypedData() *tdata.TypedData
Activity() *Activity
}
```
#### BaseTx
Common functionality and metadata for transaction types are implemented by [`BaseTx`](https://github.com/ava-labs/blobvm/blob/master/chain/base_tx.go).
- [`SetBlockID`](https://github.com/ava-labs/blobvm/blob/master/chain/base_tx.go#L26) sets the transaction's block ID.
- [`GetBlockID`](https://github.com/ava-labs/blobvm/blob/master/chain/base_tx.go#L22) returns the transaction's block ID.
- [`SetMagic`](https://github.com/ava-labs/blobvm/blob/master/chain/base_tx.go#L34) sets the magic number. The magic number is used to differentiate chains to prevent replay attacks
- [`GetMagic`](https://github.com/ava-labs/blobvm/blob/master/chain/base_tx.go#L30) returns the magic number. Magic number is defined in genesis.
- [`SetPrice`](https://github.com/ava-labs/blobvm/blob/master/chain/base_tx.go#L42) sets the price per fee unit for this transaction.
- [`GetPrice`](https://github.com/ava-labs/blobvm/blob/master/chain/base_tx.go#L38) returns the price for this transaction.
- [`FeeUnits`](https://github.com/ava-labs/blobvm/blob/master/chain/base_tx.go#L59) returns the fee units this transaction will consume.
- [`LoadUnits`](https://github.com/ava-labs/blobvm/blob/master/chain/base_tx.go#L63) identical to `FeeUnits`
- [`ExecuteBase`](https://github.com/ava-labs/blobvm/blob/master/chain/base_tx.go#L46) executes common validation checks across different transaction types. This validates the transaction contains a valid block ID, magic number, and gas price as defined by genesis.
#### TransferTx
[`TransferTx`](https://github.com/ava-labs/blobvm/blob/master/chain/transfer_tx.go#L16) supports the transfer of tokens from one account to another.
```go
type TransferTx struct {
*BaseTx `serialize:"true" json:"baseTx"`
// To is the recipient of the [Units].
To common.Address `serialize:"true" json:"to"`
// Units are transferred to [To].
Units uint64 `serialize:"true" json:"units"`
}
```
`TransferTx` embeds `BaseTx` to avoid re-implementing common operations with other transactions, but implements its own [`Execute`](https://github.com/ava-labs/blobvm/blob/master/chain/transfer_tx.go#L26) to support token transfers.
This performs a few checks to ensure that the transfer is valid before transferring the tokens between the two accounts.
```go
func (t *TransferTx) Execute(c *TransactionContext) error {
// Must transfer to someone
if bytes.Equal(t.To[:], zeroAddress[:]) {
return ErrNonActionable
}
// This prevents someone from transferring to themselves.
if bytes.Equal(t.To[:], c.Sender[:]) {
return ErrNonActionable
}
if t.Units == 0 {
return ErrNonActionable
}
if _, err := ModifyBalance(c.Database, c.Sender, false, t.Units); err != nil {
return err
}
if _, err := ModifyBalance(c.Database, t.To, true, t.Units); err != nil {
return err
}
return nil
}
```
#### SetTx
`SetTx` is used to assign a value to a key.
```go
type SetTx struct {
*BaseTx `serialize:"true" json:"baseTx"`
Value []byte `serialize:"true" json:"value"`
}
```
`SetTx` implements its own [`FeeUnits`](https://github.com/ava-labs/blobvm/blob/master/chain/set_tx.go#L48) method to compensate the network according to the size of the blob being stored.
```go
func (s *SetTx) FeeUnits(g *Genesis) uint64 {
// We don't subtract by 1 here because we want to charge extra for any
// value-based interaction (even if it is small or a delete).
return s.BaseTx.FeeUnits(g) + valueUnits(g, uint64(len(s.Value)))
}
```
`SetTx`'s [`Execute`](https://github.com/ava-labs/blobvm/blob/master/chain/set_tx.go#L21) method performs a few safety checks to validate that the blob meets the size constraints enforced by genesis and doesn't overwrite an existing key before writing it to the blockchain.
```go
func (s *SetTx) Execute(t *TransactionContext) error {
g := t.Genesis
switch {
case len(s.Value) == 0:
return ErrValueEmpty
case uint64(len(s.Value)) > g.MaxValueSize:
return ErrValueTooBig
}
k := ValueHash(s.Value)
// Do not allow duplicate value setting
_, exists, err := GetValueMeta(t.Database, k)
if err != nil {
return err
}
if exists {
return ErrKeyExists
}
return PutKey(t.Database, k, &ValueMeta{
Size: uint64(len(s.Value)),
TxID: t.TxID,
Created: t.BlockTime,
})
}
```
#### Signed Transaction
The unsigned transactions mentioned previously can't be issued to the network without first being signed. BlobVM implements signed transactions by embedding the unsigned transaction alongside its signature in [`Transaction`](https://github.com/ava-labs/blobvm/blob/master/chain/tx.go). In BlobVM, a signature is defined as the [ECDSA signature](https://en.wikipedia.org/wiki/Elliptic_Curve_Digital_Signature_Algorithm) of the issuer's private key of the [KECCAK256](https://keccak.team/keccak.html) hash of the unsigned transaction's data ([digest hash](https://eips.ethereum.org/EIPS/eip-712)).
```go
type Transaction struct {
UnsignedTransaction `serialize:"true" json:"unsignedTransaction"`
Signature []byte `serialize:"true" json:"signature"`
digestHash []byte
bytes []byte
id ids.ID
size uint64
sender common.Address
}
```
The `Transaction` type wraps any unsigned transaction. When a `Transaction` is executed, it calls the `Execute` method of the underlying embedded `UnsignedTx` and performs the following sanity checks:
1. The underlying `UnsignedTx` must meet the requirements set by genesis. This includes checks to make sure that the transaction contains the correct magic number and meets the minimum gas price as defined by genesis
2. The transaction's block ID must be a recently accepted block
3. The transaction must not be a recently issued transaction
4. The issuer of the transaction must have enough gas
5. The transaction's gas price must be meet the next expected block's minimum gas price
6. The transaction must execute without error
If the transaction is successfully verified, it's submitted as a pending write to the blockchain.
```go
func (t *Transaction) Execute(g *Genesis, db database.Database, blk *StatelessBlock, context *Context) error {
if err := t.UnsignedTransaction.ExecuteBase(g); err != nil {
return err
}
if !context.RecentBlockIDs.Contains(t.GetBlockID()) {
// Hash must be recent to be any good
// Should not happen because of mempool cleanup
return ErrInvalidBlockID
}
if context.RecentTxIDs.Contains(t.ID()) {
// Tx hash must not be recently executed (otherwise could be replayed)
//
// NOTE: We only need to keep cached tx hashes around as long as the
// block hash referenced in the tx is valid
return ErrDuplicateTx
}
// Ensure sender has balance
if _, err := ModifyBalance(db, t.sender, false, t.FeeUnits(g)*t.GetPrice()); err != nil {
return err
}
if t.GetPrice() < context.NextPrice {
return ErrInsufficientPrice
}
if err := t.UnsignedTransaction.Execute(&TransactionContext{
Genesis: g,
Database: db,
BlockTime: uint64(blk.Tmstmp),
TxID: t.id,
Sender: t.sender,
}); err != nil {
return err
}
if err := SetTransaction(db, t); err != nil {
return err
}
return nil
}
```
##### Example
Let's walk through an example on how to issue a `SetTx` transaction to the BlobVM to write a key-value pair.
1. Create the unsigned transaction for `SetTx`
```go
utx := &chain.SetTx{
BaseTx: &chain.BaseTx{},
Value: []byte("data"),
}
utx.SetBlockID(lastAcceptedID)
utx.SetMagic(genesis.Magic)
utx.SetPrice(price + blockCost/utx.FeeUnits(genesis))
```
2. Calculate the [digest hash](https://github.com/ava-labs/blobvm/blob/master/chain/tx.go#L41) for the transaction.
```go
digest, err := chain.DigestHash(utx)
```
3. [Sign](https://github.com/ava-labs/blobvm/blob/master/chain/crypto.go#L17) the digest hash with the issuer's private key.
```go
signature, err := chain.Sign(digest, privateKey)
```
4. Create and initialize the new signed transaction.
```go
tx := chain.NewTx(utx, sig)
if err := tx.Init(g); err != nil {
return ids.Empty, 0, err
}
```
5. Issue the request with the client
```
txID, err = cli.IssueRawTx(ctx, tx.Bytes())
```
### Mempool
#### Overview
The [mempool](https://github.com/ava-labs/blobvm/blob/master/mempool/mempool.go) is a buffer of volatile memory that stores pending transactions. Transactions are stored in the mempool whenever a node learns about a new transaction either through gossip with other nodes or through an API call issued by a user.
The mempool is implemented as a min-max [heap](https://en.wikipedia.org/wiki/Heap_data_structure) ordered by each transaction's gas price. The mempool is created during the [initialization](https://github.com/ava-labs/blobvm/blob/master/vm/vm.go#L93) of VM.
```go
vm.mempool = mempool.New(vm.genesis, vm.config.MempoolSize)
```
Whenever a transaction is submitted to VM, it first gets initialized, verified, and executed locally. If the transaction looks valid, then it's added to the [mempool](https://github.com/ava-labs/blobvm/blob/master/vm/vm.go#L414).
#### Add Method
When a transaction is added to the mempool, [`Add`](https://github.com/ava-labs/blobvm/blob/master/mempool/mempool.go#L43) is called. This performs the following:
- Checks if the transaction being added already exists in the mempool or not
- The transaction is added to the min-max heap
- If the mempool's heap size is larger than the maximum configured value, then the lowest paying transaction is evicted
- The transaction is added to the list of transactions that are able to be gossiped to other peers
- A notification is sent through the in the `mempool.Pending` channel to indicate that the consensus engine should build a new block
### Block Builder
#### Overview
The [`TimeBuilder`](https://github.com/ava-labs/blobvm/blob/master/vm/block_builder.go) implementation for `BlockBuilder` acts as an intermediary notification service between the mempool and the consensus engine. It serves the following functions:
- Periodically gossips new transactions to other nodes in the network
- Periodically notifies the consensus engine that new transactions from the mempool are ready to be built into blocks
`TimeBuilder` and can exist in 3 states:
- `dontBuild` - There are no transactions in the mempool that are ready to be included in a block
- `building` - The consensus engine has been notified that it should build a block and there are currently transactions in the mempool that are eligible to be included into a block
- `mayBuild` - There are transactions in the mempool that are eligible to be included into a block, but the consensus engine has not been notified yet
#### Gossip Method
The [`Gossip`](https://github.com/ava-labs/blobvm/blob/master/vm/block_builder.go#L183) method initiates the gossip of new transactions from the mempool at periodically as defined by `vm.config.GossipInterval`.
#### Build Method
The [`Build`](https://github.com/ava-labs/blobvm/blob/master/vm/block_builder.go#L166) method consumes transactions from the mempool and signals the consensus engine when it's ready to build a block.
If the mempool signals the `TimeBuilder` that it has available transactions, `TimeBuilder` will signal consensus that the VM is ready to build a block by sending the consensus engine a `common.PendingTxs` message.
When the consensus engine receives the `common.PendingTxs` message it calls the VM's `BuildBlock` method. The VM will then build a block from eligible transactions in the mempool.
If there are still remaining transactions in the mempool after a block is built, then the `TimeBuilder` is put into the `mayBuild` state to indicate that there are still transactions that are eligible to be built into block, but the consensus engine isn't aware of it yet.
### Network
[Network](https://github.com/ava-labs/blobvm/blob/master/vm/network.go) handles the workflow of gossiping transactions from a node's mempool to other nodes in the network.
#### GossipNewTxs Method
`GossipNewTxs` sends a list of transactions to other nodes in the network. `TimeBuilder` calls the network's `GossipNewTxs` function to gossip new transactions in the mempool.
```go
func (n *PushNetwork) GossipNewTxs(newTxs []*chain.Transaction) error {
txs := []*chain.Transaction{}
// Gossip at most the target units of a block at once
for _, tx := range newTxs {
if _, exists := n.gossipedTxs.Get(tx.ID()); exists {
log.Debug("already gossiped, skipping", "txId", tx.ID())
continue
}
n.gossipedTxs.Put(tx.ID(), nil)
txs = append(txs, tx)
}
return n.sendTxs(txs)
}
```
Recently gossiped transactions are maintained in a cache to avoid DDoSing a node from repeated gossip failures.
Other nodes in the network will receive the gossiped transactions through their `AppGossip` handler. Once a gossip message is received, it's deserialized and the new transactions are submitted to the VM.
```go
func (vm *VM) AppGossip(nodeID ids.NodeID, msg []byte) error {
txs := make([]*chain.Transaction, 0)
if _, err := chain.Unmarshal(msg, &txs); err != nil {
return nil
}
// submit incoming gossip
log.Debug("AppGossip transactions are being submitted", "txs", len(txs))
if errs := vm.Submit(txs...); len(errs) > 0 {
for _, err := range errs {
}
}
return nil
}
```
### Block
Blocks go through a lifecycle of being proposed by a validator, verified, and decided by consensus. Upon acceptance, a block will be committed and will be finalized on the blockchain.
BlobVM implements two types of blocks, `StatefulBlock` and `StatelessBlock`.
#### StatefulBlock
A [`StatefulBlock`](https://github.com/ava-labs/blobvm/blob/master/chain/block.go#L27) contains strictly the metadata about the block that needs to be written to the database.
```go
type StatefulBlock struct {
Prnt ids.ID `serialize:"true" json:"parent"`
Tmstmp int64 `serialize:"true" json:"timestamp"`
Hght uint64 `serialize:"true" json:"height"`
Price uint64 `serialize:"true" json:"price"`
Cost uint64 `serialize:"true" json:"cost"`
AccessProof common.Hash `serialize:"true" json:"accessProof"`
Txs []*Transaction `serialize:"true" json:"txs"`
}
```
#### StatelessBlock
[StatelessBlock](https://github.com/ava-labs/blobvm/blob/master/chain/block.go#L40) is a superset of `StatefulBlock` and additionally contains fields that are needed to support block-level operations like verification and acceptance throughout its lifecycle in the VM.
```go
type StatelessBlock struct {
*StatefulBlock `serialize:"true" json:"block"`
id ids.ID
st choices.Status
t time.Time
bytes []byte
vm VM
children []*StatelessBlock
onAcceptDB *versiondb.Database
}
```
Let's have a look at the fields of StatelessBlock:
- `StatefulBlock`: The metadata about the block that will be written to the database upon acceptance
- `bytes`: The serialized form of the `StatefulBlock`.
- `id`: The Keccak256 hash of `bytes`.
- `st`: The status of the block in consensus (i.e `Processing`, `Accepted`, or `Rejected`)
- `children`: The children of this block
- `onAcceptDB`: The database this block should be written to upon acceptance.
When the consensus engine tries to build a block by calling the VM's `BuildBlock`, the VM calls the [`block.NewBlock`](https://github.com/ava-labs/blobvm/blob/master/chain/block.go#L53) function to get a new block that is a child of the currently preferred block.
```go
func NewBlock(vm VM, parent snowman.Block, tmstp int64, context *Context) *StatelessBlock {
return &StatelessBlock{
StatefulBlock: &StatefulBlock{
Tmstmp: tmstp,
Prnt: parent.ID(),
Hght: parent.Height() + 1,
Price: context.NextPrice,
Cost: context.NextCost,
},
vm: vm,
st: choices.Processing,
}
}
```
Some `StatelessBlock` fields like the block ID, byte representation, and timestamp aren't populated immediately. These are set during the `StatelessBlock`'s [`init`](https://github.com/ava-labs/blobvm/blob/master/chain/block.go#L113) method, which initializes these fields once the block has been populated with transactions.
```go
func (b *StatelessBlock) init() error {
bytes, err := Marshal(b.StatefulBlock)
if err != nil {
return err
}
b.bytes = bytes
id, err := ids.ToID(crypto.Keccak256(b.bytes))
if err != nil {
return err
}
b.id = id
b.t = time.Unix(b.StatefulBlock.Tmstmp, 0)
g := b.vm.Genesis()
for _, tx := range b.StatefulBlock.Txs {
if err := tx.Init(g); err != nil {
return err
}
}
return nil
}
```
To build the block, the VM will try to remove as many of the highest-paying transactions from the mempool to include them in the new block until the maximum block fee set by genesis is reached.
A block once built, can exist in two states:
1. Rejected: The block was not accepted by consensus. In this case, the mempool will reclaim the rejected block's transactions so they can be included in a future block.
2. Accepted: The block was accepted by consensus. In this case, we write the block to the blockchain by committing it to the database.
When the consensus engine receives the built block, it calls the block's [`Verify`](https://github.com/ava-labs/blobvm/blob/master/chain/block.go#L228) method to validate that the block is well-formed. In BlobVM, the following constraints are placed on valid blocks:
1. A block must contain at least one transaction and the block's timestamp must be within 10s into the future.
```go
if len(b.Txs) == 0 {
return nil, nil, ErrNoTxs
}
if b.Timestamp().Unix() >= time.Now().Add(futureBound).Unix() {
return nil, nil, ErrTimestampTooLate
}
```
2. The sum of the gas units consumed by the transactions in the block must not exceed the gas limit defined by genesis.
```go
blockSize := uint64(0)
for _, tx := range b.Txs {
blockSize += tx.LoadUnits(g)
if blockSize > g.MaxBlockSize {
return nil, nil, ErrBlockTooBig
}
}
```
3. The parent block of the proposed block must exist and have an earlier timestamp.
```go
parent, err := b.vm.GetStatelessBlock(b.Prnt)
if err != nil {
log.Debug("could not get parent", "id", b.Prnt)
return nil, nil, err
}
if b.Timestamp().Unix() < parent.Timestamp().Unix() {
return nil, nil, ErrTimestampTooEarly
}
```
4. The target block price and minimum gas price must meet the minimum enforced by the VM.
```go
context, err := b.vm.ExecutionContext(b.Tmstmp, parent)
if err != nil {
return nil, nil, err
}
if b.Cost != context.NextCost {
return nil, nil, ErrInvalidCost
}
if b.Price != context.NextPrice {
return nil, nil, ErrInvalidPrice
}
```
After the results of consensus are complete, the block is either accepted by committing the block to the database or rejected by returning the block's transactions into the mempool.
```go
// implements "snowman.Block.choices.Decidable"
func (b *StatelessBlock) Accept() error {
if err := b.onAcceptDB.Commit(); err != nil {
return err
}
for _, child := range b.children {
if err := child.onAcceptDB.SetDatabase(b.vm.State()); err != nil {
return err
}
}
b.st = choices.Accepted
b.vm.Accepted(b)
return nil
}
// implements "snowman.Block.choices.Decidable"
func (b *StatelessBlock) Reject() error {
b.st = choices.Rejected
b.vm.Rejected(b)
return nil
}
```
### API
[Service](https://github.com/ava-labs/blobvm/blob/master/vm/public_service.go) implements an API server so users can interact with the VM. The VM implements the interface method [`CreateHandlers`](https://github.com/ava-labs/blobvm/blob/master/vm/vm.go#L267) that exposes the VM's RPC API.
```go
func (vm *VM) CreateHandlers() (map[string]*common.HTTPHandler, error) {
apis := map[string]*common.HTTPHandler{}
public, err := newHandler(Name, &PublicService{vm: vm})
if err != nil {
return nil, err
}
apis[PublicEndpoint] = public
return apis, nil
}
```
One API that's exposed is [`IssueRawTx`](https://github.com/ava-labs/blobvm/blob/master/vm/public_service.go#L63) to allow users to issue transactions to the BlobVM. It accepts an `IssueRawTxArgs` that contains the transaction the user wants to issue and forwards it to the VM.
```go
func (svc *PublicService) IssueRawTx(_ *http.Request, args *IssueRawTxArgs, reply *IssueRawTxReply) error {
tx := new(chain.Transaction)
if _, err := chain.Unmarshal(args.Tx, tx); err != nil {
return err
}
// otherwise, unexported tx.id field is empty
if err := tx.Init(svc.vm.genesis); err != nil {
return err
}
reply.TxID = tx.ID()
errs := svc.vm.Submit(tx)
if len(errs) == 0 {
return nil
}
if len(errs) == 1 {
return errs[0]
}
return fmt.Errorf("%v", errs)
}
```
### Virtual Machine
We have learned about all the components used in the BlobVM. Most of these components are referenced in the `vm.go` file, which acts as the entry point for the consensus engine as well as users interacting with the blockchain.
For example, the engine calls `vm.BuildBlock()`, that in turn calls `chain.BuildBlock()`. Another example is when a user issues a raw transaction through service APIs, the `vm.Submit()` method is called.
Let's look at some of the important methods of `vm.go` that must be implemented:
#### Initialize Method
[Initialize](https://github.com/ava-labs/blobvm/blob/master/vm/vm.go#L93) is invoked by `avalanchego` when creating the blockchain. `avalanchego` passes some parameters to the implementing VM.
- `ctx` - Metadata about the VM's execution
- `dbManager` - The database that the VM can write to
- `genesisBytes` - The serialized representation of the genesis state of this VM
- `upgradeBytes` - The serialized representation of network upgrades
- `configBytes` - The serialized VM-specific [configuration](https://github.com/ava-labs/blobvm/blob/master/vm/config.go#L10)
- `toEngine` - The channel used to send messages to the consensus engine
- `fxs` - Feature extensions that attach to this VM
- `appSender` - Used to send messages to other nodes in the network
BlobVM upon initialization persists these fields in its own state to use them throughout the lifetime of its execution.
```go
// implements "snowmanblock.ChainVM.common.VM"
func (vm *VM) Initialize(
ctx *snow.Context,
dbManager manager.Manager,
genesisBytes []byte,
upgradeBytes []byte,
configBytes []byte,
toEngine chan<- common.Message,
_ []*common.Fx,
appSender common.AppSender,
) error {
log.Info("initializing blobvm", "version", version.Version)
// Load config
vm.config.SetDefaults()
if len(configBytes) > 0 {
if err := ejson.Unmarshal(configBytes, &vm.config); err != nil {
return fmt.Errorf("failed to unmarshal config %s: %w", string(configBytes), err)
}
}
vm.ctx = ctx
vm.db = dbManager.Current().Database
vm.activityCache = make([]*chain.Activity, vm.config.ActivityCacheSize)
// Init channels before initializing other structs
vm.stop = make(chan struct{})
vm.builderStop = make(chan struct{})
vm.doneBuild = make(chan struct{})
vm.doneGossip = make(chan struct{})
vm.appSender = appSender
vm.network = vm.NewPushNetwork()
vm.blocks = &cache.LRU{Size: blocksLRUSize}
vm.verifiedBlocks = make(map[ids.ID]*chain.StatelessBlock)
vm.toEngine = toEngine
vm.builder = vm.NewTimeBuilder()
// Try to load last accepted
has, err := chain.HasLastAccepted(vm.db)
if err != nil {
log.Error("could not determine if have last accepted")
return err
}
// Parse genesis data
vm.genesis = new(chain.Genesis)
if err := ejson.Unmarshal(genesisBytes, vm.genesis); err != nil {
log.Error("could not unmarshal genesis bytes")
return err
}
if err := vm.genesis.Verify(); err != nil {
log.Error("genesis is invalid")
return err
}
targetUnitsPerSecond := vm.genesis.TargetBlockSize / uint64(vm.genesis.TargetBlockRate)
vm.targetRangeUnits = targetUnitsPerSecond * uint64(vm.genesis.LookbackWindow)
log.Debug("loaded genesis", "genesis", string(genesisBytes), "target range units", vm.targetRangeUnits)
vm.mempool = mempool.New(vm.genesis, vm.config.MempoolSize)
if has { //nolint:nestif
blkID, err := chain.GetLastAccepted(vm.db)
if err != nil {
log.Error("could not get last accepted", "err", err)
return err
}
blk, err := vm.GetStatelessBlock(blkID)
if err != nil {
log.Error("could not load last accepted", "err", err)
return err
}
vm.preferred, vm.lastAccepted = blkID, blk
log.Info("initialized blobvm from last accepted", "block", blkID)
} else {
genesisBlk, err := chain.ParseStatefulBlock(
vm.genesis.StatefulBlock(),
nil,
choices.Accepted,
vm,
)
if err != nil {
log.Error("unable to init genesis block", "err", err)
return err
}
// Set Balances
if err := vm.genesis.Load(vm.db, vm.AirdropData); err != nil {
log.Error("could not set genesis allocation", "err", err)
return err
}
if err := chain.SetLastAccepted(vm.db, genesisBlk); err != nil {
log.Error("could not set genesis as last accepted", "err", err)
return err
}
gBlkID := genesisBlk.ID()
vm.preferred, vm.lastAccepted = gBlkID, genesisBlk
log.Info("initialized blobvm from genesis", "block", gBlkID)
}
vm.AirdropData = nil
}
```
After initializing its own state, BlobVM also starts asynchronous workers to build blocks and gossip transactions to the rest of the network.
```
{
go vm.builder.Build()
go vm.builder.Gossip()
return nil
}
```
#### GetBlock Method
[`GetBlock`](https://github.com/ava-labs/blobvm/blob/master/vm/vm.go#L318) returns the block with the provided ID. GetBlock will attempt to fetch the given block from the database, and return an non-nil error if it wasn't able to get it.
```go
func (vm *VM) GetBlock(id ids.ID) (snowman.Block, error) {
b, err := vm.GetStatelessBlock(id)
if err != nil {
log.Warn("failed to get block", "err", err)
}
return b, err
}
```
#### ParseBlock Method
[`ParseBlock`](https://github.com/ava-labs/blobvm/blob/master/vm/vm.go#L373) deserializes a block.
```go
func (vm *VM) ParseBlock(source []byte) (snowman.Block, error) {
newBlk, err := chain.ParseBlock(
source,
choices.Processing,
vm,
)
if err != nil {
log.Error("could not parse block", "err", err)
return nil, err
}
log.Debug("parsed block", "id", newBlk.ID())
// If we have seen this block before, return it with the most
// up-to-date info
if oldBlk, err := vm.GetBlock(newBlk.ID()); err == nil {
log.Debug("returning previously parsed block", "id", oldBlk.ID())
return oldBlk, nil
}
return newBlk, nil
}
```
#### BuildBlock Method
Avalanche consensus calls [`BuildBlock`](https://github.com/ava-labs/blobvm/blob/master/vm/vm.go#L397) when it receives a notification from the VM that it has pending transactions that are ready to be issued into a block.
```go
func (vm *VM) BuildBlock() (snowman.Block, error) {
log.Debug("BuildBlock triggered")
blk, err := chain.BuildBlock(vm, vm.preferred)
vm.builder.HandleGenerateBlock()
if err != nil {
log.Debug("BuildBlock failed", "error", err)
return nil, err
}
sblk, ok := blk.(*chain.StatelessBlock)
if !ok {
return nil, fmt.Errorf("unexpected snowman.Block %T, expected *StatelessBlock", blk)
}
log.Debug("BuildBlock success", "blkID", blk.ID(), "txs", len(sblk.Txs))
return blk, nil
}
```
#### SetPreference Method
[`SetPreference`](https://github.com/ava-labs/blobvm/blob/master/vm/vm.go#L457) sets the block ID preferred by this node. A node votes to accept or reject a block based on its current preference in consensus.
```go
func (vm *VM) SetPreference(id ids.ID) error {
log.Debug("set preference", "id", id)
vm.preferred = id
return nil
}
```
#### LastAccepted Method
[LastAccepted](https://github.com/ava-labs/blobvm/blob/master/vm/vm.go#L465) returns the block ID of the block that was most recently accepted by this node.
```go
func (vm *VM) LastAccepted() (ids.ID, error) {
return vm.lastAccepted.ID(), nil
}
```
### CLI
BlobVM implements a generic key-value store, but support to read and write arbitrary files into the BlobVM blockchain is implemented in the `blob-cli`
To write a file, BlobVM breaks apart an arbitrarily large file into many small chunks. Each chunk is submitted to the VM in a `SetTx`. A root key is generated which contains all of the hashes of the chunks.
```go
func Upload(
ctx context.Context, cli client.Client, priv *ecdsa.PrivateKey,
f io.Reader, chunkSize int,
) (common.Hash, error) {
hashes := []common.Hash{}
chunk := make([]byte, chunkSize)
shouldExit := false
opts := []client.OpOption{client.WithPollTx()}
totalCost := uint64(0)
uploaded := map[common.Hash]struct{}{}
for !shouldExit {
read, err := f.Read(chunk)
if errors.Is(err, io.EOF) || read == 0 {
break
}
if err != nil {
return common.Hash{}, fmt.Errorf("%w: read error", err)
}
if read < chunkSize {
shouldExit = true
chunk = chunk[:read]
// Use small file optimization
if len(hashes) == 0 {
break
}
}
k := chain.ValueHash(chunk)
if _, ok := uploaded[k]; ok {
color.Yellow("already uploaded k=%s, skipping", k)
} else if exists, _, _, err := cli.Resolve(ctx, k); err == nil && exists {
color.Yellow("already on-chain k=%s, skipping", k)
uploaded[k] = struct{}{}
} else {
tx := &chain.SetTx{
BaseTx: &chain.BaseTx{},
Value: chunk,
}
txID, cost, err := client.SignIssueRawTx(ctx, cli, tx, priv, opts...)
if err != nil {
return common.Hash{}, err
}
totalCost += cost
color.Yellow("uploaded k=%s txID=%s cost=%d totalCost=%d", k, txID, cost, totalCost)
uploaded[k] = struct{}{}
}
hashes = append(hashes, k)
}
r := &Root{}
if len(hashes) == 0 {
if len(chunk) == 0 {
return common.Hash{}, ErrEmpty
}
r.Contents = chunk
} else {
r.Children = hashes
}
rb, err := json.Marshal(r)
if err != nil {
return common.Hash{}, err
}
rk := chain.ValueHash(rb)
tx := &chain.SetTx{
BaseTx: &chain.BaseTx{},
Value: rb,
}
txID, cost, err := client.SignIssueRawTx(ctx, cli, tx, priv, opts...)
if err != nil {
return common.Hash{}, err
}
totalCost += cost
color.Yellow("uploaded root=%v txID=%s cost=%d totalCost=%d", rk, txID, cost, totalCost)
return rk, nil
}
```
#### Example 1
```bash
blob-cli set-file ~/Downloads/computer.gif -> 6fe5a52f52b34fb1e07ba90bad47811c645176d0d49ef0c7a7b4b22013f676c8
```
Given the root hash, a file can be looked up by deserializing all of its children chunk values and reconstructing the original file.
```go
// TODO: make multi-threaded
func Download(ctx context.Context, cli client.Client, root common.Hash, f io.Writer) error {
exists, rb, _, err := cli.Resolve(ctx, root)
if err != nil {
return err
}
if !exists {
return fmt.Errorf("%w:%v", ErrMissing, root)
}
var r Root
if err := json.Unmarshal(rb, &r); err != nil {
return err
}
// Use small file optimization
if contentLen := len(r.Contents); contentLen > 0 {
if _, err := f.Write(r.Contents); err != nil {
return err
}
color.Yellow("downloaded root=%v size=%fKB", root, float64(contentLen)/units.KiB)
return nil
}
if len(r.Children) == 0 {
return ErrEmpty
}
amountDownloaded := 0
for _, h := range r.Children {
exists, b, _, err := cli.Resolve(ctx, h)
if err != nil {
return err
}
if !exists {
return fmt.Errorf("%w:%s", ErrMissing, h)
}
if _, err := f.Write(b); err != nil {
return err
}
size := len(b)
color.Yellow("downloaded chunk=%v size=%fKB", h, float64(size)/units.KiB)
amountDownloaded += size
}
color.Yellow("download complete root=%v size=%fMB", root, float64(amountDownloaded)/units.MiB)
return nil
}
```
#### Example 2
```bash
blob-cli resolve-file 6fe5a52f52b34fb1e07ba90bad47811c645176d0d49ef0c7a7b4b22013f676c8 computer_copy.gif
```
## Conclusion
This documentation covers concepts about Virtual Machine by walking through a VM that implements a decentralized key-value store.
You can learn more about the BlobVM by referencing the [README](https://github.com/ava-labs/blobvm/blob/master/README.md) in the GitHub repository.
# Simple Golang VM (/docs/virtual-machines/golang-vms/simple-golang-vm)
---
title: Simple Golang VM
description: In this tutorial, we will learn how to build a virtual machine by referencing the TimestampVM.
---
In this tutorial, we'll create a very simple VM called the [TimestampVM](https://github.com/ava-labs/timestampvm/tree/v1.2.1). Each block in the TimestampVM's blockchain contains a strictly increasing timestamp when the block was created and a 32-byte payload of data.
Such a server is useful because it can be used to prove a piece of data existed at the time the block was created. Suppose you have a book manuscript, and you want to be able to prove in the future that the manuscript exists today. You can add a block to the blockchain where the block's payload is a hash of your manuscript. In the future, you can prove that the manuscript existed today by showing that the block has the hash of your manuscript in its payload (this follows from the fact that finding the pre-image of a hash is impossible).
## TimestampVM Implementation
Now we know the interface our VM must implement and the libraries we can use to build a VM.
Let's write our VM, which implements `block.ChainVM` and whose blocks implement `snowman.Block`. You can also follow the code in the [TimestampVM repository](https://github.com/ava-labs/timestampvm/tree/main).
### Codec
`Codec` is required to encode/decode the block into byte representation. TimestampVM uses the default codec and manager.
```go title="timestampvm/codec.go"
const (
// CodecVersion is the current default codec version
CodecVersion = 0
)
// Codecs do serialization and deserialization
var (
Codec codec.Manager
)
func init() {
// Create default codec and manager
c := linearcodec.NewDefault()
Codec = codec.NewDefaultManager()
// Register codec to manager with CodecVersion
if err := Codec.RegisterCodec(CodecVersion, c); err != nil {
panic(err)
}
}
```
### State
The `State` interface defines the database layer and connections. Each VM should define their own database methods. `State` embeds the `BlockState` which defines block-related state operations.
```go title="timestampvm/state.go"
var (
// These are prefixes for db keys.
// It's important to set different prefixes for each separate database objects.
singletonStatePrefix = []byte("singleton")
blockStatePrefix = []byte("block")
_ State = &state{}
)
// State is a wrapper around avax.SingleTonState and BlockState
// State also exposes a few methods needed for managing database commits and close.
type State interface {
// SingletonState is defined in avalanchego,
// it is used to understand if db is initialized already.
avax.SingletonState
BlockState
Commit() error
Close() error
}
type state struct {
avax.SingletonState
BlockState
baseDB *versiondb.Database
}
func NewState(db database.Database, vm *VM) State {
// create a new baseDB
baseDB := versiondb.New(db)
// create a prefixed "blockDB" from baseDB
blockDB := prefixdb.New(blockStatePrefix, baseDB)
// create a prefixed "singletonDB" from baseDB
singletonDB := prefixdb.New(singletonStatePrefix, baseDB)
// return state with created sub state components
return &state{
BlockState: NewBlockState(blockDB, vm),
SingletonState: avax.NewSingletonState(singletonDB),
baseDB: baseDB,
}
}
// Commit commits pending operations to baseDB
func (s *state) Commit() error {
return s.baseDB.Commit()
}
// Close closes the underlying base database
func (s *state) Close() error {
return s.baseDB.Close()
}
```
#### Block State
This interface and implementation provides storage functions to VM to store and retrieve blocks.
```go title="timestampvm/block_state.go"
const (
lastAcceptedByte byte = iota
)
const (
// maximum block capacity of the cache
blockCacheSize = 8192
)
// persists lastAccepted block IDs with this key
var lastAcceptedKey = []byte{lastAcceptedByte}
var _ BlockState = &blockState{}
// BlockState defines methods to manage state with Blocks and LastAcceptedIDs.
type BlockState interface {
GetBlock(blkID ids.ID) (*Block, error)
PutBlock(blk *Block) error
GetLastAccepted() (ids.ID, error)
SetLastAccepted(ids.ID) error
}
// blockState implements BlocksState interface with database and cache.
type blockState struct {
// cache to store blocks
blkCache cache.Cacher
// block database
blockDB database.Database
lastAccepted ids.ID
// vm reference
vm *VM
}
// blkWrapper wraps the actual blk bytes and status to persist them together
type blkWrapper struct {
Blk []byte `serialize:"true"`
Status choices.Status `serialize:"true"`
}
// NewBlockState returns BlockState with a new cache and given db
func NewBlockState(db database.Database, vm *VM) BlockState {
return &blockState{
blkCache: &cache.LRU{Size: blockCacheSize},
blockDB: db,
vm: vm,
}
}
// GetBlock gets Block from either cache or database
func (s *blockState) GetBlock(blkID ids.ID) (*Block, error) {
// Check if cache has this blkID
if blkIntf, cached := s.blkCache.Get(blkID); cached {
// there is a key but value is nil, so return an error
if blkIntf == nil {
return nil, database.ErrNotFound
}
// We found it return the block in cache
return blkIntf.(*Block), nil
}
// get block bytes from db with the blkID key
wrappedBytes, err := s.blockDB.Get(blkID[:])
if err != nil {
// we could not find it in the db, let's cache this blkID with nil value
// so next time we try to fetch the same key we can return error
// without hitting the database
if err == database.ErrNotFound {
s.blkCache.Put(blkID, nil)
}
// could not find the block, return error
return nil, err
}
// first decode/unmarshal the block wrapper so we can have status and block bytes
blkw := blkWrapper{}
if _, err := Codec.Unmarshal(wrappedBytes, &blkw); err != nil {
return nil, err
}
// now decode/unmarshal the actual block bytes to block
blk := &Block{}
if _, err := Codec.Unmarshal(blkw.Blk, blk); err != nil {
return nil, err
}
// initialize block with block bytes, status and vm
blk.Initialize(blkw.Blk, blkw.Status, s.vm)
// put block into cache
s.blkCache.Put(blkID, blk)
return blk, nil
}
// PutBlock puts block into both database and cache
func (s *blockState) PutBlock(blk *Block) error {
// create block wrapper with block bytes and status
blkw := blkWrapper{
Blk: blk.Bytes(),
Status: blk.Status(),
}
// encode block wrapper to its byte representation
wrappedBytes, err := Codec.Marshal(CodecVersion, &blkw)
if err != nil {
return err
}
blkID := blk.ID()
// put actual block to cache, so we can directly fetch it from cache
s.blkCache.Put(blkID, blk)
// put wrapped block bytes into database
return s.blockDB.Put(blkID[:], wrappedBytes)
}
// DeleteBlock deletes block from both cache and database
func (s *blockState) DeleteBlock(blkID ids.ID) error {
s.blkCache.Put(blkID, nil)
return s.blockDB.Delete(blkID[:])
}
// GetLastAccepted returns last accepted block ID
func (s *blockState) GetLastAccepted() (ids.ID, error) {
// check if we already have lastAccepted ID in state memory
if s.lastAccepted != ids.Empty {
return s.lastAccepted, nil
}
// get lastAccepted bytes from database with the fixed lastAcceptedKey
lastAcceptedBytes, err := s.blockDB.Get(lastAcceptedKey)
if err != nil {
return ids.ID{}, err
}
// parse bytes to ID
lastAccepted, err := ids.ToID(lastAcceptedBytes)
if err != nil {
return ids.ID{}, err
}
// put lastAccepted ID into memory
s.lastAccepted = lastAccepted
return lastAccepted, nil
}
// SetLastAccepted persists lastAccepted ID into both cache and database
func (s *blockState) SetLastAccepted(lastAccepted ids.ID) error {
// if the ID in memory and the given memory are same don't do anything
if s.lastAccepted == lastAccepted {
return nil
}
// put lastAccepted ID to memory
s.lastAccepted = lastAccepted
// persist lastAccepted ID to database with fixed lastAcceptedKey
return s.blockDB.Put(lastAcceptedKey, lastAccepted[:])
}
```
### Block
Let's look at our block implementation. The type declaration is:
```go title="timestampvm/block.go"
// Block is a block on the chain.
// Each block contains:
// 1) ParentID
// 2) Height
// 3) Timestamp
// 4) A piece of data (a string)
type Block struct {
PrntID ids.ID `serialize:"true" json:"parentID"` // parent's ID
Hght uint64 `serialize:"true" json:"height"` // This block's height. The genesis block is at height 0.
Tmstmp int64 `serialize:"true" json:"timestamp"` // Time this block was proposed at
Dt [dataLen]byte `serialize:"true" json:"data"` // Arbitrary data
id ids.ID // hold this block's ID
bytes []byte // this block's encoded bytes
status choices.Status // block's status
vm *VM // the underlying VM reference, mostly used for state
}
```
The `serialize:"true"` tag indicates that the field should be included in the byte representation of the block used when persisting the block or sending it to other nodes.
#### Verify
This method verifies that a block is valid and stores it in the memory. It is important to store the verified block in the memory and return them in the `vm.GetBlock` method.
```go title="timestampvm/block.go"
// Verify returns nil iff this block is valid.
// To be valid, it must be that:
// b.parent.Timestamp < b.Timestamp <= [local time] + 1 hour
func (b *Block) Verify() error {
// Get [b]'s parent
parentID := b.Parent()
parent, err := b.vm.getBlock(parentID)
if err != nil {
return errDatabaseGet
}
// Ensure [b]'s height comes right after its parent's height
if expectedHeight := parent.Height() + 1; expectedHeight != b.Hght {
return fmt.Errorf(
"expected block to have height %d, but found %d",
expectedHeight,
b.Hght,
)
}
// Ensure [b]'s timestamp is after its parent's timestamp.
if b.Timestamp().Unix() < parent.Timestamp().Unix() {
return errTimestampTooEarly
}
// Ensure [b]'s timestamp is not more than an hour
// ahead of this node's time
if b.Timestamp().Unix() >= time.Now().Add(time.Hour).Unix() {
return errTimestampTooLate
}
// Put that block to verified blocks in memory
b.vm.verifiedBlocks[b.ID()] = b
return nil
}
```
#### Accept
`Accept` is called by the consensus to indicate this block is accepted.
```go title="timestampvm/block.go"
// Accept sets this block's status to Accepted and sets lastAccepted to this
// block's ID and saves this info to b.vm.DB
func (b *Block) Accept() error {
b.SetStatus(choices.Accepted) // Change state of this block
blkID := b.ID()
// Persist data
if err := b.vm.state.PutBlock(b); err != nil {
return err
}
// Set last accepted ID to this block ID
if err := b.vm.state.SetLastAccepted(blkID); err != nil {
return err
}
// Delete this block from verified blocks as it's accepted
delete(b.vm.verifiedBlocks, b.ID())
// Commit changes to database
return b.vm.state.Commit()
}
```
#### Reject
`Reject` is called by the consensus to indicate this block is rejected.
```go title="timestampvm/block.go"
// Reject sets this block's status to Rejected and saves the status in state
// Recall that b.vm.DB.Commit() must be called to persist to the DB
func (b *Block) Reject() error {
b.SetStatus(choices.Rejected) // Change state of this block
if err := b.vm.state.PutBlock(b); err != nil {
return err
}
// Delete this block from verified blocks as it's rejected
delete(b.vm.verifiedBlocks, b.ID())
// Commit changes to database
return b.vm.state.Commit()
}
```
#### Block Field Methods
These methods are required by the `snowman.Block` interface.
```go title="timestampvm/block.go"
// ID returns the ID of this block
func (b *Block) ID() ids.ID { return b.id }
// ParentID returns [b]'s parent's ID
func (b *Block) Parent() ids.ID { return b.PrntID }
// Height returns this block's height. The genesis block has height 0.
func (b *Block) Height() uint64 { return b.Hght }
// Timestamp returns this block's time. The genesis block has time 0.
func (b *Block) Timestamp() time.Time { return time.Unix(b.Tmstmp, 0) }
// Status returns the status of this block
func (b *Block) Status() choices.Status { return b.status }
// Bytes returns the byte repr. of this block
func (b *Block) Bytes() []byte { return b.bytes }
```
#### Helper Functions
These methods are convenience methods for blocks, they're not a part of the block interface.
```go
// Initialize sets [b.bytes] to [bytes], [b.id] to hash([b.bytes]),
// [b.status] to [status] and [b.vm] to [vm]
func (b *Block) Initialize(bytes []byte, status choices.Status, vm *VM) {
b.bytes = bytes
b.id = hashing.ComputeHash256Array(b.bytes)
b.status = status
b.vm = vm
}
// SetStatus sets the status of this block
func (b *Block) SetStatus(status choices.Status) { b.status = status }
```
### Virtual Machine
Now, let's look at our timestamp VM implementation, which implements the `block.ChainVM` interface. The declaration is:
```go title="timestampvm/vm.go"
// This Virtual Machine defines a blockchain that acts as a timestamp server
// Each block contains data (a payload) and the timestamp when it was created
const (
dataLen = 32
Name = "timestampvm"
)
// VM implements the snowman.VM interface
// Each block in this chain contains a Unix timestamp
// and a piece of data (a string)
type VM struct {
// The context of this vm
ctx *snow.Context
dbManager manager.Manager
// State of this VM
state State
// ID of the preferred block
preferred ids.ID
// channel to send messages to the consensus engine
toEngine chan<- common.Message
// Proposed pieces of data that haven't been put into a block and proposed yet
mempool [][dataLen]byte
// Block ID --> Block
// Each element is a block that passed verification but
// hasn't yet been accepted/rejected
verifiedBlocks map[ids.ID]*Block
}
```
#### Initialize
This method is called when a new instance of VM is initialized. Genesis block is created under this method.
```go title="timestampvm/vm.go"
// Initialize this vm
// [ctx] is this vm's context
// [dbManager] is the manager of this vm's database
// [toEngine] is used to notify the consensus engine that new blocks are
// ready to be added to consensus
// The data in the genesis block is [genesisData]
func (vm *VM) Initialize(
ctx *snow.Context,
dbManager manager.Manager,
genesisData []byte,
upgradeData []byte,
configData []byte,
toEngine chan<- common.Message,
_ []*common.Fx,
_ common.AppSender,
) error {
version, err := vm.Version()
if err != nil {
log.Error("error initializing Timestamp VM: %v", err)
return err
}
log.Info("Initializing Timestamp VM", "Version", version)
vm.dbManager = dbManager
vm.ctx = ctx
vm.toEngine = toEngine
vm.verifiedBlocks = make(map[ids.ID]*Block)
// Create new state
vm.state = NewState(vm.dbManager.Current().Database, vm)
// Initialize genesis
if err := vm.initGenesis(genesisData); err != nil {
return err
}
// Get last accepted
lastAccepted, err := vm.state.GetLastAccepted()
if err != nil {
return err
}
ctx.Log.Info("initializing last accepted block as %s", lastAccepted)
// Build off the most recently accepted block
return vm.SetPreference(lastAccepted)
}
```
#### `initGenesis`
`initGenesis` is a helper method which initializes the genesis block from given bytes and puts into the state.
```go title="timestampvm/vm.go"
// Initializes Genesis if required
func (vm *VM) initGenesis(genesisData []byte) error {
stateInitialized, err := vm.state.IsInitialized()
if err != nil {
return err
}
// if state is already initialized, skip init genesis.
if stateInitialized {
return nil
}
if len(genesisData) > dataLen {
return errBadGenesisBytes
}
// genesisData is a byte slice but each block contains an byte array
// Take the first [dataLen] bytes from genesisData and put them in an array
var genesisDataArr [dataLen]byte
copy(genesisDataArr[:], genesisData)
// Create the genesis block
// Timestamp of genesis block is 0. It has no parent.
genesisBlock, err := vm.NewBlock(ids.Empty, 0, genesisDataArr, time.Unix(0, 0))
if err != nil {
log.Error("error while creating genesis block: %v", err)
return err
}
// Put genesis block to state
if err := vm.state.PutBlock(genesisBlock); err != nil {
log.Error("error while saving genesis block: %v", err)
return err
}
// Accept the genesis block
// Sets [vm.lastAccepted] and [vm.preferred]
if err := genesisBlock.Accept(); err != nil {
return fmt.Errorf("error accepting genesis block: %w", err)
}
// Mark this vm's state as initialized, so we can skip initGenesis in further restarts
if err := vm.state.SetInitialized(); err != nil {
return fmt.Errorf("error while setting db to initialized: %w", err)
}
// Flush VM's database to underlying db
return vm.state.Commit()
}
```
#### CreateHandlers
Registered handlers defined in `Service`. See [below](/docs/virtual-machines/golang-vms/simple-golang-vm#api) for more on APIs.
```go title="timestampvm/vm.go"
// CreateHandlers returns a map where:
// Keys: The path extension for this blockchain's API (empty in this case)
// Values: The handler for the API
// In this case, our blockchain has only one API, which we name timestamp,
// and it has no path extension, so the API endpoint:
// [Node IP]/ext/bc/[this blockchain's ID]
// See API section in documentation for more information
func (vm *VM) CreateHandlers() (map[string]*common.HTTPHandler, error) {
server := rpc.NewServer()
server.RegisterCodec(json.NewCodec(), "application/json")
server.RegisterCodec(json.NewCodec(), "application/json;charset=UTF-8")
// Name is "timestampvm"
if err := server.RegisterService(&Service{vm: vm}, Name); err != nil {
return nil, err
}
return map[string]*common.HTTPHandler{
"": {
Handler: server,
},
}, nil
}
```
#### CreateStaticHandlers
Registers static handlers defined in `StaticService`. See [below](/docs/virtual-machines/golang-vms/simple-golang-vm#static-api) for more on static APIs.
```go title="timestampvm/vm.go"
// CreateStaticHandlers returns a map where:
// Keys: The path extension for this VM's static API
// Values: The handler for that static API
func (vm *VM) CreateStaticHandlers() (map[string]*common.HTTPHandler, error) {
server := rpc.NewServer()
server.RegisterCodec(json.NewCodec(), "application/json")
server.RegisterCodec(json.NewCodec(), "application/json;charset=UTF-8")
if err := server.RegisterService(&StaticService{}, Name); err != nil {
return nil, err
}
return map[string]*common.HTTPHandler{
"": {
LockOptions: common.NoLock,
Handler: server,
},
}, nil
}
```
#### BuildBock
`BuildBlock` builds a new block and returns it. This is mainly requested by the consensus engine.
```go title="timestampvm/vm.go"
// BuildBlock returns a block that this vm wants to add to consensus
func (vm *VM) BuildBlock() (snowman.Block, error) {
if len(vm.mempool) == 0 { // There is no block to be built
return nil, errNoPendingBlocks
}
// Get the value to put in the new block
value := vm.mempool[0]
vm.mempool = vm.mempool[1:]
// Notify consensus engine that there are more pending data for blocks
// (if that is the case) when done building this block
if len(vm.mempool) > 0 {
defer vm.NotifyBlockReady()
}
// Gets Preferred Block
preferredBlock, err := vm.getBlock(vm.preferred)
if err != nil {
return nil, fmt.Errorf("couldn't get preferred block: %w", err)
}
preferredHeight := preferredBlock.Height()
// Build the block with preferred height
newBlock, err := vm.NewBlock(vm.preferred, preferredHeight+1, value, time.Now())
if err != nil {
return nil, fmt.Errorf("couldn't build block: %w", err)
}
// Verifies block
if err := newBlock.Verify(); err != nil {
return nil, err
}
return newBlock, nil
}
```
#### NotifyBlockReady
`NotifyBlockReady` is a helper method that can send messages to the consensus engine through `toEngine` channel.
```go title="timestampvm/vm.go"
// NotifyBlockReady tells the consensus engine that a new block
// is ready to be created
func (vm *VM) NotifyBlockReady() {
select {
case vm.toEngine <- common.PendingTxs:
default:
vm.ctx.Log.Debug("dropping message to consensus engine")
}
}
```
#### GetBlock
`GetBlock` returns the block with the given block ID.
```go title="timestampvm/vm.go"
// GetBlock implements the snowman.ChainVM interface
func (vm *VM) GetBlock(blkID ids.ID) (snowman.Block, error) { return vm.getBlock(blkID) }
func (vm *VM) getBlock(blkID ids.ID) (*Block, error) {
// If block is in memory, return it.
if blk, exists := vm.verifiedBlocks[blkID]; exists {
return blk, nil
}
return vm.state.GetBlock(blkID)
}
```
#### `proposeBlock`
This method adds a piece of data to the mempool and notifies the consensus layer of the blockchain that a new block is ready to be built and voted on. This is called by API method `ProposeBlock`, which we'll see later.
```go title="timestampvm/vm.go"
// proposeBlock appends [data] to [p.mempool].
// Then it notifies the consensus engine
// that a new block is ready to be added to consensus
// (namely, a block with data [data])
func (vm *VM) proposeBlock(data [dataLen]byte) {
vm.mempool = append(vm.mempool, data)
vm.NotifyBlockReady()
}
```
#### ParseBlock
Parse a block from its byte representation.
```go title="timestampvm/vm.go"
// ParseBlock parses [bytes] to a snowman.Block
// This function is used by the vm's state to unmarshal blocks saved in state
// and by the consensus layer when it receives the byte representation of a block
// from another node
func (vm *VM) ParseBlock(bytes []byte) (snowman.Block, error) {
// A new empty block
block := &Block{}
// Unmarshal the byte repr. of the block into our empty block
_, err := Codec.Unmarshal(bytes, block)
if err != nil {
return nil, err
}
// Initialize the block
block.Initialize(bytes, choices.Processing, vm)
if blk, err := vm.getBlock(block.ID()); err == nil {
// If we have seen this block before, return it with the most up-to-date
// info
return blk, nil
}
// Return the block
return block, nil
}
```
#### NewBlock
`NewBlock` creates a new block with given block parameters.
```go title="timestampvm/vm.go"
// NewBlock returns a new Block where:
// - the block's parent is [parentID]
// - the block's data is [data]
// - the block's timestamp is [timestamp]
func (vm *VM) NewBlock(parentID ids.ID, height uint64, data [dataLen]byte, timestamp time.Time) (*Block, error) {
block := &Block{
PrntID: parentID,
Hght: height,
Tmstmp: timestamp.Unix(),
Dt: data,
}
// Get the byte representation of the block
blockBytes, err := Codec.Marshal(CodecVersion, block)
if err != nil {
return nil, err
}
// Initialize the block by providing it with its byte representation
// and a reference to this VM
block.Initialize(blockBytes, choices.Processing, vm)
return block, nil
}
```
#### SetPreference
`SetPreference` implements the `block.ChainVM`. It sets the preferred block ID.
```go title="timestampvm/vm.go"
// SetPreference sets the block with ID [ID] as the preferred block
func (vm *VM) SetPreference(id ids.ID) error {
vm.preferred = id
return nil
}
```
#### Other Functions
These functions needs to be implemented for `block.ChainVM`. Most of them are just blank functions returning `nil`.
```go title="timestampvm/vm.go"
// Bootstrapped marks this VM as bootstrapped
func (vm *VM) Bootstrapped() error { return nil }
// Bootstrapping marks this VM as bootstrapping
func (vm *VM) Bootstrapping() error { return nil }
// Returns this VM's version
func (vm *VM) Version() (string, error) {
return Version.String(), nil
}
func (vm *VM) Connected(id ids.ShortID, nodeVersion version.Application) error {
return nil // noop
}
func (vm *VM) Disconnected(id ids.ShortID) error {
return nil // noop
}
// This VM doesn't (currently) have any app-specific messages
func (vm *VM) AppGossip(nodeID ids.ShortID, msg []byte) error {
return nil
}
// This VM doesn't (currently) have any app-specific messages
func (vm *VM) AppRequest(nodeID ids.ShortID, requestID uint32, time time.Time, request []byte) error {
return nil
}
// This VM doesn't (currently) have any app-specific messages
func (vm *VM) AppResponse(nodeID ids.ShortID, requestID uint32, response []byte) error {
return nil
}
// This VM doesn't (currently) have any app-specific messages
func (vm *VM) AppRequestFailed(nodeID ids.ShortID, requestID uint32) error {
return nil
}
// Health implements the common.VM interface
func (vm *VM) HealthCheck() (interface{}, error) { return nil, nil }
```
### Factory
VMs should implement the `Factory` interface. `New` method in the interface returns a new VM instance.
```go title="timestampvm/factory.go"
var _ vms.Factory = &Factory{}
// Factory ...
type Factory struct{}
// New ...
func (f *Factory) New(*snow.Context) (interface{}, error) { return &VM{}, nil }
```
### Static API
A VM may have a static API, which allows clients to call methods that do not query or update the state of a particular blockchain, but rather apply to the VM as a whole. This is analogous to static methods in computer programming. AvalancheGo uses [Gorilla's RPC library](https://www.gorillatoolkit.org/pkg/rpc) to implement HTTP APIs. `StaticService` implements the static API for our VM.
```go title="timestampvm/static_service.go"
// StaticService defines the static API for the timestamp vm
type StaticService struct{}
```
#### Encode
For each API method, there is:
- A struct that defines the method's arguments
- A struct that defines the method's return values
- A method that implements the API method, and is parameterized on the above 2 structs
This API method encodes a string to its byte representation using a given encoding scheme. It can be used to encode data that is then put in a block and proposed as the next block for this chain.
```go title="timestampvm/static_service.go"
// EncodeArgs are arguments for Encode
type EncodeArgs struct {
Data string `json:"data"`
Encoding formatting.Encoding `json:"encoding"`
Length int32 `json:"length"`
}
// EncodeReply is the reply from Encoder
type EncodeReply struct {
Bytes string `json:"bytes"`
Encoding formatting.Encoding `json:"encoding"`
}
// Encoder returns the encoded data
func (ss *StaticService) Encode(_ *http.Request, args *EncodeArgs, reply *EncodeReply) error {
if len(args.Data) == 0 {
return fmt.Errorf("argument Data cannot be empty")
}
var argBytes []byte
if args.Length > 0 {
argBytes = make([]byte, args.Length)
copy(argBytes, args.Data)
} else {
argBytes = []byte(args.Data)
}
bytes, err := formatting.EncodeWithChecksum(args.Encoding, argBytes)
if err != nil {
return fmt.Errorf("couldn't encode data as string: %s", err)
}
reply.Bytes = bytes
reply.Encoding = args.Encoding
return nil
}
```
#### Decode
This API method is the inverse of `Encode`.
```go title="timestampvm/static_service.go"
// DecoderArgs are arguments for Decode
type DecoderArgs struct {
Bytes string `json:"bytes"`
Encoding formatting.Encoding `json:"encoding"`
}
// DecoderReply is the reply from Decoder
type DecoderReply struct {
Data string `json:"data"`
Encoding formatting.Encoding `json:"encoding"`
}
// Decoder returns the Decoded data
func (ss *StaticService) Decode(_ *http.Request, args *DecoderArgs, reply *DecoderReply) error {
bytes, err := formatting.Decode(args.Encoding, args.Bytes)
if err != nil {
return fmt.Errorf("couldn't Decode data as string: %s", err)
}
reply.Data = string(bytes)
reply.Encoding = args.Encoding
return nil
}
```
### API
A VM may also have a non-static HTTP API, which allows clients to query and update the blockchain's state. `Service`'s declaration is:
```go title="timestampvm/service.go"
// Service is the API service for this VM
type Service struct{ vm *VM }
```
Note that this struct has a reference to the VM, so it can query and update state.
This VM's API has two methods. One allows a client to get a block by its ID. The other allows a client to propose the next block of this blockchain. The blockchain ID in the endpoint changes, since every blockchain has an unique ID.
#### `timestampvm.getBlock`
Get a block by its ID. If no ID is provided, get the latest block.
##### `getBlock` Signature
```
timestampvm.getBlock({id: string}) ->
{
id: string,
data: string,
timestamp: int,
parentID: string
}
```
- `id` is the ID of the block being retrieved. If omitted from arguments, gets the latest block
- `data` is the base 58 (with checksum) representation of the block's 32 byte payload
- `timestamp` is the Unix timestamp when this block was created
- `parentID` is the block's parent
##### `getBlock` Example Call
```bash
curl -X POST --data '{
"jsonrpc": "2.0",
"method": "timestampvm.getBlock",
"params":{
"id":"xqQV1jDnCXDxhfnNT7tDBcXeoH2jC3Hh7Pyv4GXE1z1hfup5K"
},
"id": 1
}' -H 'content-type:application/json;' 127.0.0.1:9650/ext/bc/sw813hGSWH8pdU9uzaYy9fCtYFfY7AjDd2c9rm64SbApnvjmk
```
##### `getBlock` Example Response
```json
{
"jsonrpc": "2.0",
"result": {
"timestamp": "1581717416",
"data": "11111111111111111111111111111111LpoYY",
"id": "xqQV1jDnCXDxhfnNT7tDBcXeoH2jC3Hh7Pyv4GXE1z1hfup5K",
"parentID": "22XLgiM5dfCwTY9iZnVk8ZPuPe3aSrdVr5Dfrbxd3ejpJd7oef"
},
"id": 1
}
```
##### `getBlock` Implementation
```go title="timestampvm/service.go"
// GetBlockArgs are the arguments to GetBlock
type GetBlockArgs struct {
// ID of the block we're getting.
// If left blank, gets the latest block
ID *ids.ID `json:"id"`
}
// GetBlockReply is the reply from GetBlock
type GetBlockReply struct {
Timestamp json.Uint64 `json:"timestamp"` // Timestamp of most recent block
Data string `json:"data"` // Data in the most recent block. Base 58 repr. of 5 bytes.
ID ids.ID `json:"id"` // String repr. of ID of the most recent block
ParentID ids.ID `json:"parentID"` // String repr. of ID of the most recent block's parent
}
// GetBlock gets the block whose ID is [args.ID]
// If [args.ID] is empty, get the latest block
func (s *Service) GetBlock(_ *http.Request, args *GetBlockArgs, reply *GetBlockReply) error {
// If an ID is given, parse its string representation to an ids.ID
// If no ID is given, ID becomes the ID of last accepted block
var (
id ids.ID
err error
)
if args.ID == nil {
id, err = s.vm.state.GetLastAccepted()
if err != nil {
return errCannotGetLastAccepted
}
} else {
id = *args.ID
}
// Get the block from the database
block, err := s.vm.getBlock(id)
if err != nil {
return errNoSuchBlock
}
// Fill out the response with the block's data
reply.ID = block.ID()
reply.Timestamp = json.Uint64(block.Timestamp().Unix())
reply.ParentID = block.Parent()
data := block.Data()
reply.Data, err = formatting.EncodeWithChecksum(formatting.CB58, data[:])
return err
}
```
#### `timestampvm.proposeBlock`
Propose the next block on this blockchain.
##### `proposeBlock` Signature
```go
timestampvm.proposeBlock({data: string}) -> {success: bool}
```
- `data` is the base 58 (with checksum) representation of the proposed block's 32 byte payload.
##### `proposeBlock` Example Call
```bash
curl -X POST --data '{
"jsonrpc": "2.0",
"method": "timestampvm.proposeBlock",
"params":{
"data":"SkB92YpWm4Q2iPnLGCuDPZPgUQMxajqQQuz91oi3xD984f8r"
},
"id": 1
}' -H 'content-type:application/json;' 127.0.0.1:9650/ext/bc/sw813hGSWH8pdU9uzaYy9fCtYFfY7AjDd2c9rm64SbApnvjmk
```
###### `proposeBlock` Example Response
```json
{
"jsonrpc": "2.0",
"result": {
"Success": true
},
"id": 1
}
```
##### `proposeBlock` Implementation
```go title="timestampvm/service.go"
// ProposeBlockArgs are the arguments to ProposeValue
type ProposeBlockArgs struct {
// Data for the new block. Must be base 58 encoding (with checksum) of 32 bytes.
Data string
}
// ProposeBlockReply is the reply from function ProposeBlock
type ProposeBlockReply struct{
// True if the operation was successful
Success bool
}
// ProposeBlock is an API method to propose a new block whose data is [args].Data.
// [args].Data must be a string repr. of a 32 byte array
func (s *Service) ProposeBlock(_ *http.Request, args *ProposeBlockArgs, reply *ProposeBlockReply) error {
bytes, err := formatting.Decode(formatting.CB58, args.Data)
if err != nil || len(bytes) != dataLen {
return errBadData
}
var data [dataLen]byte // The data as an array of bytes
copy(data[:], bytes[:dataLen]) // Copy the bytes in dataSlice to data
s.vm.proposeBlock(data)
reply.Success = true
return nil
}
```
### Plugin
In order to make this VM compatible with `go-plugin`, we need to define a `main` package and method, which serves our VM over gRPC so that AvalancheGo can call its methods. `main.go`'s contents are:
```go title="main/main.go"
func main() {
log.Root().SetHandler(log.LvlFilterHandler(log.LvlDebug, log.StreamHandler(os.Stderr, log.TerminalFormat())))
plugin.Serve(&plugin.ServeConfig{
HandshakeConfig: rpcchainvm.Handshake,
Plugins: map[string]plugin.Plugin{
"vm": rpcchainvm.New(×tampvm.VM{}),
},
// A non-nil value here enables gRPC serving for this plugin...
GRPCServer: plugin.DefaultGRPCServer,
})
}
```
Now AvalancheGo's `rpcchainvm` can connect to this plugin and calls its methods.
### Executable Binary
This VM has a [build script](https://github.com/ava-labs/timestampvm/blob/v1.2.1/scripts/build.sh) that builds an executable of this VM (when invoked, it runs the `main` method from above.)
The path to the executable, as well as its name, can be provided to the build script via arguments. For example:
```bash
./scripts/build.sh ../avalanchego/build/plugins timestampvm
```
If no argument is given, the path defaults to a binary named with default VM ID: `$GOPATH/src/github.com/ava-labs/avalanchego/build/plugins/tGas3T58KzdjLHhBDMnH2TvrddhqTji5iZAMZ3RXs2NLpSnhH`
This name `tGas3T58KzdjLHhBDMnH2TvrddhqTji5iZAMZ3RXs2NLpSnhH` is the CB58 encoded 32 byte identifier for the VM. For the timestampvm, this is the string "timestamp" zero-extended in a 32 byte array and encoded in CB58.
### VM Aliases
Each VM has a predefined, static ID. For instance, the default ID of the TimestampVM is: `tGas3T58KzdjLHhBDMnH2TvrddhqTji5iZAMZ3RXs2NLpSnhH`.
It's possible to give an alias for these IDs. For example, we can alias `TimestampVM` by creating a JSON file at `~/.avalanchego/configs/vms/aliases.json` with:
The name of the VM binary is also its static ID and should not be changed manually. Changing the name of the VM binary will result in AvalancheGo failing to start the VM. To reference a VM by another name, define a VM alias as described below.
```json
{
"tGas3T58KzdjLHhBDMnH2TvrddhqTji5iZAMZ3RXs2NLpSnhH": [
"timestampvm",
"timestamp"
]
}
```
### Installing a VM
AvalancheGo searches for and registers plugins under the `plugins` [directory](/docs/nodes/configure/configs-flags#--plugin-dir-string).
To install the virtual machine onto your node, you need to move the built virtual machine binary under this directory. Virtual machine executable names must be either a full virtual machine ID (encoded in CB58), or a VM alias.
Copy the binary into the plugins directory.
```bash
cp -n $GOPATH/src/github.com/ava-labs/avalanchego/build/plugins/
```
#### Node Is Not Running
If your node isn't running yet, you can install all virtual machines under your `plugin` directory by starting the node.
#### Node Is Already Running
Load the binary with the `loadVMs` API.
```bash
curl -sX POST --data '{
"jsonrpc":"2.0",
"id" :1,
"method" :"admin.loadVMs",
"params" :{}
}' -H 'content-type:application/json;' 127.0.0.1:9650/ext/admin
```
Confirm the response of `loadVMs` contains the newly installed virtual machine `tGas3T58KzdjLHhBDMnH2TvrddhqTji5iZAMZ3RXs2NLpSnhH`. You'll see this virtual machine as well as any others that weren't already installed previously in the response.
```json
{
"jsonrpc": "2.0",
"result": {
"newVMs": {
"tGas3T58KzdjLHhBDMnH2TvrddhqTji5iZAMZ3RXs2NLpSnhH": [
"timestampvm",
"timestamp"
],
"spdxUxVJQbX85MGxMHbKw1sHxMnSqJ3QBzDyDYEP3h6TLuxqQ": []
}
},
"id": 1
}
```
Now, this VM's static API can be accessed at endpoints `/ext/vm/timestampvm` and `/ext/vm/timestamp`. For more details about VM configs, see [here](/docs/nodes/configure/configs-flags#virtual-machine-vm-configs).
In this tutorial, we used the VM's ID as the executable name to simplify the process. However, AvalancheGo would also accept `timestampvm` or `timestamp` since those are registered aliases in previous step.
## Wrapping Up
That's it! That's the entire implementation of a VM which defines a blockchain-based timestamp server.
In this tutorial, we learned:
- The `block.ChainVM` interface, which all VMs that define a linear chain must implement
- The `snowman.Block` interface, which all blocks that are part of a linear chain must implement
- The `rpcchainvm` type, which allows blockchains to run in their own processes.
- An actual implementation of `block.ChainVM` and `snowman.Block`.
# Installing Your VM (/docs/virtual-machines/rust-vms/installing-vm)
---
title: Installing Your VM
description: Learn how to install your VM on your node.
---
AvalancheGo searches for and registers VM plugins under the `plugins` [directory](/docs/nodes/configure/configs-flags#--plugin-dir-string).
To install the virtual machine onto your node, you need to move the built virtual machine binary under this directory. Virtual machine executable names must be either a full virtual machine ID (encoded in CB58), or a VM alias.
Copy the binary into the plugins directory.
```bash
cp -n $GOPATH/src/github.com/ava-labs/avalanchego/build/plugins/
```
## Node Is Not Running
If your node isn't running yet, you can install all virtual machines under your `plugin` directory by starting the node.
## Node Is Already Running
Load the binary with the `loadVMs` API.
```bash
curl -sX POST --data '{
"jsonrpc":"2.0",
"id" :1,
"method" :"admin.loadVMs",
"params" :{}
}' -H 'content-type:application/json;' 127.0.0.1:9650/ext/admin
```
Confirm the response of `loadVMs` contains the newly installed virtual machine `tGas3T58KzdjcJ32c6GpePhtqo9rrHJ1oR9wFBtCcMgaosthX`. You'll see this virtual machine as well as any others that weren't already installed previously in the response.
```json
{
"jsonrpc": "2.0",
"result": {
"newVMs": {
"tGas3T58KzdjcJ32c6GpePhtqo9rrHJ1oR9wFBtCcMgaosthX": [
"timestampvm-rs",
"timestamp-rs"
],
"spdxUxVJQbX85MGxMHbKw1sHxMnSqJ3QBzDyDYEP3h6TLuxqQ": []
}
},
"id": 1
}
```
Now, this VM's static API can be accessed at endpoints `/ext/vm/timestampvm-rs` and `/ext/vm/timestamp-rs`. For more details about VM configs, see [here](/docs/nodes/configure/configs-flags#virtual-machine-vm-configs).
In this tutorial, we used the VM's ID as the executable name to simplify the process. However, AvalancheGo would also accept `timestampvm-rs` or `timestamp-rs` since those are registered aliases in previous step.
# Introduction to Avalanche-RS (/docs/virtual-machines/rust-vms/intro-avalanche-rs)
---
title: Introduction to Avalanche-RS
description: Learn how to write a simple virtual machine in Rust using Avalanche-RS.
---
Since Rust is a language which we can write and implement Proto interfaces, this implies that we can also use Rust to write VMs which can then be deployed on Avalanche.
However, rather than build Rust-based from the ground-up, we can utilize Avalanche-RS, a developer toolkit comprised of powerful building blocks and primitive types which allow us to focus exclusively on the business logic of our VM rather than working on low-level logic.
## Structure of Avalanche-RS
Although Avalanche-RS is currently primarily used to build Rust-based VMs, Avalanche-RS actually consists of three different frameworks; as per the [GitHub](https://github.com/ava-labs/avalanche-rs) description of the Avalanche-RS repository, the three frameworks are as follows:
- Core: framework for core networking components for a P2P Avalanche node
- Avalanche-Consensus: a Rust implementation of the novel Avalanche consensus protocol
- Avalanche-Types: implements foundational types used in Avalanche and provides an SDK for building Rust-based VMs
As the above might make it obvious, the Avalanche-Types crate is the main framework that one would use to build Rust-based VMs.
## Documentation
For the most up-to-date information regarding the Avalache-Types library, please refer to the associated [crates.io](https://crates.io/crates/avalanche-types) page for the Avalanche-Types crate.
# Setting Up Your Environment (/docs/virtual-machines/rust-vms/setting-up-environment)
---
title: Setting Up Your Environment
description: Learn how to set up your environment to build a Rust VM.
---
In this section, we will focus on getting set up with the Rust environment necessary to build with the `avalanche-types` crates (recall that `avalanche-types` contains the SDK we want to use to build our Rust VM).
## Installing Rust
First and foremost, we will need to have Rust installed locally. If you do not have Rust installed, you can install `rustup` (the tool that manages your Rust installation) [here](https://www.rust-lang.org/tools/install).
## Adding `avalanche-types` to Your Project
Once you have Rust installed and are ready to build, you will want to add the Avalanche-Types crate to your project. Below is a baseline example of how you can do this:
```toml title="Cargo.toml"
[dependencies]
avalanche-types = "0.1.4"
```
However, if you want to use the [TimestampVM](https://github.com/ava-labs/timestampvm-rs) as a reference for your project, a more appropriate import would be the following:
```toml title="Cargo.toml"
[dependencies]
avalanche-types = { version = "0.1.4", features = ["subnet", "codec_base64"] }
```
# APIs (/docs/virtual-machines/timestamp-vm/apis)
---
title: APIs
description: Learn how to interact with TimestampVM.
---
Throughout this case study, we have been focusing of the functionality of the TimestampVM. However, one thing we haven't discussed is how external users can interact with an instance of TimestampVM.
Without a way for users to interact with TimestampVM, the blockchain itself will be stagnant. In this section, we will go over the two types of APIs used in TimestampVM:
- Static APIs
- Chain APIs
## Precursor: Static and Instance Methods
When understanding the static and chain APIs used in TimestampVM, a good way to think about these APIs is to compare them to static and instance methods in object-oriented programming. That is,
- **Static Methods**: functions which belong to the class itself, and not any instance of the class
- **Instance Methods**: functions which belong to the instance of a class
## Static APIs
We can think of the static APIs in TimestampVM as functions which call the VM and are not associated with any specific instance of the TimestampVM. Within TimestampVM, we have just one static API function - the ping function:
```rust title="timestampvm/src/api/static_handlers.rs"
/// Defines static handler RPCs for this VM.
#[rpc]
pub trait Rpc {
#[rpc(name = "ping", alias("timestampvm.ping"))]
fn ping(&self) -> BoxFuture
### Core Capabilities
* **Direct Chain Access** - RPC calls, wallet integration, and transaction management.
* **Indexed Data & Metrics** - Access Glacier Data API & Metrics API with type safety.
* **Interchain Messaging** - Build cross-L1 applications with ICM/Teleporter.
**Developer Preview**: This suite of SDKs is currently in beta and is subject to change. Use in production at your own risk.
We'd love to hear about your experience! **Please share your feedback here.**
Check out the code, contribute, or report issues. The Avalanche SDK TypeScript is fully open source.
## Which SDK Should I Use?
Choose the right SDK based on your specific needs:
| SDK Package | Description |
| :--------------------------------------------------------------------------- | :--------------------------------------------------------------- |
| [`@avalanche-sdk/client`](/avalanche-sdk/client-sdk/getting-started) | Direct blockchain interaction - transactions, wallets, RPC calls |
| [`@avalanche-sdk/chainkit`](/avalanche-sdk/chainkit-sdk/getting-started) | Complete suite: Data, Metrics and Webhooks API |
| [`@avalanche-sdk/interchain`](/avalanche-sdk/interchain-sdk/getting-started) | Send messages between Avalanche L1s using ICM/Teleporter |
## Quick Start
```bash theme={null}
npm install @avalanche-sdk/client
```
```bash theme={null}
yarn add @avalanche-sdk/client
```
```bash theme={null}
pnpm add @avalanche-sdk/client
```
### Basic Example
```typescript theme={null}
import { createClient } from '@avalanche-sdk/client';
// Initialize the client
const client = createClient({
network: 'mainnet'
});
// Get balance
const balance = await client.getBalance({
address: '0x...',
chainId: 43114
});
console.log('Balance:', balance);
```
## Available SDKs
### Client SDK
The main Avalanche client SDK for interacting with Avalanche nodes and building blockchain applications.
**Key Features:**
* **Complete API coverage** for P-Chain, X-Chain, and C-Chain.
* **Full viem compatibility** - anything you can do with viem works here.
* **TypeScript-first design** with full type safety.
* **Smart contract interactions** with first-class APIs.
* **Wallet integration** and transaction management.
* **Cross-chain transfers** between X, P and C chains.
**Common Use Cases:**
* Retrieve balances and UTXOs for addresses
* Build, sign, and issue transactions to any chain
* Add validators and delegators
* Create subnets and blockchains.
* Convert subnets to L1s.
Learn how to integrate blockchain functionality into your application
### ChainKit SDK
Combined SDK with full typed coverage of Avalanche Data (Glacier) and Metrics APIs.
**Key Features:**
* **Full endpoint coverage** for Glacier Data API and Metrics API
* **Strongly-typed models** with automatic TypeScript inference
* **Built-in pagination** helpers and automatic retries/backoff
* **High-level helpers** for transactions, blocks, addresses, tokens, NFTs
* **Metrics insights** including network health, validator stats, throughput
* **Webhook support** with payload shapes and signature verification
**API Endpoints:**
* Glacier API: [https://glacier-api.avax.network/api](https://glacier-api.avax.network/api)
* Metrics API: [https://metrics.avax.network/api](https://metrics.avax.network/api)
Access comprehensive blockchain data and analytics
### Interchain SDK
SDK for building cross-L1 applications and bridges.
**Key Features:**
* **Type-safe ICM client** for sending cross-chain messages
* **Seamless wallet integration** with existing wallet clients
* **Built-in support** for Avalanche C-Chain and custom subnets
* **Message tracking** and delivery confirmation
* **Gas estimation** for cross-chain operations
**Use Cases:**
* Cross-chain token bridges
* Multi-L1 governance systems
* Interchain data oracles
* Cross-subnet liquidity pools
Build powerful cross-chain applications
## Support
### Community & Help
* Discord - Get real-time help in the #avalanche-sdk channel
* Telegram - Join discussions
* Twitter - Stay updated
### Feedback Sessions
* Book a Google Meet Feedback Session - Schedule a 1-on-1 session to share your feedback and suggestions
### Issue Tracking
* Report a Bug
* Request a Feature
* View All Issues
### Direct Support
* Technical Issues: GitHub Issues
* Security Issues: [security@avalabs.org](mailto:security@avalabs.org)
* General Inquiries: [data-platform@avalabs.org](mailto:data-platform@avalabs.org)
# C-Chain API (/docs/rpcs/c-chain/api)
---
title: "C-Chain API"
description: "This page is an overview of the C-Chain API associated with AvalancheGo."
edit_url: https://github.com/ava-labs/coreth/edit/master/plugin/evm/api.md
---
Ethereum has its own notion of `networkID` and `chainID`. These have no relationship to Avalanche's view of networkID and chainID and are purely internal to the [C-Chain](https://github.com/docs/quick-start/primary-network#c-chain). On Mainnet, the C-Chain uses `1` and `43114` for these values. On the Fuji Testnet, it uses `1` and `43113` for these values. `networkID` and `chainID` can also be obtained using the `net_version` and `eth_chainId` methods.
## Ethereum APIs
### Endpoints
#### JSON-RPC Endpoints
To interact with C-Chain via the JSON-RPC endpoint:
```sh
/ext/bc/C/rpc
```
To interact with other instances of the EVM via the JSON-RPC endpoint:
```sh
/ext/bc/blockchainID/rpc
```
where `blockchainID` is the ID of the blockchain running the EVM.
#### WebSocket Endpoints
On the [public API node](https://github.com/docs/tooling/rpc-providers), it only supports C-Chain
websocket API calls for API methods that don't exist on the C-Chain's HTTP API
To interact with C-Chain via the websocket endpoint:
```sh
/ext/bc/C/ws
```
For example, to interact with the C-Chain's Ethereum APIs via websocket on localhost, you can use:
```sh
ws://127.0.0.1:9650/ext/bc/C/ws
```
} >
On localhost, use `ws://`. When using the [Public API](https://github.com/docs/tooling/rpc-providers) or another
host that supports encryption, use `wss://`.
To interact with other instances of the EVM via the websocket endpoint:
```sh
/ext/bc/blockchainID/ws
```
where `blockchainID` is the ID of the blockchain running the EVM.
### Standard Ethereum APIs
Avalanche offers an API interface identical to Geth's API except that it only supports the following
services:
- `web3_`
- `net_`
- `eth_`
- `personal_`
- `txpool_`
- `debug_` (note: this is turned off on the public API node.)
You can interact with these services the same exact way you'd interact with Geth (see exceptions below). See the
[Ethereum Wiki's JSON-RPC Documentation](https://ethereum.org/en/developers/docs/apis/json-rpc/)
and [Geth's JSON-RPC Documentation](https://geth.ethereum.org/docs/rpc/server)
for a full description of this API.
For batched requests on the [public API node](https://github.com/docs/tooling/rpc-providers) , the maximum
number of items is 40.
#### Exceptions
Starting with release [`v0.12.2`](https://github.com/ava-labs/avalanchego/releases/tag/v1.12.2), `eth_getProof` has a different behavior compared to geth:
- On archival nodes (nodes with`pruning-enabled` set to `false`), queries for state proofs older than 24 hours preceding the last accepted block will be rejected by default. This can be adjusted with `historical-proof-query-window`, which defines the number of blocks before the last accepted block that can be queried for state proofs. Set this option to `0` to accept a state query for any block number.
- On pruning nodes (nodes with `pruning-enabled` set to `true`), queries for state proofs outside the 32 block window after the last accepted block are always rejected.
### Avalanche - Ethereum APIs
In addition to the standard Ethereum APIs, Avalanche offers `eth_baseFee`,
`eth_maxPriorityFeePerGas`, and `eth_getChainConfig`.
They use the same endpoint as standard Ethereum APIs:
```sh
/ext/bc/C/rpc
```
#### `eth_baseFee`
Get the base fee for the next block.
**Signature:**
```sh
eth_baseFee() -> {}
```
`result` is the hex value of the base fee for the next block.
**Example Call:**
```sh
curl -X POST --data '{
"jsonrpc":"2.0",
"id" :1,
"method" :"eth_baseFee",
"params" :[]
}' -H 'content-type:application/json;' 127.0.0.1:9650/ext/bc/C/rpc
```
**Example Response:**
```json
{
"jsonrpc": "2.0",
"id": 1,
"result": "0x34630b8a00"
}
```
#### `eth_maxPriorityFeePerGas`
Get the priority fee needed to be included in a block.
**Signature:**
```sh
eth_maxPriorityFeePerGas() -> {}
```
`result` is hex value of the priority fee needed to be included in a block.
**Example Call:**
```sh
curl -X POST --data '{
"jsonrpc":"2.0",
"id" :1,
"method" :"eth_maxPriorityFeePerGas",
"params" :[]
}' -H 'content-type:application/json;' 127.0.0.1:9650/ext/bc/C/rpc
```
**Example Response:**
```json
{
"jsonrpc": "2.0",
"id": 1,
"result": "0x2540be400"
}
```
For more information on dynamic fees see the [C-Chain section of the transaction fee
documentation](https://github.com/docs/api-reference/guides/txn-fees#c-chain-fees).
## Admin APIs
The Admin API provides administrative functionality for the EVM.
### Endpoint
```sh
/ext/bc/C/admin
```
### Methods
#### `admin_startCPUProfiler`
Starts a CPU profile that writes to the specified file.
**Signature:**
```sh
admin_startCPUProfiler() -> {}
```
**Example Call:**
```sh
curl -X POST --data '{
"jsonrpc":"2.0",
"id" :1,
"method" :"admin_startCPUProfiler",
"params" :[]
}' -H 'content-type:application/json;' 127.0.0.1:9650/ext/bc/C/admin
```
#### `admin_stopCPUProfiler`
Stops the CPU profile.
**Signature:**
```sh
admin_stopCPUProfiler() -> {}
```
**Example Call:**
```sh
curl -X POST --data '{
"jsonrpc":"2.0",
"id" :1,
"method" :"admin_stopCPUProfiler",
"params" :[]
}' -H 'content-type:application/json;' 127.0.0.1:9650/ext/bc/C/admin
```
#### `admin_memoryProfile`
Runs a memory profile writing to the specified file.
**Signature:**
```sh
admin_memoryProfile() -> {}
```
**Example Call:**
```sh
curl -X POST --data '{
"jsonrpc":"2.0",
"id" :1,
"method" :"admin_memoryProfile",
"params" :[]
}' -H 'content-type:application/json;' 127.0.0.1:9650/ext/bc/C/admin
```
#### `admin_lockProfile`
Runs a mutex profile writing to the specified file.
**Signature:**
```sh
admin_lockProfile() -> {}
```
**Example Call:**
```sh
curl -X POST --data '{
"jsonrpc":"2.0",
"id" :1,
"method" :"admin_lockProfile",
"params" :[]
}' -H 'content-type:application/json;' 127.0.0.1:9650/ext/bc/C/admin
```
#### `admin_setLogLevel`
Sets the log level for the EVM.
**Signature:**
```sh
admin_setLogLevel({
level: string
}) -> {}
```
**Example Call:**
```sh
curl -X POST --data '{
"jsonrpc":"2.0",
"id" :1,
"method" :"admin_setLogLevel",
"params" :[{
"level": "debug"
}]
}' -H 'content-type:application/json;' 127.0.0.1:9650/ext/bc/C/admin
```
#### `admin_getVMConfig`
Returns the current VM configuration.
**Signature:**
```sh
admin_getVMConfig() -> {
config: {
// VM configuration fields
}
}
```
**Example Call:**
```sh
curl -X POST --data '{
"jsonrpc":"2.0",
"id" :1,
"method" :"admin_getVMConfig",
"params" :[]
}' -H 'content-type:application/json;' 127.0.0.1:9650/ext/bc/C/admin
```
## Avalanche-Specific APIs
### Endpoint
```sh
/ext/bc/C/avax
```
### Methods
#### `avax.getUTXOs`
Gets all UTXOs for the specified addresses.
**Signature:**
```sh
avax.getUTXOs({
addresses: [string],
sourceChain: string,
startIndex: {
address: string,
utxo: string
},
limit: number,
encoding: string
}) -> {
utxos: [string],
endIndex: {
address: string,
utxo: string
},
numFetched: number,
encoding: string
}
```
**Example Call:**
```sh
curl -X POST --data '{
"jsonrpc":"2.0",
"id" :1,
"method" :"avax.getUTXOs",
"params" :[{
"addresses": ["X-avax1..."],
"sourceChain": "X",
"limit": 100,
"encoding": "hex"
}]
}' -H 'content-type:application/json;' 127.0.0.1:9650/ext/bc/C/avax
```
#### `avax.issueTx`
Issues a transaction to the network.
**Signature:**
```sh
avax.issueTx({
tx: string,
encoding: string
}) -> {
txID: string
}
```
**Example Call:**
```sh
curl -X POST --data '{
"jsonrpc":"2.0",
"id" :1,
"method" :"avax.issueTx",
"params" :[{
"tx": "0x...",
"encoding": "hex"
}]
}' -H 'content-type:application/json;' 127.0.0.1:9650/ext/bc/C/avax
```
#### `avax.getAtomicTxStatus`
Returns the status of the specified atomic transaction.
**Signature:**
```sh
avax.getAtomicTxStatus({
txID: string
}) -> {
status: string,
blockHeight: number (optional)
}
```
**Example Call:**
```sh
curl -X POST --data '{
"jsonrpc":"2.0",
"id" :1,
"method" :"avax.getAtomicTxStatus",
"params" :[{
"txID": "2QouvNW..."
}]
}' -H 'content-type:application/json;' 127.0.0.1:9650/ext/bc/C/avax
```
#### `avax.getAtomicTx`
Returns the specified atomic transaction.
**Signature:**
```sh
avax.getAtomicTx({
txID: string,
encoding: string
}) -> {
tx: string,
encoding: string,
blockHeight: number (optional)
}
```
**Example Call:**
```sh
curl -X POST --data '{
"jsonrpc":"2.0",
"id" :1,
"method" :"avax.getAtomicTx",
"params" :[{
"txID": "2QouvNW...",
"encoding": "hex"
}]
}' -H 'content-type:application/json;' 127.0.0.1:9650/ext/bc/C/avax
```
#### `avax.version`
Returns the version of the VM.
**Signature:**
```sh
avax.version() -> {
version: string
}
```
**Example Call:**
```sh
curl -X POST --data '{
"jsonrpc":"2.0",
"id" :1,
"method" :"avax.version",
"params" :[]
}' -H 'content-type:application/json;' 127.0.0.1:9650/ext/bc/C/avax
```
# AvalancheGo C-Chain RPC (/docs/rpcs/c-chain)
---
title: "AvalancheGo C-Chain RPC"
description: "This page is an overview of the C-Chain RPC associated with AvalancheGo."
edit_url: https://github.com/ava-labs/coreth/edit/master/plugin/evm/api.md
---
Ethereum has its own notion of `networkID` and `chainID`. These have no relationship to Avalanche's view of networkID and chainID and are purely internal to the [C-Chain](https://github.com/docs/quick-start/primary-network#c-chain). On Mainnet, the C-Chain uses `1` and `43114` for these values. On the Fuji Testnet, it uses `1` and `43113` for these values. `networkID` and `chainID` can also be obtained using the `net_version` and `eth_chainId` methods.
## Ethereum APIs
### Endpoints
#### JSON-RPC Endpoints
To interact with C-Chain via the JSON-RPC endpoint:
```sh
/ext/bc/C/rpc
```
To interact with other instances of the EVM via the JSON-RPC endpoint:
```sh
/ext/bc/blockchainID/rpc
```
where `blockchainID` is the ID of the blockchain running the EVM.
#### WebSocket Endpoints
On the [public API node](https://github.com/docs/tooling/rpc-providers), it only supports C-Chain
websocket API calls for API methods that don't exist on the C-Chain's HTTP API
To interact with C-Chain via the websocket endpoint:
```sh
/ext/bc/C/ws
```
For example, to interact with the C-Chain's Ethereum APIs via websocket on localhost, you can use:
```sh
ws://127.0.0.1:9650/ext/bc/C/ws
```
} >
On localhost, use `ws://`. When using the [Public API](https://github.com/docs/tooling/rpc-providers) or another
host that supports encryption, use `wss://`.
To interact with other instances of the EVM via the websocket endpoint:
```sh
/ext/bc/blockchainID/ws
```
where `blockchainID` is the ID of the blockchain running the EVM.
### Standard Ethereum APIs
Avalanche offers an API interface identical to Geth's API except that it only supports the following
services:
- `web3_`
- `net_`
- `eth_`
- `personal_`
- `txpool_`
- `debug_` (note: this is turned off on the public API node.)
You can interact with these services the same exact way you'd interact with Geth (see exceptions below). See the
[Ethereum Wiki's JSON-RPC Documentation](https://ethereum.org/en/developers/docs/apis/json-rpc/)
and [Geth's JSON-RPC Documentation](https://geth.ethereum.org/docs/rpc/server)
for a full description of this API.
For batched requests on the [public API node](https://github.com/docs/tooling/rpc-providers) , the maximum
number of items is 40.
#### Exceptions
Starting with release [`v0.12.2`](https://github.com/ava-labs/avalanchego/releases/tag/v1.12.2), `eth_getProof` has a different behavior compared to geth:
- On archival nodes (nodes with`pruning-enabled` set to `false`), queries for state proofs older than 24 hours preceding the last accepted block will be rejected by default. This can be adjusted with `historical-proof-query-window`, which defines the number of blocks before the last accepted block that can be queried for state proofs. Set this option to `0` to accept a state query for any block number.
- On pruning nodes (nodes with `pruning-enabled` set to `true`), queries for state proofs outside the 32 block window after the last accepted block are always rejected.
### Avalanche - Ethereum APIs
In addition to the standard Ethereum APIs, Avalanche offers `eth_baseFee`,
`eth_maxPriorityFeePerGas`, and `eth_getChainConfig`.
They use the same endpoint as standard Ethereum APIs:
```sh
/ext/bc/C/rpc
```
#### `eth_baseFee`
Get the base fee for the next block.
**Signature:**
```sh
eth_baseFee() -> {}
```
`result` is the hex value of the base fee for the next block.
**Example Call:**
```sh
curl -X POST --data '{
"jsonrpc":"2.0",
"id" :1,
"method" :"eth_baseFee",
"params" :[]
}' -H 'content-type:application/json;' 127.0.0.1:9650/ext/bc/C/rpc
```
**Example Response:**
```json
{
"jsonrpc": "2.0",
"id": 1,
"result": "0x34630b8a00"
}
```
#### `eth_maxPriorityFeePerGas`
Get the priority fee needed to be included in a block.
**Signature:**
```sh
eth_maxPriorityFeePerGas() -> {}
```
`result` is hex value of the estimated priority fee needed to be included in a block.
**Example Call:**
```sh
curl -X POST --data '{
"jsonrpc":"2.0",
"id" :1,
"method" :"eth_maxPriorityFeePerGas",
"params" :[]
}' -H 'content-type:application/json;' 127.0.0.1:9650/ext/bc/C/rpc
```
**Example Response:**
```json
{
"jsonrpc": "2.0",
"id": 1,
"result": "0x2540be400"
}
```
For more information on dynamic fees see the [C-Chain section of the transaction fee
documentation](https://github.com/docs/api-reference/guides/txn-fees#c-chain-fees).
## Admin APIs
The Admin API provides administrative functionality for the EVM.
### Endpoint
```sh
/ext/bc/C/admin
```
### Methods
#### `admin_startCPUProfiler`
Starts a CPU profile that writes to the specified file.
**Signature:**
```sh
admin_startCPUProfiler() -> {}
```
**Example Call:**
```sh
curl -X POST --data '{
"jsonrpc":"2.0",
"id" :1,
"method" :"admin_startCPUProfiler",
"params" :[]
}' -H 'content-type:application/json;' 127.0.0.1:9650/ext/bc/C/admin
```
#### `admin_stopCPUProfiler`
Stops the CPU profile.
**Signature:**
```sh
admin_stopCPUProfiler() -> {}
```
**Example Call:**
```sh
curl -X POST --data '{
"jsonrpc":"2.0",
"id" :1,
"method" :"admin_stopCPUProfiler",
"params" :[]
}' -H 'content-type:application/json;' 127.0.0.1:9650/ext/bc/C/admin
```
#### `admin_memoryProfile`
Runs a memory profile writing to the specified file.
**Signature:**
```sh
admin_memoryProfile() -> {}
```
**Example Call:**
```sh
curl -X POST --data '{
"jsonrpc":"2.0",
"id" :1,
"method" :"admin_memoryProfile",
"params" :[]
}' -H 'content-type:application/json;' 127.0.0.1:9650/ext/bc/C/admin
```
#### `admin_lockProfile`
Runs a mutex profile writing to the specified file.
**Signature:**
```sh
admin_lockProfile() -> {}
```
**Example Call:**
```sh
curl -X POST --data '{
"jsonrpc":"2.0",
"id" :1,
"method" :"admin_lockProfile",
"params" :[]
}' -H 'content-type:application/json;' 127.0.0.1:9650/ext/bc/C/admin
```
#### `admin_setLogLevel`
Sets the log level for the EVM.
**Signature:**
```sh
admin_setLogLevel({
level: string
}) -> {}
```
**Example Call:**
```sh
curl -X POST --data '{
"jsonrpc":"2.0",
"id" :1,
"method" :"admin_setLogLevel",
"params" :[{
"level": "debug"
}]
}' -H 'content-type:application/json;' 127.0.0.1:9650/ext/bc/C/admin
```
#### `admin_getVMConfig`
Returns the current VM configuration.
**Signature:**
```sh
admin_getVMConfig() -> {
config: {
// VM configuration fields
}
}
```
**Example Call:**
```sh
curl -X POST --data '{
"jsonrpc":"2.0",
"id" :1,
"method" :"admin_getVMConfig",
"params" :[]
}' -H 'content-type:application/json;' 127.0.0.1:9650/ext/bc/C/admin
```
## Avalanche-Specific APIs
### Endpoint
```sh
/ext/bc/C/avax
```
### Methods
#### `avax.getUTXOs`
Gets all UTXOs for the specified addresses.
**Signature:**
```sh
avax.getUTXOs({
addresses: [string],
sourceChain: string,
startIndex: {
address: string,
utxo: string
},
limit: number,
encoding: string
}) -> {
utxos: [string],
endIndex: {
address: string,
utxo: string
},
numFetched: number,
encoding: string
}
```
**Example Call:**
```sh
curl -X POST --data '{
"jsonrpc":"2.0",
"id" :1,
"method" :"avax.getUTXOs",
"params" :[{
"addresses": ["X-avax1..."],
"sourceChain": "X",
"limit": 100,
"encoding": "hex"
}]
}' -H 'content-type:application/json;' 127.0.0.1:9650/ext/bc/C/avax
```
#### `avax.issueTx`
Issues a transaction to the network.
**Signature:**
```sh
avax.issueTx({
tx: string,
encoding: string
}) -> {
txID: string
}
```
**Example Call:**
```sh
curl -X POST --data '{
"jsonrpc":"2.0",
"id" :1,
"method" :"avax.issueTx",
"params" :[{
"tx": "0x...",
"encoding": "hex"
}]
}' -H 'content-type:application/json;' 127.0.0.1:9650/ext/bc/C/avax
```
#### `avax.getAtomicTxStatus`
Returns the status of the specified atomic transaction.
**Signature:**
```sh
avax.getAtomicTxStatus({
txID: string
}) -> {
status: string,
blockHeight: number (optional)
}
```
**Example Call:**
```sh
curl -X POST --data '{
"jsonrpc":"2.0",
"id" :1,
"method" :"avax.getAtomicTxStatus",
"params" :[{
"txID": "2QouvNW..."
}]
}' -H 'content-type:application/json;' 127.0.0.1:9650/ext/bc/C/avax
```
#### `avax.getAtomicTx`
Returns the specified atomic transaction.
**Signature:**
```sh
avax.getAtomicTx({
txID: string,
encoding: string
}) -> {
tx: string,
encoding: string,
blockHeight: number (optional)
}
```
**Example Call:**
```sh
curl -X POST --data '{
"jsonrpc":"2.0",
"id" :1,
"method" :"avax.getAtomicTx",
"params" :[{
"txID": "2QouvNW...",
"encoding": "hex"
}]
}' -H 'content-type:application/json;' 127.0.0.1:9650/ext/bc/C/avax
```
#### `avax.version`
Returns the version of the VM.
**Signature:**
```sh
avax.version() -> {
version: string
}
```
**Example Call:**
```sh
curl -X POST --data '{
"jsonrpc":"2.0",
"id" :1,
"method" :"avax.version",
"params" :[]
}' -H 'content-type:application/json;' 127.0.0.1:9650/ext/bc/C/avax
```
# Transaction Format (/docs/rpcs/c-chain/txn-format)
---
title: Transaction Format
---
This page is meant to be the single source of truth for how we serialize atomic
transactions in `Coreth`. This document uses the [primitive serialization](/docs/api-reference/standards/serialization-primitives) format for packing and
[secp256k1](/docs/api-reference/standards/cryptographic-primitives#cryptography-in-the-avalanche-virtual-machine)
for cryptographic user identification.
## Codec ID
Some data is prepended with a codec ID (unt16) that denotes how the data should
be deserialized. Right now, the only valid codec ID is 0 (`0x00 0x00`).
## Inputs
Inputs to Coreth Atomic Transactions are either an `EVMInput` from this chain or
a `TransferableInput` (which contains a `SECP256K1TransferInput`) from another
chain. The `EVMInput` will be used in `ExportTx` to spend funds from this chain,
while the `TransferableInput` will be used to import atomic UTXOs from another
chain.
## EVM Input
Input type that specifies an EVM account to deduct the funds from as part of an `ExportTx`.
### What EVM Input Contains
An EVM Input contains an `address`, `amount`, `assetID`, and `nonce`.
- **`Address`** is the EVM address from which to transfer funds.
- **`Amount`** is the amount of the asset to be transferred (specified in nAVAX
for AVAX and the smallest denomination for all other assets).
- **`AssetID`** is the ID of the asset to transfer.
- **`Nonce`** is the nonce of the EVM account exporting funds.
### Gantt EVM Input Specification
```text
+----------+----------+-------------------------+
| address : [20]byte | 20 bytes |
+----------+----------+-------------------------+
| amount : uint64 | 08 bytes |
+----------+----------+-------------------------+
| asset_id : [32]byte | 32 bytes |
+----------+----------+-------------------------+
| nonce : uint64 | 08 bytes |
+----------+----------+-------------------------+
| 68 bytes |
+-------------------------+
```
### Proto EVM Input Specification
```text
message {
bytes address = 1; // 20 bytes
uint64 amount = 2; // 08 bytes
bytes assetID = 3; // 32 bytes
uint64 nonce = 4; // 08 bytes
}
```
### EVM Input Example
Let's make an EVM Input:
- `Address: 0x8db97c7cece249c2b98bdc0226cc4c2a57bf52fc`
- `Amount: 2000000`
- `AssetID: 0x000102030405060708090a0b0c0d0e0f101112131415161718191a1b1c1d1e1f`
- `Nonce: 0`
```text
[
Address <- 0x8db97c7cece249c2b98bdc0226cc4c2a57bf52fc,
Amount <- 0x00000000001e8480
AssetID <- 0xdbcf890f77f49b96857648b72b77f9f82937f28a68704af05da0dc12ba53f2db
Nonce <- 0x0000000000000000
]
=
[
// address:
0x8d, 0xb9, 0x7c, 0x7c, 0xec, 0xe2, 0x49, 0xc2,
0xb9, 0x8b, 0xdc, 0x02, 0x26, 0xcc, 0x4c, 0x2a,
0x57, 0xbf, 0x52, 0xfc,
// amount:
0x00, 0x00, 0x00, 0x00, 0x00, 0x1e, 0x84, 0x80,
// assetID:
0xdb, 0xcf, 0x89, 0x0f, 0x77, 0xf4, 0x9b, 0x96,
0x85, 0x76, 0x48, 0xb7, 0x2b, 0x77, 0xf9, 0xf8,
0x29, 0x37, 0xf2, 0x8a, 0x68, 0x70, 0x4a, 0xf0,
0x5d, 0xa0, 0xdc, 0x12, 0xba, 0x53, 0xf2, 0xdb,
// nonce:
0x00, 0x00, 0x00, 0x00, 0x00, 0x00, 0x00, 0x00,
]
```
## Transferable Input
Transferable Input wraps a `SECP256K1TransferInput`. Transferable inputs
describe a specific UTXO with a provided transfer input.
### What Transferable Input Contains
A transferable input contains a `TxID`, `UTXOIndex` `AssetID` and an `Input`.
- **`TxID`** is a 32-byte array that defines which transaction this input is consuming an output from.
- **`UTXOIndex`** is an int that defines which utxo this input is consuming in the specified transaction.
- **`AssetID`** is a 32-byte array that defines which asset this input references.
- **`Input`** is a `SECP256K1TransferInput`, as defined below.
### Gantt Transferable Input Specification
```text
+------------+----------+------------------------+
| tx_id : [32]byte | 32 bytes |
+------------+----------+------------------------+
| utxo_index : int | 04 bytes |
+------------+----------+------------------------+
| asset_id : [32]byte | 32 bytes |
+------------+----------+------------------------+
| input : Input | size(input) bytes |
+------------+----------+------------------------+
| 68 + size(input) bytes |
+------------------------+
```
### Proto Transferable Input Specification
```text
message TransferableInput {
bytes tx_id = 1; // 32 bytes
uint32 utxo_index = 2; // 04 bytes
bytes asset_id = 3; // 32 bytes
Input input = 4; // size(input)
}
```
### Transferable Input Example
Let's make a transferable input:
- `TxID: 0x6613a40dcdd8d22ea4aa99a4c84349056317cf550b6685e045e459954f258e59`
- `UTXOIndex: 1`
- `AssetID: 0xdbcf890f77f49b96857648b72b77f9f82937f28a68704af05da0dc12ba53f2db`
- `Input: "Example SECP256K1 Transfer Input from below"`
```text
[
TxID <- 0x6613a40dcdd8d22ea4aa99a4c84349056317cf550b6685e045e459954f258e59
UTXOIndex <- 0x00000001
AssetID <- 0xdbcf890f77f49b96857648b72b77f9f82937f28a68704af05da0dc12ba53f2db
Input <- 0x0000000500000000075bcd15000000020000000700000003
]
=
[
// txID:
0x66, 0x13, 0xa4, 0x0d, 0xcd, 0xd8, 0xd2, 0x2e,
0xa4, 0xaa, 0x99, 0xa4, 0xc8, 0x43, 0x49, 0x05,
0x63, 0x17, 0xcf, 0x55, 0x0b, 0x66, 0x85, 0xe0,
0x45, 0xe4, 0x59, 0x95, 0x4f, 0x25, 0x8e, 0x59,
// utxoIndex:
0x00, 0x00, 0x00, 0x01,
// assetID:
0xdb, 0xcf, 0x89, 0x0f, 0x77, 0xf4, 0x9b, 0x96,
0x85, 0x76, 0x48, 0xb7, 0x2b, 0x77, 0xf9, 0xf8,
0x29, 0x37, 0xf2, 0x8a, 0x68, 0x70, 0x4a, 0xf0,
0x5d, 0xa0, 0xdc, 0x12, 0xba, 0x53, 0xf2, 0xdb,
// input:
0x00, 0x00, 0x00, 0x05, 0x00, 0x00, 0x00, 0x74,
0x6a, 0x52, 0x88, 0x00, 0x00, 0x00, 0x00, 0x01,
0x00, 0x00, 0x00, 0x00,
]
```
## SECP256K1 Transfer Input
A
[secp256k1](/docs/api-reference/standards/cryptographic-primitives#cryptography-in-the-avalanche-virtual-machine)
transfer input allows for spending an unspent secp256k1 transfer output.
### What SECP256K1 Transfer Input Contains
A secp256k1 transfer input contains an `Amount` and `AddressIndices`.
- **`TypeID`** is the ID for this input type. It is `0x00000005`.
- **`Amount`** is a long that specifies the quantity that this input should be
consuming from the UTXO. Must be positive. Must be equal to the amount
specified in the UTXO.
- **`AddressIndices`** is a list of unique ints that define the private keys
that are being used to spend the UTXO. Each UTXO has an array of addresses
that can spend the UTXO. Each int represents the index in this address array
that will sign this transaction. The array must be sorted low to high.
### Gantt SECP256K1 Transfer Input Specification
```text
+-------------------------+-------------------------------------+
| type_id : int | 4 bytes |
+-----------------+-------+-------------------------------------+
| amount : long | 8 bytes |
+-----------------+-------+-------------------------------------+
| address_indices : []int | 4 + 4 * len(address_indices) bytes |
+-----------------+-------+-------------------------------------+
| 16 + 4 * len(address_indices) bytes |
+-------------------------------------+
```
### Proto SECP256K1 Transfer Input Specification
```text
message SECP256K1TransferInput {
uint32 typeID = 1; // 04 bytes
uint64 amount = 2; // 08 bytes
repeated uint32 address_indices = 3; // 04 bytes + 04 bytes * len(address_indices)
}
```
### SECP256K1 Transfer Input Example
Let's make a payment input with:
- **`TypeId`**: 5
- **`Amount`**: 500000000000
- **`AddressIndices`**: \[0\]
```text
[
TypeID <- 0x00000005
Amount <- 500000000000 = 0x000000746a528800,
AddressIndices <- [0x00000000]
]
=
[
// type id:
0x00, 0x00, 0x00, 0x05,
// amount:
0x00, 0x00, 0x00, 0x74, 0x6a, 0x52, 0x88, 0x00,
// length:
0x00, 0x00, 0x00, 0x01,
// sig[0]
0x00, 0x00, 0x00, 0x00,
]
```
## Outputs
Outputs to Coreth Atomic Transactions are either an `EVMOutput` to be added to
the balance of an address on this chain or a `TransferableOutput` (which
contains a `SECP256K1TransferOutput`) to be moved to another chain.
The EVM Output will be used in `ImportTx` to add funds to this chain, while the
`TransferableOutput` will be used to export atomic UTXOs to another chain.
## EVM Output
Output type specifying a state change to be applied to an EVM account as part of an `ImportTx`.
### What EVM Output Contains
An EVM Output contains an `address`, `amount`, and `assetID`.
- **`Address`** is the EVM address that will receive the funds.
- **`Amount`** is the amount of the asset to be transferred (specified in nAVAX
for AVAX and the smallest denomination for all other assets).
- **`AssetID`** is the ID of the asset to transfer.
### Gantt EVM Output Specification
```text
+----------+----------+-------------------------+
| address : [20]byte | 20 bytes |
+----------+----------+-------------------------+
| amount : uin64 | 08 bytes |
+----------+----------+-------------------------+
| asset_id : [32]byte | 32 bytes |
+----------+----------+-------------------------+
| 60 bytes |
+-------------------------+
```
### Proto EVM Output Specification
```text
message {
bytes address = 1; // 20 bytes
uint64 amount = 2; // 08 bytes
bytes assetID = 3; // 32 bytes
}
```
### EVM Output Example
Let's make an EVM Output:
- `Address: 0x0eb5ccb85c29009b6060decb353a38ea3b52cd20`
- `Amount: 500000000000`
- `AssetID: 0xdbcf890f77f49b96857648b72b77f9f82937f28a68704af05da0dc12ba53f2db`
```text
[
Address <- 0x0eb5ccb85c29009b6060decb353a38ea3b52cd20,
Amount <- 0x000000746a528800
AssetID <- 0xdbcf890f77f49b96857648b72b77f9f82937f28a68704af05da0dc12ba53f2db
]
=
[
// address:
0xc3, 0x34, 0x41, 0x28, 0xe0, 0x60, 0x12, 0x8e,
0xde, 0x35, 0x23, 0xa2, 0x4a, 0x46, 0x1c, 0x89,
0x43, 0xab, 0x08, 0x59,
// amount:
0x00, 0x00, 0x00, 0x74, 0x6a, 0x52, 0x88, 0x00,
// assetID:
0xdb, 0xcf, 0x89, 0x0f, 0x77, 0xf4, 0x9b, 0x96,
0x85, 0x76, 0x48, 0xb7, 0x2b, 0x77, 0xf9, 0xf8,
0x29, 0x37, 0xf2, 0x8a, 0x68, 0x70, 0x4a, 0xf0,
0x5d, 0xa0, 0xdc, 0x12, 0xba, 0x53, 0xf2, 0xdb,
]
```
## Transferable Output
Transferable outputs wrap a `SECP256K1TransferOutput` with an asset ID.
### What Transferable Output Contains
A transferable output contains an `AssetID` and an `Output` which is a `SECP256K1TransferOutput`.
- **`AssetID`** is a 32-byte array that defines which asset this output references.
- **`Output`** is a `SECP256K1TransferOutput` as defined below.
### Gantt Transferable Output Specification
```text
+----------+----------+-------------------------+
| asset_id : [32]byte | 32 bytes |
+----------+----------+-------------------------+
| output : Output | size(output) bytes |
+----------+----------+-------------------------+
| 32 + size(output) bytes |
+-------------------------+
```
### Proto Transferable Output Specification
```text
message TransferableOutput {
bytes asset_id = 1; // 32 bytes
Output output = 2; // size(output)
}
```
### Transferable Output Example
Let's make a transferable output:
- `AssetID: 0xdbcf890f77f49b96857648b72b77f9f82937f28a68704af05da0dc12ba53f2db`
- `Output: "Example SECP256K1 Transfer Output from below"`
```text
[
AssetID <- 0xdbcf890f77f49b96857648b72b77f9f82937f28a68704af05da0dc12ba53f2db
Output <- 0x000000070000000000003039000000000000d431000000010000000251025c61fbcfc078f69334f834be6dd26d55a955c3344128e060128ede3523a24a461c8943ab0859,
]
=
[
// assetID:
0xdb, 0xcf, 0x89, 0x0f, 0x77, 0xf4, 0x9b, 0x96,
0x85, 0x76, 0x48, 0xb7, 0x2b, 0x77, 0xf9, 0xf8,
0x29, 0x37, 0xf2, 0x8a, 0x68, 0x70, 0x4a, 0xf0,
0x5d, 0xa0, 0xdc, 0x12, 0xba, 0x53, 0xf2, 0xdb,
// output:
0xdb, 0xcf, 0x89, 0x0f, 0x77, 0xf4, 0x9b, 0x96,
0x85, 0x76, 0x48, 0xb7, 0x2b, 0x77, 0xf9, 0xf8,
0x29, 0x37, 0xf2, 0x8a, 0x68, 0x70, 0x4a, 0xf0,
0x5d, 0xa0, 0xdc, 0x12, 0xba, 0x53, 0xf2, 0xdb,
0x00, 0x00, 0x00, 0x07, 0x00, 0x00, 0x00, 0x00,
0x00, 0x0f, 0x42, 0x40, 0x00, 0x00, 0x00, 0x00,
0x00, 0x00, 0x00, 0x00, 0x00, 0x00, 0x00, 0x01,
0x00, 0x00, 0x00, 0x01, 0x66, 0xf9, 0x0d, 0xb6,
0x13, 0x7a, 0x78, 0xf7, 0x6b, 0x36, 0x93, 0xf7,
0xf2, 0xbc, 0x50, 0x79, 0x56, 0xda, 0xe5, 0x63,
]
```
## SECP256K1 Transfer Output
A
[secp256k1](/docs/api-reference/standards/cryptographic-primitives#cryptography-in-the-avalanche-virtual-machine)
transfer output allows for sending a quantity of an asset to a collection of
addresses after a specified Unix time.
### What SECP256K1 Transfer Output Contains
A secp256k1 transfer output contains a `TypeID`, `Amount`, `Locktime`, `Threshold`, and `Addresses`.
- **`TypeID`** is the ID for this output type. It is `0x00000007`.
- **`Amount`** is a long that specifies the quantity of the asset that this output owns. Must be positive.
- **`Locktime`** is a long that contains the Unix timestamp that this output can
be spent after. The Unix timestamp is specific to the second.
- **`Threshold`** is an int that names the number of unique signatures required
to spend the output. Must be less than or equal to the length of
**`Addresses`**. If **`Addresses`** is empty, must be 0.
- **`Addresses`** is a list of unique addresses that correspond to the private
keys that can be used to spend this output. Addresses must be sorted
lexicographically.
### Gantt SECP256K1 Transfer Output Specification
```text
+-----------+------------+--------------------------------+
| type_id : int | 4 bytes |
+-----------+------------+--------------------------------+
| amount : long | 8 bytes |
+-----------+------------+--------------------------------+
| locktime : long | 8 bytes |
+-----------+------------+--------------------------------+
| threshold : int | 4 bytes |
+-----------+------------+--------------------------------+
| addresses : [][20]byte | 4 + 20 * len(addresses) bytes |
+-----------+------------+--------------------------------+
| 28 + 20 * len(addresses) bytes |
+--------------------------------+
```
### Proto SECP256K1 Transfer Output Specification
```text
message SECP256K1TransferOutput {
uint32 typeID = 1; // 04 bytes
uint64 amount = 2; // 08 bytes
uint64 locktime = 3; // 08 bytes
uint32 threshold = 4; // 04 bytes
repeated bytes addresses = 5; // 04 bytes + 20 bytes * len(addresses)
}
```
### SECP256K1 Transfer Output Example
Let's make a secp256k1 transfer output with:
- **`TypeID`**: 7
- **`Amount`**: 1000000
- **`Locktime`**: 0
- **`Threshold`**: 1
- **`Addresses`**:
- 0x66f90db6137a78f76b3693f7f2bc507956dae563
```text
[
TypeID <- 0x00000007
Amount <- 0x00000000000f4240
Locktime <- 0x0000000000000000
Threshold <- 0x00000001
Addresses <- [
0x66f90db6137a78f76b3693f7f2bc507956dae563
]
]
=
[
// typeID:
0x00, 0x00, 0x00, 0x07,
// amount:
0x00, 0x00, 0x00, 0x00, 0x00, 0x0f, 0x42, 0x40,
// locktime:
0x00, 0x00, 0x00, 0x00, 0x00, 0x00, 0x00, 0x00,
// threshold:
0x00, 0x00, 0x00, 0x01,
// number of addresses:
0x00, 0x00, 0x00, 0x01,
// addrs[0]:
0x66, 0xf9, 0x0d, 0xb6, 0x13, 0x7a, 0x78, 0xf7,
0x6b, 0x36, 0x93, 0xf7, 0xf2, 0xbc, 0x50, 0x79,
0x56, 0xda, 0xe5, 0x63,
]
```
## Atomic Transactions
Atomic Transactions are used to move funds between chains. There are two types `ImportTx` and `ExportTx`.
## ExportTx
ExportTx is a transaction to export funds from Coreth to a different chain.
### What ExportTx Contains
An ExportTx contains an `typeID`, `networkID`, `blockchainID`, `destinationChain`, `inputs`, and `exportedOutputs`.
- **`typeID`** is an int that the type for an ExportTx. The typeID for an exportTx is 1.
- **`networkID`** is an int that defines which Avalanche network this
transaction is meant to be issued to. This could refer to Mainnet, Fuji, etc.
and is different than the EVM's network ID.
- **`blockchainID`** is a 32-byte array that defines which blockchain this transaction was issued to.
- **`destinationChain`** is a 32-byte array that defines which blockchain this
transaction exports funds to.
- **`inputs`** is an array of EVM Inputs to fund the ExportTx.
- **`exportedOutputs`** is an array of TransferableOutputs to be transferred to `destinationChain`.
### Gantt ExportTx Specification
```text
+---------------------+----------------------+-------------------------------------------------+
| typeID : int | 04 bytes |
+---------------------+----------------------+-------------------------------------------------+
| networkID : int | 04 bytes |
+---------------------+----------------------+-------------------------------------------------+
| blockchainID : [32]byte | 32 bytes |
+---------------------+----------------------+-------------------------------------------------+
| destinationChain : [32]byte | 32 bytes |
+---------------------+----------------------+-------------------------------------------------+
| inputs : []EvmInput | 4 + size(inputs) bytes |
+---------------------+----------------------+-------------------------------------------------+
| exportedOutputs : []TransferableOutput | 4 + size(exportedOutputs) bytes |
+----------+----------+----------------------+-------------------------------------------------+
| 80 + size(inputs) + size(exportedOutputs) bytes |
+-------------------------------------------------+
```
### ExportTx Example
Let's make an EVM Output:
- **`TypeID`**: `1`
- **`NetworkID`**: `12345`
- **`BlockchainID`**: `0x91060eabfb5a571720109b5896e5ff00010a1cfe6b103d585e6ebf27b97a1735`
- **`DestinationChain`**: `0xd891ad56056d9c01f18f43f58b5c784ad07a4a49cf3d1f11623804b5cba2c6bf`
- **`Inputs`**:
- `"Example EVMInput as defined above"`
- **`Exportedoutputs`**:
- `"Example TransferableOutput as defined above"`
```text
[
TypeID <- 0x00000001
NetworkID <- 0x00003039
BlockchainID <- 0x91060eabfb5a571720109b5896e5ff00010a1cfe6b103d585e6ebf27b97a1735
DestinationChain <- 0xd891ad56056d9c01f18f43f58b5c784ad07a4a49cf3d1f11623804b5cba2c6bf
Inputs <- [
0xc3344128e060128ede3523a24a461c8943ab08590000000000003039000102030405060708090a0b0c0d0e0f101112131415161718191a1b1c1d1e1f0000000000000001
]
ExportedOutputs <- [
0xdbcf890f77f49b96857648b72b77f9f82937f28a68704af05da0dc12ba53f2dbdbcf890f77f49b96857648b72b77f9f82937f28a68704af05da0dc12ba53f2db0000000700000000000f42400000000000000000000000010000000166f90db6137a78f76b3693f7f2bc507956dae563
]
]
=
[
// typeID:
0x00, 0x00, 0x00, 0x01,
// networkID:
0x00, 0x00, 0x00, 0x04,
// blockchainID:
0x91, 0x06, 0x0e, 0xab, 0xfb, 0x5a, 0x57, 0x17,
0x20, 0x10, 0x9b, 0x58, 0x96, 0xe5, 0xff, 0x00,
0x01, 0x0a, 0x1c, 0xfe, 0x6b, 0x10, 0x3d, 0x58,
0x5e, 0x6e, 0xbf, 0x27, 0xb9, 0x7a, 0x17, 0x35,
// destination_chain:
0xd8, 0x91, 0xad, 0x56, 0x05, 0x6d, 0x9c, 0x01,
0xf1, 0x8f, 0x43, 0xf5, 0x8b, 0x5c, 0x78, 0x4a,
0xd0, 0x7a, 0x4a, 0x49, 0xcf, 0x3d, 0x1f, 0x11,
0x62, 0x38, 0x04, 0xb5, 0xcb, 0xa2, 0xc6, 0xbf,
// inputs[] count:
0x00, 0x00, 0x00, 0x01,
// inputs[0]
0x8d, 0xb9, 0x7c, 0x7c, 0xec, 0xe2, 0x49, 0xc2,
0xb9, 0x8b, 0xdc, 0x02, 0x26, 0xcc, 0x4c, 0x2a,
0x57, 0xbf, 0x52, 0xfc, 0x00, 0x00, 0x00, 0x00,
0x00, 0x1e, 0x84, 0x80, 0xdb, 0xcf, 0x89, 0x0f,
0x77, 0xf4, 0x9b, 0x96, 0x85, 0x76, 0x48, 0xb7,
0x2b, 0x77, 0xf9, 0xf8, 0x29, 0x37, 0xf2, 0x8a,
0x68, 0x70, 0x4a, 0xf0, 0x5d, 0xa0, 0xdc, 0x12,
0xba, 0x53, 0xf2, 0xdb, 0x00, 0x00, 0x00, 0x00,
0x00, 0x00, 0x00, 0x00,
// exportedOutputs[] count
0x00, 0x00, 0x00, 0x01,
// exportedOutputs[0]
0xdb, 0xcf, 0x89, 0x0f, 0x77, 0xf4, 0x9b, 0x96,
0x85, 0x76, 0x48, 0xb7, 0x2b, 0x77, 0xf9, 0xf8,
0x29, 0x37, 0xf2, 0x8a, 0x68, 0x70, 0x4a, 0xf0,
0x5d, 0xa0, 0xdc, 0x12, 0xba, 0x53, 0xf2, 0xdb,
0x00, 0x00, 0x00, 0x07, 0x00, 0x00, 0x00, 0x00,
0x00, 0x0f, 0x42, 0x40, 0x00, 0x00, 0x00, 0x00,
0x00, 0x00, 0x00, 0x00, 0x00, 0x00, 0x00, 0x01,
0x00, 0x00, 0x00, 0x01, 0x66, 0xf9, 0x0d, 0xb6,
0x13, 0x7a, 0x78, 0xf7, 0x6b, 0x36, 0x93, 0xf7,
0xf2, 0xbc, 0x50, 0x79, 0x56, 0xda, 0xe5, 0x63,
]
```
## ImportTx
ImportTx is a transaction to import funds to Coreth from another chain.
### What ImportTx Contains
An ImportTx contains an `typeID`, `networkID`, `blockchainID`,
`destinationChain`, `importedInputs`, and `Outs`.
- **`typeID`** is an int that the type for an ImportTx. The typeID for an `ImportTx` is 0.
- **`networkID`** is an int that defines which Avalanche network this
transaction is meant to be issued to. This could refer to Mainnet, Fuji, etc.
and is different than the EVM's network ID.
- **`blockchainID`** is a 32-byte array that defines which blockchain this transaction was issued to.
- **`sourceChain`** is a 32-byte array that defines which blockchain from which to import funds.
- **`importedInputs`** is an array of TransferableInputs to fund the ImportTx.
- **`Outs`** is an array of EVM Outputs to be imported to this chain.
### Gantt ImportTx Specification
```text
+---------------------+----------------------+-------------------------------------------------+
| typeID : int | 04 bytes |
+---------------------+----------------------+-------------------------------------------------+
| networkID : int | 04 bytes |
+---------------------+----------------------+-------------------------------------------------+
| blockchainID : [32]byte | 32 bytes |
+---------------------+----------------------+-------------------------------------------------+
| sourceChain : [32]byte | 32 bytes |
+---------------------+----------------------+-------------------------------------------------+
| importedInputs : []TransferableInput | 4 + size(importedInputs) bytes |
+---------------------+----------------------+-------------------------------------------------+
| outs : []EVMOutput | 4 + size(outs) bytes |
+----------+----------+----------------------+-------------------------------------------------+
| 80 + size(importedInputs) + size(outs) bytes |
+-------------------------------------------------+
```
### ImportTx Example
Let's make an ImportTx:
- **`TypeID`**: `0`
- **`NetworkID`**: `12345`
- **`BlockchainID`**: `0x91060eabfb5a571720109b5896e5ff00010a1cfe6b103d585e6ebf27b97a1735`
- **`SourceChain`**: `0xd891ad56056d9c01f18f43f58b5c784ad07a4a49cf3d1f11623804b5cba2c6bf`
- **`ImportedInputs`**:
- `"Example TransferableInput as defined above"`
- **`Outs`**:
- `"Example EVMOutput as defined above"`
```text
[
TypeID <- 0x00000000
NetworkID <- 0x00003039
BlockchainID <- 0x91060eabfb5a571720109b5896e5ff00010a1cfe6b103d585e6ebf27b97a1735
SourceChain <- 0xd891ad56056d9c01f18f43f58b5c784ad07a4a49cf3d1f11623804b5cba2c6bf
ImportedInputs <- [
0x6613a40dcdd8d22ea4aa99a4c84349056317cf550b6685e045e459954f258e5900000001dbcf890f77f49b96857648b72b77f9f82937f28a68704af05da0dc12ba53f2db00000005000000746a5288000000000100000000
]
Outs <- [
0x0eb5ccb85c29009b6060decb353a38ea3b52cd20000000746a528800dbcf890f77f49b96857648b72b77f9f82937f28a68704af05da0dc12ba53f2db
]
]
=
[
// typeID:
0x00, 0x00, 0x00, 0x00,
// networkID:
0x00, 0x00, 0x00, 0x04,
// blockchainID:
0x91, 0x06, 0x0e, 0xab, 0xfb, 0x5a, 0x57, 0x17,
0x20, 0x10, 0x9b, 0x58, 0x96, 0xe5, 0xff, 0x00,
0x01, 0x0a, 0x1c, 0xfe, 0x6b, 0x10, 0x3d, 0x58,
0x5e, 0x6e, 0xbf, 0x27, 0xb9, 0x7a, 0x17, 0x35,
// sourceChain:
0xd8, 0x91, 0xad, 0x56, 0x05, 0x6d, 0x9c, 0x01,
0xf1, 0x8f, 0x43, 0xf5, 0x8b, 0x5c, 0x78, 0x4a,
0xd0, 0x7a, 0x4a, 0x49, 0xcf, 0x3d, 0x1f, 0x11,
0x62, 0x38, 0x04, 0xb5, 0xcb, 0xa2, 0xc6, 0xbf,
// importedInputs[] count:
0x00, 0x00, 0x00, 0x01,
// importedInputs[0]
0x66, 0x13, 0xa4, 0x0d, 0xcd, 0xd8, 0xd2, 0x2e,
0xa4, 0xaa, 0x99, 0xa4, 0xc8, 0x43, 0x49, 0x05,
0x63, 0x17, 0xcf, 0x55, 0x0b, 0x66, 0x85, 0xe0,
0x45, 0xe4, 0x59, 0x95, 0x4f, 0x25, 0x8e, 0x59,
0x00, 0x00, 0x00, 0x01, 0xdb, 0xcf, 0x89, 0x0f,
0x77, 0xf4, 0x9b, 0x96, 0x85, 0x76, 0x48, 0xb7,
0x2b, 0x77, 0xf9, 0xf8, 0x29, 0x37, 0xf2, 0x8a,
0x68, 0x70, 0x4a, 0xf0, 0x5d, 0xa0, 0xdc, 0x12,
0xba, 0x53, 0xf2, 0xdb, 0x00, 0x00, 0x00, 0x05,
0x00, 0x00, 0x00, 0x74, 0x6a, 0x52, 0x88, 0x00,
0x00, 0x00, 0x00, 0x01, 0x00, 0x00, 0x00, 0x00,
// outs[] count
0x00, 0x00, 0x00, 0x01,
// outs[0]
0x0e, 0xb5, 0xcc, 0xb8, 0x5c, 0x29, 0x00, 0x9b,
0x60, 0x60, 0xde, 0xcb, 0x35, 0x3a, 0x38, 0xea,
0x3b, 0x52, 0xcd, 0x20, 0x00, 0x00, 0x00, 0x74,
0x6a, 0x52, 0x88, 0x00, 0xdb, 0xcf, 0x89, 0x0f,
0x77, 0xf4, 0x9b, 0x96, 0x85, 0x76, 0x48, 0xb7,
0x2b, 0x77, 0xf9, 0xf8, 0x29, 0x37, 0xf2, 0x8a,
0x68, 0x70, 0x4a, 0xf0, 0x5d, 0xa0, 0xdc, 0x12,
0xba, 0x53, 0xf2, 0xdb,
]
```
## Credentials
Credentials have one possible type: `SECP256K1Credential`. Each credential is
paired with an Input. The order of the credentials match the order of the
inputs.
## SECP256K1 Credential
A
[secp256k1](/docs/api-reference/standards/cryptographic-primitives#cryptography-in-the-avalanche-virtual-machine)
credential contains a list of 65-byte recoverable signatures.
### What SECP256K1 Credential Contains
- **`TypeID`** is the ID for this type. It is `0x00000009`.
- **`Signatures`** is an array of 65-byte recoverable signatures. The order of
the signatures must match the input's signature indices.
### Gantt SECP256K1 Credential Specification
```text
+------------------------------+---------------------------------+
| type_id : int | 4 bytes |
+-----------------+------------+---------------------------------+
| signatures : [][65]byte | 4 + 65 * len(signatures) bytes |
+-----------------+------------+---------------------------------+
| 8 + 65 * len(signatures) bytes |
+---------------------------------+
```
### Proto SECP256K1 Credential Specification
```text
message SECP256K1Credential {
uint32 typeID = 1; // 4 bytes
repeated bytes signatures = 2; // 4 bytes + 65 bytes * len(signatures)
}
```
### SECP256K1 Credential Example
Let's make a payment input with:
- **`TypeID`**: 9
- **`signatures`**:
- `0x0acccf47a820549a84428440e2421975138790e41be262f7197f3d93faa26cc8741060d743ffaf025782c8c86b862d2b9febebe7d352f0b4591afbd1a737f8a30010199dbf`
```text
[
TypeID <- 0x00000009
Signatures <- [
0x0acccf47a820549a84428440e2421975138790e41be262f7197f3d93faa26cc8741060d743ffaf025782c8c86b862d2b9febebe7d352f0b4591afbd1a737f8a30010199dbf,
]
]
=
[
// Type ID
0x00, 0x00, 0x00, 0x09,
// length:
0x00, 0x00, 0x00, 0x01,
// sig[0]
0x0a, 0xcc, 0xcf, 0x47, 0xa8, 0x20, 0x54, 0x9a,
0x84, 0x42, 0x84, 0x40, 0xe2, 0x42, 0x19, 0x75,
0x13, 0x87, 0x90, 0xe4, 0x1b, 0xe2, 0x62, 0xf7,
0x19, 0x7f, 0x3d, 0x93, 0xfa, 0xa2, 0x6c, 0xc8,
0x74, 0x10, 0x60, 0xd7, 0x43, 0xff, 0xaf, 0x02,
0x57, 0x82, 0xc8, 0xc8, 0x6b, 0x86, 0x2d, 0x2b,
0x9f, 0xeb, 0xeb, 0xe7, 0xd3, 0x52, 0xf0, 0xb4,
0x59, 0x1a, 0xfb, 0xd1, 0xa7, 0x37, 0xf8, 0xa3,
0x00, 0x10, 0x19, 0x9d, 0xbf,
]
```
## Signed Transaction
A signed transaction contains an unsigned `AtomicTx` and credentials.
### What Signed Transaction Contains
A signed transaction contains a `CodecID`, `AtomicTx`, and `Credentials`.
- **`CodecID`** The only current valid codec id is `00 00`.
- **`AtomicTx`** is an atomic transaction, as described above.
- **`Credentials`** is an array of credentials. Each credential corresponds to
the input at the same index in the AtomicTx
### Gantt Signed Transaction Specification
```text
+---------------------+--------------+------------------------------------------------+
| codec_id : uint16 | 2 bytes |
+---------------------+--------------+------------------------------------------------+
| atomic_tx : AtomicTx | size(atomic_tx) bytes |
+---------------------+--------------+------------------------------------------------+
| credentials : []Credential | 4 + size(credentials) bytes |
+---------------------+--------------+------------------------------------------------+
| 6 + size(atomic_tx) + len(credentials) bytes |
+------------------------------------------------+
```
### Proto Signed Transaction Specification
```text
message Tx {
uint16 codec_id = 1; // 2 bytes
AtomicTx atomic_tx = 2; // size(atomic_tx)
repeated Credential credentials = 3; // 4 bytes + size(credentials)
}
```
### Signed Transaction Example
Let's make a signed transaction that uses the unsigned transaction and credential from the previous examples.
- **`CodecID`**: `0`
- **`UnsignedTx`**: `0x000000000000303991060eabfb5a571720109b5896e5ff00010a1cfe6b103d585e6ebf27b97a1735d891ad56056d9c01f18f43f58b5c784ad07a4a49cf3d1f11623804b5cba2c6bf000000016613a40dcdd8d22ea4aa99a4c84349056317cf550b6685e045e459954f258e5900000001dbcf890f77f49b96857648b72b77f9f82937f28a68704af05da0dc12ba53f2db00000005000000746a5288000000000100000000000000010eb5ccb85c29009b6060decb353a38ea3b52cd20000000746a528800dbcf890f77f49b96857648b72b77f9f82937f28a68704af05da0dc12ba53f2db`
- **`Credentials`**
`0x00000009000000010acccf47a820549a84428440e2421975138790e41be262f7197f3d93faa26cc8741060d743ffaf025782c8c86b862d2b9febebe7d352f0b4591afbd1a737f8a300`
```text
[
CodecID <- 0x0000
UnsignedAtomic Tx <- 0x0000000100000004ffffffffeeeeeeeeddddddddccccccccbbbbbbbbaaaaaaaa999999998888888800000001000102030405060708090a0b0c0d0e0f101112131415161718191a1b1c1d1e1f000000070000000000003039000000000000d431000000010000000251025c61fbcfc078f69334f834be6dd26d55a955c3344128e060128ede3523a24a461c8943ab085900000001f1e1d1c1b1a191817161514131211101f0e0d0c0b0a09080706050403020100000000005000102030405060708090a0b0c0d0e0f101112131415161718191a1b1c1d1e1f0000000500000000075bcd150000000200000007000000030000000400010203
Credentials <- [
0x00000009000000010acccf47a820549a84428440e2421975138790e41be262f7197f3d93faa26cc8741060d743ffaf025782c8c86b862d2b9febebe7d352f0b4591afbd1a737f8a300,
]
]
=
[
// Codec ID
0x00, 0x00,
// unsigned atomic transaction:
0x00, 0x00, 0x00, 0x00, 0x00, 0x00, 0x30, 0x39,
0x91, 0x06, 0x0e, 0xab, 0xfb, 0x5a, 0x57, 0x17,
0x20, 0x10, 0x9b, 0x58, 0x96, 0xe5, 0xff, 0x00,
0x01, 0x0a, 0x1c, 0xfe, 0x6b, 0x10, 0x3d, 0x58,
0x5e, 0x6e, 0xbf, 0x27, 0xb9, 0x7a, 0x17, 0x35,
0xd8, 0x91, 0xad, 0x56, 0x05, 0x6d, 0x9c, 0x01,
0xf1, 0x8f, 0x43, 0xf5, 0x8b, 0x5c, 0x78, 0x4a,
0xd0, 0x7a, 0x4a, 0x49, 0xcf, 0x3d, 0x1f, 0x11,
0x62, 0x38, 0x04, 0xb5, 0xcb, 0xa2, 0xc6, 0xbf,
0x00, 0x00, 0x00, 0x01, 0x66, 0x13, 0xa4, 0x0d,
0xcd, 0xd8, 0xd2, 0x2e, 0xa4, 0xaa, 0x99, 0xa4,
0xc8, 0x43, 0x49, 0x05, 0x63, 0x17, 0xcf, 0x55,
0x0b, 0x66, 0x85, 0xe0, 0x45, 0xe4, 0x59, 0x95,
0x4f, 0x25, 0x8e, 0x59, 0x00, 0x00, 0x00, 0x01,
0xdb, 0xcf, 0x89, 0x0f, 0x77, 0xf4, 0x9b, 0x96,
0x85, 0x76, 0x48, 0xb7, 0x2b, 0x77, 0xf9, 0xf8,
0x29, 0x37, 0xf2, 0x8a, 0x68, 0x70, 0x4a, 0xf0,
0x5d, 0xa0, 0xdc, 0x12, 0xba, 0x53, 0xf2, 0xdb,
0x00, 0x00, 0x00, 0x05, 0x00, 0x00, 0x00, 0x74,
0x6a, 0x52, 0x88, 0x00, 0x00, 0x00, 0x00, 0x01,
0x00, 0x00, 0x00, 0x00, 0x00, 0x00, 0x00, 0x01,
0x0e, 0xb5, 0xcc, 0xb8, 0x5c, 0x29, 0x00, 0x9b,
0x60, 0x60, 0xde, 0xcb, 0x35, 0x3a, 0x38, 0xea,
0x3b, 0x52, 0xcd, 0x20, 0x00, 0x00, 0x00, 0x74,
0x6a, 0x52, 0x88, 0x00, 0xdb, 0xcf, 0x89, 0x0f,
0x77, 0xf4, 0x9b, 0x96, 0x85, 0x76, 0x48, 0xb7,
0x2b, 0x77, 0xf9, 0xf8, 0x29, 0x37, 0xf2, 0x8a,
0x68, 0x70, 0x4a, 0xf0, 0x5d, 0xa0, 0xdc, 0x12,
0xba, 0x53, 0xf2, 0xdb,
// number of credentials:
0x00, 0x00, 0x00, 0x01,
// credential[0]:
0x00, 0x00, 0x00, 0x09, 0x00, 0x00, 0x00, 0x01,
0x0a, 0xcc, 0xcf, 0x47, 0xa8, 0x20, 0x54, 0x9a,
0x84, 0x42, 0x84, 0x40, 0xe2, 0x42, 0x19, 0x75,
0x13, 0x87, 0x90, 0xe4, 0x1b, 0xe2, 0x62, 0xf7,
0x19, 0x7f, 0x3d, 0x93, 0xfa, 0xa2, 0x6c, 0xc8,
0x74, 0x10, 0x60, 0xd7, 0x43, 0xff, 0xaf, 0x02,
0x57, 0x82, 0xc8, 0xc8, 0x6b, 0x86, 0x2d, 0x2b,
0x9f, 0xeb, 0xeb, 0xe7, 0xd3, 0x52, 0xf0, 0xb4,
0x59, 0x1a, 0xfb, 0xd1, 0xa7, 0x37, 0xf8, 0xa3,
0x00,
```
## UTXO
A UTXO is a standalone representation of a transaction output.
### What UTXO Contains
A UTXO contains a `CodecID`, `TxID`, `UTXOIndex`, `AssetID`, and `Output`.
- **`CodecID`** The only valid `CodecID` is `00 00`
- **`TxID`** is a 32-byte transaction ID. Transaction IDs are calculated by
taking sha256 of the bytes of the signed transaction.
- **`UTXOIndex`** is an int that specifies which output in the transaction
specified by **`TxID`** that this utxo was created by.
- **`AssetID`** is a 32-byte array that defines which asset this utxo references.
- **`Output`** is the output object that created this utxo. The serialization of
Outputs was defined above.
### Gantt UTXO Specification
```text
+--------------+----------+-------------------------+
| codec_id : uint16 | 2 bytes |
+--------------+----------+-------------------------+
| tx_id : [32]byte | 32 bytes |
+--------------+----------+-------------------------+
| output_index : int | 4 bytes |
+--------------+----------+-------------------------+
| asset_id : [32]byte | 32 bytes |
+--------------+----------+-------------------------+
| output : Output | size(output) bytes |
+--------------+----------+-------------------------+
| 70 + size(output) bytes |
+-------------------------+
```
### Proto UTXO Specification
```text
message Utxo {
uint16 codec_id = 1; // 02 bytes
bytes tx_id = 2; // 32 bytes
uint32 output_index = 3; // 04 bytes
bytes asset_id = 4; // 32 bytes
Output output = 5; // size(output)
}
```
### UTXO Example
Let's make a UTXO from the signed transaction created above:
- **`CodecID`**: `0`
- **`TxID`**: `0xf966750f438867c3c9828ddcdbe660e21ccdbb36a9276958f011ba472f75d4e7`
- **`UTXOIndex`**: 0 = 0x00000000
- **`AssetID`**: `0x000102030405060708090a0b0c0d0e0f101112131415161718191a1b1c1d1e1f`
- **`Output`**: `"Example EVMOutput as defined above"`
```text
[
CodecID <- 0x0000
TxID <- 0xf966750f438867c3c9828ddcdbe660e21ccdbb36a9276958f011ba472f75d4e7
UTXOIndex <- 0x00000000
AssetID <- 0x000102030405060708090a0b0c0d0e0f101112131415161718191a1b1c1d1e1f
Output <- 0x000000070000000000003039000000000000d431000000010000000251025c61fbcfc078f69334f834be6dd26d55a955c3344128e060128ede3523a24a461c8943ab0859
]
=
[
// Codec ID:
0x00, 0x00,
// txID:
0xf9, 0x66, 0x75, 0x0f, 0x43, 0x88, 0x67, 0xc3,
0xc9, 0x82, 0x8d, 0xdc, 0xdb, 0xe6, 0x60, 0xe2,
0x1c, 0xcd, 0xbb, 0x36, 0xa9, 0x27, 0x69, 0x58,
0xf0, 0x11, 0xba, 0x47, 0x2f, 0x75, 0xd4, 0xe7,
// utxo index:
0x00, 0x00, 0x00, 0x00,
// assetID:
0x00, 0x01, 0x02, 0x03, 0x04, 0x05, 0x06, 0x07,
0x08, 0x09, 0x0a, 0x0b, 0x0c, 0x0d, 0x0e, 0x0f,
0x10, 0x11, 0x12, 0x13, 0x14, 0x15, 0x16, 0x17,
0x18, 0x19, 0x1a, 0x1b, 0x1c, 0x1d, 0x1e, 0x1f,
// output:
0x00, 0x00, 0x00, 0x07, 0x00, 0x00, 0x00, 0x00,
0x00, 0x00, 0x30, 0x39, 0x00, 0x00, 0x00, 0x00,
0x00, 0x00, 0xd4, 0x31, 0x00, 0x00, 0x00, 0x01,
0x00, 0x00, 0x00, 0x02, 0x00, 0x01, 0x02, 0x03,
0x04, 0x05, 0x06, 0x07, 0x08, 0x09, 0x0a, 0x0b,
0x0c, 0x0d, 0x0e, 0x0f, 0x10, 0x11, 0x12, 0x13,
0x14, 0x15, 0x16, 0x17, 0x18, 0x19, 0x1a, 0x1b,
0x1c, 0x1d, 0x1e, 0x1f, 0x20, 0x21, 0x22, 0x23,
0x24, 0x25, 0x26, 0x27,
]
```
# Health RPC (/docs/rpcs/other/health-rpc)
---
title: "Health RPC"
description: "This page is an overview of the Health RPC associated with AvalancheGo."
edit_url: https://github.com/ava-labs/avalanchego/edit/master/api/health/service.md
---
The Health API can be used for measuring node health.
This API set is for a specific node; it is unavailable on the [public server](https://build.avax.network/docs/tooling/rpc-providers).
## Health Checks
The node periodically runs all health checks, including health checks for each chain.
The frequency at which health checks are run can be specified with the [\--health-check-frequency](https://build.avax.network/docs/nodes/configure/configs-flags) flag.
## Filterable Health Checks
The health checks that are run by the node are filterable. You can specify which health checks you want to see by using `tags` filters. Returned results will only include health checks that match the specified tags and global health checks like `network`, `database` etc. When filtered, the returned results will not show the full node health, but only a subset of filtered health checks. This means the node can still be unhealthy in unfiltered checks, even if the returned results show that the node is healthy. AvalancheGo supports using subnetIDs as tags.
## GET Request
To get an HTTP status code response that indicates the node's health, make a `GET` request. If the node is healthy, it will return a `200` status code. If the node is unhealthy, it will return a `503` status code. In-depth information about the node's health is included in the response body.
### Filtering
To filter GET health checks, add a `tag` query parameter to the request. The `tag` parameter is a string. For example, to filter health results by subnetID `29uVeLPJB1eQJkzRemU8g8wZDw5uJRqpab5U2mX9euieVwiEbL`, use the following query:
```sh
curl 'http://localhost:9650/ext/health?tag=29uVeLPJB1eQJkzRemU8g8wZDw5uJRqpab5U2mX9euieVwiEbL'
```
In this example returned results will contain global health checks and health checks that are related to subnetID `29uVeLPJB1eQJkzRemU8g8wZDw5uJRqpab5U2mX9euieVwiEbL`.
**Note**: This filtering can show healthy results even if the node is unhealthy in other Chains/Avalanche L1s.
In order to filter results by multiple tags, use multiple `tag` query parameters. For example, to filter health results by subnetID `29uVeLPJB1eQJkzRemU8g8wZDw5uJRqpab5U2mX9euieVwiEbL` and `28nrH5T2BMvNrWecFcV3mfccjs6axM1TVyqe79MCv2Mhs8kxiY` use the following query:
```sh
curl 'http://localhost:9650/ext/health?tag=29uVeLPJB1eQJkzRemU8g8wZDw5uJRqpab5U2mX9euieVwiEbL&tag=28nrH5T2BMvNrWecFcV3mfccjs6axM1TVyqe79MCv2Mhs8kxiY'
```
The returned results will include health checks for both subnetIDs as well as global health checks.
### Endpoints
The available endpoints for GET requests are:
- `/ext/health` returns a holistic report of the status of the node. **Most operators should monitor this status.**
- `/ext/health/health` is the same as `/ext/health`.
- `/ext/health/readiness` returns healthy once the node has finished initializing.
- `/ext/health/liveness` returns healthy once the endpoint is available.
## JSON RPC Request
### Format
This API uses the `json 2.0` RPC format. For more information on making JSON RPC calls, see [here](https://build.avax.network/docs/api-reference/guides/issuing-api-calls).
### Endpoint
### Methods
#### `health.health`
This method returns the last set of health check results.
**Example Call**:
```sh
curl -H 'Content-Type: application/json' --data '{
"jsonrpc":"2.0",
"id" :1,
"method" :"health.health",
"params": {
"tags": ["11111111111111111111111111111111LpoYY", "29uVeLPJB1eQJkzRemU8g8wZDw5uJRqpab5U2mX9euieVwiEbL"]
}
}' 'http://localhost:9650/ext/health'
```
**Example Response**:
```json
{
"jsonrpc": "2.0",
"result": {
"checks": {
"C": {
"message": {
"engine": {
"consensus": {
"lastAcceptedHeight": 31273749,
"lastAcceptedID": "2Y4gZGzQnu8UjnHod8j1BLewHFVEbzhULPNzqrSWEHkHNqDrYL",
"longestProcessingBlock": "0s",
"processingBlocks": 0
},
"vm": null
},
"networking": {
"percentConnected": 0.9999592612587486
}
},
"timestamp": "2024-03-26T19:44:45.2931-04:00",
"duration": 20375
},
"P": {
"message": {
"engine": {
"consensus": {
"lastAcceptedHeight": 142517,
"lastAcceptedID": "2e1FEPCBEkG2Q7WgyZh1v4nt3DXj1HDbDthyhxdq2Ltg3shSYq",
"longestProcessingBlock": "0s",
"processingBlocks": 0
},
"vm": null
},
"networking": {
"percentConnected": 0.9999592612587486
}
},
"timestamp": "2024-03-26T19:44:45.293115-04:00",
"duration": 8750
},
"X": {
"message": {
"engine": {
"consensus": {
"lastAcceptedHeight": 24464,
"lastAcceptedID": "XuFCsGaSw9cn7Vuz5e2fip4KvP46Xu53S8uDRxaC2QJmyYc3w",
"longestProcessingBlock": "0s",
"processingBlocks": 0
},
"vm": null
},
"networking": {
"percentConnected": 0.9999592612587486
}
},
"timestamp": "2024-03-26T19:44:45.29312-04:00",
"duration": 23291
},
"bootstrapped": {
"message": [],
"timestamp": "2024-03-26T19:44:45.293078-04:00",
"duration": 3375
},
"database": {
"timestamp": "2024-03-26T19:44:45.293102-04:00",
"duration": 1959
},
"diskspace": {
"message": {
"availableDiskBytes": 227332591616
},
"timestamp": "2024-03-26T19:44:45.293106-04:00",
"duration": 3042
},
"network": {
"message": {
"connectedPeers": 284,
"sendFailRate": 0,
"timeSinceLastMsgReceived": "293.098ms",
"timeSinceLastMsgSent": "293.098ms"
},
"timestamp": "2024-03-26T19:44:45.2931-04:00",
"duration": 2333
},
"router": {
"message": {
"longestRunningRequest": "66.90725ms",
"outstandingRequests": 3
},
"timestamp": "2024-03-26T19:44:45.293097-04:00",
"duration": 3542
}
},
"healthy": true
},
"id": 1
}
```
In this example response, every check has passed. So, the node is healthy.
**Response Explanation**:
- `checks` is a list of health check responses.
- A check response may include a `message` with additional context.
- A check response may include an `error` describing why the check failed.
- `timestamp` is the timestamp of the last health check.
- `duration` is the execution duration of the last health check, in nanoseconds.
- `contiguousFailures` is the number of times in a row this check failed.
- `timeOfFirstFailure` is the time this check first failed.
- `healthy` is true all the health checks are passing.
#### `health.readiness`
This method returns the last evaluation of the startup health check results.
**Example Call**:
```sh
curl -H 'Content-Type: application/json' --data '{
"jsonrpc":"2.0",
"id" :1,
"method" :"health.readiness",
"params": {
"tags": ["11111111111111111111111111111111LpoYY", "29uVeLPJB1eQJkzRemU8g8wZDw5uJRqpab5U2mX9euieVwiEbL"]
}
}' 'http://localhost:9650/ext/health'
```
**Example Response**:
```json
{
"jsonrpc": "2.0",
"result": {
"checks": {
"bootstrapped": {
"message": [],
"timestamp": "2024-03-26T20:02:45.299114-04:00",
"duration": 2834
}
},
"healthy": true
},
"id": 1
}
```
In this example response, every check has passed. So, the node has finished the startup process.
**Response Explanation**:
- `checks` is a list of health check responses.
- A check response may include a `message` with additional context.
- A check response may include an `error` describing why the check failed.
- `timestamp` is the timestamp of the last health check.
- `duration` is the execution duration of the last health check, in nanoseconds.
- `contiguousFailures` is the number of times in a row this check failed.
- `timeOfFirstFailure` is the time this check first failed.
- `healthy` is true all the health checks are passing.
#### `health.liveness`
This method returns healthy.
**Example Call**:
```sh
curl -H 'Content-Type: application/json' --data '{
"jsonrpc":"2.0",
"id" :1,
"method" :"health.liveness"
}' 'http://localhost:9650/ext/health'
```
**Example Response**:
```json
{
"jsonrpc": "2.0",
"result": {
"checks": {},
"healthy": true
},
"id": 1
}
```
In this example response, the node was able to handle the request and mark the service as healthy.
**Response Explanation**:
- `checks` is an empty list.
- `healthy` is true.
# Index RPC (/docs/rpcs/other/index-rpc)
---
title: "Index RPC"
description: "This page is an overview of the Index RPC associated with AvalancheGo."
edit_url: https://github.com/ava-labs/avalanchego/edit/master/indexer/service.md
---
AvalancheGo can be configured to run with an indexer. That is, it saves (indexes) every container (a block, vertex or transaction) it accepts on the X-Chain, P-Chain and C-Chain. To run AvalancheGo with indexing enabled, set command line flag [\--index-enabled](https://build.avax.network/docs/nodes/configure/configs-flags#--index-enabled-boolean) to true.
**AvalancheGo will only index containers that are accepted when running with `--index-enabled` set to true.** To ensure your node has a complete index, run a node with a fresh database and `--index-enabled` set to true. The node will accept every block, vertex and transaction in the network history during bootstrapping, ensuring your index is complete.
It is OK to turn off your node if it is running with indexing enabled. If it restarts with indexing still enabled, it will accept all containers that were accepted while it was offline. The indexer should never fail to index an accepted block, vertex or transaction.
Indexed containers (that is, accepted blocks, vertices and transactions) are timestamped with the time at which the node accepted that container. Note that if the container was indexed during bootstrapping, other nodes may have accepted the container much earlier. Every container indexed during bootstrapping will be timestamped with the time at which the node bootstrapped, not when it was first accepted by the network.
If `--index-enabled` is changed to `false` from `true`, AvalancheGo won't start as doing so would cause a previously complete index to become incomplete, unless the user explicitly says to do so with `--index-allow-incomplete`. This protects you from accidentally running with indexing disabled, after previously running with it enabled, which would result in an incomplete index.
This document shows how to query data from AvalancheGo's Index API. The Index API is only available when running with `--index-enabled`.
## Go Client
There is a Go implementation of an Index API client. See documentation [here](https://pkg.go.dev/github.com/ava-labs/avalanchego/indexer#Client). This client can be used inside a Go program to connect to an AvalancheGo node that is running with the Index API enabled and make calls to the Index API.
## Format
This API uses the `json 2.0` RPC format. For more information on making JSON RPC calls, see [here](https://build.avax.network/docs/api-reference/guides/issuing-api-calls).
## Endpoints
Each chain has one or more index. To see if a C-Chain block is accepted, for example, send an API call to the C-Chain block index. To see if an X-Chain vertex is accepted, for example, send an API call to the X-Chain vertex index.
### C-Chain Blocks
```
/ext/index/C/block
```
### P-Chain Blocks
```
/ext/index/P/block
```
### X-Chain Transactions
```
/ext/index/X/tx
```
### X-Chain Blocks
```
/ext/index/X/block
```
To ensure historical data can be accessed, the `/ext/index/X/vtx` is still accessible, even though it is no longer populated with chain data since the Cortina activation. If you are using `V1.10.0` or higher, you need to migrate to using the `/ext/index/X/block` endpoint.
## Methods
### `index.getContainerByID`
Get container by ID.
**Signature**:
```
index.getContainerByID({
id: string,
encoding: string
}) -> {
id: string,
bytes: string,
timestamp: string,
encoding: string,
index: string
}
```
**Request**:
- `id` is the container's ID
- `encoding` is `"hex"` only.
**Response**:
- `id` is the container's ID
- `bytes` is the byte representation of the container
- `timestamp` is the time at which this node accepted the container
- `encoding` is `"hex"` only.
- `index` is how many containers were accepted in this index before this one
**Example Call**:
```sh
curl --location --request POST 'localhost:9650/ext/index/X/tx' \
--header 'Content-Type: application/json' \
--data-raw '{
"jsonrpc": "2.0",
"method": "index.getContainerByID",
"params": {
"id": "6fXf5hncR8LXvwtM8iezFQBpK5cubV6y1dWgpJCcNyzGB1EzY",
"encoding":"hex"
},
"id": 1
}'
```
**Example Response**:
```json
{
"jsonrpc": "2.0",
"id": 1,
"result": {
"id": "6fXf5hncR8LXvwtM8iezFQBpK5cubV6y1dWgpJCcNyzGB1EzY",
"bytes": "0x00000000000400003039d891ad56056d9c01f18f43f58b5c784ad07a4a49cf3d1f11623804b5cba2c6bf00000001dbcf890f77f49b96857648b72b77f9f82937f28a68704af05da0dc12ba53f2db000000070429ccc5c5eb3b80000000000000000000000001000000013cb7d3842e8cee6a0ebd09f1fe884f6861e1b29c00000001dbcf890f77f49b96857648b72b77f9f82937f28a68704af05da0dc12ba53f2db00000001dbcf890f77f49b96857648b72b77f9f82937f28a68704af05da0dc12ba53f2db000000050429d069189e0000000000010000000000000000c85fc1980a77c5da78fe5486233fc09a769bb812bcb2cc548cf9495d046b3f1b00000001dbcf890f77f49b96857648b72b77f9f82937f28a68704af05da0dc12ba53f2db00000007000003a352a38240000000000000000000000001000000013cb7d3842e8cee6a0ebd09f1fe884f6861e1b29c0000000100000009000000011cdb75d4e0b0aeaba2ebc1ef208373fedc1ebbb498f8385ad6fb537211d1523a70d903b884da77d963d56f163191295589329b5710113234934d0fd59c01676b00b63d2108",
"timestamp": "2021-04-02T15:34:00.262979-07:00",
"encoding": "hex",
"index": "0"
}
}
```
### `index.getContainerByIndex`
Get container by index. The first container accepted is at index 0, the second is at index 1, etc.
**Signature**:
```
index.getContainerByIndex({
index: uint64,
encoding: string
}) -> {
id: string,
bytes: string,
timestamp: string,
encoding: string,
index: string
}
```
**Request**:
- `index` is how many containers were accepted in this index before this one
- `encoding` is `"hex"` only.
**Response**:
- `id` is the container's ID
- `bytes` is the byte representation of the container
- `timestamp` is the time at which this node accepted the container
- `index` is how many containers were accepted in this index before this one
- `encoding` is `"hex"` only.
**Example Call**:
```sh
curl --location --request POST 'localhost:9650/ext/index/X/tx' \
--header 'Content-Type: application/json' \
--data-raw '{
"jsonrpc": "2.0",
"method": "index.getContainerByIndex",
"params": {
"index":0,
"encoding": "hex"
},
"id": 1
}'
```
**Example Response**:
```json
{
"jsonrpc": "2.0",
"id": 1,
"result": {
"id": "6fXf5hncR8LXvwtM8iezFQBpK5cubV6y1dWgpJCcNyzGB1EzY",
"bytes": "0x00000000000400003039d891ad56056d9c01f18f43f58b5c784ad07a4a49cf3d1f11623804b5cba2c6bf00000001dbcf890f77f49b96857648b72b77f9f82937f28a68704af05da0dc12ba53f2db000000070429ccc5c5eb3b80000000000000000000000001000000013cb7d3842e8cee6a0ebd09f1fe884f6861e1b29c00000001dbcf890f77f49b96857648b72b77f9f82937f28a68704af05da0dc12ba53f2db00000001dbcf890f77f49b96857648b72b77f9f82937f28a68704af05da0dc12ba53f2db000000050429d069189e0000000000010000000000000000c85fc1980a77c5da78fe5486233fc09a769bb812bcb2cc548cf9495d046b3f1b00000001dbcf890f77f49b96857648b72b77f9f82937f28a68704af05da0dc12ba53f2db00000007000003a352a38240000000000000000000000001000000013cb7d3842e8cee6a0ebd09f1fe884f6861e1b29c0000000100000009000000011cdb75d4e0b0aeaba2ebc1ef208373fedc1ebbb498f8385ad6fb537211d1523a70d903b884da77d963d56f163191295589329b5710113234934d0fd59c01676b00b63d2108",
"timestamp": "2021-04-02T15:34:00.262979-07:00",
"encoding": "hex",
"index": "0"
}
}
```
### `index.getContainerRange`
Returns the transactions at index \[`startIndex`\], \[`startIndex+1`\], ... , \[`startIndex+n-1`\]
- If \[`n`\] == 0, returns an empty response (for example: null).
- If \[`startIndex`\] > the last accepted index, returns an error (unless the above apply.)
- If \[`n`\] > \[`MaxFetchedByRange`\], returns an error.
- If we run out of transactions, returns the ones fetched before running out.
- `numToFetch` must be in `[0,1024]`.
**Signature**:
```
index.getContainerRange({
startIndex: uint64,
numToFetch: uint64,
encoding: string
}) -> []{
id: string,
bytes: string,
timestamp: string,
encoding: string,
index: string
}
```
**Request**:
- `startIndex` is the beginning index
- `numToFetch` is the number of containers to fetch
- `encoding` is `"hex"` only.
**Response**:
- `id` is the container's ID
- `bytes` is the byte representation of the container
- `timestamp` is the time at which this node accepted the container
- `encoding` is `"hex"` only.
- `index` is how many containers were accepted in this index before this one
**Example Call**:
```sh
curl --location --request POST 'localhost:9650/ext/index/X/tx' \
--header 'Content-Type: application/json' \
--data-raw '{
"jsonrpc": "2.0",
"method": "index.getContainerRange",
"params": {
"startIndex":0,
"numToFetch":100,
"encoding": "hex"
},
"id": 1
}'
```
**Example Response**:
```json
{
"jsonrpc": "2.0",
"id": 1,
"result": [
{
"id": "6fXf5hncR8LXvwtM8iezFQBpK5cubV6y1dWgpJCcNyzGB1EzY",
"bytes": "0x00000000000400003039d891ad56056d9c01f18f43f58b5c784ad07a4a49cf3d1f11623804b5cba2c6bf00000001dbcf890f77f49b96857648b72b77f9f82937f28a68704af05da0dc12ba53f2db000000070429ccc5c5eb3b80000000000000000000000001000000013cb7d3842e8cee6a0ebd09f1fe884f6861e1b29c00000001dbcf890f77f49b96857648b72b77f9f82937f28a68704af05da0dc12ba53f2db00000001dbcf890f77f49b96857648b72b77f9f82937f28a68704af05da0dc12ba53f2db000000050429d069189e0000000000010000000000000000c85fc1980a77c5da78fe5486233fc09a769bb812bcb2cc548cf9495d046b3f1b00000001dbcf890f77f49b96857648b72b77f9f82937f28a68704af05da0dc12ba53f2db00000007000003a352a38240000000000000000000000001000000013cb7d3842e8cee6a0ebd09f1fe884f6861e1b29c0000000100000009000000011cdb75d4e0b0aeaba2ebc1ef208373fedc1ebbb498f8385ad6fb537211d1523a70d903b884da77d963d56f163191295589329b5710113234934d0fd59c01676b00b63d2108",
"timestamp": "2021-04-02T15:34:00.262979-07:00",
"encoding": "hex",
"index": "0"
}
]
}
```
### `index.getIndex`
Get a container's index.
**Signature**:
```
index.getIndex({
id: string,
encoding: string
}) -> {
index: string
}
```
**Request**:
- `id` is the ID of the container to fetch
- `encoding` is `"hex"` only.
**Response**:
- `index` is how many containers were accepted in this index before this one
**Example Call**:
```sh
curl --location --request POST 'localhost:9650/ext/index/X/tx' \
--header 'Content-Type: application/json' \
--data-raw '{
"jsonrpc": "2.0",
"method": "index.getIndex",
"params": {
"id":"6fXf5hncR8LXvwtM8iezFQBpK5cubV6y1dWgpJCcNyzGB1EzY",
"encoding": "hex"
},
"id": 1
}'
```
**Example Response**:
```json
{
"jsonrpc": "2.0",
"result": {
"index": "0"
},
"id": 1
}
```
### `index.getLastAccepted`
Get the most recently accepted container.
**Signature**:
```
index.getLastAccepted({
encoding:string
}) -> {
id: string,
bytes: string,
timestamp: string,
encoding: string,
index: string
}
```
**Request**:
- `encoding` is `"hex"` only.
**Response**:
- `id` is the container's ID
- `bytes` is the byte representation of the container
- `timestamp` is the time at which this node accepted the container
- `encoding` is `"hex"` only.
**Example Call**:
```sh
curl --location --request POST 'localhost:9650/ext/index/X/tx' \
--header 'Content-Type: application/json' \
--data-raw '{
"jsonrpc": "2.0",
"method": "index.getLastAccepted",
"params": {
"encoding": "hex"
},
"id": 1
}'
```
**Example Response**:
```json
{
"jsonrpc": "2.0",
"id": 1,
"result": {
"id": "6fXf5hncR8LXvwtM8iezFQBpK5cubV6y1dWgpJCcNyzGB1EzY",
"bytes": "0x00000000000400003039d891ad56056d9c01f18f43f58b5c784ad07a4a49cf3d1f11623804b5cba2c6bf00000001dbcf890f77f49b96857648b72b77f9f82937f28a68704af05da0dc12ba53f2db000000070429ccc5c5eb3b80000000000000000000000001000000013cb7d3842e8cee6a0ebd09f1fe884f6861e1b29c00000001dbcf890f77f49b96857648b72b77f9f82937f28a68704af05da0dc12ba53f2db00000001dbcf890f77f49b96857648b72b77f9f82937f28a68704af05da0dc12ba53f2db000000050429d069189e0000000000010000000000000000c85fc1980a77c5da78fe5486233fc09a769bb812bcb2cc548cf9495d046b3f1b00000001dbcf890f77f49b96857648b72b77f9f82937f28a68704af05da0dc12ba53f2db00000007000003a352a38240000000000000000000000001000000013cb7d3842e8cee6a0ebd09f1fe884f6861e1b29c0000000100000009000000011cdb75d4e0b0aeaba2ebc1ef208373fedc1ebbb498f8385ad6fb537211d1523a70d903b884da77d963d56f163191295589329b5710113234934d0fd59c01676b00b63d2108",
"timestamp": "2021-04-02T15:34:00.262979-07:00",
"encoding": "hex",
"index": "0"
}
}
```
### `index.isAccepted`
Returns true if the container is in this index.
**Signature**:
```
index.isAccepted({
id: string,
encoding: string
}) -> {
isAccepted: bool
}
```
**Request**:
- `id` is the ID of the container to fetch
- `encoding` is `"hex"` only.
**Response**:
- `isAccepted` displays if the container has been accepted
**Example Call**:
```sh
curl --location --request POST 'localhost:9650/ext/index/X/tx' \
--header 'Content-Type: application/json' \
--data-raw '{
"jsonrpc": "2.0",
"method": "index.isAccepted",
"params": {
"id":"6fXf5hncR8LXvwtM8iezFQBpK5cubV6y1dWgpJCcNyzGB1EzY",
"encoding": "hex"
},
"id": 1
}'
```
**Example Response**:
```json
{
"jsonrpc": "2.0",
"result": {
"isAccepted": true
},
"id": 1
}
```
## Example: Iterating Through X-Chain Transaction
Here is an example of how to iterate through all transactions on the X-Chain.
You can use the Index API to get the ID of every transaction that has been accepted on the X-Chain, and use the X-Chain API method `avm.getTx` to get a human-readable representation of the transaction.
To get an X-Chain transaction by its index (the order it was accepted in), use Index API method [index.getlastaccepted](#indexgetlastaccepted).
For example, to get the second transaction (note that `"index":1`) accepted on the X-Chain, do:
```sh
curl --location --request POST 'https://indexer-demo.avax.network/ext/index/X/tx' \
--header 'Content-Type: application/json' \
--data-raw '{
"jsonrpc": "2.0",
"method": "index.getContainerByIndex",
"params": {
"encoding":"hex",
"index":1
},
"id": 1
}'
```
This returns the ID of the second transaction accepted in the X-Chain's history. To get the third transaction on the X-Chain, use `"index":2`, and so on.
The above API call gives the response below:
```json
{
"jsonrpc": "2.0",
"result": {
"id": "ZGYTSU8w3zUP6VFseGC798vA2Vnxnfj6fz1QPfA9N93bhjJvo",
"bytes": "0x00000000000000000001ed5f38341e436e5d46e2bb00b45d62ae97d1b050c64bc634ae10626739e35c4b0000000221e67317cbc4be2aeb00677ad6462778a8f52274b9d605df2591b23027a87dff000000070000000129f6afc0000000000000000000000001000000017416792e228a765c65e2d76d28ab5a16d18c342f21e67317cbc4be2aeb00677ad6462778a8f52274b9d605df2591b23027a87dff0000000700000222afa575c00000000000000000000000010000000187d6a6dd3cd7740c8b13a410bea39b01fa83bb3e000000016f375c785edb28d52edb59b54035c96c198e9d80f5f5f5eee070592fe9465b8d0000000021e67317cbc4be2aeb00677ad6462778a8f52274b9d605df2591b23027a87dff0000000500000223d9ab67c0000000010000000000000000000000010000000900000001beb83d3d29f1247efb4a3a1141ab5c966f46f946f9c943b9bc19f858bd416d10060c23d5d9c7db3a0da23446b97cd9cf9f8e61df98e1b1692d764c84a686f5f801a8da6e40",
"timestamp": "2021-11-04T00:42:55.01643414Z",
"encoding": "hex",
"index": "1"
},
"id": 1
}
```
The ID of this transaction is `ZGYTSU8w3zUP6VFseGC798vA2Vnxnfj6fz1QPfA9N93bhjJvo`.
To get the transaction by its ID, use API method `avm.getTx`:
```sh
curl -X POST --data '{
"jsonrpc":"2.0",
"id" :1,
"method" :"avm.getTx",
"params" :{
"txID":"ZGYTSU8w3zUP6VFseGC798vA2Vnxnfj6fz1QPfA9N93bhjJvo",
"encoding": "json"
}
}' -H 'content-type:application/json;' https://api.avax.network/ext/bc/X
```
**Response**:
```json
{
"jsonrpc": "2.0",
"result": {
"tx": {
"unsignedTx": {
"networkID": 1,
"blockchainID": "2oYMBNV4eNHyqk2fjjV5nVQLDbtmNJzq5s3qs3Lo6ftnC6FByM",
"outputs": [
{
"assetID": "FvwEAhmxKfeiG8SnEvq42hc6whRyY3EFYAvebMqDNDGCgxN5Z",
"fxID": "spdxUxVJQbX85MGxMHbKw1sHxMnSqJ3QBzDyDYEP3h6TLuxqQ",
"output": {
"addresses": ["X-avax1wst8jt3z3fm9ce0z6akj3266zmgccdp03hjlaj"],
"amount": 4999000000,
"locktime": 0,
"threshold": 1
}
},
{
"assetID": "FvwEAhmxKfeiG8SnEvq42hc6whRyY3EFYAvebMqDNDGCgxN5Z",
"fxID": "spdxUxVJQbX85MGxMHbKw1sHxMnSqJ3QBzDyDYEP3h6TLuxqQ",
"output": {
"addresses": ["X-avax1slt2dhfu6a6qezcn5sgtagumq8ag8we75f84sw"],
"amount": 2347999000000,
"locktime": 0,
"threshold": 1
}
}
],
"inputs": [
{
"txID": "qysTYUMCWdsR3MctzyfXiSvoSf6evbeFGRLLzA4j2BjNXTknh",
"outputIndex": 0,
"assetID": "FvwEAhmxKfeiG8SnEvq42hc6whRyY3EFYAvebMqDNDGCgxN5Z",
"fxID": "spdxUxVJQbX85MGxMHbKw1sHxMnSqJ3QBzDyDYEP3h6TLuxqQ",
"input": {
"amount": 2352999000000,
"signatureIndices": [0]
}
}
],
"memo": "0x"
},
"credentials": [
{
"fxID": "spdxUxVJQbX85MGxMHbKw1sHxMnSqJ3QBzDyDYEP3h6TLuxqQ",
"credential": {
"signatures": [
"0xbeb83d3d29f1247efb4a3a1141ab5c966f46f946f9c943b9bc19f858bd416d10060c23d5d9c7db3a0da23446b97cd9cf9f8e61df98e1b1692d764c84a686f5f801"
]
}
}
]
},
"encoding": "json"
},
"id": 1
}
```
# Admin RPC (/docs/rpcs/other)
---
title: "Admin RPC"
description: "This page is an overview of the Admin RPC associated with AvalancheGo."
edit_url: https://github.com/ava-labs/avalanchego/edit/master/api/admin/service.md
---
The Admin API can be used for measuring node health and debugging.
The Admin API is disabled by default for security reasons. To run a node with the Admin API enabled, use [`config flag --api-admin-enabled=true`](https://build.avax.network/docs/nodes/configure/configs-flags#--api-admin-enabled-boolean).
This API set is for a specific node, it is unavailable on the [public server](https://build.avax.network/docs/tooling/rpc-providers).
## Format
This API uses the `json 2.0` RPC format. For details, see [here](https://build.avax.network/docs/api-reference/guides/issuing-api-calls).
## Endpoint
```
/ext/admin
```
## Methods
### `admin.alias`
Assign an API endpoint an alias, a different endpoint for the API. The original endpoint will still work. This change only affects this node; other nodes will not know about this alias.
**Signature**:
```
admin.alias({endpoint:string, alias:string}) -> {}
```
- `endpoint` is the original endpoint of the API. `endpoint` should only include the part of the endpoint after `/ext/`.
- The API being aliased can now be called at `ext/alias`.
- `alias` can be at most 512 characters.
**Example Call**:
```sh
curl -X POST --data '{
"jsonrpc":"2.0",
"id" :1,
"method" :"admin.alias",
"params": {
"alias":"myAlias",
"endpoint":"bc/X"
}
}' -H 'content-type:application/json;' 127.0.0.1:9650/ext/admin
```
**Example Response**:
```json
{
"jsonrpc": "2.0",
"id": 1,
"result": {}
}
```
Now, calls to the X-Chain can be made to either `/ext/bc/X` or, equivalently, to `/ext/myAlias`.
### `admin.aliasChain`
Give a blockchain an alias, a different name that can be used any place the blockchain's ID is used.
Aliasing a chain can also be done via the [Node API](https://build.avax.network/docs/nodes/configure/configs-flags#--chain-aliases-file-string).
Note that the alias is set for each chain on each node individually. In a multi-node Avalanche L1, the same alias should be configured on each node to use an alias across an Avalanche L1 successfully. Setting an alias for a chain on one node does not register that alias with other nodes automatically.
**Signature**:
```
admin.aliasChain(
{
chain:string,
alias:string
}
) -> {}
```
- `chain` is the blockchain's ID.
- `alias` can now be used in place of the blockchain's ID (in API endpoints, for example.)
**Example Call**:
```sh
curl -X POST --data '{
"jsonrpc":"2.0",
"id" :1,
"method" :"admin.aliasChain",
"params": {
"chain":"sV6o671RtkGBcno1FiaDbVcFv2sG5aVXMZYzKdP4VQAWmJQnM",
"alias":"myBlockchainAlias"
}
}' -H 'content-type:application/json;' 127.0.0.1:9650/ext/admin
```
**Example Response**:
```json
{
"jsonrpc": "2.0",
"id": 1,
"result": {}
}
```
Now, instead of interacting with the blockchain whose ID is `sV6o671RtkGBcno1FiaDbVcFv2sG5aVXMZYzKdP4VQAWmJQnM` by making API calls to `/ext/bc/sV6o671RtkGBcno1FiaDbVcFv2sG5aVXMZYzKdP4VQAWmJQnM`, one can also make calls to `ext/bc/myBlockchainAlias`.
### `admin.getChainAliases`
Returns the aliases of the chain
**Signature**:
```
admin.getChainAliases(
{
chain:string
}
) -> {aliases:string[]}
```
- `chain` is the blockchain's ID.
**Example Call**:
```sh
curl -X POST --data '{
"jsonrpc":"2.0",
"id" :1,
"method" :"admin.getChainAliases",
"params": {
"chain":"sV6o671RtkGBcno1FiaDbVcFv2sG5aVXMZYzKdP4VQAWmJQnM"
}
}' -H 'content-type:application/json;' 127.0.0.1:9650/ext/admin
```
**Example Response**:
```json
{
"jsonrpc": "2.0",
"result": {
"aliases": [
"X",
"avm",
"2eNy1mUFdmaxXNj1eQHUe7Np4gju9sJsEtWQ4MX3ToiNKuADed"
]
},
"id": 1
}
```
### `admin.getLoggerLevel`
Returns log and display levels of loggers.
**Signature**:
```
admin.getLoggerLevel(
{
loggerName:string // optional
}
) -> {
loggerLevels: {
loggerName: {
logLevel: string,
displayLevel: string
}
}
}
```
- `loggerName` is the name of the logger to be returned. This is an optional argument. If not specified, it returns all possible loggers.
**Example Call**:
```sh
curl -X POST --data '{
"jsonrpc":"2.0",
"id" :1,
"method" :"admin.getLoggerLevel",
"params": {
"loggerName": "C"
}
}' -H 'content-type:application/json;' 127.0.0.1:9650/ext/admin
```
**Example Response**:
```json
{
"jsonrpc": "2.0",
"result": {
"loggerLevels": {
"C": {
"logLevel": "DEBUG",
"displayLevel": "INFO"
}
}
},
"id": 1
}
```
### `admin.loadVMs`
Dynamically loads any virtual machines installed on the node as plugins. See [here](https://build.avax.network/docs/virtual-machines#installing-a-vm) for more information on how to install a virtual machine on a node.
**Signature**:
```
admin.loadVMs() -> {
newVMs: map[string][]string
failedVMs: map[string]string,
}
```
- `failedVMs` is only included in the response if at least one virtual machine fails to be loaded.
**Example Call**:
```sh
curl -X POST --data '{
"jsonrpc":"2.0",
"id" :1,
"method" :"admin.loadVMs",
"params" :{}
}' -H 'content-type:application/json;' 127.0.0.1:9650/ext/admin
```
**Example Response**:
```json
{
"jsonrpc": "2.0",
"result": {
"newVMs": {
"tGas3T58KzdjLHhBDMnH2TvrddhqTji5iZAMZ3RXs2NLpSnhH": ["foovm"]
},
"failedVMs": {
"rXJsCSEYXg2TehWxCEEGj6JU2PWKTkd6cBdNLjoe2SpsKD9cy": "error message"
}
},
"id": 1
}
```
### `admin.lockProfile`
Writes a profile of mutex statistics to `lock.profile`.
**Signature**:
```
admin.lockProfile() -> {}
```
**Example Call**:
```sh
curl -X POST --data '{
"jsonrpc":"2.0",
"id" :1,
"method" :"admin.lockProfile",
"params" :{}
}' -H 'content-type:application/json;' 127.0.0.1:9650/ext/admin
```
**Example Response**:
```json
{
"jsonrpc": "2.0",
"id": 1,
"result": {}
}
```
### `admin.memoryProfile`
Writes a memory profile of the to `mem.profile`.
**Signature**:
```
admin.memoryProfile() -> {}
```
**Example Call**:
```sh
curl -X POST --data '{
"jsonrpc":"2.0",
"id" :1,
"method" :"admin.memoryProfile",
"params" :{}
}' -H 'content-type:application/json;' 127.0.0.1:9650/ext/admin
```
**Example Response**:
```json
{
"jsonrpc": "2.0",
"id": 1,
"result": {}
}
```
### `admin.setLoggerLevel`
Sets log and display levels of loggers.
**Signature**:
```
admin.setLoggerLevel(
{
loggerName: string, // optional
logLevel: string, // optional
displayLevel: string, // optional
}
) -> {}
```
- `loggerName` is the logger's name to be changed. This is an optional parameter. If not specified, it changes all possible loggers.
- `logLevel` is the log level of written logs, can be omitted.
- `displayLevel` is the log level of displayed logs, can be omitted.
`logLevel` and `displayLevel` cannot be omitted at the same time.
**Example Call**:
```sh
curl -X POST --data '{
"jsonrpc":"2.0",
"id" :1,
"method" :"admin.setLoggerLevel",
"params": {
"loggerName": "C",
"logLevel": "DEBUG",
"displayLevel": "INFO"
}
}' -H 'content-type:application/json;' 127.0.0.1:9650/ext/admin
```
**Example Response**:
```json
{
"jsonrpc": "2.0",
"id": 1,
"result": {}
}
```
### `admin.startCPUProfiler`
Start profiling the CPU utilization of the node. To stop, call `admin.stopCPUProfiler`. On stop, writes the profile to `cpu.profile`.
**Signature**:
```
admin.startCPUProfiler() -> {}
```
**Example Call**:
```sh
curl -X POST --data '{
"jsonrpc":"2.0",
"id" :1,
"method" :"admin.startCPUProfiler",
"params" :{}
}' -H 'content-type:application/json;' 127.0.0.1:9650/ext/admin
```
**Example Response**:
```json
{
"jsonrpc": "2.0",
"id": 1,
"result": {}
}
```
### `admin.stopCPUProfiler`
Stop the CPU profile that was previously started.
**Signature**:
```
admin.stopCPUProfiler() -> {}
```
**Example Call**:
```sh
curl -X POST --data '{
"jsonrpc":"2.0",
"id" :1,
"method" :"admin.stopCPUProfiler"
}' -H 'content-type:application/json;' 127.0.0.1:9650/ext/admin
```
**Example Response**:
```json
{
"jsonrpc": "2.0",
"id": 1,
"result": {}
}
```
# Info RPC (/docs/rpcs/other/info-rpc)
---
title: "Info RPC"
description: "This page is an overview of the Info RPC associated with AvalancheGo."
edit_url: https://github.com/ava-labs/avalanchego/edit/master/api/info/service.md
---
The Info API can be used to access basic information about an Avalanche node.
## Format
This API uses the `json 2.0` RPC format. For more information on making JSON RPC calls, see [here](https://build.avax.network/docs/api-reference/guides/issuing-api-calls).
## Endpoint
```
/ext/info
```
## Methods
### `info.acps`
Returns peer preferences for Avalanche Community Proposals (ACPs)
**Signature**:
```
info.acps() -> {
acps: map[uint32]{
supportWeight: uint64
supporters: set[string]
objectWeight: uint64
objectors: set[string]
abstainWeight: uint64
}
}
```
**Example Call**:
```sh
curl -sX POST --data '{
"jsonrpc":"2.0",
"id" :1,
"method" :"info.acps",
"params" :{}
}' -H 'content-type:application/json;' 127.0.0.1:9650/ext/info
```
**Example Response**:
```json
{
"jsonrpc": "2.0",
"result": {
"acps": {
"23": {
"supportWeight": "0",
"supporters": [],
"objectWeight": "0",
"objectors": [],
"abstainWeight": "161147778098286584"
},
"24": {
"supportWeight": "0",
"supporters": [],
"objectWeight": "0",
"objectors": [],
"abstainWeight": "161147778098286584"
},
"25": {
"supportWeight": "0",
"supporters": [],
"objectWeight": "0",
"objectors": [],
"abstainWeight": "161147778098286584"
},
"30": {
"supportWeight": "0",
"supporters": [],
"objectWeight": "0",
"objectors": [],
"abstainWeight": "161147778098286584"
},
"31": {
"supportWeight": "0",
"supporters": [],
"objectWeight": "0",
"objectors": [],
"abstainWeight": "161147778098286584"
},
"41": {
"supportWeight": "0",
"supporters": [],
"objectWeight": "0",
"objectors": [],
"abstainWeight": "161147778098286584"
},
"62": {
"supportWeight": "0",
"supporters": [],
"objectWeight": "0",
"objectors": [],
"abstainWeight": "161147778098286584"
}
}
},
"id": 1
}
```
### `info.isBootstrapped`
Check whether a given chain is done bootstrapping
**Signature**:
```
info.isBootstrapped({chain: string}) -> {isBootstrapped: bool}
```
`chain` is the ID or alias of a chain.
**Example Call**:
```sh
curl -X POST --data '{
"jsonrpc":"2.0",
"id" :1,
"method" :"info.isBootstrapped",
"params": {
"chain":"X"
}
}' -H 'content-type:application/json;' 127.0.0.1:9650/ext/info
```
**Example Response**:
```json
{
"jsonrpc": "2.0",
"result": {
"isBootstrapped": true
},
"id": 1
}
```
### `info.getBlockchainID`
Given a blockchain's alias, get its ID. (See [`admin.aliasChain`](https://build.avax.network/docs/api-reference/admin-api#adminaliaschain).)
**Signature**:
```
info.getBlockchainID({alias:string}) -> {blockchainID:string}
```
**Example Call**:
```sh
curl -X POST --data '{
"jsonrpc":"2.0",
"id" :1,
"method" :"info.getBlockchainID",
"params": {
"alias":"X"
}
}' -H 'content-type:application/json;' 127.0.0.1:9650/ext/info
```
**Example Response**:
```json
{
"jsonrpc": "2.0",
"id": 1,
"result": {
"blockchainID": "sV6o671RtkGBcno1FiaDbVcFv2sG5aVXMZYzKdP4VQAWmJQnM"
}
}
```
### `info.getNetworkID`
Get the ID of the network this node is participating in.
**Signature**:
```
info.getNetworkID() -> { networkID: int }
```
**Example Call**:
```sh
curl -X POST --data '{
"jsonrpc":"2.0",
"id" :1,
"method" :"info.getNetworkID"
}' -H 'content-type:application/json;' 127.0.0.1:9650/ext/info
```
**Example Response**:
```json
{
"jsonrpc": "2.0",
"id": 1,
"result": {
"networkID": "2"
}
}
```
Network ID of 1 = Mainnet Network ID of 5 = Fuji (testnet)
### `info.getNetworkName`
Get the name of the network this node is participating in.
**Signature**:
```
info.getNetworkName() -> { networkName:string }
```
**Example Call**:
```sh
curl -X POST --data '{
"jsonrpc":"2.0",
"id" :1,
"method" :"info.getNetworkName"
}' -H 'content-type:application/json;' 127.0.0.1:9650/ext/info
```
**Example Response**:
```json
{
"jsonrpc": "2.0",
"id": 1,
"result": {
"networkName": "local"
}
}
```
### `info.getNodeID`
Get the ID, the BLS key, and the proof of possession(BLS signature) of this node.
This endpoint set is for a specific node, it is unavailable on the [public server](https://build.avax.network/docs/tooling/rpc-providers).
**Signature**:
```
info.getNodeID() -> {
nodeID: string,
nodePOP: {
publicKey: string,
proofOfPossession: string
}
}
```
- `nodeID` Node ID is the unique identifier of the node that you set to act as a validator on the Primary Network.
- `nodePOP` is this node's BLS key and proof of possession. Nodes must register a BLS key to act as a validator on the Primary Network. Your node's POP is logged on startup and is accessible over this endpoint.
- `publicKey` is the 48 byte hex representation of the BLS key.
- `proofOfPossession` is the 96 byte hex representation of the BLS signature.
**Example Call**:
```sh
curl -X POST --data '{
"jsonrpc":"2.0",
"id" :1,
"method" :"info.getNodeID"
}' -H 'content-type:application/json;' 127.0.0.1:9650/ext/info
```
**Example Response**:
```json
{
"jsonrpc": "2.0",
"result": {
"nodeID": "NodeID-5mb46qkSBj81k9g9e4VFjGGSbaaSLFRzD",
"nodePOP": {
"publicKey": "0x8f95423f7142d00a48e1014a3de8d28907d420dc33b3052a6dee03a3f2941a393c2351e354704ca66a3fc29870282e15",
"proofOfPossession": "0x86a3ab4c45cfe31cae34c1d06f212434ac71b1be6cfe046c80c162e057614a94a5bc9f1ded1a7029deb0ba4ca7c9b71411e293438691be79c2dbf19d1ca7c3eadb9c756246fc5de5b7b89511c7d7302ae051d9e03d7991138299b5ed6a570a98"
}
},
"id": 1
}
```
### `info.getNodeIP`
Get the IP of this node.
This endpoint set is for a specific node, it is unavailable on the [public server](https://build.avax.network/docs/tooling/rpc-providers).
**Signature**:
```
info.getNodeIP() -> {ip: string}
```
**Example Call**:
```sh
curl -X POST --data '{
"jsonrpc":"2.0",
"id" :1,
"method" :"info.getNodeIP"
}' -H 'content-type:application/json;' 127.0.0.1:9650/ext/info
```
**Example Response**:
```json
{
"jsonrpc": "2.0",
"result": {
"ip": "192.168.1.1:9651"
},
"id": 1
}
```
### `info.getNodeVersion`
Get the version of this node.
**Signature**:
```
info.getNodeVersion() -> {
version: string,
databaseVersion: string,
gitCommit: string,
vmVersions: map[string]string,
rpcProtocolVersion: string,
}
```
where:
- `version` is this node's version
- `databaseVersion` is the version of the database this node is using
- `gitCommit` is the Git commit that this node was built from
- `vmVersions` is map where each key/value pair is the name of a VM, and the version of that VM this node runs
- `rpcProtocolVersion` is the RPCChainVM protocol version
**Example Call**:
```sh
curl -X POST --data '{
"jsonrpc":"2.0",
"id" :1,
"method" :"info.getNodeVersion"
}' -H 'content-type:application/json;' 127.0.0.1:9650/ext/info
```
**Example Response**:
```json
{
"jsonrpc": "2.0",
"result": {
"version": "avalanche/1.9.1",
"databaseVersion": "v1.4.5",
"rpcProtocolVersion": "18",
"gitCommit": "79cd09ba728e1cecef40acd60702f0a2d41ea404",
"vmVersions": {
"avm": "v1.9.1",
"evm": "v0.11.1",
"platform": "v1.9.1"
}
},
"id": 1
}
```
### `info.getTxFee`
Deprecated as of [v1.12.2](https://github.com/ava-labs/avalanchego/releases/tag/v1.12.2).
Get the fees of the network.
**Signature**:
```
info.getTxFee() ->
{
txFee: uint64,
createAssetTxFee: uint64,
createSubnetTxFee: uint64,
transformSubnetTxFee: uint64,
createBlockchainTxFee: uint64,
addPrimaryNetworkValidatorFee: uint64,
addPrimaryNetworkDelegatorFee: uint64,
addSubnetValidatorFee: uint64,
addSubnetDelegatorFee: uint64
}
```
- `txFee` is the default fee for issuing X-Chain transactions.
- `createAssetTxFee` is the fee for issuing a `CreateAssetTx` on the X-Chain.
- `createSubnetTxFee` is no longer used.
- `transformSubnetTxFee` is no longer used.
- `createBlockchainTxFee` is no longer used.
- `addPrimaryNetworkValidatorFee` is no longer used.
- `addPrimaryNetworkDelegatorFee` is no longer used.
- `addSubnetValidatorFee` is no longer used.
- `addSubnetDelegatorFee` is no longer used.
All fees are denominated in nAVAX.
**Example Call**:
```sh
curl -X POST --data '{
"jsonrpc":"2.0",
"id" :1,
"method" :"info.getTxFee"
}' -H 'content-type:application/json;' 127.0.0.1:9650/ext/info
```
**Example Response**:
```json
{
"jsonrpc": "2.0",
"id": 1,
"result": {
"txFee": "1000000",
"createAssetTxFee": "10000000",
"createSubnetTxFee": "1000000000",
"transformSubnetTxFee": "10000000000",
"createBlockchainTxFee": "1000000000",
"addPrimaryNetworkValidatorFee": "0",
"addPrimaryNetworkDelegatorFee": "0",
"addSubnetValidatorFee": "1000000",
"addSubnetDelegatorFee": "1000000"
}
}
```
### `info.getVMs`
Get the virtual machines installed on this node.
This endpoint set is for a specific node, it is unavailable on the [public server](https://build.avax.network/docs/tooling/rpc-providers).
**Signature**:
```
info.getVMs() -> {
vms: map[string][]string
}
```
**Example Call**:
```sh
curl -X POST --data '{
"jsonrpc":"2.0",
"id" :1,
"method" :"info.getVMs",
"params" :{}
}' -H 'content-type:application/json;' 127.0.0.1:9650/ext/info
```
**Example Response**:
```json
{
"jsonrpc": "2.0",
"result": {
"vms": {
"jvYyfQTxGMJLuGWa55kdP2p2zSUYsQ5Raupu4TW34ZAUBAbtq": ["avm"],
"mgj786NP7uDwBCcq6YwThhaN8FLyybkCa4zBWTQbNgmK6k9A6": ["evm"],
"qd2U4HDWUvMrVUeTcCHp6xH3Qpnn1XbU5MDdnBoiifFqvgXwT": ["nftfx"],
"rWhpuQPF1kb72esV2momhMuTYGkEb1oL29pt2EBXWmSy4kxnT": ["platform"],
"rXJsCSEYXg2TehWxCEEGj6JU2PWKTkd6cBdNLjoe2SpsKD9cy": ["propertyfx"],
"spdxUxVJQbX85MGxMHbKw1sHxMnSqJ3QBzDyDYEP3h6TLuxqQ": ["secp256k1fx"]
}
},
"id": 1
}
```
### `info.peers`
Get a description of peer connections.
**Signature**:
```
info.peers({
nodeIDs: string[] // optional
}) ->
{
numPeers: int,
peers:[]{
ip: string,
publicIP: string,
nodeID: string,
version: string,
lastSent: string,
lastReceived: string,
benched: string[],
observedUptime: int,
}
}
```
- `nodeIDs` is an optional parameter to specify what NodeID's descriptions should be returned. If this parameter is left empty, descriptions for all active connections will be returned. If the node is not connected to a specified NodeID, it will be omitted from the response.
- `ip` is the remote IP of the peer.
- `publicIP` is the public IP of the peer.
- `nodeID` is the prefixed Node ID of the peer.
- `version` shows which version the peer runs on.
- `lastSent` is the timestamp of last message sent to the peer.
- `lastReceived` is the timestamp of last message received from the peer.
- `benched` shows chain IDs that the peer is currently benched on.
- `observedUptime` is this node's primary network uptime, observed by the peer.
**Example Call**:
```sh
curl -X POST --data '{
"jsonrpc":"2.0",
"id" :1,
"method" :"info.peers",
"params": {
"nodeIDs": []
}
}' -H 'content-type:application/json;' 127.0.0.1:9650/ext/info
```
**Example Response**:
```json
{
"jsonrpc": "2.0",
"id": 1,
"result": {
"numPeers": 3,
"peers": [
{
"ip": "206.189.137.87:9651",
"publicIP": "206.189.137.87:9651",
"nodeID": "NodeID-8PYXX47kqLDe2wD4oPbvRRchcnSzMA4J4",
"version": "avalanche/1.9.4",
"lastSent": "2020-06-01T15:23:02Z",
"lastReceived": "2020-06-01T15:22:57Z",
"benched": [],
"observedUptime": "99",
"trackedSubnets": [],
"benched": []
},
{
"ip": "158.255.67.151:9651",
"publicIP": "158.255.67.151:9651",
"nodeID": "NodeID-C14fr1n8EYNKyDfYixJ3rxSAVqTY3a8BP",
"version": "avalanche/1.9.4",
"lastSent": "2020-06-01T15:23:02Z",
"lastReceived": "2020-06-01T15:22:34Z",
"benched": [],
"observedUptime": "75",
"trackedSubnets": [
"29uVeLPJB1eQJkzRemU8g8wZDw5uJRqpab5U2mX9euieVwiEbL"
],
"benched": []
},
{
"ip": "83.42.13.44:9651",
"publicIP": "83.42.13.44:9651",
"nodeID": "NodeID-LPbcSMGJ4yocxYxvS2kBJ6umWeeFbctYZ",
"version": "avalanche/1.9.3",
"lastSent": "2020-06-01T15:23:02Z",
"lastReceived": "2020-06-01T15:22:55Z",
"benched": [],
"observedUptime": "95",
"trackedSubnets": [],
"benched": []
}
]
}
}
```
### `info.uptime`
Returns the network's observed uptime of this node. This is the only reliable source of data for your node's uptime. Other sources may be using data gathered with incomplete (limited) information.
**Signature**:
```
info.uptime() ->
{
rewardingStakePercentage: float64,
weightedAveragePercentage: float64
}
```
- `rewardingStakePercentage` is the percent of stake which thinks this node is above the uptime requirement.
- `weightedAveragePercentage` is the stake-weighted average of all observed uptimes for this node.
**Example Call**:
```sh
curl -X POST --data '{
"jsonrpc":"2.0",
"id" :1,
"method" :"info.uptime"
}' -H 'content-type:application/json;' 127.0.0.1:9650/ext/info
```
**Example Response**:
```json
{
"jsonrpc": "2.0",
"id": 1,
"result": {
"rewardingStakePercentage": "100.0000",
"weightedAveragePercentage": "99.0000"
}
}
```
#### Example Avalanche L1 Call
```sh
curl -X POST --data '{
"jsonrpc":"2.0",
"id" :1,
"method" :"info.uptime",
"params" :{
"subnetID":"29uVeLPJB1eQJkzRemU8g8wZDw5uJRqpab5U2mX9euieVwiEbL"
}
}' -H 'content-type:application/json;' 127.0.0.1:9650/ext/info
```
#### Example Avalanche L1 Response
```json
{
"jsonrpc": "2.0",
"id": 1,
"result": {
"rewardingStakePercentage": "74.0741",
"weightedAveragePercentage": "72.4074"
}
}
```
### `info.upgrades`
Returns the upgrade history and configuration of the network.
**Example Call**:
```sh
curl -X POST --data '{
"jsonrpc":"2.0",
"id" :1,
"method" :"info.upgrades"
}' -H 'content-type:application/json;' 127.0.0.1:9650/ext/info
```
**Example Response**:
```json
{
"jsonrpc": "2.0",
"result": {
"apricotPhase1Time": "2020-12-05T05:00:00Z",
"apricotPhase2Time": "2020-12-05T05:00:00Z",
"apricotPhase3Time": "2020-12-05T05:00:00Z",
"apricotPhase4Time": "2020-12-05T05:00:00Z",
"apricotPhase4MinPChainHeight": 0,
"apricotPhase5Time": "2020-12-05T05:00:00Z",
"apricotPhasePre6Time": "2020-12-05T05:00:00Z",
"apricotPhase6Time": "2020-12-05T05:00:00Z",
"apricotPhasePost6Time": "2020-12-05T05:00:00Z",
"banffTime": "2020-12-05T05:00:00Z",
"cortinaTime": "2020-12-05T05:00:00Z",
"cortinaXChainStopVertexID": "11111111111111111111111111111111LpoYY",
"durangoTime": "2020-12-05T05:00:00Z",
"etnaTime": "2024-10-09T20:00:00Z",
"fortunaTime": "9999-12-01T05:00:00Z",
"graniteTime": "9999-12-01T05:00:00Z"
},
"id": 1
}
```
# Metrics RPC (/docs/rpcs/other/metrics-rpc)
---
title: "Metrics RPC"
description: "This page is an overview of the Metrics RPC associated with AvalancheGo."
edit_url: https://github.com/ava-labs/avalanchego/edit/master/api/metrics/service.md
---
The Metrics API allows clients to get statistics about a node's health and performance.
This API set is for a specific node, it is unavailable on the [public server](https://build.avax.network/docs/tooling/rpc-providers).
## Endpoint
```
/ext/metrics
```
## Usage
To get the node metrics:
```sh
curl -X POST 127.0.0.1:9650/ext/metrics
```
## Format
This API produces Prometheus compatible metrics. See [here](https://prometheus.io/docs/instrumenting/exposition_formats) for information on Prometheus' formatting.
[Here](https://build.avax.network/docs/nodes/maintain/monitoring) is a tutorial that shows how to set up Prometheus and Grafana to monitor AvalancheGo node using the Metrics API.
# ProposerVM RPC (/docs/rpcs/other/proposervm-rpc)
---
title: "ProposerVM RPC"
description: "This page is an overview of the ProposerVM RPC associated with AvalancheGo."
edit_url: https://github.com/ava-labs/avalanchego/edit/master/vms/proposervm/service.md
---
# ProposerVM API
The ProposerVM API allows clients to fetch information about a chain's Snowman++ wrapper information.
## Endpoint
```text
/ext/bc/{blockchainID}/proposervm
```
## Format
This API uses the `JSON-RPC 2.0` RPC format.
## Methods
### `proposervm.getProposedHeight`
Returns this node's current proposer VM height.
**Signature:**
```
proposervm.getProposedHeight() ->
{
height: int,
}
```
**Example Call:**
```sh
curl -X POST --data '{
"jsonrpc": "2.0",
"method": "proposervm.getProposedHeight",
"params": {},
"id": 1
}' -H 'content-type:application/json;' 127.0.0.1:9650/ext/bc/P/proposervm
```
**Example Response:**
```json
{
"jsonrpc": "2.0",
"result": {
"height": "56"
},
"id": 1
}
```
### `proposervm.getCurrentEpoch`
Returns the current epoch information.
**Signature:**
```
proposervm.getCurrentEpoch() ->
{
number: int,
startTime: int,
pChainHeight: int
}
```
**Example Call:**
```sh
curl -X POST --data '{
"jsonrpc": "2.0",
"method": "proposervm.getCurrentEpoch",
"params": {},
"id": 1
}' -H 'content-type:application/json;' 127.0.0.1:9650/ext/bc/P/proposervm
```
**Example Response:**
```json
{
"jsonrpc": "2.0",
"result": {
"number": "56",
"startTime":"1755802182",
"pChainHeight": "21857141"
},
"id": 1
}
```
# AvalancheGo P-Chain RPC (/docs/rpcs/p-chain)
---
title: "AvalancheGo P-Chain RPC"
description: "This page is an overview of the P-Chain RPC associated with AvalancheGo."
edit_url: https://github.com/ava-labs/avalanchego/edit/master/vms/platformvm/service.md
---
The P-Chain API allows clients to interact with the [P-Chain](https://build.avax.network/docs/quick-start/primary-network#p-chain), which maintains Avalanche’s validator set and handles blockchain creation.
## Endpoint
```
/ext/bc/P
```
## Format
This API uses the `json 2.0` RPC format.
## Methods
### `platform.getBalance`
Deprecated as of [**v1.9.12**](https://github.com/ava-labs/avalanchego/releases/tag/v1.9.12).
Get the balance of AVAX controlled by a given address.
**Signature:**
```
platform.getBalance({
addresses: []string
}) -> {
balances: string -> int,
unlockeds: string -> int,
lockedStakeables: string -> int,
lockedNotStakeables: string -> int,
utxoIDs: []{
txID: string,
outputIndex: int
}
}
```
- `addresses` are the addresses to get the balance of.
- `balances` is a map from assetID to the total balance.
- `unlockeds` is a map from assetID to the unlocked balance.
- `lockedStakeables` is a map from assetID to the locked stakeable balance.
- `lockedNotStakeables` is a map from assetID to the locked and not stakeable balance.
- `utxoIDs` are the IDs of the UTXOs that reference `address`.
**Example Call:**
```sh
curl -X POST --data '{
"jsonrpc":"2.0",
"id" : 1,
"method" :"platform.getBalance",
"params" :{
"addresses":["P-custom18jma8ppw3nhx5r4ap8clazz0dps7rv5u9xde7p"]
}
}' -H 'content-type:application/json;' 127.0.0.1:9650/ext/bc/P
```
**Example Response:**
```json
{
"jsonrpc": "2.0",
"result": {
"balance": "30000000000000000",
"unlocked": "20000000000000000",
"lockedStakeable": "10000000000000000",
"lockedNotStakeable": "0",
"balances": {
"BUuypiq2wyuLMvyhzFXcPyxPMCgSp7eeDohhQRqTChoBjKziC": "30000000000000000"
},
"unlockeds": {
"BUuypiq2wyuLMvyhzFXcPyxPMCgSp7eeDohhQRqTChoBjKziC": "20000000000000000"
},
"lockedStakeables": {
"BUuypiq2wyuLMvyhzFXcPyxPMCgSp7eeDohhQRqTChoBjKziC": "10000000000000000"
},
"lockedNotStakeables": {},
"utxoIDs": [
{
"txID": "11111111111111111111111111111111LpoYY",
"outputIndex": 1
},
{
"txID": "11111111111111111111111111111111LpoYY",
"outputIndex": 0
}
]
},
"id": 1
}
```
### `platform.getBlock`
Get a block by its ID.
**Signature:**
```
platform.getBlock({
blockID: string
encoding: string // optional
}) -> {
block: string,
encoding: string
}
```
**Request:**
- `blockID` is the block ID. It should be in cb58 format.
- `encoding` is the encoding format to use. Can be either `hex` or `json`. Defaults to `hex`.
**Response:**
- `block` is the block encoded to `encoding`.
- `encoding` is the `encoding`.
#### Hex Example
**Example Call:**
```sh
curl -X POST --data '{
"jsonrpc": "2.0",
"method": "platform.getBlock",
"params": {
"blockID": "d7WYmb8VeZNHsny3EJCwMm6QA37s1EHwMxw1Y71V3FqPZ5EFG",
"encoding": "hex"
},
"id": 1
}' -H 'content-type:application/json;' 127.0.0.1:9650/ext/bc/P
```
**Example Response:**
```json
{
"jsonrpc": "2.0",
"result": {
"block": "0x00000000000309473dc99a0851a29174d84e522da8ccb1a56ac23f7b0ba79f80acce34cf576900000000000f4241000000010000001200000001000000000000000000000000000000000000000000000000000000000000000000000000000000011c4c57e1bcb3c567f9f03caa75563502d1a21393173c06d9d79ea247b20e24800000000021e67317cbc4be2aeb00677ad6462778a8f52274b9d605df2591b23027a87dff000000050000000338e0465f0000000100000000000000000427d4b22a2a78bcddd456742caf91b56badbff985ee19aef14573e7343fd6520000000121e67317cbc4be2aeb00677ad6462778a8f52274b9d605df2591b23027a87dff000000070000000338d1041f0000000000000000000000010000000195a4467dd8f939554ea4e6501c08294386938cbf000000010000000900000001c79711c4b48dcde205b63603efef7c61773a0eb47efb503fcebe40d21962b7c25ebd734057400a12cce9cf99aceec8462923d5d91fffe1cb908372281ed738580119286dde",
"encoding": "hex"
},
"id": 1
}
```
#### JSON Example
**Example Call:**
```sh
curl -X POST --data '{
"jsonrpc": "2.0",
"method": "platform.getBlock",
"params": {
"blockID": "d7WYmb8VeZNHsny3EJCwMm6QA37s1EHwMxw1Y71V3FqPZ5EFG",
"encoding": "json"
},
"id": 1
}' -H 'content-type:application/json;' 127.0.0.1:9650/ext/bc/P
```
**Example Response:**
```json
{
"jsonrpc": "2.0",
"result": {
"block": {
"parentID": "5615di9ytxujackzaXNrVuWQy5y8Yrt8chPCscMr5Ku9YxJ1S",
"height": 1000001,
"txs": [
{
"unsignedTx": {
"inputs": {
"networkID": 1,
"blockchainID": "11111111111111111111111111111111LpoYY",
"outputs": [],
"inputs": [
{
"txID": "DTqiagiMFdqbNQ62V2Gt1GddTVLkKUk2caGr4pyza9hTtsfta",
"outputIndex": 0,
"assetID": "FvwEAhmxKfeiG8SnEvq42hc6whRyY3EFYAvebMqDNDGCgxN5Z",
"fxID": "spdxUxVJQbX85MGxMHbKw1sHxMnSqJ3QBzDyDYEP3h6TLuxqQ",
"input": {
"amount": 13839124063,
"signatureIndices": [0]
}
}
],
"memo": "0x"
},
"destinationChain": "2q9e4r6Mu3U68nU1fYjgbR6JvwrRx36CohpAX5UQxse55x1Q5",
"exportedOutputs": [
{
"assetID": "FvwEAhmxKfeiG8SnEvq42hc6whRyY3EFYAvebMqDNDGCgxN5Z",
"fxID": "spdxUxVJQbX85MGxMHbKw1sHxMnSqJ3QBzDyDYEP3h6TLuxqQ",
"output": {
"addresses": [
"P-avax1jkjyvlwclyu42n4yuegpczpfgwrf8r9lyj0d3c"
],
"amount": 13838124063,
"locktime": 0,
"threshold": 1
}
}
]
},
"credentials": [
{
"signatures": [
"0xc79711c4b48dcde205b63603efef7c61773a0eb47efb503fcebe40d21962b7c25ebd734057400a12cce9cf99aceec8462923d5d91fffe1cb908372281ed7385801"
]
}
]
}
]
},
"encoding": "json"
},
"id": 1
}
```
### `platform.getBlockByHeight`
Get a block by its height.
**Signature:**
```
platform.getBlockByHeight({
height: int
encoding: string // optional
}) -> {
block: string,
encoding: string
}
```
**Request:**
- `height` is the block height.
- `encoding` is the encoding format to use. Can be either `hex` or `json`. Defaults to `hex`.
**Response:**
- `block` is the block encoded to `encoding`.
- `encoding` is the `encoding`.
#### Hex Example
**Example Call:**
```sh
curl -X POST --data '{
"jsonrpc": "2.0",
"method": "platform.getBlockByHeight",
"params": {
"height": 1000001,
"encoding": "hex"
},
"id": 1
}' -H 'content-type:application/json;' 127.0.0.1:9650/ext/bc/P
```
**Example Response:**
```json
{
"jsonrpc": "2.0",
"result": {
"block": "0x00000000000309473dc99a0851a29174d84e522da8ccb1a56ac23f7b0ba79f80acce34cf576900000000000f4241000000010000001200000001000000000000000000000000000000000000000000000000000000000000000000000000000000011c4c57e1bcb3c567f9f03caa75563502d1a21393173c06d9d79ea247b20e24800000000021e67317cbc4be2aeb00677ad6462778a8f52274b9d605df2591b23027a87dff000000050000000338e0465f0000000100000000000000000427d4b22a2a78bcddd456742caf91b56badbff985ee19aef14573e7343fd6520000000121e67317cbc4be2aeb00677ad6462778a8f52274b9d605df2591b23027a87dff000000070000000338d1041f0000000000000000000000010000000195a4467dd8f939554ea4e6501c08294386938cbf000000010000000900000001c79711c4b48dcde205b63603efef7c61773a0eb47efb503fcebe40d21962b7c25ebd734057400a12cce9cf99aceec8462923d5d91fffe1cb908372281ed738580119286dde",
"encoding": "hex"
},
"id": 1
}
```
#### JSON Example
**Example Call:**
```sh
curl -X POST --data '{
"jsonrpc": "2.0",
"method": "platform.getBlockByHeight",
"params": {
"height": 1000001,
"encoding": "json"
},
"id": 1
}' -H 'content-type:application/json;' 127.0.0.1:9650/ext/bc/P
```
**Example Response:**
```json
{
"jsonrpc": "2.0",
"result": {
"block": {
"parentID": "5615di9ytxujackzaXNrVuWQy5y8Yrt8chPCscMr5Ku9YxJ1S",
"height": 1000001,
"txs": [
{
"unsignedTx": {
"inputs": {
"networkID": 1,
"blockchainID": "11111111111111111111111111111111LpoYY",
"outputs": [],
"inputs": [
{
"txID": "DTqiagiMFdqbNQ62V2Gt1GddTVLkKUk2caGr4pyza9hTtsfta",
"outputIndex": 0,
"assetID": "FvwEAhmxKfeiG8SnEvq42hc6whRyY3EFYAvebMqDNDGCgxN5Z",
"fxID": "spdxUxVJQbX85MGxMHbKw1sHxMnSqJ3QBzDyDYEP3h6TLuxqQ",
"input": {
"amount": 13839124063,
"signatureIndices": [0]
}
}
],
"memo": "0x"
},
"destinationChain": "2q9e4r6Mu3U68nU1fYjgbR6JvwrRx36CohpAX5UQxse55x1Q5",
"exportedOutputs": [
{
"assetID": "FvwEAhmxKfeiG8SnEvq42hc6whRyY3EFYAvebMqDNDGCgxN5Z",
"fxID": "spdxUxVJQbX85MGxMHbKw1sHxMnSqJ3QBzDyDYEP3h6TLuxqQ",
"output": {
"addresses": [
"P-avax1jkjyvlwclyu42n4yuegpczpfgwrf8r9lyj0d3c"
],
"amount": 13838124063,
"locktime": 0,
"threshold": 1
}
}
]
},
"credentials": [
{
"signatures": [
"0xc79711c4b48dcde205b63603efef7c61773a0eb47efb503fcebe40d21962b7c25ebd734057400a12cce9cf99aceec8462923d5d91fffe1cb908372281ed7385801"
]
}
]
}
]
},
"encoding": "json"
},
"id": 1
}
```
### `platform.getBlockchains`
Deprecated as of [**v1.9.12**](https://github.com/ava-labs/avalanchego/releases/tag/v1.9.12).
Get all the blockchains that exist (excluding the P-Chain).
**Signature:**
```
platform.getBlockchains() ->
{
blockchains: []{
id: string,
name: string,
subnetID: string,
vmID: string
}
}
```
- `blockchains` is all of the blockchains that exists on the Avalanche network.
- `name` is the human-readable name of this blockchain.
- `id` is the blockchain’s ID.
- `subnetID` is the ID of the Subnet that validates this blockchain.
- `vmID` is the ID of the Virtual Machine the blockchain runs.
**Example Call:**
```sh
curl -X POST --data '{
"jsonrpc": "2.0",
"method": "platform.getBlockchains",
"params": {},
"id": 1
}' -H 'content-type:application/json;' 127.0.0.1:9650/ext/bc/P
```
**Example Response:**
```json
{
"jsonrpc": "2.0",
"result": {
"blockchains": [
{
"id": "2oYMBNV4eNHyqk2fjjV5nVQLDbtmNJzq5s3qs3Lo6ftnC6FByM",
"name": "X-Chain",
"subnetID": "11111111111111111111111111111111LpoYY",
"vmID": "jvYyfQTxGMJLuGWa55kdP2p2zSUYsQ5Raupu4TW34ZAUBAbtq"
},
{
"id": "2q9e4r6Mu3U68nU1fYjgbR6JvwrRx36CohpAX5UQxse55x1Q5",
"name": "C-Chain",
"subnetID": "11111111111111111111111111111111LpoYY",
"vmID": "mgj786NP7uDwBCcq6YwThhaN8FLyybkCa4zBWTQbNgmK6k9A6"
},
{
"id": "CqhF97NNugqYLiGaQJ2xckfmkEr8uNeGG5TQbyGcgnZ5ahQwa",
"name": "Simple DAG Payments",
"subnetID": "11111111111111111111111111111111LpoYY",
"vmID": "sqjdyTKUSrQs1YmKDTUbdUhdstSdtRTGRbUn8sqK8B6pkZkz1"
},
{
"id": "VcqKNBJsYanhVFxGyQE5CyNVYxL3ZFD7cnKptKWeVikJKQkjv",
"name": "Simple Chain Payments",
"subnetID": "11111111111111111111111111111111LpoYY",
"vmID": "sqjchUjzDqDfBPGjfQq2tXW1UCwZTyvzAWHsNzF2cb1eVHt6w"
},
{
"id": "2SMYrx4Dj6QqCEA3WjnUTYEFSnpqVTwyV3GPNgQqQZbBbFgoJX",
"name": "Simple Timestamp Server",
"subnetID": "11111111111111111111111111111111LpoYY",
"vmID": "tGas3T58KzdjLHhBDMnH2TvrddhqTji5iZAMZ3RXs2NLpSnhH"
},
{
"id": "KDYHHKjM4yTJTT8H8qPs5KXzE6gQH5TZrmP1qVr1P6qECj3XN",
"name": "My new timestamp",
"subnetID": "2bRCr6B4MiEfSjidDwxDpdCyviwnfUVqB2HGwhm947w9YYqb7r",
"vmID": "tGas3T58KzdjLHhBDMnH2TvrddhqTji5iZAMZ3RXs2NLpSnhH"
},
{
"id": "2TtHFqEAAJ6b33dromYMqfgavGPF3iCpdG3hwNMiart2aB5QHi",
"name": "My new AVM",
"subnetID": "2bRCr6B4MiEfSjidDwxDpdCyviwnfUVqB2HGwhm947w9YYqb7r",
"vmID": "jvYyfQTxGMJLuGWa55kdP2p2zSUYsQ5Raupu4TW34ZAUBAbtq"
}
]
},
"id": 1
}
```
### `platform.getBlockchainStatus`
Get the status of a blockchain.
**Signature:**
```
platform.getBlockchainStatus(
{
blockchainID: string
}
) -> {status: string}
```
`status` is one of:
- `Validating`: The blockchain is being validated by this node.
- `Created`: The blockchain exists but isn’t being validated by this node.
- `Preferred`: The blockchain was proposed to be created and is likely to be created but the
transaction isn’t yet accepted.
- `Syncing`: This node is participating in this blockchain as a non-validating node.
- `Unknown`: The blockchain either wasn’t proposed or the proposal to create it isn’t preferred. The
proposal may be resubmitted.
**Example Call:**
```sh
curl -X POST --data '{
"jsonrpc": "2.0",
"method": "platform.getBlockchainStatus",
"params":{
"blockchainID":"2NbS4dwGaf2p1MaXb65PrkZdXRwmSX4ZzGnUu7jm3aykgThuZE"
},
"id": 1
}' -H 'content-type:application/json;' 127.0.0.1:9650/ext/bc/P
```
**Example Response:**
```json
{
"jsonrpc": "2.0",
"result": {
"status": "Created"
},
"id": 1
}
```
### `platform.getCurrentSupply`
Returns an upper bound on amount of tokens that exist that can stake the requested Subnet. This is
an upper bound because it does not account for burnt tokens, including transaction fees.
**Signature:**
```
platform.getCurrentSupply ({
subnetID: string // optional
}) -> { supply: int }
```
- `supply` is an upper bound on the number of tokens that exist.
**Example Call:**
```sh
curl -X POST --data '{
"jsonrpc": "2.0",
"method": "platform.getCurrentSupply",
"params": {
"subnetID": "11111111111111111111111111111111LpoYY"
},
"id": 1
}' -H 'content-type:application/json;' 127.0.0.1:9650/ext/bc/P
```
**Example Response:**
```json
{
"jsonrpc": "2.0",
"result": {
"supply": "365865167637779183"
},
"id": 1
}
```
The response in this example indicates that AVAX’s supply is at most 365.865 million.
### `platform.getCurrentValidators`
List the current validators of the given Subnet.
**Signature:**
```
platform.getCurrentValidators({
subnetID: string, // optional
nodeIDs: string[], // optional
}) -> {
validators: []{
txID: string,
startTime: string,
endTime: string,
nodeID: string,
weight: string,
validationID: string,
publicKey: string,
remainingBalanceOwner: {
locktime: string,
threshold: string,
addresses: string[]
},
deactivationOwner: {
locktime: string,
threshold: string,
addresses: string[]
},
minNonce: string,
balance: string,
validationRewardOwner: {
locktime: string,
threshold: string,
addresses: string[]
},
delegationRewardOwner: {
locktime: string,
threshold: string,
addresses: string[]
},
potentialReward: string,
delegationFee: string,
uptime: string,
connected: bool,
signer: {
publicKey: string,
proofOfPosession: string
},
delegatorCount: string,
delegatorWeight: string,
delegators: []{
txID: string,
startTime: string,
endTime: string,
weight: string,
nodeID: string,
rewardOwner: {
locktime: string,
threshold: string,
addresses: string[]
},
potentialReward: string,
}
}
}
```
- `subnetID` is the Subnet whose current validators are returned. If omitted, returns the current
validators of the Primary Network.
- `nodeIDs` is a list of the NodeIDs of current validators to request. If omitted, all current
validators are returned. If a specified NodeID is not in the set of current validators, it will
not be included in the response.
- `validators` can include different fields based on the subnet type (L1, PoA Subnets, the Primary Network):
- `txID` is the validator transaction.
- `startTime` is the Unix time when the validator starts validating the Subnet.
- `endTime` is the Unix time when the validator stops validating the Subnet. Omitted if `subnetID` is a L1 Subnet.
- `nodeID` is the validator’s node ID.
- `weight` is the validator’s weight (stake) when sampling validators.
- `validationID` is the ID for L1 subnet validator registration transaction. Omitted if `subnetID` is not an L1 Subnet.
- `publicKey` is the compressed BLS public key of the validator. Omitted if `subnetID` is not an L1 Subnet.
- `remainingBalanceOwner` is an `OutputOwners` which includes a `locktime`, `threshold`, and an array of `addresses`. It specifies the owner that will receive any withdrawn balance. Omitted if `subnetID` is not an L1 Subnet.
- `deactivationOwner` is an `OutputOwners` which includes a `locktime`, `threshold`, and an array of `addresses`. It specifies the owner that can withdraw the balance. Omitted if `subnetID` is not an L1 Subnet.
- `minNonce` is minimum nonce that must be included in a `SetL1ValidatorWeightTx` for the transaction to be valid. Omitted if `subnetID` is not an L1 Subnet.
- `balance` is current remaining balance that can be used to pay for the validators continuous fee. Omitted if `subnetID` is not an L1 Subnet.
- `validationRewardOwner` is an `OutputOwners` output which includes `locktime`, `threshold` and
array of `addresses`. Specifies the owner of the potential reward earned from staking. Omitted
if `subnetID` is not the Primary Network.
- `delegationRewardOwner` is an `OutputOwners` output which includes `locktime`, `threshold` and
array of `addresses`. Specifies the owner of the potential reward earned from delegations. Omitted if `subnetID` is not the Primary Network.
- `potentialReward` is the potential reward earned from staking. Omitted if `subnetID` is not the Primary Network.
- `delegationFeeRate` is the percent fee this validator charges when others delegate stake to
them. Omitted if `subnetID` is not the Primary Network.
- `uptime` is the % of time the queried node has reported the peer as online and validating the
Subnet. Omitted if `subnetID` is not the Primary Network.
- `connected` is if the node is connected and tracks the Subnet. Omitted if `subnetID` is not the Primary Network.
- `signer` is the node's BLS public key and proof of possession. Omitted if the validator doesn't
have a BLS public key. Omitted if `subnetID` is not the Primary Network.
- `delegatorCount` is the number of delegators on this validator.
Omitted if `subnetID` is not the Primary Network.
- `delegatorWeight` is total weight of delegators on this validator.
Omitted if `subnetID` is not the Primary Network.
- `delegators` is the list of delegators to this validator. Omitted if `subnetID` is not the Primary Network. Omitted unless `nodeIDs` specifies a single NodeID.
- `txID` is the delegator transaction.
- `startTime` is the Unix time when the delegator started.
- `endTime` is the Unix time when the delegator stops.
- `weight` is the amount of nAVAX this delegator staked.
- `nodeID` is the validating node’s node ID.
- `rewardOwner` is an `OutputOwners` output which includes `locktime`, `threshold` and array of
`addresses`.
- `potentialReward` is the potential reward earned from staking
Note: An L1 Subnet can include both initial legacy PoA validators (before L1 conversion) and L1 validators. The response will include both types of validators.
**Example Call:**
```sh
curl -X POST --data '{
"jsonrpc": "2.0",
"method": "platform.getCurrentValidators",
"params": {
"nodeIDs": ["NodeID-5mb46qkSBj81k9g9e4VFjGGSbaaSLFRzD"]
},
"id": 1
}' -H 'content-type:application/json;' 127.0.0.1:9650/ext/bc/P
```
**Example Response (Primary Network):**
```json
{
"jsonrpc": "2.0",
"result": {
"validators": [
{
"txID": "2NNkpYTGfTFLSGXJcHtVv6drwVU2cczhmjK2uhvwDyxwsjzZMm",
"startTime": "1600368632",
"endTime": "1602960455",
"weight": "2000000000000",
"nodeID": "NodeID-5mb46qkSBj81k9g9e4VFjGGSbaaSLFRzD",
"validationRewardOwner": {
"locktime": "0",
"threshold": "1",
"addresses": ["P-avax18jma8ppw3nhx5r4ap8clazz0dps7rv5ukulre5"]
},
"delegationRewardOwner": {
"locktime": "0",
"threshold": "1",
"addresses": ["P-avax18jma8ppw3nhx5r4ap8clazz0dps7rv5ukulre5"]
},
"potentialReward": "117431493426",
"delegationFee": "10.0000",
"uptime": "0.0000",
"connected": false,
"delegatorCount": "1",
"delegatorWeight": "25000000000",
"delegators": [
{
"txID": "Bbai8nzGVcyn2VmeYcbS74zfjJLjDacGNVuzuvAQkHn1uWfoV",
"startTime": "1600368523",
"endTime": "1602960342",
"weight": "25000000000",
"nodeID": "NodeID-5mb46qkSBj81k9g9e4VFjGGSbaaSLFRzD",
"rewardOwner": {
"locktime": "0",
"threshold": "1",
"addresses": ["P-avax18jma8ppw3nhx5r4ap8clazz0dps7rv5ukulre5"]
},
"potentialReward": "11743144774"
}
]
}
]
},
"id": 1
}
```
**Example Response (L1):**
```json
{
"jsonrpc": "2.0",
"result": {
"validators": [
{
"validationID": "2wTscvX3JUsMbZHFRd9t8Ywz2q9j2BmETg8cTvgUHgawjbSvZX",
"nodeID": "NodeID-5mb46qkSBj81k9g9e4VFjGGSbaaSLFRzD",
"publicKey": "0x91951771ff32b1a985a4936592bce8512a986353c4c2eb5a0f12dbb76bda3a0a0c975e26413ff44c0ee9d8d689eff8ed",
"remainingBalanceOwner": {
"locktime": "0",
"threshold": "1",
"addresses": [
"P-fuji1ywzvrftfqexh5g6qa9zyrytj6pqdfetza2hqln"
]
},
"deactivationOwner": {
"locktime": "0",
"threshold": "1",
"addresses": [
"P-fuji1ywzvrftfqexh5g6qa9zyrytj6pqdfetza2hqln"
]
},
"startTime": "1734034648",
"weight": "20",
"minNonce": "0",
"balance": "8780477952"
}
]
},
"id": 1
}
```
### `platform.getFeeConfig`
Returns the dynamic fee configuration of the P-chain.
**Signature:**
```
platform.getFeeConfig() -> {
weights: []uint64,
maxCapacity: uint64,
maxPerSecond: uint64,
targetPerSecond: uint64,
minPrice: uint64,
excessConversionConstant: uint64
}
```
- `weights` to merge fee dimensions into a single gas value
- `maxCapacity` is the amount of gas the chain is allowed to store for future use
- `maxPerSecond` is the amount of gas the chain is allowed to consume per second
- `targetPerSecond` is the target amount of gas the chain should consume per second to keep fees stable
- `minPrice` is the minimum price per unit of gas
- `excessConversionConstant` is used to convert excess gas to a gas price
**Example Call:**
```sh
curl -X POST --data '{
"jsonrpc": "2.0",
"method": "platform.getFeeConfig",
"params": {},
"id": 1
}' -H 'content-type:application/json;' 127.0.0.1:9650/ext/bc/P
```
**Example Response:**
```json
{
"jsonrpc": "2.0",
"result": {
"weights": [1, 1000, 1000, 4],
"maxCapacity": 1000000,
"maxPerSecond": 100000,
"targetPerSecond": 50000,
"minPrice": 1,
"excessConversionConstant": 2164043
},
"id": 1
}
```
### `platform.getFeeState`
Returns the current fee state of the P-chain.
**Signature:**
```
platform.getFeeState() -> {
capacity: uint64,
excess: uint64,
price: uint64,
timestamp: string
}
```
**Example Call:**
```sh
curl -X POST --data '{
"jsonrpc": "2.0",
"method": "platform.getFeeState",
"params": {},
"id": 1
}' -H 'content-type:application/json;' 127.0.0.1:9650/ext/bc/P
```
**Example Response:**
```json
{
"jsonrpc": "2.0",
"result": {
"capacity": 973044,
"excess": 26956,
"price": 1,
"timestamp": "2024-12-16T17:19:07Z"
},
"id": 1
}
```
### `platform.getHeight`
Returns the height of the last accepted block.
**Signature:**
```
platform.getHeight() ->
{
height: int,
}
```
**Example Call:**
```sh
curl -X POST --data '{
"jsonrpc": "2.0",
"method": "platform.getHeight",
"params": {},
"id": 1
}' -H 'content-type:application/json;' 127.0.0.1:9650/ext/bc/P
```
**Example Response:**
```json
{
"jsonrpc": "2.0",
"result": {
"height": "56"
},
"id": 1
}
```
### `platform.getL1Validator`
Returns a current L1 validator.
**Signature:**
```
platform.getL1Validator({
validationID: string,
}) -> {
validationID: string,
subnetID: string,
nodeID: string,
publicKey: string,
remainingBalanceOwner: {
locktime: string,
threshold: string,
addresses: string[]
},
deactivationOwner: {
locktime: string,
threshold: string,
addresses: string[]
},
startTime: string,
weight: string,
minNonce: string,
balance: string,
height: string
}
```
- `validationID` is the ID for L1 subnet validator registration transaction.
- `subnetID` is the L1 this validator is validating.
- `nodeID` is the node ID of the validator.
- `publicKey` is the compressed BLS public key of the validator.
- `remainingBalanceOwner` is an `OutputOwners` which includes a `locktime`, `threshold`, and an array of `addresses`. It specifies the owner that will receive any withdrawn balance.
- `deactivationOwner` is an `OutputOwners` which includes a `locktime`, `threshold`, and an array of `addresses`. It specifies the owner that can withdraw the balance.
- `startTime` is the unix timestamp, in seconds, of when this validator was added to the validator set.
- `weight` is weight of this validator used for consensus voting and ICM.
- `minNonce` is minimum nonce that must be included in a `SetL1ValidatorWeightTx` for the transaction to be valid.
- `balance` is current remaining balance that can be used to pay for the validators continuous fee.
- `height` is height of the last accepted block.
**Example Call:**
```sh
curl -X POST --data '{
"jsonrpc": "2.0",
"method": "platform.getL1Validator",
"params": {
"validationID": ["9FAftNgNBrzHUMMApsSyV6RcFiL9UmCbvsCu28xdLV2mQ7CMo"]
},
"id": 1
}' -H 'content-type:application/json;' 127.0.0.1:9650/ext/bc/P
```
**Example Response:**
```json
{
"jsonrpc": "2.0",
"result": {
"subnetID": "2DeHa7Qb6sufPkmQcFWG2uCd4pBPv9WB6dkzroiMQhd1NSRtof",
"nodeID": "NodeID-7Xhw2mDxuDS44j42TCB6U5579esbSt3Lg",
"validationID": "9FAftNgNBrzHUMMApsSyV6RcFiL9UmCbvsCu28xdLV2mQ7CMo",
"publicKey": "0x900c9b119b5c82d781d4b49be78c3fc7ae65f2b435b7ed9e3a8b9a03e475edff86d8a64827fec8db23a6f236afbf127d",
"remainingBalanceOwner": {
"locktime": "0",
"threshold": "0",
"addresses": []
},
"deactivationOwner": {
"locktime": "0",
"threshold": "0",
"addresses": []
},
"startTime": "1731445206",
"weight": "49463",
"minNonce": "0",
"balance": "1000000000",
"height": "3"
},
"id": 1
}
```
### `platform.getProposedHeight`
Returns this node's current proposer VM height
**Signature:**
```
platform.getProposedHeight() ->
{
height: int,
}
```
**Example Call:**
```sh
curl -X POST --data '{
"jsonrpc": "2.0",
"method": "platform.getProposedHeight",
"params": {},
"id": 1
}' -H 'content-type:application/json;' 127.0.0.1:9650/ext/bc/P
```
**Example Response:**
```json
{
"jsonrpc": "2.0",
"result": {
"height": "56"
},
"id": 1
}
```
### `platform.getMinStake`
Get the minimum amount of tokens required to validate the requested Subnet and the minimum amount of
tokens that can be delegated.
**Signature:**
```
platform.getMinStake({
subnetID: string // optional
}) ->
{
minValidatorStake : uint64,
minDelegatorStake : uint64
}
```
**Example Call:**
```sh
curl -X POST --data '{
"jsonrpc":"2.0",
"id" :1,
"method" :"platform.getMinStake",
"params": {
"subnetID":"11111111111111111111111111111111LpoYY"
},
}' -H 'content-type:application/json;' 127.0.0.1:9650/ext/bc/P
```
**Example Response:**
```json
{
"jsonrpc": "2.0",
"result": {
"minValidatorStake": "2000000000000",
"minDelegatorStake": "25000000000"
},
"id": 1
}
```
### `platform.getRewardUTXOs`
Deprecated as of [**v1.9.12**](https://github.com/ava-labs/avalanchego/releases/tag/v1.9.12).
Returns the UTXOs that were rewarded after the provided transaction's staking or delegation period
ended.
**Signature:**
```
platform.getRewardUTXOs({
txID: string,
encoding: string // optional
}) -> {
numFetched: integer,
utxos: []string,
encoding: string
}
```
- `txID` is the ID of the staking or delegating transaction
- `numFetched` is the number of returned UTXOs
- `utxos` is an array of encoded reward UTXOs
- `encoding` specifies the format for the returned UTXOs. Can only be `hex` when a value is
provided.
**Example Call:**
```sh
curl -X POST --data '{
"jsonrpc": "2.0",
"method": "platform.getRewardUTXOs",
"params": {
"txID": "2nmH8LithVbdjaXsxVQCQfXtzN9hBbmebrsaEYnLM9T32Uy2Y5"
},
"id": 1
}' -H 'content-type:application/json;' 127.0.0.1:9650/ext/bc/P
```
**Example Response:**
```json
{
"jsonrpc": "2.0",
"result": {
"numFetched": "2",
"utxos": [
"0x0000a195046108a85e60f7a864bb567745a37f50c6af282103e47cc62f036cee404700000000345aa98e8a990f4101e2268fab4c4e1f731c8dfbcffa3a77978686e6390d624f000000070000000000000001000000000000000000000001000000018ba98dabaebcd83056799841cfbc567d8b10f216c1f01765",
"0x0000ae8b1b94444eed8de9a81b1222f00f1b4133330add23d8ac288bffa98b85271100000000345aa98e8a990f4101e2268fab4c4e1f731c8dfbcffa3a77978686e6390d624f000000070000000000000001000000000000000000000001000000018ba98dabaebcd83056799841cfbc567d8b10f216473d042a"
],
"encoding": "hex"
},
"id": 1
}
```
### `platform.getStake`
Deprecated as of [**v1.9.12**](https://github.com/ava-labs/avalanchego/releases/tag/v1.9.12).
Get the amount of nAVAX staked by a set of addresses. The amount returned does not include staking
rewards.
**Signature:**
```
platform.getStake({
addresses: []string,
validatorsOnly: true or false
}) ->
{
stakeds: string -> int,
stakedOutputs: []string,
encoding: string
}
```
- `addresses` are the addresses to get information about.
- `validatorsOnly` can be either `true` or `false`. If `true`, will skip checking delegators for stake.
- `stakeds` is a map from assetID to the amount staked by addresses provided.
- `stakedOutputs` are the string representation of staked outputs.
- `encoding` specifies the format for the returned outputs.
**Example Call:**
```sh
curl -X POST --data '{
"jsonrpc": "2.0",
"method": "platform.getStake",
"params": {
"addresses": [
"P-avax1pmgmagjcljjzuz2ve339dx82khm7q8getlegte"
],
"validatorsOnly": true
},
"id": 1
}
}' -H 'content-type:application/json;' 127.0.0.1:9650/ext/bc/P
```
**Example Response:**
```json
{
"jsonrpc": "2.0",
"result": {
"staked": "6500000000000",
"stakeds": {
"FvwEAhmxKfeiG8SnEvq42hc6whRyY3EFYAvebMqDNDGCgxN5Z": "6500000000000"
},
"stakedOutputs": [
"0x000021e67317cbc4be2aeb00677ad6462778a8f52274b9d605df2591b23027a87dff00000007000005e96630e800000000000000000000000001000000011f1c933f38da6ba0ba46f8c1b0a7040a9a991a80dd338ed1"
],
"encoding": "hex"
},
"id": 1
}
```
### `platform.getStakingAssetID`
Retrieve an assetID for a Subnet’s staking asset.
**Signature:**
```
platform.getStakingAssetID({
subnetID: string // optional
}) -> {
assetID: string
}
```
- `subnetID` is the Subnet whose assetID is requested.
- `assetID` is the assetID for a Subnet’s staking asset.
**Example Call:**
```sh
curl -X POST --data '{
"jsonrpc": "2.0",
"method": "platform.getStakingAssetID",
"params": {
"subnetID": "11111111111111111111111111111111LpoYY"
},
"id": 1
}' -H 'content-type:application/json;' 127.0.0.1:9650/ext/bc/P
```
**Example Response:**
```json
{
"jsonrpc": "2.0",
"result": {
"assetID": "2fombhL7aGPwj3KH4bfrmJwW6PVnMobf9Y2fn9GwxiAAJyFDbe"
},
"id": 1
}
```
The AssetID for AVAX differs depending on the network you are on.
Mainnet: FvwEAhmxKfeiG8SnEvq42hc6whRyY3EFYAvebMqDNDGCgxN5Z
Testnet: U8iRqJoiJm8xZHAacmvYyZVwqQx6uDNtQeP3CQ6fcgQk3JqnK
### `platform.getSubnet`
Get owners and info about the Subnet or L1.
**Signature:**
```
platform.getSubnet({
subnetID: string
}) ->
{
isPermissioned: bool,
controlKeys: []string,
threshold: string,
locktime: string,
subnetTransformationTxID: string,
conversionID: string,
managerChainID: string,
managerAddress: string
}
```
- `subnetID` is the ID of the Subnet to get information about. If omitted, fails.
- `threshold` signatures from addresses in `controlKeys` are needed to make changes to
a permissioned subnet. If the Subnet is not a PoA Subnet, then `threshold` will be `0` and `controlKeys`
will be empty.
- changes can not be made into the subnet until `locktime` is in the past.
- `subnetTransformationTxID` is the ID of the transaction that changed the subnet into an elastic one, if it exists.
- `conversionID` is the ID of the conversion from a permissioned Subnet into an L1, if it exists.
- `managerChainID` is the ChainID that has the ability to modify this L1s validator set, if it exists.
- `managerAddress` is the address that has the ability to modify this L1s validator set, if it exists.
**Example Call:**
```sh
curl -X POST --data '{
"jsonrpc": "2.0",
"method": "platform.getSubnet",
"params": {"subnetID":"Vz2ArUpigHt7fyE79uF3gAXvTPLJi2LGgZoMpgNPHowUZJxBb"},
"id": 1
}' -H 'content-type:application/json;' 127.0.0.1:9650/ext/bc/P
```
**Example Response:**
```json
{
"jsonrpc": "2.0",
"result": {
"isPermissioned": true,
"controlKeys": [
"P-fuji1ztvstx6naeg6aarfd047fzppdt8v4gsah88e0c",
"P-fuji193kvt4grqewv6ce2x59wnhydr88xwdgfcedyr3"
],
"threshold": "1",
"locktime": "0",
"subnetTransformationTxID": "11111111111111111111111111111111LpoYY",
"conversionID": "11111111111111111111111111111111LpoYY",
"managerChainID": "11111111111111111111111111111111LpoYY",
"managerAddress": null
},
"id": 1
}
```
### `platform.getSubnets`
Deprecated as of [**v1.9.12**](https://github.com/ava-labs/avalanchego/releases/tag/v1.9.12).
Get info about the Subnets.
**Signature:**
```
platform.getSubnets({
ids: []string
}) ->
{
subnets: []{
id: string,
controlKeys: []string,
threshold: string
}
}
```
- `ids` are the IDs of the Subnets to get information about. If omitted, gets information about all
Subnets.
- `id` is the Subnet’s ID.
- `threshold` signatures from addresses in `controlKeys` are needed to add a validator to the
Subnet. If the Subnet is not a PoA Subnet, then `threshold` will be `0` and `controlKeys` will be
empty.
**Example Call:**
```sh
curl -X POST --data '{
"jsonrpc": "2.0",
"method": "platform.getSubnets",
"params": {"ids":["hW8Ma7dLMA7o4xmJf3AXBbo17bXzE7xnThUd3ypM4VAWo1sNJ"]},
"id": 1
}' -H 'content-type:application/json;' 127.0.0.1:9650/ext/bc/P
```
**Example Response:**
```json
{
"jsonrpc": "2.0",
"result": {
"subnets": [
{
"id": "hW8Ma7dLMA7o4xmJf3AXBbo17bXzE7xnThUd3ypM4VAWo1sNJ",
"controlKeys": [
"KNjXsaA1sZsaKCD1cd85YXauDuxshTes2",
"Aiz4eEt5xv9t4NCnAWaQJFNz5ABqLtJkR"
],
"threshold": "2"
}
]
},
"id": 1
}
```
### `platform.getTimestamp`
Get the current P-Chain timestamp.
**Signature:**
```
platform.getTimestamp() -> {time: string}
```
**Example Call:**
```sh
curl -X POST --data '{
"jsonrpc": "2.0",
"method": "platform.getTimestamp",
"params": {},
"id": 1
}
}' -H 'content-type:application/json;' 127.0.0.1:9650/ext/bc/P
```
**Example Response:**
```json
{
"jsonrpc": "2.0",
"result": {
"timestamp": "2021-09-07T00:00:00-04:00"
},
"id": 1
}
```
### `platform.getTotalStake`
Get the total amount of tokens staked on the requested Subnet.
**Signature:**
```
platform.getTotalStake({
subnetID: string
}) -> {
stake: int
weight: int
}
```
#### Primary Network Example
**Example Call:**
```sh
curl -X POST --data '{
"jsonrpc": "2.0",
"method": "platform.getTotalStake",
"params": {
"subnetID": "11111111111111111111111111111111LpoYY"
},
"id": 1
}
}' -H 'content-type:application/json;' 127.0.0.1:9650/ext/bc/P
```
**Example Response:**
```json
{
"jsonrpc": "2.0",
"result": {
"stake": "279825917679866811",
"weight": "279825917679866811"
},
"id": 1
}
```
#### Subnet Example
**Example Call:**
```sh
curl -X POST --data '{
"jsonrpc": "2.0",
"method": "platform.getTotalStake",
"params": {
"subnetID": "2bRCr6B4MiEfSjidDwxDpdCyviwnfUVqB2HGwhm947w9YYqb7r",
},
"id": 1
}
}' -H 'content-type:application/json;' 127.0.0.1:9650/ext/P
```
**Example Response:**
```json
{
"jsonrpc": "2.0",
"result": {
"weight": "100000"
},
"id": 1
}
```
### `platform.getTx`
Gets a transaction by its ID.
Optional `encoding` parameter to specify the format for the returned transaction. Can be either
`hex` or `json`. Defaults to `hex`.
**Signature:**
```
platform.getTx({
txID: string,
encoding: string // optional
}) -> {
tx: string,
encoding: string,
}
```
**Example Call:**
```sh
curl -X POST --data '{
"jsonrpc": "2.0",
"method": "platform.getTx",
"params": {
"txID":"28KVjSw5h3XKGuNpJXWY74EdnGq4TUWvCgEtJPymgQTvudiugb",
"encoding": "json"
},
"id": 1
}' -H 'content-type:application/json;' 127.0.0.1:9650/ext/bc/P
```
**Example Response:**
```json
{
"jsonrpc": "2.0",
"result": {
"tx": {
"unsignedTx": {
"networkID": 1,
"blockchainID": "11111111111111111111111111111111LpoYY",
"outputs": [],
"inputs": [
{
"txID": "NXNJHKeaJyjjWVSq341t6LGQP5UNz796o1crpHPByv1TKp9ZP",
"outputIndex": 0,
"assetID": "FvwEAhmxKfeiG8SnEvq42hc6whRyY3EFYAvebMqDNDGCgxN5Z",
"fxID": "spdxUxVJQbX85MGxMHbKw1sHxMnSqJ3QBzDyDYEP3h6TLuxqQ",
"input": {
"amount": 20824279595,
"signatureIndices": [0]
}
},
{
"txID": "2ahK5SzD8iqi5KBqpKfxrnWtrEoVwQCqJsMoB9kvChCaHgAQC9",
"outputIndex": 1,
"assetID": "FvwEAhmxKfeiG8SnEvq42hc6whRyY3EFYAvebMqDNDGCgxN5Z",
"fxID": "spdxUxVJQbX85MGxMHbKw1sHxMnSqJ3QBzDyDYEP3h6TLuxqQ",
"input": {
"amount": 28119890783,
"signatureIndices": [0]
}
}
],
"memo": "0x",
"validator": {
"nodeID": "NodeID-VT3YhgFaWEzy4Ap937qMeNEDscCammzG",
"start": 1682945406,
"end": 1684155006,
"weight": 48944170378
},
"stake": [
{
"assetID": "FvwEAhmxKfeiG8SnEvq42hc6whRyY3EFYAvebMqDNDGCgxN5Z",
"fxID": "spdxUxVJQbX85MGxMHbKw1sHxMnSqJ3QBzDyDYEP3h6TLuxqQ",
"output": {
"addresses": ["P-avax1tnuesf6cqwnjw7fxjyk7lhch0vhf0v95wj5jvy"],
"amount": 48944170378,
"locktime": 0,
"threshold": 1
}
}
],
"rewardsOwner": {
"addresses": ["P-avax19zfygxaf59stehzedhxjesads0p5jdvfeedal0"],
"locktime": 0,
"threshold": 1
}
},
"credentials": [
{
"signatures": [
"0x6954e90b98437646fde0c1d54c12190fc23ae5e319c4d95dda56b53b4a23e43825251289cdc3728f1f1e0d48eac20e5c8f097baa9b49ea8a3cb6a41bb272d16601"
]
},
{
"signatures": [
"0x6954e90b98437646fde0c1d54c12190fc23ae5e319c4d95dda56b53b4a23e43825251289cdc3728f1f1e0d48eac20e5c8f097baa9b49ea8a3cb6a41bb272d16601"
]
}
],
"id": "28KVjSw5h3XKGuNpJXWY74EdnGq4TUWvCgEtJPymgQTvudiugb"
},
"encoding": "json"
},
"id": 1
}
```
### `platform.getTxStatus`
Gets a transaction’s status by its ID. If the transaction was dropped, response will include a
`reason` field with more information why the transaction was dropped.
**Signature:**
```
platform.getTxStatus({
txID: string
}) -> { status: string }
```
`status` is one of:
- `Committed`: The transaction is (or will be) accepted by every node
- `Processing`: The transaction is being voted on by this node
- `Dropped`: The transaction will never be accepted by any node in the network, check `reason` field
for more information
- `Unknown`: The transaction hasn’t been seen by this node
**Example Call:**
```sh
curl -X POST --data '{
"jsonrpc": "2.0",
"method": "platform.getTxStatus",
"params": {
"txID":"TAG9Ns1sa723mZy1GSoGqWipK6Mvpaj7CAswVJGM6MkVJDF9Q"
},
"id": 1
}' -H 'content-type:application/json;' 127.0.0.1:9650/ext/bc/P
```
**Example Response:**
```json
{
"jsonrpc": "2.0",
"result": {
"status": "Committed"
},
"id": 1
}
```
### `platform.getUTXOs`
Gets the UTXOs that reference a given set of addresses.
**Signature:**
```
platform.getUTXOs(
{
addresses: []string,
limit: int, // optional
startIndex: { // optional
address: string,
utxo: string
},
sourceChain: string, // optional
encoding: string, // optional
},
) ->
{
numFetched: int,
utxos: []string,
endIndex: {
address: string,
utxo: string
},
encoding: string,
}
```
- `utxos` is a list of UTXOs such that each UTXO references at least one address in `addresses`.
- At most `limit` UTXOs are returned. If `limit` is omitted or greater than 1024, it is set to 1024.
- This method supports pagination. `endIndex` denotes the last UTXO returned. To get the next set of
UTXOs, use the value of `endIndex` as `startIndex` in the next call.
- If `startIndex` is omitted, will fetch all UTXOs up to `limit`.
- When using pagination (that is when `startIndex` is provided), UTXOs are not guaranteed to be unique
across multiple calls. That is, a UTXO may appear in the result of the first call, and then again
in the second call.
- When using pagination, consistency is not guaranteed across multiple calls. That is, the UTXO set
of the addresses may have changed between calls.
- `encoding` specifies the format for the returned UTXOs. Can only be `hex` when a value is
provided.
#### **Example**
Suppose we want all UTXOs that reference at least one of
`P-avax18jma8ppw3nhx5r4ap8clazz0dps7rv5ukulre5` and `P-avax1d09qn852zcy03sfc9hay2llmn9hsgnw4tp3dv6`.
```sh
curl -X POST --data '{
"jsonrpc":"2.0",
"id" :1,
"method" :"platform.getUTXOs",
"params" :{
"addresses":["P-avax18jma8ppw3nhx5r4ap8clazz0dps7rv5ukulre5", "P-avax1d09qn852zcy03sfc9hay2llmn9hsgnw4tp3dv6"],
"limit":5,
"encoding": "hex"
}
}' -H 'content-type:application/json;' 127.0.0.1:9650/ext/bc/P
```
This gives response:
```json
{
"jsonrpc": "2.0",
"result": {
"numFetched": "5",
"utxos": [
"0x0000a195046108a85e60f7a864bb567745a37f50c6af282103e47cc62f036cee404700000000345aa98e8a990f4101e2268fab4c4e1f731c8dfbcffa3a77978686e6390d624f000000070000000000000001000000000000000000000001000000018ba98dabaebcd83056799841cfbc567d8b10f216c1f01765",
"0x0000ae8b1b94444eed8de9a81b1222f00f1b4133330add23d8ac288bffa98b85271100000000345aa98e8a990f4101e2268fab4c4e1f731c8dfbcffa3a77978686e6390d624f000000070000000000000001000000000000000000000001000000018ba98dabaebcd83056799841cfbc567d8b10f216473d042a",
"0x0000731ce04b1feefa9f4291d869adc30a33463f315491e164d89be7d6d2d7890cfc00000000345aa98e8a990f4101e2268fab4c4e1f731c8dfbcffa3a77978686e6390d624f000000070000000000000001000000000000000000000001000000018ba98dabaebcd83056799841cfbc567d8b10f21600dd3047",
"0x0000b462030cc4734f24c0bc224cf0d16ee452ea6b67615517caffead123ab4fbf1500000000345aa98e8a990f4101e2268fab4c4e1f731c8dfbcffa3a77978686e6390d624f000000070000000000000001000000000000000000000001000000018ba98dabaebcd83056799841cfbc567d8b10f216c71b387e",
"0x000054f6826c39bc957c0c6d44b70f961a994898999179cc32d21eb09c1908d7167b00000000345aa98e8a990f4101e2268fab4c4e1f731c8dfbcffa3a77978686e6390d624f000000070000000000000001000000000000000000000001000000018ba98dabaebcd83056799841cfbc567d8b10f2166290e79d"
],
"endIndex": {
"address": "P-avax18jma8ppw3nhx5r4ap8clazz0dps7rv5ukulre5",
"utxo": "kbUThAUfmBXUmRgTpgD6r3nLj7rJUGho6xyht5nouNNypH45j"
},
"encoding": "hex"
},
"id": 1
}
```
Since `numFetched` is the same as `limit`, we can tell that there may be more UTXOs that were not
fetched. We call the method again, this time with `startIndex`:
```sh
curl -X POST --data '{
"jsonrpc":"2.0",
"id" :1,
"method" :"platform.getUTXOs",
"params" :{
"addresses":["P-avax18jma8ppw3nhx5r4ap8clazz0dps7rv5ukulre5"],
"limit":5,
"startIndex": {
"address": "P-avax18jma8ppw3nhx5r4ap8clazz0dps7rv5ukulre5",
"utxo": "0x62fc816bb209857923770c286192ab1f9e3f11e4a7d4ba0943111c3bbfeb9e4a5ea72fae"
},
"encoding": "hex"
}
}' -H 'content-type:application/json;' 127.0.0.1:9650/ext/bc/P
```
This gives response:
```json
{
"jsonrpc": "2.0",
"result": {
"numFetched": "4",
"utxos": [
"0x000020e182dd51ee4dcd31909fddd75bb3438d9431f8e4efce86a88a684f5c7fa09300000000345aa98e8a990f4101e2268fab4c4e1f731c8dfbcffa3a77978686e6390d624f000000070000000000000001000000000000000000000001000000018ba98dabaebcd83056799841cfbc567d8b10f21662861d59",
"0x0000a71ba36c475c18eb65dc90f6e85c4fd4a462d51c5de3ac2cbddf47db4d99284e00000000345aa98e8a990f4101e2268fab4c4e1f731c8dfbcffa3a77978686e6390d624f000000070000000000000001000000000000000000000001000000018ba98dabaebcd83056799841cfbc567d8b10f21665f6f83f",
"0x0000925424f61cb13e0fbdecc66e1270de68de9667b85baa3fdc84741d048daa69fa00000000345aa98e8a990f4101e2268fab4c4e1f731c8dfbcffa3a77978686e6390d624f000000070000000000000001000000000000000000000001000000018ba98dabaebcd83056799841cfbc567d8b10f216afecf76a",
"0x000082f30327514f819da6009fad92b5dba24d27db01e29ad7541aa8e6b6b554615c00000000345aa98e8a990f4101e2268fab4c4e1f731c8dfbcffa3a77978686e6390d624f000000070000000000000001000000000000000000000001000000018ba98dabaebcd83056799841cfbc567d8b10f216779c2d59"
],
"endIndex": {
"address": "P-avax18jma8ppw3nhx5r4ap8clazz0dps7rv5ukulre5",
"utxo": "21jG2RfqyHUUgkTLe2tUp6ETGLriSDTW3th8JXFbPRNiSZ11jK"
},
"encoding": "hex"
},
"id": 1
}
```
Since `numFetched` is less than `limit`, we know that we are done fetching UTXOs and don’t need to
call this method again.
Suppose we want to fetch the UTXOs exported from the X Chain to the P Chain in order to build an
ImportTx. Then we need to call GetUTXOs with the `sourceChain` argument in order to retrieve the
atomic UTXOs:
```sh
curl -X POST --data '{
"jsonrpc":"2.0",
"id" :1,
"method" :"platform.getUTXOs",
"params" :{
"addresses":["P-avax18jma8ppw3nhx5r4ap8clazz0dps7rv5ukulre5"],
"sourceChain": "X",
"encoding": "hex"
}
}' -H 'content-type:application/json;' 127.0.0.1:9650/ext/bc/P
```
This gives response:
```json
{
"jsonrpc": "2.0",
"result": {
"numFetched": "1",
"utxos": [
"0x00001f989ffaf18a18a59bdfbf209342aa61c6a62a67e8639d02bb3c8ddab315c6fa0000000139c33a499ce4c33a3b09cdd2cfa01ae70dbf2d18b2d7d168524440e55d55008800000007000000746a528800000000000000000000000001000000013cb7d3842e8cee6a0ebd09f1fe884f6861e1b29cd704fe76"
],
"endIndex": {
"address": "P-avax18jma8ppw3nhx5r4ap8clazz0dps7rv5ukulre5",
"utxo": "S5UKgWoVpoGFyxfisebmmRf8WqC7ZwcmYwS7XaDVZqoaFcCwK"
},
"encoding": "hex"
},
"id": 1
}
```
### `platform.getValidatorsAt`
Get the validators and their weights of a Subnet or the Primary Network at a given P-Chain height.
**Signature:**
```
platform.getValidatorsAt(
{
height: [int|string],
subnetID: string, // optional
}
)
```
- `height` is the P-Chain height to get the validator set at, or the string literal "proposed"
to return the validator set at this node's ProposerVM height.
- `subnetID` is the Subnet ID to get the validator set of. If not given, gets validator set of the
Primary Network.
**Example Call:**
```bash
curl -X POST --data '{
"jsonrpc": "2.0",
"method": "platform.getValidatorsAt",
"params": {
"height":1
},
"id": 1
}' -H 'content-type:application/json;' 127.0.0.1:9650/ext/bc/P
```
**Example Response:**
```json
{
"jsonrpc": "2.0",
"result": {
"validators": {
"NodeID-7Xhw2mDxuDS44j42TCB6U5579esbSt3Lg": 2000000000000000,
"NodeID-GWPcbFJZFfZreETSoWjPimr846mXEKCtu": 2000000000000000,
"NodeID-MFrZFVCXPv5iCn6M9K6XduxGTYp891xXZ": 2000000000000000,
"NodeID-NFBbbJ4qCmNaCzeW7sxErhvWqvEQMnYcN": 2000000000000000,
"NodeID-P7oB2McjBGgW2NXXWVYjV8JEDFoW9xDE5": 2000000000000000
}
},
"id": 1
}
```
### `platform.getAllValidatorsAt`
Get the validators and their weights of all Subnets and the Primary Network at a given P-Chain height.
**Signature:**
```
platform.getAllValidatorsAt(
{
height: [int|string],
}
)
```
```bash
curl -X POST --data '{
"jsonrpc": "2.0",
"method": "platform.getAllValidatorsAt",
"params": {
"height":1
},
"id": 1
}' -H 'content-type:application/json;' 127.0.0.1:9650/ext/bc/P
```
**Example Response:**
```json
{
"jsonrpc": "2.0",
"result": {
"validatorSets": {
"11111111111111111111111111111111LpoYY": {
"validators": [
{
"publicKey": "0x8048109c3da13de0700f9f3590c3270bfc42277417f6d0cc84282947e1a1f8b4980fd3e3fe223acf0f56a5838890814a",
"weight": "2000000000000000",
"nodeIDs": [
"NodeID-P7oB2McjBGgW2NXXWVYjV8JEDFoW9xDE5"
]
},
{
"publicKey": "0xa058ff27a4c570664bfa28e34939368539a1340867951943d0f56fa8aac13bc09ff64f341acf8cc0cef74202c2d6f9c0",
"weight": "2000000000000000",
"nodeIDs": [
"NodeID-MFrZFVCXPv5iCn6M9K6XduxGTYp891xXZ"
]
},
{
"publicKey": "0xa10b6955a85684a0f5c94b8381f04506f1bee60625927d372323f78b3d30196cc56c8618c77eaf429298e74673d832c3",
"weight": "2000000000000000",
"nodeIDs": [
"NodeID-NFBbbJ4qCmNaCzeW7sxErhvWqvEQMnYcN"
]
},
{
"publicKey": "0xaccd61ceb90c61628aa0fa34acab27ecb08f6897e9ccad283578c278c52109f9e10e4f8bc31aa6d7905c4e1623de367e",
"weight": "2000000000000000",
"nodeIDs": [
"NodeID-GWPcbFJZFfZreETSoWjPimr846mXEKCtu"
]
},
{
"publicKey": "0x900c9b119b5c82d781d4b49be78c3fc7ae65f2b435b7ed9e3a8b9a03e475edff86d8a64827fec8db23a6f236afbf127d",
"weight": "2000000000000000",
"nodeIDs": [
"NodeID-7Xhw2mDxuDS44j42TCB6U5579esbSt3Lg"
]
}
],
"totalWeight": "10000000000000000"
}
}
},
"id": 1
}
```
- `height` is the P-Chain height to get the validator set at, or the string literal "proposed"
to return the validator set at this node's ProposerVM height.
**Example Call:**
### `platform.getValidatorFeeConfig`
Returns the validator fee configuration of the P-Chain.
**Signature:**
```
platform.getValidatorFeeConfig() -> {
capacity: uint64,
target: uint64,
minPrice: uint64,
excessConversionConstant: uint64
}
```
- `capacity` is the maximum number of L1 validators the chain is allowed to have at any given time
- `target` is the target number of L1 validators the chain should have to keep fees stable
- `minPrice` is the minimum price per L1 validator
- `excessConversionConstant` is used to convert excess L1 validators to a gas price
**Example Call:**
```sh
curl -X POST --data '{
"jsonrpc": "2.0",
"method": "platform.getValidatorFeeConfig",
"params": {},
"id": 1
}' -H 'content-type:application/json;' 127.0.0.1:9650/ext/bc/P
```
**Example Response:**
```json
{
"jsonrpc": "2.0",
"result": {
"capacity": 20000,
"target": 10000,
"targetPerSecond": 50000,
"minPrice": 512,
"excessConversionConstant": 1246488515
},
"id": 1
}
```
### `platform.getValidatorFeeState`
Returns the current validator fee state of the P-Chain.
**Signature:**
```
platform.getValidatorFeeState() -> {
excess: uint64,
price: uint64,
timestamp: string
}
```
**Example Call:**
```sh
curl -X POST --data '{
"jsonrpc": "2.0",
"method": "platform.getValidatorFeeState",
"params": {},
"id": 1
}' -H 'content-type:application/json;' 127.0.0.1:9650/ext/bc/P
```
**Example Response:**
```json
{
"jsonrpc": "2.0",
"result": {
"excess": 26956,
"price": 512,
"timestamp": "2024-12-16T17:19:07Z"
},
"id": 1
}
```
### `platform.issueTx`
Issue a transaction to the Platform Chain.
**Signature:**
```
platform.issueTx({
tx: string,
encoding: string, // optional
}) -> { txID: string }
```
- `tx` is the byte representation of a transaction.
- `encoding` specifies the encoding format for the transaction bytes. Can only be `hex` when a value
is provided.
- `txID` is the transaction’s ID.
**Example Call:**
```sh
curl -X POST --data '{
"jsonrpc": "2.0",
"method": "platform.issueTx",
"params": {
"tx":"0x00000009de31b4d8b22991d51aa6aa1fc733f23a851a8c9400000000000186a0000000005f041280000000005f9ca900000030390000000000000001fceda8f90fcb5d30614b99d79fc4baa29307762668f16eb0259a57c2d3b78c875c86ec2045792d4df2d926c40f829196e0bb97ee697af71f5b0a966dabff749634c8b729855e937715b0e44303fd1014daedc752006011b730",
"encoding": "hex"
},
"id": 1
}' -H 'content-type:application/json;' 127.0.0.1:9650/ext/bc/P
```
**Example Response:**
```json
{
"jsonrpc": "2.0",
"result": {
"txID": "G3BuH6ytQ2averrLxJJugjWZHTRubzCrUZEXoheG5JMqL5ccY"
},
"id": 1
}
```
### `platform.sampleValidators`
Sample validators from the specified Subnet.
**Signature:**
```
platform.sampleValidators(
{
size: int,
subnetID: string, // optional
}
) ->
{
validators: []string
}
```
- `size` is the number of validators to sample.
- `subnetID` is the Subnet to sampled from. If omitted, defaults to the Primary Network.
- Each element of `validators` is the ID of a validator.
**Example Call:**
```sh
curl -X POST --data '{
"jsonrpc":"2.0",
"id" :1,
"method" :"platform.sampleValidators",
"params" :{
"size":2
}
}' -H 'content-type:application/json;' 127.0.0.1:9650/ext/bc/P
```
**Example Response:**
```json
{
"jsonrpc": "2.0",
"id": 1,
"result": {
"validators": [
"NodeID-MFrZFVCXPv5iCn6M9K6XduxGTYp891xXZ",
"NodeID-NFBbbJ4qCmNaCzeW7sxErhvWqvEQMnYcN"
]
}
}
```
### `platform.validatedBy`
Get the Subnet that validates a given blockchain.
**Signature:**
```
platform.validatedBy(
{
blockchainID: string
}
) -> { subnetID: string }
```
- `blockchainID` is the blockchain’s ID.
- `subnetID` is the ID of the Subnet that validates the blockchain.
**Example Call:**
```sh
curl -X POST --data '{
"jsonrpc": "2.0",
"method": "platform.validatedBy",
"params": {
"blockchainID": "KDYHHKjM4yTJTT8H8qPs5KXzE6gQH5TZrmP1qVr1P6qECj3XN"
},
"id": 1
}' -H 'content-type:application/json;' 127.0.0.1:9650/ext/bc/P
```
**Example Response:**
```json
{
"jsonrpc": "2.0",
"result": {
"subnetID": "2bRCr6B4MiEfSjidDwxDpdCyviwnfUVqB2HGwhm947w9YYqb7r"
},
"id": 1
}
```
### `platform.validates`
Get the IDs of the blockchains a Subnet validates.
**Signature:**
```
platform.validates(
{
subnetID: string
}
) -> { blockchainIDs: []string }
```
- `subnetID` is the Subnet’s ID.
- Each element of `blockchainIDs` is the ID of a blockchain the Subnet validates.
**Example Call:**
```sh
curl -X POST --data '{
"jsonrpc": "2.0",
"method": "platform.validates",
"params": {
"subnetID":"2bRCr6B4MiEfSjidDwxDpdCyviwnfUVqB2HGwhm947w9YYqb7r"
},
"id": 1
}' -H 'content-type:application/json;' 127.0.0.1:9650/ext/bc/P
```
**Example Response:**
```json
{
"jsonrpc": "2.0",
"result": {
"blockchainIDs": [
"KDYHHKjM4yTJTT8H8qPs5KXzE6gQH5TZrmP1qVr1P6qECj3XN",
"2TtHFqEAAJ6b33dromYMqfgavGPF3iCpdG3hwNMiart2aB5QHi"
]
},
"id": 1
}
```
# Transaction Format (/docs/rpcs/p-chain/txn-format)
---
title: Transaction Format
---
This file is meant to be the single source of truth for how we serialize
transactions in Avalanche's Platform Virtual Machine, aka the `Platform Chain`
or `P-Chain`. This document uses the [primitive serialization](/docs/api-reference/standards/serialization-primitives) format for packing and
[secp256k1](/docs/api-reference/standards/cryptographic-primitives#secp256k1-addresses) for cryptographic
user identification.
## Codec ID
Some data is prepended with a codec ID (unt16) that denotes how the data should
be deserialized. Right now, the only valid codec ID is 0 (`0x00 0x00`).
## Proof of Possession
A BLS public key and a proof of possession of the key.
### What Proof of Possession Contains
- **PublicKey** is the 48 byte representation of the public key.
- **Signature** is the 96 byte signature by the private key over its public key.
### Proof of Possession Specification
```text
+------------+----------+-------------------------+
| public_key : [48]byte | 48 bytes |
+------------+----------+-------------------------+
| signature : [96]byte | 96 bytes |
+------------+----------+-------------------------+
| 144 bytes |
+-------------------------+
```
### Proof of Possession Specification
```text
message ProofOfPossession {
bytes public_key = 1; // 48 bytes
bytes signature = 2; // 96 bytes
}
```
### Proof of Possession Example
```text
// Public Key:
0x85, 0x02, 0x5b, 0xca, 0x6a, 0x30, 0x2d, 0xc6,
0x13, 0x38, 0xff, 0x49, 0xc8, 0xba, 0xa5, 0x72,
0xde, 0xd3, 0xe8, 0x6f, 0x37, 0x59, 0x30, 0x4c,
0x7f, 0x61, 0x8a, 0x2a, 0x25, 0x93, 0xc1, 0x87,
0xe0, 0x80, 0xa3, 0xcf, 0xde, 0xc9, 0x50, 0x40,
0x30, 0x9a, 0xd1, 0xf1, 0x58, 0x95, 0x30, 0x67,
// Signature:
0x8b, 0x1d, 0x61, 0x33, 0xd1, 0x7e, 0x34, 0x83,
0x22, 0x0a, 0xd9, 0x60, 0xb6, 0xfd, 0xe1, 0x1e,
0x4e, 0x12, 0x14, 0xa8, 0xce, 0x21, 0xef, 0x61,
0x62, 0x27, 0xe5, 0xd5, 0xee, 0xf0, 0x70, 0xd7,
0x50, 0x0e, 0x6f, 0x7d, 0x44, 0x52, 0xc5, 0xa7,
0x60, 0x62, 0x0c, 0xc0, 0x67, 0x95, 0xcb, 0xe2,
0x18, 0xe0, 0x72, 0xeb, 0xa7, 0x6d, 0x94, 0x78,
0x8d, 0x9d, 0x01, 0x17, 0x6c, 0xe4, 0xec, 0xad,
0xfb, 0x96, 0xb4, 0x7f, 0x94, 0x22, 0x81, 0x89,
0x4d, 0xdf, 0xad, 0xd1, 0xc1, 0x74, 0x3f, 0x7f,
0x54, 0x9f, 0x1d, 0x07, 0xd5, 0x9d, 0x55, 0x65,
0x59, 0x27, 0xf7, 0x2b, 0xc6, 0xbf, 0x7c, 0x12
```
## Transferable Output
Transferable outputs wrap an output with an asset ID.
### What Transferable Output Contains
A transferable output contains an `AssetID` and an `Output`.
- **`AssetID`** is a 32-byte array that defines which asset this output
references. The only valid `AssetID` is the AVAX `AssetID`.
- **`Output`** is an output, as defined below. For example, this can be a SECP256K1 transfer output.
### Gantt Transferable Output Specification
```text
+----------+----------+-------------------------+
| asset_id : [32]byte | 32 bytes |
+----------+----------+-------------------------+
| output : Output | size(output) bytes |
+----------+----------+-------------------------+
| 32 + size(output) bytes |
+-------------------------+
```
### Proto Transferable Output Specification
```text
message TransferableOutput {
bytes asset_id = 1; // 32 bytes
Output output = 2; // size(output)
}
```
### Transferable Output Example
Let's make a transferable output:
- `AssetID: 0x6870b7d66ac32540311379e5b5dbad28ec7eb8ddbfc8f4d67299ebb48475907a`
- `Output: "Example SECP256K1 Transfer Output from below"`
```text
[
AssetID <- 0x6870b7d66ac32540311379e5b5dbad28ec7eb8ddbfc8f4d67299ebb48475907a,
Output <- 0x0000000700000000ee5be5c000000000000000000000000100000001da2bee01be82ecc00c34f361eda8eb30fb5a715c,
]
=
[
// assetID:
0x68, 0x70, 0xb7, 0xd6, 0x6a, 0xc3, 0x25, 0x40,
0x31, 0x13, 0x79, 0xe5, 0xb5, 0xdb, 0xad, 0x28,
0xec, 0x7e, 0xb8, 0xdd, 0xbf, 0xc8, 0xf4, 0xd6,
0x72, 0x99, 0xeb, 0xb4, 0x84, 0x75, 0x90, 0x7a,
// output:
0x00, 0x00, 0x00, 0x07, 0x00, 0x00, 0x00, 0x00,
0xee, 0x5b, 0xe5, 0xc0, 0x00, 0x00, 0x00, 0x00,
0x00, 0x00, 0x00, 0x00, 0x00, 0x00, 0x00, 0x01,
0x00, 0x00, 0x00, 0x01, 0xda, 0x2b, 0xee, 0x01,
0xbe, 0x82, 0xec, 0xc0, 0x0c, 0x34, 0xf3, 0x61,
0xed, 0xa8, 0xeb, 0x30, 0xfb, 0x5a, 0x71, 0x5c,
]
```
## Transferable Input
Transferable inputs describe a specific UTXO with a provided transfer input.
### What Transferable Input Contains
A transferable input contains a `TxID`, `UTXOIndex` `AssetID` and an `Input`.
- **`TxID`** is a 32-byte array that defines which transaction this input is consuming an output from.
- **`UTXOIndex`** is an int that defines which utxo this input is consuming the specified transaction.
- **`AssetID`** is a 32-byte array that defines which asset this input
references. The only valid `AssetID` is the AVAX `AssetID`.
- **`Input`** is a transferable input object.
### Gantt Transferable Input Specification
```text
+------------+----------+------------------------+
| tx_id : [32]byte | 32 bytes |
+------------+----------+------------------------+
| utxo_index : int | 04 bytes |
+------------+----------+------------------------+
| asset_id : [32]byte | 32 bytes |
+------------+----------+------------------------+
| input : Input | size(input) bytes |
+------------+----------+------------------------+
| 68 + size(input) bytes |
+------------------------+
```
### Proto Transferable Input Specification
```text
message TransferableInput {
bytes tx_id = 1; // 32 bytes
uint32 utxo_index = 2; // 04 bytes
bytes asset_id = 3; // 32 bytes
Input input = 4; // size(input)
}
```
### Transferable Input Example
Let's make a transferable input:
- **`TxID`**: `0x0dfafbdf5c81f635c9257824ff21c8e3e6f7b632ac306e11446ee540d34711a15`
- **`UTXOIndex`**: `0`
- **`AssetID`**: `0x6870b7d66ac32540311379e5b5dbad28ec7eb8ddbfc8f4d67299ebb48475907a`
- **`Input`**: `"Example SECP256K1 Transfer Input from below"`
```text
[
TxID <- 0x0dfafbdf5c81f635c9257824ff21c8e3e6f7b632ac306e11446ee540d34711a15
UTXOIndex <- 0x00000001
AssetID <- 0x6870b7d66ac32540311379e5b5dbad28ec7eb8ddbfc8f4d67299ebb48475907a
Input <- 0x0000000500000000ee6b28000000000100000000
]
=
[
// txID:
0xdf, 0xaf, 0xbd, 0xf5, 0xc8, 0x1f, 0x63, 0x5c,
0x92, 0x57, 0x82, 0x4f, 0xf2, 0x1c, 0x8e, 0x3e,
0x6f, 0x7b, 0x63, 0x2a, 0xc3, 0x06, 0xe1, 0x14,
0x46, 0xee, 0x54, 0x0d, 0x34, 0x71, 0x1a, 0x15,
// utxoIndex:
0x00, 0x00, 0x00, 0x01,
// assetID:
0x68, 0x70, 0xb7, 0xd6, 0x6a, 0xc3, 0x25, 0x40,
0x31, 0x13, 0x79, 0xe5, 0xb5, 0xdb, 0xad, 0x28,
0xec, 0x7e, 0xb8, 0xdd, 0xbf, 0xc8, 0xf4, 0xd6,
0x72, 0x99, 0xeb, 0xb4, 0x84, 0x75, 0x90, 0x7a,
// input:
0x00, 0x00, 0x00, 0x05, 0x00, 0x00, 0x00, 0x00,
0xee, 0x6b, 0x28, 0x00, 0x00, 0x00, 0x00, 0x01,
0x00, 0x00, 0x00, 0x00
]
```
## Outputs
Outputs have two possible type: `SECP256K1TransferOutput`, `SECP256K1OutputOwners`.
## SECP256K1 Transfer Output
A [secp256k1](/docs/api-reference/standards/cryptographic-primitives#secp256k1-addresses) transfer output
allows for sending a quantity of an asset to a collection of addresses after a
specified Unix time. The only valid asset is AVAX.
### What SECP256K1 Transfer Output Contains
A secp256k1 transfer output contains a `TypeID`, `Amount`, `Locktime`, `Threshold`, and `Addresses`.
- **`TypeID`** is the ID for this output type. It is `0x00000007`.
- **`Amount`** is a long that specifies the quantity of the asset that this output owns. Must be positive.
- **`Locktime`** is a long that contains the Unix timestamp that this output can
be spent after. The Unix timestamp is specific to the second.
- **`Threshold`** is an int that names the number of unique signatures required
to spend the output. Must be less than or equal to the length of
**`Addresses`**. If **`Addresses`** is empty, must be 0.
- **`Addresses`** is a list of unique addresses that correspond to the private
keys that can be used to spend this output. Addresses must be sorted
lexicographically.
### Gantt SECP256K1 Transfer Output Specification
```text
+-----------+------------+--------------------------------+
| type_id : int | 4 bytes |
+-----------+------------+--------------------------------+
| amount : long | 8 bytes |
+-----------+------------+--------------------------------+
| locktime : long | 8 bytes |
+-----------+------------+--------------------------------+
| threshold : int | 4 bytes |
+-----------+------------+--------------------------------+
| addresses : [][20]byte | 4 + 20 * len(addresses) bytes |
+-----------+------------+--------------------------------+
| 28 + 20 * len(addresses) bytes |
+--------------------------------+
```
### Proto SECP256K1 Transfer Output Specification
```text
message SECP256K1TransferOutput {
uint32 type_id = 1; // 04 bytes
uint64 amount = 2; // 08 bytes
uint64 locktime = 3; // 08 bytes
uint32 threshold = 4; // 04 bytes
repeated bytes addresses = 5; // 04 bytes + 20 bytes * len(addresses)
}
```
### SECP256K1 Transfer Output Example
Let's make a secp256k1 transfer output with:
- **`TypeID`**: 7
- **`Amount`**: 3999000000
- **`Locktime`**: 0
- **`Threshold`**: 1
- **`Addresses`**:
- 0xda2bee01be82ecc00c34f361eda8eb30fb5a715c
```text
[
TypeID <- 0x00000007
Amount <- 0x00000000ee5be5c0
Locktime <- 0x0000000000000000
Threshold <- 0x00000001
Addresses <- [
0xda2bee01be82ecc00c34f361eda8eb30fb5a715c,
]
]
=
[
// type_id:
0x00, 0x00, 0x00, 0x07,
// amount:
0x00, 0x00, 0x00, 0x00, 0xee, 0x5b, 0xe5, 0xc0,
// locktime:
0x00, 0x00, 0x00, 0x00, 0x00, 0x00, 0x00, 0x00,
// threshold:
0x00, 0x00, 0x00, 0x01,
// number of addresses:
0x00, 0x00, 0x00, 0x01,
// addrs[0]:
0xda, 0x2b, 0xee, 0x01, 0xbe, 0x82, 0xec, 0xc0,
0x0c, 0x34, 0xf3, 0x61, 0xed, 0xa8, 0xeb, 0x30,
0xfb, 0x5a, 0x71, 0x5c,
]
```
## SECP256K1 Output Owners Output
A [secp256k1](/docs/api-reference/standards/cryptographic-primitives#secp256k1-addresses) output owners
output will receive the staking rewards when the lock up period ends.
### What SECP256K1 Output Owners Output Contains
A secp256k1 output owners output contains a `TypeID`, `Locktime`, `Threshold`, and `Addresses`.
- **`TypeID`** is the ID for this output type. It is `0x0000000b`.
- **`Locktime`** is a long that contains the Unix timestamp that this output can
be spent after. The Unix timestamp is specific to the second.
- **`Threshold`** is an int that names the number of unique signatures required
to spend the output. Must be less than or equal to the length of
**`Addresses`**. If **`Addresses`** is empty, must be 0.
- **`Addresses`** is a list of unique addresses that correspond to the private
keys that can be used to spend this output. Addresses must be sorted
lexicographically.
### Gantt SECP256K1 Output Owners Output Specification
```text
+-----------+------------+--------------------------------+
| type_id : int | 4 bytes |
+-----------+------------+--------------------------------+
| locktime : long | 8 bytes |
+-----------+------------+--------------------------------+
| threshold : int | 4 bytes |
+-----------+------------+--------------------------------+
| addresses : [][20]byte | 4 + 20 * len(addresses) bytes |
+-----------+------------+--------------------------------+
| 20 + 20 * len(addresses) bytes |
+--------------------------------+
```
### Proto SECP256K1 Output Owners Output Specification
```text
message SECP256K1OutputOwnersOutput {
uint32 type_id = 1; // 04 bytes
uint64 locktime = 2; // 08 bytes
uint32 threshold = 3; // 04 bytes
repeated bytes addresses = 4; // 04 bytes + 20 bytes * len(addresses)
}
```
### SECP256K1 Output Owners Output Example
Let's make a secp256k1 output owners output with:
- **`TypeID`**: 11
- **`Locktime`**: 0
- **`Threshold`**: 1
- **`Addresses`**:
- 0xda2bee01be82ecc00c34f361eda8eb30fb5a715c
```text
[
TypeID <- 0x0000000b
Locktime <- 0x0000000000000000
Threshold <- 0x00000001
Addresses <- [
0xda2bee01be82ecc00c34f361eda8eb30fb5a715c,
]
]
=
[
// type_id:
0x00, 0x00, 0x00, 0x0b,
// locktime:
0x00, 0x00, 0x00, 0x00, 0x00, 0x00, 0x00, 0x00,
// threshold:
0x00, 0x00, 0x00, 0x01,
// number of addresses:
0x00, 0x00, 0x00, 0x01,
// addrs[0]:
0xda, 0x2b, 0xee, 0x01, 0xbe, 0x82, 0xec, 0xc0,
0x0c, 0x34, 0xf3, 0x61, 0xed, 0xa8, 0xeb, 0x30,
0xfb, 0x5a, 0x71, 0x5c,
]
```
## Inputs
Inputs have one possible type: `SECP256K1TransferInput`.
## SECP256K1 Transfer Input
A [secp256k1](/docs/api-reference/standards/cryptographic-primitives#secp256k1-addresses) transfer input
allows for spending an unspent secp256k1 transfer output.
### What SECP256K1 Transfer Input Contains
A secp256k1 transfer input contains an `Amount` and `AddressIndices`.
- **`TypeID`** is the ID for this output type. It is `0x00000005`.
- **`Amount`** is a long that specifies the quantity that this input should be
consuming from the UTXO. Must be positive. Must be equal to the amount
specified in the UTXO.
- **`AddressIndices`** is a list of unique ints that define the private keys are
being used to spend the UTXO. Each UTXO has an array of addresses that can
spend the UTXO. Each int represents the index in this address array that will
sign this transaction. The array must be sorted low to high.
### Gantt SECP256K1 Transfer Input Specification
```text
+-------------------------+-------------------------------------+
| type_id : int | 4 bytes |
+-----------------+-------+-------------------------------------+
| amount : long | 8 bytes |
+-----------------+-------+-------------------------------------+
| address_indices : []int | 4 + 4 * len(address_indices) bytes |
+-----------------+-------+-------------------------------------+
| 16 + 4 * len(address_indices) bytes |
+-------------------------------------+
```
**Proto SECP256K1 Transfer Input Specification**
```text
message SECP256K1TransferInput {
uint32 type_id = 1; // 04 bytes
uint64 amount = 2; // 08 bytes
repeated uint32 address_indices = 3; // 04 bytes + 4 bytes * len(address_indices)
}
```
### SECP256K1 Transfer Input Example
Let's make a payment input with:
- **`TypeID`**: 5
- **`Amount`**: 4000000000
- **`AddressIndices`**: \[0\]
```text
[
TypeID <- 0x00000005
Amount <- 0x00000000ee6b2800,
AddressIndices <- [0x00000000]
]
=
[
// type_id:
0x00, 0x00, 0x00, 0x05,
// amount:
0x00, 0x00, 0x00, 0x00, 0xee, 0x6b, 0x28, 0x00,
// length:
0x00, 0x00, 0x00, 0x01,
// address_indices[0]
0x00, 0x00, 0x00, 0x00
]
```
## Unsigned Transactions
Unsigned transactions contain the full content of a transaction with only the
signatures missing. Unsigned transactions have six possible types:
`AddValidatorTx`, `AddSubnetValidatorTx`, `AddDelegatorTx`, `CreateSubnetTx`,
`ImportTx`, and `ExportTx`. They embed `BaseTx`, which contains common fields
and operations.
## Unsigned BaseTx
### What Base TX Contains
A base TX contains a `TypeID`, `NetworkID`, `BlockchainID`, `Outputs`, `Inputs`, and `Memo`.
- **`TypeID`** is the ID for this type. It is `0x00000000`.
- **`NetworkID`** is an int that defines which network this transaction is meant
to be issued to. This value is meant to support transaction routing and is not
designed for replay attack prevention.
- **`BlockchainID`** is a 32-byte array that defines which blockchain this
transaction was issued to. This is used for replay attack prevention for
transactions that could potentially be valid across network or blockchain.
- **`Outputs`** is an array of transferable output objects. Outputs must be
sorted lexicographically by their serialized representation. The total
quantity of the assets created in these outputs must be less than or equal to
the total quantity of each asset consumed in the inputs minus the transaction
fee.
- **`Inputs`** is an array of transferable input objects. Inputs must be sorted
and unique. Inputs are sorted first lexicographically by their **`TxID`** and
then by the **`UTXOIndex`** from low to high. If there are inputs that have
the same **`TxID`** and **`UTXOIndex`**, then the transaction is invalid as
this would result in a double spend.
- **`Memo`** Memo field contains arbitrary bytes, up to 256 bytes.
### Gantt Base TX Specification
```text
+---------------+----------------------+-----------------------------------------+
| type_id : int | 4 bytes |
+---------------+----------------------+-----------------------------------------+
| network_id : int | 4 bytes |
+---------------+----------------------+-----------------------------------------+
| blockchain_id : [32]byte | 32 bytes |
+---------------+----------------------+-----------------------------------------+
| outputs : []TransferableOutput | 4 + size(outputs) bytes |
+---------------+----------------------+-----------------------------------------+
| inputs : []TransferableInput | 4 + size(inputs) bytes |
+---------------+----------------------+-----------------------------------------+
| memo : [256]byte | 4 + size(memo) bytes |
+---------------+----------------------+-----------------------------------------+
| 52 + size(outputs) + size(inputs) + size(memo) bytes |
+------------------------------------------------------+
```
### Proto Base TX Specification
```text
message BaseTx {
uint32 type_id = 1; // 04 bytes
uint32 network_id = 2; // 04 bytes
bytes blockchain_id = 3; // 32 bytes
repeated Output outputs = 4; // 04 bytes + size(outs)
repeated Input inputs = 5; // 04 bytes + size(ins)
bytes memo = 6; // 04 bytes + size(memo)
}
```
### Base TX Example
Let's make a base TX that uses the inputs and outputs from the previous examples:
- **`TypeID`**: `0`
- **`NetworkID`**: `12345`
- **`BlockchainID`**: `0x000000000000000000000000000000000000000000000000000000000000000`
- **`Outputs`**:
- `"Example Transferable Output as defined above"`
- **`Inputs`**:
- `"Example Transferable Input as defined above"`
```text
[
TypeID <- 0x00000000
NetworkID <- 0x00003039
BlockchainID <- 0x000000000000000000000000000000000000000000000000000000000000000
Outputs <- [
0x6870b7d66ac32540311379e5b5dbad28ec7eb8ddbfc8f4d67299ebb48475907a0000000700000000ee5be5c000000000000000000000000100000001da2bee01be82ecc00c34f361eda8eb30fb5a715c
]
Inputs <- [
0xdfafbdf5c81f635c9257824ff21c8e3e6f7b632ac306e11446ee540d34711a15000000016870b7d66ac32540311379e5b5dbad28ec7eb8ddbfc8f4d67299ebb48475907a0000000500000000ee6b28000000000100000000
]
]
=
[
// type_id:
0x00, 0x00, 0x00, 0x00,
// networkID:
0x00, 0x00, 0x30, 0x39,
// blockchainID:
0x00, 0x00, 0x00, 0x00, 0x00, 0x00, 0x00, 0x00,
0x00, 0x00, 0x00, 0x00, 0x00, 0x00, 0x00, 0x00,
0x00, 0x00, 0x00, 0x00, 0x00, 0x00, 0x00, 0x00,
0x00, 0x00, 0x00, 0x00, 0x00, 0x00, 0x00, 0x00,
// number of outputs:
0x00, 0x00, 0x00, 0x01,
// transferable output:
0x68, 0x70, 0xb7, 0xd6, 0x6a, 0xc3, 0x25, 0x40,
0x31, 0x13, 0x79, 0xe5, 0xb5, 0xdb, 0xad, 0x28,
0xec, 0x7e, 0xb8, 0xdd, 0xbf, 0xc8, 0xf4, 0xd6,
0x72, 0x99, 0xeb, 0xb4, 0x84, 0x75, 0x90, 0x7a,
0x00, 0x00, 0x00, 0x07, 0x00, 0x00, 0x00, 0x00,
0xee, 0x5b, 0xe5, 0xc0, 0x00, 0x00, 0x00, 0x00,
0x00, 0x00, 0x00, 0x00, 0x00, 0x00, 0x00, 0x01,
0x00, 0x00, 0x00, 0x01, 0xda, 0x2b, 0xee, 0x01,
0xbe, 0x82, 0xec, 0xc0, 0x0c, 0x34, 0xf3, 0x61,
0xed, 0xa8, 0xeb, 0x30, 0xfb, 0x5a, 0x71, 0x5c,
// number of inputs:
0x00, 0x00, 0x00, 0x01,
// transferable input:
0xdf, 0xaf, 0xbd, 0xf5, 0xc8, 0x1f, 0x63, 0x5c,
0x92, 0x57, 0x82, 0x4f, 0xf2, 0x1c, 0x8e, 0x3e,
0x6f, 0x7b, 0x63, 0x2a, 0xc3, 0x06, 0xe1, 0x14,
0x46, 0xee, 0x54, 0x0d, 0x34, 0x71, 0x1a, 0x15,
0x00, 0x00, 0x00, 0x01,
0x68, 0x70, 0xb7, 0xd6, 0x6a, 0xc3, 0x25, 0x40,
0x31, 0x13, 0x79, 0xe5, 0xb5, 0xdb, 0xad, 0x28,
0xec, 0x7e, 0xb8, 0xdd, 0xbf, 0xc8, 0xf4, 0xd6,
0x72, 0x99, 0xeb, 0xb4, 0x84, 0x75, 0x90, 0x7a,
0x00, 0x00, 0x00, 0x05, 0x00, 0x00, 0x00, 0x00,
0xee, 0x6b, 0x28, 0x00, 0x00, 0x00, 0x00, 0x01,
0x00, 0x00, 0x00, 0x00,
// Memo length:
0x00, 0x00, 0x00, 0x00,
]
```
## Unsigned Add Validator TX
### What Unsigned Add Validator TX Contains
An unsigned add validator TX contains a `BaseTx`, `Validator`, `Stake`,
`RewardsOwner`, and `Shares`. The `TypeID` for this type is `0x0000000c`.
- **`BaseTx`**
- **`Validator`** Validator has a `NodeID`, `StartTime`, `EndTime`, and `Weight`
- **`NodeID`** is 20 bytes which is the node ID of the validator.
- **`StartTime`** is a long which is the Unix time when the validator starts validating.
- **`EndTime`** is a long which is the Unix time when the validator stops validating.
- **`Weight`** is a long which is the amount the validator stakes
- **`Stake`** Stake has `LockedOuts`
- **`LockedOuts`** An array of Transferable Outputs that are locked for the
duration of the staking period. At the end of the staking period, these
outputs are refunded to their respective addresses.
- **`RewardsOwner`** A `SECP256K1OutputOwners`
- **`Shares`** 10,000 times percentage of reward taken from delegators
### Gantt Unsigned Add Validator TX Specification
```text
+---------------+-----------------------+-----------------------------------------+
| base_tx : BaseTx | size(base_tx) bytes |
+---------------+-----------------------+-----------------------------------------+
| validator : Validator | 44 bytes |
+---------------+-----------------------+-----------------------------------------+
| stake : Stake | size(LockedOuts) bytes |
+---------------+-----------------------+-----------------------------------------+
| rewards_owner : SECP256K1OutputOwners | size(rewards_owner) bytes |
+---------------+-----------------------+-----------------------------------------+
| shares : Shares | 4 bytes |
+---------------+-----------------------+-----------------------------------------+
| 48 + size(stake) + size(rewards_owner) + size(base_tx) bytes |
+--------------------------------------------------------------+
```
### Proto Unsigned Add Validator TX Specification
```text
message AddValidatorTx {
BaseTx base_tx = 1; // size(base_tx)
Validator validator = 2; // 44 bytes
Stake stake = 3; // size(LockedOuts)
SECP256K1OutputOwners rewards_owner = 4; // size(rewards_owner)
uint32 shares = 5; // 04 bytes
}
```
### Unsigned Add Validator TX Example
Let's make an unsigned add validator TX that uses the inputs and outputs from the previous examples:
- **`BaseTx`**: `"Example BaseTx as defined above with ID set to 0c"`
- **`Validator`** Validator has a `NodeID`, `StartTime`, `EndTime`, and `Weight`
- **`NodeID`** is 20 bytes which is the node ID of the validator.
- **`StartTime`** is a long which is the Unix time when the validator starts validating.
- **`EndTime`** is a long which is the Unix time when the validator stops validating.
- **`Weight`** is a long which is the amount the validator stakes
- **`Stake`**: `0x0000000139c33a499ce4c33a3b09cdd2cfa01ae70dbf2d18b2d7d168524440e55d55008800000007000001d1a94a2000000000000000000000000001000000013cb7d3842e8cee6a0ebd09f1fe884f6861e1b29c`
- **`RewardsOwner`**: `0x0000000b00000000000000000000000100000001da2bee01be82ecc00c34f361eda8eb30fb5a715c`
- **`Shares`**: `0x00000064`
```text
[
BaseTx <- 0x0000000c000030390000000000000000000000000000000000000000000000000000000000000006870b7d66ac32540311379e5b5dbad28ec7eb8ddbfc8f4d67299ebb48475907a0000000700000000ee5be5c000000000000000000000000100000001da2bee01be82ecc00c34f361eda8eb30fb5a715cdfafbdf5c81f635c9257824ff21c8e3e6f7b632ac306e11446ee540d34711a15000000016870b7d66ac32540311379e5b5dbad28ec7eb8ddbfc8f4d67299ebb48475907a0000000500000000ee6b28000000000100000000
NodeID <- 0xe9094f73698002fd52c90819b457b9fbc866ab80
StarTime <- 0x000000005f21f31d
EndTime <- 0x000000005f497dc6
Weight <- 0x000000000000d431
Stake <- 0x0000000139c33a499ce4c33a3b09cdd2cfa01ae70dbf2d18b2d7d168524440e55d55008800000007000001d1a94a2000000000000000000000000001000000013cb7d3842e8cee6a0ebd09f1fe884f6861e1b29c
RewardsOwner <- 0x0000000b00000000000000000000000100000001da2bee01be82ecc00c34f361eda8eb30fb5a715c
Shares <- 0x00000064
]
=
[
// base tx:
0x00, 0x00, 0x00, 0x0c, 0x00, 0x00, 0x30, 0x39,
0x00, 0x00, 0x00, 0x00, 0x00, 0x00, 0x00, 0x00,
0x00, 0x00, 0x00, 0x00, 0x00, 0x00, 0x00, 0x00,
0x00, 0x00, 0x00, 0x00, 0x00, 0x00, 0x00, 0x00,
0x00, 0x00, 0x00, 0x00, 0x00, 0x00, 0x00, 0x00,
0x00, 0x00, 0x00, 0x01, 0x68, 0x70, 0xb7, 0xd6,
0x6a, 0xc3, 0x25, 0x40, 0x31, 0x13, 0x79, 0xe5,
0xb5, 0xdb, 0xad, 0x28, 0xec, 0x7e, 0xb8, 0xdd,
0xbf, 0xc8, 0xf4, 0xd6,
0x72, 0x99, 0xeb, 0xb4, 0x84, 0x75, 0x90, 0x7a,
0x00, 0x00, 0x00, 0x07, 0x00, 0x00, 0x00, 0x00,
0xee, 0x5b, 0xe5, 0xc0, 0x00, 0x00, 0x00, 0x00,
0x00, 0x00, 0x00, 0x00, 0x00, 0x00, 0x00, 0x01,
0x00, 0x00, 0x00, 0x01, 0xda, 0x2b, 0xee, 0x01,
0xbe, 0x82, 0xec, 0xc0, 0x0c, 0x34, 0xf3, 0x61,
0xed, 0xa8, 0xeb, 0x30, 0xfb, 0x5a, 0x71, 0x5c,
0x00, 0x00, 0x00, 0x01,
0xdf, 0xaf, 0xbd, 0xf5, 0xc8, 0x1f, 0x63, 0x5c,
0x92, 0x57, 0x82, 0x4f, 0xf2, 0x1c, 0x8e, 0x3e,
0x6f, 0x7b, 0x63, 0x2a, 0xc3, 0x06, 0xe1, 0x14,
0x46, 0xee, 0x54, 0x0d, 0x34, 0x71, 0x1a, 0x15,
0x00, 0x00, 0x00, 0x01,
0x68, 0x70, 0xb7, 0xd6, 0x6a, 0xc3, 0x25, 0x40,
0x31, 0x13, 0x79, 0xe5, 0xb5, 0xdb, 0xad, 0x28,
0xec, 0x7e, 0xb8, 0xdd, 0xbf, 0xc8, 0xf4, 0xd6,
0x72, 0x99, 0xeb, 0xb4, 0x84, 0x75, 0x90, 0x7a,
0x00, 0x00, 0x00, 0x05, 0x00, 0x00, 0x00, 0x00,
0xee, 0x6b, 0x28, 0x00, 0x00, 0x00, 0x00, 0x01,
0x00, 0x00, 0x00, 0x00,
0x00, 0x00, 0x00, 0x00,
// Node ID
0xe9, 0x09, 0x4f, 0x73, 0x69, 0x80, 0x02, 0xfd,
0x52, 0xc9, 0x08, 0x19, 0xb4, 0x57, 0xb9, 0xfb,
0xc8, 0x66, 0xab, 0x80,
// StartTime
0x00, 0x00, 0x00, 0x00, 0x5f, 0x21, 0xf3, 0x1d,
// EndTime
0x00, 0x00, 0x00, 0x00, 0x5f, 0x49, 0x7d, 0xc6,
// Weight
0x00, 0x00, 0x00, 0x00, 0x00, 0x00, 0xd4, 0x31,
// Stake
0x00, 0x00, 0x00, 0x01, 0x39, 0xc3, 0x3a, 0x49,
0x9c, 0xe4, 0xc3, 0x3a, 0x3b, 0x09, 0xcd, 0xd2,
0xcf, 0xa0, 0x1a, 0xe7, 0x0d, 0xbf, 0x2d, 0x18,
0xb2, 0xd7, 0xd1, 0x68, 0x52, 0x44, 0x40, 0xe5,
0x5d, 0x55, 0x00, 0x88, 0x00, 0x00, 0x00, 0x07,
0x00, 0x00, 0x01, 0xd1, 0xa9, 0x4a, 0x20, 0x00,
0x00, 0x00, 0x00, 0x00, 0x00, 0x00, 0x00, 0x00,
0x00, 0x00, 0x00, 0x01, 0x00, 0x00, 0x00, 0x01,
0x3c, 0xb7, 0xd3, 0x84, 0x2e, 0x8c, 0xee, 0x6a,
0x0e, 0xbd, 0x09, 0xf1, 0xfe, 0x88, 0x4f, 0x68,
0x61, 0xe1, 0xb2, 0x9c,
// RewardsOwner
0x00, 0x00, 0x00, 0x0b, 0x00, 0x00, 0x00, 0x00,
0x00, 0x00, 0x00, 0x00, 0x00, 0x00, 0x00, 0x01,
0x00, 0x00, 0x00, 0x01, 0xda, 0x2b, 0xee, 0x01,
0xbe, 0x82, 0xec, 0xc0, 0x0c, 0x34, 0xf3, 0x61,
0xed, 0xa8, 0xeb, 0x30, 0xfb, 0x5a, 0x71, 0x5c,
// Shares
0x00, 0x00, 0x00, 0x64,
]
```
## Unsigned Remove Avalanche L1 Validator TX
### What Unsigned Remove Avalanche L1 Validator TX Contains
An unsigned remove Avalanche L1 validator TX contains a `BaseTx`, `NodeID`,
`SubnetID`, and `SubnetAuth`. The `TypeID` for this type is 23 or `0x00000017`.
- **`BaseTx`**
- **`NodeID`** is the 20 byte node ID of the validator.
- **`SubnetID`** is the 32 byte Avalanche L1 ID (SubnetID) that the validator is being removed from.
- **`SubnetAuth`** contains `SigIndices` and has a type id of `0x0000000a`.
`SigIndices` is a list of unique ints that define the addresses signing the
control signature which proves that the issuer has the right to remove the
node from the Avalanche L1. The array must be sorted low to high.
### Gantt Unsigned Remove Avalanche L1 Validator TX Specification
```text
+---------------+----------------------+------------------------------------------------+
| base_tx : BaseTx | size(base_tx) bytes |
+---------------+----------------------+------------------------------------------------+
| node_id : [20]byte | 20 bytes |
+---------------+----------------------+------------------------------------------------+
| subnet_id : [32]byte | 32 bytes |
+---------------+----------------------+------------------------------------------------+
| sig_indices : SubnetAuth | 4 bytes + len(sig_indices) bytes |
+---------------+----------------------+------------------------------------------------+
| 56 + len(sig_indices) + size(base_tx) bytes |
+---------------------------------------------------------------------------------------+
```
### Proto Unsigned Remove Avalanche L1 Validator TX Specification
```text
message RemoveSubnetValidatorTx {
BaseTx base_tx = 1; // size(base_tx)
string node_id = 2; // 20 bytes
SubnetID subnet_id = 3; // 32 bytes
SubnetAuth subnet_auth = 4; // 04 bytes + len(sig_indices)
}
```
### Unsigned Remove Avalanche L1 Validator TX Example
Let's make an unsigned remove Avalanche L1 validator TX that uses the inputs and
outputs from the previous examples:
- **`BaseTx`**: `"Example BaseTx as defined above with ID set to 17"`
- **`NodeID`**: `0xe902a9a86640bfdb1cd0e36c0cc982b83e5765fa`
- **`SubnetID`**: `0x4a177205df5c29929d06db9d941f83d5ea985de302015e99252d16469a6610db`
- **`SubnetAuth`**: `0x0000000a0000000100000000`
```text
[
BaseTx <- 0x0000000000013d0ad12b8ee8928edf248ca91ca55600fb383f07c32bff1d6dec472b25cf59a700000000000000000000000
NodeID <- 0xe902a9a86640bfdb1cd0e36c0cc982b83e5765fa
SubnetID <- 0x4a177205df5c29929d06db9d941f83d5ea985de302015e99252d16469a6610db
SubnetAuth <- 0x0000000a0000000100000000
]
=
[
// BaseTx
0x00, 0x00, 0x00, 0x17, 0x00, 0x00, 0x30, 0x39,
0x3d, 0x0a, 0xd1, 0x2b, 0x8e, 0xe8, 0x92, 0x8e,
0xdf, 0x24, 0x8c, 0xa9, 0x1c, 0xa5, 0x56, 0x00,
0xfb, 0x38, 0x3f, 0x07, 0xc3, 0x2b, 0xff, 0x1d,
0x6d, 0xec, 0x47, 0x2b, 0x25, 0xcf, 0x59, 0xa7,
0x00, 0x00, 0x00, 0x00, 0x00, 0x00, 0x00, 0x00,
0x00, 0x00, 0x00, 0x00,
// NodeID
0xe9, 0x02, 0xa9, 0xa8, 0x66, 0x40, 0xbf, 0xdb,
0x1c, 0xd0, 0xe3, 0x6c, 0x0c, 0xc9, 0x82, 0xb8,
0x3e, 0x57, 0x65, 0xfa,
// SubnetID
0x4a, 0x17, 0x72, 0x05, 0xdf, 0x5c, 0x29, 0x92,
0x9d, 0x06, 0xdb, 0x9d, 0x94, 0x1f, 0x83, 0xd5,
0xea, 0x98, 0x5d, 0xe3, 0x02, 0x01, 0x5e, 0x99,
0x25, 0x2d, 0x16, 0x46, 0x9a, 0x66, 0x10, 0xdb,
// SubnetAuth
// SubnetAuth TypeID
0x00, 0x00, 0x00, 0x0a,
// SigIndices length
0x00, 0x00, 0x00, 0x01,
// SigIndices
0x00, 0x00, 0x00, 0x00,
]
```
## Unsigned Add Permissionless Validator TX
### What Unsigned Add Permissionless Validator TX Contains
An unsigned add permissionless validator TX contains a `BaseTx`, `Validator`,
`SubnetID`, `Signer`, `StakeOuts`, `ValidatorRewardsOwner`,
`DelegatorRewardsOwner`, and `DelegationShares`. The `TypeID` for this type is
25 or `0x00000019`.
- **`BaseTx`**
- **`Validator`** Validator has a `NodeID`, `StartTime`, `EndTime`, and `Weight`
- **`NodeID`** is the 20 byte node ID of the validator.
- **`StartTime`** is a long which is the Unix time when the validator starts validating.
- **`EndTime`** is a long which is the Unix time when the validator stops validating.
- **`Weight`** is a long which is the amount the validator stakes
- **`SubnetID`** is the 32 byte Avalanche L1 ID (SubnetID) of the Avalanche L1 this validator will validate.
- **`Signer`** If the [SubnetID] is the primary network, [Signer] is the type ID
28 (`0x1C`) followed by a [Proof of Possession](#proof-of-possession). If the
[SubnetID] is not the primary network, this value is the empty signer, whose
byte representation is only the type ID 27 (`0x1B`).
- **`StakeOuts`** An array of Transferable Outputs. Where to send staked tokens when done validating.
- **`ValidatorRewardsOwner`** Where to send validation rewards when done validating.
- **`DelegatorRewardsOwner`** Where to send delegation rewards when done validating.
- **`DelegationShares`** a short which is the fee this validator charges
delegators as a percentage, times 10,000 For example, if this validator has
DelegationShares=300,000 then they take 30% of rewards from delegators.
### Gantt Unsigned Add Permissionless Validator TX Specification
```text
+---------------+----------------------+------------------------------------------------+
| base_tx : BaseTx | size(base_tx) bytes |
+---------------+----------------------+------------------------------------------------+
| validator : Validator | 44 bytes |
+---------------+----------------------+------------------------------------------------+
| subnet_id : [32]byte | 32 bytes |
+---------------+----------------------+------------------------------------------------+
| signer : Signer | 144 bytes |
+---------------+----------------------+------------------------------------------------+
| stake_outs : []TransferOut | 4 + size(stake_outs) bytes |
+---------------+----------------------+------------------------------------------------+
| validator_rewards_owner : SECP256K1OutputOwners | size(validator_rewards_owner) bytes |
+---------------+----------------------+------------------------------------------------+
| delegator_rewards_owner : SECP256K1OutputOwners | size(delegator_rewards_owner) bytes |
+---------------+----------------------+------------------------------------------------+
| delegation_shares : uint32 | 4 bytes |
+---------------+----------------------+------------------------------------------------+
| 232 + size(base_tx) + size(stake_outs) + |
| size(validator_rewards_owner) + size(delegator_rewards_owner) bytes |
+---------------------------------------------------------------------------------------+
```
### Proto Unsigned Add Permissionless Validator TX Specification
```text
message AddPermissionlessValidatorTx {
BaseTx base_tx = 1; // size(base_tx)
Validator validator = 2; // 44 bytes
SubnetID subnet_id = 3; // 32 bytes
Signer signer = 4; // 148 bytes
repeated TransferOut stake_outs = 5; // 4 bytes + size(stake_outs)
SECP256K1OutputOwners validator_rewards_owner = 6; // size(validator_rewards_owner) bytes
SECP256K1OutputOwners delegator_rewards_owner = 7; // size(delegator_rewards_owner) bytes
uint32 delegation_shares = 8; // 4 bytes
}
```
### Unsigned Add Permissionless Validator TX Example
Let's make an unsigned add permissionless validator TX that uses the inputs and
outputs from the previous examples:
- **`BaseTx`**: `"Example BaseTx as defined above with ID set to 1a"`
- **`Validator`**: `0x5fa29ed4356903dac2364713c60f57d8472c7dda000000006397616e0000000063beee6e000001d1a94a2000`
- **`SubnetID`**: `0xf3086d7bfc35be1c68db664ba9ce61a2060126b0d6b4bfb09fd7a5fb7678cada`
- **`Signer`**: `0x0000001ca5af179e4188583893c2b99e1a8be27d90a9213cfbff1d75b74fe2bc9f3b072c2ded0863a9d9acd9033f223295810e429238e28d3c9b7f7212b63d746b2ae73a54fe08a3de61b132f2f89e9eeff97d4d7ca3a3c88986aa855cd36296fcfe8f02162d0258be494d267d4c5798bc081ab602ded90b0fc16d8a035e68ff5294794cb63ff1ee068fbfc2b4c8cd2d08ebf297`
- **`StakeOuts`**: `0x000000013d0ad12b8ee8928edf248ca91ca55600fb383f07c32bff1d6dec472b25cf59a700000007000001d1a94a20000000000000000000000000010000000133eeffc64785cf9d80e7731d9f31f67bd03c5cf0`
- **`ValidatorRewardsOwner`**: `0x0000000b0000000000000000000000010000000172f3eb9aeaf8283011ce6e437fdecd65eace8f52`
- **`DelegatorRewardsOwner`**: `0x0000000b00000000000000000000000100000001b2b91313ac487c222445254e26cd026d21f6f440`
- **`DelegationShares`**: `0x00004e20`
```text
[
BaseTx <- 0x0000001a00003039e902a9a86640bfdb1cd0e36c0cc982b83e5765fad5f6bbe6abdcce7b5ae7d7c700000000000000014a177205df5c29929d06db9d941f83d5ea985de302015e99252d16469a6610db000000003d0ad12b8ee8928edf248ca91ca55600fb383f07c32bff1d6dec472b25cf59a700000005000001d1a94a2000000000010000000000000000
Validator <- 0x5fa29ed4356903dac2364713c60f57d8472c7dda000000006397616e0000000063beee6e000001d1a94a2000
SubnetID <- 0xf3086d7bfc35be1c68db664ba9ce61a2060126b0d6b4bfb09fd7a5fb7678cada
Signer <- 0x0000001ca5af179e4188583893c2b99e1a8be27d90a9213cfbff1d75b74fe2bc9f3b072c2ded0863a9d9acd9033f223295810e429238e28d3c9b7f7212b63d746b2ae73a54fe08a3de61b132f2f89e9eeff97d4d7ca3a3c88986aa855cd36296fcfe8f02162d0258be494d267d4c5798bc081ab602ded90b0fc16d8a035e68ff5294794cb63ff1ee068fbfc2b4c8cd2d08ebf297
StakeOuts <- 0x000000013d0ad12b8ee8928edf248ca91ca55600fb383f07c32bff1d6dec472b25cf59a700000007000001d1a94a20000000000000000000000000010000000133eeffc64785cf9d80e7731d9f31f67bd03c5cf0
ValidatorRewardsOwner <- 0x0000000b0000000000000000000000010000000172f3eb9aeaf8283011ce6e437fdecd65eace8f52
DelegatorRewardsOwner <- 0x0000000b0000000000000000000000010000000172f3eb9aeaf8283011ce6e437fdecd65eace8f52
DelegationShares <- 0x00004e20
]
=
[
// BaseTx
0x00, 0x00, 0x00, 0x1a, 0x00, 0x00, 0x30, 0x39,
0xe9, 0x02, 0xa9, 0xa8, 0x66, 0x40, 0xbf, 0xdb,
0x1c, 0xd0, 0xe3, 0x6c, 0x0c, 0xc9, 0x82, 0xb8,
0x3e, 0x57, 0x65, 0xfa, 0xd5, 0xf6, 0xbb, 0xe6,
0xab, 0xdc, 0xce, 0x7b, 0x5a, 0xe7, 0xd7, 0xc7,
0x00, 0x00, 0x00, 0x00, 0x00, 0x00, 0x00, 0x01,
0x4a, 0x17, 0x72, 0x05, 0xdf, 0x5c, 0x29, 0x92,
0x9d, 0x06, 0xdb, 0x9d, 0x94, 0x1f, 0x83, 0xd5,
0xea, 0x98, 0x5d, 0xe3, 0x02, 0x01, 0x5e, 0x99,
0x25, 0x2d, 0x16, 0x46, 0x9a, 0x66, 0x10, 0xdb,
0x00, 0x00, 0x00, 0x00, 0x3d, 0x0a, 0xd1, 0x2b,
0x8e, 0xe8, 0x92, 0x8e, 0xdf, 0x24, 0x8c, 0xa9,
0x1c, 0xa5, 0x56, 0x00, 0xfb, 0x38, 0x3f, 0x07,
0xc3, 0x2b, 0xff, 0x1d, 0x6d, 0xec, 0x47, 0x2b,
0x25, 0xcf, 0x59, 0xa7, 0x00, 0x00, 0x00, 0x05,
0x00, 0x00, 0x01, 0xd1, 0xa9, 0x4a, 0x20, 0x00,
0x00, 0x00, 0x00, 0x01, 0x00, 0x00, 0x00, 0x00,
0x00, 0x00, 0x00, 0x00,
// Validator
// NodeID
0x5f, 0xa2, 0x9e, 0xd4, 0x35, 0x69, 0x03, 0xda,
0xc2, 0x36, 0x47, 0x13, 0xc6, 0x0f, 0x57, 0xd8,
0x47, 0x2c, 0x7d, 0xda, 0x
// Start time
0x00, 0x00, 0x00, 0x00, 0x63, 0x97, 0x61, 0x6e,
// End time
0x00, 0x00, 0x00, 0x00, 0x63, 0xbe, 0xee, 0x6e,
// Weight
0x00, 0x00, 0x01, 0xd1, 0xa9, 0x4a, 0x20, 0x00,
// SubnetID
0xf3, 0x08, 0x6d, 0x7b, 0xfc, 0x35, 0xbe, 0x1c,
0x68, 0xdb, 0x66, 0x4b, 0xa9, 0xce, 0x61, 0xa2,
0x06, 0x01, 0x26, 0xb0, 0xd6, 0xb4, 0xbf, 0xb0,
0x9f, 0xd7, 0xa5, 0xfb, 0x76, 0x78, 0xca, 0xda,
// Signer
// TypeID
0x00, 0x00, 0x00, 0x1c,
// Pub key
0xa5, 0xaf, 0x17, 0x9e, 0x41, 0x88, 0x58, 0x38,
0x93, 0xc2, 0xb9, 0x9e, 0x1a, 0x8b, 0xe2, 0x7d,
0x90, 0xa9, 0x21, 0x3c, 0xfb, 0xff, 0x1d, 0x75,
0xb7, 0x4f, 0xe2, 0xbc, 0x9f, 0x3b, 0x07, 0x2c,
0x2d, 0xed, 0x08, 0x63, 0xa9, 0xd9, 0xac, 0xd9,
0x03, 0x3f, 0x22, 0x32, 0x95, 0x81, 0x0e, 0x42,
// Sig
0x92, 0x38, 0xe2, 0x8d, 0x3c, 0x9b, 0x7f, 0x72,
0x12, 0xb6, 0x3d, 0x74, 0x6b, 0x2a, 0xe7, 0x3a,
0x54, 0xfe, 0x08, 0xa3, 0xde, 0x61, 0xb1, 0x32,
0xf2, 0xf8, 0x9e, 0x9e, 0xef, 0xf9, 0x7d, 0x4d,
0x7c, 0xa3, 0xa3, 0xc8, 0x89, 0x86, 0xaa, 0x85,
0x5c, 0xd3, 0x62, 0x96, 0xfc, 0xfe, 0x8f, 0x02,
0x16, 0x2d, 0x02, 0x58, 0xbe, 0x49, 0x4d, 0x26,
0x7d, 0x4c, 0x57, 0x98, 0xbc, 0x08, 0x1a, 0xb6,
0x02, 0xde, 0xd9, 0x0b, 0x0f, 0xc1, 0x6d, 0x8a,
0x03, 0x5e, 0x68, 0xff, 0x52, 0x94, 0x79, 0x4c,
0xb6, 0x3f, 0xf1, 0xee, 0x06, 0x8f, 0xbf, 0xc2,
0xb4, 0xc8, 0xcd, 0x2d, 0x08, 0xeb, 0xf2, 0x97,
// Stake outs
// Num stake outs
0x00, 0x00, 0x00, 0x01,
// AssetID
0x3d, 0x0a, 0xd1, 0x2b, 0x8e, 0xe8, 0x92, 0x8e,
0xdf, 0x24, 0x8c, 0xa9, 0x1c, 0xa5, 0x56, 0x00,
0xfb, 0x38, 0x3f, 0x07, 0xc3, 0x2b, 0xff, 0x1d,
0x6d, 0xec, 0x47, 0x2b, 0x25, 0xcf, 0x59, 0xa7,
// Output
// typeID
0x00, 0x00, 0x00, 0x07,
// Amount
0x00, 0x00, 0x01, 0xd1, 0xa9, 0x4a, 0x20, 0x00,
// Locktime
0x00, 0x00, 0x00, 0x00, 0x00, 0x00, 0x00, 0x00,
// Threshold
0x00, 0x00, 0x00, 0x01,
// Num addrs
0x00, 0x00, 0x00, 0x01,
// Addr 0
0x33, 0xee, 0xff, 0xc6, 0x47, 0x85, 0xcf, 0x9d,
0x80, 0xe7, 0x73, 0x1d, 0x9f, 0x31, 0xf6, 0x7b,
0xd0, 0x3c, 0x5c, 0xf0,
// Validator rewards owner
// TypeID
0x00, 0x00, 0x00, 0x0b,
// Locktime
0x00, 0x00, 0x00, 0x00, 0x00, 0x00, 0x00, 0x00,
// Threshold
0x00, 0x00, 0x00, 0x01,
// Num addrs
0x00, 0x00, 0x00, 0x01,
// Addr 0
0x72, 0xf3, 0xeb, 0x9a, 0xea, 0xf8, 0x28, 0x30,
0x11, 0xce, 0x6e, 0x43, 0x7f, 0xde, 0xcd, 0x65,
0xea, 0xce, 0x8f, 0x52,
// Delegator rewards owner
// TypeID
0x00, 0x00, 0x00, 0x0b,
// Locktime
0x00, 0x00, 0x00, 0x00, 0x00, 0x00, 0x00, 0x00,
// Threshold
0x00, 0x00, 0x00, 0x01,
// Num addrs
0x00, 0x00, 0x00, 0x01,
// Addr 0
0xb2, 0xb9, 0x13, 0x13, 0xac, 0x48, 0x7c, 0x22,
0x24, 0x45, 0x25, 0x4e, 0x26, 0xcd, 0x02, 0x6d,
0x21, 0xf6, 0xf4, 0x40,
// Delegation shares
0x00, 0x00, 0x4e, 0x20,
]
```
## Unsigned Add Permissionless Delegator TX
### What Unsigned Add Permissionless Delegator TX Contains
An unsigned add permissionless delegator TX contains a `BaseTx`, `Validator`,
`SubnetID`, `StakeOuts`, and `DelegatorRewardsOwner`. The `TypeID` for this type
is 26 or `0x0000001a`.
- **`BaseTx`**
- **`Validator`** Validator has a `NodeID`, `StartTime`, `EndTime`, and `Weight`
- **`NodeID`** is the 20 byte node ID of the validator.
- **`StartTime`** is a long which is the Unix time when the validator starts validating.
- **`EndTime`** is a long which is the Unix time when the validator stops validating.
- **`Weight`** is a long which is the amount the validator stakes
- **`SubnetID`** is the 32 byte Avalanche L1 ID (SubnetID) of the Avalanche L1 this delegation is on.
- **`StakeOuts`** An array of Transferable Outputs. Where to send staked tokens when done validating.
- **`DelegatorRewardsOwner`** Where to send staking rewards when done validating.
### Gantt Unsigned Add Permissionless Delegator TX Specification
```text
+---------------+----------------------+------------------------------------------------+
| base_tx : BaseTx | size(base_tx) bytes |
+---------------+----------------------+------------------------------------------------+
| validator : Validator | 44 bytes |
+---------------+----------------------+------------------------------------------------+
| subnet_id : [32]byte | 32 bytes |
+---------------+----------------------+------------------------------------------------+
| stake_outs : []TransferOut | 4 + size(stake_outs) bytes |
+---------------+----------------------+------------------------------------------------+
| delegator_rewards_owner : SECP256K1OutputOwners | size(delegator_rewards_owner) bytes |
+---------------+----------------------+------------------------------------------------+
| 80 + size(base_tx) + size(stake_outs) + size(delegator_rewards_owner) bytes |
+---------------------------------------------------------------------------------------+
```
### Proto Unsigned Add Permissionless Delegator TX Specification
```text
message AddPermissionlessDelegatorTx {
BaseTx base_tx = 1; // size(base_tx)
Validator validator = 2; // size(validator)
SubnetID subnet_id = 3; // 32 bytes
repeated TransferOut stake_outs = 4; // 4 bytes + size(stake_outs)
SECP256K1OutputOwners delegator_rewards_owner = 5; // size(delegator_rewards_owner) bytes
}
```
### Unsigned Add Permissionless Delegator TX Example
Let's make an unsigned add permissionless delegator TX that uses the inputs and
outputs from the previous examples:
- **`BaseTx`**: `"Example BaseTx as defined above with ID set to 1a"`
- **`Validator`**: `0x5fa29ed4356903dac2364713c60f57d8472c7dda00000000639761970000000063beee97000001d1a94a2000`
- **`SubnetID`**: `0xf3086d7bfc35be1c68db664ba9ce61a2060126b0d6b4bfb09fd7a5fb7678cada`
- **`StakeOuts`**: `0x000000013d0ad12b8ee8928edf248ca91ca55600fb383f07c32bff1d6dec472b25cf59a700000007000001d1a94a20000000000000000000000000010000000133eeffc64785cf9d80e7731d9f31f67bd03c5cf0`
- **`DelegatorRewardsOwner`**: `0x0000000b0000000000000000000000010000000172f3eb9aeaf8283011ce6e437fdecd65eace8f52`
```text
[
BaseTx <- 0x0000001a00003039e902a9a86640bfdb1cd0e36c0cc982b83e5765fad5f6bbe6abdcce7b5ae7d7c700000000000000014a177205df5c29929d06db9d941f83d5ea985de302015e99252d16469a6610db000000003d0ad12b8ee8928edf248ca91ca55600fb383f07c32bff1d6dec472b25cf59a700000005000001d1a94a2000000000010000000000000000
Validator <- 0x5fa29ed4356903dac2364713c60f57d8472c7dda00000000639761970000000063beee97000001d1a94a2000
SubnetID <- 0xf3086d7bfc35be1c68db664ba9ce61a2060126b0d6b4bfb09fd7a5fb7678cada
StakeOuts <- 0x000000013d0ad12b8ee8928edf248ca91ca55600fb383f07c32bff1d6dec472b25cf59a700000007000001d1a94a20000000000000000000000000010000000133eeffc64785cf9d80e7731d9f31f67bd03c5cf0
DelegatorRewardsOwner <- 0x0000000b0000000000000000000000010000000172f3eb9aeaf8283011ce6e437fdecd65eace8f52
]
=
[
// BaseTx
0x00, 0x00, 0x00, 0x1a, 0x00, 0x00, 0x30, 0x39,
0xe9, 0x02, 0xa9, 0xa8, 0x66, 0x40, 0xbf, 0xdb,
0x1c, 0xd0, 0xe3, 0x6c, 0x0c, 0xc9, 0x82, 0xb8,
0x3e, 0x57, 0x65, 0xfa, 0xd5, 0xf6, 0xbb, 0xe6,
0xab, 0xdc, 0xce, 0x7b, 0x5a, 0xe7, 0xd7, 0xc7,
0x00, 0x00, 0x00, 0x00, 0x00, 0x00, 0x00, 0x01,
0x4a, 0x17, 0x72, 0x05, 0xdf, 0x5c, 0x29, 0x92,
0x9d, 0x06, 0xdb, 0x9d, 0x94, 0x1f, 0x83, 0xd5,
0xea, 0x98, 0x5d, 0xe3, 0x02, 0x01, 0x5e, 0x99,
0x25, 0x2d, 0x16, 0x46, 0x9a, 0x66, 0x10, 0xdb,
0x00, 0x00, 0x00, 0x00, 0x3d, 0x0a, 0xd1, 0x2b,
0x8e, 0xe8, 0x92, 0x8e, 0xdf, 0x24, 0x8c, 0xa9,
0x1c, 0xa5, 0x56, 0x00, 0xfb, 0x38, 0x3f, 0x07,
0xc3, 0x2b, 0xff, 0x1d, 0x6d, 0xec, 0x47, 0x2b,
0x25, 0xcf, 0x59, 0xa7, 0x00, 0x00, 0x00, 0x05,
0x00, 0x00, 0x01, 0xd1, 0xa9, 0x4a, 0x20, 0x00,
0x00, 0x00, 0x00, 0x01, 0x00, 0x00, 0x00, 0x00,
0x00, 0x00, 0x00, 0x00,
// Validator
// NodeID
0x5f, 0xa2, 0x9e, 0xd4, 0x35, 0x69, 0x03, 0xda,
0xc2, 0x36, 0x47, 0x13, 0xc6, 0x0f, 0x57, 0xd8,
0x47, 0x2c, 0x7d, 0xda,
// Start time
0x00, 0x00, 0x00, 0x00, 0x63, 0x97, 0x61, 0x97,
// End time
0x00, 0x00, 0x00, 0x00, 0x63, 0xbe, 0xee, 0x97,
// Weight
0x00, 0x00, 0x01, 0xd1, 0xa9, 0x4a, 0x20, 0x00,
// Stake_outs
// Num stake outs
0x00, 0x00, 0x00, 0x01,
// Stake out 0
// AssetID
0x3d, 0x0a, 0xd1, 0x2b, 0x8e, 0xe8, 0x92, 0x8e,
0xdf, 0x24, 0x8c, 0xa9, 0x1c, 0xa5, 0x56, 0x00,
0xfb, 0x38, 0x3f, 0x07, 0xc3, 0x2b, 0xff, 0x1d,
0x6d, 0xec, 0x47, 0x2b, 0x25, 0xcf, 0x59, 0xa7,
// TypeID
0x00, 0x00, 0x00, 0x07,
// Amount
0x00, 0x00, 0x01, 0xd1, 0xa9, 0x4a, 0x20, 0x00,
// Locktime
0x00, 0x00, 0x00, 0x00, 0x00, 0x00, 0x00, 0x00,
// Threshold
0x00, 0x00, 0x00, 0x01,
// Num addrs
0x00, 0x00, 0x00, 0x01,
// Addr 0
0x33, 0xee, 0xff, 0xc6, 0x47, 0x85, 0xcf, 0x9d,
0x80, 0xe7, 0x73, 0x1d, 0x9f, 0x31, 0xf6, 0x7b,
0xd0, 0x3c, 0x5c, 0xf0,
// Delegator_rewards_owner
// TypeID
0x00, 0x00, 0x00, 0x0b,
// Locktime
0x00, 0x00, 0x00, 0x00, 0x00, 0x00, 0x00, 0x00,
// Threshold
0x00, 0x00, 0x00, 0x01,
// Num addrs
0x00, 0x00, 0x00, 0x01,
// Addr 0
0x72, 0xf3, 0xeb, 0x9a, 0xea, 0xf8, 0x28, 0x30,
0x11, 0xce, 0x6e, 0x43, 0x7f, 0xde, 0xcd, 0x65,
0xea, 0xce, 0x8f, 0x52,
]
```
## Unsigned Transform Avalanche L1 TX
> **Note:** This transaction type has been disabled post-activation of ACP-77 (Etna upgrade). The `TransformSubnetTx` is no longer accepted on the P-Chain after the activation of this upgrade.
Transforms a permissioned Avalanche L1 into a permissionless Avalanche L1. Must be signed by the Avalanche L1 owner.
### What Unsigned Transform Avalanche L1 TX Contains
An unsigned transform Avalanche L1 TX contains a `BaseTx`, `SubnetID`, `AssetID`,
`InitialSupply`, `MaximumSupply`, `MinConsumptionRate`, `MaxConsumptionRate`,
`MinValidatorStake`, `MaxValidatorStake`, `MinStakeDuration`,
`MaxStakeDuration`, `MinDelegationFee`, `MinDelegatorStake`,
`MaxValidatorWeightFactor`, `UptimeRequirement`, and `SubnetAuth`. The `TypeID`
for this type is 24 or `0x00000018`.
- **`BaseTx`**
- **`SubnetID`** a 32-byte Avalanche L1 ID of the Avalanche L1 to transform.
- **`AssetID`** is a 32-byte array that defines which asset to use when staking on the Avalanche L1.
- Restrictions
- Must not be the Empty ID
- Must not be the AVAX ID
- **`InitialSupply`** is a long which is the amount to initially specify as the current supply.
- Restrictions
- Must be > 0
- **`MaximumSupply`** is a long which is the amount to specify as the maximum token supply.
- Restrictions
- Must be >= [InitialSupply]
- **`MinConsumptionRate`** is a long which is the rate to allocate funds if the
validator's stake duration is 0.
- **`MaxConsumptionRate`** is a long which is the rate to allocate funds if the
validator's stake duration is equal to the minting period.
- Restrictions
- Must be `>=` [MinConsumptionRate]
- Must be `<=` [`reward.PercentDenominator`]
- **`MinValidatorStake`** is a long which the minimum amount of funds required to become a validator.
- Restrictions
- Must be `>` 0
- Must be `<=` [InitialSupply]
- **`MaxValidatorStake`** is a long which is the maximum amount of funds a
single validator can be allocated, including delegated funds.
- Restrictions:
- Must be `>=` [MinValidatorStake]
- Must be `<=` [MaximumSupply]
- **`MinStakeDuration`** is a short which is the minimum number of seconds a staker can stake for.
- Restrictions
- Must be `>` 0
- **`MaxStakeDuration`** is a short which is the maximum number of seconds a staker can stake for.
- Restrictions
- Must be `>=` [MinStakeDuration]
- Must be `<=` [GlobalMaxStakeDuration]
- **`MinDelegationFee`** is a short is the minimum percentage a validator must
charge a delegator for delegating.
- Restrictions
- Must be `<=` [`reward.PercentDenominator`]
- **`MinDelegatorStake`** is a short which is the minimum amount of funds required to become a delegator.
- Restrictions
- Must be `>` 0
- **`MaxValidatorWeightFactor`** is a byte which is the factor which calculates
the maximum amount of delegation a validator can receive. Note: a value of 1
effectively disables delegation.
- Restrictions
- Must be `>` 0
- **`UptimeRequirement`** is a short which is the minimum percentage a validator
must be online and responsive to receive a reward.
- Restrictions
- Must be `<=` [`reward.PercentDenominator`]
- **`SubnetAuth`** contains `SigIndices` and has a type id of `0x0000000a`.
`SigIndices` is a list of unique ints that define the addresses signing the
control signature to authorizes this transformation. The array must be sorted
low to high.
### Gantt Unsigned Transform Avalanche L1 TX Specification
```text
+----------------------+------------------+----------------------------------+
| base_tx : BaseTx | size(base_tx) bytes |
+----------------------+------------------+----------------------------------+
| subnet_id : [32]byte | 32 bytes |
+----------------------+------------------+----------------------------------+
| asset_id : [32]byte | 32 bytes |
+----------------------+------------------+----------------------------------+
| initial_supply : long | 8 bytes |
+----------------------+------------------+----------------------------------+
| maximum_supply : long | 8 bytes |
+----------------------+------------------+----------------------------------+
| min_consumption_rate : long | 8 bytes |
+----------------------+------------------+----------------------------------+
| max_consumption_rate : long | 8 bytes |
+----------------------+------------------+----------------------------------+
| min_validator_stake : long | 8 bytes |
+----------------------+------------------+----------------------------------+
| max_validator_stake : long | 8 bytes |
+----------------------+------------------+----------------------------------+
| min_stake_duration : short | 4 bytes |
+----------------------+------------------+----------------------------------+
| max_stake_duration : short | 4 bytes |
+----------------------+------------------+----------------------------------+
| min_delegation_fee : short | 4 bytes |
+----------------------+------------------+----------------------------------+
| min_delegator_stake : long | 8 bytes |
+----------------------+------------------+----------------------------------+
| max_validator_weight_factor : byte | 1 byte |
+----------------------+------------------+----------------------------------+
| uptime_requirement : short | 4 bytes |
+----------------------+------------------+----------------------------------+
| subnet_auth : SubnetAuth | 4 bytes + len(sig_indices) bytes |
+----------------------+------------------+----------------------------------+
| 141 + size(base_tx) + len(sig_indices) bytes |
+----------------------------------------------------------------------------+
```
### Proto Unsigned Transform Avalanche L1 TX Specification
```text
message TransformSubnetTx {
BaseTx base_tx = 1; // size(base_tx)
SubnetID subnet_id = 2; // 32 bytes
bytes asset_id = 3; // 32 bytes
uint64 initial_supply = 4; // 08 bytes
uint64 maximum_supply = 5; // 08 bytes
uint64 min_consumption_rate = 6; // 08 bytes
uint64 max_consumption_rate = 7; // 08 bytes
uint64 min_validator_stake = 8; // 08 bytes
uint64 max_validator_stake = 9; // 08 bytes
uint32 min_stake_duration = 10; // 04 bytes
uint32 max_stake_duration = 11; // 04 bytes
uint32 min_delegation_fee = 12; // 04 bytes
uint32 min_delegator_stake = 13; // 08 bytes
byte max_validator_weight_factor = 14; // 01 byte
uint32 uptime_requirement = 15; // 04 bytes
SubnetAuth subnet_auth = 16; // 04 bytes + len(sig_indices)
}
```
### Unsigned Transform Avalanche L1 TX Example
Let's make an unsigned transform Avalanche L1 TX that uses the inputs and outputs from the previous examples:
- **`BaseTx`**: `"Example BaseTx as defined above with ID set to 18"`
- **`SubnetID`**: `0x5fa29ed4356903dac2364713c60f57d8472c7dda4a5e08d88a88ad8ea71aed60`
- **`AssetID`**: `0xf3086d7bfc35be1c68db664ba9ce61a2060126b0d6b4bfb09fd7a5fb7678cada`
- **`InitialSupply`**: `0x000000e8d4a51000`
- **`MaximumSupply`**: `0x000009184e72a000`
- **`MinConsumptionRate`**: `0x0000000000000001`
- **`MaxConsumptionRate`**: `0x000000000000000a`
- **`MinValidatorStake`**: `0x000000174876e800`
- **`MaxValidatorStake`**: `0x000001d1a94a2000`
- **`MinStakeDuration`**: `0x00015180`
- **`MaxStakeDuration`**: `0x01e13380`
- **`MinDelegationFee`**: `0x00002710`
- **`MinDelegatorStake`**: `0x000000174876e800`
- **`MaxValidatorWeightFactor`**: `0x05`
- **`UptimeRequirement`**: `0x000c3500`
- **`SubnetAuth`**:
- **`TypeID`**: `0x0000000a`
- **`SigIndices`**: `0x00000000`
```text
[
BaseTx <- 0000001800003039e902a9a86640bfdb1cd0e36c0cc982b83e5765fad5f6bbe6abdcce7b5ae7d7c700000000000000014a177205df5c29929d06db9d941f83d5ea985de302015e99252d16469a6610db000000003d0ad12b8ee8928edf248ca91ca55600fb383f07c32bff1d6dec472b25cf59a70000000500000000000f4240000000010000000000000000
SubnetID <- 0x5fa29ed4356903dac2364713c60f57d8472c7dda4a5e08d88a88ad8ea71aed60
AssetID <- 0xf3086d7bfc35be1c68db664ba9ce61a2060126b0d6b4bfb09fd7a5fb7678cada
InitialSupply <- 0x000000e8d4a51000
MaximumSupply <- 0x000009184e72a000
MinConsumptionRate <- 0x0000000000000001
MaxConsumptionRate <- 0x000000000000000a
MinValidatorStake <- 0x000000174876e800
MaxValidatorStake <- 0x000001d1a94a2000
MinStakeDuration <- 0x00015180
MaxStakeDuration <- 0x01e13380
MinDelegationFee <- 0x00002710
MinDelegatorStake <- 0x000000174876e800
MaxValidatorWeightFactor <- 0x05
UptimeRequirement <- 0x000c3500
SubnetAuth <- 0x0000000a0000000100000000
]
=
[
// BaseTx:
0x00, 0x00, 0x00, 0x01, 0x00, 0x00, 0x30, 0x39,
0xe9, 0x02, 0xa9, 0xa8, 0x66, 0x40, 0xbf, 0xdb,
0x1c, 0xd0, 0xe3, 0x6c, 0x0c, 0xc9, 0x82, 0xb8,
0x3e, 0x57, 0x65, 0xfa, 0xd5, 0xf6, 0xbb, 0xe6,
0xab, 0xdc, 0xce, 0x7b, 0x5a, 0xe7, 0xd7, 0xc7,
0x00, 0x00, 0x00, 0x00, 0x00, 0x00, 0x00, 0x01,
0x4a, 0x17, 0x72, 0x05, 0xdf, 0x5c, 0x29, 0x92,
0x9d, 0x06, 0xdb, 0x9d, 0x94, 0x1f, 0x83, 0xd5,
0xea, 0x98, 0x5d, 0xe3, 0x02, 0x01, 0x5e, 0x99,
0x25, 0x2d, 0x16, 0x46, 0x9a, 0x66, 0x10, 0xdb,
0x00, 0x00, 0x00, 0x00, 0x3d, 0x0a, 0xd1, 0x2b,
0x8e, 0xe8, 0x92, 0x8e, 0xdf, 0x24, 0x8c, 0xa9,
0x1c, 0xa5, 0x56, 0x00, 0xfb, 0x38, 0x3f, 0x07,
0xc3, 0x2b, 0xff, 0x1d, 0x6d, 0xec, 0x47, 0x2b,
0x25, 0xcf, 0x59, 0xa7, 0x00, 0x00, 0x00, 0x05,
0x00, 0x00, 0x00, 0x00, 0x00, 0x0f, 0x42, 0x40,
0x00, 0x00, 0x00, 0x01, 0x00, 0x00, 0x00, 0x00,
0x00, 0x00, 0x00, 0x00, 0x5f, 0xa2, 0x9e, 0xd4,
0x35, 0x69, 0x03, 0xda, 0xc2, 0x36, 0x47, 0x13,
0xc6, 0x0f, 0x57, 0xd8, 0x47, 0x2c, 0x7d, 0xda,
0x4a, 0x5e, 0x08, 0xd8, 0x8a, 0x88, 0xad, 0x8e,
0xa7, 0x1a, 0xed, 0x60, 0xf3, 0x08, 0x6d, 0x7b,
0xfc, 0x35, 0xbe, 0x1c, 0x68, 0xdb, 0x66, 0x4b,
0xa9, 0xce, 0x61, 0xa2, 0x06, 0x01, 0x26, 0xb0,
0xd6, 0xb4, 0xbf, 0xb0, 0x9f, 0xd7, 0xa5, 0xfb,
0x76, 0x78, 0xca, 0xda, 0x00, 0x00, 0x00, 0xe8,
0xd4, 0xa5, 0x10, 0x00, 0x00, 0x00, 0x09, 0x18,
0x4e, 0x72, 0xa0, 0x00, 0x00, 0x00, 0x00, 0x00,
0x00, 0x00, 0x00, 0x01, 0x00, 0x00, 0x00, 0x00,
0x00, 0x00, 0x00, 0x0a, 0x00, 0x00, 0x00, 0x17,
0x48, 0x76, 0xe8, 0x00, 0x00, 0x00, 0x01, 0xd1,
0xa9, 0x4a, 0x20, 0x00, 0x00, 0x01, 0x51, 0x80,
0x01, 0xe1, 0x33, 0x80, 0x00, 0x00, 0x27, 0x10,
0x00, 0x00, 0x00, 0x17, 0x48, 0x76, 0xe8, 0x00,
0x05, 0x00, 0x0c, 0x35, 0x00, 0x00, 0x00, 0x00,
0x0a, 0x00, 0x00, 0x00, 0x01, 0x00, 0x00, 0x00,
0x00,
// SubnetID
0x5f, 0xa2, 0x9e, 0xd4, 0x35, 0x69, 0x03, 0xda,
0xc2, 0x36, 0x47, 0x13, 0xc6, 0x0f, 0x57, 0xd8,
0x47, 0x2c, 0x7d, 0xda, 0x4a, 0x5e, 0x08, 0xd8,
0x8a, 0x88, 0xad, 0x8e, 0xa7, 0x1a, 0xed, 0x60,
// AssetID
0xf3, 0x08, 0x6d, 0x7b, 0xfc, 0x35, 0xbe, 0x1c,
0x68, 0xdb, 0x66, 0x4b, 0xa9, 0xce, 0x61, 0xa2,
0x06, 0x01, 0x26, 0xb0, 0xd6, 0xb4, 0xbf, 0xb0,
0x9f, 0xd7, 0xa5, 0xfb, 0x76, 0x78, 0xca, 0xda,
// InitialSupply
0x00, 0x00, 0x00, 0xe8, 0xd4, 0xa5, 0x10, 0x00,
// MaximumSupply
0x00, 0x00, 0x09, 0x18, 0x4e, 0x72, 0xa0, 0x00,
// MinConsumptionRate
0x00, 0x00, 0x00, 0x00, 0x00, 0x00, 0x00, 0x01,
// MaxConsumptionRate
0x00, 0x00, 0x00, 0x00, 0x00, 0x00, 0x00, 0x0a,
// MinValidatorStake
0x00, 0x00, 0x00, 0x17, 0x48, 0x76, 0xe8, 0x00,
// MaxValidatorStake
0x00, 0x00, 0x01, 0xd1, 0xa9, 0x4a, 0x20, 0x00,
// MinStakeDuration
0x00, 0x01, 0x51, 0x80,
// MaxStakeDuration
0x01, 0xe1, 0x33, 0x80,
// MinDelegationFee
0x00, 0x00, 0x27, 0x10,
// MinDelegatorStake
0x00, 0x00, 0x00, 0x17, 0x48, 0x76, 0xe8, 0x00,
// MaxValidatorWeightFactor
0x05,
// UptimeRequirement
0x00, 0x0c, 0x35, 0x00,
```
// SubnetAuth
```
// SubnetAuth TypeID
0x00, 0x00, 0x00, 0x0a,
// SigIndices length
0x00, 0x00, 0x00, 0x01,
// SigIndices
0x00, 0x00, 0x00, 0x00,
]
```
## Unsigned Add Avalanche L1 Validator TX
### What Unsigned Add Avalanche L1 Validator TX Contains
An unsigned add Avalanche L1 validator TX contains a `BaseTx`, `Validator`,
`SubnetID`, and `SubnetAuth`. The `TypeID` for this type is `0x0000000d`.
- **`BaseTx`**
- **`Validator`** Validator has a `NodeID`, `StartTime`, `EndTime`, and `Weight`
- **`NodeID`** is the 20 byte node ID of the validator.
- **`StartTime`** is a long which is the Unix time when the validator starts validating.
- **`EndTime`** is a long which is the Unix time when the validator stops validating.
- **`Weight`** is a long which is the amount the validator stakes
- **`SubnetID`** is the 32 byte Avalanche L1 ID to add the validator to.
- **`SubnetAuth`** contains `SigIndices` and has a type id of `0x0000000a`.
`SigIndices` is a list of unique ints that define the addresses signing the
control signature to add a validator to an Avalanche L1. The array must be sorted low
to high.
### Gantt Unsigned Add Avalanche L1 Validator TX Specification
```text
+---------------+----------------------+-----------------------------------------+
| base_tx : BaseTx | size(base_tx) bytes |
+---------------+----------------------+-----------------------------------------+
| validator : Validator | 44 bytes |
+---------------+----------------------+-----------------------------------------+
| subnet_id : [32]byte | 32 bytes |
+---------------+----------------------+-----------------------------------------+
| subnet_auth : SubnetAuth | 4 bytes + len(sig_indices) bytes |
+---------------+----------------------+-----------------------------------------+
| 80 + len(sig_indices) + size(base_tx) bytes |
+---------------------------------------------+
```
### Proto Unsigned Add Avalanche L1 Validator TX Specification
```text
message AddSubnetValidatorTx {
BaseTx base_tx = 1; // size(base_tx)
Validator validator = 2; // size(validator)
SubnetID subnet_id = 3; // 32 bytes
SubnetAuth subnet_auth = 4; // 04 bytes + len(sig_indices)
}
```
### Unsigned Add Avalanche L1 Validator TX Example
Let's make an unsigned add Avalanche L1 validator TX that uses the inputs and outputs from the previous examples:
- **`BaseTx`**: `"Example BaseTx as defined above with ID set to 0d"`
- **`NodeID`**: `0xe9094f73698002fd52c90819b457b9fbc866ab80`
- **`StarTime`**: `0x000000005f21f31d`
- **`EndTime`**: `0x000000005f497dc6`
- **`Weight`**: `0x000000000000d431`
- **`SubnetID`**: `0x58b1092871db85bc752742054e2e8be0adf8166ec1f0f0769f4779f14c71d7eb`
- **`SubnetAuth`**:
- **`TypeID`**: `0x0000000a`
- **`SigIndices`**: `0x00000000`
```text
[
BaseTx <- 0x0000000d000030390000000000000000000000000000000000000000000000000000000000000006870b7d66ac32540311379e5b5dbad28ec7eb8ddbfc8f4d67299ebb48475907a0000000700000000ee5be5c000000000000000000000000100000001da2bee01be82ecc00c34f361eda8eb30fb5a715cdfafbdf5c81f635c9257824ff21c8e3e6f7b632ac306e11446ee540d34711a15000000016870b7d66ac32540311379e5b5dbad28ec7eb8ddbfc8f4d67299ebb48475907a0000000500000000ee6b28000000000100000000
NodeID <- 0xe9094f73698002fd52c90819b457b9fbc866ab80
StarTime <- 0x000000005f21f31d
EndTime <- 0x000000005f497dc6
Weight <- 0x000000000000d431
SubnetID <- 0x58b1092871db85bc752742054e2e8be0adf8166ec1f0f0769f4779f14c71d7eb
SubnetAuth TypeID <- 0x0000000a
SubnetAuth <- 0x00000000
]
=
[
// base tx:
0x00, 0x00, 0x00, 0x0d,
0x00, 0x00, 0x30, 0x39,
0x00, 0x00, 0x00, 0x00, 0x00, 0x00, 0x00, 0x00,
0x00, 0x00, 0x00, 0x00, 0x00, 0x00, 0x00, 0x00,
0x00, 0x00, 0x00, 0x00, 0x00, 0x00, 0x00, 0x00,
0x00, 0x00, 0x00, 0x00, 0x00, 0x00, 0x00, 0x00,
0x00, 0x00, 0x00, 0x01,
0x68, 0x70, 0xb7, 0xd6, 0x6a, 0xc3, 0x25, 0x40,
0x31, 0x13, 0x79, 0xe5, 0xb5, 0xdb, 0xad, 0x28,
0xec, 0x7e, 0xb8, 0xdd, 0xbf, 0xc8, 0xf4, 0xd6,
0x72, 0x99, 0xeb, 0xb4, 0x84, 0x75, 0x90, 0x7a,
0x00, 0x00, 0x00, 0x07, 0x00, 0x00, 0x00, 0x00,
0xee, 0x5b, 0xe5, 0xc0, 0x00, 0x00, 0x00, 0x00,
0x00, 0x00, 0x00, 0x00, 0x00, 0x00, 0x00, 0x01,
0x00, 0x00, 0x00, 0x01, 0xda, 0x2b, 0xee, 0x01,
0xbe, 0x82, 0xec, 0xc0, 0x0c, 0x34, 0xf3, 0x61,
0xed, 0xa8, 0xeb, 0x30, 0xfb, 0x5a, 0x71, 0x5c,
0x00, 0x00, 0x00, 0x01,
0xdf, 0xaf, 0xbd, 0xf5, 0xc8, 0x1f, 0x63, 0x5c,
0x92, 0x57, 0x82, 0x4f, 0xf2, 0x1c, 0x8e, 0x3e,
0x6f, 0x7b, 0x63, 0x2a, 0xc3, 0x06, 0xe1, 0x14,
0x46, 0xee, 0x54, 0x0d, 0x34, 0x71, 0x1a, 0x15,
0x00, 0x00, 0x00, 0x01,
0x68, 0x70, 0xb7, 0xd6, 0x6a, 0xc3, 0x25, 0x40,
0x31, 0x13, 0x79, 0xe5, 0xb5, 0xdb, 0xad, 0x28,
0xec, 0x7e, 0xb8, 0xdd, 0xbf, 0xc8, 0xf4, 0xd6,
0x72, 0x99, 0xeb, 0xb4, 0x84, 0x75, 0x90, 0x7a,
0x00, 0x00, 0x00, 0x05, 0x00, 0x00, 0x00, 0x00,
0xee, 0x6b, 0x28, 0x00, 0x00, 0x00, 0x00, 0x01,
0x00, 0x00, 0x00, 0x00,
0x00, 0x00, 0x00, 0x00,
// Node ID
0xe9, 0x09, 0x4f, 0x73, 0x69, 0x80, 0x02, 0xfd,
0x52, 0xc9, 0x08, 0x19, 0xb4, 0x57, 0xb9, 0xfb,
0xc8, 0x66, 0xab, 0x80,
// StartTime
0x00, 0x00, 0x00, 0x00, 0x5f, 0x21, 0xf3, 0x1d,
// EndTime
0x00, 0x00, 0x00, 0x00, 0x5f, 0x49, 0x7d, 0xc6,
// Weight
0x00, 0x00, 0x00, 0x00, 0x00, 0x00, 0xd4, 0x31,
// SubnetID
0x58, 0xb1, 0x09, 0x28, 0x71, 0xdb, 0x85, 0xbc,
0x75, 0x27, 0x42, 0x05, 0x4e, 0x2e, 0x8b, 0xe0,
0xad, 0xf8, 0x16, 0x6e, 0xc1, 0xf0, 0xf0, 0x76,
0x9f, 0x47, 0x79, 0xf1, 0x4c, 0x71, 0xd7, 0xeb,
// SubnetAuth
// SubnetAuth TypeID
0x00, 0x00, 0x00, 0x0a,
// SigIndices length
0x00, 0x00, 0x00, 0x01,
// SigIndices
0x00, 0x00, 0x00, 0x00,
]
```
## Unsigned Add Delegator TX
### What Unsigned Add Delegator TX Contains
An unsigned add delegator TX contains a `BaseTx`, `Validator`, `Stake`, and
`RewardsOwner`. The `TypeID` for this type is `0x0000000e`.
- **`BaseTx`**
- **`Validator`** Validator has a `NodeID`, `StartTime`, `EndTime`, and `Weight`
- **`NodeID`** is 20 bytes which is the node ID of the delegatee.
- **`StartTime`** is a long which is the Unix time when the delegator starts delegating.
- **`EndTime`** is a long which is the Unix time when the delegator stops
delegating (and staked AVAX is returned).
- **`Weight`** is a long which is the amount the delegator stakes
- **`Stake`** Stake has `LockedOuts`
- **`LockedOuts`** An array of Transferable Outputs that are locked for the
duration of the staking period. At the end of the staking period, these
outputs are refunded to their respective addresses.
- **`RewardsOwner`** An `SECP256K1OutputOwners`
### Gantt Unsigned Add Delegator TX Specification
```text
+---------------+-----------------------+-----------------------------------------+
| base_tx : BaseTx | size(base_tx) bytes |
+---------------+-----------------------+-----------------------------------------+
| validator : Validator | 44 bytes |
+---------------+-----------------------+-----------------------------------------+
| stake : Stake | size(LockedOuts) bytes |
+---------------+-----------------------+-----------------------------------------+
| rewards_owner : SECP256K1OutputOwners | size(rewards_owner) bytes |
+---------------+-----------------------+-----------------------------------------+
| 44 + size(stake) + size(rewards_owner) + size(base_tx) bytes |
+-----------------------------------------------------------------+
```
### Proto Unsigned Add Delegator TX Specification
```text
message AddDelegatorTx {
BaseTx base_tx = 1; // size(base_tx)
Validator validator = 2; // 44 bytes
Stake stake = 3; // size(LockedOuts)
SECP256K1OutputOwners rewards_owner = 4; // size(rewards_owner)
}
```
### Unsigned Add Delegator TX Example
Let's make an unsigned add delegator TX that uses the inputs and outputs from the previous examples:
- **`BaseTx`**: `"Example BaseTx as defined above with ID set to 0e"`
- **`NodeID`**: `0xe9094f73698002fd52c90819b457b9fbc866ab80`
- **`StarTime`**: `0x000000005f21f31d`
- **`EndTime`**: `0x000000005f497dc6`
- **`Weight`**: `0x000000000000d431`
- **`Stake`**: `0x0000000139c33a499ce4c33a3b09cdd2cfa01ae70dbf2d18b2d7d168524440e55d55008800000007000001d1a94a2000000000000000000000000001000000013cb7d3842e8cee6a0ebd09f1fe884f6861e1b29c`
- **`RewardsOwner`**: `0x0000000b00000000000000000000000100000001da2bee01be82ecc00c34f361eda8eb30fb5a715c`
```text
[
BaseTx <- 0x0000000e000030390000000000000000000000000000000000000000000000000000000000000006870b7d66ac32540311379e5b5dbad28ec7eb8ddbfc8f4d67299ebb48475907a0000000700000000ee5be5c000000000000000000000000100000001da2bee01be82ecc00c34f361eda8eb30fb5a715cdfafbdf5c81f635c9257824ff21c8e3e6f7b632ac306e11446ee540d34711a15000000016870b7d66ac32540311379e5b5dbad28ec7eb8ddbfc8f4d67299ebb48475907a0000000500000000ee6b28000000000100000000
NodeID <- 0xe9094f73698002fd52c90819b457b9fbc866ab80
StarTime <- 0x000000005f21f31d
EndTime <- 0x000000005f497dc6
Weight <- 0x000000000000d431
Stake <- 0x0000000139c33a499ce4c33a3b09cdd2cfa01ae70dbf2d18b2d7d168524440e55d55008800000007000001d1a94a2000000000000000000000000001000000013cb7d3842e8cee6a0ebd09f1fe884f6861e1b29c
RewardsOwner <- 0x0000000b00000000000000000000000100000001da2bee01be82ecc00c34f361eda8eb30fb5a715c
]
=
[
// base tx:
0x00, 0x00, 0x00, 0x0e, 0x00, 0x00, 0x30, 0x39,
0x00, 0x00, 0x00, 0x00, 0x00, 0x00, 0x00, 0x00,
0x00, 0x00, 0x00, 0x00, 0x00, 0x00, 0x00, 0x00,
0x00, 0x00, 0x00, 0x00, 0x00, 0x00, 0x00, 0x00,
0x00, 0x00, 0x00, 0x00, 0x00, 0x00, 0x00, 0x00,
0x00, 0x00, 0x00, 0x01,
0x68, 0x70, 0xb7, 0xd6, 0x6a, 0xc3, 0x25, 0x40,
0x31, 0x13, 0x79, 0xe5, 0xb5, 0xdb, 0xad, 0x28,
0xec, 0x7e, 0xb8, 0xdd, 0xbf, 0xc8, 0xf4, 0xd6,
0x72, 0x99, 0xeb, 0xb4, 0x84, 0x75, 0x90, 0x7a,
0x00, 0x00, 0x00, 0x07, 0x00, 0x00, 0x00, 0x00,
0xee, 0x5b, 0xe5, 0xc0, 0x00, 0x00, 0x00, 0x00,
0x00, 0x00, 0x00, 0x00, 0x00, 0x00, 0x00, 0x01,
0x00, 0x00, 0x00, 0x01, 0xda, 0x2b, 0xee, 0x01,
0xbe, 0x82, 0xec, 0xc0, 0x0c, 0x34, 0xf3, 0x61,
0xed, 0xa8, 0xeb, 0x30, 0xfb, 0x5a, 0x71, 0x5c,
0x00, 0x00, 0x00, 0x01,
0xdf, 0xaf, 0xbd, 0xf5, 0xc8, 0x1f, 0x63, 0x5c,
0x92, 0x57, 0x82, 0x4f, 0xf2, 0x1c, 0x8e, 0x3e,
0x6f, 0x7b, 0x63, 0x2a, 0xc3, 0x06, 0xe1, 0x14,
0x46, 0xee, 0x54, 0x0d, 0x34, 0x71, 0x1a, 0x15,
0x00, 0x00, 0x00, 0x01,
0x68, 0x70, 0xb7, 0xd6, 0x6a, 0xc3, 0x25, 0x40,
0x31, 0x13, 0x79, 0xe5, 0xb5, 0xdb, 0xad, 0x28,
0xec, 0x7e, 0xb8, 0xdd, 0xbf, 0xc8, 0xf4, 0xd6,
0x72, 0x99, 0xeb, 0xb4, 0x84, 0x75, 0x90, 0x7a,
0x00, 0x00, 0x00, 0x05, 0x00, 0x00, 0x00, 0x00,
0xee, 0x6b, 0x28, 0x00, 0x00, 0x00, 0x00, 0x01,
0x00, 0x00, 0x00, 0x00,
0x00, 0x00, 0x00, 0x00,
// Node ID
0xe9, 0x09, 0x4f, 0x73, 0x69, 0x80, 0x02, 0xfd,
0x52, 0xc9, 0x08, 0x19, 0xb4, 0x57, 0xb9, 0xfb,
0xc8, 0x66, 0xab, 0x80,
// StartTime
0x00, 0x00, 0x00, 0x00, 0x5f, 0x21, 0xf3, 0x1d,
// EndTime
0x00, 0x00, 0x00, 0x00, 0x5f, 0x49, 0x7d, 0xc6,
// Weight
0x00, 0x00, 0x00, 0x00, 0x00, 0x00, 0xd4, 0x31,
// Stake
0x00, 0x00, 0x00, 0x01, 0x39, 0xc3, 0x3a, 0x49,
0x9c, 0xe4, 0xc3, 0x3a, 0x3b, 0x09, 0xcd, 0xd2,
0xcf, 0xa0, 0x1a, 0xe7, 0x0d, 0xbf, 0x2d, 0x18,
0xb2, 0xd7, 0xd1, 0x68, 0x52, 0x44, 0x40, 0xe5,
0x5d, 0x55, 0x00, 0x88, 0x00, 0x00, 0x00, 0x07,
0x00, 0x00, 0x01, 0xd1, 0xa9, 0x4a, 0x20, 0x00,
0x00, 0x00, 0x00, 0x00, 0x00, 0x00, 0x00, 0x00,
0x00, 0x00, 0x00, 0x01, 0x00, 0x00, 0x00, 0x01,
0x3c, 0xb7, 0xd3, 0x84, 0x2e, 0x8c, 0xee, 0x6a,
0x0e, 0xbd, 0x09, 0xf1, 0xfe, 0x88, 0x4f, 0x68,
0x61, 0xe1, 0xb2, 0x9c,
// RewardsOwner
0x00, 0x00, 0x00, 0x0b, 0x00, 0x00, 0x00, 0x00,
0x00, 0x00, 0x00, 0x00, 0x00, 0x00, 0x00, 0x01,
0x00, 0x00, 0x00, 0x01, 0xda, 0x2b, 0xee, 0x01,
0xbe, 0x82, 0xec, 0xc0, 0x0c, 0x34, 0xf3, 0x61,
0xed, 0xa8, 0xeb, 0x30, 0xfb, 0x5a, 0x71, 0x5c,
]
```
## Unsigned Create Chain TX
### What Unsigned Create Chain TX Contains
An unsigned create chain TX contains a `BaseTx`, `SubnetID`, `ChainName`,
`VMID`, `FxIDs`, `GenesisData` and `SubnetAuth`. The `TypeID` for this type is
`0x0000000f`.
- **`BaseTx`**
- **`SubnetID`** ID of the Avalanche L1 that validates this blockchain
- **`ChainName`** A human readable name for the chain; need not be unique
- **`VMID`** ID of the VM running on the new chain
- **`FxIDs`** IDs of the feature extensions running on the new chain
- **`GenesisData`** Byte representation of genesis state of the new chain
- **`SubnetAuth`** Authorizes this blockchain to be added to this Avalanche L1
### Gantt Unsigned Create Chain TX Specification
```text
+--------------+-------------+------------------------------------------+
| base_tx : BaseTx | size(base_tx) bytes |
+--------------+-------------+------------------------------------------+
| subnet_id : SubnetID | 32 bytes |
+--------------+-------------+------------------------------------------+
| chain_name : ChainName | 2 + len(chain_name) bytes |
+--------------+-------------+------------------------------------------+
| vm_id : VMID | 32 bytes |
+--------------+-------------+------------------------------------------+
| fx_ids : FxIDs | 4 + size(fx_ids) bytes |
+--------------+-------------+------------------------------------------+
| genesis_data : GenesisData | 4 + size(genesis_data) bytes |
+--------------+-------------+------------------------------------------+
| subnet_auth : SubnetAuth | size(subnet_auth) bytes |
+--------------+-------------+------------------------------------------+
| 74 + size(base_tx) + size(chain_name) + size(fx_ids) + |
| size(genesis_data) + size(subnet_auth) bytes |
+--------------+--------------------------------------------------------+
```
### Proto Unsigned Create Chain TX Specification
```text
message CreateChainTx {
BaseTx base_tx = 1; // size(base_tx)
SubnetID subnet_id = 2; // 32 bytes
ChainName chain_name = 3; // 2 + len(chain_name) bytes
VMID vm_id = 4; // 32 bytes
FxIDs fx_ids = 5; // 4 + size(fx_ids) bytes
GenesisData genesis_data = 6 // 4 + size(genesis_data) bytes
SubnetAuth subnet_auth = 7; // size(subnet_auth) bytes
}
```
### Unsigned Create Chain TX Example
Let's make an unsigned create chain TX that uses the inputs and outputs from the previous examples:
- **`BaseTx`**: `"Example BaseTx as defined above with ID set to 0f"`
- **`SubnetID`**: `24tZhrm8j8GCJRE9PomW8FaeqbgGS4UAQjJnqqn8pq5NwYSYV1`
- **`ChainName`**: `EPIC AVM`
- **`VMID`**: `avm`
- **`FxIDs`**: [`secp256k1fx`]
- **`GenesisData`**: `11111DdZMhYXUZiFV9FNpfpTSQroysXhzWicG954YAKfkrk3bCEzLVY7gun1eAmAwMiQzVhtGpdR6dnPVcfhBE7brzkJ1r4wzi3dgA8G9Jwc4WpZ6Uh4Dr9aTdw7sFA5cpvCAVBsx6Xf3CB82jwH1gjPZ3WQnnCSKr2reoLtam6TfyYRra5xxXSkZcUm6BaJMW4fKzNP58uyExajPYKZvT5LrQ7MPJ9Fp7ebmYSzXg7YYauNARj`
- **`SubnetAuth`**: `0x0000000a0000000100000000`
```text
[
BaseTx <- 0x0000000f000030390000000000000000000000000000000000000000000000000000000000000006870b7d66ac32540311379e5b5dbad28ec7eb8ddbfc8f4d67299ebb48475907a0000000700000000ee5be5c000000000000000000000000100000001da2bee01be82ecc00c34f361eda8eb30fb5a715cdfafbdf5c81f635c9257824ff21c8e3e6f7b632ac306e11446ee540d34711a15000000016870b7d66ac32540311379e5b5dbad28ec7eb8ddbfc8f4d67299ebb48475907a0000000500000000ee6b28000000000100000000
SubnetID <- 0x8c86d07cd60218661863e0116552dccd5bd84c564bd29d7181dbddd5ec616104
ChainName <- 0x455049432041564d
VMID <- 0x61766d0000000000000000000000000000000000000000000000000000000000
FxIDs <- 0x736563703235366b316678000000000000000000000000000000000000000000
GenesisData <- 0x000000000001000e4173736574416c6961735465737400000539000000000000000000000000000000000000000000000000000000000000000000000000000000000000001b66726f6d20736e6f77666c616b6520746f206176616c616e636865000a54657374204173736574000454455354000000000100000000000000010000000700000000000001fb000000000000000000000001000000013cb7d3842e8cee6a0ebd09f1fe884f6861e1b29c
SubnetAuth <- 0x0000000a0000000100000000
]
=
[
// base tx
0x00, 0x00, 0x00, 0x0f,
0x00, 0x00, 0x30, 0x39, 0x00, 0x00, 0x00, 0x00,
0x00, 0x00, 0x00, 0x00, 0x00, 0x00, 0x00, 0x00,
0x00, 0x00, 0x00, 0x00, 0x00, 0x00, 0x00, 0x00,
0x00, 0x00, 0x00, 0x00, 0x00, 0x00, 0x00, 0x00,
0x00, 0x00, 0x00, 0x00, 0x00, 0x00, 0x00, 0x01,
0x39, 0xc3, 0x3a, 0x49, 0x9c, 0xe4, 0xc3, 0x3a,
0x3b, 0x09, 0xcd, 0xd2, 0xcf, 0xa0, 0x1a, 0xe7,
0x0d, 0xbf, 0x2d, 0x18, 0xb2, 0xd7, 0xd1, 0x68,
0x52, 0x44, 0x40, 0xe5, 0x5d, 0x55, 0x00, 0x88,
0x00, 0x00, 0x00, 0x07, 0x00, 0x00, 0x12, 0x30,
0x9c, 0xd5, 0xfd, 0xc0, 0x00, 0x00, 0x00, 0x00,
0x00, 0x00, 0x00, 0x00, 0x00, 0x00, 0x00, 0x01,
0x00, 0x00, 0x00, 0x01, 0x3c, 0xb7, 0xd3, 0x84,
0x2e, 0x8c, 0xee, 0x6a, 0x0e, 0xbd, 0x09, 0xf1,
0xfe, 0x88, 0x4f, 0x68, 0x61, 0xe1, 0xb2, 0x9c,
0x00, 0x00, 0x00, 0x00, 0x00, 0x00, 0x00, 0x00,
// end base tx
// Subnet id
0x8c, 0x86, 0xd0, 0x7c, 0xd6, 0x02, 0x18, 0x66,
0x18, 0x63, 0xe0, 0x11, 0x65, 0x52, 0xdc, 0xcd,
0x5b, 0xd8, 0x4c, 0x56, 0x4b, 0xd2, 0x9d, 0x71,
0x81, 0xdb, 0xdd, 0xd5, 0xec, 0x61, 0x61, 0x04,
// chain name length
0x00, 0x08,
// chain name
0x45, 0x50, 0x49, 0x43, 0x20, 0x41, 0x56, 0x4d,
// vm id
0x61, 0x76, 0x6d, 0x00, 0x00, 0x00, 0x00, 0x00,
0x00, 0x00, 0x00, 0x00, 0x00, 0x00, 0x00, 0x00,
0x00, 0x00, 0x00, 0x00, 0x00, 0x00, 0x00, 0x00,
0x00, 0x00, 0x00, 0x00, 0x00, 0x00, 0x00, 0x00,
// fxids
// num fxids
0x00, 0x00, 0x00, 0x01,
// fxid
0x73, 0x65, 0x63, 0x70, 0x32, 0x35, 0x36, 0x6b,
0x31, 0x66, 0x78, 0x00, 0x00, 0x00, 0x00, 0x00,
0x00, 0x00, 0x00, 0x00, 0x00, 0x00, 0x00, 0x00,
0x00, 0x00, 0x00, 0x00, 0x00, 0x00, 0x00, 0x00,
// genesis data len
0x00, 0x00, 0x00, 0xb0,
// genesis data
0x00, 0x00, 0x00, 0x00, 0x00, 0x01, 0x00, 0x0e,
0x41, 0x73, 0x73, 0x65, 0x74, 0x41, 0x6c, 0x69,
0x61, 0x73, 0x54, 0x65, 0x73, 0x74, 0x00, 0x00,
0x05, 0x39, 0x00, 0x00, 0x00, 0x00, 0x00, 0x00,
0x00, 0x00, 0x00, 0x00, 0x00, 0x00, 0x00, 0x00,
0x00, 0x00, 0x00, 0x00, 0x00, 0x00, 0x00, 0x00,
0x00, 0x00, 0x00, 0x00, 0x00, 0x00, 0x00, 0x00,
0x00, 0x00, 0x00, 0x00, 0x00, 0x00, 0x00, 0x00,
0x00, 0x00, 0x00, 0x00, 0x00, 0x1b, 0x66, 0x72,
0x6f, 0x6d, 0x20, 0x73, 0x6e, 0x6f, 0x77, 0x66,
0x6c, 0x61, 0x6b, 0x65, 0x20, 0x74, 0x6f, 0x20,
0x61, 0x76, 0x61, 0x6c, 0x61, 0x6e, 0x63, 0x68,
0x65, 0x00, 0x0a, 0x54, 0x65, 0x73, 0x74, 0x20,
0x41, 0x73, 0x73, 0x65, 0x74, 0x00, 0x04, 0x54,
0x45, 0x53, 0x54, 0x00, 0x00, 0x00, 0x00, 0x01,
0x00, 0x00, 0x00, 0x00, 0x00, 0x00, 0x00, 0x01,
0x00, 0x00, 0x00, 0x07, 0x00, 0x00, 0x00, 0x00,
0x00, 0x00, 0x01, 0xfb, 0x00, 0x00, 0x00, 0x00,
0x00, 0x00, 0x00, 0x00, 0x00, 0x00, 0x00, 0x01,
0x00, 0x00, 0x00, 0x01, 0x3c, 0xb7, 0xd3, 0x84,
0x2e, 0x8c, 0xee, 0x6a, 0x0e, 0xbd, 0x09, 0xf1,
0xfe, 0x88, 0x4f, 0x68, 0x61, 0xe1, 0xb2, 0x9c,
// type id (Subnet Auth)
0x00, 0x00, 0x00, 0x0a,
// num address indices
0x00, 0x00, 0x00, 0x01,
// address index
0x00, 0x00, 0x00, 0x00,
]
```
## Unsigned Create Avalanche L1 TX
### What Unsigned Create Avalanche L1 TX Contains
An unsigned create Avalanche L1 TX contains a `BaseTx`, and `RewardsOwner`. The `TypeID` for this type is `0x00000010`.
- **`BaseTx`**
- **`RewardsOwner`** A `SECP256K1OutputOwners`
### Gantt Unsigned Create Avalanche L1 TX Specification
```text
+-----------------+-----------------------|---------------------------------+
| base_tx : BaseTx | size(base_tx) bytes |
+-----------------+-----------------------+--------------------------------+
| rewards_owner : SECP256K1OutputOwners | size(rewards_owner) bytes |
+-----------------+-----------------------+---------------------------------+
| size(rewards_owner) + size(base_tx) bytes |
+-------------------------------------------+
```
### Proto Unsigned Create Avalanche L1 TX Specification
```text
message CreateSubnetTx {
BaseTx base_tx = 1; // size(base_tx)
SECP256K1OutputOwners rewards_owner = 2; // size(rewards_owner)
}
```
### Unsigned Create Avalanche L1 TX Example
Let's make an unsigned create Avalanche L1 TX that uses the inputs from the previous examples:
- **`BaseTx`**: "Example BaseTx as defined above but with TypeID set to 16"
- **`RewardsOwner`**:
- **`TypeId`**: 11
- **`Locktime`**: 0
- **`Threshold`**: 1
- **`Addresses`**: \[ 0xda2bee01be82ecc00c34f361eda8eb30fb5a715c \]
```text
[
BaseTx <- 0x00000010000030390000000000000000000000000000000000000000000000000000000000000006870b7d66ac32540311379e5b5dbad28ec7eb8ddbfc8f4d67299ebb48475907a0000000700000000ee5be5c000000000000000000000000100000001da2bee01be82ecc00c34f361eda8eb30fb5a715cdfafbdf5c81f635c9257824ff21c8e3e6f7b632ac306e11446ee540d34711a15000000016870b7d66ac32540311379e5b5dbad28ec7eb8ddbfc8f4d67299ebb48475907a0000000500000000ee6b28000000000100000000
RewardsOwner <-
TypeID <- 0x0000000b
Locktime <- 0x0000000000000000
Threshold <- 0x00000001
Addresses <- [
0xda2bee01be82ecc00c34f361eda8eb30fb5a715c,
]
]
=
[
// base tx:
0x00, 0x00, 0x00, 0x10,
0x00, 0x00, 0x30, 0x39, 0x00, 0x00, 0x00, 0x00,
0x00, 0x00, 0x00, 0x00, 0x00, 0x00, 0x00, 0x00,
0x00, 0x00, 0x00, 0x00, 0x00, 0x00, 0x00, 0x00,
0x00, 0x00, 0x00, 0x00, 0x00, 0x00, 0x00, 0x00,
0x00, 0x00, 0x00, 0x00, 0x00, 0x00, 0x00, 0x01,
0x39, 0xc3, 0x3a, 0x49, 0x9c, 0xe4, 0xc3, 0x3a,
0x3b, 0x09, 0xcd, 0xd2, 0xcf, 0xa0, 0x1a, 0xe7,
0x0d, 0xbf, 0x2d, 0x18, 0xb2, 0xd7, 0xd1, 0x68,
0x52, 0x44, 0x40, 0xe5, 0x5d, 0x55, 0x00, 0x88,
0x00, 0x00, 0x00, 0x07, 0x00, 0x00, 0x12, 0x30,
0x9c, 0xd5, 0xfd, 0xc0, 0x00, 0x00, 0x00, 0x00,
0x00, 0x00, 0x00, 0x00, 0x00, 0x00, 0x00, 0x01,
0x00, 0x00, 0x00, 0x01, 0x3c, 0xb7, 0xd3, 0x84,
0x2e, 0x8c, 0xee, 0x6a, 0x0e, 0xbd, 0x09, 0xf1,
0xfe, 0x88, 0x4f, 0x68, 0x61, 0xe1, 0xb2, 0x9c,
0x00, 0x00, 0x00, 0x00, 0x00, 0x00, 0x00, 0x00,
// RewardsOwner type id
0x00, 0x00, 0x00, 0x0b,
// locktime:
0x00, 0x00, 0x00, 0x00, 0x00, 0x00, 0x00, 0x00,
// threshold:
0x00, 0x00, 0x00, 0x01,
// number of addresses:
0x00, 0x00, 0x00, 0x01,
// addrs[0]:
0xda, 0x2b, 0xee, 0x01,
0xbe, 0x82, 0xec, 0xc0, 0x0c, 0x34, 0xf3, 0x61,
0xed, 0xa8, 0xeb, 0x30, 0xfb, 0x5a, 0x71, 0x5c
]
```
## Unsigned Import TX
### What Unsigned Import TX Contains
An unsigned import TX contains a `BaseTx`, `SourceChain`, and `Ins`. The `TypeID` for this type is `0x00000011`.
- **`BaseTx`**
- **`SourceChain`** is a 32-byte source blockchain ID.
- **`Ins`** is a variable length array of Transferable Inputs.
### Gantt Unsigned Import TX Specification
```text
+-----------------+--------------|---------------------------------+
| base_tx : BaseTx | size(base_tx) bytes |
+-----------------+--------------+---------------------------------+
| source_chain : [32]byte | 32 bytes |
+-----------------+--------------+---------------------------------+
| ins : []TransferIn | 4 + size(ins) bytes |
+-----------------+--------------+---------------------------------+
| 36 + size(ins) + size(base_tx) bytes |
+--------------------------------------+
```
### Proto Unsigned Import TX Specification
```text
message ImportTx {
BaseTx base_tx = 1; // size(base_tx)
bytes source_chain = 2; // 32 bytes
repeated TransferIn ins = 3; // 4 bytes + size(ins)
}
```
### Unsigned Import TX Example
Let's make an unsigned import TX that uses the inputs from the previous examples:
- **`BaseTx`**: "Example BaseTx as defined above with TypeID set to 17"
- **`SourceChain`**:
- **`Ins`**: "Example SECP256K1 Transfer Input as defined above"
```text
[
BaseTx <- 0x00000011000030390000000000000000000000000000000000000000000000000000000000000006870b7d66ac32540311379e5b5dbad28ec7eb8ddbfc8f4d67299ebb48475907a0000000700000000ee5be5c000000000000000000000000100000001da2bee01be82ecc00c34f361eda8eb30fb5a715cdfafbdf5c81f635c9257824ff21c8e3e6f7b632ac306e11446ee540d34711a15000000016870b7d66ac32540311379e5b5dbad28ec7eb8ddbfc8f4d67299ebb48475907a0000000500000000ee6b28000000000100000000
SourceChain <- 0x787cd3243c002e9bf5bbbaea8a42a16c1a19cc105047c66996807cbf16acee10
Ins <- [
// input:
]
]
=
[
// base tx:
0x00, 0x00, 0x00, 0x11,
0x00, 0x00, 0x30, 0x39, 0x00, 0x00, 0x00, 0x00,
0x00, 0x00, 0x00, 0x00, 0x00, 0x00, 0x00, 0x00,
0x00, 0x00, 0x00, 0x00, 0x00, 0x00, 0x00, 0x00,
0x00, 0x00, 0x00, 0x00, 0x00, 0x00, 0x00, 0x00,
0x00, 0x00, 0x00, 0x00, 0x00, 0x00, 0x00, 0x01,
0x39, 0xc3, 0x3a, 0x49, 0x9c, 0xe4, 0xc3, 0x3a,
0x3b, 0x09, 0xcd, 0xd2, 0xcf, 0xa0, 0x1a, 0xe7,
0x0d, 0xbf, 0x2d, 0x18, 0xb2, 0xd7, 0xd1, 0x68,
0x52, 0x44, 0x40, 0xe5, 0x5d, 0x55, 0x00, 0x88,
0x00, 0x00, 0x00, 0x07, 0x00, 0x00, 0x12, 0x30,
0x9c, 0xd5, 0xfd, 0xc0, 0x00, 0x00, 0x00, 0x00,
0x00, 0x00, 0x00, 0x00, 0x00, 0x00, 0x00, 0x01,
0x00, 0x00, 0x00, 0x01, 0x3c, 0xb7, 0xd3, 0x84,
0x2e, 0x8c, 0xee, 0x6a, 0x0e, 0xbd, 0x09, 0xf1,
0xfe, 0x88, 0x4f, 0x68, 0x61, 0xe1, 0xb2, 0x9c,
0x00, 0x00, 0x00, 0x00, 0x00, 0x00, 0x00, 0x00,
// sourceChain
0x78, 0x7c, 0xd3, 0x24, 0x3c, 0x00, 0x2e, 0x9b,
0xf5, 0xbb, 0xba, 0xea, 0x8a, 0x42, 0xa1, 0x6c,
0x1a, 0x19, 0xcc, 0x10, 0x50, 0x47, 0xc6, 0x69,
0x96, 0x80, 0x7c, 0xbf, 0x16, 0xac, 0xee, 0x10,
// input count:
0x00, 0x00, 0x00, 0x01,
// txID:
0xf1, 0xe1, 0xd1, 0xc1, 0xb1, 0xa1, 0x91, 0x81,
0x71, 0x61, 0x51, 0x41, 0x31, 0x21, 0x11, 0x01,
0xf0, 0xe0, 0xd0, 0xc0, 0xb0, 0xa0, 0x90, 0x80,
0x70, 0x60, 0x50, 0x40, 0x30, 0x20, 0x10, 0x00,
// utxoIndex:
0x00, 0x00, 0x00, 0x05,
// assetID:
0x00, 0x01, 0x02, 0x03, 0x04, 0x05, 0x06, 0x07,
0x08, 0x09, 0x0a, 0x0b, 0x0c, 0x0d, 0x0e, 0x0f,
0x10, 0x11, 0x12, 0x13, 0x14, 0x15, 0x16, 0x17,
0x18, 0x19, 0x1a, 0x1b, 0x1c, 0x1d, 0x1e, 0x1f,
// input:
0x00, 0x00, 0x00, 0x05, 0x00, 0x00, 0x00, 0x00,
0xee, 0x6b, 0x28, 0x00, 0x00, 0x00, 0x00, 0x01,
0x00, 0x00, 0x00, 0x00,
]
```
## Unsigned Export TX
### What Unsigned Export TX Contains
An unsigned export TX contains a `BaseTx`, `DestinationChain`, and `Outs`. The
`TypeID` for this type is `0x00000012`.
- **`DestinationChain`** is the 32 byte ID of the chain where the funds are being exported to.
- **`Outs`** is a variable length array of Transferable Outputs.
### Gantt Unsigned Export TX Specification
```text
+-------------------+---------------+--------------------------------------+
| base_tx : BaseTx | size(base_tx) bytes |
+-------------------+---------------+--------------------------------------+
| destination_chain : [32]byte | 32 bytes |
+-------------------+---------------+--------------------------------------+
| outs : []TransferOut | 4 + size(outs) bytes |
+-------------------+---------------+--------------------------------------+
| 36 + size(outs) + size(base_tx) bytes |
+---------------------------------------+
```
### Proto Unsigned Export TX Specification
```text
message ExportTx {
BaseTx base_tx = 1; // size(base_tx)
bytes destination_chain = 2; // 32 bytes
repeated TransferOut outs = 3; // 4 bytes + size(outs)
}
```
### Unsigned Export TX Example
Let's make an unsigned export TX that uses the outputs from the previous examples:
- `BaseTx`: "Example BaseTx as defined above" with `TypeID` set to 18
- `DestinationChain`: `0x0000000000000000000000000000000000000000000000000000000000000000`
- `Outs`: "Example SECP256K1 Transfer Output as defined above"
```text
[
BaseTx <- 0x00000012000030390000000000000000000000000000000000000000000000000000000000000006870b7d66ac32540311379e5b5dbad28ec7eb8ddbfc8f4d67299ebb48475907a0000000700000000ee5be5c000000000000000000000000100000001da2bee01be82ecc00c34f361eda8eb30fb5a715cdfafbdf5c81f635c9257824ff21c8e3e6f7b632ac306e11446ee540d34711a15000000016870b7d66ac32540311379e5b5dbad28ec7eb8ddbfc8f4d67299ebb48475907a0000000500000000ee6b28000000000100000000
DestinationChain <- 0x0000000000000000000000000000000000000000000000000000000000000000
Outs <- [
000102030405060708090a0b0c0d0e0f101112131415161718191a1b1c1d1e1f000000070000000000003039000000000000d431000000010000000251025c61fbcfc078f69334f834be6dd26d55a955c3344128e060128ede3523a24a461c8943ab0859,
]
]
=
[
// base tx:
0x00, 0x00, 0x00, 0x12
0x00, 0x00, 0x00, 0x04, 0xff, 0xff, 0xff, 0xff,
0xee, 0xee, 0xee, 0xee, 0xdd, 0xdd, 0xdd, 0xdd,
0xcc, 0xcc, 0xcc, 0xcc, 0xbb, 0xbb, 0xbb, 0xbb,
0xaa, 0xaa, 0xaa, 0xaa, 0x99, 0x99, 0x99, 0x99,
0x88, 0x88, 0x88, 0x88, 0x00, 0x00, 0x00, 0x01,
0x00, 0x01, 0x02, 0x03, 0x04, 0x05, 0x06, 0x07,
0x08, 0x09, 0x0a, 0x0b, 0x0c, 0x0d, 0x0e, 0x0f,
0x10, 0x11, 0x12, 0x13, 0x14, 0x15, 0x16, 0x17,
0x18, 0x19, 0x1a, 0x1b, 0x1c, 0x1d, 0x1e, 0x1f,
0x00, 0x00, 0x00, 0x07, 0x00, 0x00, 0x00, 0x00,
0x00, 0x00, 0x30, 0x39, 0x00, 0x00, 0x00, 0x00,
0x00, 0x00, 0xd4, 0x31, 0x00, 0x00, 0x00, 0x01,
0x00, 0x00, 0x00, 0x02, 0x51, 0x02, 0x5c, 0x61,
0xfb, 0xcf, 0xc0, 0x78, 0xf6, 0x93, 0x34, 0xf8,
0x34, 0xbe, 0x6d, 0xd2, 0x6d, 0x55, 0xa9, 0x55,
0xc3, 0x34, 0x41, 0x28, 0xe0, 0x60, 0x12, 0x8e,
0xde, 0x35, 0x23, 0xa2, 0x4a, 0x46, 0x1c, 0x89,
0x43, 0xab, 0x08, 0x59, 0x00, 0x00, 0x00, 0x01,
0xf1, 0xe1, 0xd1, 0xc1, 0xb1, 0xa1, 0x91, 0x81,
0x71, 0x61, 0x51, 0x41, 0x31, 0x21, 0x11, 0x01,
0xf0, 0xe0, 0xd0, 0xc0, 0xb0, 0xa0, 0x90, 0x80,
0x70, 0x60, 0x50, 0x40, 0x30, 0x20, 0x10, 0x00,
0x00, 0x00, 0x00, 0x05, 0x00, 0x01, 0x02, 0x03,
0x04, 0x05, 0x06, 0x07, 0x08, 0x09, 0x0a, 0x0b,
0x0c, 0x0d, 0x0e, 0x0f, 0x10, 0x11, 0x12, 0x13,
0x14, 0x15, 0x16, 0x17, 0x18, 0x19, 0x1a, 0x1b,
0x1c, 0x1d, 0x1e, 0x1f, 0x00, 0x00, 0x00, 0x05,
0x00, 0x00, 0x00, 0x00, 0x07, 0x5b, 0xcd, 0x15,
0x00, 0x00, 0x00, 0x02, 0x00, 0x00, 0x00, 0x07,
0x00, 0x00, 0x00, 0x03, 0x00, 0x00, 0x00, 0x04,
0x00, 0x01, 0x02, 0x03
// destination_chain:
0x00, 0x00, 0x00, 0x00, 0x00, 0x00, 0x00, 0x00,
0x00, 0x00, 0x00, 0x00, 0x00, 0x00, 0x00, 0x00,
0x00, 0x00, 0x00, 0x00, 0x00, 0x00, 0x00, 0x00,
0x00, 0x00, 0x00, 0x00, 0x00, 0x00, 0x00, 0x00,
// outs[] count:
0x00, 0x00, 0x00, 0x01,
// assetID:
0x00, 0x01, 0x02, 0x03, 0x04, 0x05, 0x06, 0x07,
0x08, 0x09, 0x0a, 0x0b, 0x0c, 0x0d, 0x0e, 0x0f,
0x10, 0x11, 0x12, 0x13, 0x14, 0x15, 0x16, 0x17,
0x18, 0x19, 0x1a, 0x1b, 0x1c, 0x1d, 0x1e, 0x1f,
// output:
0x00, 0x00, 0x00, 0x07,
0x00, 0x00, 0x00, 0x00, 0x00, 0x00, 0x30, 0x39,
0x00, 0x00, 0x00, 0x00, 0x00, 0x00, 0xd4, 0x31,
0x00, 0x00, 0x00, 0x01, 0x00, 0x00, 0x00, 0x02,
0x51, 0x02, 0x5c, 0x61, 0xfb, 0xcf, 0xc0, 0x78,
0xf6, 0x93, 0x34, 0xf8, 0x34, 0xbe, 0x6d, 0xd2,
0x6d, 0x55, 0xa9, 0x55, 0xc3, 0x34, 0x41, 0x28,
0xe0, 0x60, 0x12, 0x8e, 0xde, 0x35, 0x23, 0xa2,
0x4a, 0x46, 0x1c, 0x89, 0x43, 0xab, 0x08, 0x59,
]
```
## Credentials
Credentials have one possible types: `SECP256K1Credential`. Each credential is
paired with an Input or Operation. The order of the credentials match the order
of the inputs or operations.
## SECP256K1 Credential
A [secp256k1](/docs/api-reference/standards/cryptographic-primitives#secp256k1-addresses) credential
contains a list of 65-byte recoverable signatures.
### What SECP256K1 Credential Contains
- **`TypeID`** is the ID for this type. It is `0x00000009`.
- **`Signatures`** is an array of 65-byte recoverable signatures. The order of
the signatures must match the input's signature indices.
### Gantt SECP256K1 Credential Specification
```text
+------------------------------+---------------------------------+
| type_id : int | 4 bytes |
+-----------------+------------+---------------------------------+
| signatures : [][65]byte | 4 + 65 * len(signatures) bytes |
+-----------------+------------+---------------------------------+
| 8 + 65 * len(signatures) bytes |
+---------------------------------+
```
### Proto SECP256K1 Credential Specification
```text
message SECP256K1Credential {
uint32 TypeID = 1; // 4 bytes
repeated bytes signatures = 2; // 4 bytes + 65 bytes * len(signatures)
}
```
### SECP256K1 Credential Example
Let's make a payment input with:
- **`signatures`**:
- `0x000102030405060708090a0b0c0d0e0f101112131415161718191a1b1c1e1d1f202122232425262728292a2b2c2e2d2f303132333435363738393a3b3c3d3e3f00`
- `0x404142434445464748494a4b4c4d4e4f505152535455565758595a5b5c5e5d5f606162636465666768696a6b6c6e6d6f707172737475767778797a7b7c7d7e7f00`
```text
[
Signatures <- [
0x000102030405060708090a0b0c0d0e0f101112131415161718191a1b1c1e1d1f202122232425262728292a2b2c2e2d2f303132333435363738393a3b3c3d3e3f00,
0x404142434445464748494a4b4c4d4e4f505152535455565758595a5b5c5e5d5f606162636465666768696a6b6c6e6d6f707172737475767778797a7b7c7d7e7f00,
]
]
=
[
// Type ID
0x00, 0x00, 0x00, 0x09,
// length:
0x00, 0x00, 0x00, 0x02,
// sig[0]
0x00, 0x01, 0x02, 0x03, 0x04, 0x05, 0x06, 0x07,
0x08, 0x09, 0x0a, 0x0b, 0x0c, 0x0d, 0x0e, 0x0f,
0x10, 0x11, 0x12, 0x13, 0x14, 0x15, 0x16, 0x17,
0x18, 0x19, 0x1a, 0x1b, 0x1c, 0x1e, 0x1d, 0x1f,
0x20, 0x21, 0x22, 0x23, 0x24, 0x25, 0x26, 0x27,
0x28, 0x29, 0x2a, 0x2b, 0x2c, 0x2e, 0x2d, 0x2f,
0x30, 0x31, 0x32, 0x33, 0x34, 0x35, 0x36, 0x37,
0x38, 0x39, 0x3a, 0x3b, 0x3c, 0x3d, 0x3e, 0x3f,
0x00,
// sig[1]
0x40, 0x41, 0x42, 0x43, 0x44, 0x45, 0x46, 0x47,
0x48, 0x49, 0x4a, 0x4b, 0x4c, 0x4d, 0x4e, 0x4f,
0x50, 0x51, 0x52, 0x53, 0x54, 0x55, 0x56, 0x57,
0x58, 0x59, 0x5a, 0x5b, 0x5c, 0x5e, 0x5d, 0x5f,
0x60, 0x61, 0x62, 0x63, 0x64, 0x65, 0x66, 0x67,
0x68, 0x69, 0x6a, 0x6b, 0x6c, 0x6e, 0x6d, 0x6f,
0x70, 0x71, 0x72, 0x73, 0x74, 0x75, 0x76, 0x77,
0x78, 0x79, 0x7a, 0x7b, 0x7c, 0x7d, 0x7e, 0x7f,
0x00,
]
```
## Signed Transaction
A signed transaction is an unsigned transaction with the addition of an array of credentials.
### What Signed Transaction Contains
A signed transaction contains a `CodecID`, `UnsignedTx`, and `Credentials`.
- **`CodecID`** The only current valid codec id is `00 00`.
- **`UnsignedTx`** is an unsigned transaction, as described above.
- **`Credentials`** is an array of credentials. Each credential will be paired
with the input in the same index at this credential.
### Gantt Signed Transaction Specification
```text
+---------------------+--------------+------------------------------------------------+
| codec_id : uint16 | 2 bytes |
+---------------------+--------------+------------------------------------------------+
| unsigned_tx : UnsignedTx | size(unsigned_tx) bytes |
+---------------------+--------------+------------------------------------------------+
| credentials : []Credential | 4 + size(credentials) bytes |
+---------------------+--------------+------------------------------------------------+
| 6 + size(unsigned_tx) + len(credentials) bytes |
+------------------------------------------------+
```
### Proto Signed Transaction Specification
```text
message Tx {
uint32 codec_id = 1; // 2 bytes
UnsignedTx unsigned_tx = 2; // size(unsigned_tx)
repeated Credential credentials = 3; // 4 bytes + size(credentials)
}
```
### Signed Transaction Example
Let's make a signed transaction that uses the unsigned transaction and credential from the previous examples.
- **`CodecID`**: `0`
- **`UnsignedTx`**: `0x0000000100000003ffffffffeeeeeeeeddddddddccccccccbbbbbbbbaaaaaaaa999999998888888800000001000102030405060708090a0b0c0d0e0f101112131415161718191a1b1c1d1e1f000000070000000000003039000000000000d431000000010000000251025c61fbcfc078f69334f834be6dd26d55a955c3344128e060128ede3523a24a461c8943ab085900000001f1e1d1c1b1a191817161514131211101f0e0d0c0b0a09080706050403020100000000005000102030405060708090a0b0c0d0e0f101112131415161718191a1b1c1d1e1f0000000500000000075bcd150000000200000003000000070000000400010203`
- **`Credentials`** `0x0000000900000002000102030405060708090a0b0c0d0e0f101112131415161718191a1b1c1e1d1f202122232425262728292a2b2c2e2d2f303132333435363738393a3b3c3d3e3f00404142434445464748494a4b4c4d4e4f505152535455565758595a5b5c5e5d5f606162636465666768696a6b6c6e6d6f707172737475767778797a7b7c7d7e7f00`
```text
[
CodecID <- 0x0000
UnsignedTx <- 0x0000000100000003ffffffffeeeeeeeeddddddddccccccccbbbbbbbbaaaaaaaa999999998888888800000001000102030405060708090a0b0c0d0e0f101112131415161718191a1b1c1d1e1f000000070000000000003039000000000000d431000000010000000251025c61fbcfc078f69334f834be6dd26d55a955c3344128e060128ede3523a24a461c8943ab085900000001f1e1d1c1b1a191817161514131211101f0e0d0c0b0a09080706050403020100000000005000102030405060708090a0b0c0d0e0f101112131415161718191a1b1c1d1e1f0000000500000000075bcd150000000200000003000000070000000400010203
Credentials <- [
0x0000000900000002000102030405060708090a0b0c0d0e0f101112131415161718191a1b1c1e1d1f202122232425262728292a2b2c2e2d2f303132333435363738393a3b3c3d3e3f00404142434445464748494a4b4c4d4e4f505152535455565758595a5b5c5e5d5f606162636465666768696a6b6c6e6d6f707172737475767778797a7b7c7d7e7f00,
]
]
=
[
// Codec ID
0x00, 0x00,
// unsigned transaction:
0x00, 0x00, 0x00, 0x01, 0x00, 0x00, 0x00, 0x03,
0xff, 0xff, 0xff, 0xff, 0xee, 0xee, 0xee, 0xee,
0xdd, 0xdd, 0xdd, 0xdd, 0xcc, 0xcc, 0xcc, 0xcc,
0xbb, 0xbb, 0xbb, 0xbb, 0xaa, 0xaa, 0xaa, 0xaa,
0x99, 0x99, 0x99, 0x99, 0x88, 0x88, 0x88, 0x88,
0x00, 0x00, 0x00, 0x01, 0x00, 0x01, 0x02, 0x03,
0x04, 0x05, 0x06, 0x07, 0x08, 0x09, 0x0a, 0x0b,
0x0c, 0x0d, 0x0e, 0x0f, 0x10, 0x11, 0x12, 0x13,
0x14, 0x15, 0x16, 0x17, 0x18, 0x19, 0x1a, 0x1b,
0x1c, 0x1d, 0x1e, 0x1f, 0x00, 0x00, 0x00, 0x07,
0x00, 0x00, 0x00, 0x00, 0x00, 0x00, 0x30, 0x39,
0x00, 0x00, 0x00, 0x00, 0x00, 0x00, 0xd4, 0x31,
0x00, 0x00, 0x00, 0x01, 0x00, 0x00, 0x00, 0x02,
0x51, 0x02, 0x5c, 0x61, 0xfb, 0xcf, 0xc0, 0x78,
0xf6, 0x93, 0x34, 0xf8, 0x34, 0xbe, 0x6d, 0xd2,
0x6d, 0x55, 0xa9, 0x55, 0xc3, 0x34, 0x41, 0x28,
0xe0, 0x60, 0x12, 0x8e, 0xde, 0x35, 0x23, 0xa2,
0x4a, 0x46, 0x1c, 0x89, 0x43, 0xab, 0x08, 0x59,
0x00, 0x00, 0x00, 0x01, 0xf1, 0xe1, 0xd1, 0xc1,
0xb1, 0xa1, 0x91, 0x81, 0x71, 0x61, 0x51, 0x41,
0x31, 0x21, 0x11, 0x01, 0xf0, 0xe0, 0xd0, 0xc0,
0xb0, 0xa0, 0x90, 0x80, 0x70, 0x60, 0x50, 0x40,
0x30, 0x20, 0x10, 0x00, 0x00, 0x00, 0x00, 0x05,
0x00, 0x01, 0x02, 0x03, 0x04, 0x05, 0x06, 0x07,
0x08, 0x09, 0x0a, 0x0b, 0x0c, 0x0d, 0x0e, 0x0f,
0x10, 0x11, 0x12, 0x13, 0x14, 0x15, 0x16, 0x17,
0x18, 0x19, 0x1a, 0x1b, 0x1c, 0x1d, 0x1e, 0x1f,
0x00, 0x00, 0x00, 0x05, 0x00, 0x00, 0x00, 0x00,
0x07, 0x5b, 0xcd, 0x15, 0x00, 0x00, 0x00, 0x02,
0x00, 0x00, 0x00, 0x03, 0x00, 0x00, 0x00, 0x07,
0x00, 0x00, 0x00, 0x04, 0x00, 0x01, 0x02, 0x03
// number of credentials:
0x00, 0x00, 0x00, 0x01,
// credential[0]:
0x00, 0x00, 0x00, 0x09, 0x00, 0x00, 0x00, 0x02,
0x00, 0x01, 0x02, 0x03, 0x04, 0x05, 0x06, 0x07,
0x08, 0x09, 0x0a, 0x0b, 0x0c, 0x0d, 0x0e, 0x0f,
0x10, 0x11, 0x12, 0x13, 0x14, 0x15, 0x16, 0x17,
0x18, 0x19, 0x1a, 0x1b, 0x1c, 0x1e, 0x1d, 0x1f,
0x20, 0x21, 0x22, 0x23, 0x24, 0x25, 0x26, 0x27,
0x28, 0x29, 0x2a, 0x2b, 0x2c, 0x2e, 0x2d, 0x2f,
0x30, 0x31, 0x32, 0x33, 0x34, 0x35, 0x36, 0x37,
0x38, 0x39, 0x3a, 0x3b, 0x3c, 0x3d, 0x3e, 0x3f,
0x00, 0x40, 0x41, 0x42, 0x43, 0x44, 0x45, 0x46,
0x47, 0x48, 0x49, 0x4a, 0x4b, 0x4c, 0x4d, 0x4e,
0x4f, 0x50, 0x51, 0x52, 0x53, 0x54, 0x55, 0x56,
0x57, 0x58, 0x59, 0x5a, 0x5b, 0x5c, 0x5e, 0x5d,
0x5f, 0x60, 0x61, 0x62, 0x63, 0x64, 0x65, 0x66,
0x67, 0x68, 0x69, 0x6a, 0x6b, 0x6c, 0x6e, 0x6d,
0x6f, 0x70, 0x71, 0x72, 0x73, 0x74, 0x75, 0x76,
0x77, 0x78, 0x79, 0x7a, 0x7b, 0x7c, 0x7d, 0x7e,
0x7f, 0x00,
]
```
## UTXO
A UTXO is a standalone representation of a transaction output.
### What UTXO Contains
A UTXO contains a `CodecID`, `TxID`, `UTXOIndex`, and `Output`.
- **`CodecID`** The only current valid codec id is `00 00`.
- **`TxID`** is a 32-byte transaction ID. Transaction IDs are calculated by
taking sha256 of the bytes of the signed transaction.
- **`UTXOIndex`** is an int that specifies which output in the transaction
specified by **`TxID`** that this utxo was created by.
- **`AssetID`** is a 32-byte array that defines which asset this utxo
references.
- **`Output`** is the output object that created this utxo. The serialization of
Outputs was defined above.
#### Gantt UTXO Specification
```text
+--------------+----------+-------------------------+
| codec_id : uint16 | 2 bytes |
+--------------+----------+-------------------------+
| tx_id : [32]byte | 32 bytes |
+--------------+----------+-------------------------+
| output_index : int | 4 bytes |
+--------------+----------+-------------------------+
| asset_id : [32]byte | 32 bytes |
+--------------+----------+-------------------------+
| output : Output | size(output) bytes |
+--------------+----------+-------------------------+
| 70 + size(output) bytes |
+-------------------------+
```
### Proto UTXO Specification
```text
message Utxo {
uint32 codec_id = 1; // 02 bytes
bytes tx_id = 2; // 32 bytes
uint32 output_index = 3; // 04 bytes
bytes asset_id = 4; // 32 bytes
Output output = 5; // size(output)
}
```
### UTXO Example
Let's make a UTXO from the signed transaction created above:
- **`CodecID`**: `0`
- **`TxID`**: `0xf966750f438867c3c9828ddcdbe660e21ccdbb36a9276958f011ba472f75d4e7`
- **`UTXOIndex`**: 0x00000000
- **`AssetID`**: `0x000102030405060708090a0b0c0d0e0f101112131415161718191a1b1c1d1e1f`
- **`Output`**: `"Example SECP256K1 Transferable Output as defined above"`
```text
[
CodecID <- 0x0000
TxID <- 0xf966750f438867c3c9828ddcdbe660e21ccdbb36a9276958f011ba472f75d4e7
UTXOIndex <- 0x00000000
AssetID <- 0x000102030405060708090a0b0c0d0e0f101112131415161718191a1b1c1d1e1f
Output <- 0x000000070000000000003039000000000000d431000000010000000251025c61fbcfc078f69334f834be6dd26d55a955c3344128e060128ede3523a24a461c8943ab0859
]
=
[
// Codec ID:
0x00, 0x00,
// txID:
0xf9, 0x66, 0x75, 0x0f, 0x43, 0x88, 0x67, 0xc3,
0xc9, 0x82, 0x8d, 0xdc, 0xdb, 0xe6, 0x60, 0xe2,
0x1c, 0xcd, 0xbb, 0x36, 0xa9, 0x27, 0x69, 0x58,
0xf0, 0x11, 0xba, 0x47, 0x2f, 0x75, 0xd4, 0xe7,
// utxo index:
0x00, 0x00, 0x00, 0x00,
// assetID:
0x00, 0x01, 0x02, 0x03, 0x04, 0x05, 0x06, 0x07,
0x08, 0x09, 0x0a, 0x0b, 0x0c, 0x0d, 0x0e, 0x0f,
0x10, 0x11, 0x12, 0x13, 0x14, 0x15, 0x16, 0x17,
0x18, 0x19, 0x1a, 0x1b, 0x1c, 0x1d, 0x1e, 0x1f,
// output:
0x00, 0x00, 0x00, 0x07, 0x00, 0x00, 0x00, 0x00,
0x00, 0x00, 0x30, 0x39, 0x00, 0x00, 0x00, 0x00,
0x00, 0x00, 0xd4, 0x31, 0x00, 0x00, 0x00, 0x01,
0x00, 0x00, 0x00, 0x02, 0x00, 0x01, 0x02, 0x03,
0x04, 0x05, 0x06, 0x07, 0x08, 0x09, 0x0a, 0x0b,
0x0c, 0x0d, 0x0e, 0x0f, 0x10, 0x11, 0x12, 0x13,
0x14, 0x15, 0x16, 0x17, 0x18, 0x19, 0x1a, 0x1b,
0x1c, 0x1d, 0x1e, 0x1f, 0x20, 0x21, 0x22, 0x23,
0x24, 0x25, 0x26, 0x27,
]
```
## StakeableLockIn
A StakeableLockIn is a staked and locked input. The StakeableLockIn can only
fund StakeableLockOuts with the same address until its lock time has passed.
### What StakeableLockIn Contains
A StakeableLockIn contains a `TypeID`, `Locktime` and `TransferableIn`.
- **`TypeID`** is the ID for this output type. It is `0x00000015`.
- **`Locktime`** is a long that contains the Unix timestamp before which the
input can be consumed only to stake. The Unix timestamp is specific to the
second.
- **`TransferableIn`** is a transferable input object.
### Gantt StakeableLockIn Specification
```text
+-----------------+-------------------+--------------------------------+
| type_id : int | 4 bytes |
+-----------------+-------------------+--------------------------------+
| locktime : long | 8 bytes |
+-----------------+-------------------+--------------------------------+
| transferable_in : TransferableInput | size(transferable_in) |
+-----------------+-------------------+--------------------------------+
| 12 + size(transferable_in) bytes |
+----------------------------------+
```
### Proto StakeableLockIn Specification
```text
message StakeableLockIn {
uint32 type_id = 1; // 04 bytes
uint64 locktime = 2; // 08 bytes
TransferableInput transferable_in = 3; // size(transferable_in)
}
```
### StakeableLockIn Example
Let's make a StakeableLockIn with:
- **`TypeID`**: 21
- **`Locktime`**: 54321
- **`TransferableIn`**: "Example SECP256K1 Transfer Input as defined above"
```text
[
TypeID <- 0x00000015
Locktime <- 0x000000000000d431
TransferableIn <- [
f1e1d1c1b1a191817161514131211101f0e0d0c0b0a09080706050403020100000000005000102030405060708090a0b0c0d0e0f101112131415161718191a1b1c1d1e1f0000000500000000075bcd150000000100000000,
]
]
=
[
// type_id:
0x00, 0x00, 0x00, 0x15,
// locktime:
0x00, 0x00, 0x00, 0x00, 0x00, 0x00, 0xd4, 0x31,
// transferable_in
0xf1, 0xe1, 0xd1, 0xc1, 0xb1, 0xa1, 0x91, 0x81,
0x71, 0x61, 0x51, 0x41, 0x31, 0x21, 0x11, 0x01,
0xf0, 0xe0, 0xd0, 0xc0, 0xb0, 0xa0, 0x90, 0x80,
0x70, 0x60, 0x50, 0x40, 0x30, 0x20, 0x10, 0x00,
0x00, 0x00, 0x00, 0x05,
0x00, 0x01, 0x02, 0x03, 0x04, 0x05, 0x06, 0x07,
0x08, 0x09, 0x0a, 0x0b, 0x0c, 0x0d, 0x0e, 0x0f,
0x10, 0x11, 0x12, 0x13, 0x14, 0x15, 0x16, 0x17,
0x18, 0x19, 0x1a, 0x1b, 0x1c, 0x1d, 0x1e, 0x1f,
0x00, 0x00, 0x00, 0x05, 0x00, 0x00, 0x00, 0x00,
0x07, 0x5b, 0xcd, 0x15, 0x00, 0x00, 0x00, 0x01,
0x00, 0x00, 0x00, 0x00,
]
```
## StakeableLockOut
A StakeableLockOut is an output that is locked until its lock time, but can be staked in the meantime.
### What StakeableLockOut Contains
A StakeableLockOut contains a `TypeID`, `Locktime` and `TransferableOut`.
- **`TypeID`** is the ID for this output type. It is `0x00000016`.
- **`Locktime`** is a long that contains the Unix timestamp before which the
output can be consumed only to stake. The Unix timestamp is specific to the
second.
- **`transferableout`**: "Example SECP256K1 Transfer Output as defined above"
### Gantt StakeableLockOut Specification
```text
+------------------+--------------------+--------------------------------+
| type_id : int | 4 bytes |
+------------------+--------------------+--------------------------------+
| locktime : long | 8 bytes |
+------------------+--------------------+--------------------------------+
| transferable_out : TransferableOutput | size(transferable_out) |
+------------------+--------------------+--------------------------------+
| 12 + size(transferable_out) bytes |
+-----------------------------------+
```
### Proto StakeableLockOut Specification
```text
message StakeableLockOut {
uint32 type_id = 1; // 04 bytes
uint64 locktime = 2; // 08 bytes
TransferableOutput transferable_out = 3; // size(transferable_out)
}
```
### StakeableLockOut Example
Let's make a stakeablelockout with:
- **`TypeID`**: 22
- **`Locktime`**: 54321
- **`TransferableOutput`**: `"Example SECP256K1 Transfer Output from above"`
```text
[
TypeID <- 0x00000016
Locktime <- 0x000000000000d431
TransferableOutput <- 0x000000070000000000003039000000000000d431000000010000000251025c61fbcfc078f69334f834be6dd26d55a955c3344128e060128ede3523a24a461c8943ab0859,
]
=
[
// type_id:
0x00, 0x00, 0x00, 0x16,
// locktime:
0x00, 0x00, 0x00, 0x00, 0x00, 0x00, 0xd4, 0x31,
// transferable_out
0x00, 0x00, 0x00, 0x07, 0x00, 0x00, 0x00, 0x00,
0x00, 0x00, 0x30, 0x39, 0x00, 0x00, 0x00, 0x00,
0x00, 0x00, 0xd4, 0x31, 0x00, 0x00, 0x00, 0x01,
0x00, 0x00, 0x00, 0x02, 0x51, 0x02, 0x5c, 0x61,
0xfb, 0xcf, 0xc0, 0x78, 0xf6, 0x93, 0x34, 0xf8,
0x34, 0xbe, 0x6d, 0xd2, 0x6d, 0x55, 0xa9, 0x55,
0xc3, 0x34, 0x41, 0x28, 0xe0, 0x60, 0x12, 0x8e,
0xde, 0x35, 0x23, 0xa2, 0x4a, 0x46, 0x1c, 0x89,
0x43, 0xab, 0x08, 0x59,
]
```
## Avalanche L1 Auth
### What Avalanche L1 Auth Contains
Specifies the addresses whose signatures will be provided to demonstrate that
the owners of an Avalanche L1 approve something.
- **`TypeID`** is the ID for this type. It is `0x0000000a`.
- **`AddressIndices`** defines which addresses' signatures will be attached to
this transaction. AddressIndices[i] is the index in an Avalanche L1 owner list that
corresponds to the signature at index i in the signature list. Must be sorted
low to high and not have duplicates.
### Gantt Avalanche L1 Auth Specification
```text
+-----------------+------------------+-------------------------------------+
| type_id : int | 4 bytes |
+-----------------+------------------+-------------------------------------+
| address_indices : []int | 4 + 4*len(address_indices) bytes |
+-----------------+------------------+-------------------------------------+
| 8 + 4*len(address_indices) bytes |
+-----------------+--------------------------------------------------------+
```
### Proto Avalanche L1 Auth Specification
```text
message SubnetAuth {
uint32 type_id = 1; // 04 bytes
repeated AddressIndex address_indices = 2; // 04 + 4*len(address_indices) bytes
}
```
### Avalanche L1 Auth Example
Let's make an Avalanche L1 auth:
- **`TypeID`**: `10`
- **`AddressIndices`**: [`0`]
```text
[
TypeID <- 0x0000000a
AddressIndices <- [
0x00000000
]
]
=
[
// type id
0x00, 0x00, 00x0, 0x0a,
// num address indices
0x00, 0x00, 0x00, 0x01,
// address index 1
0x00, 0x00, 0x00, 0x00
]
```
## Validator
A validator verifies transactions on a blockchain.
### What Validator Contains
A validator contains `NodeID`, `Start`, `End`, and `Wght`
- **`NodeID`** is the ID of the validator
- **`Start`** Unix time this validator starts validating
- **`End`** Unix time this validator stops validating
- **`Wght`** Weight of this validator used when sampling
### Gantt Validator Specification
```text
+------------------+----------+
| node_id : string | 20 bytes |
+------------------+----------+
| start : uint64 | 8 bytes |
+------------------+----------+
| end : uint64 | 8 bytes |
+------------------+----------+
| wght : uint64 | 8 bytes |
+------------------+----------+
| | 44 bytes |
+------------------+----------+
```
### Proto Validator Specification
```text
message Validator {
string node_id = 1; // 20 bytes
uint64 start = 2; // 08 bytes
uint64 end = 3; // 08 bytes
uint64 wght = 4; // 08 bytes
}
```
### Validator Example
Let's make a validator:
- **`NodeID`**: `"NodeID-GWPcbFJZFfZreETSoWjPimr846mXEKCtu"`
- **`Start`**: `1643068824`
- **`End`**: `1644364767`
- **`Wght`**: `20`
```text
[
NodeID <- 0xaa18d3991cf637aa6c162f5e95cf163f69cd8291
Start <- 0x61ef3d98
End <- 0x620303df
Wght <- 0x14
]
=
[
// node id
0xaa, 0x18, 0xd3, 0x99, 0x1c, 0xf6, 0x37,
0xaa, 0x6c, 0x16, 0x2f, 0x5e, 0x95, 0xcf,
0x16, 0x3f, 0x69, 0xcd, 0x82, 0x91,
// start
0x61, 0xef, 0x3d, 0x98,
// end
0x62, 0x03, 0x03, 0xdf,
// wght
0x14,
]
```
## Rewards Owner
Where to send staking rewards when done validating
### What Rewards Owner Contains
A rewards owner contains a `TypeID`, `Locktime`, `Threshold`, and `Addresses`.
- **`TypeID`** is the ID for this validator. It is `0x0000000b`.
- **`Locktime`** is a long that contains the Unix timestamp that this output can
be spent after. The Unix timestamp is specific to the second.
- **`Threshold`** is an int that names the number of unique signatures required
to spend the output. Must be less than or equal to the length of
**`Addresses`**. If **`Addresses`** is empty, must be 0.
- **`Addresses`** is a list of unique addresses that correspond to the private
keys that can be used to spend this output. Addresses must be sorted
lexicographically.
### Gantt Rewards Owner Specification
```text
+------------------------+-------------------------------+
| type_id : int | 4 bytes |
+------------------------+-------------------------------+
| locktime : long | 8 bytes |
+------------------------+-------------------------------+
| threshold : int | 4 bytes |
+------------------------+-------------------------------+
| addresses : [][20]byte | 4 + 20 * len(addresses) bytes |
+------------------------+-------------------------------+
| | 40 bytes |
+------------------------+-------------------------------+
```
### Proto Rewards Owner Specification
```text
message RewardsOwner {
string type_id = 1; // 4 bytes
uint64 locktime = 2; // 08 bytes
uint32 threshold = 3; // 04 bytes
repeated bytes addresses = 4; // 04 bytes + 20 bytes * len(addresses)
}
```
### Rewards Owner Example
Let's make a rewards owner:
- **`TypeID`**: `11`
- **`Locktime`**: `54321`
- **`Threshold`**: `1`
- **`Addresses`**:
- `0x51025c61fbcfc078f69334f834be6dd26d55a955`
- `0xc3344128e060128ede3523a24a461c8943ab0859`
```text
[
TypeID <- 0x0000000b
Locktime <- 0x000000000000d431
Threshold <- 0x00000001
Addresses <- [
0x51025c61fbcfc078f69334f834be6dd26d55a955,
0xc3344128e060128ede3523a24a461c8943ab0859,
]
]
=
[
// type id
0x00, 0x00, 0x00, 0x0b,
// locktime
0x00, 0x00, 0x00, 0x00, 0x00, 0x00, 0xd4, 0x31,
// threshold:
0x00, 0x00, 0x00, 0x01,
// number of addresses:
0x00, 0x00, 0x00, 0x02,
// addrs[0]:
0x51, 0x02, 0x5c, 0x61, 0xfb, 0xcf, 0xc0, 0x78,
0xf6, 0x93, 0x34, 0xf8, 0x34, 0xbe, 0x6d, 0xd2,
0x6d, 0x55, 0xa9, 0x55,
// addrs[1]:
0xc3, 0x34, 0x41, 0x28, 0xe0, 0x60, 0x12, 0x8e,
0xde, 0x35, 0x23, 0xa2, 0x4a, 0x46, 0x1c, 0x89,
0x43, 0xab, 0x08, 0x59,
]
```
## Unsigned Convert Subnet To L1 TX
### What Unsigned Convert Subnet To L1 TX Contains
An unsigned convert subnet to L1 TX contains a `BaseTx`, `Subnet`, `ChainID`, `Address`, `Validators`, and `SubnetAuth`. The `TypeID` for this type is `0x00000030`.
- **`BaseTx`**
- **`Subnet`** ID of the Subnet to transform into an L1. Must not be the Primary Network ID.
- **`ChainID`** BlockchainID where the validator manager lives.
- **`Address`** Address of the validator manager.
- **`Validators`** Initial continuous-fee-paying validators for the L1.
- **`SubnetAuth`** Authorizes this conversion. Must be signed by the Subnet's owner.
### Gantt Unsigned Convert Subnet To L1 TX Specification
```text
+------------+------------------+----------------------------------+
| base_tx : BaseTx | size(base_tx) bytes |
+------------+------------------+----------------------------------+
| subnet : [32]byte | 32 bytes |
+------------+------------------+----------------------------------+
| chain_id : [32]byte | 32 bytes |
+------------+------------------+----------------------------------+
| address : []byte | 4 + len(address) bytes |
+------------+------------------+----------------------------------+
| validators : []L1Validator | 4 + size(validators) bytes |
+------------+------------------+----------------------------------+
| subnet_auth: SubnetAuth | 4 bytes + len(sig_indices) bytes |
+------------+------------------+----------------------------------+
| 76 + size(base_tx) + len(address) + size(validators) + len(sig_indices) bytes |
+----------------------------------------------------------------------------+
```
### Proto Unsigned Convert Subnet To L1 TX Specification
```text
message ConvertSubnetToL1Tx {
BaseTx base_tx = 1; // size(base_tx)
SubnetID subnet = 2; // 32 bytes
ChainID chain_id = 3; // 32 bytes
bytes address = 4; // 4 + len(address) bytes
repeated L1Validator validators = 5; // 4 + size(validators) bytes
SubnetAuth subnet_auth = 6; // 4 bytes + len(sig_indices)
}
```
## Unsigned Register L1 Validator TX
### What Unsigned Register L1 Validator TX Contains
An unsigned register L1 validator TX contains a `BaseTx`, `Balance`, `Signer` and `Message`. The `TypeID` for this type is `0x00000031`.
- **`BaseTx`**
- **`Balance`** is the amount of AVAX being provided for fees, where `Balance <= sum($AVAX inputs) - sum($AVAX outputs) - TxFee`.
- **`Signer`** is a BLS signature proving ownership of the BLS public key specified in the Message for this validator.
- **`Message`** is a RegisterL1ValidatorMessage payload delivered as a Warp Message.
### Gantt Unsigned Register L1 Validator TX Specification
```text
+------------+------------------+----------------------------------+
| base_tx : BaseTx | size(base_tx) bytes |
+------------+------------------+----------------------------------+
| balance : uint64 | 8 bytes |
+------------+------------------+----------------------------------+
| signer : [96]byte | 96 bytes |
+------------+------------------+----------------------------------+
| message : WarpMessage | size(message) bytes |
+------------+------------------+----------------------------------+
| 104 + size(base_tx) + size(message) bytes |
+------------------------------------------------------------------+
```
### Proto Unsigned Register L1 Validator TX Specification
```text
message RegisterL1ValidatorTx {
BaseTx base_tx = 1; // size(base_tx)
uint64 balance = 2; // 8 bytes
bytes signer = 3; // 96 bytes
WarpMessage message = 4; // size(message) bytes
}
```
## Unsigned Set L1 Validator Weight TX
### What Unsigned Set L1 Validator Weight TX Contains
An unsigned set L1 validator weight TX contains a `BaseTx` and `Message`. The `TypeID` for this type is `0x00000032`.
- **`BaseTx`**
- **`Message`** An L1ValidatorWeightMessage payload delivered as a Warp Message. Contains the validationID, nonce, and new weight for a validator.
### Gantt Unsigned Set L1 Validator Weight TX Specification
```text
+------------+------------------+----------------------------------+
| base_tx : BaseTx | size(base_tx) bytes |
+------------+------------------+----------------------------------+
| message : WarpMessage | size(message) bytes |
+------------+------------------+----------------------------------+
| size(base_tx) + size(message) bytes |
+------------------------------------------------------------------+
```
### Proto Unsigned Set L1 Validator Weight TX Specification
```text
message SetL1ValidatorWeightTx {
BaseTx base_tx = 1; // size(base_tx)
WarpMessage message = 2; // size(message) bytes
}
```
## Unsigned Disable L1 Validator TX
### What Unsigned Disable L1 Validator TX Contains
An unsigned disable L1 validator TX contains a `BaseTx`, `ValidationID` and `DisableAuth`. The `TypeID` for this type is `0x00000033`.
- **`BaseTx`**
- **`ValidationID`** ID corresponding to the validator to be disabled.
- **`DisableAuth`** Authorizes this validator to be disabled. Must be signed by the DisableOwner specified when the validator was added.
### Gantt Unsigned Disable L1 Validator TX Specification
```text
+----------------+------------------+----------------------------------+
| base_tx : BaseTx | size(base_tx) bytes |
+----------------+------------------+----------------------------------+
| validation_id : [32]byte | 32 bytes |
+----------------+------------------+----------------------------------+
| disable_auth : Verifiable | size(disable_auth) bytes |
+----------------+------------------+----------------------------------+
| 32 + size(base_tx) + size(disable_auth) bytes |
+----------------------------------------------------------------------+
```
### Proto Unsigned Disable L1 Validator TX Specification
```text
message DisableL1ValidatorTx {
BaseTx base_tx = 1; // size(base_tx)
bytes validation_id = 2; // 32 bytes
Verifiable disable_auth = 3; // size(disable_auth) bytes
}
```
## Unsigned Increase L1 Validator Balance TX
### What Unsigned Increase L1 Validator Balance TX Contains
An unsigned increase L1 validator balance TX contains a `BaseTx`, `ValidationID` and `Balance`. The `TypeID` for this type is `0x00000034`.
- **`BaseTx`**
- **`ValidationID`** ID corresponding to the validator.
- **`Balance`** Additional AVAX amount to add to the validator's balance where `Balance <= sum($AVAX inputs) - sum($AVAX outputs) - TxFee`.
### Gantt Unsigned Increase L1 Validator Balance TX Specification
```text
+----------------+------------------+----------------------------------+
| base_tx : BaseTx | size(base_tx) bytes |
+----------------+------------------+----------------------------------+
| validation_id : [32]byte | 32 bytes |
+----------------+------------------+----------------------------------+
| balance : uint64 | 8 bytes |
+----------------+------------------+----------------------------------+
| 40 + size(base_tx) bytes |
+----------------------------------------------------------------------+
```
### Proto Unsigned Increase L1 Validator Balance TX Specification
```text
message IncreaseL1ValidatorBalanceTx {
BaseTx base_tx = 1; // size(base_tx)
bytes validation_id = 2; // 32 bytes
uint64 balance = 3; // 8 bytes
}
```
# Subnet-EVM RPC (/docs/rpcs/subnet-evm)
---
title: "Subnet-EVM RPC"
description: "This page describes the RPC endpoints available for Subnet-EVM based blockchains."
edit_url: https://github.com/ava-labs/subnet-evm/edit/master/plugin/evm/service.md
---
[Subnet-EVM](https://github.com/ava-labs/subnet-evm) APIs are identical to
[Coreth](https://build.avax.network/docs/api-reference/c-chain/api) C-Chain APIs, except Avalanche Specific APIs
starting with `avax`. Subnet-EVM also supports standard Ethereum APIs as well. For more
information about Coreth APIs see [GitHub](https://github.com/ava-labs/coreth).
Subnet-EVM has some additional APIs that are not available in Coreth.
## `eth_feeConfig`
Subnet-EVM comes with an API request for getting fee config at a specific block. You can use this
API to check your activated fee config.
**Signature:**
```bash
eth_feeConfig([blk BlkNrOrHash]) -> {feeConfig: json}
```
- `blk` is the block number or hash at which to retrieve the fee config. Defaults to the latest block if omitted.
**Example Call:**
```bash
curl -X POST --data '{
"jsonrpc": "2.0",
"method": "eth_feeConfig",
"params": [
"latest"
],
"id": 1
}' -H 'content-type:application/json;' 127.0.0.1:9650/ext/bc/2ebCneCbwthjQ1rYT41nhd7M76Hc6YmosMAQrTFhBq8qeqh6tt/rpc
```
**Example Response:**
```json
{
"jsonrpc": "2.0",
"id": 1,
"result": {
"feeConfig": {
"gasLimit": 15000000,
"targetBlockRate": 2,
"minBaseFee": 33000000000,
"targetGas": 15000000,
"baseFeeChangeDenominator": 36,
"minBlockGasCost": 0,
"maxBlockGasCost": 1000000,
"blockGasCostStep": 200000
},
"lastChangedAt": 0
}
}
```
## `eth_getChainConfig`
`eth_getChainConfig` returns the Chain Config of the blockchain. This API is enabled by default with
`internal-blockchain` namespace.
This API exists on the C-Chain as well, but in addition to the normal Chain Config returned by the
C-Chain `eth_getChainConfig` on `subnet-evm` additionally returns the upgrade config, which specifies
network upgrades activated after the genesis. **Signature:**
```bash
eth_getChainConfig({}) -> {chainConfig: json}
```
**Example Call:**
```bash
curl -X POST --data '{
"jsonrpc":"2.0",
"id" :1,
"method" :"eth_getChainConfig",
"params" :[]
}' -H 'content-type:application/json;' 127.0.0.1:9650/ext/bc/Nvqcm33CX2XABS62iZsAcVUkavfnzp1Sc5k413wn5Nrf7Qjt7/rpc
```
**Example Response:**
```json
{
"jsonrpc": "2.0",
"id": 1,
"result": {
"chainId": 43214,
"feeConfig": {
"gasLimit": 8000000,
"targetBlockRate": 2,
"minBaseFee": 33000000000,
"targetGas": 15000000,
"baseFeeChangeDenominator": 36,
"minBlockGasCost": 0,
"maxBlockGasCost": 1000000,
"blockGasCostStep": 200000
},
"allowFeeRecipients": true,
"homesteadBlock": 0,
"eip150Block": 0,
"eip150Hash": "0x2086799aeebeae135c246c65021c82b4e15a2c451340993aacfd2751886514f0",
"eip155Block": 0,
"eip158Block": 0,
"byzantiumBlock": 0,
"constantinopleBlock": 0,
"petersburgBlock": 0,
"istanbulBlock": 0,
"muirGlacierBlock": 0,
"subnetEVMTimestamp": 0,
"contractDeployerAllowListConfig": {
"adminAddresses": ["0x8db97c7cece249c2b98bdc0226cc4c2a57bf52fc"],
"blockTimestamp": 0
},
"contractNativeMinterConfig": {
"adminAddresses": ["0x8db97c7cece249c2b98bdc0226cc4c2a57bf52fc"],
"blockTimestamp": 0
},
"feeManagerConfig": {
"adminAddresses": ["0x8db97c7cece249c2b98bdc0226cc4c2a57bf52fc"],
"blockTimestamp": 0
},
"upgrades": {
"precompileUpgrades": [
{
"feeManagerConfig": {
"adminAddresses": null,
"blockTimestamp": 1661541259,
"disable": true
}
},
{
"feeManagerConfig": {
"adminAddresses": null,
"blockTimestamp": 1661541269
}
}
]
}
}
}
```
## `eth_getActivePrecompilesAt`
**DEPRECATED—instead use** [`eth_getActiveRulesAt`](#eth_getactiveprecompilesat).
`eth_getActivePrecompilesAt` returns activated precompiles at a specific timestamp. If no
timestamp is provided it returns the latest block timestamp. This API is enabled by default with
`internal-blockchain` namespace.
**Signature:**
```bash
eth_getActivePrecompilesAt([timestamp uint]) -> {precompiles: []Precompile}
```
- `timestamp` specifies the timestamp to show the precompiles active at this time. If omitted it shows precompiles activated at the latest block timestamp.
**Example Call:**
```bash
curl -X POST --data '{
"jsonrpc": "2.0",
"method": "eth_getActivePrecompilesAt",
"params": [],
"id": 1
}' -H 'content-type:application/json;' 127.0.0.1:9650/ext/bc/Nvqcm33CX2XABS62iZsAcVUkavfnzp1Sc5k413wn5Nrf7Qjt7/rpc
```
**Example Response:**
```json
{
"jsonrpc": "2.0",
"id": 1,
"result": {
"contractDeployerAllowListConfig": {
"adminAddresses": ["0x8db97c7cece249c2b98bdc0226cc4c2a57bf52fc"],
"blockTimestamp": 0
},
"contractNativeMinterConfig": {
"adminAddresses": ["0x8db97c7cece249c2b98bdc0226cc4c2a57bf52fc"],
"blockTimestamp": 0
},
"feeManagerConfig": {
"adminAddresses": ["0x8db97c7cece249c2b98bdc0226cc4c2a57bf52fc"],
"blockTimestamp": 0
}
}
}
```
## `eth_getActiveRulesAt`
`eth_getActiveRulesAt` returns activated rules (precompiles, upgrades) at a specific timestamp. If no
timestamp is provided it returns the latest block timestamp. This API is enabled by default with
`internal-blockchain` namespace.
**Signature:**
```bash
eth_getActiveRulesAt([timestamp uint]) -> {rules: json}
```
- `timestamp` specifies the timestamp to show the rules active at this time. If omitted it shows rules activated at the latest block timestamp.
**Example Call:**
```bash
curl -X POST --data '{
"jsonrpc": "2.0",
"method": "eth_getActiveRulesAt",
"params": [],
"id": 1
}' -H 'content-type:application/json;' 127.0.0.1:9650/ext/bc/Nvqcm33CX2XABS62iZsAcVUkavfnzp1Sc5k413wn5Nrf7Qjt7/rpc
```
**Example Response:**
```json
{
"jsonrpc": "2.0",
"id": 1,
"result": {
"ethRules": {
"IsHomestead": true,
"IsEIP150": true,
"IsEIP155": true,
"IsEIP158": true,
"IsByzantium": true,
"IsConstantinople": true,
"IsPetersburg": true,
"IsIstanbul": true,
"IsCancun": true
},
"avalancheRules": {
"IsSubnetEVM": true,
"IsDurango": true,
"IsEtna": true
},
"precompiles": {
"contractNativeMinterConfig": {
"timestamp": 0
},
"rewardManagerConfig": {
"timestamp": 1712918700
},
"warpConfig": {
"timestamp": 1714158045
}
}
}
}
```
## `validators.getCurrentValidators`
This API retrieves the list of current validators for the Subnet/L1. It provides detailed information about each validator, including their ID, status, weight, connection, and uptime.
URL: `http:///ext/bc//validators`
**Signature:**
```bash
validators.getCurrentValidators({nodeIDs: []string}) -> {validators: []Validator}
```
- `nodeIDs` is an optional parameter that specifies the node IDs of the validators to retrieve. If omitted, all validators are returned.
**Example Call:**
```bash
curl -X POST --data '{
"jsonrpc": "2.0",
"method": "validators.getCurrentValidators",
"params": {
"nodeIDs": []
},
"id": 1
}' -H 'content-type:application/json;' 127.0.0.1:9650/ext/bc/C49rHzk3vLr1w9Z8sY7scrZ69TU4WcD2pRS6ZyzaSn9xA2U9F/validators
```
**Example Response:**
```json
{
"jsonrpc": "2.0",
"result": {
"validators": [
{
"validationID": "nESqWkcNXihfdZESS2idWbFETMzatmkoTCktjxG1qryaQXfS6",
"nodeID": "NodeID-P7oB2McjBGgW2NXXWVYjV8JEDFoW9xDE5",
"weight": 20,
"startTimestamp": 1732025492,
"isActive": true,
"isL1Validator": false,
"isConnected": true,
"uptimeSeconds": 36,
"uptimePercentage": 100
}
]
},
"id": 1
}
```
**Response Fields:**
- `validationID`: (string) Unique identifier for the validation. This returns validation ID for L1s, AddSubnetValidator txID for Subnets.
- `nodeID`: (string) Node identifier for the validator.
- `weight`: (integer) The weight of the validator, often representing stake.
- `startTimestamp`: (integer) UNIX timestamp for when validation started.
- `isActive`: (boolean) Indicates if the validator is active. This returns true if this is L1 validator and has enough continuous subnet staking fees in P-Chain. It always returns true for subnet validators.
- `isL1Validator`: (boolean) Indicates if the validator is a L1 validator or a subnet validator.
- `isConnected`: (boolean) Indicates if the validator node is currently connected to the callee node.
- `uptimeSeconds`: (integer) The number of seconds the validator has been online.
- `uptimePercentage`: (float) The percentage of time the validator has been online.
# X-Chain API (/docs/rpcs/x-chain/api)
---
title: "X-Chain API"
description: "This page is an overview of the X-Chain API associated with AvalancheGo."
edit_url: https://github.com/ava-labs/avalanchego/edit/master/vms/avm/service.md
---
The [X-Chain](https://build.avax.network/docs/quick-start/primary-network#x-chain),
Avalanche's native platform for creating and trading assets, is an instance of the Avalanche Virtual
Machine (AVM). This API allows clients to create and trade assets on the X-Chain and other instances
of the AVM.
## Format
This API uses the `json 2.0` RPC format. For more information on making JSON RPC calls, see
[here](https://build.avax.network/docs/api-reference/guides/issuing-api-calls).
## Endpoints
`/ext/bc/X` to interact with the X-Chain.
`/ext/bc/blockchainID` to interact with other AVM instances, where `blockchainID` is the ID of a
blockchain running the AVM.
## Methods
### `avm.getAllBalances`
Deprecated as of [**v1.9.12**](https://github.com/ava-labs/avalanchego/releases/tag/v1.9.12).
Get the balances of all assets controlled by a given address.
**Signature:**
```sh
avm.getAllBalances({address:string}) -> {
balances: []{
asset: string,
balance: int
}
}
```
**Example Call:**
```sh
curl -X POST --data '{
"jsonrpc":"2.0",
"id" : 1,
"method" :"avm.getAllBalances",
"params" :{
"address":"X-avax1c79e0dd0susp7dc8udq34jgk2yvve7hapvdyht"
}
}' -H 'content-type:application/json;' 127.0.0.1:9650/ext/bc/X
```
**Example Response:**
```json
{
"jsonrpc": "2.0",
"result": {
"balances": [
{
"asset": "AVAX",
"balance": "102"
},
{
"asset": "2sdnziCz37Jov3QSNMXcFRGFJ1tgauaj6L7qfk7yUcRPfQMC79",
"balance": "10000"
}
]
},
"id": 1
}
```
### `avm.getAssetDescription`
Get information about an asset.
**Signature:**
```sh
avm.getAssetDescription({assetID: string}) -> {
assetId: string,
name: string,
symbol: string,
denomination: int
}
```
- `assetID` is the id of the asset for which the information is requested.
- `name` is the asset’s human-readable, not necessarily unique name.
- `symbol` is the asset’s symbol.
- `denomination` determines how balances of this asset are displayed by user interfaces. If
denomination is 0, 100 units of this asset are displayed as 100. If denomination is 1, 100 units
of this asset are displayed as 10.0. If denomination is 2, 100 units of this asset are displays as
.100, etc.
The AssetID for AVAX differs depending on the network you are on.
Mainnet: FvwEAhmxKfeiG8SnEvq42hc6whRyY3EFYAvebMqDNDGCgxN5Z
Testnet: U8iRqJoiJm8xZHAacmvYyZVwqQx6uDNtQeP3CQ6fcgQk3JqnK
For finding the `assetID` of other assets, this [info] might be useful.
Also, `avm.getUTXOs` returns the `assetID` in its output.
**Example Call:**
```sh
curl -X POST --data '{
"jsonrpc":"2.0",
"id" :1,
"method" :"avm.getAssetDescription",
"params" :{
"assetID" :"FvwEAhmxKfeiG8SnEvq42hc6whRyY3EFYAvebMqDNDGCgxN5Z"
}
}' -H 'content-type:application/json;' 127.0.0.1:9650/ext/bc/X
```
**Example Response:**
```json
{
"jsonrpc": "2.0",
"result": {
"assetID": "FvwEAhmxKfeiG8SnEvq42hc6whRyY3EFYAvebMqDNDGCgxN5Z",
"name": "Avalanche",
"symbol": "AVAX",
"denomination": "9"
},
"id": 1
}`
```
### `avm.getBalance`
Deprecated as of [**v1.9.12**](https://github.com/ava-labs/avalanchego/releases/tag/v1.9.12).
Get the balance of an asset controlled by a given address.
**Signature:**
```sh
avm.getBalance({
address: string,
assetID: string
}) -> {balance: int}
```
- `address` owner of the asset
- `assetID` id of the asset for which the balance is requested
**Example Call:**
```sh
curl -X POST --data '{
"jsonrpc":"2.0",
"id" : 1,
"method" :"avm.getBalance",
"params" :{
"address":"X-avax18jma8ppw3nhx5r4ap8clazz0dps7rv5ukulre5",
"assetID": "2pYGetDWyKdHxpFxh2LHeoLNCH6H5vxxCxHQtFnnFaYxLsqtHC"
}
}' -H 'content-type:application/json;' 127.0.0.1:9650/ext/bc/X
```
**Example Response:**
```json
{
"jsonrpc": "2.0",
"id": 1,
"result": {
"balance": "299999999999900",
"utxoIDs": [
{
"txID": "WPQdyLNqHfiEKp4zcCpayRHYDVYuh1hqs9c1RqgZXS4VPgdvo",
"outputIndex": 1
}
]
}
}
```
### `avm.getBlock`
Returns the block with the given id.
**Signature:**
```sh
avm.getBlock({
blockID: string
encoding: string // optional
}) -> {
block: string,
encoding: string
}
```
**Request:**
- `blockID` is the block ID. It should be in cb58 format.
- `encoding` is the encoding format to use. Can be either `hex` or `json`. Defaults to `hex`.
**Response:**
- `block` is the transaction encoded to `encoding`.
- `encoding` is the `encoding`.
#### Hex Example
**Example Call:**
```sh
curl -X POST --data '{
"jsonrpc": "2.0",
"method": "avm.getBlock",
"params": {
"blockID": "tXJ4xwmR8soHE6DzRNMQPtiwQvuYsHn6eLLBzo2moDqBquqy6",
"encoding": "hex"
},
"id": 1
}' -H 'content-type:application/json;' 127.0.0.1:9650/ext/bc/X
```
**Example Response:**
```json
{
"jsonrpc": "2.0",
"result": {
"block": "0x00000000002000000000641ad33ede17f652512193721df87994f783ec806bb5640c39ee73676caffcc3215e0651000000000049a80a000000010000000e0000000100000000000000000000000000000000000000000000000000000000000000000000000121e67317cbc4be2aeb00677ad6462778a8f52274b9d605df2591b23027a87dff000000070000002e1a2a3910000000000000000000000001000000015cf998275803a7277926912defdf177b2e97b0b400000001e0d825c5069a7336671dd27eaa5c7851d2cf449e7e1cdc469c5c9e5a953955950000000021e67317cbc4be2aeb00677ad6462778a8f52274b9d605df2591b23027a87dff000000050000008908223b680000000100000000000000005e45d02fcc9e585544008f1df7ae5c94bf7f0f2600000000641ad3b600000000642d48b60000005aedf802580000000121e67317cbc4be2aeb00677ad6462778a8f52274b9d605df2591b23027a87dff000000070000005aedf80258000000000000000000000001000000015cf998275803a7277926912defdf177b2e97b0b40000000b000000000000000000000001000000012892441ba9a160bcdc596dcd2cc3ad83c3493589000000010000000900000001adf2237a5fe2dfd906265e8e14274aa7a7b2ee60c66213110598ba34fb4824d74f7760321c0c8fb1e8d3c5e86909248e48a7ae02e641da5559351693a8a1939800286d4fa2",
"encoding": "hex"
},
"id": 1
}
```
### `avm.getBlockByHeight`
Returns block at the given height.
**Signature:**
```sh
avm.getBlockByHeight({
height: string
encoding: string // optional
}) -> {
block: string,
encoding: string
}
```
**Request:**
- `blockHeight` is the block height. It should be in `string` format.
- `encoding` is the encoding format to use. Can be either `hex` or `json`. Defaults to `hex`.
**Response:**
- `block` is the transaction encoded to `encoding`.
- `encoding` is the `encoding`.
#### Hex Example
**Example Call:**
```sh
curl -X POST --data '{
"jsonrpc": "2.0",
"method": "avm.getBlockByHeight",
"params": {
"height": "275686313486",
"encoding": "hex"
},
"id": 1
}' -H 'content-type:application/json;' 127.0.0.1:9650/ext/bc/X
```
**Example Response:**
```json
{
"jsonrpc": "2.0",
"result": {
"block": "0x00000000002000000000642f6739d4efcdd07e4d4919a7fc2020b8a0f081dd64c262aaace5a6dad22be0b55fec0700000000004db9e100000001000000110000000100000000000000000000000000000000000000000000000000000000000000000000000121e67317cbc4be2aeb00677ad6462778a8f52274b9d605df2591b23027a87dff000000070000005c6ece390000000000000000000000000100000001930ab7bf5018bfc6f9435c8b15ba2fe1e619c0230000000000000000ed5f38341e436e5d46e2bb00b45d62ae97d1b050c64bc634ae10626739e35c4b00000001c6dda861341665c3b555b46227fb5e56dc0a870c5482809349f04b00348af2a80000000021e67317cbc4be2aeb00677ad6462778a8f52274b9d605df2591b23027a87dff000000050000005c6edd7b40000000010000000000000001000000090000000178688f4d5055bd8733801f9b52793da885bef424c90526c18e4dd97f7514bf6f0c3d2a0e9a5ea8b761bc41902eb4902c34ef034c4d18c3db7c83c64ffeadd93600731676de",
"encoding": "hex"
},
"id": 1
}
```
### `avm.getHeight`
Returns the height of the last accepted block.
**Signature:**
```sh
avm.getHeight() ->
{
height: uint64,
}
```
**Example Call:**
```sh
curl -X POST --data '{
"jsonrpc": "2.0",
"method": "avm.getHeight",
"params": {},
"id": 1
}' -H 'content-type:application/json;' 127.0.0.1:9650/ext/bc/X
```
**Example Response:**
```json
{
"jsonrpc": "2.0",
"result": {
"height": "5094088"
},
"id": 1
}
```
### `avm.getTx`
Returns the specified transaction. The `encoding` parameter sets the format of the returned
transaction. Can be either `"hex"` or `"json"`. Defaults to `"hex"`.
**Signature:**
```sh
avm.getTx({
txID: string,
encoding: string, //optional
}) -> {
tx: string,
encoding: string,
}
```
**Example Call:**
```sh
curl -X POST --data '{
"jsonrpc":"2.0",
"id" :1,
"method" :"avm.getTx",
"params" :{
"txID":"2oJCbb8pfdxEHAf9A8CdN4Afj9VSR3xzyzNkf8tDv7aM1sfNFL",
"encoding": "json"
}
}' -H 'content-type:application/json;' 127.0.0.1:9650/ext/bc/X
```
**Example Response:**
```json
{
"jsonrpc": "2.0",
"result": {
"tx": {
"unsignedTx": {
"networkID": 1,
"blockchainID": "2oYMBNV4eNHyqk2fjjV5nVQLDbtmNJzq5s3qs3Lo6ftnC6FByM",
"outputs": [],
"inputs": [
{
"txID": "2jbZUvi6nHy3Pgmk8xcMpSg5cW6epkPqdKkHSCweb4eRXtq4k9",
"outputIndex": 1,
"assetID": "FvwEAhmxKfeiG8SnEvq42hc6whRyY3EFYAvebMqDNDGCgxN5Z",
"fxID": "spdxUxVJQbX85MGxMHbKw1sHxMnSqJ3QBzDyDYEP3h6TLuxqQ",
"input": {
"amount": 2570382395,
"signatureIndices": [0]
}
}
],
"memo": "0x",
"destinationChain": "11111111111111111111111111111111LpoYY",
"exportedOutputs": [
{
"assetID": "FvwEAhmxKfeiG8SnEvq42hc6whRyY3EFYAvebMqDNDGCgxN5Z",
"fxID": "spdxUxVJQbX85MGxMHbKw1sHxMnSqJ3QBzDyDYEP3h6TLuxqQ",
"output": {
"addresses": ["X-avax1tnuesf6cqwnjw7fxjyk7lhch0vhf0v95wj5jvy"],
"amount": 2569382395,
"locktime": 0,
"threshold": 1
}
}
]
},
"credentials": [
{
"fxID": "spdxUxVJQbX85MGxMHbKw1sHxMnSqJ3QBzDyDYEP3h6TLuxqQ",
"credential": {
"signatures": [
"0x46ebcbcfbee3ece1fd15015204045cf3cb77f42c48d0201fc150341f91f086f177cfca8894ca9b4a0c55d6950218e4ea8c01d5c4aefb85cd7264b47bd57d224400"
]
}
}
],
"id": "2oJCbb8pfdxEHAf9A8CdN4Afj9VSR3xzyzNkf8tDv7aM1sfNFL"
},
"encoding": "json"
},
"id": 1
}
```
Where:
- `credentials` is a list of this transaction's credentials. Each credential proves that this
transaction's creator is allowed to consume one of this transaction's inputs. Each credential is a
list of signatures.
- `unsignedTx` is the non-signature portion of the transaction.
- `networkID` is the ID of the network this transaction happened on. (Avalanche Mainnet is `1`.)
- `blockchainID` is the ID of the blockchain this transaction happened on. (Avalanche Mainnet
X-Chain is `2oYMBNV4eNHyqk2fjjV5nVQLDbtmNJzq5s3qs3Lo6ftnC6FByM`.)
- Each element of `outputs` is an output (UTXO) of this transaction that is not being exported to
another chain.
- Each element of `inputs` is an input of this transaction which has not been imported from another
chain.
- Import Transactions have additional fields `sourceChain` and `importedInputs`, which specify the
blockchain ID that assets are being imported from, and the inputs that are being imported.
- Export Transactions have additional fields `destinationChain` and `exportedOutputs`, which specify
the blockchain ID that assets are being exported to, and the UTXOs that are being exported.
An output contains:
- `assetID`: The ID of the asset being transferred. (The Mainnet Avax ID is
`FvwEAhmxKfeiG8SnEvq42hc6whRyY3EFYAvebMqDNDGCgxN5Z`.)
- `fxID`: The ID of the FX this output uses.
- `output`: The FX-specific contents of this output.
Most outputs use the secp256k1 FX, look like this:
```json
{
"assetID": "FvwEAhmxKfeiG8SnEvq42hc6whRyY3EFYAvebMqDNDGCgxN5Z",
"fxID": "spdxUxVJQbX85MGxMHbKw1sHxMnSqJ3QBzDyDYEP3h6TLuxqQ",
"output": {
"addresses": ["X-avax126rd3w35xwkmj8670zvf7y5r8k36qa9z9803wm"],
"amount": 1530084210,
"locktime": 0,
"threshold": 1
}
}
```
The above output can be consumed after Unix time `locktime` by a transaction that has signatures
from `threshold` of the addresses in `addresses`.
### `avm.getTxFee`
Get the fees of the network.
**Signature**:
```
avm.getTxFee() ->
{
txFee: uint64,
createAssetTxFee: uint64,
}
```
- `txFee` is the default fee for making transactions.
- `createAssetTxFee` is the fee for creating a new asset.
All fees are denominated in nAVAX.
**Example Call**:
```sh
curl -X POST --data '{
"jsonrpc":"2.0",
"id" : 1,
"method" :"avm.getTxFee",
}' -H 'content-type:application/json;' 127.0.0.1:9650/ext/bc/X
```
**Example Response**:
```json
{
"jsonrpc": "2.0",
"result": {
"txFee": "1000000",
"createAssetTxFee": "10000000"
}
}
```
### `avm.getTxStatus`
Deprecated as of **v1.10.0**.
Get the status of a transaction sent to the network.
**Signature:**
```sh
avm.getTxStatus({txID: string}) -> {status: string}
```
`status` is one of:
- `Accepted`: The transaction is (or will be) accepted by every node
- `Processing`: The transaction is being voted on by this node
- `Rejected`: The transaction will never be accepted by any node in the network
- `Unknown`: The transaction hasn’t been seen by this node
**Example Call:**
```sh
curl -X POST --data '{
"jsonrpc":"2.0",
"id" :1,
"method" :"avm.getTxStatus",
"params" :{
"txID":"2QouvFWUbjuySRxeX5xMbNCuAaKWfbk5FeEa2JmoF85RKLk2dD"
}
}' -H 'content-type:application/json;' 127.0.0.1:9650/ext/bc/X
```
**Example Response:**
```json
{
"jsonrpc": "2.0",
"id": 1,
"result": {
"status": "Accepted"
}
}
```
### `avm.getUTXOs`
Gets the UTXOs that reference a given address. If `sourceChain` is specified, then it will retrieve
the atomic UTXOs exported from that chain to the X Chain.
**Signature:**
```sh
avm.getUTXOs({
addresses: []string,
limit: int, //optional
startIndex: { //optional
address: string,
utxo: string
},
sourceChain: string, //optional
encoding: string //optional
}) -> {
numFetched: int,
utxos: []string,
endIndex: {
address: string,
utxo: string
},
sourceChain: string, //optional
encoding: string
}
```
- `utxos` is a list of UTXOs such that each UTXO references at least one address in `addresses`.
- At most `limit` UTXOs are returned. If `limit` is omitted or greater than 1024, it is set to 1024.
- This method supports pagination. `endIndex` denotes the last UTXO returned. To get the next set of
UTXOs, use the value of `endIndex` as `startIndex` in the next call.
- If `startIndex` is omitted, will fetch all UTXOs up to `limit`.
- When using pagination (when `startIndex` is provided), UTXOs are not guaranteed to be unique
across multiple calls. That is, a UTXO may appear in the result of the first call, and then again
in the second call.
- When using pagination, consistency is not guaranteed across multiple calls. That is, the UTXO set
of the addresses may have changed between calls.
- `encoding` sets the format for the returned UTXOs. Can only be `hex` when a value is provided.
#### **Example**
Suppose we want all UTXOs that reference at least one of
`X-avax18jma8ppw3nhx5r4ap8clazz0dps7rv5ukulre5` and `X-avax1d09qn852zcy03sfc9hay2llmn9hsgnw4tp3dv6`.
```sh
curl -X POST --data '{
"jsonrpc":"2.0",
"id" :1,
"method" :"avm.getUTXOs",
"params" :{
"addresses":["X-avax18jma8ppw3nhx5r4ap8clazz0dps7rv5ukulre5", "X-avax1d09qn852zcy03sfc9hay2llmn9hsgnw4tp3dv6"],
"limit":5,
"encoding": "hex"
}
}' -H 'content-type:application/json;' 127.0.0.1:9650/ext/bc/X
```
This gives response:
```json
{
"jsonrpc": "2.0",
"result": {
"numFetched": "5",
"utxos": [
"0x0000a195046108a85e60f7a864bb567745a37f50c6af282103e47cc62f036cee404700000000345aa98e8a990f4101e2268fab4c4e1f731c8dfbcffa3a77978686e6390d624f000000070000000000000001000000000000000000000001000000018ba98dabaebcd83056799841cfbc567d8b10f216c1f01765",
"0x0000ae8b1b94444eed8de9a81b1222f00f1b4133330add23d8ac288bffa98b85271100000000345aa98e8a990f4101e2268fab4c4e1f731c8dfbcffa3a77978686e6390d624f000000070000000000000001000000000000000000000001000000018ba98dabaebcd83056799841cfbc567d8b10f216473d042a",
"0x0000731ce04b1feefa9f4291d869adc30a33463f315491e164d89be7d6d2d7890cfc00000000345aa98e8a990f4101e2268fab4c4e1f731c8dfbcffa3a77978686e6390d624f000000070000000000000001000000000000000000000001000000018ba98dabaebcd83056799841cfbc567d8b10f21600dd3047",
"0x0000b462030cc4734f24c0bc224cf0d16ee452ea6b67615517caffead123ab4fbf1500000000345aa98e8a990f4101e2268fab4c4e1f731c8dfbcffa3a77978686e6390d624f000000070000000000000001000000000000000000000001000000018ba98dabaebcd83056799841cfbc567d8b10f216c71b387e",
"0x000054f6826c39bc957c0c6d44b70f961a994898999179cc32d21eb09c1908d7167b00000000345aa98e8a990f4101e2268fab4c4e1f731c8dfbcffa3a77978686e6390d624f000000070000000000000001000000000000000000000001000000018ba98dabaebcd83056799841cfbc567d8b10f2166290e79d"
],
"endIndex": {
"address": "X-avax18jma8ppw3nhx5r4ap8clazz0dps7rv5ukulre5",
"utxo": "kbUThAUfmBXUmRgTpgD6r3nLj7rJUGho6xyht5nouNNypH45j"
},
"encoding": "hex"
},
"id": 1
}
```
Since `numFetched` is the same as `limit`, we can tell that there may be more UTXOs that were not
fetched. We call the method again, this time with `startIndex`:
```sh
curl -X POST --data '{
"jsonrpc":"2.0",
"id" :2,
"method" :"avm.getUTXOs",
"params" :{
"addresses":["X-avax18jma8ppw3nhx5r4ap8clazz0dps7rv5ukulre5"],
"limit":5,
"startIndex": {
"address": "X-avax18jma8ppw3nhx5r4ap8clazz0dps7rv5ukulre5",
"utxo": "kbUThAUfmBXUmRgTpgD6r3nLj7rJUGho6xyht5nouNNypH45j"
},
"encoding": "hex"
}
}' -H 'content-type:application/json;' 127.0.0.1:9650/ext/bc/X
```
This gives response:
```json
{
"jsonrpc": "2.0",
"result": {
"numFetched": "4",
"utxos": [
"0x000020e182dd51ee4dcd31909fddd75bb3438d9431f8e4efce86a88a684f5c7fa09300000000345aa98e8a990f4101e2268fab4c4e1f731c8dfbcffa3a77978686e6390d624f000000070000000000000001000000000000000000000001000000018ba98dabaebcd83056799841cfbc567d8b10f21662861d59",
"0x0000a71ba36c475c18eb65dc90f6e85c4fd4a462d51c5de3ac2cbddf47db4d99284e00000000345aa98e8a990f4101e2268fab4c4e1f731c8dfbcffa3a77978686e6390d624f000000070000000000000001000000000000000000000001000000018ba98dabaebcd83056799841cfbc567d8b10f21665f6f83f",
"0x0000925424f61cb13e0fbdecc66e1270de68de9667b85baa3fdc84741d048daa69fa00000000345aa98e8a990f4101e2268fab4c4e1f731c8dfbcffa3a77978686e6390d624f000000070000000000000001000000000000000000000001000000018ba98dabaebcd83056799841cfbc567d8b10f216afecf76a",
"0x000082f30327514f819da6009fad92b5dba24d27db01e29ad7541aa8e6b6b554615c00000000345aa98e8a990f4101e2268fab4c4e1f731c8dfbcffa3a77978686e6390d624f000000070000000000000001000000000000000000000001000000018ba98dabaebcd83056799841cfbc567d8b10f216779c2d59"
],
"endIndex": {
"address": "X-avax18jma8ppw3nhx5r4ap8clazz0dps7rv5ukulre5",
"utxo": "21jG2RfqyHUUgkTLe2tUp6ETGLriSDTW3th8JXFbPRNiSZ11jK"
},
"encoding": "hex"
},
"id": 1
}
```
Since `numFetched` is less than `limit`, we know that we are done fetching UTXOs and don’t need to
call this method again.
Suppose we want to fetch the UTXOs exported from the P Chain to the X Chain in order to build an
ImportTx. Then we need to call GetUTXOs with the `sourceChain` argument in order to retrieve the
atomic UTXOs:
```sh
curl -X POST --data '{
"jsonrpc":"2.0",
"id" :1,
"method" :"avm.getUTXOs",
"params" :{
"addresses":["X-avax18jma8ppw3nhx5r4ap8clazz0dps7rv5ukulre5", "X-avax1d09qn852zcy03sfc9hay2llmn9hsgnw4tp3dv6"],
"limit":5,
"sourceChain": "P",
"encoding": "hex"
}
}' -H 'content-type:application/json;' 127.0.0.1:9650/ext/bc/X
```
This gives response:
```json
{
"jsonrpc": "2.0",
"result": {
"numFetched": "1",
"utxos": [
"0x00001f989ffaf18a18a59bdfbf209342aa61c6a62a67e8639d02bb3c8ddab315c6fa0000000039c33a499ce4c33a3b09cdd2cfa01ae70dbf2d18b2d7d168524440e55d550088000000070011c304cd7eb5c0000000000000000000000001000000013cb7d3842e8cee6a0ebd09f1fe884f6861e1b29c83497819"
],
"endIndex": {
"address": "X-avax18jma8ppw3nhx5r4ap8clazz0dps7rv5ukulre5",
"utxo": "2Sz2XwRYqUHwPeiKoRnZ6ht88YqzAF1SQjMYZQQaB5wBFkAqST"
},
"encoding": "hex"
},
"id": 1
}
```
### `avm.issueTx`
Send a signed transaction to the network. `encoding` specifies the format of the signed transaction.
Can only be `hex` when a value is provided.
**Signature:**
```sh
avm.issueTx({
tx: string,
encoding: string, //optional
}) -> {
txID: string
}
```
**Example Call:**
```sh
curl -X POST --data '{
"jsonrpc":"2.0",
"id" : 1,
"method" :"avm.issueTx",
"params" :{
"tx":"0x00000009de31b4d8b22991d51aa6aa1fc733f23a851a8c9400000000000186a0000000005f041280000000005f9ca900000030390000000000000001fceda8f90fcb5d30614b99d79fc4baa29307762668f16eb0259a57c2d3b78c875c86ec2045792d4df2d926c40f829196e0bb97ee697af71f5b0a966dabff749634c8b729855e937715b0e44303fd1014daedc752006011b730",
"encoding": "hex"
}
}' -H 'content-type:application/json;' 127.0.0.1:9650/ext/bc/X
```
**Example Response:**
```json
{
"jsonrpc": "2.0",
"id": 1,
"result": {
"txID": "NUPLwbt2hsYxpQg4H2o451hmTWQ4JZx2zMzM4SinwtHgAdX1JLPHXvWSXEnpecStLj"
}
}
```
### `wallet.issueTx`
Send a signed transaction to the network and assume the TX will be accepted. `encoding` specifies
the format of the signed transaction. Can only be `hex` when a value is provided.
This call is made to the wallet API endpoint:
`/ext/bc/X/wallet`
:::caution
Endpoint deprecated as of [**v1.9.12**](https://github.com/ava-labs/avalanchego/releases/tag/v1.9.12).
:::
**Signature:**
```sh
wallet.issueTx({
tx: string,
encoding: string, //optional
}) -> {
txID: string
}
```
**Example Call:**
```sh
curl -X POST --data '{
"jsonrpc":"2.0",
"id" : 1,
"method" :"wallet.issueTx",
"params" :{
"tx":"0x00000009de31b4d8b22991d51aa6aa1fc733f23a851a8c9400000000000186a0000000005f041280000000005f9ca900000030390000000000000001fceda8f90fcb5d30614b99d79fc4baa29307762668f16eb0259a57c2d3b78c875c86ec2045792d4df2d926c40f829196e0bb97ee697af71f5b0a966dabff749634c8b729855e937715b0e44303fd1014daedc752006011b730",
"encoding": "hex"
}
}' -H 'content-type:application/json;' 127.0.0.1:9650/ext/bc/X/wallet
```
**Example Response:**
```json
{
"jsonrpc": "2.0",
"id": 1,
"result": {
"txID": "NUPLwbt2hsYxpQg4H2o451hmTWQ4JZx2zMzM4SinwtHgAdX1JLPHXvWSXEnpecStLj"
}
}
```
# AvalancheGo X-Chain RPC (/docs/rpcs/x-chain)
---
title: "AvalancheGo X-Chain RPC"
description: "This page is an overview of the X-Chain RPC associated with AvalancheGo."
edit_url: https://github.com/ava-labs/avalanchego/edit/master/vms/avm/service.md
---
The [X-Chain](https://build.avax.network/docs/quick-start/primary-network#x-chain),
Avalanche's native platform for creating and trading assets, is an instance of the Avalanche Virtual
Machine (AVM). This API allows clients to create and trade assets on the X-Chain and other instances
of the AVM.
## Format
This API uses the `json 2.0` RPC format. For more information on making JSON RPC calls, see
[here](https://build.avax.network/docs/api-reference/guides/issuing-api-calls).
## Endpoints
`/ext/bc/X` to interact with the X-Chain.
`/ext/bc/blockchainID` to interact with other AVM instances, where `blockchainID` is the ID of a
blockchain running the AVM.
## Methods
### `avm.getAllBalances`
Deprecated as of [**v1.9.12**](https://github.com/ava-labs/avalanchego/releases/tag/v1.9.12).
Get the balances of all assets controlled by a given address.
**Signature:**
```sh
avm.getAllBalances({address:string}) -> {
balances: []{
asset: string,
balance: int
}
}
```
**Example Call:**
```sh
curl -X POST --data '{
"jsonrpc":"2.0",
"id" : 1,
"method" :"avm.getAllBalances",
"params" :{
"address":"X-avax1c79e0dd0susp7dc8udq34jgk2yvve7hapvdyht"
}
}' -H 'content-type:application/json;' 127.0.0.1:9650/ext/bc/X
```
**Example Response:**
```json
{
"jsonrpc": "2.0",
"result": {
"balances": [
{
"asset": "AVAX",
"balance": "102"
},
{
"asset": "2sdnziCz37Jov3QSNMXcFRGFJ1tgauaj6L7qfk7yUcRPfQMC79",
"balance": "10000"
}
]
},
"id": 1
}
```
### `avm.getAssetDescription`
Get information about an asset.
**Signature:**
```sh
avm.getAssetDescription({assetID: string}) -> {
assetId: string,
name: string,
symbol: string,
denomination: int
}
```
- `assetID` is the id of the asset for which the information is requested.
- `name` is the asset’s human-readable, not necessarily unique name.
- `symbol` is the asset’s symbol.
- `denomination` determines how balances of this asset are displayed by user interfaces. If
denomination is 0, 100 units of this asset are displayed as 100. If denomination is 1, 100 units
of this asset are displayed as 10.0. If denomination is 2, 100 units of this asset are displays as
.100, etc.
The AssetID for AVAX differs depending on the network you are on.
Mainnet: FvwEAhmxKfeiG8SnEvq42hc6whRyY3EFYAvebMqDNDGCgxN5Z
Testnet: U8iRqJoiJm8xZHAacmvYyZVwqQx6uDNtQeP3CQ6fcgQk3JqnK
For finding the `assetID` of other assets, this [info] might be useful.
Also, `avm.getUTXOs` returns the `assetID` in its output.
**Example Call:**
```sh
curl -X POST --data '{
"jsonrpc":"2.0",
"id" :1,
"method" :"avm.getAssetDescription",
"params" :{
"assetID" :"FvwEAhmxKfeiG8SnEvq42hc6whRyY3EFYAvebMqDNDGCgxN5Z"
}
}' -H 'content-type:application/json;' 127.0.0.1:9650/ext/bc/X
```
**Example Response:**
```json
{
"jsonrpc": "2.0",
"result": {
"assetID": "FvwEAhmxKfeiG8SnEvq42hc6whRyY3EFYAvebMqDNDGCgxN5Z",
"name": "Avalanche",
"symbol": "AVAX",
"denomination": "9"
},
"id": 1
}`
```
### `avm.getBalance`
Deprecated as of [**v1.9.12**](https://github.com/ava-labs/avalanchego/releases/tag/v1.9.12).
Get the balance of an asset controlled by a given address.
**Signature:**
```sh
avm.getBalance({
address: string,
assetID: string
}) -> {balance: int}
```
- `address` owner of the asset
- `assetID` id of the asset for which the balance is requested
**Example Call:**
```sh
curl -X POST --data '{
"jsonrpc":"2.0",
"id" : 1,
"method" :"avm.getBalance",
"params" :{
"address":"X-avax18jma8ppw3nhx5r4ap8clazz0dps7rv5ukulre5",
"assetID": "2pYGetDWyKdHxpFxh2LHeoLNCH6H5vxxCxHQtFnnFaYxLsqtHC"
}
}' -H 'content-type:application/json;' 127.0.0.1:9650/ext/bc/X
```
**Example Response:**
```json
{
"jsonrpc": "2.0",
"id": 1,
"result": {
"balance": "299999999999900",
"utxoIDs": [
{
"txID": "WPQdyLNqHfiEKp4zcCpayRHYDVYuh1hqs9c1RqgZXS4VPgdvo",
"outputIndex": 1
}
]
}
}
```
### `avm.getBlock`
Returns the block with the given id.
**Signature:**
```sh
avm.getBlock({
blockID: string
encoding: string // optional
}) -> {
block: string,
encoding: string
}
```
**Request:**
- `blockID` is the block ID. It should be in cb58 format.
- `encoding` is the encoding format to use. Can be either `hex` or `json`. Defaults to `hex`.
**Response:**
- `block` is the transaction encoded to `encoding`.
- `encoding` is the `encoding`.
#### Hex Example
**Example Call:**
```sh
curl -X POST --data '{
"jsonrpc": "2.0",
"method": "avm.getBlock",
"params": {
"blockID": "tXJ4xwmR8soHE6DzRNMQPtiwQvuYsHn6eLLBzo2moDqBquqy6",
"encoding": "hex"
},
"id": 1
}' -H 'content-type:application/json;' 127.0.0.1:9650/ext/bc/X
```
**Example Response:**
```json
{
"jsonrpc": "2.0",
"result": {
"block": "0x00000000002000000000641ad33ede17f652512193721df87994f783ec806bb5640c39ee73676caffcc3215e0651000000000049a80a000000010000000e0000000100000000000000000000000000000000000000000000000000000000000000000000000121e67317cbc4be2aeb00677ad6462778a8f52274b9d605df2591b23027a87dff000000070000002e1a2a3910000000000000000000000001000000015cf998275803a7277926912defdf177b2e97b0b400000001e0d825c5069a7336671dd27eaa5c7851d2cf449e7e1cdc469c5c9e5a953955950000000021e67317cbc4be2aeb00677ad6462778a8f52274b9d605df2591b23027a87dff000000050000008908223b680000000100000000000000005e45d02fcc9e585544008f1df7ae5c94bf7f0f2600000000641ad3b600000000642d48b60000005aedf802580000000121e67317cbc4be2aeb00677ad6462778a8f52274b9d605df2591b23027a87dff000000070000005aedf80258000000000000000000000001000000015cf998275803a7277926912defdf177b2e97b0b40000000b000000000000000000000001000000012892441ba9a160bcdc596dcd2cc3ad83c3493589000000010000000900000001adf2237a5fe2dfd906265e8e14274aa7a7b2ee60c66213110598ba34fb4824d74f7760321c0c8fb1e8d3c5e86909248e48a7ae02e641da5559351693a8a1939800286d4fa2",
"encoding": "hex"
},
"id": 1
}
```
### `avm.getBlockByHeight`
Returns block at the given height.
**Signature:**
```sh
avm.getBlockByHeight({
height: string
encoding: string // optional
}) -> {
block: string,
encoding: string
}
```
**Request:**
- `blockHeight` is the block height. It should be in `string` format.
- `encoding` is the encoding format to use. Can be either `hex` or `json`. Defaults to `hex`.
**Response:**
- `block` is the transaction encoded to `encoding`.
- `encoding` is the `encoding`.
#### Hex Example
**Example Call:**
```sh
curl -X POST --data '{
"jsonrpc": "2.0",
"method": "avm.getBlockByHeight",
"params": {
"height": "275686313486",
"encoding": "hex"
},
"id": 1
}' -H 'content-type:application/json;' 127.0.0.1:9650/ext/bc/X
```
**Example Response:**
```json
{
"jsonrpc": "2.0",
"result": {
"block": "0x00000000002000000000642f6739d4efcdd07e4d4919a7fc2020b8a0f081dd64c262aaace5a6dad22be0b55fec0700000000004db9e100000001000000110000000100000000000000000000000000000000000000000000000000000000000000000000000121e67317cbc4be2aeb00677ad6462778a8f52274b9d605df2591b23027a87dff000000070000005c6ece390000000000000000000000000100000001930ab7bf5018bfc6f9435c8b15ba2fe1e619c0230000000000000000ed5f38341e436e5d46e2bb00b45d62ae97d1b050c64bc634ae10626739e35c4b00000001c6dda861341665c3b555b46227fb5e56dc0a870c5482809349f04b00348af2a80000000021e67317cbc4be2aeb00677ad6462778a8f52274b9d605df2591b23027a87dff000000050000005c6edd7b40000000010000000000000001000000090000000178688f4d5055bd8733801f9b52793da885bef424c90526c18e4dd97f7514bf6f0c3d2a0e9a5ea8b761bc41902eb4902c34ef034c4d18c3db7c83c64ffeadd93600731676de",
"encoding": "hex"
},
"id": 1
}
```
### `avm.getHeight`
Returns the height of the last accepted block.
**Signature:**
```sh
avm.getHeight() ->
{
height: uint64,
}
```
**Example Call:**
```sh
curl -X POST --data '{
"jsonrpc": "2.0",
"method": "avm.getHeight",
"params": {},
"id": 1
}' -H 'content-type:application/json;' 127.0.0.1:9650/ext/bc/X
```
**Example Response:**
```json
{
"jsonrpc": "2.0",
"result": {
"height": "5094088"
},
"id": 1
}
```
### `avm.getTx`
Returns the specified transaction. The `encoding` parameter sets the format of the returned
transaction. Can be either `"hex"` or `"json"`. Defaults to `"hex"`.
**Signature:**
```sh
avm.getTx({
txID: string,
encoding: string, //optional
}) -> {
tx: string,
encoding: string,
}
```
**Example Call:**
```sh
curl -X POST --data '{
"jsonrpc":"2.0",
"id" :1,
"method" :"avm.getTx",
"params" :{
"txID":"2oJCbb8pfdxEHAf9A8CdN4Afj9VSR3xzyzNkf8tDv7aM1sfNFL",
"encoding": "json"
}
}' -H 'content-type:application/json;' 127.0.0.1:9650/ext/bc/X
```
**Example Response:**
```json
{
"jsonrpc": "2.0",
"result": {
"tx": {
"unsignedTx": {
"networkID": 1,
"blockchainID": "2oYMBNV4eNHyqk2fjjV5nVQLDbtmNJzq5s3qs3Lo6ftnC6FByM",
"outputs": [],
"inputs": [
{
"txID": "2jbZUvi6nHy3Pgmk8xcMpSg5cW6epkPqdKkHSCweb4eRXtq4k9",
"outputIndex": 1,
"assetID": "FvwEAhmxKfeiG8SnEvq42hc6whRyY3EFYAvebMqDNDGCgxN5Z",
"fxID": "spdxUxVJQbX85MGxMHbKw1sHxMnSqJ3QBzDyDYEP3h6TLuxqQ",
"input": {
"amount": 2570382395,
"signatureIndices": [0]
}
}
],
"memo": "0x",
"destinationChain": "11111111111111111111111111111111LpoYY",
"exportedOutputs": [
{
"assetID": "FvwEAhmxKfeiG8SnEvq42hc6whRyY3EFYAvebMqDNDGCgxN5Z",
"fxID": "spdxUxVJQbX85MGxMHbKw1sHxMnSqJ3QBzDyDYEP3h6TLuxqQ",
"output": {
"addresses": ["X-avax1tnuesf6cqwnjw7fxjyk7lhch0vhf0v95wj5jvy"],
"amount": 2569382395,
"locktime": 0,
"threshold": 1
}
}
]
},
"credentials": [
{
"fxID": "spdxUxVJQbX85MGxMHbKw1sHxMnSqJ3QBzDyDYEP3h6TLuxqQ",
"credential": {
"signatures": [
"0x46ebcbcfbee3ece1fd15015204045cf3cb77f42c48d0201fc150341f91f086f177cfca8894ca9b4a0c55d6950218e4ea8c01d5c4aefb85cd7264b47bd57d224400"
]
}
}
],
"id": "2oJCbb8pfdxEHAf9A8CdN4Afj9VSR3xzyzNkf8tDv7aM1sfNFL"
},
"encoding": "json"
},
"id": 1
}
```
Where:
- `credentials` is a list of this transaction's credentials. Each credential proves that this
transaction's creator is allowed to consume one of this transaction's inputs. Each credential is a
list of signatures.
- `unsignedTx` is the non-signature portion of the transaction.
- `networkID` is the ID of the network this transaction happened on. (Avalanche Mainnet is `1`.)
- `blockchainID` is the ID of the blockchain this transaction happened on. (Avalanche Mainnet
X-Chain is `2oYMBNV4eNHyqk2fjjV5nVQLDbtmNJzq5s3qs3Lo6ftnC6FByM`.)
- Each element of `outputs` is an output (UTXO) of this transaction that is not being exported to
another chain.
- Each element of `inputs` is an input of this transaction which has not been imported from another
chain.
- Import Transactions have additional fields `sourceChain` and `importedInputs`, which specify the
blockchain ID that assets are being imported from, and the inputs that are being imported.
- Export Transactions have additional fields `destinationChain` and `exportedOutputs`, which specify
the blockchain ID that assets are being exported to, and the UTXOs that are being exported.
An output contains:
- `assetID`: The ID of the asset being transferred. (The Mainnet Avax ID is
`FvwEAhmxKfeiG8SnEvq42hc6whRyY3EFYAvebMqDNDGCgxN5Z`.)
- `fxID`: The ID of the FX this output uses.
- `output`: The FX-specific contents of this output.
Most outputs use the secp256k1 FX, look like this:
```json
{
"assetID": "FvwEAhmxKfeiG8SnEvq42hc6whRyY3EFYAvebMqDNDGCgxN5Z",
"fxID": "spdxUxVJQbX85MGxMHbKw1sHxMnSqJ3QBzDyDYEP3h6TLuxqQ",
"output": {
"addresses": ["X-avax126rd3w35xwkmj8670zvf7y5r8k36qa9z9803wm"],
"amount": 1530084210,
"locktime": 0,
"threshold": 1
}
}
```
The above output can be consumed after Unix time `locktime` by a transaction that has signatures
from `threshold` of the addresses in `addresses`.
### `avm.getTxFee`
Get the fees of the network.
**Signature**:
```
avm.getTxFee() ->
{
txFee: uint64,
createAssetTxFee: uint64,
}
```
- `txFee` is the default fee for making transactions.
- `createAssetTxFee` is the fee for creating a new asset.
All fees are denominated in nAVAX.
**Example Call**:
```sh
curl -X POST --data '{
"jsonrpc":"2.0",
"id" : 1,
"method" :"avm.getTxFee",
}' -H 'content-type:application/json;' 127.0.0.1:9650/ext/bc/X
```
**Example Response**:
```json
{
"jsonrpc": "2.0",
"result": {
"txFee": "1000000",
"createAssetTxFee": "10000000"
}
}
```
### `avm.getTxStatus`
Deprecated as of **v1.10.0**.
Get the status of a transaction sent to the network.
**Signature:**
```sh
avm.getTxStatus({txID: string}) -> {status: string}
```
`status` is one of:
- `Accepted`: The transaction is (or will be) accepted by every node
- `Processing`: The transaction is being voted on by this node
- `Rejected`: The transaction will never be accepted by any node in the network
- `Unknown`: The transaction hasn’t been seen by this node
**Example Call:**
```sh
curl -X POST --data '{
"jsonrpc":"2.0",
"id" :1,
"method" :"avm.getTxStatus",
"params" :{
"txID":"2QouvFWUbjuySRxeX5xMbNCuAaKWfbk5FeEa2JmoF85RKLk2dD"
}
}' -H 'content-type:application/json;' 127.0.0.1:9650/ext/bc/X
```
**Example Response:**
```json
{
"jsonrpc": "2.0",
"id": 1,
"result": {
"status": "Accepted"
}
}
```
### `avm.getUTXOs`
Gets the UTXOs that reference a given address. If `sourceChain` is specified, then it will retrieve
the atomic UTXOs exported from that chain to the X Chain.
**Signature:**
```sh
avm.getUTXOs({
addresses: []string,
limit: int, //optional
startIndex: { //optional
address: string,
utxo: string
},
sourceChain: string, //optional
encoding: string //optional
}) -> {
numFetched: int,
utxos: []string,
endIndex: {
address: string,
utxo: string
},
sourceChain: string, //optional
encoding: string
}
```
- `utxos` is a list of UTXOs such that each UTXO references at least one address in `addresses`.
- At most `limit` UTXOs are returned. If `limit` is omitted or greater than 1024, it is set to 1024.
- This method supports pagination. `endIndex` denotes the last UTXO returned. To get the next set of
UTXOs, use the value of `endIndex` as `startIndex` in the next call.
- If `startIndex` is omitted, will fetch all UTXOs up to `limit`.
- When using pagination (when `startIndex` is provided), UTXOs are not guaranteed to be unique
across multiple calls. That is, a UTXO may appear in the result of the first call, and then again
in the second call.
- When using pagination, consistency is not guaranteed across multiple calls. That is, the UTXO set
of the addresses may have changed between calls.
- `encoding` sets the format for the returned UTXOs. Can only be `hex` when a value is provided.
#### **Example**
Suppose we want all UTXOs that reference at least one of
`X-avax18jma8ppw3nhx5r4ap8clazz0dps7rv5ukulre5` and `X-avax1d09qn852zcy03sfc9hay2llmn9hsgnw4tp3dv6`.
```sh
curl -X POST --data '{
"jsonrpc":"2.0",
"id" :1,
"method" :"avm.getUTXOs",
"params" :{
"addresses":["X-avax18jma8ppw3nhx5r4ap8clazz0dps7rv5ukulre5", "X-avax1d09qn852zcy03sfc9hay2llmn9hsgnw4tp3dv6"],
"limit":5,
"encoding": "hex"
}
}' -H 'content-type:application/json;' 127.0.0.1:9650/ext/bc/X
```
This gives response:
```json
{
"jsonrpc": "2.0",
"result": {
"numFetched": "5",
"utxos": [
"0x0000a195046108a85e60f7a864bb567745a37f50c6af282103e47cc62f036cee404700000000345aa98e8a990f4101e2268fab4c4e1f731c8dfbcffa3a77978686e6390d624f000000070000000000000001000000000000000000000001000000018ba98dabaebcd83056799841cfbc567d8b10f216c1f01765",
"0x0000ae8b1b94444eed8de9a81b1222f00f1b4133330add23d8ac288bffa98b85271100000000345aa98e8a990f4101e2268fab4c4e1f731c8dfbcffa3a77978686e6390d624f000000070000000000000001000000000000000000000001000000018ba98dabaebcd83056799841cfbc567d8b10f216473d042a",
"0x0000731ce04b1feefa9f4291d869adc30a33463f315491e164d89be7d6d2d7890cfc00000000345aa98e8a990f4101e2268fab4c4e1f731c8dfbcffa3a77978686e6390d624f000000070000000000000001000000000000000000000001000000018ba98dabaebcd83056799841cfbc567d8b10f21600dd3047",
"0x0000b462030cc4734f24c0bc224cf0d16ee452ea6b67615517caffead123ab4fbf1500000000345aa98e8a990f4101e2268fab4c4e1f731c8dfbcffa3a77978686e6390d624f000000070000000000000001000000000000000000000001000000018ba98dabaebcd83056799841cfbc567d8b10f216c71b387e",
"0x000054f6826c39bc957c0c6d44b70f961a994898999179cc32d21eb09c1908d7167b00000000345aa98e8a990f4101e2268fab4c4e1f731c8dfbcffa3a77978686e6390d624f000000070000000000000001000000000000000000000001000000018ba98dabaebcd83056799841cfbc567d8b10f2166290e79d"
],
"endIndex": {
"address": "X-avax18jma8ppw3nhx5r4ap8clazz0dps7rv5ukulre5",
"utxo": "kbUThAUfmBXUmRgTpgD6r3nLj7rJUGho6xyht5nouNNypH45j"
},
"encoding": "hex"
},
"id": 1
}
```
Since `numFetched` is the same as `limit`, we can tell that there may be more UTXOs that were not
fetched. We call the method again, this time with `startIndex`:
```sh
curl -X POST --data '{
"jsonrpc":"2.0",
"id" :2,
"method" :"avm.getUTXOs",
"params" :{
"addresses":["X-avax18jma8ppw3nhx5r4ap8clazz0dps7rv5ukulre5"],
"limit":5,
"startIndex": {
"address": "X-avax18jma8ppw3nhx5r4ap8clazz0dps7rv5ukulre5",
"utxo": "kbUThAUfmBXUmRgTpgD6r3nLj7rJUGho6xyht5nouNNypH45j"
},
"encoding": "hex"
}
}' -H 'content-type:application/json;' 127.0.0.1:9650/ext/bc/X
```
This gives response:
```json
{
"jsonrpc": "2.0",
"result": {
"numFetched": "4",
"utxos": [
"0x000020e182dd51ee4dcd31909fddd75bb3438d9431f8e4efce86a88a684f5c7fa09300000000345aa98e8a990f4101e2268fab4c4e1f731c8dfbcffa3a77978686e6390d624f000000070000000000000001000000000000000000000001000000018ba98dabaebcd83056799841cfbc567d8b10f21662861d59",
"0x0000a71ba36c475c18eb65dc90f6e85c4fd4a462d51c5de3ac2cbddf47db4d99284e00000000345aa98e8a990f4101e2268fab4c4e1f731c8dfbcffa3a77978686e6390d624f000000070000000000000001000000000000000000000001000000018ba98dabaebcd83056799841cfbc567d8b10f21665f6f83f",
"0x0000925424f61cb13e0fbdecc66e1270de68de9667b85baa3fdc84741d048daa69fa00000000345aa98e8a990f4101e2268fab4c4e1f731c8dfbcffa3a77978686e6390d624f000000070000000000000001000000000000000000000001000000018ba98dabaebcd83056799841cfbc567d8b10f216afecf76a",
"0x000082f30327514f819da6009fad92b5dba24d27db01e29ad7541aa8e6b6b554615c00000000345aa98e8a990f4101e2268fab4c4e1f731c8dfbcffa3a77978686e6390d624f000000070000000000000001000000000000000000000001000000018ba98dabaebcd83056799841cfbc567d8b10f216779c2d59"
],
"endIndex": {
"address": "X-avax18jma8ppw3nhx5r4ap8clazz0dps7rv5ukulre5",
"utxo": "21jG2RfqyHUUgkTLe2tUp6ETGLriSDTW3th8JXFbPRNiSZ11jK"
},
"encoding": "hex"
},
"id": 1
}
```
Since `numFetched` is less than `limit`, we know that we are done fetching UTXOs and don’t need to
call this method again.
Suppose we want to fetch the UTXOs exported from the P Chain to the X Chain in order to build an
ImportTx. Then we need to call GetUTXOs with the `sourceChain` argument in order to retrieve the
atomic UTXOs:
```sh
curl -X POST --data '{
"jsonrpc":"2.0",
"id" :1,
"method" :"avm.getUTXOs",
"params" :{
"addresses":["X-avax18jma8ppw3nhx5r4ap8clazz0dps7rv5ukulre5", "X-avax1d09qn852zcy03sfc9hay2llmn9hsgnw4tp3dv6"],
"limit":5,
"sourceChain": "P",
"encoding": "hex"
}
}' -H 'content-type:application/json;' 127.0.0.1:9650/ext/bc/X
```
This gives response:
```json
{
"jsonrpc": "2.0",
"result": {
"numFetched": "1",
"utxos": [
"0x00001f989ffaf18a18a59bdfbf209342aa61c6a62a67e8639d02bb3c8ddab315c6fa0000000039c33a499ce4c33a3b09cdd2cfa01ae70dbf2d18b2d7d168524440e55d550088000000070011c304cd7eb5c0000000000000000000000001000000013cb7d3842e8cee6a0ebd09f1fe884f6861e1b29c83497819"
],
"endIndex": {
"address": "X-avax18jma8ppw3nhx5r4ap8clazz0dps7rv5ukulre5",
"utxo": "2Sz2XwRYqUHwPeiKoRnZ6ht88YqzAF1SQjMYZQQaB5wBFkAqST"
},
"encoding": "hex"
},
"id": 1
}
```
### `avm.issueTx`
Send a signed transaction to the network. `encoding` specifies the format of the signed transaction.
Can only be `hex` when a value is provided.
**Signature:**
```sh
avm.issueTx({
tx: string,
encoding: string, //optional
}) -> {
txID: string
}
```
**Example Call:**
```sh
curl -X POST --data '{
"jsonrpc":"2.0",
"id" : 1,
"method" :"avm.issueTx",
"params" :{
"tx":"0x00000009de31b4d8b22991d51aa6aa1fc733f23a851a8c9400000000000186a0000000005f041280000000005f9ca900000030390000000000000001fceda8f90fcb5d30614b99d79fc4baa29307762668f16eb0259a57c2d3b78c875c86ec2045792d4df2d926c40f829196e0bb97ee697af71f5b0a966dabff749634c8b729855e937715b0e44303fd1014daedc752006011b730",
"encoding": "hex"
}
}' -H 'content-type:application/json;' 127.0.0.1:9650/ext/bc/X
```
**Example Response:**
```json
{
"jsonrpc": "2.0",
"id": 1,
"result": {
"txID": "NUPLwbt2hsYxpQg4H2o451hmTWQ4JZx2zMzM4SinwtHgAdX1JLPHXvWSXEnpecStLj"
}
}
```
### `wallet.issueTx`
Send a signed transaction to the network and assume the TX will be accepted. `encoding` specifies
the format of the signed transaction. Can only be `hex` when a value is provided.
This call is made to the wallet API endpoint:
`/ext/bc/X/wallet`
:::caution
Endpoint deprecated as of [**v1.9.12**](https://github.com/ava-labs/avalanchego/releases/tag/v1.9.12).
:::
**Signature:**
```sh
wallet.issueTx({
tx: string,
encoding: string, //optional
}) -> {
txID: string
}
```
**Example Call:**
```sh
curl -X POST --data '{
"jsonrpc":"2.0",
"id" : 1,
"method" :"wallet.issueTx",
"params" :{
"tx":"0x00000009de31b4d8b22991d51aa6aa1fc733f23a851a8c9400000000000186a0000000005f041280000000005f9ca900000030390000000000000001fceda8f90fcb5d30614b99d79fc4baa29307762668f16eb0259a57c2d3b78c875c86ec2045792d4df2d926c40f829196e0bb97ee697af71f5b0a966dabff749634c8b729855e937715b0e44303fd1014daedc752006011b730",
"encoding": "hex"
}
}' -H 'content-type:application/json;' 127.0.0.1:9650/ext/bc/X/wallet
```
**Example Response:**
```json
{
"jsonrpc": "2.0",
"id": 1,
"result": {
"txID": "NUPLwbt2hsYxpQg4H2o451hmTWQ4JZx2zMzM4SinwtHgAdX1JLPHXvWSXEnpecStLj"
}
}
```
# X-Chain RPC (/docs/rpcs/x-chain/rpc)
---
title: "X-Chain RPC"
description: "This page is an overview of the X-Chain RPC associated with AvalancheGo."
edit_url: https://github.com/ava-labs/avalanchego/edit/master/vms/avm/service.md
---
The [X-Chain](https://build.avax.network/docs/quick-start/primary-network#x-chain),
Avalanche's native platform for creating and trading assets, is an instance of the Avalanche Virtual
Machine (AVM). This API allows clients to create and trade assets on the X-Chain and other instances
of the AVM.
## Format
This API uses the `json 2.0` RPC format. For more information on making JSON RPC calls, see
[here](https://build.avax.network/docs/api-reference/guides/issuing-api-calls).
## Endpoints
`/ext/bc/X` to interact with the X-Chain.
`/ext/bc/blockchainID` to interact with other AVM instances, where `blockchainID` is the ID of a
blockchain running the AVM.
## Methods
### `avm.getAllBalances`
Deprecated as of [**v1.9.12**](https://github.com/ava-labs/avalanchego/releases/tag/v1.9.12).
Get the balances of all assets controlled by a given address.
**Signature:**
```sh
avm.getAllBalances({address:string}) -> {
balances: []{
asset: string,
balance: int
}
}
```
**Example Call:**
```sh
curl -X POST --data '{
"jsonrpc":"2.0",
"id" : 1,
"method" :"avm.getAllBalances",
"params" :{
"address":"X-avax1c79e0dd0susp7dc8udq34jgk2yvve7hapvdyht"
}
}' -H 'content-type:application/json;' 127.0.0.1:9650/ext/bc/X
```
**Example Response:**
```json
{
"jsonrpc": "2.0",
"result": {
"balances": [
{
"asset": "AVAX",
"balance": "102"
},
{
"asset": "2sdnziCz37Jov3QSNMXcFRGFJ1tgauaj6L7qfk7yUcRPfQMC79",
"balance": "10000"
}
]
},
"id": 1
}
```
### `avm.getAssetDescription`
Get information about an asset.
**Signature:**
```sh
avm.getAssetDescription({assetID: string}) -> {
assetId: string,
name: string,
symbol: string,
denomination: int
}
```
- `assetID` is the id of the asset for which the information is requested.
- `name` is the asset’s human-readable, not necessarily unique name.
- `symbol` is the asset’s symbol.
- `denomination` determines how balances of this asset are displayed by user interfaces. If
denomination is 0, 100 units of this asset are displayed as 100. If denomination is 1, 100 units
of this asset are displayed as 10.0. If denomination is 2, 100 units of this asset are displays as
.100, etc.
The AssetID for AVAX differs depending on the network you are on.
Mainnet: FvwEAhmxKfeiG8SnEvq42hc6whRyY3EFYAvebMqDNDGCgxN5Z
Testnet: U8iRqJoiJm8xZHAacmvYyZVwqQx6uDNtQeP3CQ6fcgQk3JqnK
For finding the `assetID` of other assets, this [info] might be useful.
Also, `avm.getUTXOs` returns the `assetID` in its output.
**Example Call:**
```sh
curl -X POST --data '{
"jsonrpc":"2.0",
"id" :1,
"method" :"avm.getAssetDescription",
"params" :{
"assetID" :"FvwEAhmxKfeiG8SnEvq42hc6whRyY3EFYAvebMqDNDGCgxN5Z"
}
}' -H 'content-type:application/json;' 127.0.0.1:9650/ext/bc/X
```
**Example Response:**
```json
{
"jsonrpc": "2.0",
"result": {
"assetID": "FvwEAhmxKfeiG8SnEvq42hc6whRyY3EFYAvebMqDNDGCgxN5Z",
"name": "Avalanche",
"symbol": "AVAX",
"denomination": "9"
},
"id": 1
}`
```
### `avm.getBalance`
Deprecated as of [**v1.9.12**](https://github.com/ava-labs/avalanchego/releases/tag/v1.9.12).
Get the balance of an asset controlled by a given address.
**Signature:**
```sh
avm.getBalance({
address: string,
assetID: string
}) -> {balance: int}
```
- `address` owner of the asset
- `assetID` id of the asset for which the balance is requested
**Example Call:**
```sh
curl -X POST --data '{
"jsonrpc":"2.0",
"id" : 1,
"method" :"avm.getBalance",
"params" :{
"address":"X-avax18jma8ppw3nhx5r4ap8clazz0dps7rv5ukulre5",
"assetID": "2pYGetDWyKdHxpFxh2LHeoLNCH6H5vxxCxHQtFnnFaYxLsqtHC"
}
}' -H 'content-type:application/json;' 127.0.0.1:9650/ext/bc/X
```
**Example Response:**
```json
{
"jsonrpc": "2.0",
"id": 1,
"result": {
"balance": "299999999999900",
"utxoIDs": [
{
"txID": "WPQdyLNqHfiEKp4zcCpayRHYDVYuh1hqs9c1RqgZXS4VPgdvo",
"outputIndex": 1
}
]
}
}
```
### `avm.getBlock`
Returns the block with the given id.
**Signature:**
```sh
avm.getBlock({
blockID: string
encoding: string // optional
}) -> {
block: string,
encoding: string
}
```
**Request:**
- `blockID` is the block ID. It should be in cb58 format.
- `encoding` is the encoding format to use. Can be either `hex` or `json`. Defaults to `hex`.
**Response:**
- `block` is the transaction encoded to `encoding`.
- `encoding` is the `encoding`.
#### Hex Example
**Example Call:**
```sh
curl -X POST --data '{
"jsonrpc": "2.0",
"method": "avm.getBlock",
"params": {
"blockID": "tXJ4xwmR8soHE6DzRNMQPtiwQvuYsHn6eLLBzo2moDqBquqy6",
"encoding": "hex"
},
"id": 1
}' -H 'content-type:application/json;' 127.0.0.1:9650/ext/bc/X
```
**Example Response:**
```json
{
"jsonrpc": "2.0",
"result": {
"block": "0x00000000002000000000641ad33ede17f652512193721df87994f783ec806bb5640c39ee73676caffcc3215e0651000000000049a80a000000010000000e0000000100000000000000000000000000000000000000000000000000000000000000000000000121e67317cbc4be2aeb00677ad6462778a8f52274b9d605df2591b23027a87dff000000070000002e1a2a3910000000000000000000000001000000015cf998275803a7277926912defdf177b2e97b0b400000001e0d825c5069a7336671dd27eaa5c7851d2cf449e7e1cdc469c5c9e5a953955950000000021e67317cbc4be2aeb00677ad6462778a8f52274b9d605df2591b23027a87dff000000050000008908223b680000000100000000000000005e45d02fcc9e585544008f1df7ae5c94bf7f0f2600000000641ad3b600000000642d48b60000005aedf802580000000121e67317cbc4be2aeb00677ad6462778a8f52274b9d605df2591b23027a87dff000000070000005aedf80258000000000000000000000001000000015cf998275803a7277926912defdf177b2e97b0b40000000b000000000000000000000001000000012892441ba9a160bcdc596dcd2cc3ad83c3493589000000010000000900000001adf2237a5fe2dfd906265e8e14274aa7a7b2ee60c66213110598ba34fb4824d74f7760321c0c8fb1e8d3c5e86909248e48a7ae02e641da5559351693a8a1939800286d4fa2",
"encoding": "hex"
},
"id": 1
}
```
### `avm.getBlockByHeight`
Returns block at the given height.
**Signature:**
```sh
avm.getBlockByHeight({
height: string
encoding: string // optional
}) -> {
block: string,
encoding: string
}
```
**Request:**
- `blockHeight` is the block height. It should be in `string` format.
- `encoding` is the encoding format to use. Can be either `hex` or `json`. Defaults to `hex`.
**Response:**
- `block` is the transaction encoded to `encoding`.
- `encoding` is the `encoding`.
#### Hex Example
**Example Call:**
```sh
curl -X POST --data '{
"jsonrpc": "2.0",
"method": "avm.getBlockByHeight",
"params": {
"height": "275686313486",
"encoding": "hex"
},
"id": 1
}' -H 'content-type:application/json;' 127.0.0.1:9650/ext/bc/X
```
**Example Response:**
```json
{
"jsonrpc": "2.0",
"result": {
"block": "0x00000000002000000000642f6739d4efcdd07e4d4919a7fc2020b8a0f081dd64c262aaace5a6dad22be0b55fec0700000000004db9e100000001000000110000000100000000000000000000000000000000000000000000000000000000000000000000000121e67317cbc4be2aeb00677ad6462778a8f52274b9d605df2591b23027a87dff000000070000005c6ece390000000000000000000000000100000001930ab7bf5018bfc6f9435c8b15ba2fe1e619c0230000000000000000ed5f38341e436e5d46e2bb00b45d62ae97d1b050c64bc634ae10626739e35c4b00000001c6dda861341665c3b555b46227fb5e56dc0a870c5482809349f04b00348af2a80000000021e67317cbc4be2aeb00677ad6462778a8f52274b9d605df2591b23027a87dff000000050000005c6edd7b40000000010000000000000001000000090000000178688f4d5055bd8733801f9b52793da885bef424c90526c18e4dd97f7514bf6f0c3d2a0e9a5ea8b761bc41902eb4902c34ef034c4d18c3db7c83c64ffeadd93600731676de",
"encoding": "hex"
},
"id": 1
}
```
### `avm.getHeight`
Returns the height of the last accepted block.
**Signature:**
```sh
avm.getHeight() ->
{
height: uint64,
}
```
**Example Call:**
```sh
curl -X POST --data '{
"jsonrpc": "2.0",
"method": "avm.getHeight",
"params": {},
"id": 1
}' -H 'content-type:application/json;' 127.0.0.1:9650/ext/bc/X
```
**Example Response:**
```json
{
"jsonrpc": "2.0",
"result": {
"height": "5094088"
},
"id": 1
}
```
### `avm.getTx`
Returns the specified transaction. The `encoding` parameter sets the format of the returned
transaction. Can be either `"hex"` or `"json"`. Defaults to `"hex"`.
**Signature:**
```sh
avm.getTx({
txID: string,
encoding: string, //optional
}) -> {
tx: string,
encoding: string,
}
```
**Example Call:**
```sh
curl -X POST --data '{
"jsonrpc":"2.0",
"id" :1,
"method" :"avm.getTx",
"params" :{
"txID":"2oJCbb8pfdxEHAf9A8CdN4Afj9VSR3xzyzNkf8tDv7aM1sfNFL",
"encoding": "json"
}
}' -H 'content-type:application/json;' 127.0.0.1:9650/ext/bc/X
```
**Example Response:**
```json
{
"jsonrpc": "2.0",
"result": {
"tx": {
"unsignedTx": {
"networkID": 1,
"blockchainID": "2oYMBNV4eNHyqk2fjjV5nVQLDbtmNJzq5s3qs3Lo6ftnC6FByM",
"outputs": [],
"inputs": [
{
"txID": "2jbZUvi6nHy3Pgmk8xcMpSg5cW6epkPqdKkHSCweb4eRXtq4k9",
"outputIndex": 1,
"assetID": "FvwEAhmxKfeiG8SnEvq42hc6whRyY3EFYAvebMqDNDGCgxN5Z",
"fxID": "spdxUxVJQbX85MGxMHbKw1sHxMnSqJ3QBzDyDYEP3h6TLuxqQ",
"input": {
"amount": 2570382395,
"signatureIndices": [0]
}
}
],
"memo": "0x",
"destinationChain": "11111111111111111111111111111111LpoYY",
"exportedOutputs": [
{
"assetID": "FvwEAhmxKfeiG8SnEvq42hc6whRyY3EFYAvebMqDNDGCgxN5Z",
"fxID": "spdxUxVJQbX85MGxMHbKw1sHxMnSqJ3QBzDyDYEP3h6TLuxqQ",
"output": {
"addresses": ["X-avax1tnuesf6cqwnjw7fxjyk7lhch0vhf0v95wj5jvy"],
"amount": 2569382395,
"locktime": 0,
"threshold": 1
}
}
]
},
"credentials": [
{
"fxID": "spdxUxVJQbX85MGxMHbKw1sHxMnSqJ3QBzDyDYEP3h6TLuxqQ",
"credential": {
"signatures": [
"0x46ebcbcfbee3ece1fd15015204045cf3cb77f42c48d0201fc150341f91f086f177cfca8894ca9b4a0c55d6950218e4ea8c01d5c4aefb85cd7264b47bd57d224400"
]
}
}
],
"id": "2oJCbb8pfdxEHAf9A8CdN4Afj9VSR3xzyzNkf8tDv7aM1sfNFL"
},
"encoding": "json"
},
"id": 1
}
```
Where:
- `credentials` is a list of this transaction's credentials. Each credential proves that this
transaction's creator is allowed to consume one of this transaction's inputs. Each credential is a
list of signatures.
- `unsignedTx` is the non-signature portion of the transaction.
- `networkID` is the ID of the network this transaction happened on. (Avalanche Mainnet is `1`.)
- `blockchainID` is the ID of the blockchain this transaction happened on. (Avalanche Mainnet
X-Chain is `2oYMBNV4eNHyqk2fjjV5nVQLDbtmNJzq5s3qs3Lo6ftnC6FByM`.)
- Each element of `outputs` is an output (UTXO) of this transaction that is not being exported to
another chain.
- Each element of `inputs` is an input of this transaction which has not been imported from another
chain.
- Import Transactions have additional fields `sourceChain` and `importedInputs`, which specify the
blockchain ID that assets are being imported from, and the inputs that are being imported.
- Export Transactions have additional fields `destinationChain` and `exportedOutputs`, which specify
the blockchain ID that assets are being exported to, and the UTXOs that are being exported.
An output contains:
- `assetID`: The ID of the asset being transferred. (The Mainnet Avax ID is
`FvwEAhmxKfeiG8SnEvq42hc6whRyY3EFYAvebMqDNDGCgxN5Z`.)
- `fxID`: The ID of the FX this output uses.
- `output`: The FX-specific contents of this output.
Most outputs use the secp256k1 FX, look like this:
```json
{
"assetID": "FvwEAhmxKfeiG8SnEvq42hc6whRyY3EFYAvebMqDNDGCgxN5Z",
"fxID": "spdxUxVJQbX85MGxMHbKw1sHxMnSqJ3QBzDyDYEP3h6TLuxqQ",
"output": {
"addresses": ["X-avax126rd3w35xwkmj8670zvf7y5r8k36qa9z9803wm"],
"amount": 1530084210,
"locktime": 0,
"threshold": 1
}
}
```
The above output can be consumed after Unix time `locktime` by a transaction that has signatures
from `threshold` of the addresses in `addresses`.
### `avm.getTxFee`
Get the fees of the network.
**Signature**:
```
avm.getTxFee() ->
{
txFee: uint64,
createAssetTxFee: uint64,
}
```
- `txFee` is the default fee for making transactions.
- `createAssetTxFee` is the fee for creating a new asset.
All fees are denominated in nAVAX.
**Example Call**:
```sh
curl -X POST --data '{
"jsonrpc":"2.0",
"id" : 1,
"method" :"avm.getTxFee",
}' -H 'content-type:application/json;' 127.0.0.1:9650/ext/bc/X
```
**Example Response**:
```json
{
"jsonrpc": "2.0",
"result": {
"txFee": "1000000",
"createAssetTxFee": "10000000"
}
}
```
### `avm.getTxStatus`
Deprecated as of **v1.10.0**.
Get the status of a transaction sent to the network.
**Signature:**
```sh
avm.getTxStatus({txID: string}) -> {status: string}
```
`status` is one of:
- `Accepted`: The transaction is (or will be) accepted by every node
- `Processing`: The transaction is being voted on by this node
- `Rejected`: The transaction will never be accepted by any node in the network
- `Unknown`: The transaction hasn’t been seen by this node
**Example Call:**
```sh
curl -X POST --data '{
"jsonrpc":"2.0",
"id" :1,
"method" :"avm.getTxStatus",
"params" :{
"txID":"2QouvFWUbjuySRxeX5xMbNCuAaKWfbk5FeEa2JmoF85RKLk2dD"
}
}' -H 'content-type:application/json;' 127.0.0.1:9650/ext/bc/X
```
**Example Response:**
```json
{
"jsonrpc": "2.0",
"id": 1,
"result": {
"status": "Accepted"
}
}
```
### `avm.getUTXOs`
Gets the UTXOs that reference a given address. If `sourceChain` is specified, then it will retrieve
the atomic UTXOs exported from that chain to the X Chain.
**Signature:**
```sh
avm.getUTXOs({
addresses: []string,
limit: int, //optional
startIndex: { //optional
address: string,
utxo: string
},
sourceChain: string, //optional
encoding: string //optional
}) -> {
numFetched: int,
utxos: []string,
endIndex: {
address: string,
utxo: string
},
sourceChain: string, //optional
encoding: string
}
```
- `utxos` is a list of UTXOs such that each UTXO references at least one address in `addresses`.
- At most `limit` UTXOs are returned. If `limit` is omitted or greater than 1024, it is set to 1024.
- This method supports pagination. `endIndex` denotes the last UTXO returned. To get the next set of
UTXOs, use the value of `endIndex` as `startIndex` in the next call.
- If `startIndex` is omitted, will fetch all UTXOs up to `limit`.
- When using pagination (when `startIndex` is provided), UTXOs are not guaranteed to be unique
across multiple calls. That is, a UTXO may appear in the result of the first call, and then again
in the second call.
- When using pagination, consistency is not guaranteed across multiple calls. That is, the UTXO set
of the addresses may have changed between calls.
- `encoding` sets the format for the returned UTXOs. Can only be `hex` when a value is provided.
#### **Example**
Suppose we want all UTXOs that reference at least one of
`X-avax18jma8ppw3nhx5r4ap8clazz0dps7rv5ukulre5` and `X-avax1d09qn852zcy03sfc9hay2llmn9hsgnw4tp3dv6`.
```sh
curl -X POST --data '{
"jsonrpc":"2.0",
"id" :1,
"method" :"avm.getUTXOs",
"params" :{
"addresses":["X-avax18jma8ppw3nhx5r4ap8clazz0dps7rv5ukulre5", "X-avax1d09qn852zcy03sfc9hay2llmn9hsgnw4tp3dv6"],
"limit":5,
"encoding": "hex"
}
}' -H 'content-type:application/json;' 127.0.0.1:9650/ext/bc/X
```
This gives response:
```json
{
"jsonrpc": "2.0",
"result": {
"numFetched": "5",
"utxos": [
"0x0000a195046108a85e60f7a864bb567745a37f50c6af282103e47cc62f036cee404700000000345aa98e8a990f4101e2268fab4c4e1f731c8dfbcffa3a77978686e6390d624f000000070000000000000001000000000000000000000001000000018ba98dabaebcd83056799841cfbc567d8b10f216c1f01765",
"0x0000ae8b1b94444eed8de9a81b1222f00f1b4133330add23d8ac288bffa98b85271100000000345aa98e8a990f4101e2268fab4c4e1f731c8dfbcffa3a77978686e6390d624f000000070000000000000001000000000000000000000001000000018ba98dabaebcd83056799841cfbc567d8b10f216473d042a",
"0x0000731ce04b1feefa9f4291d869adc30a33463f315491e164d89be7d6d2d7890cfc00000000345aa98e8a990f4101e2268fab4c4e1f731c8dfbcffa3a77978686e6390d624f000000070000000000000001000000000000000000000001000000018ba98dabaebcd83056799841cfbc567d8b10f21600dd3047",
"0x0000b462030cc4734f24c0bc224cf0d16ee452ea6b67615517caffead123ab4fbf1500000000345aa98e8a990f4101e2268fab4c4e1f731c8dfbcffa3a77978686e6390d624f000000070000000000000001000000000000000000000001000000018ba98dabaebcd83056799841cfbc567d8b10f216c71b387e",
"0x000054f6826c39bc957c0c6d44b70f961a994898999179cc32d21eb09c1908d7167b00000000345aa98e8a990f4101e2268fab4c4e1f731c8dfbcffa3a77978686e6390d624f000000070000000000000001000000000000000000000001000000018ba98dabaebcd83056799841cfbc567d8b10f2166290e79d"
],
"endIndex": {
"address": "X-avax18jma8ppw3nhx5r4ap8clazz0dps7rv5ukulre5",
"utxo": "kbUThAUfmBXUmRgTpgD6r3nLj7rJUGho6xyht5nouNNypH45j"
},
"encoding": "hex"
},
"id": 1
}
```
Since `numFetched` is the same as `limit`, we can tell that there may be more UTXOs that were not
fetched. We call the method again, this time with `startIndex`:
```sh
curl -X POST --data '{
"jsonrpc":"2.0",
"id" :2,
"method" :"avm.getUTXOs",
"params" :{
"addresses":["X-avax18jma8ppw3nhx5r4ap8clazz0dps7rv5ukulre5"],
"limit":5,
"startIndex": {
"address": "X-avax18jma8ppw3nhx5r4ap8clazz0dps7rv5ukulre5",
"utxo": "kbUThAUfmBXUmRgTpgD6r3nLj7rJUGho6xyht5nouNNypH45j"
},
"encoding": "hex"
}
}' -H 'content-type:application/json;' 127.0.0.1:9650/ext/bc/X
```
This gives response:
```json
{
"jsonrpc": "2.0",
"result": {
"numFetched": "4",
"utxos": [
"0x000020e182dd51ee4dcd31909fddd75bb3438d9431f8e4efce86a88a684f5c7fa09300000000345aa98e8a990f4101e2268fab4c4e1f731c8dfbcffa3a77978686e6390d624f000000070000000000000001000000000000000000000001000000018ba98dabaebcd83056799841cfbc567d8b10f21662861d59",
"0x0000a71ba36c475c18eb65dc90f6e85c4fd4a462d51c5de3ac2cbddf47db4d99284e00000000345aa98e8a990f4101e2268fab4c4e1f731c8dfbcffa3a77978686e6390d624f000000070000000000000001000000000000000000000001000000018ba98dabaebcd83056799841cfbc567d8b10f21665f6f83f",
"0x0000925424f61cb13e0fbdecc66e1270de68de9667b85baa3fdc84741d048daa69fa00000000345aa98e8a990f4101e2268fab4c4e1f731c8dfbcffa3a77978686e6390d624f000000070000000000000001000000000000000000000001000000018ba98dabaebcd83056799841cfbc567d8b10f216afecf76a",
"0x000082f30327514f819da6009fad92b5dba24d27db01e29ad7541aa8e6b6b554615c00000000345aa98e8a990f4101e2268fab4c4e1f731c8dfbcffa3a77978686e6390d624f000000070000000000000001000000000000000000000001000000018ba98dabaebcd83056799841cfbc567d8b10f216779c2d59"
],
"endIndex": {
"address": "X-avax18jma8ppw3nhx5r4ap8clazz0dps7rv5ukulre5",
"utxo": "21jG2RfqyHUUgkTLe2tUp6ETGLriSDTW3th8JXFbPRNiSZ11jK"
},
"encoding": "hex"
},
"id": 1
}
```
Since `numFetched` is less than `limit`, we know that we are done fetching UTXOs and don’t need to
call this method again.
Suppose we want to fetch the UTXOs exported from the P Chain to the X Chain in order to build an
ImportTx. Then we need to call GetUTXOs with the `sourceChain` argument in order to retrieve the
atomic UTXOs:
```sh
curl -X POST --data '{
"jsonrpc":"2.0",
"id" :1,
"method" :"avm.getUTXOs",
"params" :{
"addresses":["X-avax18jma8ppw3nhx5r4ap8clazz0dps7rv5ukulre5", "X-avax1d09qn852zcy03sfc9hay2llmn9hsgnw4tp3dv6"],
"limit":5,
"sourceChain": "P",
"encoding": "hex"
}
}' -H 'content-type:application/json;' 127.0.0.1:9650/ext/bc/X
```
This gives response:
```json
{
"jsonrpc": "2.0",
"result": {
"numFetched": "1",
"utxos": [
"0x00001f989ffaf18a18a59bdfbf209342aa61c6a62a67e8639d02bb3c8ddab315c6fa0000000039c33a499ce4c33a3b09cdd2cfa01ae70dbf2d18b2d7d168524440e55d550088000000070011c304cd7eb5c0000000000000000000000001000000013cb7d3842e8cee6a0ebd09f1fe884f6861e1b29c83497819"
],
"endIndex": {
"address": "X-avax18jma8ppw3nhx5r4ap8clazz0dps7rv5ukulre5",
"utxo": "2Sz2XwRYqUHwPeiKoRnZ6ht88YqzAF1SQjMYZQQaB5wBFkAqST"
},
"encoding": "hex"
},
"id": 1
}
```
### `avm.issueTx`
Send a signed transaction to the network. `encoding` specifies the format of the signed transaction.
Can only be `hex` when a value is provided.
**Signature:**
```sh
avm.issueTx({
tx: string,
encoding: string, //optional
}) -> {
txID: string
}
```
**Example Call:**
```sh
curl -X POST --data '{
"jsonrpc":"2.0",
"id" : 1,
"method" :"avm.issueTx",
"params" :{
"tx":"0x00000009de31b4d8b22991d51aa6aa1fc733f23a851a8c9400000000000186a0000000005f041280000000005f9ca900000030390000000000000001fceda8f90fcb5d30614b99d79fc4baa29307762668f16eb0259a57c2d3b78c875c86ec2045792d4df2d926c40f829196e0bb97ee697af71f5b0a966dabff749634c8b729855e937715b0e44303fd1014daedc752006011b730",
"encoding": "hex"
}
}' -H 'content-type:application/json;' 127.0.0.1:9650/ext/bc/X
```
**Example Response:**
```json
{
"jsonrpc": "2.0",
"id": 1,
"result": {
"txID": "NUPLwbt2hsYxpQg4H2o451hmTWQ4JZx2zMzM4SinwtHgAdX1JLPHXvWSXEnpecStLj"
}
}
```
### `wallet.issueTx`
Send a signed transaction to the network and assume the TX will be accepted. `encoding` specifies
the format of the signed transaction. Can only be `hex` when a value is provided.
This call is made to the wallet API endpoint:
`/ext/bc/X/wallet`
:::caution
Endpoint deprecated as of [**v1.9.12**](https://github.com/ava-labs/avalanchego/releases/tag/v1.9.12).
:::
**Signature:**
```sh
wallet.issueTx({
tx: string,
encoding: string, //optional
}) -> {
txID: string
}
```
**Example Call:**
```sh
curl -X POST --data '{
"jsonrpc":"2.0",
"id" : 1,
"method" :"wallet.issueTx",
"params" :{
"tx":"0x00000009de31b4d8b22991d51aa6aa1fc733f23a851a8c9400000000000186a0000000005f041280000000005f9ca900000030390000000000000001fceda8f90fcb5d30614b99d79fc4baa29307762668f16eb0259a57c2d3b78c875c86ec2045792d4df2d926c40f829196e0bb97ee697af71f5b0a966dabff749634c8b729855e937715b0e44303fd1014daedc752006011b730",
"encoding": "hex"
}
}' -H 'content-type:application/json;' 127.0.0.1:9650/ext/bc/X/wallet
```
**Example Response:**
```json
{
"jsonrpc": "2.0",
"id": 1,
"result": {
"txID": "NUPLwbt2hsYxpQg4H2o451hmTWQ4JZx2zMzM4SinwtHgAdX1JLPHXvWSXEnpecStLj"
}
}
```
# Transaction Format (/docs/rpcs/x-chain/txn-format)
---
title: Transaction Format
---
This file is meant to be the single source of truth for how we serialize
transactions in the Avalanche Virtual Machine (AVM). This document uses the
[primitive serialization](/docs/api-reference/standards/serialization-primitives) format for packing and
[secp256k1](/docs/api-reference/standards/cryptographic-primitives#secp256k1-addresses) for cryptographic
user identification.
## Codec ID
Some data is prepended with a codec ID (unt16) that denotes how the data should
be deserialized. Right now, the only valid codec ID is 0 (`0x00 0x00`).
## Transferable Output
Transferable outputs wrap an output with an asset ID.
### What Transferable Output Contains
A transferable output contains an `AssetID` and an [`Output`](/docs/api-reference/x-chain/txn-format#outputs).
- **`AssetID`** is a 32-byte array that defines which asset this output references.
- **`Output`** is an output, as defined
[below](/docs/api-reference/x-chain/txn-format#outputs). Outputs have four possible types:
[`SECP256K1TransferOutput`](/docs/api-reference/x-chain/txn-format#secp256k1-transfer-output),
[`SECP256K1MintOutput`](/docs/api-reference/x-chain/txn-format#secp256k1-mint-output),
[`NFTTransferOutput`](/docs/api-reference/x-chain/txn-format#nft-transfer-output)
and [`NFTMintOutput`](/docs/api-reference/x-chain/txn-format#nft-mint-output).
### Gantt Transferable Output Specification
```text
+----------+----------+-------------------------+
| asset_id : [32]byte | 32 bytes |
+----------+----------+-------------------------+
| output : Output | size(output) bytes |
+----------+----------+-------------------------+
| 32 + size(output) bytes |
+-------------------------+
```
### Proto Transferable Output Specification
```text
message TransferableOutput {
bytes asset_id = 1; // 32 bytes
Output output = 2; // size(output)
}
```
### Transferable Output Example
Let's make a transferable output:
- `AssetID`: `0x000102030405060708090a0b0c0d0e0f101112131415161718191a1b1c1d1e1f`
- `Output`: `"Example SECP256K1 Transfer Output from below"`
```text
[
AssetID <- 0x000102030405060708090a0b0c0d0e0f101112131415161718191a1b1c1d1e1f
Output <- 0x000000070000000000003039000000000000d431000000010000000251025c61fbcfc078f69334f834be6dd26d55a955c3344128e060128ede3523a24a461c8943ab0859,
]
=
[
// assetID:
0x00, 0x01, 0x02, 0x03, 0x04, 0x05, 0x06, 0x07,
0x08, 0x09, 0x0a, 0x0b, 0x0c, 0x0d, 0x0e, 0x0f,
0x10, 0x11, 0x12, 0x13, 0x14, 0x15, 0x16, 0x17,
0x18, 0x19, 0x1a, 0x1b, 0x1c, 0x1d, 0x1e, 0x1f,
// output:
0x00, 0x00, 0x00, 0x07, 0x00, 0x00, 0x00, 0x00,
0x00, 0x00, 0x30, 0x39, 0x00, 0x00, 0x00, 0x00,
0x00, 0x00, 0xd4, 0x31, 0x00, 0x00, 0x00, 0x01,
0x00, 0x00, 0x00, 0x02, 0x51, 0x02, 0x5c, 0x61,
0xfb, 0xcf, 0xc0, 0x78, 0xf6, 0x93, 0x34, 0xf8,
0x34, 0xbe, 0x6d, 0xd2, 0x6d, 0x55, 0xa9, 0x55,
0xc3, 0x34, 0x41, 0x28, 0xe0, 0x60, 0x12, 0x8e,
0xde, 0x35, 0x23, 0xa2, 0x4a, 0x46, 0x1c, 0x89,
0x43, 0xab, 0x08, 0x59,
]
```
## Transferable Input
Transferable inputs describe a specific UTXO with a provided transfer input.
### What Transferable Input Contains
A transferable input contains a `TxID`, `UTXOIndex` `AssetID` and an `Input`.
- **`TxID`** is a 32-byte array that defines which transaction this input is
consuming an output from. Transaction IDs are calculated by taking sha256 of
the bytes of the signed transaction.
- **`UTXOIndex`** is an int that defines which UTXO this input is consuming in the specified transaction.
- **`AssetID`** is a 32-byte array that defines which asset this input references.
- **`Input`** is an input, as defined below. This can currently only be a [SECP256K1 transfer input](/docs/api-reference/x-chain/txn-format#secp256k1-transfer-input)
### Gantt Transferable Input Specification
```text
+------------+----------+------------------------+
| tx_id : [32]byte | 32 bytes |
+------------+----------+------------------------+
| utxo_index : int | 04 bytes |
+------------+----------+------------------------+
| asset_id : [32]byte | 32 bytes |
+------------+----------+------------------------+
| input : Input | size(input) bytes |
+------------+----------+------------------------+
| 68 + size(input) bytes |
+------------------------+
```
### Proto Transferable Input Specification
```text
message TransferableInput {
bytes tx_id = 1; // 32 bytes
uint32 utxo_index = 2; // 04 bytes
bytes asset_id = 3; // 32 bytes
Input input = 4; // size(input)
}
```
### Transferable Input Example
Let's make a transferable input:
- `TxID`: `0xf1e1d1c1b1a191817161514131211101f0e0d0c0b0a090807060504030201000`
- `UTXOIndex`: `5`
- `AssetID`: `0x000102030405060708090a0b0c0d0e0f101112131415161718191a1b1c1d1e1f`
- `Input`: `"Example SECP256K1 Transfer Input from below"`
```text
[
TxID <- 0xf1e1d1c1b1a191817161514131211101f0e0d0c0b0a090807060504030201000
UTXOIndex <- 0x00000005
AssetID <- 0x000102030405060708090a0b0c0d0e0f101112131415161718191a1b1c1d1e1f
Input <- 0x0000000500000000075bcd15000000020000000700000003
]
=
[
// txID:
0xf1, 0xe1, 0xd1, 0xc1, 0xb1, 0xa1, 0x91, 0x81,
0x71, 0x61, 0x51, 0x41, 0x31, 0x21, 0x11, 0x01,
0xf0, 0xe0, 0xd0, 0xc0, 0xb0, 0xa0, 0x90, 0x80,
0x70, 0x60, 0x50, 0x40, 0x30, 0x20, 0x10, 0x00,
// utxoIndex:
0x00, 0x00, 0x00, 0x05,
// assetID:
0x00, 0x01, 0x02, 0x03, 0x04, 0x05, 0x06, 0x07,
0x08, 0x09, 0x0a, 0x0b, 0x0c, 0x0d, 0x0e, 0x0f,
0x10, 0x11, 0x12, 0x13, 0x14, 0x15, 0x16, 0x17,
0x18, 0x19, 0x1a, 0x1b, 0x1c, 0x1d, 0x1e, 0x1f,
// input:
0x00, 0x00, 0x00, 0x05, 0x00, 0x00, 0x00, 0x00,
0x07, 0x5b, 0xcd, 0x15, 0x00, 0x00, 0x00, 0x02,
0x00, 0x00, 0x00, 0x03, 0x00, 0x00, 0x00, 0x07
]
```
## Transferable Op
Transferable operations describe a set of UTXOs with a provided transfer
operation. Only one Asset ID is able to be referenced per operation.
### What Transferable Op Contains
A transferable operation contains an `AssetID`, `UTXOIDs`, and a `TransferOp`.
- **`AssetID`** is a 32-byte array that defines which asset this operation changes.
- **`UTXOIDs`** is an array of TxID-OutputIndex tuples. This array must be
sorted in lexicographical order.
- **`TransferOp`** is a [transferable operation object](/docs/api-reference/x-chain/txn-format#operations).
### Gantt Transferable Op Specification
```text
+-------------+------------+------------------------------+
| asset_id : [32]byte | 32 bytes |
+-------------+------------+------------------------------+
| utxo_ids : []UTXOID | 4 + 36 * len(utxo_ids) bytes |
+-------------+------------+------------------------------+
| transfer_op : TransferOp | size(transfer_op) bytes |
+-------------+------------+------------------------------+
| 36 + 36 * len(utxo_ids) |
| + size(transfer_op) bytes |
+------------------------------+
```
### Proto Transferable Op Specification
```text
message UTXOID {
bytes tx_id = 1; // 32 bytes
uint32 utxo_index = 2; // 04 bytes
}
message TransferableOp {
bytes asset_id = 1; // 32 bytes
repeated UTXOID utxo_ids = 2; // 4 + 36 * len(utxo_ids) bytes
TransferOp transfer_op = 3; // size(transfer_op)
}
```
### Transferable Op Example
Let's make a transferable operation:
- `AssetID`: `0x000102030405060708090a0b0c0d0e0f101112131415161718191a1b1c1d1e1f`
- `UTXOIDs`:
- `UTXOID`:
- `TxID`: `0xf1e1d1c1b1a191817161514131211101f0e0d0c0b0a090807060504030201000`
- `UTXOIndex`: `5`
- `Op`: `"Example Transfer Op from below"`
```text
[
AssetID <- 0x000102030405060708090a0b0c0d0e0f101112131415161718191a1b1c1d1e1f
UTXOIDs <- [
{
TxID:0xf1e1d1c1b1a191817161514131211101f0e0d0c0b0a090807060504030201000
UTXOIndex:5
}
]
Op <- 0x0000000d0000000200000003000000070000303900000003431100000000010000000251025c61fbcfc078f69334f834be6dd26d55a955c3344128e060128ede3523a24a461c8943ab0859
]
=
[
// assetID:
0x00, 0x01, 0x02, 0x03, 0x04, 0x05, 0x06, 0x07,
0x08, 0x09, 0x0a, 0x0b, 0x0c, 0x0d, 0x0e, 0x0f,
0x10, 0x11, 0x12, 0x13, 0x14, 0x15, 0x16, 0x17,
0x18, 0x19, 0x1a, 0x1b, 0x1c, 0x1d, 0x1e, 0x1f,
// number of utxoIDs:
0x00, 0x00, 0x00, 0x01,
// txID:
0xf1, 0xe1, 0xd1, 0xc1, 0xb1, 0xa1, 0x91, 0x81,
0x71, 0x61, 0x51, 0x41, 0x31, 0x21, 0x11, 0x01,
0xf0, 0xe0, 0xd0, 0xc0, 0xb0, 0xa0, 0x90, 0x80,
0x70, 0x60, 0x50, 0x40, 0x30, 0x20, 0x10, 0x00,
// utxoIndex:
0x00, 0x00, 0x00, 0x05,
// op:
0x00, 0x00, 0x00, 0x0d, 0x00, 0x00, 0x00, 0x02,
0x00, 0x00, 0x00, 0x03, 0x00, 0x00, 0x00, 0x07,
0x00, 0x00, 0x30, 0x39, 0x00, 0x00, 0x00, 0x03,
0x43, 0x11, 0x00, 0x00, 0x00, 0x00, 0x01, 0x00,
0x00, 0x00, 0x02, 0x51, 0x02, 0x5c, 0x61, 0xfb,
0xcf, 0xc0, 0x78, 0xf6, 0x93, 0x34, 0xf8, 0x34,
0xbe, 0x6d, 0xd2, 0x6d, 0x55, 0xa9, 0x55, 0xc3,
0x34, 0x41, 0x28, 0xe0, 0x60, 0x12, 0x8e, 0xde,
0x35, 0x23, 0xa2, 0x4a, 0x46, 0x1c, 0x89, 0x43,
0xab, 0x08, 0x59,
]
```
## Outputs
Outputs have four possible types:
[`SECP256K1TransferOutput`](/docs/api-reference/x-chain/txn-format#secp256k1-transfer-output),
[`SECP256K1MintOutput`](/docs/api-reference/x-chain/txn-format#secp256k1-mint-output),
[`NFTTransferOutput`](/docs/api-reference/x-chain/txn-format#nft-transfer-output) and
[`NFTMintOutput`](/docs/api-reference/x-chain/txn-format#nft-mint-output).
## SECP256K1 Mint Output
A [secp256k1](/docs/api-reference/standards/cryptographic-primitives#secp256k1-addresses) mint output is
an output that is owned by a collection of addresses.
### What SECP256K1 Mint Output Contains
A secp256k1 Mint output contains a `TypeID`, `Locktime`, `Threshold`, and `Addresses`.
- **`TypeID`** is the ID for this output type. It is `0x00000006`.
- **`Locktime`** is a long that contains the Unix timestamp that this output can
be spent after. The Unix timestamp is specific to the second.
- **`Threshold`** is an int that names the number of unique signatures required
to spend the output. Must be less than or equal to the length of
**`Addresses`**. If **`Addresses`** is empty, must be 0.
- **`Addresses`** is a list of unique addresses that correspond to the private
keys that can be used to spend this output. Addresses must be sorted
lexicographically.
### Gantt SECP256K1 Mint Output Specification
```text
+-----------+------------+--------------------------------+
| type_id : int | 4 bytes |
+-----------+------------+--------------------------------+
| locktime : long | 8 bytes |
+-----------+------------+--------------------------------+
| threshold : int | 4 bytes |
+-----------+------------+--------------------------------+
| addresses : [][20]byte | 4 + 20 * len(addresses) bytes |
+-----------+------------+--------------------------------+
| 20 + 20 * len(addresses) bytes |
+--------------------------------+
```
### Proto SECP256K1 Mint Output Specification
```text
message SECP256K1MintOutput {
uint32 typeID = 1; // 04 bytes
uint64 locktime = 2; // 08 bytes
uint32 threshold = 3; // 04 bytes
repeated bytes addresses = 4; // 04 bytes + 20 bytes * len(addresses)
}
```
### SECP256K1 Mint Output Example
Let's make a SECP256K1 mint output with:
- **`TypeID`**: `6`
- **`Locktime`**: `54321`
- **`Threshold`**: `1`
- **`Addresses`**:
- `0x51025c61fbcfc078f69334f834be6dd26d55a955`
- `0xc3344128e060128ede3523a24a461c8943ab0859`
```text
[
TypeID <- 0x00000006
Locktime <- 0x000000000000d431
Threshold <- 0x00000001
Addresses <- [
0x51025c61fbcfc078f69334f834be6dd26d55a955,
0xc3344128e060128ede3523a24a461c8943ab0859,
]
]
=
[
// typeID:
0x00, 0x00, 0x00, 0x06,
// locktime:
0x00, 0x00, 0x00, 0x00, 0x00, 0x00, 0xd4, 0x31,
// threshold:
0x00, 0x00, 0x00, 0x01,
// number of addresses:
0x00, 0x00, 0x00, 0x02,
// addrs[0]:
0x51, 0x02, 0x5c, 0x61, 0xfb, 0xcf, 0xc0, 0x78,
0xf6, 0x93, 0x34, 0xf8, 0x34, 0xbe, 0x6d, 0xd2,
0x6d, 0x55, 0xa9, 0x55,
// addrs[1]:
0xc3, 0x34, 0x41, 0x28, 0xe0, 0x60, 0x12, 0x8e,
0xde, 0x35, 0x23, 0xa2, 0x4a, 0x46, 0x1c, 0x89,
0x43, 0xab, 0x08, 0x59,
]
```
## SECP256K1 Transfer Output
A [secp256k1](/docs/api-reference/standards/cryptographic-primitives#secp256k1-addresses) transfer output
allows for sending a quantity of an asset to a collection of addresses after a
specified Unix time.
### What SECP256K1 Transfer Output Contains
A secp256k1 transfer output contains a `TypeID`, `Amount`, `Locktime`, `Threshold`, and `Addresses`.
- **`TypeID`** is the ID for this output type. It is `0x00000007`.
- **`Amount`** is a long that specifies the quantity of the asset that this output owns. Must be positive.
- **`Locktime`** is a long that contains the Unix timestamp that this output can
be spent after. The Unix timestamp is specific to the second.
- **`Threshold`** is an int that names the number of unique signatures required
to spend the output. Must be less than or equal to the length of
**`Addresses`**. If **`Addresses`** is empty, must be 0.
- **`Addresses`** is a list of unique addresses that correspond to the private
keys that can be used to spend this output. Addresses must be sorted
lexicographically.
### Gantt SECP256K1 Transfer Output Specification
```text
+-----------+------------+--------------------------------+
| type_id : int | 4 bytes |
+-----------+------------+--------------------------------+
| amount : long | 8 bytes |
+-----------+------------+--------------------------------+
| locktime : long | 8 bytes |
+-----------+------------+--------------------------------+
| threshold : int | 4 bytes |
+-----------+------------+--------------------------------+
| addresses : [][20]byte | 4 + 20 * len(addresses) bytes |
+-----------+------------+--------------------------------+
| 28 + 20 * len(addresses) bytes |
+--------------------------------+
```
### Proto SECP256K1 Transfer Output Specification
```text
message SECP256K1TransferOutput {
uint32 typeID = 1; // 04 bytes
uint64 amount = 2; // 08 bytes
uint64 locktime = 3; // 08 bytes
uint32 threshold = 4; // 04 bytes
repeated bytes addresses = 5; // 04 bytes + 20 bytes * len(addresses)
}
```
### SECP256K1 Transfer Output Example
Let's make a secp256k1 transfer output with:
- **`TypeID`**: `7`
- **`Amount`**: `12345`
- **`Locktime`**: `54321`
- **`Threshold`**: `1`
- **`Addresses`**:
- `0x51025c61fbcfc078f69334f834be6dd26d55a955`
- `0xc3344128e060128ede3523a24a461c8943ab0859`
```text
[
TypeID <- 0x00000007
Amount <- 0x0000000000003039
Locktime <- 0x000000000000d431
Threshold <- 0x00000001
Addresses <- [
0x51025c61fbcfc078f69334f834be6dd26d55a955,
0xc3344128e060128ede3523a24a461c8943ab0859,
]
]
=
[
// typeID:
0x00, 0x00, 0x00, 0x07,
// amount:
0x00, 0x00, 0x00, 0x00, 0x00, 0x00, 0x30, 0x39,
// locktime:
0x00, 0x00, 0x00, 0x00, 0x00, 0x00, 0xd4, 0x31,
// threshold:
0x00, 0x00, 0x00, 0x01,
// number of addresses:
0x00, 0x00, 0x00, 0x02,
// addrs[0]:
0x51, 0x02, 0x5c, 0x61, 0xfb, 0xcf, 0xc0, 0x78,
0xf6, 0x93, 0x34, 0xf8, 0x34, 0xbe, 0x6d, 0xd2,
0x6d, 0x55, 0xa9, 0x55,
// addrs[1]:
0xc3, 0x34, 0x41, 0x28, 0xe0, 0x60, 0x12, 0x8e,
0xde, 0x35, 0x23, 0xa2, 0x4a, 0x46, 0x1c, 0x89,
0x43, 0xab, 0x08, 0x59,
]
```
## NFT Mint Output
An NFT mint output is an NFT that is owned by a collection of addresses.
### What NFT Mint Output Contains
An NFT Mint output contains a `TypeID`, `GroupID`, `Locktime`, `Threshold`, and `Addresses`.
- **`TypeID`** is the ID for this output type. It is `0x0000000a`.
- **`GroupID`** is an int that specifies the group this NFT is issued to.
- **`Locktime`** is a long that contains the Unix timestamp that this output can
be spent after. The Unix timestamp is specific to the second.
- **`Threshold`** is an int that names the number of unique signatures required
to spend the output. Must be less than or equal to the length of
**`Addresses`**. If **`Addresses`** is empty, must be 0.
- **`Addresses`** is a list of unique addresses that correspond to the private
keys that can be used to spend this output. Addresses must be sorted
lexicographically.
### Gantt NFT Mint Output Specification
```text
+-----------+------------+--------------------------------+
| type_id : int | 4 bytes |
+-----------+------------+--------------------------------+
| group_id : int | 4 bytes |
+-----------+------------+--------------------------------+
| locktime : long | 8 bytes |
+-----------+------------+--------------------------------+
| threshold : int | 4 bytes |
+-----------+------------+--------------------------------+
| addresses : [][20]byte | 4 + 20 * len(addresses) bytes |
+-----------+------------+--------------------------------+
| 24 + 20 * len(addresses) bytes |
+--------------------------------+
```
### Proto NFT Mint Output Specification
```text
message NFTMintOutput {
uint32 typeID = 1; // 04 bytes
uint32 group_id = 2; // 04 bytes
uint64 locktime = 3; // 08 bytes
uint32 threshold = 4; // 04 bytes
repeated bytes addresses = 5; // 04 bytes + 20 bytes * len(addresses)
}
```
### NFT Mint Output Example
Let's make an NFT mint output with:
- **`TypeID`**: `10`
- **`GroupID`**: `12345`
- **`Locktime`**: `54321`
- **`Threshold`**: `1`
- **`Addresses`**:
- `0x51025c61fbcfc078f69334f834be6dd26d55a955`
- `0xc3344128e060128ede3523a24a461c8943ab0859`
```text
[
TypeID <- 0x0000000a
GroupID <- 0x00003039
Locktime <- 0x000000000000d431
Threshold <- 0x00000001
Addresses <- [
0x51025c61fbcfc078f69334f834be6dd26d55a955,
0xc3344128e060128ede3523a24a461c8943ab0859,
]
]
=
[
// TypeID
0x00, 0x00, 0x00, 0x0a,
// groupID:
0x00, 0x00, 0x30, 0x39,
// locktime:
0x00, 0x00, 0x00, 0x00, 0x00, 0x00, 0xd4, 0x31,
// threshold:
0x00, 0x00, 0x00, 0x01,
// number of addresses:
0x00, 0x00, 0x00, 0x02,
// addrs[0]:
0x51, 0x02, 0x5c, 0x61, 0xfb, 0xcf, 0xc0, 0x78,
0xf6, 0x93, 0x34, 0xf8, 0x34, 0xbe, 0x6d, 0xd2,
0x6d, 0x55, 0xa9, 0x55,
// addrs[1]:
0xc3, 0x34, 0x41, 0x28, 0xe0, 0x60, 0x12, 0x8e,
0xde, 0x35, 0x23, 0xa2, 0x4a, 0x46, 0x1c, 0x89,
0x43, 0xab, 0x08, 0x59,
]
```
## NFT Transfer Output
An NFT transfer output is an NFT that is owned by a collection of addresses.
### What NFT Transfer Output Contains
An NFT transfer output contains a `TypeID`, `GroupID`, `Payload`, `Locktime`, `Threshold`, and `Addresses`.
- **`TypeID`** is the ID for this output type. It is `0x0000000b`.
- **`GroupID`** is an int that specifies the group this NFT was issued with.
- **`Payload`** is an arbitrary string of bytes no long longer than 1024 bytes.
- **`Locktime`** is a long that contains the Unix timestamp that this output can
be spent after. The Unix timestamp is specific to the second.
- **`Threshold`** is an int that names the number of unique signatures required
to spend the output. Must be less than or equal to the length of
**`Addresses`**. If **`Addresses`** is empty, must be 0.
- **`Addresses`** is a list of unique addresses that correspond to the private
keys that can be used to spend this output. Addresses must be sorted
lexicographically.
### Gantt NFT Transfer Output Specification
```text
+-----------+------------+-------------------------------+
| type_id : int | 4 bytes |
+-----------+------------+-------------------------------+
| group_id : int | 4 bytes |
+-----------+------------+-------------------------------+
| payload : []byte | 4 + len(payload) bytes |
+-----------+------------+-------------------------------+
| locktime : long | 8 bytes |
+-----------+------------+-------------------------------+
| threshold : int | 4 bytes |
+-----------+------------+-------------------------------+
| addresses : [][20]byte | 4 + 20 * len(addresses) bytes |
+-----------+------------+-------------------------------+
| 28 + len(payload) |
| + 20 * len(addresses) bytes |
+-------------------------------+
```
### Proto NFT Transfer Output Specification
```text
message NFTTransferOutput {
uint32 typeID = 1; // 04 bytes
uint32 group_id = 2; // 04 bytes
bytes payload = 3; // 04 bytes + len(payload)
uint64 locktime = 4 // 08 bytes
uint32 threshold = 5; // 04 bytes
repeated bytes addresses = 6; // 04 bytes + 20 bytes * len(addresses)
}
```
### NFT Transfer Output Example
Let's make an NFT transfer output with:
- **`TypeID`**: `11`
- **`GroupID`**: `12345`
- **`Payload`**: `NFT Payload`
- **`Locktime`**: `54321`
- **`Threshold`**: `1`
- **`Addresses`**:
- `0x51025c61fbcfc078f69334f834be6dd26d55a955`
- `0xc3344128e060128ede3523a24a461c8943ab0859`
```text
[
TypeID <- 0x0000000b
GroupID <- 0x00003039
Payload <- 0x4e4654205061796c6f6164
Locktime <- 0x000000000000d431
Threshold <- 0x00000001
Addresses <- [
0x51025c61fbcfc078f69334f834be6dd26d55a955,
0xc3344128e060128ede3523a24a461c8943ab0859,
]
]
=
[
// TypeID:
0x00, 0x00, 0x00, 0x0b,
// groupID:
0x00, 0x00, 0x30, 0x39,
// length of payload:
0x00, 0x00, 0x00, 0x0b,
// payload:
0x4e, 0x46, 0x54, 0x20, 0x50, 0x61, 0x79, 0x6c,
0x6f, 0x61, 0x64,
// locktime:
0x00, 0x00, 0x00, 0x00, 0x00, 0x00, 0xd4, 0x31,
// threshold:
0x00, 0x00, 0x00, 0x01,
// number of addresses:
0x00, 0x00, 0x00, 0x02,
// addrs[0]:
0x51, 0x02, 0x5c, 0x61, 0xfb, 0xcf, 0xc0, 0x78,
0xf6, 0x93, 0x34, 0xf8, 0x34, 0xbe, 0x6d, 0xd2,
0x6d, 0x55, 0xa9, 0x55,
// addrs[1]:
0xc3, 0x34, 0x41, 0x28, 0xe0, 0x60, 0x12, 0x8e,
0xde, 0x35, 0x23, 0xa2, 0x4a, 0x46, 0x1c, 0x89,
0x43, 0xab, 0x08, 0x59,
]
```
## Inputs
Inputs have one possible type: `SECP256K1TransferInput`.
## SECP256K1 Transfer Input
A [secp256k1](/docs/api-reference/standards/cryptographic-primitives#secp256k1-addresses) transfer input
allows for spending an unspent secp256k1 transfer output.
### What SECP256K1 Transfer Input Contains
A secp256k1 transfer input contains an `Amount` and `AddressIndices`.
- **`TypeID`** is the ID for this input type. It is `0x00000005`.
- **`Amount`** is a long that specifies the quantity that this input should be
consuming from the UTXO. Must be positive. Must be equal to the amount
specified in the UTXO.
- **`AddressIndices`** is a list of unique ints that define the private keys
that are being used to spend the UTXO. Each UTXO has an array of addresses
that can spend the UTXO. Each int represents the index in this address array
that will sign this transaction. The array must be sorted low to high.
### Gantt SECP256K1 Transfer Input Specification
```text
+-------------------------+-------------------------------------+
| type_id : int | 4 bytes |
+-----------------+-------+-------------------------------------+
| amount : long | 8 bytes |
+-----------------+-------+-------------------------------------+
| address_indices : []int | 4 + 4 * len(address_indices) bytes |
+-----------------+-------+-------------------------------------+
| 16 + 4 * len(address_indices) bytes |
+-------------------------------------+
```
### Proto SECP256K1 Transfer Input Specification
```text
message SECP256K1TransferInput {
uint32 typeID = 1; // 04 bytes
uint64 amount = 2; // 08 bytes
repeated uint32 address_indices = 3; // 04 bytes + 04 bytes * len(address_indices)
}
```
### SECP256K1 Transfer Input Example
Let's make a payment input with:
- **`TypeId`**: `5`
- **`Amount`**: `123456789`
- **`AddressIndices`**: \[`3`,`7`\]
```text
[
TypeID <- 0x00000005
Amount <- 123456789 = 0x00000000075bcd15,
AddressIndices <- [0x00000003, 0x00000007]
]
=
[
// type id:
0x00, 0x00, 0x00, 0x05,
// amount:
0x00, 0x00, 0x00, 0x00, 0x07, 0x5b, 0xcd, 0x15,
// length:
0x00, 0x00, 0x00, 0x02,
// sig[0]
0x00, 0x00, 0x00, 0x03,
// sig[1]
0x00, 0x00, 0x00, 0x07,
]
```
## Operations
Operations have three possible types: `SECP256K1MintOperation`, `NFTMintOp`, and `NFTTransferOp`.
## SECP256K1 Mint Operation
A [secp256k1](/docs/api-reference/standards/cryptographic-primitives#secp256k1-addresses) mint operation
consumes a SECP256K1 mint output, creates a new mint output and sends a transfer
output to a new set of owners.
### What SECP256K1 Mint Operation Contains
A secp256k1 Mint operation contains a `TypeID`, `AddressIndices`, `MintOutput`, and `TransferOutput`.
- **`TypeID`** is the ID for this output type. It is `0x00000008`.
- **`AddressIndices`** is a list of unique ints that define the private keys
that are being used to spend the
[UTXO](/docs/api-reference/x-chain/txn-format#utxo). Each UTXO has an array of
addresses that can spend the UTXO. Each int represents the index in this
address array that will sign this transaction. The array must be sorted low to
high.
- **`MintOutput`** is a [SECP256K1 Mint output](/docs/api-reference/x-chain/txn-format#secp256k1-mint-output).
- **`TransferOutput`** is a [SECP256K1 Transfer output](/docs/api-reference/x-chain/txn-format#secp256k1-transfer-output).
### Gantt SECP256K1 Mint Operation Specification
```text
+----------------------------------+------------------------------------+
| type_id : int | 4 bytes |
+----------------------------------+------------------------------------+
| address_indices : []int | 4 + 4 * len(address_indices) bytes |
+----------------------------------+------------------------------------+
| mint_output : MintOutput | size(mint_output) bytes |
+----------------------------------+------------------------------------+
| transfer_output : TransferOutput | size(transfer_output) bytes |
+----------------------------------+------------------------------------+
| 8 + 4 * len(address_indices) |
| + size(mint_output) |
| + size(transfer_output) bytes |
+------------------------------------+
```
### Proto SECP256K1 Mint Operation Specification
```text
message SECP256K1MintOperation {
uint32 typeID = 1; // 4 bytes
repeated uint32 address_indices = 2; // 04 bytes + 04 bytes * len(address_indices)
MintOutput mint_output = 3; // size(mint_output
TransferOutput transfer_output = 4; // size(transfer_output)
}
```
### SECP256K1 Mint Operation Example
Let's make a [secp256k1](/docs/api-reference/standards/cryptographic-primitives#secp256k1-addresses) mint
operation with:
- **`TypeId`**: `8`
- **`AddressIndices`**:
- `0x00000003`
- `0x00000007`
- **`MintOutput`**: `"Example SECP256K1 Mint Output from above"`
- **`TransferOutput`**: `"Example SECP256K1 Transfer Output from above"`
```text
[
TypeID <- 0x00000008
AddressIndices <- [0x00000003, 0x00000007]
MintOutput <- 0x00000006000000000000d431000000010000000251025c61fbcfc078f69334f834be6dd26d55a955c3344128e060128ede3523a24a461c89
TransferOutput <- 0x000000070000000000003039000000000000d431000000010000000251025c61fbcfc078f69334f834be6dd26d55a955c3344128e060128ede3523a24a461c8943ab0859
]
=
[
// typeID
0x00, 0x00, 0x00, 0x08,
// number of address_indices:
0x00, 0x00, 0x00, 0x02,
// address_indices[0]:
0x00, 0x00, 0x00, 0x03,
// address_indices[1]:
0x00, 0x00, 0x00, 0x07,
// mint output
0x00, 0x00, 0x00, 0x06, 0x00, 0x00, 0x00, 0x00,
0x00, 0x00, 0xd4, 0x31, 0x00, 0x00, 0x00, 0x01,
0x00, 0x00, 0x00, 0x02, 0x51, 0x02, 0x5c, 0x61,
0xfb, 0xcf, 0xc0, 0x78, 0xf6, 0x93, 0x34, 0xf8,
0x34, 0xbe, 0x6d, 0xd2, 0x6d, 0x55, 0xa9, 0x55,
0xc3, 0x34, 0x41, 0x28, 0xe0, 0x60, 0x12, 0x8e,
0xde, 0x35, 0x23, 0xa2, 0x4a, 0x46, 0x1c, 0x89,
0x43, 0xab, 0x08, 0x59,
// transfer output
0x00, 0x00, 0x00, 0x07, 0x00, 0x00, 0x00, 0x00,
0x00, 0x00, 0x30, 0x39, 0x00, 0x00, 0x00, 0x00,
0x00, 0x00, 0xd4, 0x31, 0x00, 0x00, 0x00, 0x01,
0x00, 0x00, 0x00, 0x02, 0x51, 0x02, 0x5c, 0x61,
0xfb, 0xcf, 0xc0, 0x78, 0xf6, 0x93, 0x34, 0xf8,
0x34, 0xbe, 0x6d, 0xd2, 0x6d, 0x55, 0xa9, 0x55,
0xc3, 0x34, 0x41, 0x28, 0xe0, 0x60, 0x12, 0x8e,
0xde, 0x35, 0x23, 0xa2, 0x4a, 0x46, 0x1c, 0x89,
0x43, 0xab, 0x08, 0x59,
]
```
## NFT Mint Op
An NFT mint operation consumes an NFT mint output and sends an unspent output to a new set of owners.
### What NFT Mint Op Contains
An NFT mint operation contains a `TypeID`, `AddressIndices`, `GroupID`, `Payload`, and `Output` of addresses.
- **`TypeID`** is the ID for this operation type. It is `0x0000000c`.
- **`AddressIndices`** is a list of unique ints that define the private keys
that are being used to spend the UTXO. Each UTXO has an array of addresses
that can spend the UTXO. Each int represents the index in this address array
that will sign this transaction. The array must be sorted low to high.
- **`GroupID`** is an int that specifies the group this NFT is issued to.
- **`Payload`** is an arbitrary string of bytes no longer than 1024 bytes.
- **`Output`** is not a `TransferableOutput`, but rather is a lock time,
threshold, and an array of unique addresses that correspond to the private
keys that can be used to spend this output. Addresses must be sorted
lexicographically.
### Gantt NFT Mint Op Specification
```text
+------------------------------+------------------------------------+
| type_id : int | 4 bytes |
+-----------------+------------+------------------------------------+
| address_indices : []int | 4 + 4 * len(address_indices) bytes |
+-----------------+------------+------------------------------------+
| group_id : int | 4 bytes |
+-----------------+------------+------------------------------------+
| payload : []byte | 4 + len(payload) bytes |
+-----------------+------------+------------------------------------+
| outputs : []Output | 4 + size(outputs) bytes |
+-----------------+------------+------------------------------------+
| 20 + |
| 4 * len(address_indices) + |
| len(payload) + |
| size(outputs) bytes |
+------------------------------------+
```
### Proto NFT Mint Op Specification
```text
message NFTMintOp {
uint32 typeID = 1; // 04 bytes
repeated uint32 address_indices = 2; // 04 bytes + 04 bytes * len(address_indices)
uint32 group_id = 3; // 04 bytes
bytes payload = 4; // 04 bytes + len(payload)
repeated bytes outputs = 5; // 04 bytes + size(outputs)
}
```
### NFT Mint Op Example
Let's make an NFT mint operation with:
- **`TypeId`**: `12`
- **`AddressIndices`**:
- `0x00000003`
- `0x00000007`
- **`GroupID`**: `12345`
- **`Payload`**: `0x431100`
- **`Locktime`**: `54321`
- **`Threshold`**: `1`
- **`Addresses`**:
- `0xc3344128e060128ede3523a24a461c8943ab0859`
```text
[
TypeID <- 0x0000000c
AddressIndices <- [
0x00000003,
0x00000007,
]
GroupID <- 0x00003039
Payload <- 0x431100
Locktime <- 0x000000000000d431
Threshold <- 0x00000001
Addresses <- [
0xc3344128e060128ede3523a24a461c8943ab0859
]
]
=
[
// Type ID
0x00, 0x00, 0x00, 0x0c,
// number of address indices:
0x00, 0x00, 0x00, 0x02,
// address index 0:
0x00, 0x00, 0x00, 0x03,
// address index 1:
0x00, 0x00, 0x00, 0x07,
// groupID:
0x00, 0x00, 0x30, 0x39,
// length of payload:
0x00, 0x00, 0x00, 0x03,
// payload:
0x43, 0x11, 0x00,
// number of outputs:
0x00, 0x00, 0x00, 0x01,
// outputs[0]
// locktime:
0x00, 0x00, 0x00, 0x00, 0x00, 0x00, 0xd4, 0x31,
// threshold:
0x00, 0x00, 0x00, 0x01,
// number of addresses:
0x00, 0x00, 0x00, 0x01,
// addrs[0]:
0xc3, 0x34, 0x41, 0x28, 0xe0, 0x60, 0x12, 0x8e,
0xde, 0x35, 0x23, 0xa2, 0x4a, 0x46, 0x1c, 0x89,
0x43, 0xab, 0x08, 0x59,
]
```
## NFT Transfer Op
An NFT transfer operation sends an unspent NFT transfer output to a new set of owners.
### What NFT Transfer Op Contains
An NFT transfer operation contains a `TypeID`, `AddressIndices` and an untyped `NFTTransferOutput`.
- **`TypeID`** is the ID for this output type. It is `0x0000000d`.
- **`AddressIndices`** is a list of unique ints that define the private keys
that are being used to spend the UTXO. Each UTXO has an array of addresses
that can spend the UTXO. Each int represents the index in this address array
that will sign this transaction. The array must be sorted low to high.
- **`NFTTransferOutput`** is the output of this operation and must be an [NFT Transfer Output](/docs/api-reference/x-chain/txn-format#nft-transfer-output). This
output doesn't have the **`TypeId`**, because the type is known by the context
of being in this operation.
### Gantt NFT Transfer Op Specification
```text
+------------------------------+------------------------------------+
| type_id : int | 4 bytes |
+-----------------+------------+------------------------------------+
| address_indices : []int | 4 + 4 * len(address_indices) bytes |
+-----------------+------------+------------------------------------+
| group_id : int | 4 bytes |
+-----------------+------------+------------------------------------+
| payload : []byte | 4 + len(payload) bytes |
+-----------------+------------+------------------------------------+
| locktime : long | 8 bytes |
+-----------+------------+------------------------------------------+
| threshold : int | 4 bytes |
+-----------------+------------+------------------------------------+
| addresses : [][20]byte | 4 + 20 * len(addresses) bytes |
+-----------------+------------+------------------------------------+
| 36 + len(payload) |
| + 4 * len(address_indices) |
| + 20 * len(addresses) bytes |
+------------------------------------+
```
### Proto NFT Transfer Op Specification
```text
message NFTTransferOp {
uint32 typeID = 1; // 04 bytes
repeated uint32 address_indices = 2; // 04 bytes + 04 bytes * len(address_indices)
uint32 group_id = 3; // 04 bytes
bytes payload = 4; // 04 bytes + len(payload)
uint64 locktime = 5; // 08 bytes
uint32 threshold = 6; // 04 bytes
repeated bytes addresses = 7; // 04 bytes + 20 bytes * len(addresses)
}
```
### NFT Transfer Op Example
Let's make an NFT transfer operation with:
- **`TypeID`**: `13`
- **`AddressIndices`**:
- `0x00000007`
- `0x00000003`
- **`GroupID`**: `12345`
- **`Payload`**: `0x431100`
- **`Locktime`**: `54321`
- **`Threshold`**: `1`
- **`Addresses`**:
- `0xc3344128e060128ede3523a24a461c8943ab0859`
- `0x51025c61fbcfc078f69334f834be6dd26d55a955`
```text
[
TypeID <- 0x0000000d
AddressIndices <- [
0x00000007,
0x00000003,
]
GroupID <- 0x00003039
Payload <- 0x431100
Locktime <- 0x000000000000d431
Threshold <- 00000001
Addresses <- [
0x51025c61fbcfc078f69334f834be6dd26d55a955,
0xc3344128e060128ede3523a24a461c8943ab0859,
]
]
=
[
// Type ID
0x00, 0x00, 0x00, 0x0d,
// number of address indices:
0x00, 0x00, 0x00, 0x02,
// address index 0:
0x00, 0x00, 0x00, 0x07,
// address index 1:
0x00, 0x00, 0x00, 0x03,
// groupID:
0x00, 0x00, 0x30, 0x39,
// length of payload:
0x00, 0x00, 0x00, 0x03,
// payload:
0x43, 0x11, 0x00,
// locktime:
0x00, 0x00, 0x00, 0x00, 0x00, 0x00, 0xd4, 0x31,
// threshold:
0x00, 0x00, 0x00, 0x01,
// number of addresses:
0x00, 0x00, 0x00, 0x02,
// addrs[0]:
0x51, 0x02, 0x5c, 0x61, 0xfb, 0xcf, 0xc0, 0x78,
0xf6, 0x93, 0x34, 0xf8, 0x34, 0xbe, 0x6d, 0xd2,
0x6d, 0x55, 0xa9, 0x55,
// addrs[1]:
0xc3, 0x34, 0x41, 0x28, 0xe0, 0x60, 0x12, 0x8e,
0xde, 0x35, 0x23, 0xa2, 0x4a, 0x46, 0x1c, 0x89,
0x43, 0xab, 0x08, 0x59,
]
```
## Initial State
Initial state describes the initial state of an asset when it is created. It
contains the ID of the feature extension that the asset uses, and a variable
length array of outputs that denote the genesis UTXO set of the asset.
### What Initial State Contains
Initial state contains a `FxID` and an array of `Output`.
- **`FxID`** is an int that defines which feature extension this state is part
of. For SECP256K1 assets, this is `0x00000000`. For NFT assets, this is
`0x00000001`.
- **`Outputs`** is a variable length array of
[outputs](/docs/api-reference/x-chain/txn-format#outputs), as defined above.
### Gantt Initial State Specification
```text
+---------------+----------+-------------------------------+
| fx_id : int | 4 bytes |
+---------------+----------+-------------------------------+
| outputs : []Output | 4 + size(outputs) bytes |
+---------------+----------+-------------------------------+
| 8 + size(outputs) bytes |
+-------------------------------+
```
### Proto Initial State Specification
```text
message InitialState {
uint32 fx_id = 1; // 04 bytes
repeated Output outputs = 2; // 04 + size(outputs) bytes
}
```
### Initial State Example
Let's make an initial state:
- `FxID`: `0x00000000`
- `InitialState`: `["Example SECP256K1 Transfer Output from above"]`
```text
[
FxID <- 0x00000000
InitialState <- [
0x000000070000000000003039000000000000d431000000010000000251025c61fbcfc078f69334f834be6dd26d55a955c3344128e060128ede3523a24a461c8943ab0859,
]
]
=
[
// fxID:
0x00, 0x00, 0x00, 0x00,
// num outputs:
0x00, 0x00, 0x00, 0x01,
// output:
0x00, 0x00, 0x00, 0x07, 0x00, 0x00, 0x00, 0x00,
0x00, 0x00, 0x30, 0x39, 0x00, 0x00, 0x00, 0x00,
0x00, 0x00, 0xd4, 0x31, 0x00, 0x00, 0x00, 0x01,
0x00, 0x00, 0x00, 0x02, 0x51, 0x02, 0x5c, 0x61,
0xfb, 0xcf, 0xc0, 0x78, 0xf6, 0x93, 0x34, 0xf8,
0x34, 0xbe, 0x6d, 0xd2, 0x6d, 0x55, 0xa9, 0x55,
0xc3, 0x34, 0x41, 0x28, 0xe0, 0x60, 0x12, 0x8e,
0xde, 0x35, 0x23, 0xa2, 0x4a, 0x46, 0x1c, 0x89,
0x43, 0xab, 0x08, 0x59,
]
```
## Credentials
Credentials have two possible types: `SECP256K1Credential`, and `NFTCredential`.
Each credential is paired with an Input or Operation. The order of the
credentials match the order of the inputs or operations.
## SECP256K1 Credential
A [secp256k1](/docs/api-reference/standards/cryptographic-primitives#secp256k1-addresses) credential
contains a list of 65-byte recoverable signatures.
### What SECP256K1 Credential Contains
- **`TypeID`** is the ID for this type. It is `0x00000009`.
- **`Signatures`** is an array of 65-byte recoverable signatures. The order of
the signatures must match the input's signature indices.
### Gantt SECP256K1 Credential Specification
```text
+------------------------------+---------------------------------+
| type_id : int | 4 bytes |
+-----------------+------------+---------------------------------+
| signatures : [][65]byte | 4 + 65 * len(signatures) bytes |
+-----------------+------------+---------------------------------+
| 8 + 65 * len(signatures) bytes |
+---------------------------------+
```
### Proto SECP256K1 Credential Specification
```text
message SECP256K1Credential {
uint32 typeID = 1; // 4 bytes
repeated bytes signatures = 2; // 4 bytes + 65 bytes * len(signatures)
}
```
### SECP256K1 Credential Example
Let's make a payment input with:
- **`TypeID`**: `9`
- **`signatures`**:
- `0x000102030405060708090a0b0c0d0e0f101112131415161718191a1b1c1e1d1f202122232425262728292a2b2c2e2d2f303132333435363738393a3b3c3d3e3f00`
- `0x404142434445464748494a4b4c4d4e4f505152535455565758595a5b5c5e5d5f606162636465666768696a6b6c6e6d6f707172737475767778797a7b7c7d7e7f00`
```text
[
TypeID <- 0x00000009
Signatures <- [
0x000102030405060708090a0b0c0d0e0f101112131415161718191a1b1c1e1d1f202122232425262728292a2b2c2e2d2f303132333435363738393a3b3c3d3e3f00,
0x404142434445464748494a4b4c4d4e4f505152535455565758595a5b5c5e5d5f606162636465666768696a6b6c6e6d6f707172737475767778797a7b7c7d7e7f00,
]
]
=
[
// Type ID
0x00, 0x00, 0x00, 0x09,
// length:
0x00, 0x00, 0x00, 0x02,
// sig[0]
0x00, 0x01, 0x02, 0x03, 0x04, 0x05, 0x06, 0x07,
0x08, 0x09, 0x0a, 0x0b, 0x0c, 0x0d, 0x0e, 0x0f,
0x10, 0x11, 0x12, 0x13, 0x14, 0x15, 0x16, 0x17,
0x18, 0x19, 0x1a, 0x1b, 0x1c, 0x1e, 0x1d, 0x1f,
0x20, 0x21, 0x22, 0x23, 0x24, 0x25, 0x26, 0x27,
0x28, 0x29, 0x2a, 0x2b, 0x2c, 0x2e, 0x2d, 0x2f,
0x30, 0x31, 0x32, 0x33, 0x34, 0x35, 0x36, 0x37,
0x38, 0x39, 0x3a, 0x3b, 0x3c, 0x3d, 0x3e, 0x3f,
0x00,
// sig[1]
0x40, 0x41, 0x42, 0x43, 0x44, 0x45, 0x46, 0x47,
0x48, 0x49, 0x4a, 0x4b, 0x4c, 0x4d, 0x4e, 0x4f,
0x50, 0x51, 0x52, 0x53, 0x54, 0x55, 0x56, 0x57,
0x58, 0x59, 0x5a, 0x5b, 0x5c, 0x5e, 0x5d, 0x5f,
0x60, 0x61, 0x62, 0x63, 0x64, 0x65, 0x66, 0x67,
0x68, 0x69, 0x6a, 0x6b, 0x6c, 0x6e, 0x6d, 0x6f,
0x70, 0x71, 0x72, 0x73, 0x74, 0x75, 0x76, 0x77,
0x78, 0x79, 0x7a, 0x7b, 0x7c, 0x7d, 0x7e, 0x7f,
0x00,
]
```
## NFT Credential
An NFT credential is the same as an [secp256k1 credential](/docs/api-reference/x-chain/txn-format#secp256k1-credential) with a
different TypeID. The TypeID for an NFT credential is `0x0000000e`.
## Unsigned Transactions
Unsigned transactions contain the full content of a transaction with only the
signatures missing. Unsigned transactions have four possible types:
[`CreateAssetTx`](/docs/api-reference/x-chain/txn-format#what-unsigned-create-asset-tx-contains),
[`OperationTx`](/docs/api-reference/x-chain/txn-format#what-unsigned-operation-tx-contains),
[`ImportTx`](/docs/api-reference/x-chain/txn-format#what-unsigned-import-tx-contains),
and
[`ExportTx`](/docs/api-reference/x-chain/txn-format#what-unsigned-export-tx-contains).
They all embed
[`BaseTx`](/docs/api-reference/x-chain/txn-format#what-base-tx-contains), which
contains common fields and operations.
## Unsigned BaseTx
### What Base TX Contains
A base TX contains a `TypeID`, `NetworkID`, `BlockchainID`, `Outputs`, `Inputs`, and `Memo`.
- **`TypeID`** is the ID for this type. It is `0x00000000`.
- **`NetworkID`** is an int that defines which network this transaction is meant
to be issued to. This value is meant to support transaction routing and is not
designed for replay attack prevention.
- **`BlockchainID`** is a 32-byte array that defines which blockchain this
transaction was issued to. This is used for replay attack prevention for
transactions that could potentially be valid across network or blockchain.
- **`Outputs`** is an array of [transferable output objects](/docs/api-reference/x-chain/txn-format#transferable-output). Outputs must
be sorted lexicographically by their serialized representation. The total
quantity of the assets created in these outputs must be less than or equal to
the total quantity of each asset consumed in the inputs minus the transaction
fee.
- **`Inputs`** is an array of [transferable input objects](/docs/api-reference/x-chain/txn-format#transferable-input). Inputs must be
sorted and unique. Inputs are sorted first lexicographically by their
**`TxID`** and then by the **`UTXOIndex`** from low to high. If there are
inputs that have the same **`TxID`** and **`UTXOIndex`**, then the transaction
is invalid as this would result in a double spend.
- **`Memo`** Memo field contains arbitrary bytes, up to 256 bytes.
### Gantt Base TX Specification
```text
+--------------------------------------+-----------------------------------------+
| type_id : int | 4 bytes |
+---------------+----------------------+-----------------------------------------+
| network_id : int | 4 bytes |
+---------------+----------------------+-----------------------------------------+
| blockchain_id : [32]byte | 32 bytes |
+---------------+----------------------+-----------------------------------------+
| outputs : []TransferableOutput | 4 + size(outputs) bytes |
+---------------+----------------------+-----------------------------------------+
| inputs : []TransferableInput | 4 + size(inputs) bytes |
+---------------+----------------------+-----------------------------------------+
| memo : [256]byte | 4 + size(memo) bytes |
+---------------+----------------------+-----------------------------------------+
| 52 + size(outputs) + size(inputs) + size(memo) bytes |
+------------------------------------------------------+
```
### Proto Base TX Specification
```text
message BaseTx {
uint32 typeID = 1; // 04 bytes
uint32 network_id = 2; // 04 bytes
bytes blockchain_id = 3; // 32 bytes
repeated Output outputs = 4; // 04 bytes + size(outs)
repeated Input inputs = 5; // 04 bytes + size(ins)
bytes memo = 6; // 04 bytes + size(memo)
}
```
### Base TX Example
Let's make an base TX that uses the inputs and outputs from the previous examples:
- **`TypeID`**: `0`
- **`NetworkID`**: `4`
- **`BlockchainID`**: `0xffffffffeeeeeeeeddddddddcccccccbbbbbbbbaaaaaaaa9999999988888888`
- **`Outputs`**:
- `"Example Transferable Output as defined above"`
- **`Inputs`**:
- `"Example Transferable Input as defined above"`
- **`Memo`**: `0x00010203`
```text
[
TypeID <- 0x00000000
NetworkID <- 0x00000004
BlockchainID <- 0xffffffffeeeeeeeeddddddddcccccccbbbbbbbbaaaaaaaa9999999988888888
Outputs <- [
0x000102030405060708090a0b0c0d0e0f101112131415161718191a1b1c1d1e1f000000070000000000003039000000000000d431000000010000000251025c61fbcfc078f69334f834be6dd26d55a955c3344128e060128ede3523a24a461c8943ab0859
]
Inputs <- [
0xf1e1d1c1b1a191817161514131211101f0e0d0c0b0a09080706050403020100000000005000102030405060708090a0b0c0d0e0f101112131415161718191a1b1c1d1e1f0000000500000000075bcd15000000020000000700000003
]
Memo <- 0x00010203
]
=
[
// typeID
0x00, 0x00, 0x00, 0x00,
// networkID:
0x00, 0x00, 0x00, 0x04,
// blockchainID:
0xff, 0xff, 0xff, 0xff, 0xee, 0xee, 0xee, 0xee,
0xdd, 0xdd, 0xdd, 0xdd, 0xcc, 0xcc, 0xcc, 0xcc,
0xbb, 0xbb, 0xbb, 0xbb, 0xaa, 0xaa, 0xaa, 0xaa,
0x99, 0x99, 0x99, 0x99, 0x88, 0x88, 0x88, 0x88,
// number of outputs:
0x00, 0x00, 0x00, 0x01,
// transferable output:
0x00, 0x01, 0x02, 0x03, 0x04, 0x05, 0x06, 0x07,
0x08, 0x09, 0x0a, 0x0b, 0x0c, 0x0d, 0x0e, 0x0f,
0x10, 0x11, 0x12, 0x13, 0x14, 0x15, 0x16, 0x17,
0x18, 0x19, 0x1a, 0x1b, 0x1c, 0x1d, 0x1e, 0x1f,
0x00, 0x00, 0x00, 0x07, 0x00, 0x00, 0x00, 0x00,
0x00, 0x00, 0x30, 0x39, 0x00, 0x00, 0x00, 0x00,
0x00, 0x00, 0xd4, 0x31, 0x00, 0x00, 0x00, 0x01,
0x00, 0x00, 0x00, 0x02, 0x51, 0x02, 0x5c, 0x61,
0xfb, 0xcf, 0xc0, 0x78, 0xf6, 0x93, 0x34, 0xf8,
0x34, 0xbe, 0x6d, 0xd2, 0x6d, 0x55, 0xa9, 0x55,
0xc3, 0x34, 0x41, 0x28, 0xe0, 0x60, 0x12, 0x8e,
0xde, 0x35, 0x23, 0xa2, 0x4a, 0x46, 0x1c, 0x89,
0x43, 0xab, 0x08, 0x59,
// number of inputs:
0x00, 0x00, 0x00, 0x01,
// transferable input:
0xf1, 0xe1, 0xd1, 0xc1, 0xb1, 0xa1, 0x91, 0x81,
0x71, 0x61, 0x51, 0x41, 0x31, 0x21, 0x11, 0x01,
0xf0, 0xe0, 0xd0, 0xc0, 0xb0, 0xa0, 0x90, 0x80,
0x70, 0x60, 0x50, 0x40, 0x30, 0x20, 0x10, 0x00,
0x00, 0x00, 0x00, 0x05, 0x00, 0x01, 0x02, 0x03,
0x04, 0x05, 0x06, 0x07, 0x08, 0x09, 0x0a, 0x0b,
0x0c, 0x0d, 0x0e, 0x0f, 0x10, 0x11, 0x12, 0x13,
0x14, 0x15, 0x16, 0x17, 0x18, 0x19, 0x1a, 0x1b,
0x1c, 0x1d, 0x1e, 0x1f, 0x00, 0x00, 0x00, 0x05,
0x00, 0x00, 0x00, 0x00, 0x07, 0x5b, 0xcd, 0x15,
0x00, 0x00, 0x00, 0x02, 0x00, 0x00, 0x00, 0x07,
0x00, 0x00, 0x00, 0x03,
// Memo length:
0x00, 0x00, 0x00, 0x04,
// Memo:
0x00, 0x01, 0x02, 0x03,
]
```
## Unsigned CreateAssetTx
### What Unsigned Create Asset TX Contains
An unsigned create asset TX contains a `BaseTx`, `Name`, `Symbol`,
`Denomination`, and `InitialStates`. The `TypeID` is `0x00000001`.
- **`BaseTx`**
- **`Name`** is a human readable string that defines the name of the asset this
transaction will create. The name is not guaranteed to be unique. The name
must consist of only printable ASCII characters and must be no longer than 128
characters.
- **`Symbol`** is a human readable string that defines the symbol of the asset
this transaction will create. The symbol is not guaranteed to be unique. The
symbol must consist of only printable ASCII characters and must be no longer
than 4 characters.
- **`Denomination`** is a byte that defines the divisibility of the asset this
transaction will create. For example, the AVAX token is divisible into
billionths. Therefore, the denomination of the AVAX token is 9. The
denomination must be no more than 32.
- **`InitialStates`** is a variable length array that defines the feature
extensions this asset supports, and the [initial state](/docs/api-reference/x-chain/txn-format#initial-state) of those feature
extensions.
### Gantt Unsigned Create Asset TX Specification
```text
+----------------+----------------+--------------------------------------+
| base_tx : BaseTx | size(base_tx) bytes |
+----------------+----------------+--------------------------------------+
| name : string | 2 + len(name) bytes |
+----------------+----------------+--------------------------------------+
| symbol : string | 2 + len(symbol) bytes |
+----------------+----------------+--------------------------------------+
| denomination : byte | 1 bytes |
+----------------+----------------+--------------------------------------+
| initial_states : []InitialState | 4 + size(initial_states) bytes |
+----------------+----------------+--------------------------------------+
| size(base_tx) + size(initial_states) |
| + 9 + len(name) + len(symbol) bytes |
+--------------------------------------+
```
### Proto Unsigned Create Asset TX Specification
```text
message CreateAssetTx {
BaseTx base_tx = 1; // size(base_tx)
string name = 2; // 2 bytes + len(name)
name symbol = 3; // 2 bytes + len(symbol)
uint8 denomination = 4; // 1 bytes
repeated InitialState initial_states = 5; // 4 bytes + size(initial_states)
}
```
### Unsigned Create Asset TX Example
Let's make an unsigned base TX that uses the inputs and outputs from the previous examples:
- `BaseTx`: `"Example BaseTx as defined above with ID set to 1"`
- `Name`: `Volatility Index`
- `Symbol`: `VIX`
- `Denomination`: `2`
- **`InitialStates`**:
- `"Example Initial State as defined above"`
```text
[
BaseTx <- 0x0000000100000004ffffffffeeeeeeeeddddddddccccccccbbbbbbbbaaaaaaaa999999998888888800000001000102030405060708090a0b0c0d0e0f101112131415161718191a1b1c1d1e1f000000070000000000003039000000000000d431000000010000000251025c61fbcfc078f69334f834be6dd26d55a955c3344128e060128ede3523a24a461c8943ab085900000001f1e1d1c1b1a191817161514131211101f0e0d0c0b0a09080706050403020100000000005000102030405060708090a0b0c0d0e0f101112131415161718191a1b1c1d1e1f0000000500000000075bcd150000000200000007000000030000000400010203
Name <- 0x0010566f6c6174696c69747920496e646578
Symbol <- 0x0003564958
Denomination <- 0x02
InitialStates <- [
0x0000000000000001000000070000000000003039000000000000d431000000010000000251025c61fbcfc078f69334f834be6dd26d55a955c3344128e060128ede3523a24a461c8943ab0859,
]
]
=
[
// base tx:
0x00, 0x00, 0x00, 0x01, 0x00, 0x00, 0x00, 0x04,
0xff, 0xff, 0xff, 0xff, 0xee, 0xee, 0xee, 0xee,
0xdd, 0xdd, 0xdd, 0xdd,
0xcc, 0xcc, 0xcc, 0xcc, 0xbb, 0xbb, 0xbb, 0xbb,
0xaa, 0xaa, 0xaa, 0xaa, 0x99, 0x99, 0x99, 0x99,
0x88, 0x88, 0x88, 0x88, 0x00, 0x00, 0x00, 0x01,
0x00, 0x01, 0x02, 0x03, 0x04, 0x05, 0x06, 0x07,
0x08, 0x09, 0x0a, 0x0b, 0x0c, 0x0d, 0x0e, 0x0f,
0x10, 0x11, 0x12, 0x13, 0x14, 0x15, 0x16, 0x17,
0x18, 0x19, 0x1a, 0x1b, 0x1c, 0x1d, 0x1e, 0x1f,
0x00, 0x00, 0x00, 0x07, 0x00, 0x00, 0x00, 0x00,
0x00, 0x00, 0x30, 0x39, 0x00, 0x00, 0x00, 0x00,
0x00, 0x00, 0xd4, 0x31, 0x00, 0x00, 0x00, 0x01,
0x00, 0x00, 0x00, 0x02, 0x51, 0x02, 0x5c, 0x61,
0xfb, 0xcf, 0xc0, 0x78, 0xf6, 0x93, 0x34, 0xf8,
0x34, 0xbe, 0x6d, 0xd2, 0x6d, 0x55, 0xa9, 0x55,
0xc3, 0x34, 0x41, 0x28, 0xe0, 0x60, 0x12, 0x8e,
0xde, 0x35, 0x23, 0xa2, 0x4a, 0x46, 0x1c, 0x89,
0x43, 0xab, 0x08, 0x59, 0x00, 0x00, 0x00, 0x01,
0xf1, 0xe1, 0xd1, 0xc1, 0xb1, 0xa1, 0x91, 0x81,
0x71, 0x61, 0x51, 0x41, 0x31, 0x21, 0x11, 0x01,
0xf0, 0xe0, 0xd0, 0xc0, 0xb0, 0xa0, 0x90, 0x80,
0x70, 0x60, 0x50, 0x40, 0x30, 0x20, 0x10, 0x00,
0x00, 0x00, 0x00, 0x05, 0x00, 0x01, 0x02, 0x03,
0x04, 0x05, 0x06, 0x07, 0x08, 0x09, 0x0a, 0x0b,
0x0c, 0x0d, 0x0e, 0x0f, 0x10, 0x11, 0x12, 0x13,
0x14, 0x15, 0x16, 0x17, 0x18, 0x19, 0x1a, 0x1b,
0x1c, 0x1d, 0x1e, 0x1f, 0x00, 0x00, 0x00, 0x05,
0x00, 0x00, 0x00, 0x00, 0x07, 0x5b, 0xcd, 0x15,
0x00, 0x00, 0x00, 0x02, 0x00, 0x00, 0x00, 0x07,
0x00, 0x00, 0x00, 0x03, 0x00, 0x00, 0x00, 0x04,
0x00, 0x01, 0x02, 0x03
// name:
0x00, 0x10, 0x56, 0x6f, 0x6c, 0x61, 0x74, 0x69,
0x6c, 0x69, 0x74, 0x79, 0x20, 0x49, 0x6e, 0x64,
0x65, 0x78,
// symbol length:
0x00, 0x03,
// symbol:
0x56, 0x49, 0x58,
// denomination:
0x02,
// number of InitialStates:
0x00, 0x00, 0x00, 0x01,
// InitialStates[0]:
0x00, 0x00, 0x00, 0x00, 0x00, 0x00, 0x00, 0x01,
0x00, 0x00, 0x00, 0x07, 0x00, 0x00, 0x00, 0x00,
0x00, 0x00, 0x30, 0x39, 0x00, 0x00, 0x00, 0x00,
0x00, 0x00, 0xd4, 0x31, 0x00, 0x00, 0x00, 0x01,
0x00, 0x00, 0x00, 0x02, 0x51, 0x02, 0x5c, 0x61,
0xfb, 0xcf, 0xc0, 0x78, 0xf6, 0x93, 0x34, 0xf8,
0x34, 0xbe, 0x6d, 0xd2, 0x6d, 0x55, 0xa9, 0x55,
0xc3, 0x34, 0x41, 0x28, 0xe0, 0x60, 0x12, 0x8e,
0xde, 0x35, 0x23, 0xa2, 0x4a, 0x46, 0x1c, 0x89,
0x43, 0xab, 0x08, 0x59,
]
```
## Unsigned OperationTx
### What Unsigned Operation TX Contains
An unsigned operation TX contains a `BaseTx`, and `Ops`. The `TypeID` for this type is `0x00000002`.
- **`BaseTx`**
- **`Ops`** is a variable-length array of [Transferable Ops](/docs/api-reference/x-chain/txn-format#transferable-op).
### Gantt Unsigned Operation TX Specification
```text
+---------+------------------+-------------------------------------+
| base_tx : BaseTx | size(base_tx) bytes |
+---------+------------------+-------------------------------------+
| ops : []TransferableOp | 4 + size(ops) bytes |
+---------+------------------+-------------------------------------+
| 4 + size(ops) + size(base_tx) bytes |
+-------------------------------------+
```
### Proto Unsigned Operation TX Specification
```text
message OperationTx {
BaseTx base_tx = 1; // size(base_tx)
repeated TransferOp ops = 2; // 4 bytes + size(ops)
}
```
### Unsigned Operation TX Example
Let's make an unsigned operation TX that uses the inputs and outputs from the previous examples:
- `BaseTx`: `"Example BaseTx above" with TypeID set to 2`
- **`Ops`**: \[`"Example Transferable Op as defined above"`\]
```text
[
BaseTx <- 0x0000000200000004ffffffffeeeeeeeeddddddddccccccccbbbbbbbbaaaaaaaa999999998888888800000001000102030405060708090a0b0c0d0e0f101112131415161718191a1b1c1d1e1f000000070000000000003039000000000000d431000000010000000251025c61fbcfc078f69334f834be6dd26d55a955c3344128e060128ede3523a24a461c8943ab085900000001f1e1d1c1b1a191817161514131211101f0e0d0c0b0a09080706050403020100000000005000102030405060708090a0b0c0d0e0f101112131415161718191a1b1c1d1e1f0000000500000000075bcd150000000200000007000000030000000400010203
Ops <- [
0x000102030405060708090a0b0c0d0e0f101112131415161718191a1b1c1d1e1f00000001f1e1d1c1b1a191817161514131211101f0e0d0c0b0a090807060504030201000000000050000000d0000000200000003000000070000303900000003431100000000010000000251025c61fbcfc078f69334f834be6dd26d55a955c3344128e060128ede3523a24a461c8943ab0859,
]
]
=
[
// base tx:
0x00, 0x00, 0x00, 0x02,
0x00, 0x00, 0x00, 0x04, 0xff, 0xff, 0xff, 0xff,
0xee, 0xee, 0xee, 0xee, 0xdd, 0xdd, 0xdd, 0xdd,
0xcc, 0xcc, 0xcc, 0xcc, 0xbb, 0xbb, 0xbb, 0xbb,
0xaa, 0xaa, 0xaa, 0xaa, 0x99, 0x99, 0x99, 0x99,
0x88, 0x88, 0x88, 0x88, 0x00, 0x00, 0x00, 0x01,
0x00, 0x01, 0x02, 0x03, 0x04, 0x05, 0x06, 0x07,
0x08, 0x09, 0x0a, 0x0b, 0x0c, 0x0d, 0x0e, 0x0f,
0x10, 0x11, 0x12, 0x13, 0x14, 0x15, 0x16, 0x17,
0x18, 0x19, 0x1a, 0x1b, 0x1c, 0x1d, 0x1e, 0x1f,
0x00, 0x00, 0x00, 0x07, 0x00, 0x00, 0x00, 0x00,
0x00, 0x00, 0x30, 0x39, 0x00, 0x00, 0x00, 0x00,
0x00, 0x00, 0xd4, 0x31, 0x00, 0x00, 0x00, 0x01,
0x00, 0x00, 0x00, 0x02, 0x51, 0x02, 0x5c, 0x61,
0xfb, 0xcf, 0xc0, 0x78, 0xf6, 0x93, 0x34, 0xf8,
0x34, 0xbe, 0x6d, 0xd2, 0x6d, 0x55, 0xa9, 0x55,
0xc3, 0x34, 0x41, 0x28, 0xe0, 0x60, 0x12, 0x8e,
0xde, 0x35, 0x23, 0xa2, 0x4a, 0x46, 0x1c, 0x89,
0x43, 0xab, 0x08, 0x59, 0x00, 0x00, 0x00, 0x01,
0xf1, 0xe1, 0xd1, 0xc1, 0xb1, 0xa1, 0x91, 0x81,
0x71, 0x61, 0x51, 0x41, 0x31, 0x21, 0x11, 0x01,
0xf0, 0xe0, 0xd0, 0xc0, 0xb0, 0xa0, 0x90, 0x80,
0x70, 0x60, 0x50, 0x40, 0x30, 0x20, 0x10, 0x00,
0x00, 0x00, 0x00, 0x05, 0x00, 0x01, 0x02, 0x03,
0x04, 0x05, 0x06, 0x07, 0x08, 0x09, 0x0a, 0x0b,
0x0c, 0x0d, 0x0e, 0x0f, 0x10, 0x11, 0x12, 0x13,
0x14, 0x15, 0x16, 0x17, 0x18, 0x19, 0x1a, 0x1b,
0x1c, 0x1d, 0x1e, 0x1f, 0x00, 0x00, 0x00, 0x05,
0x00, 0x00, 0x00, 0x00, 0x07, 0x5b, 0xcd, 0x15,
0x00, 0x00, 0x00, 0x02, 0x00, 0x00, 0x00, 0x07,
0x00, 0x00, 0x00, 0x03, 0x00, 0x00, 0x00, 0x04,
0x00, 0x01, 0x02, 0x03
// number of operations:
0x00, 0x00, 0x00, 0x01,
// transfer operation:
0x00, 0x01, 0x02, 0x03, 0x04, 0x05, 0x06, 0x07,
0x08, 0x09, 0x0a, 0x0b, 0x0c, 0x0d, 0x0e, 0x0f,
0x10, 0x11, 0x12, 0x13, 0x14, 0x15, 0x16, 0x17,
0x18, 0x19, 0x1a, 0x1b, 0x1c, 0x1d, 0x1e, 0x1f,
0x00, 0x00, 0x00, 0x01, 0xf1, 0xe1, 0xd1, 0xc1,
0xb1, 0xa1, 0x91, 0x81, 0x71, 0x61, 0x51, 0x41,
0x31, 0x21, 0x11, 0x01, 0xf0, 0xe0, 0xd0, 0xc0,
0xb0, 0xa0, 0x90, 0x80, 0x70, 0x60, 0x50, 0x40,
0x30, 0x20, 0x10, 0x00, 0x00, 0x00, 0x00, 0x05,
0x00, 0x00, 0x00, 0x0d, 0x00, 0x00, 0x00, 0x02,
0x00, 0x00, 0x00, 0x03, 0x00, 0x00, 0x00, 0x07,
0x00, 0x00, 0x30, 0x39, 0x00, 0x00, 0x00, 0x03,
0x43, 0x11, 0x00, 0x00, 0x00, 0x00, 0x01, 0x00,
0x00, 0x00, 0x02, 0x51, 0x02, 0x5c, 0x61, 0xfb,
0xcf, 0xc0, 0x78, 0xf6, 0x93, 0x34, 0xf8, 0x34,
0xbe, 0x6d, 0xd2, 0x6d, 0x55, 0xa9, 0x55, 0xc3,
0x34, 0x41, 0x28, 0xe0, 0x60, 0x12, 0x8e, 0xde,
0x35, 0x23, 0xa2, 0x4a, 0x46, 0x1c, 0x89, 0x43,
0xab, 0x08, 0x59,
]
```
## Unsigned ImportTx
### What Unsigned Import TX Contains
An unsigned import TX contains a `BaseTx`, `SourceChain` and `Ins`. \* The `TypeID`for this type is `0x00000003`.
- **`BaseTx`**
- **`SourceChain`** is a 32-byte source blockchain ID.
- **`Ins`** is a variable length array of [Transferable Inputs](/docs/api-reference/x-chain/txn-format#transferable-input).
### Gantt Unsigned Import TX Specification
```text
+---------+----------------------+-----------------------------+
| base_tx : BaseTx | size(base_tx) bytes |
+-----------------+--------------+-----------------------------+
| source_chain : [32]byte | 32 bytes |
+---------+----------------------+-----------------------------+
| ins : []TransferIn | 4 + size(ins) bytes |
+---------+----------------------+-----------------------------+
| 36 + size(ins) + size(base_tx) bytes |
+--------------------------------------+
```
### Proto Unsigned Import TX Specification
```text
message ImportTx {
BaseTx base_tx = 1; // size(base_tx)
bytes source_chain = 2; // 32 bytes
repeated TransferIn ins = 3; // 4 bytes + size(ins)
}
```
### Unsigned Import TX Example
Let's make an unsigned import TX that uses the inputs from the previous examples:
- `BaseTx`: `"Example BaseTx as defined above"`, but with `TypeID` set to `3`
- `SourceChain`: `0x0000000000000000000000000000000000000000000000000000000000000000`
- `Ins`: `"Example SECP256K1 Transfer Input as defined above"`
```text
[
BaseTx <- 0x0000000300000004ffffffffeeeeeeeeddddddddccccccccbbbbbbbbaaaaaaaa999999998888888800000001000102030405060708090a0b0c0d0e0f101112131415161718191a1b1c1d1e1f000000070000000000003039000000000000d431000000010000000251025c61fbcfc078f69334f834be6dd26d55a955c3344128e060128ede3523a24a461c8943ab085900000001f1e1d1c1b1a191817161514131211101f0e0d0c0b0a09080706050403020100000000005000102030405060708090a0b0c0d0e0f101112131415161718191a1b1c1d1e1f0000000500000000075bcd150000000200000007000000030000000400010203
SourceChain <- 0x0000000000000000000000000000000000000000000000000000000000000000
Ins <- [
f1e1d1c1b1a191817161514131211101f0e0d0c0b0a09080706050403020100000000005000102030405060708090a0b0c0d0e0f101112131415161718191a1b1c1d1e1f0000000500000000075bcd15000000020000000300000007,
]
]
=
[
// base tx:
0x00, 0x00, 0x00, 0x03,
0x00, 0x00, 0x00, 0x04, 0xff, 0xff, 0xff, 0xff,
0xee, 0xee, 0xee, 0xee, 0xdd, 0xdd, 0xdd, 0xdd,
0xcc, 0xcc, 0xcc, 0xcc, 0xbb, 0xbb, 0xbb, 0xbb,
0xaa, 0xaa, 0xaa, 0xaa, 0x99, 0x99, 0x99, 0x99,
0x88, 0x88, 0x88, 0x88, 0x00, 0x00, 0x00, 0x01,
0x00, 0x01, 0x02, 0x03, 0x04, 0x05, 0x06, 0x07,
0x08, 0x09, 0x0a, 0x0b, 0x0c, 0x0d, 0x0e, 0x0f,
0x10, 0x11, 0x12, 0x13, 0x14, 0x15, 0x16, 0x17,
0x18, 0x19, 0x1a, 0x1b, 0x1c, 0x1d, 0x1e, 0x1f,
0x00, 0x00, 0x00, 0x07, 0x00, 0x00, 0x00, 0x00,
0x00, 0x00, 0x30, 0x39, 0x00, 0x00, 0x00, 0x00,
0x00, 0x00, 0xd4, 0x31, 0x00, 0x00, 0x00, 0x01,
0x00, 0x00, 0x00, 0x02, 0x51, 0x02, 0x5c, 0x61,
0xfb, 0xcf, 0xc0, 0x78, 0xf6, 0x93, 0x34, 0xf8,
0x34, 0xbe, 0x6d, 0xd2, 0x6d, 0x55, 0xa9, 0x55,
0xc3, 0x34, 0x41, 0x28, 0xe0, 0x60, 0x12, 0x8e,
0xde, 0x35, 0x23, 0xa2, 0x4a, 0x46, 0x1c, 0x89,
0x43, 0xab, 0x08, 0x59, 0x00, 0x00, 0x00, 0x01,
0xf1, 0xe1, 0xd1, 0xc1, 0xb1, 0xa1, 0x91, 0x81,
0x71, 0x61, 0x51, 0x41, 0x31, 0x21, 0x11, 0x01,
0xf0, 0xe0, 0xd0, 0xc0, 0xb0, 0xa0, 0x90, 0x80,
0x70, 0x60, 0x50, 0x40, 0x30, 0x20, 0x10, 0x00,
0x00, 0x00, 0x00, 0x05, 0x00, 0x01, 0x02, 0x03,
0x04, 0x05, 0x06, 0x07, 0x08, 0x09, 0x0a, 0x0b,
0x0c, 0x0d, 0x0e, 0x0f, 0x10, 0x11, 0x12, 0x13,
0x14, 0x15, 0x16, 0x17, 0x18, 0x19, 0x1a, 0x1b,
0x1c, 0x1d, 0x1e, 0x1f, 0x00, 0x00, 0x00, 0x05,
0x00, 0x00, 0x00, 0x00, 0x07, 0x5b, 0xcd, 0x15,
0x00, 0x00, 0x00, 0x02, 0x00, 0x00, 0x00, 0x07,
0x00, 0x00, 0x00, 0x03, 0x00, 0x00, 0x00, 0x04,
0x00, 0x01, 0x02, 0x03
// source chain:
0x00, 0x00, 0x00, 0x00, 0x00, 0x00, 0x00, 0x00,
0x00, 0x00, 0x00, 0x00, 0x00, 0x00, 0x00, 0x00,
0x00, 0x00, 0x00, 0x00, 0x00, 0x00, 0x00, 0x00,
0x00, 0x00, 0x00, 0x00, 0x00, 0x00, 0x00, 0x00,
// input count:
0x00, 0x00, 0x00, 0x01,
// txID:
0xf1, 0xe1, 0xd1, 0xc1, 0xb1, 0xa1, 0x91, 0x81,
0x71, 0x61, 0x51, 0x41, 0x31, 0x21, 0x11, 0x01,
0xf0, 0xe0, 0xd0, 0xc0, 0xb0, 0xa0, 0x90, 0x80,
0x70, 0x60, 0x50, 0x40, 0x30, 0x20, 0x10, 0x00,
// utxoIndex:
0x00, 0x00, 0x00, 0x05,
// assetID:
0x00, 0x01, 0x02, 0x03, 0x04, 0x05, 0x06, 0x07,
0x08, 0x09, 0x0a, 0x0b, 0x0c, 0x0d, 0x0e, 0x0f,
0x10, 0x11, 0x12, 0x13, 0x14, 0x15, 0x16, 0x17,
0x18, 0x19, 0x1a, 0x1b, 0x1c, 0x1d, 0x1e, 0x1f,
// input:
0x00, 0x00, 0x00, 0x05, 0x00, 0x00, 0x00, 0x00,
0x07, 0x5b, 0xcd, 0x15, 0x00, 0x00, 0x00, 0x02,
0x00, 0x00, 0x00, 0x03, 0x00, 0x00, 0x00, 0x07,
]
```
## Unsigned ExportTx
### What Unsigned Export TX Contains
An unsigned export TX contains a `BaseTx`, `DestinationChain`, and `Outs`. The
`TypeID` for this type is `0x00000004`.
- **`DestinationChain`** is the 32 byte ID of the chain where the funds are being exported to.
- **`Outs`** is a variable length array of [Transferable Outputs](/docs/api-reference/x-chain/txn-format#transferable-output).
### Gantt Unsigned Export TX Specification
```text
+-------------------+---------------+--------------------------------------+
| base_tx : BaseTx | size(base_tx) bytes |
+-------------------+---------------+--------------------------------------+
| destination_chain : [32]byte | 32 bytes |
+-------------------+---------------+--------------------------------------+
| outs : []TransferOut | 4 + size(outs) bytes |
+-------------------+---------------+--------------------------------------+
| 36 + size(outs) + size(base_tx) bytes |
+---------------------------------------+
```
### Proto Unsigned Export TX Specification
```text
message ExportTx {
BaseTx base_tx = 1; // size(base_tx)
bytes destination_chain = 2; // 32 bytes
repeated TransferOut outs = 3; // 4 bytes + size(outs)
}
```
### Unsigned Export TX Example
Let's make an unsigned export TX that uses the outputs from the previous examples:
- `BaseTx`: `"Example BaseTx as defined above"`, but with `TypeID` set to `4`
- `DestinationChain`: `0x0000000000000000000000000000000000000000000000000000000000000000`
- `Outs`: `"Example SECP256K1 Transfer Output as defined above"`
```text
[
BaseTx <- 0x0000000400000004ffffffffeeeeeeeeddddddddccccccccbbbbbbbbaaaaaaaa999999998888888800000001000102030405060708090a0b0c0d0e0f101112131415161718191a1b1c1d1e1f000000070000000000003039000000000000d431000000010000000251025c61fbcfc078f69334f834be6dd26d55a955c3344128e060128ede3523a24a461c8943ab085900000001f1e1d1c1b1a191817161514131211101f0e0d0c0b0a09080706050403020100000000005000102030405060708090a0b0c0d0e0f101112131415161718191a1b1c1d1e1f0000000500000000075bcd150000000200000007000000030000000400010203
DestinationChain <- 0x0000000000000000000000000000000000000000000000000000000000000000
Outs <- [
000102030405060708090a0b0c0d0e0f101112131415161718191a1b1c1d1e1f000000070000000000003039000000000000d431000000010000000251025c61fbcfc078f69334f834be6dd26d55a955c3344128e060128ede3523a24a461c8943ab0859,
]
]
=
[
// base tx:
0x00, 0x00, 0x00, 0x04
0x00, 0x00, 0x00, 0x04, 0xff, 0xff, 0xff, 0xff,
0xee, 0xee, 0xee, 0xee, 0xdd, 0xdd, 0xdd, 0xdd,
0xcc, 0xcc, 0xcc, 0xcc, 0xbb, 0xbb, 0xbb, 0xbb,
0xaa, 0xaa, 0xaa, 0xaa, 0x99, 0x99, 0x99, 0x99,
0x88, 0x88, 0x88, 0x88, 0x00, 0x00, 0x00, 0x01,
0x00, 0x01, 0x02, 0x03, 0x04, 0x05, 0x06, 0x07,
0x08, 0x09, 0x0a, 0x0b, 0x0c, 0x0d, 0x0e, 0x0f,
0x10, 0x11, 0x12, 0x13, 0x14, 0x15, 0x16, 0x17,
0x18, 0x19, 0x1a, 0x1b, 0x1c, 0x1d, 0x1e, 0x1f,
0x00, 0x00, 0x00, 0x07, 0x00, 0x00, 0x00, 0x00,
0x00, 0x00, 0x30, 0x39, 0x00, 0x00, 0x00, 0x00,
0x00, 0x00, 0xd4, 0x31, 0x00, 0x00, 0x00, 0x01,
0x00, 0x00, 0x00, 0x02, 0x51, 0x02, 0x5c, 0x61,
0xfb, 0xcf, 0xc0, 0x78, 0xf6, 0x93, 0x34, 0xf8,
0x34, 0xbe, 0x6d, 0xd2, 0x6d, 0x55, 0xa9, 0x55,
0xc3, 0x34, 0x41, 0x28, 0xe0, 0x60, 0x12, 0x8e,
0xde, 0x35, 0x23, 0xa2, 0x4a, 0x46, 0x1c, 0x89,
0x43, 0xab, 0x08, 0x59, 0x00, 0x00, 0x00, 0x01,
0xf1, 0xe1, 0xd1, 0xc1, 0xb1, 0xa1, 0x91, 0x81,
0x71, 0x61, 0x51, 0x41, 0x31, 0x21, 0x11, 0x01,
0xf0, 0xe0, 0xd0, 0xc0, 0xb0, 0xa0, 0x90, 0x80,
0x70, 0x60, 0x50, 0x40, 0x30, 0x20, 0x10, 0x00,
0x00, 0x00, 0x00, 0x05, 0x00, 0x01, 0x02, 0x03,
0x04, 0x05, 0x06, 0x07, 0x08, 0x09, 0x0a, 0x0b,
0x0c, 0x0d, 0x0e, 0x0f, 0x10, 0x11, 0x12, 0x13,
0x14, 0x15, 0x16, 0x17, 0x18, 0x19, 0x1a, 0x1b,
0x1c, 0x1d, 0x1e, 0x1f, 0x00, 0x00, 0x00, 0x05,
0x00, 0x00, 0x00, 0x00, 0x07, 0x5b, 0xcd, 0x15,
0x00, 0x00, 0x00, 0x02, 0x00, 0x00, 0x00, 0x07,
0x00, 0x00, 0x00, 0x03, 0x00, 0x00, 0x00, 0x04,
0x00, 0x01, 0x02, 0x03
// destination_chain:
0x00, 0x00, 0x00, 0x00, 0x00, 0x00, 0x00, 0x00,
0x00, 0x00, 0x00, 0x00, 0x00, 0x00, 0x00, 0x00,
0x00, 0x00, 0x00, 0x00, 0x00, 0x00, 0x00, 0x00,
0x00, 0x00, 0x00, 0x00, 0x00, 0x00, 0x00, 0x00,
// outs[] count:
0x00, 0x00, 0x00, 0x01,
// assetID:
0x00, 0x01, 0x02, 0x03, 0x04, 0x05, 0x06, 0x07,
0x08, 0x09, 0x0a, 0x0b, 0x0c, 0x0d, 0x0e, 0x0f,
0x10, 0x11, 0x12, 0x13, 0x14, 0x15, 0x16, 0x17,
0x18, 0x19, 0x1a, 0x1b, 0x1c, 0x1d, 0x1e, 0x1f,
// output:
0x00, 0x00, 0x00, 0x07,
0x00, 0x00, 0x00, 0x00, 0x00, 0x00, 0x30, 0x39,
0x00, 0x00, 0x00, 0x00, 0x00, 0x00, 0xd4, 0x31,
0x00, 0x00, 0x00, 0x01, 0x00, 0x00, 0x00, 0x02,
0x51, 0x02, 0x5c, 0x61, 0xfb, 0xcf, 0xc0, 0x78,
0xf6, 0x93, 0x34, 0xf8, 0x34, 0xbe, 0x6d, 0xd2,
0x6d, 0x55, 0xa9, 0x55, 0xc3, 0x34, 0x41, 0x28,
0xe0, 0x60, 0x12, 0x8e, 0xde, 0x35, 0x23, 0xa2,
0x4a, 0x46, 0x1c, 0x89, 0x43, 0xab, 0x08, 0x59,
]
```
## Signed Transaction
A signed transaction is an unsigned transaction with the addition of an array of [credentials](/docs/api-reference/x-chain/txn-format#credentials).
### What Signed Transaction Contains
A signed transaction contains a `CodecID`, `UnsignedTx`, and `Credentials`.
- **`CodecID`** The only current valid codec id is `00 00`.
- **`UnsignedTx`** is an unsigned transaction, as described above.
- **`Credentials`** is an array of
[credentials](/docs/api-reference/x-chain/txn-format#credentials). Each credential
will be paired with the input in the same index at this credential.
### Gantt Signed Transaction Specification
```text
+---------------------+--------------+------------------------------------------------+
| codec_id : uint16 | 2 bytes |
+---------------------+--------------+------------------------------------------------+
| unsigned_tx : UnsignedTx | size(unsigned_tx) bytes |
+---------------------+--------------+------------------------------------------------+
| credentials : []Credential | 4 + size(credentials) bytes |
+---------------------+--------------+------------------------------------------------+
| 6 + size(unsigned_tx) + len(credentials) bytes |
+------------------------------------------------+
```
### Proto Signed Transaction Specification
```text
message Tx {
uint16 codec_id = 1; // 2 bytes
UnsignedTx unsigned_tx = 2; // size(unsigned_tx)
repeated Credential credentials = 3; // 4 bytes + size(credentials)
}
```
### Signed Transaction Example
Let's make a signed transaction that uses the unsigned transaction and
credentials from the previous examples.
- **`CodecID`**: `0`
- **`UnsignedTx`**: `0x0000000100000004ffffffffeeeeeeeeddddddddccccccccbbbbbbbbaaaaaaaa999999998888888800000001000102030405060708090a0b0c0d0e0f101112131415161718191a1b1c1d1e1f000000070000000000003039000000000000d431000000010000000251025c61fbcfc078f69334f834be6dd26d55a955c3344128e060128ede3523a24a461c8943ab085900000001f1e1d1c1b1a191817161514131211101f0e0d0c0b0a09080706050403020100000000005000102030405060708090a0b0c0d0e0f101112131415161718191a1b1c1d1e1f0000000500000000075bcd150000000200000007000000030000000400010203`
- **`Credentials`** `0x0000000900000002000102030405060708090a0b0c0d0e0f101112131415161718191a1b1c1e1d1f202122232425262728292a2b2c2e2d2f303132333435363738393a3b3c3d3e3f00404142434445464748494a4b4c4d4e4f505152535455565758595a5b5c5e5d5f606162636465666768696a6b6c6e6d6f707172737475767778797a7b7c7d7e7f00`
```text
[
CodecID <- 0x0000
UnsignedTx <- 0x0000000100000004ffffffffeeeeeeeeddddddddccccccccbbbbbbbbaaaaaaaa999999998888888800000001000102030405060708090a0b0c0d0e0f101112131415161718191a1b1c1d1e1f000000070000000000003039000000000000d431000000010000000251025c61fbcfc078f69334f834be6dd26d55a955c3344128e060128ede3523a24a461c8943ab085900000001f1e1d1c1b1a191817161514131211101f0e0d0c0b0a09080706050403020100000000005000102030405060708090a0b0c0d0e0f101112131415161718191a1b1c1d1e1f0000000500000000075bcd150000000200000007000000030000000400010203
Credentials <- [
0x0000000900000002000102030405060708090a0b0c0d0e0f101112131415161718191a1b1c1e1d1f202122232425262728292a2b2c2e2d2f303132333435363738393a3b3c3d3e3f00404142434445464748494a4b4c4d4e4f505152535455565758595a5b5c5e5d5f606162636465666768696a6b6c6e6d6f707172737475767778797a7b7c7d7e7f00,
]
]
=
[
// Codec ID
0x00, 0x00,
// unsigned transaction:
0x00, 0x00, 0x00, 0x01, 0x00, 0x00, 0x00, 0x04,
0xff, 0xff, 0xff, 0xff, 0xee, 0xee, 0xee, 0xee,
0xdd, 0xdd, 0xdd, 0xdd, 0xcc, 0xcc, 0xcc, 0xcc,
0xbb, 0xbb, 0xbb, 0xbb, 0xaa, 0xaa, 0xaa, 0xaa,
0x99, 0x99, 0x99, 0x99, 0x88, 0x88, 0x88, 0x88,
0x00, 0x00, 0x00, 0x01, 0x00, 0x01, 0x02, 0x03,
0x04, 0x05, 0x06, 0x07, 0x08, 0x09, 0x0a, 0x0b,
0x0c, 0x0d, 0x0e, 0x0f, 0x10, 0x11, 0x12, 0x13,
0x14, 0x15, 0x16, 0x17, 0x18, 0x19, 0x1a, 0x1b,
0x1c, 0x1d, 0x1e, 0x1f, 0x00, 0x00, 0x00, 0x07,
0x00, 0x00, 0x00, 0x00, 0x00, 0x00, 0x30, 0x39,
0x00, 0x00, 0x00, 0x00, 0x00, 0x00, 0xd4, 0x31,
0x00, 0x00, 0x00, 0x01, 0x00, 0x00, 0x00, 0x02,
0x51, 0x02, 0x5c, 0x61, 0xfb, 0xcf, 0xc0, 0x78,
0xf6, 0x93, 0x34, 0xf8, 0x34, 0xbe, 0x6d, 0xd2,
0x6d, 0x55, 0xa9, 0x55, 0xc3, 0x34, 0x41, 0x28,
0xe0, 0x60, 0x12, 0x8e, 0xde, 0x35, 0x23, 0xa2,
0x4a, 0x46, 0x1c, 0x89, 0x43, 0xab, 0x08, 0x59,
0x00, 0x00, 0x00, 0x01, 0xf1, 0xe1, 0xd1, 0xc1,
0xb1, 0xa1, 0x91, 0x81, 0x71, 0x61, 0x51, 0x41,
0x31, 0x21, 0x11, 0x01, 0xf0, 0xe0, 0xd0, 0xc0,
0xb0, 0xa0, 0x90, 0x80, 0x70, 0x60, 0x50, 0x40,
0x30, 0x20, 0x10, 0x00, 0x00, 0x00, 0x00, 0x05,
0x00, 0x01, 0x02, 0x03, 0x04, 0x05, 0x06, 0x07,
0x08, 0x09, 0x0a, 0x0b, 0x0c, 0x0d, 0x0e, 0x0f,
0x10, 0x11, 0x12, 0x13, 0x14, 0x15, 0x16, 0x17,
0x18, 0x19, 0x1a, 0x1b, 0x1c, 0x1d, 0x1e, 0x1f,
0x00, 0x00, 0x00, 0x05, 0x00, 0x00, 0x00, 0x00,
0x07, 0x5b, 0xcd, 0x15, 0x00, 0x00, 0x00, 0x02,
0x00, 0x00, 0x00, 0x07, 0x00, 0x00, 0x00, 0x03,
0x00, 0x00, 0x00, 0x04, 0x00, 0x01, 0x02, 0x03
// number of credentials:
0x00, 0x00, 0x00, 0x01,
// credential[0]:
0x00, 0x00, 0x00, 0x09, 0x00, 0x00, 0x00, 0x02,
0x00, 0x01, 0x02, 0x03, 0x04, 0x05, 0x06, 0x07,
0x08, 0x09, 0x0a, 0x0b, 0x0c, 0x0d, 0x0e, 0x0f,
0x10, 0x11, 0x12, 0x13, 0x14, 0x15, 0x16, 0x17,
0x18, 0x19, 0x1a, 0x1b, 0x1c, 0x1e, 0x1d, 0x1f,
0x20, 0x21, 0x22, 0x23, 0x24, 0x25, 0x26, 0x27,
0x28, 0x29, 0x2a, 0x2b, 0x2c, 0x2e, 0x2d, 0x2f,
0x30, 0x31, 0x32, 0x33, 0x34, 0x35, 0x36, 0x37,
0x38, 0x39, 0x3a, 0x3b, 0x3c, 0x3d, 0x3e, 0x3f,
0x00, 0x40, 0x41, 0x42, 0x43, 0x44, 0x45, 0x46,
0x47, 0x48, 0x49, 0x4a, 0x4b, 0x4c, 0x4d, 0x4e,
0x4f, 0x50, 0x51, 0x52, 0x53, 0x54, 0x55, 0x56,
0x57, 0x58, 0x59, 0x5a, 0x5b, 0x5c, 0x5e, 0x5d,
0x5f, 0x60, 0x61, 0x62, 0x63, 0x64, 0x65, 0x66,
0x67, 0x68, 0x69, 0x6a, 0x6b, 0x6c, 0x6e, 0x6d,
0x6f, 0x70, 0x71, 0x72, 0x73, 0x74, 0x75, 0x76,
0x77, 0x78, 0x79, 0x7a, 0x7b, 0x7c, 0x7d, 0x7e,
0x7f, 0x00,
```
## UTXO
A UTXO is a standalone representation of a transaction output.
### What UTXO Contains
A UTXO contains a `CodecID`, `TxID`, `UTXOIndex`, `AssetID`, and `Output`.
- **`CodecID`** The only valid `CodecID` is `00 00`
- **`TxID`** is a 32-byte transaction ID. Transaction IDs are calculated by
taking sha256 of the bytes of the signed transaction.
- **`UTXOIndex`** is an int that specifies which output in the transaction
specified by **`TxID`** that this UTXO was created by.
- **`AssetID`** is a 32-byte array that defines which asset this UTXO
references.
- **`Output`** is the output object that created this UTXO. The serialization of
Outputs was defined above. Valid output types are [SECP Mint Output](/docs/api-reference/x-chain/txn-format#secp256k1-mint-output), [SECP Transfer Output](/docs/api-reference/x-chain/txn-format#secp256k1-transfer-output),
[NFT Mint Output](/docs/api-reference/x-chain/txn-format#nft-mint-output), [NFT Transfer Output](/docs/api-reference/x-chain/txn-format#nft-transfer-output).
### Gantt UTXO Specification
```text
+--------------+----------+-------------------------+
| codec_id : uint16 | 2 bytes |
+--------------+----------+-------------------------+
| tx_id : [32]byte | 32 bytes |
+--------------+----------+-------------------------+
| output_index : int | 4 bytes |
+--------------+----------+-------------------------+
| asset_id : [32]byte | 32 bytes |
+--------------+----------+-------------------------+
| output : Output | size(output) bytes |
+--------------+----------+-------------------------+
| 70 + size(output) bytes |
+-------------------------+
```
### Proto UTXO Specification
```text
message Utxo {
uint16 codec_id = 1; // 02 bytes
bytes tx_id = 2; // 32 bytes
uint32 output_index = 3; // 04 bytes
bytes asset_id = 4; // 32 bytes
Output output = 5; // size(output)
}
```
### UTXO Examples
Let's make a UTXO with a SECP Mint Output:
- **`CodecID`**: `0`
- **`TxID`**: `0x47c92ed62d18e3cccda512f60a0d5b1e939b6ab73fb2d011e5e306e79bd0448f`
- **`UTXOIndex`**: `0` = `0x00000001`
- **`AssetID`**: `0x47c92ed62d18e3cccda512f60a0d5b1e939b6ab73fb2d011e5e306e79bd0448f`
- **`Output`**: `0x00000006000000000000000000000001000000013cb7d3842e8cee6a0ebd09f1fe884f6861e1b29c6276aa2a`
```text
[
CodecID <- 0x0000
TxID <- 0x47c92ed62d18e3cccda512f60a0d5b1e939b6ab73fb2d011e5e306e79bd0448f
UTXOIndex <- 0x00000001
AssetID <- 0x47c92ed62d18e3cccda512f60a0d5b1e939b6ab73fb2d011e5e306e79bd0448f
Output <- 00000006000000000000000000000001000000013cb7d3842e8cee6a0ebd09f1fe884f6861e1b29c6276aa2a
]
=
[
// codecID:
0x00, 0x00,
// txID:
0x47, 0xc9, 0x2e, 0xd6, 0x2d, 0x18, 0xe3, 0xcc,
0xcd, 0xa5, 0x12, 0xf6, 0x0a, 0x0d, 0x5b, 0x1e,
0x93, 0x9b, 0x6a, 0xb7, 0x3f, 0xb2, 0xd0, 0x11,
0xe5, 0xe3, 0x06, 0xe7, 0x9b, 0xd0, 0x44, 0x8f,
// utxo index:
0x00, 0x00, 0x00, 0x01,
// assetID:
0x47, 0xc9, 0x2e, 0xd6, 0x2d, 0x18, 0xe3, 0xcc,
0xcd, 0xa5, 0x12, 0xf6, 0x0a, 0x0d, 0x5b, 0x1e,
0x93, 0x9b, 0x6a, 0xb7, 0x3f, 0xb2, 0xd0, 0x11,
0xe5, 0xe3, 0x06, 0xe7, 0x9b, 0xd0, 0x44, 0x8f,
// secp mint output:
0x00, 0x00, 0x00, 0x06, 0x00, 0x00, 0x00, 0x00,
0x00, 0x00, 0x00, 0x00, 0x00, 0x00, 0x00, 0x01,
0x00, 0x00, 0x00, 0x01, 0x3c, 0xb7, 0xd3, 0x84,
0x2e, 0x8c, 0xee, 0x6a, 0x0e, 0xbd, 0x09, 0xf1,
0xfe, 0x88, 0x4f, 0x68, 0x61, 0xe1, 0xb2, 0x9c,
0x62, 0x76, 0xaa, 0x2a,
]
```
Let's make a UTXO with a SECP Transfer Output from the signed transaction created above:
- **`CodecID`**: `0`
- **`TxID`**: `0xf966750f438867c3c9828ddcdbe660e21ccdbb36a9276958f011ba472f75d4e7`
- **`UTXOIndex`**: `0` = `0x00000000`
- **`AssetID`**: `0x000102030405060708090a0b0c0d0e0f101112131415161718191a1b1c1d1e1f`
- **`Output`**: `"Example SECP256K1 Transferable Output as defined above"`
```text
[
CodecID <- 0x0000
TxID <- 0xf966750f438867c3c9828ddcdbe660e21ccdbb36a9276958f011ba472f75d4e7
UTXOIndex <- 0x00000000
AssetID <- 0x000102030405060708090a0b0c0d0e0f101112131415161718191a1b1c1d1e1f
Output <- 0x000000070000000000003039000000000000d431000000010000000251025c61fbcfc078f69334f834be6dd26d55a955c3344128e060128ede3523a24a461c8943ab0859
]
=
[
// codecID:
0x00, 0x00,
// txID:
0xf9, 0x66, 0x75, 0x0f, 0x43, 0x88, 0x67, 0xc3,
0xc9, 0x82, 0x8d, 0xdc, 0xdb, 0xe6, 0x60, 0xe2,
0x1c, 0xcd, 0xbb, 0x36, 0xa9, 0x27, 0x69, 0x58,
0xf0, 0x11, 0xba, 0x47, 0x2f, 0x75, 0xd4, 0xe7,
// utxo index:
0x00, 0x00, 0x00, 0x00,
// assetID:
0x00, 0x01, 0x02, 0x03, 0x04, 0x05, 0x06, 0x07,
0x08, 0x09, 0x0a, 0x0b, 0x0c, 0x0d, 0x0e, 0x0f,
0x10, 0x11, 0x12, 0x13, 0x14, 0x15, 0x16, 0x17,
0x18, 0x19, 0x1a, 0x1b, 0x1c, 0x1d, 0x1e, 0x1f,
// secp transfer output:
0x00, 0x00, 0x00, 0x07, 0x00, 0x00, 0x00, 0x00,
0x00, 0x00, 0x30, 0x39, 0x00, 0x00, 0x00, 0x00,
0x00, 0x00, 0xd4, 0x31, 0x00, 0x00, 0x00, 0x01,
0x00, 0x00, 0x00, 0x02, 0x00, 0x01, 0x02, 0x03,
0x04, 0x05, 0x06, 0x07, 0x08, 0x09, 0x0a, 0x0b,
0x0c, 0x0d, 0x0e, 0x0f, 0x10, 0x11, 0x12, 0x13,
0x14, 0x15, 0x16, 0x17, 0x18, 0x19, 0x1a, 0x1b,
0x1c, 0x1d, 0x1e, 0x1f, 0x20, 0x21, 0x22, 0x23,
0x24, 0x25, 0x26, 0x27,
]
```
Let's make a UTXO with an NFT Mint Output:
- **`CodecID`**: `0`
- **`TxID`**: `0x03c686efe8d80c519f356929f6da945f7ff90378f0044bb0e1a5d6c1ad06bae7`
- **`UTXOIndex`**: `0` = `0x00000001`
- **`AssetID`**: `0x03c686efe8d80c519f356929f6da945f7ff90378f0044bb0e1a5d6c1ad06bae7`
- **`Output`**: `0x0000000a00000000000000000000000000000001000000013cb7d3842e8cee6a0ebd09f1fe884f6861e1b29c6276aa2a`
```text
[
CodecID <- 0x0000
TxID <- 0x03c686efe8d80c519f356929f6da945f7ff90378f0044bb0e1a5d6c1ad06bae7
UTXOIndex <- 0x00000001
AssetID <- 0x03c686efe8d80c519f356929f6da945f7ff90378f0044bb0e1a5d6c1ad06bae7
Output <- 0000000a00000000000000000000000000000001000000013cb7d3842e8cee6a0ebd09f1fe884f6861e1b29c6276aa2a
]
=
[
// codecID:
0x00, 0x00,
// txID:
0x03, 0xc6, 0x86, 0xef, 0xe8, 0xd8, 0x0c, 0x51,
0x9f, 0x35, 0x69, 0x29, 0xf6, 0xda, 0x94, 0x5f,
0x7f, 0xf9, 0x03, 0x78, 0xf0, 0x04, 0x4b, 0xb0,
0xe1, 0xa5, 0xd6, 0xc1, 0xad, 0x06, 0xba, 0xe7,
// utxo index:
0x00, 0x00, 0x00, 0x01,
// assetID:
0x03, 0xc6, 0x86, 0xef, 0xe8, 0xd8, 0x0c, 0x51,
0x9f, 0x35, 0x69, 0x29, 0xf6, 0xda, 0x94, 0x5f,
0x7f, 0xf9, 0x03, 0x78, 0xf0, 0x04, 0x4b, 0xb0,
0xe1, 0xa5, 0xd6, 0xc1, 0xad, 0x06, 0xba, 0xe7,
// nft mint output:
0x00, 0x00, 0x00, 0x0a, 0x00, 0x00, 0x00, 0x00,
0x00, 0x00, 0x00, 0x00, 0x00, 0x00, 0x00, 0x00,
0x00, 0x00, 0x00, 0x01, 0x00, 0x00, 0x00, 0x01,
0x3c, 0xb7, 0xd3, 0x84, 0x2e, 0x8c, 0xee, 0x6a,
0x0e, 0xbd, 0x09, 0xf1, 0xfe, 0x88, 0x4f, 0x68,
0x61, 0xe1, 0xb2, 0x9c, 0x62, 0x76, 0xaa, 0x2a,
]
```
Let's make a UTXO with an NFT Transfer Output:
- **`CodecID`**: `0`
- **`TxID`**: `0xa68f794a7de7bdfc5db7ba5b73654304731dd586bbf4a6d7b05be6e49de2f936`
- **`UTXOIndex`**: `0` = `0x00000001`
- **`AssetID`**: `0x03c686efe8d80c519f356929f6da945f7ff90378f0044bb0e1a5d6c1ad06bae7`
- **`Output`**: `0x0000000b000000000000000b4e4654205061796c6f6164000000000000000000000001000000013cb7d3842e8cee6a0ebd09f1fe884f6861e1b29c6276aa2a`
```text
[
CodecID <- 0x0000
TxID <- 0xa68f794a7de7bdfc5db7ba5b73654304731dd586bbf4a6d7b05be6e49de2f936
UTXOIndex <- 0x00000001
AssetID <- 0x03c686efe8d80c519f356929f6da945f7ff90378f0044bb0e1a5d6c1ad06bae7
Output <- 0000000b000000000000000b4e4654205061796c6f6164000000000000000000000001000000013cb7d3842e8cee6a0ebd09f1fe884f6861e1b29c6276aa2a
]
=
[
// codecID:
0x00, 0x00,
// txID:
0xa6, 0x8f, 0x79, 0x4a, 0x7d, 0xe7, 0xbd, 0xfc,
0x5d, 0xb7, 0xba, 0x5b, 0x73, 0x65, 0x43, 0x04,
0x73, 0x1d, 0xd5, 0x86, 0xbb, 0xf4, 0xa6, 0xd7,
0xb0, 0x5b, 0xe6, 0xe4, 0x9d, 0xe2, 0xf9, 0x36,
// utxo index:
0x00, 0x00, 0x00, 0x01,
// assetID:
0x03, 0xc6, 0x86, 0xef, 0xe8, 0xd8, 0x0c, 0x51,
0x9f, 0x35, 0x69, 0x29, 0xf6, 0xda, 0x94, 0x5f,
0x7f, 0xf9, 0x03, 0x78, 0xf0, 0x04, 0x4b, 0xb0,
0xe1, 0xa5, 0xd6, 0xc1, 0xad, 0x06, 0xba, 0xe7,
// nft transfer output:
0x00, 0x00, 0x00, 0x0b, 0x00, 0x00, 0x00, 0x00,
0x00, 0x00, 0x00, 0x0b, 0x4e, 0x46, 0x54, 0x20,
0x50, 0x61, 0x79, 0x6c, 0x6f, 0x61, 0x64, 0x00,
0x00, 0x00, 0x00, 0x00, 0x00, 0x00, 0x00, 0x00,
0x00, 0x00, 0x01, 0x00, 0x00, 0x00, 0x01, 0x3c,
0xb7, 0xd3, 0x84, 0x2e, 0x8c, 0xee, 0x6a, 0x0e,
0xbd, 0x09, 0xf1, 0xfe, 0x88, 0x4f, 0x68, 0x61,
0xe1, 0xb2, 0x9c, 0x62, 0x76, 0xaa, 0x2a,
]
```
## GenesisAsset
An asset to be issued in an instance of the AVM's Genesis
### What GenesisAsset Contains
An instance of a GenesisAsset contains an `Alias`, `NetworkID`, `BlockchainID`,
`Outputs`, `Inputs`, `Memo`, `Name`, `Symbol`, `Denomination`, and
`InitialStates`.
- **`Alias`** is the alias for this asset.
- **`NetworkID`** defines which network this transaction is meant to be issued
to. This value is meant to support transaction routing and is not designed for
replay attack prevention.
- **`BlockchainID`** is the ID (32-byte array) that defines which blockchain
this transaction was issued to. This is used for replay attack prevention for
transactions that could potentially be valid across network or blockchain.
- **`Outputs`** is an array of [transferable output objects](/docs/api-reference/x-chain/txn-format#transferable-output). Outputs must
be sorted lexicographically by their serialized representation. The total
quantity of the assets created in these outputs must be less than or equal to
the total quantity of each asset consumed in the inputs minus the transaction
fee.
- **`Inputs`** is an array of [transferable input objects](/docs/api-reference/x-chain/txn-format#transferable-input). Inputs must be
sorted and unique. Inputs are sorted first lexicographically by their
**`TxID`** and then by the **`UTXOIndex`** from low to high. If there are
inputs that have the same **`TxID`** and **`UTXOIndex`**, then the transaction
is invalid as this would result in a double spend.
- **`Memo`** is a memo field that contains arbitrary bytes, up to 256 bytes.
- **`Name`** is a human readable string that defines the name of the asset this
transaction will create. The name is not guaranteed to be unique. The name
must consist of only printable ASCII characters and must be no longer than 128
characters.
- **`Symbol`** is a human readable string that defines the symbol of the asset
this transaction will create. The symbol is not guaranteed to be unique. The
symbol must consist of only printable ASCII characters and must be no longer
than 4 characters.
- **`Denomination`** is a byte that defines the divisibility of the asset this
transaction will create. For example, the AVAX token is divisible into
billionths. Therefore, the denomination of the AVAX token is 9. The
denomination must be no more than 32.
- **`InitialStates`** is a variable length array that defines the feature
extensions this asset supports, and the [initial state](/docs/api-reference/x-chain/txn-format#initial-state) of those feature
extensions.
### Gantt GenesisAsset Specification
````text
+----------------+----------------------+--------------------------------+
| alias : string | 2 + len(alias) bytes |
+----------------+----------------------+--------------------------------+
| network_id : int | 4 bytes |
+----------------+----------------------+--------------------------------+
| blockchain_id : [32]byte | 32 bytes |
+----------------+----------------------+--------------------------------+
| outputs : []TransferableOutput | 4 + size(outputs) bytes |
+----------------+----------------------+--------------------------------+
| inputs : []TransferableInput | 4 + size(inputs) bytes |
+----------------+----------------------+--------------------------------+
| memo : [256]byte | 4 + size(memo) bytes |
+----------------+----------------------+--------------------------------+
| name : string | 2 + len(name) bytes |
+----------------+----------------------+--------------------------------+
| symbol : string | 2 + len(symbol) bytes |
+----------------+----------------------+--------------------------------+
| denomination : byte | 1 bytes |
+----------------+----------------------+--------------------------------+
| initial_states : []InitialState | 4 + size(initial_states) bytes |
+----------------+----------------------+--------------------------------+
| 59 + size(alias) + size(outputs) + size(inputs) + size(memo) |
| + len(name) + len(symbol) + size(initial_states) bytes |
+------------------------------------------------------------------------+
### Proto GenesisAsset Specification
```text
message GenesisAsset {
string alias = 1; // 2 bytes + len(alias)
uint32 network_id = 2; // 04 bytes
bytes blockchain_id = 3; // 32 bytes
repeated Output outputs = 4; // 04 bytes + size(outputs)
repeated Input inputs = 5; // 04 bytes + size(inputs)
bytes memo = 6; // 04 bytes + size(memo)
string name = 7; // 2 bytes + len(name)
name symbol = 8; // 2 bytes + len(symbol)
uint8 denomination = 9; // 1 bytes
repeated InitialState initial_states = 10; // 4 bytes + size(initial_states)
}
````
### GenesisAsset Example
Let's make a GenesisAsset:
- **`Alias`**: `asset1`
- **`NetworkID`**: `12345`
- **`BlockchainID`**: `0x0000000000000000000000000000000000000000000000000000000000000000`
- **`Outputs`**: \[\]
- **`Inputs`**: \[\]
- **`Memo`**: `2Zc54v4ek37TEwu4LiV3j41PUMRd6acDDU3ZCVSxE7X`
- **`Name`**: `asset1`
- **`Symbol`**: `MFCA`
- **`Denomination`**: `1`
- **`InitialStates`**:
- `"Example Initial State as defined above"`
```text
[
Alias <- 0x617373657431
NetworkID <- 0x00003039
BlockchainID <- 0x0000000000000000000000000000000000000000000000000000000000000000
Outputs <- []
Inputs <- []
Memo <- 0x66x726f6d20736e6f77666c616b6520746f206176616c616e636865
Name <- 0x617373657431
Symbol <- 0x66x726f6d20736e6f77666c616b6520746f206176616c616e636865
Denomination <- 0x66x726f6d20736e6f77666c616b6520746f206176616c616e636865
InitialStates <- [
0x0000000000000001000000070000000000003039000000000000d431000000010000000251025c61fbcfc078f69334f834be6dd26d55a955c3344128e060128ede3523a24a461c8943ab0859
]
]
=
[
// asset alias len:
0x00, 0x06,
// asset alias:
0x61, 0x73, 0x73, 0x65, 0x74, 0x31,
// network_id:
0x00, 0x00, 0x30, 0x39,
// blockchain_id:
0x00, 0x00, 0x00, 0x00, 0x00, 0x00, 0x00, 0x00, 0x00, 0x00,
0x00, 0x00, 0x00, 0x00, 0x00, 0x00, 0x00, 0x00, 0x00, 0x00,
0x00, 0x00, 0x00, 0x00, 0x00, 0x00, 0x00, 0x00, 0x00, 0x00, 0x00, 0x00,
// output_len:
0x00, 0x00, 0x00, 0x00,
// input_len:
0x00, 0x00, 0x00, 0x00,
// memo_len:
0x00, 0x00, 0x00, 0x1b,
// memo:
0x66, 0x72, 0x6f, 0x6d, 0x20, 0x73, 0x6e, 0x6f, 0x77, 0x66, 0x6c, 0x61,
0x6b, 0x65, 0x20, 0x74, 0x6f, 0x20, 0x61, 0x76, 0x61, 0x6c, 0x61, 0x6e, 0x63, 0x68, 0x65,
// asset_name_len:
0x00, 0x0f,
// asset_name:
0x6d, 0x79, 0x46, 0x69, 0x78, 0x65, 0x64, 0x43, 0x61, 0x70, 0x41, 0x73, 0x73, 0x65, 0x74,
// symbol_len:
0x00, 0x04,
// symbol:
0x4d, 0x46, 0x43, 0x41,
// denomination:
0x07,
// number of InitialStates:
0x00, 0x00, 0x00, 0x01,
// InitialStates[0]:
0x00, 0x00, 0x00, 0x00, 0x00, 0x00, 0x00, 0x01,
0x00, 0x00, 0x00, 0x07, 0x00, 0x00, 0x00, 0x00,
0x00, 0x00, 0x30, 0x39, 0x00, 0x00, 0x00, 0x00,
0x00, 0x00, 0xd4, 0x31, 0x00, 0x00, 0x00, 0x01,
0x00, 0x00, 0x00, 0x02, 0x51, 0x02, 0x5c, 0x61,
0xfb, 0xcf, 0xc0, 0x78, 0xf6, 0x93, 0x34, 0xf8,
0x34, 0xbe, 0x6d, 0xd2, 0x6d, 0x55, 0xa9, 0x55,
0xc3, 0x34, 0x41, 0x28, 0xe0, 0x60, 0x12, 0x8e,
0xde, 0x35, 0x23, 0xa2, 0x4a, 0x46, 0x1c, 0x89,
0x43, 0xab, 0x08, 0x59,
]
```
# Background and Requirements (/docs/virtual-machines/custom-precompiles/background-requirements)
---
title: Background and Requirements
description: Learn about the background and requirements for customizing Ethereum Virtual Machine.
---
This is a brief overview of what this tutorial will cover.
- Write a Solidity interface
- Generate the precompile template
- Implement the precompile functions in Golang
- Write and run tests
Stateful precompiles are [alpha software](https://en.wikipedia.org/wiki/Software_release_life_cycle#Alpha). Build at your own risk.
In this tutorial, we used a branch based on Subnet-EVM version `v0.5.2`. You can find the branch [here](https://github.com/ava-labs/subnet-evm/tree/helloworld-official-tutorial-v2). The code in this branch is the same as Subnet-EVM except for the `precompile/contracts/helloworld` directory. The directory contains the code for the `HelloWorld` precompile. We will be using this precompile as an example to learn how to write a stateful precompile. The code in this branch can become outdated. You should always use the latest version of Subnet-EVM when you develop your own precompile.
## Precompile-EVM
Subnet-EVM precompiles can be registered from an external repo. This allows developer to build their precompiles without maintaining a fork of Subnet-EVM. The precompiles are then registered in the Subnet-EVM at build time.
The difference between using Subnet-EVM and Precompile-EVM is that with Subnet-EVM you can change EVM internals to interact with your precompiles. Such as changing fee structure, adding new opcodes, changing how to build a block, etc. With Precompile-EVM you can only add new stateful precompiles that can interact with the StateDB. Precompiles built with Precompile-EVM are still very powerful because it can directly access to the state and modify it.
There is a template repo for how to build a precompile with this way called [Precompile-EVM](https://github.com/ava-labs/precompile-evm). Both Subnet-EVM and Precompile-EVM share similar directory structures and common codes.
You can reference the Precompile-EVM PR that adds Hello World precompile [here](https://github.com/ava-labs/precompile-evm/pull/12).
## Requirements
This tutorial assumes familiarity with Golang and JavaScript.
Additionally, users should be deeply familiar with the EVM in order to understand its invariants since adding a Stateful Precompile modifies the EVM itself.
Here are some recommended resources to learn the ins and outs of the EVM:
- [The Ethereum Virtual Machine](https://github.com/ethereumbook/ethereumbook/blob/develop/13evm.asciidoc)
- [Precompiles in Solidity](https://medium.com/@rbkhmrcr/precompiles-solidity-e5d29bd428c4)
- [Deconstructing a Smart Contract](https://blog.openzeppelin.com/deconstructing-a-solidity-contract-part-i-introduction-832efd2d7737/)
- [Layout of State Variables in Storage](https://docs.soliditylang.org/en/v0.8.10/internals/layout_in_storage.html)
- [Layout in Memory](https://docs.soliditylang.org/en/v0.8.10/internals/layout_in_memory.html)
- [Layout of Call Data](https://docs.soliditylang.org/en/v0.8.10/internals/layout_in_calldata.html)
- [Contract ABI Specification](https://docs.soliditylang.org/en/v0.8.10/abi-spec.html)
- [Customizing the EVM with Stateful Precompiles](https://medium.com/avalancheavax/customizing-the-evm-with-stateful-precompiles-f44a34f39efd)
Please install the following before getting started.
First, install the latest version of Go. Follow the instructions [here](https://go.dev/doc/install). You can verify by running `go version`.
Set the `$GOPATH` environment variable properly for Go to look for Go Workspaces. Please read [this](https://go.dev/doc/gopath_code) for details. You can verify by running `echo $GOPATH`.
See [here](https://github.com/golang/go/wiki/SettingGOPATH) for instructions on setting the GOPATH based on system configurations.
As a few things will be installed into `$GOPATH/bin`, please make sure that `$GOPATH/bin` is in your `$PATH`, otherwise, you may get an error running the commands below. To do that, run the command: `export PATH=$PATH:$GOROOT/bin:$GOPATH/bin`
Download the following prerequisites into your `$GOPATH`:
- Git Clone the repository (Subnet-EVM or Precompile-EVM)
- Git Clone [AvalancheGo](https://github.com/ava-labs/avalanchego) repository
- Install [Avalanche Network Runner](/docs/tooling/avalanche-network-runner/introduction)
- Install [solc](https://github.com/ethereum/solc-js#usage-on-the-command-line)
- Install [Node.js and NPM](https://nodejs.org/en/download) For easy copy paste, use the below commands:
```bash
cd $GOPATH
mkdir -p src/github.com/ava-labs
cd src/github.com/ava-labs
```
Clone the repository:
```bash
git clone git@github.com:ava-labs/subnet-evm.git
```
Then run the following commands:
```bash
git clone git@github.com:ava-labs/avalanchego.git
curl -sSfL https://raw.githubusercontent.com/ava-labs/avalanche-network-runner/main/scripts/install.sh | sh -s
npm install -g solc
```
```bash
git clone git@github.com:ava-labs/precompile-evm.git
```
Alternatively you can use it as a template repo from github.
Then run the following commands:
```bash
git clone git@github.com:ava-labs/avalanchego.git
curl -sSfL https://raw.githubusercontent.com/ava-labs/avalanche-network-runner/main/scripts/install.sh | sh -s
npm install -g solc
```
## Complete Code
You can inspect example pull request for the complete code.
[Subnet-EVM Hello World Pull Request](https://github.com/ava-labs/subnet-evm/pull/565/)
[Precompile-EVM Hello World Pull Request](https://github.com/ava-labs/precompile-evm/pull/12/)
For a full-fledged example, you can also check out the [Reward Manager Precompile](https://github.com/ava-labs/subnet-evm/blob/helloworld-official-tutorial-v2/precompile/contracts/rewardmanager/).
# Generating Your Precompile (/docs/virtual-machines/custom-precompiles/create-precompile)
---
title: Generating Your Precompile
description: In this section, we will go over the process for automatically generating the template code which you can configure accordingly for your stateful precompile.
---
First, we must create the Solidity interface that we want our precompile to implement. This will be the HelloWorld Interface. It will have two simple functions, `sayHello()`, `setGreeting()` and an event `GreetingChanged`. These two functions will demonstrate the getting and setting respectively of a value stored in the precompile's state space.
The `sayHello()` function is a `view` function, meaning it does not modify the state of the precompile and returns a string result. The `setGreeting()` function is a state changer function, meaning it modifies the state of the precompile. The `HelloWorld` interface inherits `IAllowList` interface to use the allow list functionality.
For this tutorial, we will be working in a new branch in Subnet-EVM/Precompile-EVM repo.
```bash
cd $GOPATH/src/github.com/ava-labs/subnet-evm
```
We will start off in this directory `./contracts/`:
```bash
cd contracts/
```
Create a new file called `IHelloWorld.sol` and copy and paste the below code:
```solidity title="contracts/IHelloWorld.sol"
// (c) 2022-2023, Ava Labs, Inc. All rights reserved.
// See the file LICENSE for licensing terms.
// SPDX-License-Identifier: MIT
pragma solidity >=0.8.0;
import "./IAllowList.sol";
interface IHelloWorld is IAllowList {
event GreetingChanged(
address indexed sender,
string oldGreeting,
string newGreeting
);
// sayHello returns the stored greeting string
function sayHello() external view returns (string calldata result);
// setGreeting stores the greeting string
function setGreeting(string calldata response) external;
}
```
Now we have an interface that our precompile can implement! Let's create an [ABI](https://docs.soliditylang.org/en/v0.8.13/abi-spec.html#contract-abi-specification) of our Solidity interface.
In the same directory, let's run:
```bash
solc --abi ./contracts/interfaces/IHelloWorld.sol -o ./abis
```
This generates the ABI code under `./abis/contracts_interfaces_IHelloWorld_sol_IHelloWorld.abi`.
```
[
{
"anonymous": false,
"inputs": [
{
"indexed": true,
"internalType": "address",
"name": "sender",
"type": "address"
},
{
"indexed": false,
"internalType": "string",
"name": "oldGreeting",
"type": "string"
},
{
"indexed": false,
"internalType": "string",
"name": "newGreeting",
"type": "string"
}
],
"name": "GreetingChanged",
"type": "event"
},
{
"anonymous": false,
"inputs": [
{
"indexed": true,
"internalType": "uint256",
"name": "role",
"type": "uint256"
},
{
"indexed": true,
"internalType": "address",
"name": "account",
"type": "address"
},
{
"indexed": true,
"internalType": "address",
"name": "sender",
"type": "address"
},
{
"indexed": false,
"internalType": "uint256",
"name": "oldRole",
"type": "uint256"
}
],
"name": "RoleSet",
"type": "event"
},
{
"inputs": [
{ "internalType": "address", "name": "addr", "type": "address" }
],
"name": "readAllowList",
"outputs": [
{ "internalType": "uint256", "name": "role", "type": "uint256" }
],
"stateMutability": "view",
"type": "function"
},
{
"inputs": [],
"name": "sayHello",
"outputs": [
{ "internalType": "string", "name": "result", "type": "string" }
],
"stateMutability": "view",
"type": "function"
},
{
"inputs": [
{ "internalType": "address", "name": "addr", "type": "address" }
],
"name": "setAdmin",
"outputs": [],
"stateMutability": "nonpayable",
"type": "function"
},
{
"inputs": [
{ "internalType": "address", "name": "addr", "type": "address" }
],
"name": "setEnabled",
"outputs": [],
"stateMutability": "nonpayable",
"type": "function"
},
{
"inputs": [
{ "internalType": "string", "name": "response", "type": "string" }
],
"name": "setGreeting",
"outputs": [],
"stateMutability": "nonpayable",
"type": "function"
},
{
"inputs": [
{ "internalType": "address", "name": "addr", "type": "address" }
],
"name": "setManager",
"outputs": [],
"stateMutability": "nonpayable",
"type": "function"
},
{
"inputs": [
{ "internalType": "address", "name": "addr", "type": "address" }
],
"name": "setNone",
"outputs": [],
"stateMutability": "nonpayable",
"type": "function"
}
]
```
As you can see the ABI also contains the `IAllowList` interface functions. This is because the `IHelloWorld` interface inherits from the `IAllowList` interface.
Note: The ABI must have named outputs in order to generate the precompile template.
Now that we have an ABI for the precompile gen tool to interact with, we can run the following command to generate our HelloWorld precompile files!
Let's go back to the root of the repository and run the PrecompileGen script helper:
```bash
cd ..
```
Both of these Subnet-EVM and Precompile-EVM have the same `generate_precompile.sh` script. The one in Precompile-EVM installs the script from Subnet-EVM and runs it.
```bash
./scripts/generate_precompile.sh --help
# output
Using branch: precompile-tutorial
NAME:
precompilegen - subnet-evm precompile generator tool
USAGE:
main [global options] command [command options] [arguments...]
VERSION:
1.10.26-stable
COMMANDS:
help, h Shows a list of commands or help for one command
GLOBAL OPTIONS:
--abi value
Path to the contract ABI json to generate, - for STDIN
--out value
Output folder for the generated precompile files, - for STDOUT (default =
./precompile/contracts/{pkg}). Test files won't be generated if STDOUT is used
--pkg value
Go package name to generate the precompile into (default = {type})
--type value
Struct name for the precompile (default = {abi file name})
MISC
--help, -h (default: false)
show help
--version, -v (default: false)
print the version
COPYRIGHT:
Copyright 2013-2022 The go-ethereum Authors
```
Now let's generate the precompile template files!
```bash
cd $GOPATH/src/github.com/ava-labs/precompile-evm
```
We will start off in this directory `./contracts/`:
```bash
cd contracts/
```
For Precompile-EVM interfaces and other contracts in Subnet-EVM can be accessible through `@avalabs/subnet-evm-contracts` package. This is already added to the `package.json` file. You can install it by running `npm install`. In order to import `IAllowList` interface, you can use the following import statement:
```solidity
import "@avalabs/subnet-evm-contracts/contracts/interfaces/IAllowList.sol";
```
The full file looks like this:
```solidity
// SPDX-License-Identifier: MIT
pragma solidity >=0.8.0;
import "@avalabs/subnet-evm-contracts/contracts/interfaces/IAllowList.sol";
interface IHelloWorld is IAllowList {
event GreetingChanged(
address indexed sender,
string oldGreeting,
string newGreeting
);
// sayHello returns the stored greeting string
function sayHello() external view returns (string calldata result);
// setGreeting stores the greeting string
function setGreeting(string calldata response) external;
}
```
Now we have an interface that our precompile can implement! Let's create an ABI of our Solidity interface.
In Precompile-EVM we import contracts from `@avalabs/subnet-evm-contracts` package. In order to generate the ABI in Precompile-EVM we need to include the `node_modules` folder to find imported contracts with following flags:
- `--abi`: ABI specification of the contracts.
- `--base-path path`: Use the given path as the root of the source tree instead of the root of the filesystem.
- `--include-path path`: Make an additional source directory available to the default import callback. Use this option if you want to import contracts whose location is not fixed in relation to your main source tree; for example third-party libraries installed using a package manager. Can be used multiple times. Can only be used if base path has a non-empty value.
- `--output-dir path`: If given, creates one file per output component and contract/file at the specified directory.
- `--overwrite`: Overwrite existing files (used together with` --output-dir`).
```bash
solc --abi ./contracts/interfaces/IHelloWorld.sol -o ./abis --base-path . --include-path ./node_modules
```
This generates the ABI code under `./abis/contracts_interfaces_IHelloWorld_sol_IHelloWorld.abi`.
```
[
{
"anonymous": false,
"inputs": [
{
"indexed": true,
"internalType": "address",
"name": "sender",
"type": "address"
},
{
"indexed": false,
"internalType": "string",
"name": "oldGreeting",
"type": "string"
},
{
"indexed": false,
"internalType": "string",
"name": "newGreeting",
"type": "string"
}
],
"name": "GreetingChanged",
"type": "event"
},
{
"anonymous": false,
"inputs": [
{
"indexed": true,
"internalType": "uint256",
"name": "role",
"type": "uint256"
},
{
"indexed": true,
"internalType": "address",
"name": "account",
"type": "address"
},
{
"indexed": true,
"internalType": "address",
"name": "sender",
"type": "address"
},
{
"indexed": false,
"internalType": "uint256",
"name": "oldRole",
"type": "uint256"
}
],
"name": "RoleSet",
"type": "event"
},
{
"inputs": [
{ "internalType": "address", "name": "addr", "type": "address" }
],
"name": "readAllowList",
"outputs": [
{ "internalType": "uint256", "name": "role", "type": "uint256" }
],
"stateMutability": "view",
"type": "function"
},
{
"inputs": [],
"name": "sayHello",
"outputs": [
{ "internalType": "string", "name": "result", "type": "string" }
],
"stateMutability": "view",
"type": "function"
},
{
"inputs": [
{ "internalType": "address", "name": "addr", "type": "address" }
],
"name": "setAdmin",
"outputs": [],
"stateMutability": "nonpayable",
"type": "function"
},
{
"inputs": [
{ "internalType": "address", "name": "addr", "type": "address" }
],
"name": "setEnabled",
"outputs": [],
"stateMutability": "nonpayable",
"type": "function"
},
{
"inputs": [
{ "internalType": "string", "name": "response", "type": "string" }
],
"name": "setGreeting",
"outputs": [],
"stateMutability": "nonpayable",
"type": "function"
},
{
"inputs": [
{ "internalType": "address", "name": "addr", "type": "address" }
],
"name": "setManager",
"outputs": [],
"stateMutability": "nonpayable",
"type": "function"
},
{
"inputs": [
{ "internalType": "address", "name": "addr", "type": "address" }
],
"name": "setNone",
"outputs": [],
"stateMutability": "nonpayable",
"type": "function"
}
]
```
As you can see the ABI also contains the `IAllowList` interface functions. This is because the `IHelloWorld` interface inherits from the `IAllowList` interface.
Note: The ABI must have named outputs in order to generate the precompile template.
Now that we have an ABI for the precompile gen tool to interact with, we can run the following command to generate our HelloWorld precompile files!
Let's go back to the root of the repository and run the PrecompileGen script helper:
```bash
cd ..
```
Both of these Subnet-EVM and Precompile-EVM have the same generate_precompile.sh script. The one in Precompile-EVM installs the script from Subnet-EVM and runs it.
```bash
./scripts/generate_precompile.sh --help
# output
Using branch: precompile-tutorial
NAME:
precompilegen - subnet-evm precompile generator tool
USAGE:
main [global options] command [command options] [arguments...]
VERSION:
1.10.26-stable
COMMANDS:
help, h Shows a list of commands or help for one command
GLOBAL OPTIONS:
--abi value
Path to the contract ABI json to generate, - for STDIN
--out value
Output folder for the generated precompile files, - for STDOUT (default =
./precompile/contracts/{pkg}). Test files won't be generated if STDOUT is used
--pkg value
Go package name to generate the precompile into (default = {type})
--type value
Struct name for the precompile (default = {abi file name})
MISC
--help, -h (default: false)
show help
--version, -v (default: false)
print the version
COPYRIGHT:
Copyright 2013-2022 The go-ethereum Authors
```
Now let's generate the precompile template files!
In Subnet-EVM precompile implementations reside under the `./precompile/contracts` directory. Let's generate our precompile template in the `./precompile/contracts/helloworld` directory, where `helloworld` is the name of the Go package we want to generate the precompile into.
```bash
./scripts/generate_precompile.sh --abi ./contracts/abis/contracts_interfaces_IHelloWorld_sol_IHelloWorld.abi --type HelloWorld --pkg helloworld
```
This generates a precompile template files `contract.go`, `contract.abi`, `config.go`, `module.go`, `event.go` and `README.md` files. `README.md` explains general guidelines for precompile development. You should carefully read this file before modifying the precompile template.
```
There are some must-be-done changes waiting in the generated file. Each area requiring you to add your code is marked with CUSTOM CODE to make them easy to find and modify.
Additionally there are other files you need to edit to activate your precompile.
These areas are highlighted with comments "ADD YOUR PRECOMPILE HERE".
For testing take a look at other precompile tests in contract_test.go and config_test.go in other precompile folders.
General guidelines for precompile development:
1- Set a suitable config key in generated module.go. E.g: "yourPrecompileConfig"
2- Read the comment and set a suitable contract address in generated module.go. E.g:
ContractAddress = common.HexToAddress("ASUITABLEHEXADDRESS")
3- It is recommended to only modify code in the highlighted areas marked with "CUSTOM CODE STARTS HERE". Typically, custom codes are required in only those areas.
Modifying code outside of these areas should be done with caution and with a deep understanding of how these changes may impact the EVM.
4- If you have any event defined in your precompile, review the generated event.go file and set your event gas costs. You should also emit your event in your function in the contract.go file.
5- Set gas costs in generated contract.go
6- Force import your precompile package in precompile/registry/registry.go
7- Add your config unit tests under generated package config_test.go
8- Add your contract unit tests under generated package contract_test.go
9- Additionally you can add a full-fledged VM test for your precompile under plugin/vm/vm_test.go. See existing precompile tests for examples.
10- Add your solidity interface and test contract to contracts/contracts
11- Write solidity contract tests for your precompile in contracts/contracts/test
12- Write TypeScript DS-Test counterparts for your solidity tests in contracts/test
13- Create your genesis with your precompile enabled in tests/precompile/genesis/
14- Create e2e test for your solidity test in tests/precompile/solidity/suites.go
15- Run your e2e precompile Solidity tests with './scripts/run_ginkgo.sh`
```
Let's follow these steps and create our HelloWorld precompile.
For Precompile-EVM we don't need to put files under a deep directory structure. We can just generate the precompile template under its own directory via `--out ./helloworld` flag.
```bash
./scripts/generate_precompile.sh --abi ./contracts/abis/contracts_interfaces_IHelloWorld_sol_IHelloWorld.abi --type HelloWorld --pkg helloworld --out ./helloworld
```
This generates a precompile template files `contract.go`, `contract.abi`, `config.go`, `module.go`, `event.go` and `README.md` files. `README.md` explains general guidelines for precompile development. You should carefully read this file before modifying the precompile template.
```
There are some must-be-done changes waiting in the generated file. Each area requiring you to add your code is marked with CUSTOM CODE to make them easy to find and modify.
Additionally there are other files you need to edit to activate your precompile.
These areas are highlighted with comments "ADD YOUR PRECOMPILE HERE".
For testing take a look at other precompile tests in contract_test.go and config_test.go in other precompile folders.
General guidelines for precompile development:
1- Set a suitable config key in generated module.go. E.g: "yourPrecompileConfig"
2- Read the comment and set a suitable contract address in generated module.go. E.g:
ContractAddress = common.HexToAddress("ASUITABLEHEXADDRESS")
3- It is recommended to only modify code in the highlighted areas marked with "CUSTOM CODE STARTS HERE". Typically, custom codes are required in only those areas.
Modifying code outside of these areas should be done with caution and with a deep understanding of how these changes may impact the EVM.
4- If you have any event defined in your precompile, review the generated event.go file and set your event gas costs. You should also emit your event in your function in the contract.go file.
5- Set gas costs in generated contract.go
6- Force import your precompile package in precompile/registry/registry.go
7- Add your config unit tests under generated package config_test.go
8- Add your contract unit tests under generated package contract_test.go
9- Additionally you can add a full-fledged VM test for your precompile under plugin/vm/vm_test.go. See existing precompile tests for examples.
10- Add your solidity interface and test contract to contracts/contracts
11- Write solidity contract tests for your precompile in contracts/contracts/test
12- Write TypeScript DS-Test counterparts for your solidity tests in contracts/test
13- Create your genesis with your precompile enabled in tests/precompile/genesis/
14- Create e2e test for your solidity test in tests/precompile/solidity/suites.go
15- Run your e2e precompile Solidity tests with './scripts/run_ginkgo.sh`
```
Let's follow these steps and create our HelloWorld precompile!
# Defining Your Precompile (/docs/virtual-machines/custom-precompiles/defining-precompile)
---
title: Defining Your Precompile
description: Now that we have autogenerated the template code required for our precompile, let's actually write the logic for the precompile itself.
---
## Setting Config Key
Let's jump to `helloworld/module.go` file first. This file contains the module definition for our precompile. You can see the `ConfigKey` is set to some default value of `helloWorldConfig`. This key should be unique to the precompile.
This config key determines which JSON key to use when reading the precompile's config from the JSON upgrade/genesis file. In this case, the config key is `helloWorldConfig` and the JSON config should look like this:
```json
{
"helloWorldConfig": {
"blockTimestamp": 0
...
}
}
```
## Setting Contract Address
In the `helloworld/module.go` you can see the `ContractAddress` is set to some default value. This should be changed to a suitable address for your precompile. The address should be unique to the precompile. There is a registry of precompile addresses under [`precompile/registry/registry.go`](https://github.com/ava-labs/subnet-evm/blob/helloworld-official-tutorial-v2/precompile/registry/registry.go).
A list of addresses is specified in the comments under this file. Modify the default value to be the next user available stateful precompile address. For forks of Subnet-EVM or Precompile-EVM, users should start at `0x0300000000000000000000000000000000000000` to ensure that their own modifications do not conflict with stateful precompiles that may be added to Subnet-EVM in the future. You should pick an address that is not already taken.
```go title="helloworld/module.go"
// This list is kept just for reference. The actual addresses defined in respective packages of precompiles.
// Note: it is important that none of these addresses conflict with each other or any other precompiles
// in core/vm/contracts.go.
// The first stateful precompiles were added in coreth to support nativeAssetCall and nativeAssetBalance. New stateful precompiles
// originating in coreth will continue at this prefix, so we reserve this range in subnet-evm so that they can be migrated into
// subnet-evm without issue.
// These start at the address: 0x0100000000000000000000000000000000000000 and will increment by 1.
// Optional precompiles implemented in subnet-evm start at 0x0200000000000000000000000000000000000000 and will increment by 1
// from here to reduce the risk of conflicts.
// For forks of subnet-evm, users should start at 0x0300000000000000000000000000000000000000 to ensure
// that their own modifications do not conflict with stateful precompiles that may be added to subnet-evm
// in the future.
// ContractDeployerAllowListAddress = common.HexToAddress("0x0200000000000000000000000000000000000000")
// ContractNativeMinterAddress = common.HexToAddress("0x0200000000000000000000000000000000000001")
// TxAllowListAddress = common.HexToAddress("0x0200000000000000000000000000000000000002")
// FeeManagerAddress = common.HexToAddress("0x0200000000000000000000000000000000000003")
// RewardManagerAddress = common.HexToAddress("0x0200000000000000000000000000000000000004")
// HelloWorldAddress = common.HexToAddress("0x0300000000000000000000000000000000000000")
// ADD YOUR PRECOMPILE HERE
// {YourPrecompile}Address = common.HexToAddress("0x03000000000000000000000000000000000000??")
```
Don't forget to update the actual variable `ContractAddress` in `module.go` to the address you chose. It should look like this:
```go title="helloworld/module.go"
// ContractAddress is the defined address of the precompile contract.
// This should be unique across all precompile contracts.
// See params/precompile_modules.go for registered precompile contracts and more information.
var ContractAddress = common.HexToAddress("0x0300000000000000000000000000000000000000")
```
Now when Subnet-EVM sees the `helloworld.ContractAddress` as input when executing [`CALL`](https://github.com/ava-labs/subnet-evm/blob/helloworld-official-tutorial-v2/core/vm/evm.go#L251), [`CALLCODE`](https://github.com/ava-labs/subnet-evm/blob/helloworld-official-tutorial-v2/core/vm/evm.go#L341), [`DELEGATECALL`](https://github.com/ava-labs/subnet-evm/blob/helloworld-official-tutorial-v2/core/vm/evm.go#L392), [`STATICCALL`](https://github.com/ava-labs/subnet-evm/blob/helloworld-official-tutorial-v2/core/vm/evm.go#L435), it can run the precompile if the precompile is enabled.
## Adding Custom Code
Search (`CTRL F`) throughout the file with `CUSTOM CODE STARTS HERE` to find the areas in the precompile package that you need to modify. You should start with the reference imports code block.
### Module File
The module file contains fundamental information about the precompile. This includes the key for the precompile, the address of the precompile, and a configurator. This file is located at [`./precompile/helloworld/module.go`](https://github.com/ava-labs/subnet-evm/blob/helloworld-official-tutorial-v2/precompile/contracts/helloworld/module.go) for Subnet-EVM and [./helloworld/module.go](https://github.com/ava-labs/precompile-evm/blob/hello-world-example/helloworld/module.go) for Precompile-EVM.
This file defines the module for the precompile. The module is used to register the precompile to the precompile registry. The precompile registry is used to read configs and enable the precompile. Registration is done in the `init()` function of the module file. `MakeConfig()` is used to create a new instance for the precompile config. This will be used in custom Unmarshal/Marshal logic. You don't need to override these functions.
#### Configure()
Module file contains a `configurator` which implements the `contract.Configurator` interface. This interface includes a `Configure()` function used to configure the precompile and set the initial state of the precompile. This function is called when the precompile is enabled. This is typically used to read from a given config in upgrade/genesis JSON and sets the initial state of the precompile accordingly. This function also calls `AllowListConfig.Configure()` to invoke AllowList configuration as the last step. You should keep it as it is if you want to use AllowList. You can modify this function for your custom logic. You can circle back to this function later after you have finalized the implementation of the precompile config.
### Config File
The config file contains the config for the precompile. This file is located at [`./precompile/helloworld/config.go`](https://github.com/ava-labs/subnet-evm/blob/helloworld-official-tutorial-v2/precompile/contracts/helloworld/config.go) for Subnet-EVM and [./helloworld/config.go](https://github.com/ava-labs/precompile-evm/blob/hello-world-example/helloworld/config.go) for Precompile-EVM. This file contains the `Config` struct, which implements `precompileconfig.Config` interface. It has some embedded structs like `precompileconfig.Upgrade`. `Upgrade` is used to enable upgrades for the precompile. It contains the `BlockTimestamp` and `Disable` to enable/disable upgrades. `BlockTimestamp` is the timestamp of the block when the upgrade will be activated. `Disable` is used to disable the upgrade. If you use `AllowList` for the precompile, there is also `allowlist.AllowListConfig` embedded in the `Config` struct. `AllowListConfig` is used to specify initial roles for specified addresses. If you have any custom fields in your precompile config, you can add them here. These custom fields will be read from upgrade/genesis JSON and set in the precompile config.
```go title="precompile/helloworld/config.go"
// Config implements the precompileconfig.Config interface and
// adds specific configuration for HelloWorld.
type Config struct {
allowlist.AllowListConfig
precompileconfig.Upgrade
}
```
#### Verify()
`Verify()` is called on startup and an error is treated as fatal. Generated code contains a call to `AllowListConfig.Verify()` to verify the `AllowListConfig`. You can leave that as is and start adding your own custom verify code after that.
We can leave this function as is right now because there is no invalid custom configuration for the `Config`.
```go title="precompile/helloworld/config.go"
// Verify tries to verify Config and returns an error accordingly.
func (c *Config) Verify() error {
// Verify AllowList first
if err := c.AllowListConfig.Verify(); err != nil {
return err
}
// CUSTOM CODE STARTS HERE
// Add your own custom verify code for Config here
// and return an error accordingly
return nil
}
```
#### Equal()
Next, we see is `Equal()`. This function determines if two precompile configs are equal. This is used to determine if the precompile needs to be upgraded. There is some default code that is generated for checking `Upgrade` and `AllowListConfig` equality.
```go title="precompile/helloworld/config.go"
// Equal returns true if [s] is a [*Config] and it has been configured identical to [c].
func (c *Config) Equal(s precompileconfig.Config) bool {
// typecast before comparison
other, ok := (s).(*Config)
if !ok {
return false
}
// CUSTOM CODE STARTS HERE
// modify this boolean accordingly with your custom Config, to check if [other] and the current [c] are equal
// if Config contains only Upgrade and AllowListConfig you can skip modifying it.
equals := c.Upgrade.Equal(&other.Upgrade) && c.AllowListConfig.Equal(&other.AllowListConfig)
return equals
}
```
We can leave this function as is since we check `Upgrade` and `AllowListConfig` for equality which are the only fields that `Config` struct has.
### Modify Configure()
We can now circle back to `Configure()` in `module.go` as we finished implementing `Config` struct. This function configures the `state` with the initial configuration at`blockTimestamp` when the precompile is enabled.
In the HelloWorld example, we want to set up a default key-value mapping in the state where the key is `storageKey` and the value is `Hello World!`. The `StateDB` allows us to store a key-value mapping of 32-byte hashes. The below code snippet can be copied and pasted to overwrite the default `Configure()` code.
```go title="precompile/helloworld/module.go"
const defaultGreeting = "Hello World!"
// Configure configures [state] with the given [cfg] precompileconfig.
// This function is called by the EVM once per precompile contract activation.
// You can use this function to set up your precompile contract's initial state,
// by using the [cfg] config and [state] stateDB.
func (*configurator) Configure(chainConfig contract.ChainConfig, cfg precompileconfig.Config, state contract.StateDB, _ contract.BlockContext) error {
config, ok := cfg.(*Config)
if !ok {
return fmt.Errorf("incorrect config %T: %v", config, config)
}
// CUSTOM CODE STARTS HERE
// This will be called in the first block where HelloWorld stateful precompile is enabled.
// 1) If BlockTimestamp is nil, this will not be called
// 2) If BlockTimestamp is 0, this will be called while setting up the genesis block
// 3) If BlockTimestamp is 1000, this will be called while processing the first block
// whose timestamp is >= 1000
//
// Set the initial value under [common.BytesToHash([]byte("storageKey")] to "Hello World!"
StoreGreeting(state, defaultGreeting)
// AllowList is activated for this precompile. Configuring allowlist addresses here.
return config.AllowListConfig.Configure(state, ContractAddress)
}
```
### Event File
The event file contains the events that the precompile can emit. This file is located at [`./precompile/helloworld/event.go`](https://github.com/ava-labs/subnet-evm/blob/helloworld-official-tutorial-v2/precompile/contracts/helloworld/event.go) for Subnet-EVM and [./helloworld/event.go](https://github.com/ava-labs/precompile-evm/blob/hello-world-example/helloworld/event.go) for Precompile-EVM. The file begins with a comment about events and how they can be emitted:
```go title="precompile/helloworld/event.go"
/* NOTE: Events can only be emitted in state-changing functions. So you cannot use events in read-only (view) functions.
Events are generally emitted at the end of a state-changing function with AddLog method of the StateDB. The AddLog method takes 4 arguments:
1. Address of the contract that emitted the event.
2. Topic hashes of the event.
3. Encoded non-indexed data of the event.
4. Block number at which the event was emitted.
The first argument is the address of the contract that emitted the event.
Topics can be at most 4 elements, the first topic is the hash of the event signature and the rest are the indexed event arguments. There can be at most 3 indexed arguments.
Topics cannot be fully unpacked into their original values since they're 32-bytes hashes.
The non-indexed arguments are encoded using the ABI encoding scheme. The non-indexed arguments can be unpacked into their original values.
Before packing the event, you need to calculate the gas cost of the event. The gas cost of an event is the base gas cost + the gas cost of the topics + the gas cost of the non-indexed data.
See Get{EvetName}EventGasCost functions for more details.
You can use the following code to emit an event in your state-changing precompile functions (generated packer might be different):*/
topics, data, err := PackMyEvent(
topic1,
topic2,
data1,
data2,
)
if err != nil {
return nil, remainingGas, err
}
accessibleState.GetStateDB().AddLog(&types.Log{
Address: ContractAddress,
Topics: topics,
Data: data,
BlockNumber: accessibleState.GetBlockContext().Number().Uint64(),
})
```
```go title="precompile/helloworld/event.go"
/* NOTE: Events can only be emitted in state-changing functions. So you cannot use events in read-only (view) functions.
Events are generally emitted at the end of a state-changing function with AddLog method of the StateDB. The AddLog method takes 4 arguments:
1. Address of the contract that emitted the event.
2. Topic hashes of the event.
3. Encoded non-indexed data of the event.
4. Block number at which the event was emitted.
The first argument is the address of the contract that emitted the event.
Topics can be at most 4 elements, the first topic is the hash of the event signature and the rest are the indexed event arguments. There can be at most 3 indexed arguments.
Topics cannot be fully unpacked into their original values since they're 32-bytes hashes.
The non-indexed arguments are encoded using the ABI encoding scheme. The non-indexed arguments can be unpacked into their original values.
Before packing the event, you need to calculate the gas cost of the event. The gas cost of an event is the base gas cost + the gas cost of the topics + the gas cost of the non-indexed data.
See Get{EvetName}EventGasCost functions for more details.
You can use the following code to emit an event in your state-changing precompile functions (generated packer might be different):*/
topics, data, err := PackMyEvent(
topic1,
topic2,
data1,
data2,
)
if err != nil {
return nil, remainingGas, err
}
accessibleState.GetStateDB().AddLog(
ContractAddress,
topics,
data,
accessibleState.GetBlockContext().Number().Uint64(),
)
```
In this file you should set your event's gas cost and implement the `Get{EventName}EventGasCost` function. This function should take the data you want to emit and calculate the gas cost. In this example we defined our event as follow, and plan to emit it in the `setGreeting` function:
```go
event GreetingChanged(address indexed sender, string oldGreeting, string newGreeting);
```
We used arbitrary strings as non-indexed event data, remind that each emitted event is stored on chain, thus charging right amount is critical. We calculated gas cost according to the length of the string to make sure we're charging right amount of gas. If you're sure that you're dealing with a fixed length data, you can use a fixed gas cost for your event. We will show how events can be emitted under the Contract File section.
### Contract File
The contract file contains the functions of the precompile contract that will be called by the EVM. The file is located at [`./precompile/helloworld/contract.go`](https://github.com/ava-labs/subnet-evm/blob/helloworld-official-tutorial-v2/precompile/contracts/helloworld/contract.go) for Subnet-EVM and [./helloworld/contract.go](https://github.com/ava-labs/precompile-evm/blob/hello-world-example/helloworld/contract.go) for Precompile-EVM. Since we use `IAllowList` interface there will be auto-generated code for `AllowList` functions like below:
```go title="precompile/helloworld/contract.go"
// GetHelloWorldAllowListStatus returns the role of [address] for the HelloWorld list.
func GetHelloWorldAllowListStatus(stateDB contract.StateDB, address common.Address) allowlist.Role {
return allowlist.GetAllowListStatus(stateDB, ContractAddress, address)
}
// SetHelloWorldAllowListStatus sets the permissions of [address] to [role] for the
// HelloWorld list. Assumes [role] has already been verified as valid.
// This stores the [role] in the contract storage with address [ContractAddress]
// and [address] hash. It means that any reusage of the [address] key for different value
// conflicts with the same slot [role] is stored.
// Precompile implementations must use a different key than [address] for their storage.
func SetHelloWorldAllowListStatus(stateDB contract.StateDB, address common.Address, role allowlist.Role) {
allowlist.SetAllowListRole(stateDB, ContractAddress, address, role)
}
```
These will be helpful to use AllowList precompile helper in our functions.
#### Packers and Unpackers
There are also auto-generated Packers and Unpackers for the ABI. These will be used in `sayHello` and `setGreeting` functions to comfort the ABI. These functions are auto-generated and will be used in necessary places accordingly. You don't need to worry about how to deal with them, but it's good to know what they are.
Note: There were few changes to precompile packers with Durango. In this example we assumed that the HelloWorld precompile contract has been deployed before Durango. We need to activate this condition only after Durango. If this is a new precompile and never deployed before Durango, you can activate it immediately by removing the if condition.
Each input to a precompile contract function has it's own `Unpacker` function as follows (if deployed before Durango):
```go title="precompile/helloworld/contract.go"
// UnpackSetGreetingInput attempts to unpack [input] into the string type argument
// assumes that [input] does not include selector (omits first 4 func signature bytes)
// if [useStrictMode] is true, it will return an error if the length of [input] is not [common.HashLength]
func UnpackSetGreetingInput(input []byte, useStrictMode bool) (string, error) {
// Initially we had this check to ensure that the input was the correct length.
// However solidity does not always pack the input to the correct length, and allows
// for extra padding bytes to be added to the end of the input. Therefore, we have removed
// this check with the Durango. We still need to keep this check for backwards compatibility.
if useStrictMode && len(input) > common.HashLength {
return "", ErrInputExceedsLimit
}
res, err := HelloWorldABI.UnpackInput("setGreeting", input, useStrictMode)
if err != nil {
return "", err
}
unpacked := *abi.ConvertType(res[0], new(string)).(*string)
return unpacked, nil
}
```
If this is a new precompile that will be deployed after Durango, you can skip strict mode handling and use false:
```go title="precompile/helloworld/contract.go"
func UnpackSetGreetingInput(input []byte) (string, error) {
res, err := HelloWorldABI.UnpackInput("setGreeting", input, false)
if err != nil {
return "", err
}
unpacked := *abi.ConvertType(res[0], new(string)).(*string)
return unpacked, nil
}
```
The ABI is a binary format and the input to the precompile contract function is a byte array. The `Unpacker` function converts this input to a more easy-to-use format so that we can use it in our function.
Similarly, there is a `Packer` function for each output of a precompile contract function as follows:
```go title="precompile/helloworld/contract.go"
// PackSayHelloOutput attempts to pack given result of type string
// to conform the ABI outputs.
func PackSayHelloOutput(result string) ([]byte, error) {
return HelloWorldABI.PackOutput("sayHello", result)
}
```
This function converts the output of the function to a byte array that conforms to the ABI and can be returned to the EVM as a result.
#### Modify sayHello()
The next place to modify is in our `sayHello()` function. In a previous step, we created the `IHelloWorld.sol` interface with two functions `sayHello()` and `setGreeting()`. We finally get to implement them here. If any contract calls these functions from the interface, the below function gets executed. This function is a simple getter function.
In `Configure()` we set up a mapping with the key as `storageKey` and the value as `Hello World!`. In this function, we will be returning whatever value is at `storageKey`. The below code snippet can be copied and pasted to overwrite the default `setGreeting` code.
First, we add a helper function to get the greeting value from the stateDB, this will be helpful when we test our contract. We will use the `storageKeyHash` to store the value in the Contract's reserved storage in the stateDB.
```go title="precompile/helloworld/contract.go"
var (
// storageKeyHash is the hash of the storage key "storageKey" in the contract storage.
// This is used to store the value of the greeting in the contract storage.
// It is important to use a unique key here to avoid conflicts with other storage keys
// like addresses, AllowList, etc.
storageKeyHash = common.BytesToHash([]byte("storageKey"))
)
// GetGreeting returns the value of the storage key "storageKey" in the contract storage,
// with leading zeroes trimmed.
// This function is mostly used for tests.
func GetGreeting(stateDB contract.StateDB) string {
// Get the value set at recipient
value := stateDB.GetState(ContractAddress, storageKeyHash)
return string(common.TrimLeftZeroes(value.Bytes()))
}
```
Now we can modify the `sayHello` function to return the stored value.
```go title="precompile/helloworld/contract.go"
func sayHello(accessibleState contract.AccessibleState, caller common.Address, addr common.Address, input []byte, suppliedGas uint64, readOnly bool) (ret []byte, remainingGas uint64, err error) {
if remainingGas, err = contract.DeductGas(suppliedGas, SayHelloGasCost); err != nil {
return nil, 0, err
}
// CUSTOM CODE STARTS HERE
// Get the current state
currentState := accessibleState.GetStateDB()
// Get the value set at recipient
value := GetGreeting(currentState)
packedOutput, err := PackSayHelloOutput(value)
if err != nil {
return nil, remainingGas, err
}
// Return the packed output and the remaining gas
return packedOutput, remainingGas, nil
}
```
#### Modify setGreeting()
`setGreeting()` function is a simple setter function. It takes in `input` and we will set that as the value in the state mapping with the key as `storageKey`. It also checks if the VM running the precompile is in read-only mode. If it is, it returns an error. At the end of a successful execution, it will emit `GreetingChanged` event.
There is also a generated `AllowList` code in that function. This generated code checks if the caller address is eligible to perform this state-changing operation. If not, it returns an error.
Let's add the helper function to set the greeting value in the stateDB, this will be helpful when we test our contract.
```go title="precompile/helloworld/contract.go"
// StoreGreeting sets the value of the storage key "storageKey" in the contract storage.
func StoreGreeting(stateDB contract.StateDB, input string) {
inputPadded := common.LeftPadBytes([]byte(input), common.HashLength)
inputHash := common.BytesToHash(inputPadded)
stateDB.SetState(ContractAddress, storageKeyHash, inputHash)
}
```
The below code snippet can be copied and pasted to overwrite the default `setGreeting()` code.
```go title="precompile/helloworld/contract.go"
func setGreeting(accessibleState contract.AccessibleState, caller common.Address, addr common.Address, input []byte, suppliedGas uint64, readOnly bool) (ret []byte, remainingGas uint64, err error) {
if remainingGas, err = contract.DeductGas(suppliedGas, SetGreetingGasCost); err != nil {
return nil, 0, err
}
if readOnly {
return nil, remainingGas, vmerrs.ErrWriteProtection
}
// do not use strict mode after Durango
useStrictMode := !contract.IsDurangoActivated(accessibleState)
// attempts to unpack [input] into the arguments to the SetGreetingInput.
// Assumes that [input] does not include selector
// You can use unpacked [inputStruct] variable in your code
inputStruct, err := UnpackSetGreetingInput(input, useStrictMode)
if err != nil {
return nil, remainingGas, err
}
// Allow list is enabled and SetGreeting is a state-changer function.
// This part of the code restricts the function to be called only by enabled/admin addresses in the allow list.
// You can modify/delete this code if you don't want this function to be restricted by the allow list.
stateDB := accessibleState.GetStateDB()
// Verify that the caller is in the allow list and therefore has the right to call this function.
callerStatus := allowlist.GetAllowListStatus(stateDB, ContractAddress, caller)
if !callerStatus.IsEnabled() {
return nil, remainingGas, fmt.Errorf("%w: %s", ErrCannotSetGreeting, caller)
}
// allow list code ends here.
// CUSTOM CODE STARTS HERE
// With Durango, you can emit an event in your state-changing precompile functions.
// Note: If you have been using the precompile before Durango, you should activate it only after Durango.
// Activating this code before Durango will result in a consensus failure.
// If this is a new precompile and never deployed before Durango, you can activate it immediately by removing
// the if condition.
// We will first read the old greeting. So we should charge the gas for reading the storage.
if remainingGas, err = contract.DeductGas(remainingGas, contract.ReadGasCostPerSlot); err != nil {
return nil, 0, err
}
oldGreeting := GetGreeting(stateDB)
eventData := GreetingChangedEventData{
OldGreeting: oldGreeting,
NewGreeting: inputStruct,
}
topics, data, err := PackGreetingChangedEvent(caller, eventData)
if err != nil {
return nil, remainingGas, err
}
// Charge the gas for emitting the event.
eventGasCost := GetGreetingChangedEventGasCost(eventData)
if remainingGas, err = contract.DeductGas(remainingGas, eventGasCost); err != nil {
return nil, 0, err
}
// Emit the event
stateDB.AddLog(&types.Log{
Address: ContractAddress,
Topics: topics,
Data: data,
BlockNumber: accessibleState.GetBlockContext().Number().Uint64(),
})
// setGreeting is the execution function
// "SetGreeting(name string)" and sets the storageKey
// in the string returned by hello world
StoreGreeting(stateDB, inputStruct)
// This function does not return an output, leave this one as is
packedOutput := []byte{}
// Return the packed output and the remaining gas
return packedOutput, remainingGas, nil
}
```
```go title="precompile/helloworld/contract.go"
func setGreeting(accessibleState contract.AccessibleState, caller common.Address, addr common.Address, input []byte, suppliedGas uint64, readOnly bool) (ret []byte, remainingGas uint64, err error) {
if remainingGas, err = contract.DeductGas(suppliedGas, SetGreetingGasCost); err != nil {
return nil, 0, err
}
if readOnly {
return nil, remainingGas, vmerrs.ErrWriteProtection
}
// do not use strict mode after Durango
useStrictMode := !contract.IsDurangoActivated(accessibleState)
// attempts to unpack [input] into the arguments to the SetGreetingInput.
// Assumes that [input] does not include selector
// You can use unpacked [inputStruct] variable in your code
inputStruct, err := UnpackSetGreetingInput(input, useStrictMode)
if err != nil {
return nil, remainingGas, err
}
// Allow list is enabled and SetGreeting is a state-changer function.
// This part of the code restricts the function to be called only by enabled/admin addresses in the allow list.
// You can modify/delete this code if you don't want this function to be restricted by the allow list.
stateDB := accessibleState.GetStateDB()
// Verify that the caller is in the allow list and therefore has the right to call this function.
callerStatus := allowlist.GetAllowListStatus(stateDB, ContractAddress, caller)
if !callerStatus.IsEnabled() {
return nil, remainingGas, fmt.Errorf("%w: %s", ErrCannotSetGreeting, caller)
}
// allow list code ends here.
// CUSTOM CODE STARTS HERE
// With Durango, you can emit an event in your state-changing precompile functions.
// Note: If you have been using the precompile before Durango, you should activate it only after Durango.
// Activating this code before Durango will result in a consensus failure.
// If this is a new precompile and never deployed before Durango, you can activate it immediately by removing
// the if condition.
// We will first read the old greeting. So we should charge the gas for reading the storage.
if remainingGas, err = contract.DeductGas(remainingGas, contract.ReadGasCostPerSlot); err != nil {
return nil, 0, err
}
oldGreeting := GetGreeting(stateDB)
eventData := GreetingChangedEventData{
OldGreeting: oldGreeting,
NewGreeting: inputStruct,
}
topics, data, err := PackGreetingChangedEvent(caller, eventData)
if err != nil {
return nil, remainingGas, err
}
// Charge the gas for emitting the event.
eventGasCost := GetGreetingChangedEventGasCost(eventData)
if remainingGas, err = contract.DeductGas(remainingGas, eventGasCost); err != nil {
return nil, 0, err
}
// Emit the event
stateDB.AddLog(&types.Log{
Address: ContractAddress,
Topics: topics,
Data: data,
BlockNumber: accessibleState.GetBlockContext().Number().Uint64(),
})
// setGreeting is the execution function
// "SetGreeting(name string)" and sets the storageKey
// in the string returned by hello world
StoreGreeting(stateDB, inputStruct)
// This function does not return an output, leave this one as is
packedOutput := []byte{}
// Return the packed output and the remaining gas
return packedOutput, remainingGas, nil
}
```
Precompile events introduced with Durango. In this example we assumed that the `HelloWorld` precompile contract has been deployed before Durango.
If this is a new precompile and it will be deployed after Durango, you can activate it immediately by removing the Durango if condition (`contract.IsDurangoActivated(accessibleState)`).
### Setting Gas Costs
Setting gas costs for functions is very important and should be done carefully. If the gas costs are set too low, then functions can be abused and can cause DoS attacks. If the gas costs are set too high, then the contract will be too expensive to run.
Subnet-EVM has some predefined gas costs for write and read operations in [`precompile/contract/utils.go`](https://github.com/ava-labs/subnet-evm/blob/helloworld-official-tutorial-v2/precompile/contract/utils.go#L19-L20). In order to provide a baseline for gas costs, we have set the following gas costs.
```go title="precompile/contract/utils.go"
// Gas costs for stateful precompiles
const (
WriteGasCostPerSlot = 20_000
ReadGasCostPerSlot = 5_000
)
```
- `WriteGasCostPerSlot` is the cost of one write such as modifying a state storage slot.
- `ReadGasCostPerSlot` is the cost of reading a state storage slot.
This should be in your gas cost estimations based on how many times the precompile function does a read or a write. For example, if the precompile modifies the state slot of its precompile address twice then the gas cost for that function would be `40_000`. However, if the precompile does additional operations and requires more computational power, then you should increase the gas costs accordingly.
On top of these gas costs, we also have to account for the gas costs of AllowList gas costs. These are the gas costs of reading and writing permissions for addresses in AllowList. These are defined under Subnet-EVM's [`precompile/allowlist/allowlist.go`](https://github.com/ava-labs/subnet-evm/blob/helloworld-official-tutorial-v2/precompile/allowlist/allowlist.go#L28-L29).
By default, these are added to the default gas costs of the state-change functions (SetGreeting) of the precompile. Meaning that these functions will cost an additional `ReadAllowListGasCost` in order to read permissions from the storage. If you don't plan to read permissions from the storage then you can omit these.
Now going back to our `/helloworld/contract.go`, we can modify our precompile function gas costs. Please search (`CTRL F`) `SET A GAS COST HERE` to locate the default gas cost code.
```go title="helloworld/contract.go"
SayHelloGasCost uint64 = 0 // SET A GAS COST HERE
SetGreetingGasCost uint64 = 0 + allowlist.ReadAllowListGasCost // SET A GAS COST HERE
```
We get and set our greeting with `sayHello()` and `setGreeting()` in one slot respectively so we can define the gas costs as follows. We also read permissions from the AllowList in `setGreeting()` so we keep `allowlist.ReadAllowListGasCost`.
```go title="helloworld/contract.go"
SayHelloGasCost uint64 = contract.ReadGasCostPerSlot
SetGreetingGasCost uint64 = contract.WriteGasCostPerSlot + allowlist.ReadAllowListGasCost
```
## Registering Your Precompile
We should register our precompile package to the Subnet-EVM to be discovered by other packages. Our `Module` file contains an `init()` function that registers our precompile. `init()` is called when the package is imported. We should register our precompile in a common package so that it can be imported by other packages.
For Subnet-EVM we have a precompile registry under [`/precompile/registry/registry.go`](https://github.com/ava-labs/subnet-evm/blob/helloworld-official-tutorial-v2/precompile/registry/registry.go). This registry force-imports precompiles from other packages, for example:
```go title="precompile/registry/registry.go"
// Force imports of each precompile to ensure each precompile's init function runs and registers itself
// with the registry.
import (
_ "github.com/ava-labs/subnet-evm/precompile/contracts/deployerallowlist"
_ "github.com/ava-labs/subnet-evm/precompile/contracts/nativeminter"
_ "github.com/ava-labs/subnet-evm/precompile/contracts/txallowlist"
_ "github.com/ava-labs/subnet-evm/precompile/contracts/feemanager"
_ "github.com/ava-labs/subnet-evm/precompile/contracts/rewardmanager"
_ "github.com/ava-labs/subnet-evm/precompile/contracts/helloworld"
// ADD YOUR PRECOMPILE HERE
// _ "github.com/ava-labs/subnet-evm/precompile/contracts/yourprecompile"
)
```
The registry itself also force-imported by the [\`/plugin/evm/vm.go](https://github.com/ava-labs/subnet-evm/blob/helloworld-official-tutorial-v2/plugin/evm/vm.go#L50). This ensures that the registry is imported and the precompiles are registered.
For Precompile-EVM there is a `plugin/main.go` file in Precompile-EVM that orchestrates this precompile registration.
```go title="plugin/main.go"
// (c) 2019-2023, Ava Labs, Inc. All rights reserved.
// See the file LICENSE for licensing terms.
package main
import (
"fmt"
"github.com/ava-labs/avalanchego/version"
"github.com/ava-labs/subnet-evm/plugin/evm"
"github.com/ava-labs/subnet-evm/plugin/runner"
// Each precompile generated by the precompilegen tool has a self-registering init function
// that registers the precompile with the subnet-evm. Importing the precompile package here
// will cause the precompile to be registered with the subnet-evm.
_ "github.com/ava-labs/precompile-evm/helloworld"
// ADD YOUR PRECOMPILE HERE
//_ "github.com/ava-labs/precompile-evm/{yourprecompilepkg}"
)
```
# Writing Test Cases (/docs/virtual-machines/custom-precompiles/defining-test-cases)
---
title: Writing Test Cases
description: In this section, we will go over the different ways we can write test cases for our stateful precompile.
---
## Adding Config Tests
Precompile generation tool generates skeletons for unit tests as well. Generated config tests will be under [`./precompile/contracts/helloworld/config_test.go`](https://github.com/ava-labs/subnet-evm/blob/helloworld-official-tutorial-v2/precompile/contracts/helloworld/config_test.go) for Subnet-EVM and [`./helloworld/config_test.go`](https://github.com/ava-labs/precompile-evm/blob/hello-world-example/helloworld/config_test.go) for Precompile-EVM. There are mainly two functions we need to test: `Verify` and `Equal`. `Verify` checks if the precompile is configured correctly. `Equal` checks if the precompile is equal to another precompile. Generated `Verify` tests contain a valid case.
You can add more invalid cases depending on your implementation. `Equal` tests generate some invalid cases to test different timestamps, types, and AllowList cases. You can check each `config_test.go` files for other precompiles under the Subnet-EVM's [`./precompile/contracts`](https://github.com/ava-labs/subnet-evm/blob/helloworld-official-tutorial-v2/precompile/contracts/) directory for more examples.
## Adding Contract Tests
The tool also generates contract tests to make sure our precompile is working correctly. Generated tests include cases to test allow list capabilities, gas costs, and calling functions in read-only mode. You can check other `contract_test.go` files in the `/precompile/contracts`. Hello World contract tests will be under [`./precompile/contracts/helloworld/contract_test.go`](https://github.com/ava-labs/subnet-evm/blob/helloworld-official-tutorial-v2/precompile/contracts/helloworld/contract_test.go) for Subnet-EVM and [`./helloworld/contract_test.go`](https://github.com/ava-labs/precompile-evm/blob/hello-world-example/helloworld/contract_test.go) for Precompile-EVM.
We will also add more test to cover functionalities of `sayHello()` and `setGreeting()`. Contract tests are defined in a standard structure that each test can customize to their needs. The test structure is as follows:
```go
// PrecompileTest is a test case for a precompile
type PrecompileTest struct {
// Caller is the address of the precompile caller
Caller common.Address
// Input the raw input bytes to the precompile
Input []byte
// InputFn is a function that returns the raw input bytes to the precompile
// If specified, Input will be ignored.
InputFn func(t *testing.T) []byte
// SuppliedGas is the amount of gas supplied to the precompile
SuppliedGas uint64
// ReadOnly is whether the precompile should be called in read only
// mode. If true, the precompile should not modify the state.
ReadOnly bool
// Config is the config to use for the precompile
// It should be the same precompile config that is used in the
// precompile's configurator.
// If nil, Configure will not be called.
Config precompileconfig.Config
// BeforeHook is called before the precompile is called.
BeforeHook func(t *testing.T, state contract.StateDB)
// AfterHook is called after the precompile is called.
AfterHook func(t *testing.T, state contract.StateDB)
// ExpectedRes is the expected raw byte result returned by the precompile
ExpectedRes []byte
// ExpectedErr is the expected error returned by the precompile
ExpectedErr string
// BlockNumber is the block number to use for the precompile's block context
BlockNumber int64
}
```
Each test can populate the fields of the `PrecompileTest` struct to customize the test. This test uses an AllowList helper function `allowlist.RunPrecompileWithAllowListTests(t, Module, state.NewTestStateDB, tests)` which can run all specified tests plus AllowList test suites. If you don't plan to use AllowList, you can directly run them as follows:
```go
for name, test := range tests {
t.Run(name, func(t *testing.T) {
test.Run(t, module, newStateDB(t))
})
}
```
## Adding VM Tests (Optional)
This is only applicable for direct Subnet-EVM forks as test files are not directly exported in Golang. If you use Precompile-EVM you can skip this step.
VM tests are tests that run the precompile by calling it through the Subnet-EVM. These are the most comprehensive tests that we can run. If your precompile modifies how the Subnet-EVM works, for example changing blockchain rules, you should add a VM test. For example, you can take a look at the `TestRewardManagerPrecompileSetRewardAddress` function in [here](https://github.com/ava-labs/subnet-evm/blob/helloworld-official-tutorial-v2/plugin/evm/vm_test.go#L2772).
For this Hello World example, we don't modify any Subnet-EVM rules, so we don't need to add any VM tests.
## Adding Solidity Test Contracts
Let's add our test contract to `./contracts/contracts`. This smart contract lets us interact with our precompile! We cast the `HelloWorld` precompile address to the `IHelloWorld` interface. In doing so, `helloWorld` is now a contract of type `IHelloWorld` and when we call any functions on that contract, we will be redirected to the HelloWorld precompile address.
The below code snippet can be copied and pasted into a new file called `ExampleHelloWorld.sol`:
```go
//SPDX-License-Identifier: MIT
pragma solidity ^0.8.0;
import "./IHelloWorld.sol";
// ExampleHelloWorld shows how the HelloWorld precompile can be used in a smart contract.
contract ExampleHelloWorld {
address constant HELLO_WORLD_ADDRESS =
0x0300000000000000000000000000000000000000;
IHelloWorld helloWorld = IHelloWorld(HELLO_WORLD_ADDRESS);
function sayHello() public view returns (string memory) {
return helloWorld.sayHello();
}
function setGreeting(string calldata greeting) public {
helloWorld.setGreeting(greeting);
}
}
```
Hello World Precompile is a different contract than ExampleHelloWorld and has a different address. Since the precompile uses AllowList for a permissioned access, any call to the precompile including from ExampleHelloWorld will be denied unless the caller is added to the AllowList.
Please note that this contract is simply a wrapper and is calling the precompile functions. The reason why we add another example smart contract is to have a simpler stateless tests.
For the test contract we write our test in `./contracts/test/ExampleHelloWorldTest.sol`.
```solidity
//SPDX-License-Identifier: MIT
pragma solidity ^0.8.0;
import "../ExampleHelloWorld.sol";
import "../interfaces/IHelloWorld.sol";
import "./AllowListTest.sol";
contract ExampleHelloWorldTest is AllowListTest {
IHelloWorld helloWorld = IHelloWorld(HELLO_WORLD_ADDRESS);
function step_getDefaultHelloWorld() public {
ExampleHelloWorld example = new ExampleHelloWorld();
address exampleAddress = address(example);
assertRole(helloWorld.readAllowList(exampleAddress), AllowList.Role.None);
assertEq(example.sayHello(), "Hello World!");
}
function step_doesNotSetGreetingBeforeEnabled() public {
ExampleHelloWorld example = new ExampleHelloWorld();
address exampleAddress = address(example);
assertRole(helloWorld.readAllowList(exampleAddress), AllowList.Role.None);
try example.setGreeting("testing") {
assertTrue(false, "setGreeting should fail");
} catch {}
}
function step_setAndGetGreeting() public {
ExampleHelloWorld example = new ExampleHelloWorld();
address exampleAddress = address(example);
assertRole(helloWorld.readAllowList(exampleAddress), AllowList.Role.None);
helloWorld.setEnabled(exampleAddress);
assertRole(
helloWorld.readAllowList(exampleAddress),
AllowList.Role.Enabled
);
string memory greeting = "testgreeting";
example.setGreeting(greeting);
assertEq(example.sayHello(), greeting);
}
}
```
For Precompile-EVM, you should import AllowListTest with `@avalabs/subnet-evm-contracts` NPM package:
```solidity
//SPDX-License-Identifier: MIT
pragma solidity ^0.8.0;
import "../ExampleHelloWorld.sol";
import "../interfaces/IHelloWorld.sol";
import "@avalabs/subnet-evm-contracts/contracts/test/AllowListTest.sol";
contract ExampleHelloWorldTest is AllowListTest {
IHelloWorld helloWorld = IHelloWorld(HELLO_WORLD_ADDRESS);
function step_getDefaultHelloWorld() public {
ExampleHelloWorld example = new ExampleHelloWorld();
address exampleAddress = address(example);
assertRole(helloWorld.readAllowList(exampleAddress), AllowList.Role.None);
assertEq(example.sayHello(), "Hello World!");
}
function step_doesNotSetGreetingBeforeEnabled() public {
ExampleHelloWorld example = new ExampleHelloWorld();
address exampleAddress = address(example);
assertRole(helloWorld.readAllowList(exampleAddress), AllowList.Role.None);
try example.setGreeting("testing") {
assertTrue(false, "setGreeting should fail");
} catch {}
}
function step_setAndGetGreeting() public {
ExampleHelloWorld example = new ExampleHelloWorld();
address exampleAddress = address(example);
assertRole(helloWorld.readAllowList(exampleAddress), AllowList.Role.None);
helloWorld.setEnabled(exampleAddress);
assertRole(
helloWorld.readAllowList(exampleAddress),
AllowList.Role.Enabled
);
string memory greeting = "testgreeting";
example.setGreeting(greeting);
assertEq(example.sayHello(), greeting);
}
}
```
## Adding DS-Test Case
We can now trigger this test contract via `hardhat` tests. The test script uses Subnet-EVM's `test` framework test in `./contracts/test`. You can find more information about the test framework [here](https://github.com/ava-labs/subnet-evm/blob/helloworld-official-tutorial-v2/contracts/test/utils.ts). We also can test the events emitted by the precompile. The test script looks like this:
The test script looks like this:
```go
// (c) 2019-2022, Ava Labs, Inc. All rights reserved.
// See the file LICENSE for licensing terms.
import { expect } from "chai";
import { SignerWithAddress } from "@nomiclabs/hardhat-ethers/signers";
import { Contract } from "ethers";
import { ethers } from "hardhat";
import { test } from "./utils";
// make sure this is always an admin for hello world precompile
const ADMIN_ADDRESS = "0x8db97C7cEcE249c2b98bDC0226Cc4C2A57BF52FC";
const HELLO_WORLD_ADDRESS = "0x0300000000000000000000000000000000000000";
describe("ExampleHelloWorldTest", function () {
this.timeout("30s");
beforeEach("Setup DS-Test contract", async function () {
const signer = await ethers.getSigner(ADMIN_ADDRESS);
const helloWorldPromise = ethers.getContractAt(
"IHelloWorld",
HELLO_WORLD_ADDRESS,
signer
);
return ethers
.getContractFactory("ExampleHelloWorldTest", { signer })
.then((factory) => factory.deploy())
.then((contract) => {
this.testContract = contract;
return contract.deployed().then(() => contract);
})
.then(() => Promise.all([helloWorldPromise]))
.then(([helloWorld]) => helloWorld.setAdmin(this.testContract.address))
.then((tx) => tx.wait());
});
test("should gets default hello world", ["step_getDefaultHelloWorld"]);
test(
"should not set greeting before enabled",
"step_doesNotSetGreetingBeforeEnabled"
);
test(
"should set and get greeting with enabled account",
"step_setAndGetGreeting"
);
});
describe("IHelloWorld events", function () {
let owner: SignerWithAddress;
let contract: Contract;
let defaultGreeting = "Hello, World!";
before(async function () {
owner = await ethers.getSigner(ADMIN_ADDRESS);
contract = await ethers.getContractAt(
"IHelloWorld",
HELLO_WORLD_ADDRESS,
owner
);
// reset greeting
let tx = await contract.setGreeting(defaultGreeting);
await tx.wait();
});
it("should emit GreetingChanged event", async function () {
let newGreeting = "helloprecompile";
await expect(contract.setGreeting(newGreeting))
.to.emit(contract, "GreetingChanged")
.withArgs(
owner.address,
// old greeting
defaultGreeting,
// new greeting
newGreeting
);
});
});
```
The test script looks like this:
```go
// (c) 2019-2022, Ava Labs, Inc. All rights reserved.
// See the file LICENSE for licensing terms.
import { expect } from "chai";
import { SignerWithAddress } from "@nomiclabs/hardhat-ethers/signers";
import { Contract } from "ethers";
import { ethers } from "hardhat";
import { test } from "@avalabs/subnet-evm-contracts";
// make sure this is always an admin for hello world precompile
const ADMIN_ADDRESS = "0x8db97C7cEcE249c2b98bDC0226Cc4C2A57BF52FC";
const HELLO_WORLD_ADDRESS = "0x0300000000000000000000000000000000000000";
describe("ExampleHelloWorldTest", function () {
this.timeout("30s");
beforeEach("Setup DS-Test contract", async function () {
const signer = await ethers.getSigner(ADMIN_ADDRESS);
const helloWorldPromise = ethers.getContractAt(
"IHelloWorld",
HELLO_WORLD_ADDRESS,
signer
);
return ethers
.getContractFactory("ExampleHelloWorldTest", { signer })
.then((factory) => factory.deploy())
.then((contract) => {
this.testContract = contract;
return contract.deployed().then(() => contract);
})
.then(() => Promise.all([helloWorldPromise]))
.then(([helloWorld]) => helloWorld.setAdmin(this.testContract.address))
.then((tx) => tx.wait());
});
test("should gets default hello world", ["step_getDefaultHelloWorld"]);
test(
"should not set greeting before enabled",
"step_doesNotSetGreetingBeforeEnabled"
);
test(
"should set and get greeting with enabled account",
"step_setAndGetGreeting"
);
});
describe("IHelloWorld events", function () {
let owner: SignerWithAddress;
let contract: Contract;
let defaultGreeting = "Hello, World!";
before(async function () {
owner = await ethers.getSigner(ADMIN_ADDRESS);
contract = await ethers.getContractAt(
"IHelloWorld",
HELLO_WORLD_ADDRESS,
owner
);
// reset greeting
let tx = await contract.setGreeting(defaultGreeting);
await tx.wait();
});
it("should emit GreetingChanged event", async function () {
let newGreeting = "helloprecompile";
await expect(contract.setGreeting(newGreeting))
.to.emit(contract, "GreetingChanged")
.withArgs(
owner.address,
// old greeting
defaultGreeting,
// new greeting
newGreeting
);
});
});
```
# Executing Test Cases (/docs/virtual-machines/custom-precompiles/executing-test-cases)
---
title: Executing Test Cases
description: In this section, we will go over how to be able to execute the test cases you wrote in the last section.
---
## Adding the Test Genesis File
To run our e2e contract tests, we will need to create an Avalanche L1 that has the `Hello World` precompile activated, so we will copy and paste the below genesis file into: `/tests/precompile/genesis/hello_world.json`.
Note: it's important that this has the same name as the HardHat test file we created previously.
```json
{
"config": {
"chainId": 99999,
"homesteadBlock": 0,
"eip150Block": 0,
"eip150Hash": "0x2086799aeebeae135c246c65021c82b4e15a2c451340993aacfd2751886514f0",
"eip155Block": 0,
"eip158Block": 0,
"byzantiumBlock": 0,
"constantinopleBlock": 0,
"petersburgBlock": 0,
"istanbulBlock": 0,
"muirGlacierBlock": 0,
"feeConfig": {
"gasLimit": 20000000,
"minBaseFee": 1000000000,
"targetGas": 100000000,
"baseFeeChangeDenominator": 48,
"minBlockGasCost": 0,
"maxBlockGasCost": 10000000,
"targetBlockRate": 2,
"blockGasCostStep": 500000
},
"helloWorldConfig": {
"blockTimestamp": 0,
"adminAddresses": ["0x8db97C7cEcE249c2b98bDC0226Cc4C2A57BF52FC"]
}
},
"alloc": {
"8db97C7cEcE249c2b98bDC0226Cc4C2A57BF52FC": {
"balance": "0x52B7D2DCC80CD2E4000000"
},
"0x0Fa8EA536Be85F32724D57A37758761B86416123": {
"balance": "0x52B7D2DCC80CD2E4000000"
}
},
"nonce": "0x0",
"timestamp": "0x66321C34",
"extraData": "0x00",
"gasLimit": "0x1312D00",
"difficulty": "0x0",
"mixHash": "0x0000000000000000000000000000000000000000000000000000000000000000",
"coinbase": "0x0000000000000000000000000000000000000000",
"number": "0x0",
"gasUsed": "0x0",
"parentHash": "0x0000000000000000000000000000000000000000000000000000000000000000"
}
```
Adding this to our genesis enables our HelloWorld precompile at the genesis block (0th block), with `0x8db97C7cEcE249c2b98bDC0226Cc4C2A57BF52FC` as the admin address.
```json
{
"helloWorldConfig": {
"blockTimestamp": 0,
"adminAddresses": ["0x8db97C7cEcE249c2b98bDC0226Cc4C2A57BF52FC"]
}
}
```
## Declaring the HardHat E2E Test
Now that we have declared the HardHat test and corresponding `genesis.json` file. The last step to running the e2e test is to declare the new test in `/tests/precompile/solidity/suites.go`.
At the bottom of the file you will see the following code commented out:
```go title="suites.go"
// ADD YOUR PRECOMPILE HERE
/*
ginkgo.It("your precompile", ginkgo.Label("Precompile"), ginkgo.Label("YourPrecompile"), func() {
ctx, cancel := context.WithTimeout(context.Background(), time.Minute)
defer cancel()
// Specify the name shared by the genesis file in ./tests/precompile/genesis/{your_precompile}.json
// and the test file in ./contracts/tests/{your_precompile}.ts
blockchainID := subnetsSuite.GetBlockchainID("{your_precompile}")
runDefaultHardhatTests(ctx, blockchainID, "{your_precompile}")
*/
```
`runDefaultHardhatTests` will run the default Hardhat test command and use the default genesis path. If you want to use a different test command and genesis path than the defaults, you can use the `utils.CreateSubnet` and `utils.RunTestCMD`. See how they were used with default params [here](https://github.com/ava-labs/subnet-evm/blob/helloworld-official-tutorial-v2/tests/utils/subnet.go#L113)
You should copy and paste the ginkgo `It` node and update from `{your_precompile}` to `hello_world`. The string passed in to `utils.RunDefaultHardhatTests(ctx, "your_precompile")` will be used to find both the HardHat test file to execute and the genesis file, which is why you need to use the same name for both.
After modifying the `It` node, it should look like the following (you can copy and paste this directly if you prefer):
```go
ginkgo.It("hello world", ginkgo.Label("Precompile"), ginkgo.Label("HelloWorld"), func() {
ctx, cancel := context.WithTimeout(context.Background(), time.Minute)
defer cancel()
blockchainID := subnetsSuite.GetBlockchainID("hello_world")
runDefaultHardhatTests(ctx, blockchainID, "hello_world")
})
```
Now that we've set up the new ginkgo test, we can run the ginkgo test that we want by using the `GINKGO_LABEL_FILTER`. This environment variable is passed as a flag to Ginkgo in `./scripts/run_ginkgo.sh` and restricts what tests will run to only the tests with a matching label.
## Running E2E Tests
Before we start testing, we will need to build the AvalancheGo binary and the custom Subnet-EVM binary.
Precompile-EVM bundles Subnet-EVM and runs it under the hood in the [`plugins/main.go`](https://github.com/ava-labs/precompile-evm/blob/hello-world-example/plugin/main.go#L24). Meaning that Precompile-EVM binary works the same way as Subnet-EVM binary. Precompile-EVM repo has also same scripts and the build process as Subnet-EVM. Following steps also apply to Precompile-EVM.
You should have cloned [AvalancheGo](https://github.com/ava-labs/avalanchego) within your `$GOPATH` in the [Background and Requirements](/docs/virtual-machines/custom-precompiles/background-requirements) section, so you can build AvalancheGo with the following command:
```bash
cd $GOPATH/src/github.com/ava-labs/avalanchego
./scripts/build.sh
```
Once you've built AvalancheGo, you can confirm that it was successful by printing the version:
```bash
./build/avalanchego --version
```
This should print something like the following (if you are running AvalancheGo v1.9.7):
```bash
avalanchego/1.11.0 [database=v1.4.5, rpcchainvm=33, commit=c60f7d2dd10c87f57382885b59d6fb2c763eded7, go=1.21.7]
```
This path will be used later as the environment variable `AVALANCHEGO_EXEC_PATH` in the network runner.
Please note that the RPCChainVM version of AvalancheGo and Subnet-EVM must match.
Once we've built AvalancheGo, we can navigate back to the repo and build the binary:
```bash
cd $GOPATH/src/github.com/ava-labs/subnet-evm
./scripts/build.sh
```
This will build the Subnet-EVM binary and place it in AvalancheGo's `build/plugins` directory by default at the file path: `$GOPATH/src/github.com/ava-labs/avalanchego/build/plugins/srEXiWaHuhNyGwPUi444Tu47ZEDwxTWrbQiuD7FmgSAQ6X7Dy`
To confirm that the Subnet-EVM binary is compatible with AvalancheGo, you can run the same version command and confirm the RPCChainVM version matches:
```bash
$GOPATH/src/github.com/ava-labs/avalanchego/build/plugins/srEXiWaHuhNyGwPUi444Tu47ZEDwxTWrbQiuD7FmgSAQ6X7Dy --version
```
This should give similar output:
```bash
Subnet-EVM/v0.6.1 [AvalancheGo=v1.11.1, rpcchainvm=33]
```
```bash
cd $GOPATH/src/github.com/ava-labs/precompile-evm
./scripts/build.sh
```
This will build the Precompile-EVM binary and place it in AvalancheGo's `build/plugins` directory by default at the file path: `$GOPATH/src/github.com/ava-labs/avalanchego/build/plugins/srEXiWaHuhNyGwPUi444Tu47ZEDwxTWrbQiuD7FmgSAQ6X7Dy`
To confirm that the Precompile-EVM binary is compatible with AvalancheGo, you can run the same version command and confirm the RPCChainVM version matches:
```bash
$GOPATH/src/github.com/ava-labs/avalanchego/build/plugins/srEXiWaHuhNyGwPUi444Tu47ZEDwxTWrbQiuD7FmgSAQ6X7Dy --version
```
This should give similar output:
```bash
Precompile-EVM/v0.2.0 Subnet-EVM/v0.6.1 [AvalancheGo=v1.11.1, rpcchainvm=33]
```
If the RPCChainVM Protocol version printed out does not match the one used in AvalancheGo then Subnet-EVM will not be able to talk to AvalancheGo and the blockchain will not start. You can find the compatibility table for AvalancheGo and Subnet-EVM [here](https://github.com/ava-labs/subnet-evm#avalanchego-compatibility).
The `build/plugins` directory will later be used as the `AVALANCHEGO_PLUGIN_PATH`.
### Running Ginkgo Tests
To run ONLY the HelloWorld precompile test, run the command:
```bash
cd $GOPATH/src/github.com/ava-labs/subnet-evm
```
```bash
cd $GOPATH/src/github.com/ava-labs/precompile-evm
```
use `GINKGO_LABEL_FILTER` env var to filter the test:
```bash
GINKGO_LABEL_FILTER=HelloWorld ./scripts/run_ginkgo.sh
```
You will first see the node starting up in the `BeforeSuite` section of the precompile test:
```bash
GINKGO_LABEL_FILTER=HelloWorld ./scripts/run_ginkgo.sh
# output
Using branch: hello-world-tutorial-walkthrough
building precompile.test
# github.com/ava-labs/subnet-evm/tests/precompile.test
ld: warning: could not create compact unwind for _blst_sha256_block_data_order: does not use RBP or RSP based frame
Compiled precompile.test
# github.com/ava-labs/subnet-evm/tests/load.test
ld: warning: could not create compact unwind for _blst_sha256_block_data_order: does not use RBP or RSP based frame
Compiled load.test
Running Suite: subnet-evm precompile ginkgo test suite - /Users/avalabs/go/src/github.com/ava-labs/subnet-evm
===================================================================================================================
Random Seed: 1674833631
Will run 1 of 7 specs
------------------------------
[BeforeSuite]
/Users/avalabs/go/src/github.com/ava-labs/subnet-evm/tests/precompile/precompile_test.go:31
> Enter [BeforeSuite] TOP-LEVEL - /Users/avalabs/go/src/github.com/ava-labs/subnet-evm/tests/precompile/precompile_test.go:31 @ 01/27/23 10:33:51.001
INFO [01-27|10:33:51.002] Starting AvalancheGo node wd=/Users/avalabs/go/src/github.com/ava-labs/subnet-evm
INFO [01-27|10:33:51.002] Executing cmd="./scripts/run.sh "
[streaming output] Using branch: hello-world-tutorial-walkthrough
...
[BeforeSuite] PASSED [15.002 seconds]
```
After the `BeforeSuite` completes successfully, it will skip all but the `HelloWorld` labeled precompile test:
```bash
S [SKIPPED]
[Precompiles]
/Users/avalabs/go/src/github.com/ava-labs/subnet-evm/tests/precompile/solidity/suites.go:26
contract native minter [Precompile, ContractNativeMinter]
/Users/avalabs/go/src/github.com/ava-labs/subnet-evm/tests/precompile/solidity/suites.go:29
------------------------------
S [SKIPPED]
[Precompiles]
/Users/avalabs/go/src/github.com/ava-labs/subnet-evm/tests/precompile/solidity/suites.go:26
tx allow list [Precompile, TxAllowList]
/Users/avalabs/go/src/github.com/ava-labs/subnet-evm/tests/precompile/solidity/suites.go:36
------------------------------
...
Combined output:
Compiling 2 files with 0.8.0
Compilation finished successfully
ExampleHelloWorldTest
✓ should gets default hello world (4057ms)
✓ should not set greeting before enabled (4067ms)
✓ should set and get greeting with enabled account (4074ms)
3 passing (33s)
< Exit [It] hello world - /Users/avalabs/go/src/github.com/ava-labs/subnet-evm/tests/precompile/solidity/suites.go:64 @ 01/27/23 10:34:17.484 (11.48s)
• [11.480 seconds]
------------------------------
```
Finally, you will see the load test being skipped as well:
```bash
Running Suite: subnet-evm small load simulator test suite - /Users/avalabs/go/src/github.com/ava-labs/subnet-evm
======================================================================================================================
Random Seed: 1674833658
Will run 0 of 1 specs
S [SKIPPED]
[Load Simulator]
/Users/avalabs/go/src/github.com/ava-labs/subnet-evm/tests/load/load_test.go:49
basic subnet load test [load]
/Users/avalabs/go/src/github.com/ava-labs/subnet-evm/tests/load/load_test.go:50
------------------------------
Ran 0 of 1 Specs in 0.000 seconds
SUCCESS! -- 0 Passed | 0 Failed | 0 Pending | 1 Skipped
PASS
```
Looks like the tests are passing!
If your tests failed, please retrace your steps. Most likely the error is that the precompile was not enabled and some code is missing. Try running `npm install` in the contracts directory to ensure that hardhat and other packages are installed.
You may also use the [official tutorial implementation](https://github.com/ava-labs/subnet-evm/tree/helloworld-official-tutorial-v2) to double-check your work as well.
# Custom Precompiles (/docs/virtual-machines/custom-precompiles)
---
title: Custom Precompiles
description: In this tutorial, we are going to walk through how we can generate a stateful precompile from scratch. Before we start, let's brush up on what a precompile is, what a stateful precompile is, and why this is extremely useful.
---
## Background
### Precompiled Contracts
Ethereum uses precompiles to efficiently implement cryptographic primitives within the EVM instead of re-implementing the same primitives in Solidity. The following precompiles are currently included: ecrecover, sha256, blake2f, ripemd-160, Bn256Add, Bn256Mul, Bn256Pairing, the identity function, and modular exponentiation.
We can see these [precompile](https://github.com/ethereum/go-ethereum/blob/v1.11.1/core/vm/contracts.go#L82) mappings from address to function here in the Ethereum VM:
```go
// PrecompiledContractsBerlin contains the default set of pre-compiled Ethereum
// contracts used in the Berlin release.
var PrecompiledContractsBerlin = map[common.Address]PrecompiledContract{
common.BytesToAddress([]byte{1}): &ecrecover{},
common.BytesToAddress([]byte{2}): &sha256hash{},
common.BytesToAddress([]byte{3}): &ripemd160hash{},
common.BytesToAddress([]byte{4}): &dataCopy{},
common.BytesToAddress([]byte{5}): &bigModExp{eip2565: true},
common.BytesToAddress([]byte{6}): &bn256AddIstanbul{},
common.BytesToAddress([]byte{7}): &bn256ScalarMulIstanbul{},
common.BytesToAddress([]byte{8}): &bn256PairingIstanbul{},
common.BytesToAddress([]byte{9}): &blake2F{},
}
```
These precompile addresses start from `0x0000000000000000000000000000000000000001` and increment by 1.
A [precompile](https://github.com/ava-labs/subnet-evm/blob/helloworld-official-tutorial-v2/core/vm/contracts.go#L54-L57) follows this interface:
```go
// PrecompiledContract is the basic interface for native Go contracts. The implementation
// requires a deterministic gas count based on the input size of the Run method of the
// contract.
type PrecompiledContract interface {
RequiredGas(input []byte) uint64 // RequiredPrice calculates the contract gas use
Run(input []byte) ([]byte, error) // Run runs the precompiled contract
}
```
Here is an example of the [sha256 precompile](https://github.com/ava-labs/subnet-evm/blob/helloworld-official-tutorial-v2/core/vm/contracts.go#L237-L250) function.
```go
type sha256hash struct{}
// RequiredGas returns the gas required to execute the pre-compiled contract.
//
// This method does not require any overflow checking as the input size gas costs
// required for anything significant is so high it's impossible to pay for.
func (c *sha256hash) RequiredGas(input []byte) uint64 {
return uint64(len(input)+31)/32*params.Sha256PerWordGas + params.Sha256BaseGas
}
func (c *sha256hash) Run(input []byte) ([]byte, error) {
h := sha256.Sum256(input)
return h[:], nil
}
```
The CALL opcode (CALL, STATICCALL, DELEGATECALL, and CALLCODE) allows us to invoke this precompile.
The function signature of CALL in the EVM is as follows:
```go
Call(
caller ContractRef,
addr common.Address,
input []byte,
gas uint64,
value *big.Int,
)(ret []byte, leftOverGas uint64, err error)
```
Precompiles are a shortcut to execute a function implemented by the EVM itself, rather than an actual contract. A precompile is associated with a fixed address defined in the EVM. There is no byte code associated with that address.
When a precompile is called, the EVM checks if the input address is a precompile address, and if so it executes the precompile. Otherwise, it loads the smart contract at the input address and runs it on the EVM interpreter with the specified input data.
### Stateful Precompiled Contracts
A stateful precompile builds on a precompile in that it adds state access. Stateful precompiles are not available in the default EVM, and are specific to Avalanche EVMs such as [Coreth](https://github.com/ava-labs/coreth) and [Subnet-EVM](https://github.com/ava-labs/subnet-evm).
A stateful precompile follows this [interface](https://github.com/ava-labs/subnet-evm/blob/helloworld-official-tutorial-v2/precompile/contract/interfaces.go#L17-L20):
```go
// StatefulPrecompiledContract is the interface for executing a precompiled contract
type StatefulPrecompiledContract interface {
// Run executes the precompiled contract.
Run(accessibleState PrecompileAccessibleState,
caller common.Address,
addr common.Address,
input []byte,
suppliedGas uint64,
readOnly bool)
(ret []byte, remainingGas uint64, err error)
}
```
A stateful precompile injects state access through the `PrecompileAccessibleState` interface to provide access to the EVM state including the ability to modify balances and read/write storage.
This way we can provide even more customization of the EVM through Stateful Precompiles than we can with the original precompile interface!
### AllowList
The AllowList enables a precompile to enforce permissions on addresses. The AllowList is not a contract itself, but a helper structure to provide a control mechanism for wrapping contracts. It provides an `AllowListConfig` to the precompile so that it can take an initial configuration from genesis/upgrade. It also provides functions to set/read the permissions. In this tutorial, we used `IAllowList` interface to provide permission control to the `HelloWorld` precompile. `IAllowList` is defined in Subnet-EVM under [`./contracts/contracts/interfaces/IAllowList.sol`](https://github.com/ava-labs/subnet-evm/blob/helloworld-official-tutorial-v2/contracts/contracts/interfaces/IAllowList.sol). The interface is as follows:
```go
//SPDX-License-Identifier: MIT
pragma solidity ^0.8.0;
interface IAllowList {
event RoleSet(
uint256 indexed role,
address indexed account,
address indexed sender,
uint256 oldRole
);
// Set [addr] to have the admin role over the precompile contract.
function setAdmin(address addr) external;
// Set [addr] to be enabled on the precompile contract.
function setEnabled(address addr) external;
// Set [addr] to have the manager role over the precompile contract.
function setManager(address addr) external;
// Set [addr] to have no role for the precompile contract.
function setNone(address addr) external;
// Read the status of [addr].
function readAllowList(address addr) external view returns (uint256 role);
}
```
You can find more information about the AllowList interface [here](/docs/avalanche-l1s/upgrade/customize-avalanche-l1#allowlist-interface).
# Deploying Your Precompile (/docs/virtual-machines/custom-precompiles/precompile-deployment)
---
title: Deploying Your Precompile
description: Now that we have defined our precompile, let's deploy it to a local network.
---
We made it! Everything works in our Ginkgo tests, and now we want to spin up a local network with the Hello World precompile activated.
Start the server in a terminal in a new tab using avalanche-network-runner. Please check out [this link](/docs/tooling/avalanche-network-runner/introduction) for more information on Avalanche Network Runner, how to download it, and how to use it. The server will be in "listening" mode waiting for API calls.
We will start the server from the Subnet-EVM directory so that we can use a relative file path to the genesis JSON file:
```bash
cd $GOPATH/src/github.com/ava-labs/subnet-evm
```
```bash
cd $GOPATH/src/github.com/ava-labs/precompile-evm
```
Then run ANR:
```bash
avalanche-network-runner server \
--log-level debug \
--port=":8080" \
--grpc-gateway-port=":8081"
```
Since we already compiled AvalancheGo and Subnet-EVM/Precompile-EVM in a previous step, we should have the AvalancheGo and Subnet-EVM binaries ready to go.
We can now set the following paths. `AVALANCHEGO_EXEC_PATH` points to the latest AvalancheGo binary we have just built. `AVALANCHEGO_PLUGIN_PATH` points to the plugins path which should have the Subnet-EVM binary we have just built:
```bash
export AVALANCHEGO_EXEC_PATH="${GOPATH}/src/github.com/ava-labs/avalanchego/build/avalanchego"
export AVALANCHEGO_PLUGIN_PATH="${HOME}/.avalanchego/plugins"
```
The following command will "issue requests" to the server we just spun up. We can use avalanche-network-runner to spin up some nodes that run the latest version of Subnet-EVM:
```bash
avalanche-network-runner control start \
--log-level debug \
--endpoint="0.0.0.0:8080" \
--number-of-nodes=5 \
--avalanchego-path ${AVALANCHEGO_EXEC_PATH} \
--plugin-dir ${AVALANCHEGO_PLUGIN_PATH} \
--blockchain-specs '[{"vm_name": "subnetevm", "genesis": "./tests/precompile/genesis/hello_world.json"}]'
```
We can look at the server terminal tab and see it booting up the local network. If the network startup is successful then you should see something like this:
```bash
[blockchain RPC for "srEXiWaHuhNyGwPUi444Tu47ZEDwxTWrbQiuD7FmgSAQ6X7Dy"] "http://127.0.0.1:9650/ext/bc/2jDWMrF9yKK8gZfJaaaSfACKeMasiNgHmuZip5mWxUfhKaYoEU"
[blockchain RPC for "srEXiWaHuhNyGwPUi444Tu47ZEDwxTWrbQiuD7FmgSAQ6X7Dy"] "http://127.0.0.1:9652/ext/bc/2jDWMrF9yKK8gZfJaaaSfACKeMasiNgHmuZip5mWxUfhKaYoEU"
[blockchain RPC for "srEXiWaHuhNyGwPUi444Tu47ZEDwxTWrbQiuD7FmgSAQ6X7Dy"] "http://127.0.0.1:9654/ext/bc/2jDWMrF9yKK8gZfJaaaSfACKeMasiNgHmuZip5mWxUfhKaYoEU"
[blockchain RPC for "srEXiWaHuhNyGwPUi444Tu47ZEDwxTWrbQiuD7FmgSAQ6X7Dy"] "http://127.0.0.1:9656/ext/bc/2jDWMrF9yKK8gZfJaaaSfACKeMasiNgHmuZip5mWxUfhKaYoEU"
[blockchain RPC for "srEXiWaHuhNyGwPUi444Tu47ZEDwxTWrbQiuD7FmgSAQ6X7Dy"] "http://127.0.0.1:9658/ext/bc/2jDWMrF9yKK8gZfJaaaSfACKeMasiNgHmuZip5mWxUfhKaYoEU"
```
This shows the extension to the API server on AvalancheGo that's specific to the Subnet-EVM Blockchain instance. To interact with it, you will want to append the `/rpc` extension, which will supply the standard Ethereum API calls.
For example, you can use the RPC URL: `http://127.0.0.1:9650/ext/bc/2jDWMrF9yKK8gZfJaaaSfACKeMasiNgHmuZip5mWxUfhKaYoEU/rpc`
## Maintenance
You should always keep your fork up to date with the latest changes in the official Subnet-EVM repo. If you have forked the Subnet-EVM repo, there could be conflicts and you may need to manually resolve them.
If you used Precompile-EVM, you can update your repo by bumping Subnet-EVM versions in [`go.mod`](https://github.com/ava-labs/precompile-evm/blob/hello-world-example/go.mod#L7) and [`version.sh`](https://github.com/ava-labs/precompile-evm/blob/hello-world-example/scripts/versions.sh#L4)
## Conclusion
We have now created a stateful precompile from scratch with the precompile generation tool. We hope you had fun and learned a little more about the Subnet-EVM. Now that you have created a simple stateful precompile, we urge you to create one of your own.
If you have an idea for a stateful precompile that may be useful to the community, feel free to create a fork of [Subnet-EVM](https://github.com/ava-labs/subnet-evm) and create a pull request.
# Complex Golang VM (/docs/virtual-machines/golang-vms/complex-golang-vm)
---
title: Complex Golang VM
description: In this tutorial, we'll walk through how to build a virtual machine by referencing the BlobVM.
---
The [BlobVM](https://github.com/ava-labs/blobvm) is a virtual machine that can be used to implement a decentralized key-value store. A blob (shorthand for "binary large object") is an arbitrary piece of data.
BlobVM stores a key-value pair by breaking it apart into multiple chunks stored with their hashes as their keys in the blockchain. A root key-value pair has references to these chunks for lookups. By default, the maximum chunk size is set to 200 KiB.
## Components
A VM defines how a blockchain should be built. A block is populated with a set of transactions which mutate the state of the blockchain when executed. When a block with a set of transactions is applied to a given state, a state transition occurs by executing all of the transactions in the block in-order and applying it to the previous block of the blockchain. By executing a series of blocks chronologically, anyone can verify and reconstruct the state of the blockchain at an arbitrary point in time.
The BlobVM repository has a few components to handle the lifecycle of tasks from a transaction being issued to a block being accepted across the network:
- **Transaction**: A state transition
- **Mempool**: Stores pending transactions that haven't been finalized yet
- **Network**: Propagates transactions from the mempool other nodes in the network
- **Block**: Defines the block format, how to verify it, and how it should be accepted or rejected across the network
- **Block Builder**: Builds blocks by including transactions from the mempool
- **Virtual Machine**: Application-level logic. Implements the VM interface needed to interact with Avalanche consensus and defines the blueprint for the blockchain.
- **Service**: Exposes APIs so users can interact with the VM
- **Factory**: Used to initialize the VM
## Lifecycle of a Transaction
A VM will often times expose a set of APIs so users can interact with the it. In the blockchain, blocks can contain a set of transactions which mutate the blockchain's state. Let's dive into the lifecycle of a transaction from its issuance to its finalization on the blockchain.
- A user makes an API request to `service.IssueRawTx` to issue their transaction. This API will deserialize the user's transaction and forward it to the VM
- The transaction is submitted to the VM which is then added to the VM's mempool
- The VM asynchronously periodically gossips new transactions in its mempool to other nodes in the network so they can learn about them
- The VM sends the Avalanche consensus engine a message to indicate that it has transactions in the mempool that are ready to be built into a block
- The VM proposes the block with to consensus
- Consensus verifies that the block is valid and well-formed
- Consensus gets the network to vote on whether the block should be accepted or rejected. If a block is rejected, its transactions are reclaimed by the mempool so they can be included in a future block. If a block is accepted, it's finalized by writing it to the blockchain.
## Coding the Virtual Machine
We'll dive into a few of the packages that are in the The BlobVM repository to learn more about how they work:
1. [`vm`](https://github.com/ava-labs/blobvm/tree/master/vm)
- `block_builder.go`
- `chain_vm.go`
- `network.go`
- `service.go`
- `vm.go`
2. [`chain`](https://github.com/ava-labs/blobvm/tree/master/chain)
- `unsigned_tx.go`
- `base_tx.go`
- `transfer_tx.go`
- `set_tx.go`
- `tx.go`
- `block.go`
- `mempool.go`
- `storage.go`
- `builder.go`
3. [`mempool`](https://github.com/ava-labs/blobvm/tree/master/mempool)
- `mempool.go`
### Transactions
The state the blockchain can only be mutated by getting the network to accept a signed transaction. A signed transaction contains the transaction to be executed alongside the signature of the issuer. The signature is required to cryptographically verify the sender's identity. A VM can define an arbitrary amount of unique transactions types to support different operations on the blockchain. The BlobVM implements two different transactions types:
- [TransferTx](https://github.com/ava-labs/blobvm/blob/master/chain/transfer_tx.go) - Transfers coins between accounts.
- [SetTx](https://github.com/ava-labs/blobvm/blob/master/chain/set_tx.go) - Stores a key-value pair on the blockchain.
#### UnsignedTransaction
All transactions in the BlobVM implement the common [`UnsignedTransaction`](https://github.com/ava-labs/blobvm/blob/master/chain/unsigned_tx.go) interface, which exposes shared functionality for all transaction types.
```go
type UnsignedTransaction interface {
Copy() UnsignedTransaction
GetBlockID() ids.ID
GetMagic() uint64
GetPrice() uint64
SetBlockID(ids.ID)
SetMagic(uint64)
SetPrice(uint64)
FeeUnits(*Genesis) uint64 // number of units to mine tx
LoadUnits(*Genesis) uint64 // units that should impact fee rate
ExecuteBase(*Genesis) error
Execute(*TransactionContext) error
TypedData() *tdata.TypedData
Activity() *Activity
}
```
#### BaseTx
Common functionality and metadata for transaction types are implemented by [`BaseTx`](https://github.com/ava-labs/blobvm/blob/master/chain/base_tx.go).
- [`SetBlockID`](https://github.com/ava-labs/blobvm/blob/master/chain/base_tx.go#L26) sets the transaction's block ID.
- [`GetBlockID`](https://github.com/ava-labs/blobvm/blob/master/chain/base_tx.go#L22) returns the transaction's block ID.
- [`SetMagic`](https://github.com/ava-labs/blobvm/blob/master/chain/base_tx.go#L34) sets the magic number. The magic number is used to differentiate chains to prevent replay attacks
- [`GetMagic`](https://github.com/ava-labs/blobvm/blob/master/chain/base_tx.go#L30) returns the magic number. Magic number is defined in genesis.
- [`SetPrice`](https://github.com/ava-labs/blobvm/blob/master/chain/base_tx.go#L42) sets the price per fee unit for this transaction.
- [`GetPrice`](https://github.com/ava-labs/blobvm/blob/master/chain/base_tx.go#L38) returns the price for this transaction.
- [`FeeUnits`](https://github.com/ava-labs/blobvm/blob/master/chain/base_tx.go#L59) returns the fee units this transaction will consume.
- [`LoadUnits`](https://github.com/ava-labs/blobvm/blob/master/chain/base_tx.go#L63) identical to `FeeUnits`
- [`ExecuteBase`](https://github.com/ava-labs/blobvm/blob/master/chain/base_tx.go#L46) executes common validation checks across different transaction types. This validates the transaction contains a valid block ID, magic number, and gas price as defined by genesis.
#### TransferTx
[`TransferTx`](https://github.com/ava-labs/blobvm/blob/master/chain/transfer_tx.go#L16) supports the transfer of tokens from one account to another.
```go
type TransferTx struct {
*BaseTx `serialize:"true" json:"baseTx"`
// To is the recipient of the [Units].
To common.Address `serialize:"true" json:"to"`
// Units are transferred to [To].
Units uint64 `serialize:"true" json:"units"`
}
```
`TransferTx` embeds `BaseTx` to avoid re-implementing common operations with other transactions, but implements its own [`Execute`](https://github.com/ava-labs/blobvm/blob/master/chain/transfer_tx.go#L26) to support token transfers.
This performs a few checks to ensure that the transfer is valid before transferring the tokens between the two accounts.
```go
func (t *TransferTx) Execute(c *TransactionContext) error {
// Must transfer to someone
if bytes.Equal(t.To[:], zeroAddress[:]) {
return ErrNonActionable
}
// This prevents someone from transferring to themselves.
if bytes.Equal(t.To[:], c.Sender[:]) {
return ErrNonActionable
}
if t.Units == 0 {
return ErrNonActionable
}
if _, err := ModifyBalance(c.Database, c.Sender, false, t.Units); err != nil {
return err
}
if _, err := ModifyBalance(c.Database, t.To, true, t.Units); err != nil {
return err
}
return nil
}
```
#### SetTx
`SetTx` is used to assign a value to a key.
```go
type SetTx struct {
*BaseTx `serialize:"true" json:"baseTx"`
Value []byte `serialize:"true" json:"value"`
}
```
`SetTx` implements its own [`FeeUnits`](https://github.com/ava-labs/blobvm/blob/master/chain/set_tx.go#L48) method to compensate the network according to the size of the blob being stored.
```go
func (s *SetTx) FeeUnits(g *Genesis) uint64 {
// We don't subtract by 1 here because we want to charge extra for any
// value-based interaction (even if it is small or a delete).
return s.BaseTx.FeeUnits(g) + valueUnits(g, uint64(len(s.Value)))
}
```
`SetTx`'s [`Execute`](https://github.com/ava-labs/blobvm/blob/master/chain/set_tx.go#L21) method performs a few safety checks to validate that the blob meets the size constraints enforced by genesis and doesn't overwrite an existing key before writing it to the blockchain.
```go
func (s *SetTx) Execute(t *TransactionContext) error {
g := t.Genesis
switch {
case len(s.Value) == 0:
return ErrValueEmpty
case uint64(len(s.Value)) > g.MaxValueSize:
return ErrValueTooBig
}
k := ValueHash(s.Value)
// Do not allow duplicate value setting
_, exists, err := GetValueMeta(t.Database, k)
if err != nil {
return err
}
if exists {
return ErrKeyExists
}
return PutKey(t.Database, k, &ValueMeta{
Size: uint64(len(s.Value)),
TxID: t.TxID,
Created: t.BlockTime,
})
}
```
#### Signed Transaction
The unsigned transactions mentioned previously can't be issued to the network without first being signed. BlobVM implements signed transactions by embedding the unsigned transaction alongside its signature in [`Transaction`](https://github.com/ava-labs/blobvm/blob/master/chain/tx.go). In BlobVM, a signature is defined as the [ECDSA signature](https://en.wikipedia.org/wiki/Elliptic_Curve_Digital_Signature_Algorithm) of the issuer's private key of the [KECCAK256](https://keccak.team/keccak.html) hash of the unsigned transaction's data ([digest hash](https://eips.ethereum.org/EIPS/eip-712)).
```go
type Transaction struct {
UnsignedTransaction `serialize:"true" json:"unsignedTransaction"`
Signature []byte `serialize:"true" json:"signature"`
digestHash []byte
bytes []byte
id ids.ID
size uint64
sender common.Address
}
```
The `Transaction` type wraps any unsigned transaction. When a `Transaction` is executed, it calls the `Execute` method of the underlying embedded `UnsignedTx` and performs the following sanity checks:
1. The underlying `UnsignedTx` must meet the requirements set by genesis. This includes checks to make sure that the transaction contains the correct magic number and meets the minimum gas price as defined by genesis
2. The transaction's block ID must be a recently accepted block
3. The transaction must not be a recently issued transaction
4. The issuer of the transaction must have enough gas
5. The transaction's gas price must be meet the next expected block's minimum gas price
6. The transaction must execute without error
If the transaction is successfully verified, it's submitted as a pending write to the blockchain.
```go
func (t *Transaction) Execute(g *Genesis, db database.Database, blk *StatelessBlock, context *Context) error {
if err := t.UnsignedTransaction.ExecuteBase(g); err != nil {
return err
}
if !context.RecentBlockIDs.Contains(t.GetBlockID()) {
// Hash must be recent to be any good
// Should not happen because of mempool cleanup
return ErrInvalidBlockID
}
if context.RecentTxIDs.Contains(t.ID()) {
// Tx hash must not be recently executed (otherwise could be replayed)
//
// NOTE: We only need to keep cached tx hashes around as long as the
// block hash referenced in the tx is valid
return ErrDuplicateTx
}
// Ensure sender has balance
if _, err := ModifyBalance(db, t.sender, false, t.FeeUnits(g)*t.GetPrice()); err != nil {
return err
}
if t.GetPrice() < context.NextPrice {
return ErrInsufficientPrice
}
if err := t.UnsignedTransaction.Execute(&TransactionContext{
Genesis: g,
Database: db,
BlockTime: uint64(blk.Tmstmp),
TxID: t.id,
Sender: t.sender,
}); err != nil {
return err
}
if err := SetTransaction(db, t); err != nil {
return err
}
return nil
}
```
##### Example
Let's walk through an example on how to issue a `SetTx` transaction to the BlobVM to write a key-value pair.
1. Create the unsigned transaction for `SetTx`
```go
utx := &chain.SetTx{
BaseTx: &chain.BaseTx{},
Value: []byte("data"),
}
utx.SetBlockID(lastAcceptedID)
utx.SetMagic(genesis.Magic)
utx.SetPrice(price + blockCost/utx.FeeUnits(genesis))
```
2. Calculate the [digest hash](https://github.com/ava-labs/blobvm/blob/master/chain/tx.go#L41) for the transaction.
```go
digest, err := chain.DigestHash(utx)
```
3. [Sign](https://github.com/ava-labs/blobvm/blob/master/chain/crypto.go#L17) the digest hash with the issuer's private key.
```go
signature, err := chain.Sign(digest, privateKey)
```
4. Create and initialize the new signed transaction.
```go
tx := chain.NewTx(utx, sig)
if err := tx.Init(g); err != nil {
return ids.Empty, 0, err
}
```
5. Issue the request with the client
```
txID, err = cli.IssueRawTx(ctx, tx.Bytes())
```
### Mempool
#### Overview
The [mempool](https://github.com/ava-labs/blobvm/blob/master/mempool/mempool.go) is a buffer of volatile memory that stores pending transactions. Transactions are stored in the mempool whenever a node learns about a new transaction either through gossip with other nodes or through an API call issued by a user.
The mempool is implemented as a min-max [heap](https://en.wikipedia.org/wiki/Heap_data_structure) ordered by each transaction's gas price. The mempool is created during the [initialization](https://github.com/ava-labs/blobvm/blob/master/vm/vm.go#L93) of VM.
```go
vm.mempool = mempool.New(vm.genesis, vm.config.MempoolSize)
```
Whenever a transaction is submitted to VM, it first gets initialized, verified, and executed locally. If the transaction looks valid, then it's added to the [mempool](https://github.com/ava-labs/blobvm/blob/master/vm/vm.go#L414).
#### Add Method
When a transaction is added to the mempool, [`Add`](https://github.com/ava-labs/blobvm/blob/master/mempool/mempool.go#L43) is called. This performs the following:
- Checks if the transaction being added already exists in the mempool or not
- The transaction is added to the min-max heap
- If the mempool's heap size is larger than the maximum configured value, then the lowest paying transaction is evicted
- The transaction is added to the list of transactions that are able to be gossiped to other peers
- A notification is sent through the in the `mempool.Pending` channel to indicate that the consensus engine should build a new block
### Block Builder
#### Overview
The [`TimeBuilder`](https://github.com/ava-labs/blobvm/blob/master/vm/block_builder.go) implementation for `BlockBuilder` acts as an intermediary notification service between the mempool and the consensus engine. It serves the following functions:
- Periodically gossips new transactions to other nodes in the network
- Periodically notifies the consensus engine that new transactions from the mempool are ready to be built into blocks
`TimeBuilder` and can exist in 3 states:
- `dontBuild` - There are no transactions in the mempool that are ready to be included in a block
- `building` - The consensus engine has been notified that it should build a block and there are currently transactions in the mempool that are eligible to be included into a block
- `mayBuild` - There are transactions in the mempool that are eligible to be included into a block, but the consensus engine has not been notified yet
#### Gossip Method
The [`Gossip`](https://github.com/ava-labs/blobvm/blob/master/vm/block_builder.go#L183) method initiates the gossip of new transactions from the mempool at periodically as defined by `vm.config.GossipInterval`.
#### Build Method
The [`Build`](https://github.com/ava-labs/blobvm/blob/master/vm/block_builder.go#L166) method consumes transactions from the mempool and signals the consensus engine when it's ready to build a block.
If the mempool signals the `TimeBuilder` that it has available transactions, `TimeBuilder` will signal consensus that the VM is ready to build a block by sending the consensus engine a `common.PendingTxs` message.
When the consensus engine receives the `common.PendingTxs` message it calls the VM's `BuildBlock` method. The VM will then build a block from eligible transactions in the mempool.
If there are still remaining transactions in the mempool after a block is built, then the `TimeBuilder` is put into the `mayBuild` state to indicate that there are still transactions that are eligible to be built into block, but the consensus engine isn't aware of it yet.
### Network
[Network](https://github.com/ava-labs/blobvm/blob/master/vm/network.go) handles the workflow of gossiping transactions from a node's mempool to other nodes in the network.
#### GossipNewTxs Method
`GossipNewTxs` sends a list of transactions to other nodes in the network. `TimeBuilder` calls the network's `GossipNewTxs` function to gossip new transactions in the mempool.
```go
func (n *PushNetwork) GossipNewTxs(newTxs []*chain.Transaction) error {
txs := []*chain.Transaction{}
// Gossip at most the target units of a block at once
for _, tx := range newTxs {
if _, exists := n.gossipedTxs.Get(tx.ID()); exists {
log.Debug("already gossiped, skipping", "txId", tx.ID())
continue
}
n.gossipedTxs.Put(tx.ID(), nil)
txs = append(txs, tx)
}
return n.sendTxs(txs)
}
```
Recently gossiped transactions are maintained in a cache to avoid DDoSing a node from repeated gossip failures.
Other nodes in the network will receive the gossiped transactions through their `AppGossip` handler. Once a gossip message is received, it's deserialized and the new transactions are submitted to the VM.
```go
func (vm *VM) AppGossip(nodeID ids.NodeID, msg []byte) error {
txs := make([]*chain.Transaction, 0)
if _, err := chain.Unmarshal(msg, &txs); err != nil {
return nil
}
// submit incoming gossip
log.Debug("AppGossip transactions are being submitted", "txs", len(txs))
if errs := vm.Submit(txs...); len(errs) > 0 {
for _, err := range errs {
}
}
return nil
}
```
### Block
Blocks go through a lifecycle of being proposed by a validator, verified, and decided by consensus. Upon acceptance, a block will be committed and will be finalized on the blockchain.
BlobVM implements two types of blocks, `StatefulBlock` and `StatelessBlock`.
#### StatefulBlock
A [`StatefulBlock`](https://github.com/ava-labs/blobvm/blob/master/chain/block.go#L27) contains strictly the metadata about the block that needs to be written to the database.
```go
type StatefulBlock struct {
Prnt ids.ID `serialize:"true" json:"parent"`
Tmstmp int64 `serialize:"true" json:"timestamp"`
Hght uint64 `serialize:"true" json:"height"`
Price uint64 `serialize:"true" json:"price"`
Cost uint64 `serialize:"true" json:"cost"`
AccessProof common.Hash `serialize:"true" json:"accessProof"`
Txs []*Transaction `serialize:"true" json:"txs"`
}
```
#### StatelessBlock
[StatelessBlock](https://github.com/ava-labs/blobvm/blob/master/chain/block.go#L40) is a superset of `StatefulBlock` and additionally contains fields that are needed to support block-level operations like verification and acceptance throughout its lifecycle in the VM.
```go
type StatelessBlock struct {
*StatefulBlock `serialize:"true" json:"block"`
id ids.ID
st choices.Status
t time.Time
bytes []byte
vm VM
children []*StatelessBlock
onAcceptDB *versiondb.Database
}
```
Let's have a look at the fields of StatelessBlock:
- `StatefulBlock`: The metadata about the block that will be written to the database upon acceptance
- `bytes`: The serialized form of the `StatefulBlock`.
- `id`: The Keccak256 hash of `bytes`.
- `st`: The status of the block in consensus (i.e `Processing`, `Accepted`, or `Rejected`)
- `children`: The children of this block
- `onAcceptDB`: The database this block should be written to upon acceptance.
When the consensus engine tries to build a block by calling the VM's `BuildBlock`, the VM calls the [`block.NewBlock`](https://github.com/ava-labs/blobvm/blob/master/chain/block.go#L53) function to get a new block that is a child of the currently preferred block.
```go
func NewBlock(vm VM, parent snowman.Block, tmstp int64, context *Context) *StatelessBlock {
return &StatelessBlock{
StatefulBlock: &StatefulBlock{
Tmstmp: tmstp,
Prnt: parent.ID(),
Hght: parent.Height() + 1,
Price: context.NextPrice,
Cost: context.NextCost,
},
vm: vm,
st: choices.Processing,
}
}
```
Some `StatelessBlock` fields like the block ID, byte representation, and timestamp aren't populated immediately. These are set during the `StatelessBlock`'s [`init`](https://github.com/ava-labs/blobvm/blob/master/chain/block.go#L113) method, which initializes these fields once the block has been populated with transactions.
```go
func (b *StatelessBlock) init() error {
bytes, err := Marshal(b.StatefulBlock)
if err != nil {
return err
}
b.bytes = bytes
id, err := ids.ToID(crypto.Keccak256(b.bytes))
if err != nil {
return err
}
b.id = id
b.t = time.Unix(b.StatefulBlock.Tmstmp, 0)
g := b.vm.Genesis()
for _, tx := range b.StatefulBlock.Txs {
if err := tx.Init(g); err != nil {
return err
}
}
return nil
}
```
To build the block, the VM will try to remove as many of the highest-paying transactions from the mempool to include them in the new block until the maximum block fee set by genesis is reached.
A block once built, can exist in two states:
1. Rejected: The block was not accepted by consensus. In this case, the mempool will reclaim the rejected block's transactions so they can be included in a future block.
2. Accepted: The block was accepted by consensus. In this case, we write the block to the blockchain by committing it to the database.
When the consensus engine receives the built block, it calls the block's [`Verify`](https://github.com/ava-labs/blobvm/blob/master/chain/block.go#L228) method to validate that the block is well-formed. In BlobVM, the following constraints are placed on valid blocks:
1. A block must contain at least one transaction and the block's timestamp must be within 10s into the future.
```go
if len(b.Txs) == 0 {
return nil, nil, ErrNoTxs
}
if b.Timestamp().Unix() >= time.Now().Add(futureBound).Unix() {
return nil, nil, ErrTimestampTooLate
}
```
2. The sum of the gas units consumed by the transactions in the block must not exceed the gas limit defined by genesis.
```go
blockSize := uint64(0)
for _, tx := range b.Txs {
blockSize += tx.LoadUnits(g)
if blockSize > g.MaxBlockSize {
return nil, nil, ErrBlockTooBig
}
}
```
3. The parent block of the proposed block must exist and have an earlier timestamp.
```go
parent, err := b.vm.GetStatelessBlock(b.Prnt)
if err != nil {
log.Debug("could not get parent", "id", b.Prnt)
return nil, nil, err
}
if b.Timestamp().Unix() < parent.Timestamp().Unix() {
return nil, nil, ErrTimestampTooEarly
}
```
4. The target block price and minimum gas price must meet the minimum enforced by the VM.
```go
context, err := b.vm.ExecutionContext(b.Tmstmp, parent)
if err != nil {
return nil, nil, err
}
if b.Cost != context.NextCost {
return nil, nil, ErrInvalidCost
}
if b.Price != context.NextPrice {
return nil, nil, ErrInvalidPrice
}
```
After the results of consensus are complete, the block is either accepted by committing the block to the database or rejected by returning the block's transactions into the mempool.
```go
// implements "snowman.Block.choices.Decidable"
func (b *StatelessBlock) Accept() error {
if err := b.onAcceptDB.Commit(); err != nil {
return err
}
for _, child := range b.children {
if err := child.onAcceptDB.SetDatabase(b.vm.State()); err != nil {
return err
}
}
b.st = choices.Accepted
b.vm.Accepted(b)
return nil
}
// implements "snowman.Block.choices.Decidable"
func (b *StatelessBlock) Reject() error {
b.st = choices.Rejected
b.vm.Rejected(b)
return nil
}
```
### API
[Service](https://github.com/ava-labs/blobvm/blob/master/vm/public_service.go) implements an API server so users can interact with the VM. The VM implements the interface method [`CreateHandlers`](https://github.com/ava-labs/blobvm/blob/master/vm/vm.go#L267) that exposes the VM's RPC API.
```go
func (vm *VM) CreateHandlers() (map[string]*common.HTTPHandler, error) {
apis := map[string]*common.HTTPHandler{}
public, err := newHandler(Name, &PublicService{vm: vm})
if err != nil {
return nil, err
}
apis[PublicEndpoint] = public
return apis, nil
}
```
One API that's exposed is [`IssueRawTx`](https://github.com/ava-labs/blobvm/blob/master/vm/public_service.go#L63) to allow users to issue transactions to the BlobVM. It accepts an `IssueRawTxArgs` that contains the transaction the user wants to issue and forwards it to the VM.
```go
func (svc *PublicService) IssueRawTx(_ *http.Request, args *IssueRawTxArgs, reply *IssueRawTxReply) error {
tx := new(chain.Transaction)
if _, err := chain.Unmarshal(args.Tx, tx); err != nil {
return err
}
// otherwise, unexported tx.id field is empty
if err := tx.Init(svc.vm.genesis); err != nil {
return err
}
reply.TxID = tx.ID()
errs := svc.vm.Submit(tx)
if len(errs) == 0 {
return nil
}
if len(errs) == 1 {
return errs[0]
}
return fmt.Errorf("%v", errs)
}
```
### Virtual Machine
We have learned about all the components used in the BlobVM. Most of these components are referenced in the `vm.go` file, which acts as the entry point for the consensus engine as well as users interacting with the blockchain.
For example, the engine calls `vm.BuildBlock()`, that in turn calls `chain.BuildBlock()`. Another example is when a user issues a raw transaction through service APIs, the `vm.Submit()` method is called.
Let's look at some of the important methods of `vm.go` that must be implemented:
#### Initialize Method
[Initialize](https://github.com/ava-labs/blobvm/blob/master/vm/vm.go#L93) is invoked by `avalanchego` when creating the blockchain. `avalanchego` passes some parameters to the implementing VM.
- `ctx` - Metadata about the VM's execution
- `dbManager` - The database that the VM can write to
- `genesisBytes` - The serialized representation of the genesis state of this VM
- `upgradeBytes` - The serialized representation of network upgrades
- `configBytes` - The serialized VM-specific [configuration](https://github.com/ava-labs/blobvm/blob/master/vm/config.go#L10)
- `toEngine` - The channel used to send messages to the consensus engine
- `fxs` - Feature extensions that attach to this VM
- `appSender` - Used to send messages to other nodes in the network
BlobVM upon initialization persists these fields in its own state to use them throughout the lifetime of its execution.
```go
// implements "snowmanblock.ChainVM.common.VM"
func (vm *VM) Initialize(
ctx *snow.Context,
dbManager manager.Manager,
genesisBytes []byte,
upgradeBytes []byte,
configBytes []byte,
toEngine chan<- common.Message,
_ []*common.Fx,
appSender common.AppSender,
) error {
log.Info("initializing blobvm", "version", version.Version)
// Load config
vm.config.SetDefaults()
if len(configBytes) > 0 {
if err := ejson.Unmarshal(configBytes, &vm.config); err != nil {
return fmt.Errorf("failed to unmarshal config %s: %w", string(configBytes), err)
}
}
vm.ctx = ctx
vm.db = dbManager.Current().Database
vm.activityCache = make([]*chain.Activity, vm.config.ActivityCacheSize)
// Init channels before initializing other structs
vm.stop = make(chan struct{})
vm.builderStop = make(chan struct{})
vm.doneBuild = make(chan struct{})
vm.doneGossip = make(chan struct{})
vm.appSender = appSender
vm.network = vm.NewPushNetwork()
vm.blocks = &cache.LRU{Size: blocksLRUSize}
vm.verifiedBlocks = make(map[ids.ID]*chain.StatelessBlock)
vm.toEngine = toEngine
vm.builder = vm.NewTimeBuilder()
// Try to load last accepted
has, err := chain.HasLastAccepted(vm.db)
if err != nil {
log.Error("could not determine if have last accepted")
return err
}
// Parse genesis data
vm.genesis = new(chain.Genesis)
if err := ejson.Unmarshal(genesisBytes, vm.genesis); err != nil {
log.Error("could not unmarshal genesis bytes")
return err
}
if err := vm.genesis.Verify(); err != nil {
log.Error("genesis is invalid")
return err
}
targetUnitsPerSecond := vm.genesis.TargetBlockSize / uint64(vm.genesis.TargetBlockRate)
vm.targetRangeUnits = targetUnitsPerSecond * uint64(vm.genesis.LookbackWindow)
log.Debug("loaded genesis", "genesis", string(genesisBytes), "target range units", vm.targetRangeUnits)
vm.mempool = mempool.New(vm.genesis, vm.config.MempoolSize)
if has { //nolint:nestif
blkID, err := chain.GetLastAccepted(vm.db)
if err != nil {
log.Error("could not get last accepted", "err", err)
return err
}
blk, err := vm.GetStatelessBlock(blkID)
if err != nil {
log.Error("could not load last accepted", "err", err)
return err
}
vm.preferred, vm.lastAccepted = blkID, blk
log.Info("initialized blobvm from last accepted", "block", blkID)
} else {
genesisBlk, err := chain.ParseStatefulBlock(
vm.genesis.StatefulBlock(),
nil,
choices.Accepted,
vm,
)
if err != nil {
log.Error("unable to init genesis block", "err", err)
return err
}
// Set Balances
if err := vm.genesis.Load(vm.db, vm.AirdropData); err != nil {
log.Error("could not set genesis allocation", "err", err)
return err
}
if err := chain.SetLastAccepted(vm.db, genesisBlk); err != nil {
log.Error("could not set genesis as last accepted", "err", err)
return err
}
gBlkID := genesisBlk.ID()
vm.preferred, vm.lastAccepted = gBlkID, genesisBlk
log.Info("initialized blobvm from genesis", "block", gBlkID)
}
vm.AirdropData = nil
}
```
After initializing its own state, BlobVM also starts asynchronous workers to build blocks and gossip transactions to the rest of the network.
```
{
go vm.builder.Build()
go vm.builder.Gossip()
return nil
}
```
#### GetBlock Method
[`GetBlock`](https://github.com/ava-labs/blobvm/blob/master/vm/vm.go#L318) returns the block with the provided ID. GetBlock will attempt to fetch the given block from the database, and return an non-nil error if it wasn't able to get it.
```go
func (vm *VM) GetBlock(id ids.ID) (snowman.Block, error) {
b, err := vm.GetStatelessBlock(id)
if err != nil {
log.Warn("failed to get block", "err", err)
}
return b, err
}
```
#### ParseBlock Method
[`ParseBlock`](https://github.com/ava-labs/blobvm/blob/master/vm/vm.go#L373) deserializes a block.
```go
func (vm *VM) ParseBlock(source []byte) (snowman.Block, error) {
newBlk, err := chain.ParseBlock(
source,
choices.Processing,
vm,
)
if err != nil {
log.Error("could not parse block", "err", err)
return nil, err
}
log.Debug("parsed block", "id", newBlk.ID())
// If we have seen this block before, return it with the most
// up-to-date info
if oldBlk, err := vm.GetBlock(newBlk.ID()); err == nil {
log.Debug("returning previously parsed block", "id", oldBlk.ID())
return oldBlk, nil
}
return newBlk, nil
}
```
#### BuildBlock Method
Avalanche consensus calls [`BuildBlock`](https://github.com/ava-labs/blobvm/blob/master/vm/vm.go#L397) when it receives a notification from the VM that it has pending transactions that are ready to be issued into a block.
```go
func (vm *VM) BuildBlock() (snowman.Block, error) {
log.Debug("BuildBlock triggered")
blk, err := chain.BuildBlock(vm, vm.preferred)
vm.builder.HandleGenerateBlock()
if err != nil {
log.Debug("BuildBlock failed", "error", err)
return nil, err
}
sblk, ok := blk.(*chain.StatelessBlock)
if !ok {
return nil, fmt.Errorf("unexpected snowman.Block %T, expected *StatelessBlock", blk)
}
log.Debug("BuildBlock success", "blkID", blk.ID(), "txs", len(sblk.Txs))
return blk, nil
}
```
#### SetPreference Method
[`SetPreference`](https://github.com/ava-labs/blobvm/blob/master/vm/vm.go#L457) sets the block ID preferred by this node. A node votes to accept or reject a block based on its current preference in consensus.
```go
func (vm *VM) SetPreference(id ids.ID) error {
log.Debug("set preference", "id", id)
vm.preferred = id
return nil
}
```
#### LastAccepted Method
[LastAccepted](https://github.com/ava-labs/blobvm/blob/master/vm/vm.go#L465) returns the block ID of the block that was most recently accepted by this node.
```go
func (vm *VM) LastAccepted() (ids.ID, error) {
return vm.lastAccepted.ID(), nil
}
```
### CLI
BlobVM implements a generic key-value store, but support to read and write arbitrary files into the BlobVM blockchain is implemented in the `blob-cli`
To write a file, BlobVM breaks apart an arbitrarily large file into many small chunks. Each chunk is submitted to the VM in a `SetTx`. A root key is generated which contains all of the hashes of the chunks.
```go
func Upload(
ctx context.Context, cli client.Client, priv *ecdsa.PrivateKey,
f io.Reader, chunkSize int,
) (common.Hash, error) {
hashes := []common.Hash{}
chunk := make([]byte, chunkSize)
shouldExit := false
opts := []client.OpOption{client.WithPollTx()}
totalCost := uint64(0)
uploaded := map[common.Hash]struct{}{}
for !shouldExit {
read, err := f.Read(chunk)
if errors.Is(err, io.EOF) || read == 0 {
break
}
if err != nil {
return common.Hash{}, fmt.Errorf("%w: read error", err)
}
if read < chunkSize {
shouldExit = true
chunk = chunk[:read]
// Use small file optimization
if len(hashes) == 0 {
break
}
}
k := chain.ValueHash(chunk)
if _, ok := uploaded[k]; ok {
color.Yellow("already uploaded k=%s, skipping", k)
} else if exists, _, _, err := cli.Resolve(ctx, k); err == nil && exists {
color.Yellow("already on-chain k=%s, skipping", k)
uploaded[k] = struct{}{}
} else {
tx := &chain.SetTx{
BaseTx: &chain.BaseTx{},
Value: chunk,
}
txID, cost, err := client.SignIssueRawTx(ctx, cli, tx, priv, opts...)
if err != nil {
return common.Hash{}, err
}
totalCost += cost
color.Yellow("uploaded k=%s txID=%s cost=%d totalCost=%d", k, txID, cost, totalCost)
uploaded[k] = struct{}{}
}
hashes = append(hashes, k)
}
r := &Root{}
if len(hashes) == 0 {
if len(chunk) == 0 {
return common.Hash{}, ErrEmpty
}
r.Contents = chunk
} else {
r.Children = hashes
}
rb, err := json.Marshal(r)
if err != nil {
return common.Hash{}, err
}
rk := chain.ValueHash(rb)
tx := &chain.SetTx{
BaseTx: &chain.BaseTx{},
Value: rb,
}
txID, cost, err := client.SignIssueRawTx(ctx, cli, tx, priv, opts...)
if err != nil {
return common.Hash{}, err
}
totalCost += cost
color.Yellow("uploaded root=%v txID=%s cost=%d totalCost=%d", rk, txID, cost, totalCost)
return rk, nil
}
```
#### Example 1
```bash
blob-cli set-file ~/Downloads/computer.gif -> 6fe5a52f52b34fb1e07ba90bad47811c645176d0d49ef0c7a7b4b22013f676c8
```
Given the root hash, a file can be looked up by deserializing all of its children chunk values and reconstructing the original file.
```go
// TODO: make multi-threaded
func Download(ctx context.Context, cli client.Client, root common.Hash, f io.Writer) error {
exists, rb, _, err := cli.Resolve(ctx, root)
if err != nil {
return err
}
if !exists {
return fmt.Errorf("%w:%v", ErrMissing, root)
}
var r Root
if err := json.Unmarshal(rb, &r); err != nil {
return err
}
// Use small file optimization
if contentLen := len(r.Contents); contentLen > 0 {
if _, err := f.Write(r.Contents); err != nil {
return err
}
color.Yellow("downloaded root=%v size=%fKB", root, float64(contentLen)/units.KiB)
return nil
}
if len(r.Children) == 0 {
return ErrEmpty
}
amountDownloaded := 0
for _, h := range r.Children {
exists, b, _, err := cli.Resolve(ctx, h)
if err != nil {
return err
}
if !exists {
return fmt.Errorf("%w:%s", ErrMissing, h)
}
if _, err := f.Write(b); err != nil {
return err
}
size := len(b)
color.Yellow("downloaded chunk=%v size=%fKB", h, float64(size)/units.KiB)
amountDownloaded += size
}
color.Yellow("download complete root=%v size=%fMB", root, float64(amountDownloaded)/units.MiB)
return nil
}
```
#### Example 2
```bash
blob-cli resolve-file 6fe5a52f52b34fb1e07ba90bad47811c645176d0d49ef0c7a7b4b22013f676c8 computer_copy.gif
```
## Conclusion
This documentation covers concepts about Virtual Machine by walking through a VM that implements a decentralized key-value store.
You can learn more about the BlobVM by referencing the [README](https://github.com/ava-labs/blobvm/blob/master/README.md) in the GitHub repository.
# Simple Golang VM (/docs/virtual-machines/golang-vms/simple-golang-vm)
---
title: Simple Golang VM
description: In this tutorial, we will learn how to build a virtual machine by referencing the TimestampVM.
---
In this tutorial, we'll create a very simple VM called the [TimestampVM](https://github.com/ava-labs/timestampvm/tree/v1.2.1). Each block in the TimestampVM's blockchain contains a strictly increasing timestamp when the block was created and a 32-byte payload of data.
Such a server is useful because it can be used to prove a piece of data existed at the time the block was created. Suppose you have a book manuscript, and you want to be able to prove in the future that the manuscript exists today. You can add a block to the blockchain where the block's payload is a hash of your manuscript. In the future, you can prove that the manuscript existed today by showing that the block has the hash of your manuscript in its payload (this follows from the fact that finding the pre-image of a hash is impossible).
## TimestampVM Implementation
Now we know the interface our VM must implement and the libraries we can use to build a VM.
Let's write our VM, which implements `block.ChainVM` and whose blocks implement `snowman.Block`. You can also follow the code in the [TimestampVM repository](https://github.com/ava-labs/timestampvm/tree/main).
### Codec
`Codec` is required to encode/decode the block into byte representation. TimestampVM uses the default codec and manager.
```go title="timestampvm/codec.go"
const (
// CodecVersion is the current default codec version
CodecVersion = 0
)
// Codecs do serialization and deserialization
var (
Codec codec.Manager
)
func init() {
// Create default codec and manager
c := linearcodec.NewDefault()
Codec = codec.NewDefaultManager()
// Register codec to manager with CodecVersion
if err := Codec.RegisterCodec(CodecVersion, c); err != nil {
panic(err)
}
}
```
### State
The `State` interface defines the database layer and connections. Each VM should define their own database methods. `State` embeds the `BlockState` which defines block-related state operations.
```go title="timestampvm/state.go"
var (
// These are prefixes for db keys.
// It's important to set different prefixes for each separate database objects.
singletonStatePrefix = []byte("singleton")
blockStatePrefix = []byte("block")
_ State = &state{}
)
// State is a wrapper around avax.SingleTonState and BlockState
// State also exposes a few methods needed for managing database commits and close.
type State interface {
// SingletonState is defined in avalanchego,
// it is used to understand if db is initialized already.
avax.SingletonState
BlockState
Commit() error
Close() error
}
type state struct {
avax.SingletonState
BlockState
baseDB *versiondb.Database
}
func NewState(db database.Database, vm *VM) State {
// create a new baseDB
baseDB := versiondb.New(db)
// create a prefixed "blockDB" from baseDB
blockDB := prefixdb.New(blockStatePrefix, baseDB)
// create a prefixed "singletonDB" from baseDB
singletonDB := prefixdb.New(singletonStatePrefix, baseDB)
// return state with created sub state components
return &state{
BlockState: NewBlockState(blockDB, vm),
SingletonState: avax.NewSingletonState(singletonDB),
baseDB: baseDB,
}
}
// Commit commits pending operations to baseDB
func (s *state) Commit() error {
return s.baseDB.Commit()
}
// Close closes the underlying base database
func (s *state) Close() error {
return s.baseDB.Close()
}
```
#### Block State
This interface and implementation provides storage functions to VM to store and retrieve blocks.
```go title="timestampvm/block_state.go"
const (
lastAcceptedByte byte = iota
)
const (
// maximum block capacity of the cache
blockCacheSize = 8192
)
// persists lastAccepted block IDs with this key
var lastAcceptedKey = []byte{lastAcceptedByte}
var _ BlockState = &blockState{}
// BlockState defines methods to manage state with Blocks and LastAcceptedIDs.
type BlockState interface {
GetBlock(blkID ids.ID) (*Block, error)
PutBlock(blk *Block) error
GetLastAccepted() (ids.ID, error)
SetLastAccepted(ids.ID) error
}
// blockState implements BlocksState interface with database and cache.
type blockState struct {
// cache to store blocks
blkCache cache.Cacher
// block database
blockDB database.Database
lastAccepted ids.ID
// vm reference
vm *VM
}
// blkWrapper wraps the actual blk bytes and status to persist them together
type blkWrapper struct {
Blk []byte `serialize:"true"`
Status choices.Status `serialize:"true"`
}
// NewBlockState returns BlockState with a new cache and given db
func NewBlockState(db database.Database, vm *VM) BlockState {
return &blockState{
blkCache: &cache.LRU{Size: blockCacheSize},
blockDB: db,
vm: vm,
}
}
// GetBlock gets Block from either cache or database
func (s *blockState) GetBlock(blkID ids.ID) (*Block, error) {
// Check if cache has this blkID
if blkIntf, cached := s.blkCache.Get(blkID); cached {
// there is a key but value is nil, so return an error
if blkIntf == nil {
return nil, database.ErrNotFound
}
// We found it return the block in cache
return blkIntf.(*Block), nil
}
// get block bytes from db with the blkID key
wrappedBytes, err := s.blockDB.Get(blkID[:])
if err != nil {
// we could not find it in the db, let's cache this blkID with nil value
// so next time we try to fetch the same key we can return error
// without hitting the database
if err == database.ErrNotFound {
s.blkCache.Put(blkID, nil)
}
// could not find the block, return error
return nil, err
}
// first decode/unmarshal the block wrapper so we can have status and block bytes
blkw := blkWrapper{}
if _, err := Codec.Unmarshal(wrappedBytes, &blkw); err != nil {
return nil, err
}
// now decode/unmarshal the actual block bytes to block
blk := &Block{}
if _, err := Codec.Unmarshal(blkw.Blk, blk); err != nil {
return nil, err
}
// initialize block with block bytes, status and vm
blk.Initialize(blkw.Blk, blkw.Status, s.vm)
// put block into cache
s.blkCache.Put(blkID, blk)
return blk, nil
}
// PutBlock puts block into both database and cache
func (s *blockState) PutBlock(blk *Block) error {
// create block wrapper with block bytes and status
blkw := blkWrapper{
Blk: blk.Bytes(),
Status: blk.Status(),
}
// encode block wrapper to its byte representation
wrappedBytes, err := Codec.Marshal(CodecVersion, &blkw)
if err != nil {
return err
}
blkID := blk.ID()
// put actual block to cache, so we can directly fetch it from cache
s.blkCache.Put(blkID, blk)
// put wrapped block bytes into database
return s.blockDB.Put(blkID[:], wrappedBytes)
}
// DeleteBlock deletes block from both cache and database
func (s *blockState) DeleteBlock(blkID ids.ID) error {
s.blkCache.Put(blkID, nil)
return s.blockDB.Delete(blkID[:])
}
// GetLastAccepted returns last accepted block ID
func (s *blockState) GetLastAccepted() (ids.ID, error) {
// check if we already have lastAccepted ID in state memory
if s.lastAccepted != ids.Empty {
return s.lastAccepted, nil
}
// get lastAccepted bytes from database with the fixed lastAcceptedKey
lastAcceptedBytes, err := s.blockDB.Get(lastAcceptedKey)
if err != nil {
return ids.ID{}, err
}
// parse bytes to ID
lastAccepted, err := ids.ToID(lastAcceptedBytes)
if err != nil {
return ids.ID{}, err
}
// put lastAccepted ID into memory
s.lastAccepted = lastAccepted
return lastAccepted, nil
}
// SetLastAccepted persists lastAccepted ID into both cache and database
func (s *blockState) SetLastAccepted(lastAccepted ids.ID) error {
// if the ID in memory and the given memory are same don't do anything
if s.lastAccepted == lastAccepted {
return nil
}
// put lastAccepted ID to memory
s.lastAccepted = lastAccepted
// persist lastAccepted ID to database with fixed lastAcceptedKey
return s.blockDB.Put(lastAcceptedKey, lastAccepted[:])
}
```
### Block
Let's look at our block implementation. The type declaration is:
```go title="timestampvm/block.go"
// Block is a block on the chain.
// Each block contains:
// 1) ParentID
// 2) Height
// 3) Timestamp
// 4) A piece of data (a string)
type Block struct {
PrntID ids.ID `serialize:"true" json:"parentID"` // parent's ID
Hght uint64 `serialize:"true" json:"height"` // This block's height. The genesis block is at height 0.
Tmstmp int64 `serialize:"true" json:"timestamp"` // Time this block was proposed at
Dt [dataLen]byte `serialize:"true" json:"data"` // Arbitrary data
id ids.ID // hold this block's ID
bytes []byte // this block's encoded bytes
status choices.Status // block's status
vm *VM // the underlying VM reference, mostly used for state
}
```
The `serialize:"true"` tag indicates that the field should be included in the byte representation of the block used when persisting the block or sending it to other nodes.
#### Verify
This method verifies that a block is valid and stores it in the memory. It is important to store the verified block in the memory and return them in the `vm.GetBlock` method.
```go title="timestampvm/block.go"
// Verify returns nil iff this block is valid.
// To be valid, it must be that:
// b.parent.Timestamp < b.Timestamp <= [local time] + 1 hour
func (b *Block) Verify() error {
// Get [b]'s parent
parentID := b.Parent()
parent, err := b.vm.getBlock(parentID)
if err != nil {
return errDatabaseGet
}
// Ensure [b]'s height comes right after its parent's height
if expectedHeight := parent.Height() + 1; expectedHeight != b.Hght {
return fmt.Errorf(
"expected block to have height %d, but found %d",
expectedHeight,
b.Hght,
)
}
// Ensure [b]'s timestamp is after its parent's timestamp.
if b.Timestamp().Unix() < parent.Timestamp().Unix() {
return errTimestampTooEarly
}
// Ensure [b]'s timestamp is not more than an hour
// ahead of this node's time
if b.Timestamp().Unix() >= time.Now().Add(time.Hour).Unix() {
return errTimestampTooLate
}
// Put that block to verified blocks in memory
b.vm.verifiedBlocks[b.ID()] = b
return nil
}
```
#### Accept
`Accept` is called by the consensus to indicate this block is accepted.
```go title="timestampvm/block.go"
// Accept sets this block's status to Accepted and sets lastAccepted to this
// block's ID and saves this info to b.vm.DB
func (b *Block) Accept() error {
b.SetStatus(choices.Accepted) // Change state of this block
blkID := b.ID()
// Persist data
if err := b.vm.state.PutBlock(b); err != nil {
return err
}
// Set last accepted ID to this block ID
if err := b.vm.state.SetLastAccepted(blkID); err != nil {
return err
}
// Delete this block from verified blocks as it's accepted
delete(b.vm.verifiedBlocks, b.ID())
// Commit changes to database
return b.vm.state.Commit()
}
```
#### Reject
`Reject` is called by the consensus to indicate this block is rejected.
```go title="timestampvm/block.go"
// Reject sets this block's status to Rejected and saves the status in state
// Recall that b.vm.DB.Commit() must be called to persist to the DB
func (b *Block) Reject() error {
b.SetStatus(choices.Rejected) // Change state of this block
if err := b.vm.state.PutBlock(b); err != nil {
return err
}
// Delete this block from verified blocks as it's rejected
delete(b.vm.verifiedBlocks, b.ID())
// Commit changes to database
return b.vm.state.Commit()
}
```
#### Block Field Methods
These methods are required by the `snowman.Block` interface.
```go title="timestampvm/block.go"
// ID returns the ID of this block
func (b *Block) ID() ids.ID { return b.id }
// ParentID returns [b]'s parent's ID
func (b *Block) Parent() ids.ID { return b.PrntID }
// Height returns this block's height. The genesis block has height 0.
func (b *Block) Height() uint64 { return b.Hght }
// Timestamp returns this block's time. The genesis block has time 0.
func (b *Block) Timestamp() time.Time { return time.Unix(b.Tmstmp, 0) }
// Status returns the status of this block
func (b *Block) Status() choices.Status { return b.status }
// Bytes returns the byte repr. of this block
func (b *Block) Bytes() []byte { return b.bytes }
```
#### Helper Functions
These methods are convenience methods for blocks, they're not a part of the block interface.
```go
// Initialize sets [b.bytes] to [bytes], [b.id] to hash([b.bytes]),
// [b.status] to [status] and [b.vm] to [vm]
func (b *Block) Initialize(bytes []byte, status choices.Status, vm *VM) {
b.bytes = bytes
b.id = hashing.ComputeHash256Array(b.bytes)
b.status = status
b.vm = vm
}
// SetStatus sets the status of this block
func (b *Block) SetStatus(status choices.Status) { b.status = status }
```
### Virtual Machine
Now, let's look at our timestamp VM implementation, which implements the `block.ChainVM` interface. The declaration is:
```go title="timestampvm/vm.go"
// This Virtual Machine defines a blockchain that acts as a timestamp server
// Each block contains data (a payload) and the timestamp when it was created
const (
dataLen = 32
Name = "timestampvm"
)
// VM implements the snowman.VM interface
// Each block in this chain contains a Unix timestamp
// and a piece of data (a string)
type VM struct {
// The context of this vm
ctx *snow.Context
dbManager manager.Manager
// State of this VM
state State
// ID of the preferred block
preferred ids.ID
// channel to send messages to the consensus engine
toEngine chan<- common.Message
// Proposed pieces of data that haven't been put into a block and proposed yet
mempool [][dataLen]byte
// Block ID --> Block
// Each element is a block that passed verification but
// hasn't yet been accepted/rejected
verifiedBlocks map[ids.ID]*Block
}
```
#### Initialize
This method is called when a new instance of VM is initialized. Genesis block is created under this method.
```go title="timestampvm/vm.go"
// Initialize this vm
// [ctx] is this vm's context
// [dbManager] is the manager of this vm's database
// [toEngine] is used to notify the consensus engine that new blocks are
// ready to be added to consensus
// The data in the genesis block is [genesisData]
func (vm *VM) Initialize(
ctx *snow.Context,
dbManager manager.Manager,
genesisData []byte,
upgradeData []byte,
configData []byte,
toEngine chan<- common.Message,
_ []*common.Fx,
_ common.AppSender,
) error {
version, err := vm.Version()
if err != nil {
log.Error("error initializing Timestamp VM: %v", err)
return err
}
log.Info("Initializing Timestamp VM", "Version", version)
vm.dbManager = dbManager
vm.ctx = ctx
vm.toEngine = toEngine
vm.verifiedBlocks = make(map[ids.ID]*Block)
// Create new state
vm.state = NewState(vm.dbManager.Current().Database, vm)
// Initialize genesis
if err := vm.initGenesis(genesisData); err != nil {
return err
}
// Get last accepted
lastAccepted, err := vm.state.GetLastAccepted()
if err != nil {
return err
}
ctx.Log.Info("initializing last accepted block as %s", lastAccepted)
// Build off the most recently accepted block
return vm.SetPreference(lastAccepted)
}
```
#### `initGenesis`
`initGenesis` is a helper method which initializes the genesis block from given bytes and puts into the state.
```go title="timestampvm/vm.go"
// Initializes Genesis if required
func (vm *VM) initGenesis(genesisData []byte) error {
stateInitialized, err := vm.state.IsInitialized()
if err != nil {
return err
}
// if state is already initialized, skip init genesis.
if stateInitialized {
return nil
}
if len(genesisData) > dataLen {
return errBadGenesisBytes
}
// genesisData is a byte slice but each block contains an byte array
// Take the first [dataLen] bytes from genesisData and put them in an array
var genesisDataArr [dataLen]byte
copy(genesisDataArr[:], genesisData)
// Create the genesis block
// Timestamp of genesis block is 0. It has no parent.
genesisBlock, err := vm.NewBlock(ids.Empty, 0, genesisDataArr, time.Unix(0, 0))
if err != nil {
log.Error("error while creating genesis block: %v", err)
return err
}
// Put genesis block to state
if err := vm.state.PutBlock(genesisBlock); err != nil {
log.Error("error while saving genesis block: %v", err)
return err
}
// Accept the genesis block
// Sets [vm.lastAccepted] and [vm.preferred]
if err := genesisBlock.Accept(); err != nil {
return fmt.Errorf("error accepting genesis block: %w", err)
}
// Mark this vm's state as initialized, so we can skip initGenesis in further restarts
if err := vm.state.SetInitialized(); err != nil {
return fmt.Errorf("error while setting db to initialized: %w", err)
}
// Flush VM's database to underlying db
return vm.state.Commit()
}
```
#### CreateHandlers
Registered handlers defined in `Service`. See [below](/docs/virtual-machines/golang-vms/simple-golang-vm#api) for more on APIs.
```go title="timestampvm/vm.go"
// CreateHandlers returns a map where:
// Keys: The path extension for this blockchain's API (empty in this case)
// Values: The handler for the API
// In this case, our blockchain has only one API, which we name timestamp,
// and it has no path extension, so the API endpoint:
// [Node IP]/ext/bc/[this blockchain's ID]
// See API section in documentation for more information
func (vm *VM) CreateHandlers() (map[string]*common.HTTPHandler, error) {
server := rpc.NewServer()
server.RegisterCodec(json.NewCodec(), "application/json")
server.RegisterCodec(json.NewCodec(), "application/json;charset=UTF-8")
// Name is "timestampvm"
if err := server.RegisterService(&Service{vm: vm}, Name); err != nil {
return nil, err
}
return map[string]*common.HTTPHandler{
"": {
Handler: server,
},
}, nil
}
```
#### CreateStaticHandlers
Registers static handlers defined in `StaticService`. See [below](/docs/virtual-machines/golang-vms/simple-golang-vm#static-api) for more on static APIs.
```go title="timestampvm/vm.go"
// CreateStaticHandlers returns a map where:
// Keys: The path extension for this VM's static API
// Values: The handler for that static API
func (vm *VM) CreateStaticHandlers() (map[string]*common.HTTPHandler, error) {
server := rpc.NewServer()
server.RegisterCodec(json.NewCodec(), "application/json")
server.RegisterCodec(json.NewCodec(), "application/json;charset=UTF-8")
if err := server.RegisterService(&StaticService{}, Name); err != nil {
return nil, err
}
return map[string]*common.HTTPHandler{
"": {
LockOptions: common.NoLock,
Handler: server,
},
}, nil
}
```
#### BuildBock
`BuildBlock` builds a new block and returns it. This is mainly requested by the consensus engine.
```go title="timestampvm/vm.go"
// BuildBlock returns a block that this vm wants to add to consensus
func (vm *VM) BuildBlock() (snowman.Block, error) {
if len(vm.mempool) == 0 { // There is no block to be built
return nil, errNoPendingBlocks
}
// Get the value to put in the new block
value := vm.mempool[0]
vm.mempool = vm.mempool[1:]
// Notify consensus engine that there are more pending data for blocks
// (if that is the case) when done building this block
if len(vm.mempool) > 0 {
defer vm.NotifyBlockReady()
}
// Gets Preferred Block
preferredBlock, err := vm.getBlock(vm.preferred)
if err != nil {
return nil, fmt.Errorf("couldn't get preferred block: %w", err)
}
preferredHeight := preferredBlock.Height()
// Build the block with preferred height
newBlock, err := vm.NewBlock(vm.preferred, preferredHeight+1, value, time.Now())
if err != nil {
return nil, fmt.Errorf("couldn't build block: %w", err)
}
// Verifies block
if err := newBlock.Verify(); err != nil {
return nil, err
}
return newBlock, nil
}
```
#### NotifyBlockReady
`NotifyBlockReady` is a helper method that can send messages to the consensus engine through `toEngine` channel.
```go title="timestampvm/vm.go"
// NotifyBlockReady tells the consensus engine that a new block
// is ready to be created
func (vm *VM) NotifyBlockReady() {
select {
case vm.toEngine <- common.PendingTxs:
default:
vm.ctx.Log.Debug("dropping message to consensus engine")
}
}
```
#### GetBlock
`GetBlock` returns the block with the given block ID.
```go title="timestampvm/vm.go"
// GetBlock implements the snowman.ChainVM interface
func (vm *VM) GetBlock(blkID ids.ID) (snowman.Block, error) { return vm.getBlock(blkID) }
func (vm *VM) getBlock(blkID ids.ID) (*Block, error) {
// If block is in memory, return it.
if blk, exists := vm.verifiedBlocks[blkID]; exists {
return blk, nil
}
return vm.state.GetBlock(blkID)
}
```
#### `proposeBlock`
This method adds a piece of data to the mempool and notifies the consensus layer of the blockchain that a new block is ready to be built and voted on. This is called by API method `ProposeBlock`, which we'll see later.
```go title="timestampvm/vm.go"
// proposeBlock appends [data] to [p.mempool].
// Then it notifies the consensus engine
// that a new block is ready to be added to consensus
// (namely, a block with data [data])
func (vm *VM) proposeBlock(data [dataLen]byte) {
vm.mempool = append(vm.mempool, data)
vm.NotifyBlockReady()
}
```
#### ParseBlock
Parse a block from its byte representation.
```go title="timestampvm/vm.go"
// ParseBlock parses [bytes] to a snowman.Block
// This function is used by the vm's state to unmarshal blocks saved in state
// and by the consensus layer when it receives the byte representation of a block
// from another node
func (vm *VM) ParseBlock(bytes []byte) (snowman.Block, error) {
// A new empty block
block := &Block{}
// Unmarshal the byte repr. of the block into our empty block
_, err := Codec.Unmarshal(bytes, block)
if err != nil {
return nil, err
}
// Initialize the block
block.Initialize(bytes, choices.Processing, vm)
if blk, err := vm.getBlock(block.ID()); err == nil {
// If we have seen this block before, return it with the most up-to-date
// info
return blk, nil
}
// Return the block
return block, nil
}
```
#### NewBlock
`NewBlock` creates a new block with given block parameters.
```go title="timestampvm/vm.go"
// NewBlock returns a new Block where:
// - the block's parent is [parentID]
// - the block's data is [data]
// - the block's timestamp is [timestamp]
func (vm *VM) NewBlock(parentID ids.ID, height uint64, data [dataLen]byte, timestamp time.Time) (*Block, error) {
block := &Block{
PrntID: parentID,
Hght: height,
Tmstmp: timestamp.Unix(),
Dt: data,
}
// Get the byte representation of the block
blockBytes, err := Codec.Marshal(CodecVersion, block)
if err != nil {
return nil, err
}
// Initialize the block by providing it with its byte representation
// and a reference to this VM
block.Initialize(blockBytes, choices.Processing, vm)
return block, nil
}
```
#### SetPreference
`SetPreference` implements the `block.ChainVM`. It sets the preferred block ID.
```go title="timestampvm/vm.go"
// SetPreference sets the block with ID [ID] as the preferred block
func (vm *VM) SetPreference(id ids.ID) error {
vm.preferred = id
return nil
}
```
#### Other Functions
These functions needs to be implemented for `block.ChainVM`. Most of them are just blank functions returning `nil`.
```go title="timestampvm/vm.go"
// Bootstrapped marks this VM as bootstrapped
func (vm *VM) Bootstrapped() error { return nil }
// Bootstrapping marks this VM as bootstrapping
func (vm *VM) Bootstrapping() error { return nil }
// Returns this VM's version
func (vm *VM) Version() (string, error) {
return Version.String(), nil
}
func (vm *VM) Connected(id ids.ShortID, nodeVersion version.Application) error {
return nil // noop
}
func (vm *VM) Disconnected(id ids.ShortID) error {
return nil // noop
}
// This VM doesn't (currently) have any app-specific messages
func (vm *VM) AppGossip(nodeID ids.ShortID, msg []byte) error {
return nil
}
// This VM doesn't (currently) have any app-specific messages
func (vm *VM) AppRequest(nodeID ids.ShortID, requestID uint32, time time.Time, request []byte) error {
return nil
}
// This VM doesn't (currently) have any app-specific messages
func (vm *VM) AppResponse(nodeID ids.ShortID, requestID uint32, response []byte) error {
return nil
}
// This VM doesn't (currently) have any app-specific messages
func (vm *VM) AppRequestFailed(nodeID ids.ShortID, requestID uint32) error {
return nil
}
// Health implements the common.VM interface
func (vm *VM) HealthCheck() (interface{}, error) { return nil, nil }
```
### Factory
VMs should implement the `Factory` interface. `New` method in the interface returns a new VM instance.
```go title="timestampvm/factory.go"
var _ vms.Factory = &Factory{}
// Factory ...
type Factory struct{}
// New ...
func (f *Factory) New(*snow.Context) (interface{}, error) { return &VM{}, nil }
```
### Static API
A VM may have a static API, which allows clients to call methods that do not query or update the state of a particular blockchain, but rather apply to the VM as a whole. This is analogous to static methods in computer programming. AvalancheGo uses [Gorilla's RPC library](https://www.gorillatoolkit.org/pkg/rpc) to implement HTTP APIs. `StaticService` implements the static API for our VM.
```go title="timestampvm/static_service.go"
// StaticService defines the static API for the timestamp vm
type StaticService struct{}
```
#### Encode
For each API method, there is:
- A struct that defines the method's arguments
- A struct that defines the method's return values
- A method that implements the API method, and is parameterized on the above 2 structs
This API method encodes a string to its byte representation using a given encoding scheme. It can be used to encode data that is then put in a block and proposed as the next block for this chain.
```go title="timestampvm/static_service.go"
// EncodeArgs are arguments for Encode
type EncodeArgs struct {
Data string `json:"data"`
Encoding formatting.Encoding `json:"encoding"`
Length int32 `json:"length"`
}
// EncodeReply is the reply from Encoder
type EncodeReply struct {
Bytes string `json:"bytes"`
Encoding formatting.Encoding `json:"encoding"`
}
// Encoder returns the encoded data
func (ss *StaticService) Encode(_ *http.Request, args *EncodeArgs, reply *EncodeReply) error {
if len(args.Data) == 0 {
return fmt.Errorf("argument Data cannot be empty")
}
var argBytes []byte
if args.Length > 0 {
argBytes = make([]byte, args.Length)
copy(argBytes, args.Data)
} else {
argBytes = []byte(args.Data)
}
bytes, err := formatting.EncodeWithChecksum(args.Encoding, argBytes)
if err != nil {
return fmt.Errorf("couldn't encode data as string: %s", err)
}
reply.Bytes = bytes
reply.Encoding = args.Encoding
return nil
}
```
#### Decode
This API method is the inverse of `Encode`.
```go title="timestampvm/static_service.go"
// DecoderArgs are arguments for Decode
type DecoderArgs struct {
Bytes string `json:"bytes"`
Encoding formatting.Encoding `json:"encoding"`
}
// DecoderReply is the reply from Decoder
type DecoderReply struct {
Data string `json:"data"`
Encoding formatting.Encoding `json:"encoding"`
}
// Decoder returns the Decoded data
func (ss *StaticService) Decode(_ *http.Request, args *DecoderArgs, reply *DecoderReply) error {
bytes, err := formatting.Decode(args.Encoding, args.Bytes)
if err != nil {
return fmt.Errorf("couldn't Decode data as string: %s", err)
}
reply.Data = string(bytes)
reply.Encoding = args.Encoding
return nil
}
```
### API
A VM may also have a non-static HTTP API, which allows clients to query and update the blockchain's state. `Service`'s declaration is:
```go title="timestampvm/service.go"
// Service is the API service for this VM
type Service struct{ vm *VM }
```
Note that this struct has a reference to the VM, so it can query and update state.
This VM's API has two methods. One allows a client to get a block by its ID. The other allows a client to propose the next block of this blockchain. The blockchain ID in the endpoint changes, since every blockchain has an unique ID.
#### `timestampvm.getBlock`
Get a block by its ID. If no ID is provided, get the latest block.
##### `getBlock` Signature
```
timestampvm.getBlock({id: string}) ->
{
id: string,
data: string,
timestamp: int,
parentID: string
}
```
- `id` is the ID of the block being retrieved. If omitted from arguments, gets the latest block
- `data` is the base 58 (with checksum) representation of the block's 32 byte payload
- `timestamp` is the Unix timestamp when this block was created
- `parentID` is the block's parent
##### `getBlock` Example Call
```bash
curl -X POST --data '{
"jsonrpc": "2.0",
"method": "timestampvm.getBlock",
"params":{
"id":"xqQV1jDnCXDxhfnNT7tDBcXeoH2jC3Hh7Pyv4GXE1z1hfup5K"
},
"id": 1
}' -H 'content-type:application/json;' 127.0.0.1:9650/ext/bc/sw813hGSWH8pdU9uzaYy9fCtYFfY7AjDd2c9rm64SbApnvjmk
```
##### `getBlock` Example Response
```json
{
"jsonrpc": "2.0",
"result": {
"timestamp": "1581717416",
"data": "11111111111111111111111111111111LpoYY",
"id": "xqQV1jDnCXDxhfnNT7tDBcXeoH2jC3Hh7Pyv4GXE1z1hfup5K",
"parentID": "22XLgiM5dfCwTY9iZnVk8ZPuPe3aSrdVr5Dfrbxd3ejpJd7oef"
},
"id": 1
}
```
##### `getBlock` Implementation
```go title="timestampvm/service.go"
// GetBlockArgs are the arguments to GetBlock
type GetBlockArgs struct {
// ID of the block we're getting.
// If left blank, gets the latest block
ID *ids.ID `json:"id"`
}
// GetBlockReply is the reply from GetBlock
type GetBlockReply struct {
Timestamp json.Uint64 `json:"timestamp"` // Timestamp of most recent block
Data string `json:"data"` // Data in the most recent block. Base 58 repr. of 5 bytes.
ID ids.ID `json:"id"` // String repr. of ID of the most recent block
ParentID ids.ID `json:"parentID"` // String repr. of ID of the most recent block's parent
}
// GetBlock gets the block whose ID is [args.ID]
// If [args.ID] is empty, get the latest block
func (s *Service) GetBlock(_ *http.Request, args *GetBlockArgs, reply *GetBlockReply) error {
// If an ID is given, parse its string representation to an ids.ID
// If no ID is given, ID becomes the ID of last accepted block
var (
id ids.ID
err error
)
if args.ID == nil {
id, err = s.vm.state.GetLastAccepted()
if err != nil {
return errCannotGetLastAccepted
}
} else {
id = *args.ID
}
// Get the block from the database
block, err := s.vm.getBlock(id)
if err != nil {
return errNoSuchBlock
}
// Fill out the response with the block's data
reply.ID = block.ID()
reply.Timestamp = json.Uint64(block.Timestamp().Unix())
reply.ParentID = block.Parent()
data := block.Data()
reply.Data, err = formatting.EncodeWithChecksum(formatting.CB58, data[:])
return err
}
```
#### `timestampvm.proposeBlock`
Propose the next block on this blockchain.
##### `proposeBlock` Signature
```go
timestampvm.proposeBlock({data: string}) -> {success: bool}
```
- `data` is the base 58 (with checksum) representation of the proposed block's 32 byte payload.
##### `proposeBlock` Example Call
```bash
curl -X POST --data '{
"jsonrpc": "2.0",
"method": "timestampvm.proposeBlock",
"params":{
"data":"SkB92YpWm4Q2iPnLGCuDPZPgUQMxajqQQuz91oi3xD984f8r"
},
"id": 1
}' -H 'content-type:application/json;' 127.0.0.1:9650/ext/bc/sw813hGSWH8pdU9uzaYy9fCtYFfY7AjDd2c9rm64SbApnvjmk
```
###### `proposeBlock` Example Response
```json
{
"jsonrpc": "2.0",
"result": {
"Success": true
},
"id": 1
}
```
##### `proposeBlock` Implementation
```go title="timestampvm/service.go"
// ProposeBlockArgs are the arguments to ProposeValue
type ProposeBlockArgs struct {
// Data for the new block. Must be base 58 encoding (with checksum) of 32 bytes.
Data string
}
// ProposeBlockReply is the reply from function ProposeBlock
type ProposeBlockReply struct{
// True if the operation was successful
Success bool
}
// ProposeBlock is an API method to propose a new block whose data is [args].Data.
// [args].Data must be a string repr. of a 32 byte array
func (s *Service) ProposeBlock(_ *http.Request, args *ProposeBlockArgs, reply *ProposeBlockReply) error {
bytes, err := formatting.Decode(formatting.CB58, args.Data)
if err != nil || len(bytes) != dataLen {
return errBadData
}
var data [dataLen]byte // The data as an array of bytes
copy(data[:], bytes[:dataLen]) // Copy the bytes in dataSlice to data
s.vm.proposeBlock(data)
reply.Success = true
return nil
}
```
### Plugin
In order to make this VM compatible with `go-plugin`, we need to define a `main` package and method, which serves our VM over gRPC so that AvalancheGo can call its methods. `main.go`'s contents are:
```go title="main/main.go"
func main() {
log.Root().SetHandler(log.LvlFilterHandler(log.LvlDebug, log.StreamHandler(os.Stderr, log.TerminalFormat())))
plugin.Serve(&plugin.ServeConfig{
HandshakeConfig: rpcchainvm.Handshake,
Plugins: map[string]plugin.Plugin{
"vm": rpcchainvm.New(×tampvm.VM{}),
},
// A non-nil value here enables gRPC serving for this plugin...
GRPCServer: plugin.DefaultGRPCServer,
})
}
```
Now AvalancheGo's `rpcchainvm` can connect to this plugin and calls its methods.
### Executable Binary
This VM has a [build script](https://github.com/ava-labs/timestampvm/blob/v1.2.1/scripts/build.sh) that builds an executable of this VM (when invoked, it runs the `main` method from above.)
The path to the executable, as well as its name, can be provided to the build script via arguments. For example:
```bash
./scripts/build.sh ../avalanchego/build/plugins timestampvm
```
If no argument is given, the path defaults to a binary named with default VM ID: `$GOPATH/src/github.com/ava-labs/avalanchego/build/plugins/tGas3T58KzdjLHhBDMnH2TvrddhqTji5iZAMZ3RXs2NLpSnhH`
This name `tGas3T58KzdjLHhBDMnH2TvrddhqTji5iZAMZ3RXs2NLpSnhH` is the CB58 encoded 32 byte identifier for the VM. For the timestampvm, this is the string "timestamp" zero-extended in a 32 byte array and encoded in CB58.
### VM Aliases
Each VM has a predefined, static ID. For instance, the default ID of the TimestampVM is: `tGas3T58KzdjLHhBDMnH2TvrddhqTji5iZAMZ3RXs2NLpSnhH`.
It's possible to give an alias for these IDs. For example, we can alias `TimestampVM` by creating a JSON file at `~/.avalanchego/configs/vms/aliases.json` with:
The name of the VM binary is also its static ID and should not be changed manually. Changing the name of the VM binary will result in AvalancheGo failing to start the VM. To reference a VM by another name, define a VM alias as described below.
```json
{
"tGas3T58KzdjLHhBDMnH2TvrddhqTji5iZAMZ3RXs2NLpSnhH": [
"timestampvm",
"timestamp"
]
}
```
### Installing a VM
AvalancheGo searches for and registers plugins under the `plugins` [directory](/docs/nodes/configure/configs-flags#--plugin-dir-string).
To install the virtual machine onto your node, you need to move the built virtual machine binary under this directory. Virtual machine executable names must be either a full virtual machine ID (encoded in CB58), or a VM alias.
Copy the binary into the plugins directory.
```bash
cp -n $GOPATH/src/github.com/ava-labs/avalanchego/build/plugins/
```
#### Node Is Not Running
If your node isn't running yet, you can install all virtual machines under your `plugin` directory by starting the node.
#### Node Is Already Running
Load the binary with the `loadVMs` API.
```bash
curl -sX POST --data '{
"jsonrpc":"2.0",
"id" :1,
"method" :"admin.loadVMs",
"params" :{}
}' -H 'content-type:application/json;' 127.0.0.1:9650/ext/admin
```
Confirm the response of `loadVMs` contains the newly installed virtual machine `tGas3T58KzdjLHhBDMnH2TvrddhqTji5iZAMZ3RXs2NLpSnhH`. You'll see this virtual machine as well as any others that weren't already installed previously in the response.
```json
{
"jsonrpc": "2.0",
"result": {
"newVMs": {
"tGas3T58KzdjLHhBDMnH2TvrddhqTji5iZAMZ3RXs2NLpSnhH": [
"timestampvm",
"timestamp"
],
"spdxUxVJQbX85MGxMHbKw1sHxMnSqJ3QBzDyDYEP3h6TLuxqQ": []
}
},
"id": 1
}
```
Now, this VM's static API can be accessed at endpoints `/ext/vm/timestampvm` and `/ext/vm/timestamp`. For more details about VM configs, see [here](/docs/nodes/configure/configs-flags#virtual-machine-vm-configs).
In this tutorial, we used the VM's ID as the executable name to simplify the process. However, AvalancheGo would also accept `timestampvm` or `timestamp` since those are registered aliases in previous step.
## Wrapping Up
That's it! That's the entire implementation of a VM which defines a blockchain-based timestamp server.
In this tutorial, we learned:
- The `block.ChainVM` interface, which all VMs that define a linear chain must implement
- The `snowman.Block` interface, which all blocks that are part of a linear chain must implement
- The `rpcchainvm` type, which allows blockchains to run in their own processes.
- An actual implementation of `block.ChainVM` and `snowman.Block`.
# Installing Your VM (/docs/virtual-machines/rust-vms/installing-vm)
---
title: Installing Your VM
description: Learn how to install your VM on your node.
---
AvalancheGo searches for and registers VM plugins under the `plugins` [directory](/docs/nodes/configure/configs-flags#--plugin-dir-string).
To install the virtual machine onto your node, you need to move the built virtual machine binary under this directory. Virtual machine executable names must be either a full virtual machine ID (encoded in CB58), or a VM alias.
Copy the binary into the plugins directory.
```bash
cp -n $GOPATH/src/github.com/ava-labs/avalanchego/build/plugins/
```
## Node Is Not Running
If your node isn't running yet, you can install all virtual machines under your `plugin` directory by starting the node.
## Node Is Already Running
Load the binary with the `loadVMs` API.
```bash
curl -sX POST --data '{
"jsonrpc":"2.0",
"id" :1,
"method" :"admin.loadVMs",
"params" :{}
}' -H 'content-type:application/json;' 127.0.0.1:9650/ext/admin
```
Confirm the response of `loadVMs` contains the newly installed virtual machine `tGas3T58KzdjcJ32c6GpePhtqo9rrHJ1oR9wFBtCcMgaosthX`. You'll see this virtual machine as well as any others that weren't already installed previously in the response.
```json
{
"jsonrpc": "2.0",
"result": {
"newVMs": {
"tGas3T58KzdjcJ32c6GpePhtqo9rrHJ1oR9wFBtCcMgaosthX": [
"timestampvm-rs",
"timestamp-rs"
],
"spdxUxVJQbX85MGxMHbKw1sHxMnSqJ3QBzDyDYEP3h6TLuxqQ": []
}
},
"id": 1
}
```
Now, this VM's static API can be accessed at endpoints `/ext/vm/timestampvm-rs` and `/ext/vm/timestamp-rs`. For more details about VM configs, see [here](/docs/nodes/configure/configs-flags#virtual-machine-vm-configs).
In this tutorial, we used the VM's ID as the executable name to simplify the process. However, AvalancheGo would also accept `timestampvm-rs` or `timestamp-rs` since those are registered aliases in previous step.
# Introduction to Avalanche-RS (/docs/virtual-machines/rust-vms/intro-avalanche-rs)
---
title: Introduction to Avalanche-RS
description: Learn how to write a simple virtual machine in Rust using Avalanche-RS.
---
Since Rust is a language which we can write and implement Proto interfaces, this implies that we can also use Rust to write VMs which can then be deployed on Avalanche.
However, rather than build Rust-based from the ground-up, we can utilize Avalanche-RS, a developer toolkit comprised of powerful building blocks and primitive types which allow us to focus exclusively on the business logic of our VM rather than working on low-level logic.
## Structure of Avalanche-RS
Although Avalanche-RS is currently primarily used to build Rust-based VMs, Avalanche-RS actually consists of three different frameworks; as per the [GitHub](https://github.com/ava-labs/avalanche-rs) description of the Avalanche-RS repository, the three frameworks are as follows:
- Core: framework for core networking components for a P2P Avalanche node
- Avalanche-Consensus: a Rust implementation of the novel Avalanche consensus protocol
- Avalanche-Types: implements foundational types used in Avalanche and provides an SDK for building Rust-based VMs
As the above might make it obvious, the Avalanche-Types crate is the main framework that one would use to build Rust-based VMs.
## Documentation
For the most up-to-date information regarding the Avalache-Types library, please refer to the associated [crates.io](https://crates.io/crates/avalanche-types) page for the Avalanche-Types crate.
# Setting Up Your Environment (/docs/virtual-machines/rust-vms/setting-up-environment)
---
title: Setting Up Your Environment
description: Learn how to set up your environment to build a Rust VM.
---
In this section, we will focus on getting set up with the Rust environment necessary to build with the `avalanche-types` crates (recall that `avalanche-types` contains the SDK we want to use to build our Rust VM).
## Installing Rust
First and foremost, we will need to have Rust installed locally. If you do not have Rust installed, you can install `rustup` (the tool that manages your Rust installation) [here](https://www.rust-lang.org/tools/install).
## Adding `avalanche-types` to Your Project
Once you have Rust installed and are ready to build, you will want to add the Avalanche-Types crate to your project. Below is a baseline example of how you can do this:
```toml title="Cargo.toml"
[dependencies]
avalanche-types = "0.1.4"
```
However, if you want to use the [TimestampVM](https://github.com/ava-labs/timestampvm-rs) as a reference for your project, a more appropriate import would be the following:
```toml title="Cargo.toml"
[dependencies]
avalanche-types = { version = "0.1.4", features = ["subnet", "codec_base64"] }
```
# APIs (/docs/virtual-machines/timestamp-vm/apis)
---
title: APIs
description: Learn how to interact with TimestampVM.
---
Throughout this case study, we have been focusing of the functionality of the TimestampVM. However, one thing we haven't discussed is how external users can interact with an instance of TimestampVM.
Without a way for users to interact with TimestampVM, the blockchain itself will be stagnant. In this section, we will go over the two types of APIs used in TimestampVM:
- Static APIs
- Chain APIs
## Precursor: Static and Instance Methods
When understanding the static and chain APIs used in TimestampVM, a good way to think about these APIs is to compare them to static and instance methods in object-oriented programming. That is,
- **Static Methods**: functions which belong to the class itself, and not any instance of the class
- **Instance Methods**: functions which belong to the instance of a class
## Static APIs
We can think of the static APIs in TimestampVM as functions which call the VM and are not associated with any specific instance of the TimestampVM. Within TimestampVM, we have just one static API function - the ping function:
```rust title="timestampvm/src/api/static_handlers.rs"
/// Defines static handler RPCs for this VM.
#[rpc]
pub trait Rpc {
#[rpc(name = "ping", alias("timestampvm.ping"))]
fn ping(&self) -> BoxFuture
 ---
We introduce "acceptance proofs", so that a peer can verify any block accepted by consensus. In the aforementioned use-case, if a P-Chain block is unknown by a peer, it can request the block and proof at the provided height from a peer. If a block's proof is valid, the block can be executed to advance the local P-Chain and verify the proposed subnet block. Peers can request blocks from any peer without requiring consensus locally or communication with a validator. This has the added benefit of reducing the number of required connections and p2p message load served by P-Chain validators.
---
Figure 2: A Validator is verifying a subnet’s block `Z` which references an unknown P-Chain block `C` in its block header
---
We introduce "acceptance proofs", so that a peer can verify any block accepted by consensus. In the aforementioned use-case, if a P-Chain block is unknown by a peer, it can request the block and proof at the provided height from a peer. If a block's proof is valid, the block can be executed to advance the local P-Chain and verify the proposed subnet block. Peers can request blocks from any peer without requiring consensus locally or communication with a validator. This has the added benefit of reducing the number of required connections and p2p message load served by P-Chain validators.
---
Figure 2: A Validator is verifying a subnet’s block `Z` which references an unknown P-Chain block `C` in its block header
 Figure 3: A Validator requests the blocks and proofs for `B` and `C` from a peer
 Figure 4: The Validator accepts the P-Chain blocks and is now able to verify `Z`
 ---
## Specification
Note: The following is pseudocode.
### P2P
#### Aggregation
```diff
+ message GetAcceptanceSignatureRequest {
+ bytes chain_id = 1;
+ uint32 request_id = 2;
+ bytes block_id = 3;
+ }
```
The `GetAcceptanceSignatureRequest` message is sent to a peer to request their signature for a given block id.
```diff
+ message GetAcceptanceSignatureResponse {
+ bytes chain_id = 1;
+ uint32 request_id = 2;
+ bytes bls_signature = 3;
+ }
```
`GetAcceptanceSignatureResponse` is sent to a peer as a response for `GetAcceptanceSignatureRequest`. `bls_signature` is the peer’s signature using their registered primary network BLS staking key over the requested `block_id`. An empty `bls_signature` field indicates that the block was not accepted yet.
## Security Considerations
Nodes that bootstrap using state sync may not have the entire history of the
P-Chain and therefore will not be able to provide the entire history for a block
that is referenced in a block that they propose. This would be needed to unblock a node that is attempting to fast-forward their P-Chain, as they require the entire ancestry between their current accepted tip and the block they are attempting to forward to. It is assumed that nodes will have some minimum amount of recent state so that the requester can eventually be unblocked by retrying, as only one node with the requested ancestry is required to unblock the requester.
An alternative is to make a churn assumption and validate the proposed block's proof with a stale validator set to avoid complexity, but this introduces more security concerns.
## Copyright
Copyright and related rights waived via [CC0](https://creativecommons.org/publicdomain/zero/1.0/).
# ACP-77: Reinventing Subnets (/docs/acps/77-reinventing-subnets)
---
title: "ACP-77: Reinventing Subnets"
description: "Details for Avalanche Community Proposal 77: Reinventing Subnets"
edit_url: https://github.com/avalanche-foundation/ACPs/edit/main/ACPs/77-reinventing-subnets/README.md
---
| ACP | 77 |
| :------------ | :---------------------------------------------------------------------------------------- |
| **Title** | Reinventing Subnets |
| **Author(s)** | Dhruba Basu ([@dhrubabasu](https://github.com/dhrubabasu)) |
| **Status** | Activated ([Discussion](https://github.com/avalanche-foundation/ACPs/discussions/78)) |
| **Track** | Standards |
| **Replaces** | [ACP-13](https://github.com/avalanche-foundation/ACPs/blob/main/ACPs/13-subnet-only-validators/README.md) |
## Abstract
Overhaul Subnet creation and management to unlock increased flexibility for Subnet creators by:
- Separating Subnet validators from Primary Network validators (Primary Network Partial Sync, Removal of 2000 $AVAX requirement)
- Moving ownership of Subnet validator set management from P-Chain to Subnets (ERC-20/ERC-721/Arbitrary Staking, Staking Reward Management)
- Introducing a continuous P-Chain fee mechanism for Subnet validators (Continuous Subnet Staking)
This ACP supersedes [ACP-13](https://github.com/avalanche-foundation/ACPs/blob/main/ACPs/13-subnet-only-validators/README.md) and borrows some of its language.
## Motivation
Each node operator must stake at least 2000 $AVAX ($70k at time of writing) to first become a Primary Network validator before they qualify to become a Subnet validator. Most Subnets aim to launch with at least 8 Subnet validators, which requires staking 16000 $AVAX ($560k at time of writing). All Subnet validators, to satisfy their role as Primary Network validators, must also [allocate 8 AWS vCPU, 16 GB RAM, and 1 TB storage](https://github.com/ava-labs/avalanchego/blob/master/README.md#installation) to sync the entire Primary Network (X-Chain, P-Chain, and C-Chain) and participate in its consensus, in addition to whatever resources are required for each Subnet they are validating.
Regulated entities that are prohibited from validating permissionless, smart contract-enabled blockchains (like the C-Chain) cannot launch a Subnet because they cannot opt-out of Primary Network Validation. This deployment blocker prevents a large cohort of Real World Asset (RWA) issuers from bringing unique, valuable tokens to the Avalanche Ecosystem (that could move between C-Chain <-> Subnets using Avalanche Warp Messaging/Teleporter).
A widely validated Subnet that is not properly metered could destabilize the Primary Network if usage spikes unexpectedly. Underprovisioned Primary Network validators running such a Subnet may exit with an OOM exception, see degraded disk performance, or find it difficult to allocate CPU time to P/X/C-Chain validation. The inverse also holds for Subnets with the Primary Network (where some undefined behavior could bring a Subnet offline).
Although the fee paid to the Primary Network to operate a Subnet does not go up with the amount of activity on the Subnet, the fixed, upfront cost of setting up a Subnet validator on the Primary Network deters new projects that prefer smaller, even variable, costs until demand is observed. _Unlike L2s that pay some increasing fee (usually denominated in units per transaction byte) to an external chain for data availability and security as activity scales, Subnets provide their own security/data availability and the only cost operators must pay from processing more activity is the hardware cost of supporting additional load._
Elastic Subnets, introduced in [Banff](https://medium.com/avalancheavax/banff-elastic-subnets-44042f41e34c), enabled Subnet creators to activate Proof-of-Stake validation and uptime-based rewards using their own token. However, this token is required to be an ANT (created on the X-Chain) and locked on the P-Chain. All staking rewards were distributed on the P-Chain with the reward curve being defined in the `TransformSubnetTx` and, once set, was unable to be modified.
With no Elastic Subnets live on Mainnet, it is clear that Permissionless Subnets as they stand today could be more desirable. There are many successful Permissioned Subnets in production but many Subnet creators have raised the above as points of concern. In summary, the Avalanche community could benefit from a more flexible and affordable mechanism to launch Permissionless Subnets.
### A Note on Nomenclature
Avalanche Subnets are subnetworks validated by a subset of the Primary Network validator set. The new network creation flow outlined in this ACP does not require any intersection between the new network's validator set and the Primary Network's validator set. Moreover, the new networks have greater functionality and sovereignty than Subnets. To distinguish between these two kinds of networks, the community has been referring to these new networks as _Avalanche Layer 1s_, or L1s for short.
All networks created through the old network creation flow will continue to be referred to as Avalanche Subnets.
## Specification
At a high-level, L1s can manage their validator sets externally to the P-Chain by setting the blockchain ID and address of their _validator manager_. The P-Chain will consume Warp messages that modify the L1's validator set. To confirm modification of the L1's validator set, the P-Chain will also produce Warp messages. L1 validators are not required to validate the Primary Network, and do not have the same 2000 $AVAX stake requirement that Subnet validators have. To maintain an active L1 validator, a continuous fee denominated in $AVAX is assessed. L1 validators are only required to sync the P-Chain (not X/C-Chain) in order to track validator set changes and support cross-L1 communication.
### P-Chain Warp Message Payloads
To enable management of an L1's validator set externally to the P-Chain, Warp message verification will be added to the [`PlatformVM`](https://github.com/ava-labs/avalanchego/tree/master/vms/platformvm). For a Warp message to be considered valid by the P-Chain, at least 67% of the `sourceChainID`'s weight must have participated in the aggregate BLS signature. This is equivalent to the threshold set for the C-Chain. A future ACP may be proposed to support modification of this threshold on a per-L1 basis.
The following Warp message payloads are introduced on the P-Chain:
- `SubnetToL1ConversionMessage`
- `RegisterL1ValidatorMessage`
- `L1ValidatorRegistrationMessage`
- `L1ValidatorWeightMessage`
The method of requesting signatures for these messages is left unspecified. A viable option for supporting this functionality is laid out in [ACP-118](https://github.com/avalanche-foundation/ACPs/blob/main/ACPs/118-warp-signature-request/README.md) with the `SignatureRequest` message.
All node IDs contained within the message specifications are represented as variable length arrays such that they can support new node IDs types should the P-Chain add support for them in the future.
The serialization of each of these messages is as follows.
#### `SubnetToL1ConversionMessage`
The P-Chain can produce a `SubnetToL1ConversionMessage` for consumers (i.e. validator managers) to be aware of the initial validator set.
The following serialization is defined as the `ValidatorData`:
| Field | Type | Size |
| -------------: | ---------: | -----------------------: |
| `nodeID` | `[]byte` | 4 + len(`nodeID`) bytes |
| `blsPublicKey` | `[48]byte` | 48 bytes |
| `weight` | `uint64` | 8 bytes |
| | | 60 + len(`nodeID`) bytes |
The following serialization is defined as the `ConversionData`:
| Field | Type | Size |
| ---------------: | ----------------: | ---------------------------------------------------------: |
| `codecID` | `uint16` | 2 bytes |
| `subnetID` | `[32]byte` | 32 bytes |
| `managerChainID` | `[32]byte` | 32 bytes |
| `managerAddress` | `[]byte` | 4 + len(`managerAddress`) bytes |
| `validators` | `[]ValidatorData` | 4 + sum(`validatorLengths`) bytes |
| | | 74 + len(`managerAddress`) + sum(`validatorLengths`) bytes |
- `codecID` is the codec version used to serialize the payload, and is hardcoded to `0x0000`
- `sum(validatorLengths)` is the sum of the lengths of `ValidatorData` serializations included in `validators`.
- `subnetID` identifies the Subnet that is being converted to an L1 (described further below).
- `managerChainID` and `managerAddress` identify the validator manager for the newly created L1. This is the (blockchain ID, address) tuple allowed to send Warp messages to modify the L1's validator set.
- `validators` are the initial continuous-fee-paying validators for the given L1.
The `SubnetToL1ConversionMessage` is specified as an `AddressedCall` with `sourceChainID` set to the P-Chain ID, the `sourceAddress` set to an empty byte array, and a payload of:
| Field | Type | Size |
| -------------: | ---------: | -------: |
| `codecID` | `uint16` | 2 bytes |
| `typeID` | `uint32` | 4 bytes |
| `conversionID` | `[32]byte` | 32 bytes |
| | | 38 bytes |
- `codecID` is the codec version used to serialize the payload, and is hardcoded to `0x0000`
- `typeID` is the payload type identifier and is `0x00000000` for this message
- `conversionID` is the SHA256 hash of the `ConversionData` from a given `ConvertSubnetToL1Tx`
#### `RegisterL1ValidatorMessage`
The P-Chain can consume a `RegisterL1ValidatorMessage` from validator managers through a `RegisterL1ValidatorTx` to register an addition to the L1's validator set.
The following is the serialization of a `PChainOwner`:
| Field | Type | Size |
| ----------: | -----------: | -------------------------------: |
| `threshold` | `uint32` | 4 bytes |
| `addresses` | `[][20]byte` | 4 + len(`addresses`) \\* 20 bytes |
| | | 8 + len(`addresses`) \\* 20 bytes |
- `threshold` is the number of `addresses` that must provide a signature for the `PChainOwner` to authorize an action.
- Validation criteria:
- If `threshold` is `0`, `addresses` must be empty
- `threshold` <= len(`addresses`)
- Entries of `addresses` must be unique and sorted in ascending order
The `RegisterL1ValidatorMessage` is specified as an `AddressedCall` with a payload of:
| Field | Type | Size |
| ----------------------: | ------------: | ------------------------------------------------------------------------: |
| `codecID` | `uint16` | 2 bytes |
| `typeID` | `uint32` | 4 bytes |
| `subnetID` | `[32]byte` | 32 bytes |
| `nodeID` | `[]byte` | 4 + len(`nodeID`) bytes |
| `blsPublicKey` | `[48]byte` | 48 bytes |
| `expiry` | `uint64` | 8 bytes |
| `remainingBalanceOwner` | `PChainOwner` | 8 + len(`addresses`) \\* 20 bytes |
| `disableOwner` | `PChainOwner` | 8 + len(`addresses`) \\* 20 bytes |
| `weight` | `uint64` | 8 bytes |
| | | 122 + len(`nodeID`) + (len(`addresses1`) + len(`addresses2`)) \\* 20 bytes |
- `codecID` is the codec version used to serialize the payload, and is hardcoded to `0x0000`
- `typeID` is the payload type identifier and is `0x00000001` for this payload
- `subnetID`, `nodeID`, `weight`, and `blsPublicKey` are for the validator being added
- `expiry` is the time at which this message becomes invalid. As of a P-Chain timestamp `>= expiry`, this Avalanche Warp Message can no longer be used to add the `nodeID` to the validator set of `subnetID`
- `remainingBalanceOwner` is the P-Chain owner where leftover $AVAX from the validator's Balance will be issued to when this validator it is removed from the validator set.
- `disableOwner` is the only P-Chain owner allowed to disable the validator using `DisableL1ValidatorTx`, specified below.
#### `L1ValidatorRegistrationMessage`
The P-Chain can produce an `L1ValidatorRegistrationMessage` for consumers to verify that a validation period has either begun or has been invalidated.
The `L1ValidatorRegistrationMessage` is specified as an `AddressedCall` with `sourceChainID` set to the P-Chain ID, the `sourceAddress` set to an empty byte array, and a payload of:
| Field | Type | Size |
| -------------: | ---------: | -------: |
| `codecID` | `uint16` | 2 bytes |
| `typeID` | `uint32` | 4 bytes |
| `validationID` | `[32]byte` | 32 bytes |
| `registered` | `bool` | 1 byte |
| | | 39 bytes |
- `codecID` is the codec version used to serialize the payload, and is hardcoded to `0x0000`
- `typeID` is the payload type identifier and is `0x00000002` for this message
- `validationID` identifies the validator for the message
- `registered` is a boolean representing the status of the `validationID`. If true, the `validationID` corresponds to a validator in the current validator set. If false, the `validationID` does not correspond to a validator in the current validator set, and never will in the future.
#### `L1ValidatorWeightMessage`
The P-Chain can consume an `L1ValidatorWeightMessage` through a `SetL1ValidatorWeightTx` to update the weight of an existing validator. The P-Chain can also produce an `L1ValidatorWeightMessage` for consumers to verify that the validator weight update has been effectuated.
The `L1ValidatorWeightMessage` is specified as an `AddressedCall` with the following payload. When sent from the P-Chain, the `sourceChainID` is set to the P-Chain ID, and the `sourceAddress` is set to an empty byte array.
| Field | Type | Size |
| -------------: | ---------: | -------: |
| `codecID` | `uint16` | 2 bytes |
| `typeID` | `uint32` | 4 bytes |
| `validationID` | `[32]byte` | 32 bytes |
| `nonce` | `uint64` | 8 bytes |
| `weight` | `uint64` | 8 bytes |
| | | 54 bytes |
- `codecID` is the codec version used to serialize the payload, and is hardcoded to `0x0000`
- `typeID` is the payload type identifier and is `0x00000003` for this message
- `validationID` identifies the validator for the message
- `nonce` is a strictly increasing number that denotes the latest validator weight update and provides replay protection for this transaction
- `weight` is the new `weight` of the validator
### New P-Chain Transaction Types
Both before and after this ACP, to create a Subnet, a `CreateSubnetTx` must be issued on the P-Chain. This transaction includes an `Owner` field which defines the key that today can be used to authorize any validator set additions (`AddSubnetValidatorTx`) or removals (`RemoveSubnetValidatorTx`).
To be considered a permissionless network, or Avalanche Layer 1:
- This `Owner` key must no longer have the ability to modify the validator set.
- New transaction types must support modification of the validator set via Warp messages.
The following new transaction types are introduced on the P-Chain to support this functionality:
- `ConvertSubnetToL1Tx`
- `RegisterL1ValidatorTx`
- `SetL1ValidatorWeightTx`
- `DisableL1ValidatorTx`
- `IncreaseL1ValidatorBalanceTx`
#### `ConvertSubnetToL1Tx`
To convert a Subnet into an L1, a `ConvertSubnetToL1Tx` must be issued to set the `(chainID, address)` pair that will manage the L1's validator set. The `Owner` key defined in `CreateSubnetTx` must provide a signature to authorize this conversion.
The `ConvertSubnetToL1Tx` specification is:
```go
type PChainOwner struct {
// The threshold number of `Addresses` that must provide a signature in order for
// the `PChainOwner` to be considered valid.
Threshold uint32 `json:"threshold"`
// The 20-byte addresses that are allowed to sign to authenticate a `PChainOwner`.
// Note: It is required for:
// - len(Addresses) == 0 if `Threshold` is 0.
// - len(Addresses) >= `Threshold`
// - The values in Addresses to be sorted in ascending order.
Addresses []ids.ShortID `json:"addresses"`
}
type L1Validator struct {
// NodeID of this validator
NodeID []byte `json:"nodeID"`
// Weight of this validator used when sampling
Weight uint64 `json:"weight"`
// Initial balance for this validator
Balance uint64 `json:"balance"`
// [Signer] is the BLS public key and proof-of-possession for this validator.
// Note: We do not enforce that the BLS key is unique across all validators.
// This means that validators can share a key if they so choose.
// However, a NodeID + L1 does uniquely map to a BLS key
Signer signer.ProofOfPossession `json:"signer"`
// Leftover $AVAX from the [Balance] will be issued to this
// owner once it is removed from the validator set.
RemainingBalanceOwner PChainOwner `json:"remainingBalanceOwner"`
// The only owner allowed to disable this validator on the P-Chain.
DisableOwner PChainOwner `json:"disableOwner"`
}
type ConvertSubnetToL1Tx struct {
// Metadata, inputs and outputs
BaseTx
// ID of the Subnet to transform
// Restrictions:
// - Must not be the Primary Network ID
Subnet ids.ID `json:"subnetID"`
// BlockchainID where the validator manager lives
ChainID ids.ID `json:"chainID"`
// Address of the validator manager
Address []byte `json:"address"`
// Initial continuous-fee-paying validators for the L1
Validators []L1Validator `json:"validators"`
// Authorizes this conversion
SubnetAuth verify.Verifiable `json:"subnetAuthorization"`
}
```
After this transaction is accepted, `CreateChainTx` and `AddSubnetValidatorTx` are disabled on the Subnet. The only action that the `Owner` key is able to take is removing Subnet validators with `RemoveSubnetValidatorTx` that had been added using `AddSubnetValidatorTx`. Unless removed by the `Owner` key, any Subnet validators added previously with an `AddSubnetValidatorTx` will continue to validate the Subnet until their [`End`](https://github.com/ava-labs/avalanchego/blob/a1721541754f8ee23502b456af86fea8c766352a/vms/platformvm/txs/validator.go#L27) time is reached. Once all Subnet validators added with `AddSubnetValidatorTx` are no longer in the validator set, the `Owner` key is powerless. `RegisterL1ValidatorTx` and `SetL1ValidatorWeightTx` must be used to manage the L1's validator set.
The `validationID` for validators added through `ConvertSubnetToL1Tx` is defined as the SHA256 hash of the 36 bytes resulting from concatenating the 32 byte `subnetID` with the 4 byte `validatorIndex` (index in the `Validators` array within the transaction).
Once this transaction is accepted, the P-Chain must be willing sign a `SubnetToL1ConversionMessage` with a `conversionID` corresponding to `ConversionData` populated with the values from this transaction.
#### `RegisterL1ValidatorTx`
After a `ConvertSubnetToL1Tx` has been accepted, new validators can only be added by using a `RegisterL1ValidatorTx`. The specification of this transaction is:
```go
type RegisterL1ValidatorTx struct {
// Metadata, inputs and outputs
BaseTx
// Balance <= sum($AVAX inputs) - sum($AVAX outputs) - TxFee.
Balance uint64 `json:"balance"`
// [Signer] is a BLS signature proving ownership of the BLS public key specified
// below in `Message` for this validator.
// Note: We do not enforce that the BLS key is unique across all validators.
// This means that validators can share a key if they so choose.
// However, a NodeID + L1 does uniquely map to a BLS key
Signer [96]byte `json:"signer"`
// A RegisterL1ValidatorMessage payload
Message warp.Message `json:"message"`
}
```
The `validationID` of validators added via `RegisterL1ValidatorTx` is defined as the SHA256 hash of the `Payload` of the `AddressedCall` in `Message`.
When a `RegisterL1ValidatorTx` is accepted on the P-Chain, the validator is added to the L1's validator set. A `minNonce` field corresponding to the `validationID` will be stored on addition to the validator set (initially set to `0`). This field will be used when validating the `SetL1ValidatorWeightTx` defined below.
This `validationID` will be used for replay protection. Used `validationID`s will be stored on the P-Chain. If a `RegisterL1ValidatorTx`'s `validationID` has already been used, the transaction will be considered invalid. To prevent storing an unbounded number of `validationID`s, the `expiry` of the `RegisterL1ValidatorMessage` is required to be no more than 24 hours in the future of the time the transaction is issued on the P-Chain. Any `validationIDs` corresponding to an expired timestamp can be flushed from the P-Chain's state.
L1s are responsible for defining the procedure on how to retrieve the above information from prospective validators.
An EVM-compatible L1 may choose to implement this step like so:
- Use the number of tokens the user has staked into a smart contract on the L1 to determine the weight of their validator
- Require the user to submit an on-chain transaction with their validator information
- Generate the Warp message
For a `RegisterL1ValidatorTx` to be valid, `Signer` must be a valid proof-of-possession of the `blsPublicKey` defined in the `RegisterL1ValidatorMessage` contained in the transaction.
After a `RegisterL1ValidatorTx` is accepted, the P-Chain must be willing to sign an `L1ValidatorRegistrationMessage` for the given `validationID` with `registered` set to `true`. This remains the case until the time at which the validator is removed from the validator set using a `SetL1ValidatorWeightTx`, as described below.
When it is known that a given `validationID` _is not and never will be_ registered, the P-Chain must be willing to sign an `L1ValidatorRegistrationMessage` for the `validationID` with `registered` set to `false`. This could be the case if the `expiry` time of the message has passed prior to the message being delivered in a `RegisterL1ValidatorTx`, or if the validator was successfully registered and then later removed. This enables the P-Chain to prove to validator managers that a validator has been removed or never added. The P-Chain must refuse to sign any `L1ValidatorRegistrationMessage` where the `validationID` does not correspond to an active validator and the `expiry` is in the future.
#### `SetL1ValidatorWeightTx`
`SetL1ValidatorWeightTx` is used to modify the voting weight of a validator. The specification of this transaction is:
```go
type SetL1ValidatorWeightTx struct {
// Metadata, inputs and outputs
BaseTx
// An L1ValidatorWeightMessage payload
Message warp.Message `json:"message"`
}
```
Applications of this transaction could include:
- Increase the voting weight of a validator if a delegation is made on the L1
- Increase the voting weight of a validator if the stake amount is increased (by staking rewards for example)
- Decrease the voting weight of a misbehaving validator
- Remove an inactive validator
The validation criteria for `L1ValidatorWeightMessage` is:
- `nonce >= minNonce`. Note that `nonce` is not required to be incremented by `1` with each successive validator weight update.
- When `minNonce == MaxUint64`, `nonce` must be `MaxUint64` and `weight` must be `0`. This prevents L1s from being unable to remove `nodeID` in a subsequent transaction.
- If `weight == 0`, the validator being removed must not be the last one in the set. If all validators are removed, there are no valid Warp messages that can be produced to register new validators through `RegisterL1ValidatorMessage`. With no validators, block production will halt and the L1 is unrecoverable. This validation criteria serves as a guardrail against this situation. A future ACP can remove this guardrail as users get more familiar with the new L1 mechanics and tooling matures to fork an L1.
When `weight != 0`, the weight of the validator is updated to `weight` and `minNonce` is updated to `nonce + 1`.
When `weight == 0`, the validator is removed from the validator set. All state related to the validator, including the `minNonce` and `validationID`, are reaped from the P-Chain state. Tracking these post-removal is not required since `validationID` can never be re-initialized due to the replay protection provided by `expiry` in `RegisterL1ValidatorTx`. Any unspent $AVAX in the validator's `Balance` will be issued in a single UTXO to the `RemainingBalanceOwner` for this validator. Recall that `RemainingBalanceOwner` is specified when the validator is first added to the L1's validator set (in either `ConvertSubnetToL1Tx` or `RegisterL1ValidatorTx`).
Note: There is no explicit `EndTime` for L1 validators added in a `ConvertSubnetToL1Tx` or `RegisterL1ValidatorTx`. The only time when L1 validators are removed from the L1's validator set is through this transaction when `weight == 0`.
#### `DisableL1ValidatorTx`
L1 validators can use `DisableL1ValidatorTx` to mark their validator as inactive. The specification of this transaction is:
```go
type DisableL1ValidatorTx struct {
// Metadata, inputs and outputs
BaseTx
// ID corresponding to the validator
ValidationID ids.ID `json:"validationID"`
// Authorizes this validator to be disabled
DisableAuth verify.Verifiable `json:"disableAuthorization"`
}
```
The `DisableOwner` specified for this validator must sign the transaction. Any unspent $AVAX in the validator's `Balance` will be issued in a single UTXO to the `RemainingBalanceOwner` for this validator. Recall that both `DisableOwner` and `RemainingBalanceOwner` are specified when the validator is first added to the L1's validator set (in either `ConvertSubnetToL1Tx` or `RegisterL1ValidatorTx`).
For full removal from an L1's validator set, a `SetL1ValidatorWeightTx` must be issued with weight `0`. To do so, a Warp message is required from the L1's validator manager. However, to support the ability to claim the unspent `Balance` for a validator without authorization is critical for failed L1s.
Note that this does not modify an L1's total staking weight. This transaction marks the validator as inactive, but does not remove it from the L1's validator set. Inactive validators can re-activate at any time by increasing their balance with an `IncreaseL1ValidatorBalanceTx`.
L1 creators should be aware that there is no notion of `MinStakeDuration` that is enforced by the P-Chain. It is expected that L1s who choose to enforce a `MinStakeDuration` will lock the validator's Stake for the L1's desired `MinStakeDuration`.
#### `IncreaseL1ValidatorBalanceTx`
L1 validators are required to maintain a non-zero balance used to pay the continuous fee on the P-Chain in order to be considered active. The `IncreaseL1ValidatorBalanceTx` can be used by anybody to add additional $AVAX to the `Balance` to a validator. The specification of this transaction is:
```go
type IncreaseL1ValidatorBalanceTx struct {
// Metadata, inputs and outputs
BaseTx
// ID corresponding to the validator
ValidationID ids.ID `json:"validationID"`
// Balance <= sum($AVAX inputs) - sum($AVAX outputs) - TxFee
Balance uint64 `json:"balance"`
}
```
If the validator corresponding to `ValidationID` is currently inactive (`Balance` was exhausted or `DisableL1ValidatorTx` was issued), this transaction will move them back to the active validator set.
Note: The $AVAX added to `Balance` can be claimed at any time by the validator using `DisableL1ValidatorTx`.
### Bootstrapping L1 Nodes
Bootstrapping a node/validator is the process of securely recreating the latest state of the blockchain locally. At the end of this process, the local state of a node/validator must be in sync with the local state of other virtuous nodes/validators. The node/validator can then verify new incoming transactions and reach consensus with other nodes/validators.
To bootstrap a node/validator, a few critical questions must be answered: How does one discover peers in the network? How does one determine that a discovered peer is honestly participating in the network?
For standalone networks like the Avalanche Primary Network, this is done by connecting to a hardcoded [set](https://github.com/ava-labs/avalanchego/blob/master/genesis/bootstrappers.json) of trusted bootstrappers to then discover new peers. Ethereum calls their set [bootnodes](https://ethereum.org/developers/docs/nodes-and-clients/bootnodes).
Since L1 validators are not required to be Primary Network validators, a list of validator IPs to connect to (the functional bootstrappers of the L1) cannot be provided by simply connecting to the Primary Network validators. However, the Primary Network can enable nodes tracking an L1 to seamlessly connect to the validators by tracking and gossiping L1 validator IPs. L1s will not need to operate and maintain a set of bootstrappers and can rely on the Primary Network for peer discovery.
### Sidebar: L1 Sovereignty
After this ACP is activated, the P-Chain will no longer support staking of any assets other than $AVAX for the Primary Network. The P-Chain will not support the distribution of staking rewards for L1s. All staking-related operations for L1 validation must be managed by the L1's validator manager. The P-Chain simply requires a continuous fee per validator. If an L1 would like to manage their validator's balances on the P-Chain, it can cover the cost for all L1 validators by posting the $AVAX balance on the P-Chain. L1s can implement any mechanism they want to pay the continuous fee charged by the P-Chain for its participants.
The L1 has full ownership over its validator set, not the P-Chain. There are no restrictions on what requirements an L1 can have for validators to join. Any stake that is required to join the L1's validator set is not locked on the P-Chain. If a validator is removed from the L1's validator set via a `SetL1ValidatorWeightTx` with weight `0`, the stake will continue to be locked outside of the P-Chain. How each L1 handles stake associated with the validator is entirely left up to the L1 and can be treated independently to what happens on the P-Chain.
The relationship between the P-Chain and L1s provides a dynamic where L1s can use the P-Chain as an impartial judge to modify parameters (in addition to its existing role of helping to validate incoming Avalanche Warp Messages). If a validator is misbehaving, the L1 validators can collectively generate a BLS multisig to reduce the voting weight of a misbehaving validator. This operation is fully secured by the Avalanche Primary Network (225M $AVAX or $8.325B at the time of writing).
Follow-up ACPs could extend the P-Chain <-> L1 relationship to include parametrization of the 67% threshold to enable L1s to choose a different threshold based on their security model (e.g. a simple majority of 51%).
### Continuous Fee Mechanism
Every additional validator on the P-Chain adds persistent load to the Avalanche Network. When a validator transaction is issued on the P-Chain, it is charged for the computational cost of the transaction itself but is not charged for the cost of an active validator over the time they are validating on the network (which may be indefinitely). This is a common problem in blockchains, spawning many state rent proposals in the broader blockchain space to address it. The following fee mechanism takes advantage of the fact that each L1 validator uses the same amount of computation and charges each L1 validator the dynamic base fee for every discrete unit of time it is active.
To charge each L1 validator, the notion of a `Balance` is introduced. The `Balance` of a validator will be continuously charged during the time they are active to cover the cost of storing the associated validator properties (BLS key, weight, nonce) in memory and to track IPs (in addition to other services provided by the Primary Network). This `Balance` is initialized with the `RegisterL1ValidatorTx` that added them to the active validator set. `Balance` can be increased at any time using the `IncreaseL1ValidatorBalanceTx`. When this `Balance` reaches `0`, the validator will be considered "inactive" and will no longer participate in validating the L1. Inactive validators can be moved back to the active validator set at any time using the same `IncreaseL1ValidatorBalanceTx`. Once a validator is considered inactive, the P-Chain will remove these properties from memory and only retain them on disk. All messages from that validator will be considered invalid until it is revived using the `IncreaseL1ValidatorBalanceTx`. L1s can reduce the amount of inactive weight by removing inactive validators with the `SetL1ValidatorWeightTx` (`Weight` = 0).
Since each L1 validator is charged the same amount at each point in time, tracking the fees for the entire validator set is straight-forward. The accumulated dynamic base fee for the entire network is tracked in a single uint. This accumulated value should be equal to the fee charged if a validator was active from the time the accumulator was instantiated. The validator set is maintained in a priority queue. A pseudocode implementation of the continuous fee mechanism is provided below.
```python
# Pseudocode
class ValidatorQueue:
def __init__(self, fee_getter):
self.acc = 0
self.queue = PriorityQueue()
self.fee_getter = fee_getter
# At each time period, increment the accumulator and
# pop all validators from the top of the queue that
# ran out of funds.
# Note: The amount of work done in a single block
# should be bounded to prevent a large number of
# validator operations from happening at the same
# time.
def time_elapse(self, t):
self.acc = self.acc + self.fee_getter(t)
while True:
vdr = self.queue.peek()
if vdr.balance < self.acc:
self.queue.pop()
continue
return
# Validator was added
def validator_enter(self, vdr):
vdr.balance = vdr.balance + self.acc
self.queue.add(vdr)
# Validator was removed
def validator_remove(self, vdrNodeID):
vdr = find_and_remove(self.queue, vdrNodeID)
vdr.balance = vdr.balance - self.acc
vdr.refund() # Refund [vdr.balance] to [RemainingBalanceOwner]
self.queue.remove()
# Validator's balance was topped up
def validator_increase(self, vdrNodeID, balance):
vdr = find_and_remove(self.queue, vdrNodeID)
vdr.balance = vdr.balance + balance
self.queue.add(vdr)
```
#### Fee Algorithm
[ACP-103](https://github.com/avalanche-foundation/ACPs/blob/main/ACPs/103-dynamic-fees/README.md) proposes a dynamic fee mechanism for transactions on the P-Chain. This mechanism is repurposed with minor modifications for the active L1 validator continuous fee.
At activation, the number of excess active L1 validators $x$ is set to `0`.
The fee rate per second for an active L1 validator is:
$$M \cdot \exp\left(\frac{x}{K}\right)$$
Where:
- $M$ is the minimum price for an active L1 validator
- $\exp\left(x\right)$ is an approximation of $e^x$ following the EIP-4844 specification
```python
# Approximates factor * e ** (numerator / denominator) using Taylor expansion
def fake_exponential(factor: int, numerator: int, denominator: int) -> int:
i = 1
output = 0
numerator_accum = factor * denominator
while numerator_accum > 0:
output += numerator_accum
numerator_accum = (numerator_accum * numerator) // (denominator * i)
i += 1
return output // denominator
```
- $K$ is a constant to control the rate of change for the L1 validator price
After every second, $x$ will be updated:
$$x = \max(x + (V - T), 0)$$
Where:
- $V$ is the number of active L1 validators
- $T$ is the target number of active L1 validators
Whenever $x$ increases by $K$, the price per active L1 validator increases by a factor of `~2.7`. If the price per active L1 validator gets too expensive, some active L1 validators will exit the active validator set, decreasing $x$, dropping the price. The price per active L1 validator constantly adjusts to make sure that, on average, the P-Chain has no more than $T$ active L1 validators.
#### Block Processing
Before processing the transactions inside a block, all validators that no longer have a sufficient (non-zero) balance are deactivated.
After processing the transactions inside a block, all validators that do not have a sufficient balance for the next second are deactivated.
##### Block Timestamp Validity Change
To ensure that validators are charged accurately, blocks are only considered valid if advancing the chain times would not cause a validator to have a negative balance.
This upholds the expectation that the number of L1 validators remains constant between blocks.
The block building protocol is modified to account for this change by first checking if the wall clock time removes any validator due to a lack of funds. If the wall clock time does not remove any L1 validators, the wall clock time is used to build the block. If it does, the time at which the first validator gets removed is used.
##### Fee Calculation
The total validator fee assessed in $\Delta t$ is:
```python
# Calculate the fee to charge over Δt
def cost_over_time(V:int, T:int, x:int, Δt: int) -> int:
cost = 0
for _ in range(Δt):
x = max(x + V - T, 0)
cost += fake_exponential(M, x, K)
return cost
```
#### Parameters
The parameters at activation are:
| Parameter | Definition | Value |
| --------- | ------------------------------------------- | ------------- |
| $T$ | target number of validators | 10_000 |
| $C$ | capacity number of validators | 20_000 |
| $M$ | minimum fee rate | 512 nAVAX/s |
| $K$ | constant to control the rate of fee changes | 1_246_488_515 |
An $M$ of 512 nAVAX/s equates to ~1.33 AVAX/month to run an L1 validator, so long as the total number of continuous-fee-paying L1 validators stays at or below $T$.
$K$ was chosen to set the maximum fee doubling rate to ~24 hours. This is in the extreme case that the network has $C$ validators for prolonged periods of time; if the network has $T$+1 validators for example, the fee rate would double every ~27 years.
A future ACP can adjust the parameters to increase $T$, reduce $M$, and/or modify $K$.
#### User Experience
L1 validators are continuously charged a fee, albeit a small one. This poses a challenge for L1 validators: How do they maintain the balance over time?
Node clients should expose an API to track how much balance is remaining in the validator's account. This will provide a way for L1 validators to track how quickly it is going down and top-up when needed. A nice byproduct of the above design is the balance in the validator's account is claimable. This means users can top-up as much $AVAX as they want and rest-assured knowing they can always retrieve it if there is an excessive amount.
The expectation is that most users will not interact with node clients or track when or how much they need to top-up their validator account. Wallet providers will abstract away most of this process. For users who desire more convenience, L1-as-a-Service providers will abstract away all of this process.
## Backwards Compatibility
This new design for Subnets proposes a large rework to all L1-related mechanics. Rollout should be done on a going-forward basis to not cause any service disruption for live Subnets. All current Subnet validators will be able to continue validating both the Primary Network and whatever Subnets they are validating.
Any state execution changes must be coordinated through a mandatory upgrade. Implementors must take care to continue to verify the existing ruleset until the upgrade is activated. After activation, nodes should verify the new ruleset. Implementors must take care to only verify the presence of 2000 $AVAX prior to activation.
### Deactivated Transactions
- P-Chain
- `TransformSubnetTx`
After this ACP is activated, Elastic Subnets will be disabled. `TransformSubnetTx` will not be accepted post-activation. As there are no Mainnet Elastic Subnets, there should be no production impact with this deactivation.
### New Transactions
- P-Chain
- `ConvertSubnetToL1Tx`
- `RegisterL1ValidatorTx`
- `SetL1ValidatorWeightTx`
- `DisableL1ValidatorTx`
- `IncreaseL1ValidatorBalanceTx`
## Reference Implementation
ACP-77 was implemented and will be merged into AvalancheGo behind the `Etna` upgrade flag. The full body of work can be found tagged with the `acp77` label [here](https://github.com/ava-labs/avalanchego/issues?q=sort%3Aupdated-desc+label%3Aacp77).
Since Etna is not yet activated, all new transactions introduced in ACP-77 will be rejected by AvalancheGo. If any modifications are made to ACP-77 as part of the ACP process, the implementation must be updated prior to activation.
## Security Considerations
This ACP introduces Avalanche Layer 1s, a new network type that costs significantly less than Avalanche Subnets. This can lead to a large increase in the number of networks and, by extension, the number of validators. Each additional validator adds consistent RAM usage to the P-Chain. However, this should be appropriately metered by the continuous fee mechanism outlined above.
With the sovereignty L1s have from the P-Chain, L1 staking tokens are not locked on the P-Chain. This poses a security consideration for L1 validators: Malicious chains can choose to remove validators at will and take any funds that the validator has locked on the L1. The P-Chain only provides the guarantee that L1 validators can retrieve the remaining $AVAX Balance for their validator via a `DisableL1ValidatorTx`. Any assets on the L1 is entirely under the purview of the L1. The onus is on L1 validators to vet the L1's security for any assets transferred onto the L1.
With a long window of expiry (24 hours) for the Warp message in `RegisterL1ValidatorTx`, spam of validator registration could lead to high memory pressure on the P-Chain. A future ACP can reduce the window of expiry if 24 hours proves to be a problem.
NodeIDs can be added to an L1's validator set involuntarily. However, it is important to note that any stake/rewards are _not_ at risk. For a node operator who was added to a validator set involuntarily, they would only need to generate a new NodeID via key rotation as there is no lock-up of any stake to create a NodeID. This is an explicit tradeoff for easier on-boarding of NodeIDs. This mirrors the Primary Network validators guarantee of no stake/rewards at risk.
The continuous fee mechanism outlined above does not apply to inactive L1 validators since they are not stored in memory. However, inactive L1 validators are persisted on disk which can lead to persistent P-Chain state growth. A future ACP can introduce a mechanism to decrease the rate of P-Chain state growth or provide a state expiry path to reduce the amount of P-Chain state.
## Acknowledgements
Special thanks to [@StephenButtolph](https://github.com/StephenButtolph), [@aaronbuchwald](https://github.com/aaronbuchwald), and [@patrick-ogrady](https://github.com/patrick-ogrady) for their feedback on these ideas. Thank you to the broader Ava Labs Platform Engineering Group for their feedback on this ACP prior to publication.
## Copyright
Copyright and related rights waived via [CC0](https://creativecommons.org/publicdomain/zero/1.0/).
# ACP-83: Dynamic Multidimensional Fees (/docs/acps/83-dynamic-multidimensional-fees)
---
title: "ACP-83: Dynamic Multidimensional Fees"
description: "Details for Avalanche Community Proposal 83: Dynamic Multidimensional Fees"
edit_url: https://github.com/avalanche-foundation/ACPs/edit/main/ACPs/83-dynamic-multidimensional-fees/README.md
---
| ACP | 83 |
| :--- | :--- |
| **Title** | Dynamic multidimensional fees for P-chain and X-chain |
| **Author(s)** | Alberto Benegiamo ([@abi87](https://github.com/abi87)) |
| **Status** | Stale |
| **Track** | Standards |
| **Superseded-By** | [ACP-103](https://github.com/avalanche-foundation/ACPs/blob/main/ACPs/103-dynamic-fees/README.md) |
## Abstract
Introduce a dynamic and multidimensional fees scheme for the P-chain and X-chain.
Dynamic fees helps to preserve the stability of the chain as it provides a feedback mechanism that increases the cost of resources when the network operates above its target utilization.
Multidimensional fees ensures that high demand for orthogonal resources does not drive up the price of underutilized resources. For example, networks provide and consume orthogonal resources including, but not limited to, bandwidth, chain state, read/write throughput, and CPU. By independently metering each resource, they can be granularly priced and stay closer to optimal resource utilization.
## Motivation
The P-Chain and X-Chain currently have fixed fees and in some cases those fees are fixed to zero.
This makes transaction issuance predictable, but does not provide feedback mechanism to preserve chain stability under high load. In contrast, the C-Chain, which has the highest and most regular load among the chains on the Primary Network, already supports dynamic fees. This ACP proposes to introduce a similar dynamic fee mechanism for the P-Chain and X-Chain to further improve the Primary Network's stability and resilience under load.
However, unlike the C-Chain, we propose a multidimensional fee scheme with an exponential update rule for each fee dimension. The [HyperSDK](https://github.com/ava-labs/hypersdk) already utilizes a multidimensional fee scheme with optional priority fees and its efficiency is backed by [academic research](https://arxiv.org/abs/2208.07919).
Finally, we split the fee into two parts: a `base fee` and a `priority fee`. The `base fee` is calculated by the network each block to accurately price each resource at a given point in time. Whatever amount greater than the base fee is burnt is treated as the `priority fee` to prioritize faster transaction inclusion.
## Specification
We introduce the multidimensional scheme first and then how to apply the dynamic fee update rule for each fee dimension. Finally we list the new block verification rules, valid once the new fee scheme activates.
### Multidimensional scheme components
We define four fee dimensions, `Bandwidth`, `Reads`, `Writes`, `Compute`, to describe transactions complexity. In more details:
- `Bandwidth` measures the transaction size in bytes, as encoded by the AvalancheGo codec. Byte length is a proxy for the network resources needed to disseminate the transaction.
- `Reads` measures the number of DB reads needed to verify the transactions. DB reads include UTXOs reads and any other state quantity relevant for the specific transaction.
- `Writes` measures the number of DB writes following the transaction verification. DB writes include UTXOs generated as outputs of the transactions and any other state quantity relevant for the specific transaction.
- `Compute` measures the number of signatures to be verified, including UTXOs ones and those related to authorization of specific operations.
For each fee dimension $i$, we define:
- *fee rate* $r_i$ as the price, denominated in AVAX, to be paid for a transaction with complexity $u_i$ along the fee dimension $i$.
- *base fee* as the minimal fee needed to accept a transaction. Base fee is given be the formula
$$base \ fee = \sum_{i=0}^3 r_i \times u_i$$
- *priority fee* as an optional fee paid on top of the base fee to speed up the transaction inclusion in a block.
### Dynamic scheme components
Fee rates are updated in time, to allow a fee increase when network is getting congested. Each new block is a potential source of congestion, as its transactions carry complexity that each validator must process to verify and eventually accept the block. The more complexity carries a block, and the more rapidly blocks are produced, the higher the congestion.
We seek a scheme that rapidly increases the fees when blocks complexity goes above a defined threshold and that equally rapidly decreases the fees once complexity goes down (because blocks carry less/simpler transactions, or because they are produced more slowly). We define the desired threshold as a *target complexity rate* $T$: we would want to process every second a block whose complexity is $T$. Any complexity more than that causes some congestion that we want to penalize via fees.
In order to update fees rates we track, per each block and each fee dimension, a parameter called cumulative excess complexity. Fee rates applied to a block will be defined in terms of cumulative excess complexity as we show in the following.
Suppose that a block $B_t$ is the current chain tip. $B_t$ has the following features:
- $t$ is its timestamp.
- $\Delta C_t$ is the cumulative excess complexity along fee dimension $i$.
Say a new block $B_{t + \Delta T}$ is built on top of $B$, with the following features:
- $t + \Delta T$ is its timestamp
- $C_{t + \Delta T}$ is its complexity along fee dimension $i$.
Then the fee rate $r_{t + \Delta T}$ applied for the block $B_{t + \Delta T}$ along dimension $i$ will be:
$$ r_{t + \Delta T} = r^{min} \times e^{\frac{max(0, \Delta C_t - T \times \Delta T)}{Denom}} $$
where
- $r^{min}$ is the minimal fee rate along fee dimension $i$
- $T$ is the target complexity rate along fee dimension $i$
- $Denom$ is a normalization constant for the fee dimension $i$
Moreover, once the block $B_{t + \Delta T}$ is accepted, the cumulative excess complexity is updated as follows:
$$\Delta C_{t + \Delta T} = max\large(0, \Delta C_{t} - T \times \Delta T\large) + C_{t + \Delta T}$$
The fee rate update formula guarantees that fee rates increase if incoming blocks are complex (large $C_{t + \Delta T}$) and if blocks are emitted rapidly (small $\Delta T$). Symmetrically, fee rates decrease to the minimum if incoming blocks are less complex and if blocks are produced less frequently.
The update formula has a few paramenters to be tuned, independently, for each fee dimension. We defer discussion about tuning to the [implementation section](#tuning-the-update-formula).
## Block verification rules
Upon activation of the dynamic multidimensional fees scheme we modify block processing as follows:
- **Bound block complexity**. For each fee dimension $i$, we define a *maximal block complexity* $Max$. A block is only valid if the block complexity $C$ is less than the maximum block complexity: $C \leq Max$.
- **Verify transaction fee**. When verifying each transaction in a block, we confirm that it can cover its own base fee. Note that both base fee and optional priority fees are burned.
## User Experience
### How will the wallets estimate the fees?
AvalancheGo nodes will provide new APIs exposing the current and expected fee rates, as they are likely to change block by block. Wallets can then use the fees rates to select UTXOs to pay the transaction fees. Moreover, the AvalancheGo implementation proposed above offers a `fees.Calculator` struct that can be reused by wallets and downstream projects to evaluate calculate fees.
### How will wallets be able to re-issue Txs at a higher fee?
Wallets should be able to simply re-issue the transaction since current AvalancheGo implementation drops mempool transactions whose fee rate is lower than current one. More specifically, a transaction may be valid the moment it enters the mempool and it won’t be re-verified as long as it stays in there. However, as soon as the transaction is selected to be included in the next block, it is re-verified against the latest preferred tip. If fees are not enough by this time, the transaction is dropped and the wallet can simply re-issue it at a higher fee, or wait for the fee rate to go down. Note that priority fees offer some buffer space against an increase in the fee rate. A transaction paying just the base fee will be evicted from the mempool in the face of a fee rate increase, while a transaction paying some extra priority fee may have enough buffer room to stay valid after some amount of fee increase.
### How does priority fees guarantee a faster block inclusion?
AvalancheGo mempool will be restructured to order transactions by priority fees. Transactions paying priority fees will be selected for block inclusion first, without violating any spend dependency.
## Backwards Compatibility
Modifying the fee scheme for P-Chain and X-Chain requires a mandatory upgrade for activation. Moreover, wallets must be modified to properly handle the new fee scheme once activated.
## Reference Implementation
The implementation is split across multiple PRs:
- P-Chain work is tracked in this issue: [https://github.com/ava-labs/avalanchego/issues/2707](https://github.com/ava-labs/avalanchego/issues/2707)
- X-Chain work is tracked in this issue: [https://github.com/ava-labs/avalanchego/issues/2708](https://github.com/ava-labs/avalanchego/issues/2708)
A very important implementation step is tuning the update formula parameters for each chain and each fee dimension. We show here the principles we followed for tuning and a simulation based on historical data.
### Tuning the update formula
The basic idea is to measure the complexity of blocks already accepted and derive the parameters from it. You can find the historical data in [this repo](https://github.com/abi87/complexities).
To simplify the exposition I am purposefully ignoring chain specifics (like P-chain proposal blocks). We can account for chain specifics while processing the historical data. Here are the principles:
- **Target block complexity rate $T$**: calculate the distribution of block complexity and pick a high enough quantile.
- **Max block complexity $Max$**: this is probably the trickiest parameter to set.
Historically we had [pretty big transactions](https://subnets.avax.network/p-chain/tx/27pjHPRCvd3zaoQUYMesqtkVfZ188uP93zetNSqk3kSH1WjED1) (more than $1.000$ referenced utxos). Setting a max block complexity so high that these big transactions are allowed is akin to setting no complexity cap.
On the other side, we still want to allow, even encourage, UTXO consolidation, so we may want to allow transactions [like this](https://subnets.avax.network/p-chain/tx/2LxyHzbi2AGJ4GAcHXth6pj5DwVLWeVmog2SAfh4WrqSBdENhV).
A principled way to set max block complexity may be the following:
- calculate the target block complexity rate (see previous point)
- calculate the median time elapsed among consecutive blocks
- The product of these two quantities should gives us something like a target block complexity.
- Set the max block complexity to say $\times 50$ the target value.
- **Normalization coefficient $Denom$**: I suggest we size it as follows:
- Find the largest historical peak, i.e. the sequence of consecutive blocks which contained the most complexity in the shortest period of time
- Tune $Denom$ so that it would cause a $\times 10000$ increase in the fee rate for such a peak. This increase would push fees from the milliAVAX we normally pay under stable network condition up to tens of AVAX.
- **Minimal fee rates $r^{min}$**: we could size them so that transactions fees do not change very much with respect to the currently fixed values.
We simulate below how the update formula would behave on an peak period from Avalanche mainnet.
---
## Specification
Note: The following is pseudocode.
### P2P
#### Aggregation
```diff
+ message GetAcceptanceSignatureRequest {
+ bytes chain_id = 1;
+ uint32 request_id = 2;
+ bytes block_id = 3;
+ }
```
The `GetAcceptanceSignatureRequest` message is sent to a peer to request their signature for a given block id.
```diff
+ message GetAcceptanceSignatureResponse {
+ bytes chain_id = 1;
+ uint32 request_id = 2;
+ bytes bls_signature = 3;
+ }
```
`GetAcceptanceSignatureResponse` is sent to a peer as a response for `GetAcceptanceSignatureRequest`. `bls_signature` is the peer’s signature using their registered primary network BLS staking key over the requested `block_id`. An empty `bls_signature` field indicates that the block was not accepted yet.
## Security Considerations
Nodes that bootstrap using state sync may not have the entire history of the
P-Chain and therefore will not be able to provide the entire history for a block
that is referenced in a block that they propose. This would be needed to unblock a node that is attempting to fast-forward their P-Chain, as they require the entire ancestry between their current accepted tip and the block they are attempting to forward to. It is assumed that nodes will have some minimum amount of recent state so that the requester can eventually be unblocked by retrying, as only one node with the requested ancestry is required to unblock the requester.
An alternative is to make a churn assumption and validate the proposed block's proof with a stale validator set to avoid complexity, but this introduces more security concerns.
## Copyright
Copyright and related rights waived via [CC0](https://creativecommons.org/publicdomain/zero/1.0/).
# ACP-77: Reinventing Subnets (/docs/acps/77-reinventing-subnets)
---
title: "ACP-77: Reinventing Subnets"
description: "Details for Avalanche Community Proposal 77: Reinventing Subnets"
edit_url: https://github.com/avalanche-foundation/ACPs/edit/main/ACPs/77-reinventing-subnets/README.md
---
| ACP | 77 |
| :------------ | :---------------------------------------------------------------------------------------- |
| **Title** | Reinventing Subnets |
| **Author(s)** | Dhruba Basu ([@dhrubabasu](https://github.com/dhrubabasu)) |
| **Status** | Activated ([Discussion](https://github.com/avalanche-foundation/ACPs/discussions/78)) |
| **Track** | Standards |
| **Replaces** | [ACP-13](https://github.com/avalanche-foundation/ACPs/blob/main/ACPs/13-subnet-only-validators/README.md) |
## Abstract
Overhaul Subnet creation and management to unlock increased flexibility for Subnet creators by:
- Separating Subnet validators from Primary Network validators (Primary Network Partial Sync, Removal of 2000 $AVAX requirement)
- Moving ownership of Subnet validator set management from P-Chain to Subnets (ERC-20/ERC-721/Arbitrary Staking, Staking Reward Management)
- Introducing a continuous P-Chain fee mechanism for Subnet validators (Continuous Subnet Staking)
This ACP supersedes [ACP-13](https://github.com/avalanche-foundation/ACPs/blob/main/ACPs/13-subnet-only-validators/README.md) and borrows some of its language.
## Motivation
Each node operator must stake at least 2000 $AVAX ($70k at time of writing) to first become a Primary Network validator before they qualify to become a Subnet validator. Most Subnets aim to launch with at least 8 Subnet validators, which requires staking 16000 $AVAX ($560k at time of writing). All Subnet validators, to satisfy their role as Primary Network validators, must also [allocate 8 AWS vCPU, 16 GB RAM, and 1 TB storage](https://github.com/ava-labs/avalanchego/blob/master/README.md#installation) to sync the entire Primary Network (X-Chain, P-Chain, and C-Chain) and participate in its consensus, in addition to whatever resources are required for each Subnet they are validating.
Regulated entities that are prohibited from validating permissionless, smart contract-enabled blockchains (like the C-Chain) cannot launch a Subnet because they cannot opt-out of Primary Network Validation. This deployment blocker prevents a large cohort of Real World Asset (RWA) issuers from bringing unique, valuable tokens to the Avalanche Ecosystem (that could move between C-Chain <-> Subnets using Avalanche Warp Messaging/Teleporter).
A widely validated Subnet that is not properly metered could destabilize the Primary Network if usage spikes unexpectedly. Underprovisioned Primary Network validators running such a Subnet may exit with an OOM exception, see degraded disk performance, or find it difficult to allocate CPU time to P/X/C-Chain validation. The inverse also holds for Subnets with the Primary Network (where some undefined behavior could bring a Subnet offline).
Although the fee paid to the Primary Network to operate a Subnet does not go up with the amount of activity on the Subnet, the fixed, upfront cost of setting up a Subnet validator on the Primary Network deters new projects that prefer smaller, even variable, costs until demand is observed. _Unlike L2s that pay some increasing fee (usually denominated in units per transaction byte) to an external chain for data availability and security as activity scales, Subnets provide their own security/data availability and the only cost operators must pay from processing more activity is the hardware cost of supporting additional load._
Elastic Subnets, introduced in [Banff](https://medium.com/avalancheavax/banff-elastic-subnets-44042f41e34c), enabled Subnet creators to activate Proof-of-Stake validation and uptime-based rewards using their own token. However, this token is required to be an ANT (created on the X-Chain) and locked on the P-Chain. All staking rewards were distributed on the P-Chain with the reward curve being defined in the `TransformSubnetTx` and, once set, was unable to be modified.
With no Elastic Subnets live on Mainnet, it is clear that Permissionless Subnets as they stand today could be more desirable. There are many successful Permissioned Subnets in production but many Subnet creators have raised the above as points of concern. In summary, the Avalanche community could benefit from a more flexible and affordable mechanism to launch Permissionless Subnets.
### A Note on Nomenclature
Avalanche Subnets are subnetworks validated by a subset of the Primary Network validator set. The new network creation flow outlined in this ACP does not require any intersection between the new network's validator set and the Primary Network's validator set. Moreover, the new networks have greater functionality and sovereignty than Subnets. To distinguish between these two kinds of networks, the community has been referring to these new networks as _Avalanche Layer 1s_, or L1s for short.
All networks created through the old network creation flow will continue to be referred to as Avalanche Subnets.
## Specification
At a high-level, L1s can manage their validator sets externally to the P-Chain by setting the blockchain ID and address of their _validator manager_. The P-Chain will consume Warp messages that modify the L1's validator set. To confirm modification of the L1's validator set, the P-Chain will also produce Warp messages. L1 validators are not required to validate the Primary Network, and do not have the same 2000 $AVAX stake requirement that Subnet validators have. To maintain an active L1 validator, a continuous fee denominated in $AVAX is assessed. L1 validators are only required to sync the P-Chain (not X/C-Chain) in order to track validator set changes and support cross-L1 communication.
### P-Chain Warp Message Payloads
To enable management of an L1's validator set externally to the P-Chain, Warp message verification will be added to the [`PlatformVM`](https://github.com/ava-labs/avalanchego/tree/master/vms/platformvm). For a Warp message to be considered valid by the P-Chain, at least 67% of the `sourceChainID`'s weight must have participated in the aggregate BLS signature. This is equivalent to the threshold set for the C-Chain. A future ACP may be proposed to support modification of this threshold on a per-L1 basis.
The following Warp message payloads are introduced on the P-Chain:
- `SubnetToL1ConversionMessage`
- `RegisterL1ValidatorMessage`
- `L1ValidatorRegistrationMessage`
- `L1ValidatorWeightMessage`
The method of requesting signatures for these messages is left unspecified. A viable option for supporting this functionality is laid out in [ACP-118](https://github.com/avalanche-foundation/ACPs/blob/main/ACPs/118-warp-signature-request/README.md) with the `SignatureRequest` message.
All node IDs contained within the message specifications are represented as variable length arrays such that they can support new node IDs types should the P-Chain add support for them in the future.
The serialization of each of these messages is as follows.
#### `SubnetToL1ConversionMessage`
The P-Chain can produce a `SubnetToL1ConversionMessage` for consumers (i.e. validator managers) to be aware of the initial validator set.
The following serialization is defined as the `ValidatorData`:
| Field | Type | Size |
| -------------: | ---------: | -----------------------: |
| `nodeID` | `[]byte` | 4 + len(`nodeID`) bytes |
| `blsPublicKey` | `[48]byte` | 48 bytes |
| `weight` | `uint64` | 8 bytes |
| | | 60 + len(`nodeID`) bytes |
The following serialization is defined as the `ConversionData`:
| Field | Type | Size |
| ---------------: | ----------------: | ---------------------------------------------------------: |
| `codecID` | `uint16` | 2 bytes |
| `subnetID` | `[32]byte` | 32 bytes |
| `managerChainID` | `[32]byte` | 32 bytes |
| `managerAddress` | `[]byte` | 4 + len(`managerAddress`) bytes |
| `validators` | `[]ValidatorData` | 4 + sum(`validatorLengths`) bytes |
| | | 74 + len(`managerAddress`) + sum(`validatorLengths`) bytes |
- `codecID` is the codec version used to serialize the payload, and is hardcoded to `0x0000`
- `sum(validatorLengths)` is the sum of the lengths of `ValidatorData` serializations included in `validators`.
- `subnetID` identifies the Subnet that is being converted to an L1 (described further below).
- `managerChainID` and `managerAddress` identify the validator manager for the newly created L1. This is the (blockchain ID, address) tuple allowed to send Warp messages to modify the L1's validator set.
- `validators` are the initial continuous-fee-paying validators for the given L1.
The `SubnetToL1ConversionMessage` is specified as an `AddressedCall` with `sourceChainID` set to the P-Chain ID, the `sourceAddress` set to an empty byte array, and a payload of:
| Field | Type | Size |
| -------------: | ---------: | -------: |
| `codecID` | `uint16` | 2 bytes |
| `typeID` | `uint32` | 4 bytes |
| `conversionID` | `[32]byte` | 32 bytes |
| | | 38 bytes |
- `codecID` is the codec version used to serialize the payload, and is hardcoded to `0x0000`
- `typeID` is the payload type identifier and is `0x00000000` for this message
- `conversionID` is the SHA256 hash of the `ConversionData` from a given `ConvertSubnetToL1Tx`
#### `RegisterL1ValidatorMessage`
The P-Chain can consume a `RegisterL1ValidatorMessage` from validator managers through a `RegisterL1ValidatorTx` to register an addition to the L1's validator set.
The following is the serialization of a `PChainOwner`:
| Field | Type | Size |
| ----------: | -----------: | -------------------------------: |
| `threshold` | `uint32` | 4 bytes |
| `addresses` | `[][20]byte` | 4 + len(`addresses`) \\* 20 bytes |
| | | 8 + len(`addresses`) \\* 20 bytes |
- `threshold` is the number of `addresses` that must provide a signature for the `PChainOwner` to authorize an action.
- Validation criteria:
- If `threshold` is `0`, `addresses` must be empty
- `threshold` <= len(`addresses`)
- Entries of `addresses` must be unique and sorted in ascending order
The `RegisterL1ValidatorMessage` is specified as an `AddressedCall` with a payload of:
| Field | Type | Size |
| ----------------------: | ------------: | ------------------------------------------------------------------------: |
| `codecID` | `uint16` | 2 bytes |
| `typeID` | `uint32` | 4 bytes |
| `subnetID` | `[32]byte` | 32 bytes |
| `nodeID` | `[]byte` | 4 + len(`nodeID`) bytes |
| `blsPublicKey` | `[48]byte` | 48 bytes |
| `expiry` | `uint64` | 8 bytes |
| `remainingBalanceOwner` | `PChainOwner` | 8 + len(`addresses`) \\* 20 bytes |
| `disableOwner` | `PChainOwner` | 8 + len(`addresses`) \\* 20 bytes |
| `weight` | `uint64` | 8 bytes |
| | | 122 + len(`nodeID`) + (len(`addresses1`) + len(`addresses2`)) \\* 20 bytes |
- `codecID` is the codec version used to serialize the payload, and is hardcoded to `0x0000`
- `typeID` is the payload type identifier and is `0x00000001` for this payload
- `subnetID`, `nodeID`, `weight`, and `blsPublicKey` are for the validator being added
- `expiry` is the time at which this message becomes invalid. As of a P-Chain timestamp `>= expiry`, this Avalanche Warp Message can no longer be used to add the `nodeID` to the validator set of `subnetID`
- `remainingBalanceOwner` is the P-Chain owner where leftover $AVAX from the validator's Balance will be issued to when this validator it is removed from the validator set.
- `disableOwner` is the only P-Chain owner allowed to disable the validator using `DisableL1ValidatorTx`, specified below.
#### `L1ValidatorRegistrationMessage`
The P-Chain can produce an `L1ValidatorRegistrationMessage` for consumers to verify that a validation period has either begun or has been invalidated.
The `L1ValidatorRegistrationMessage` is specified as an `AddressedCall` with `sourceChainID` set to the P-Chain ID, the `sourceAddress` set to an empty byte array, and a payload of:
| Field | Type | Size |
| -------------: | ---------: | -------: |
| `codecID` | `uint16` | 2 bytes |
| `typeID` | `uint32` | 4 bytes |
| `validationID` | `[32]byte` | 32 bytes |
| `registered` | `bool` | 1 byte |
| | | 39 bytes |
- `codecID` is the codec version used to serialize the payload, and is hardcoded to `0x0000`
- `typeID` is the payload type identifier and is `0x00000002` for this message
- `validationID` identifies the validator for the message
- `registered` is a boolean representing the status of the `validationID`. If true, the `validationID` corresponds to a validator in the current validator set. If false, the `validationID` does not correspond to a validator in the current validator set, and never will in the future.
#### `L1ValidatorWeightMessage`
The P-Chain can consume an `L1ValidatorWeightMessage` through a `SetL1ValidatorWeightTx` to update the weight of an existing validator. The P-Chain can also produce an `L1ValidatorWeightMessage` for consumers to verify that the validator weight update has been effectuated.
The `L1ValidatorWeightMessage` is specified as an `AddressedCall` with the following payload. When sent from the P-Chain, the `sourceChainID` is set to the P-Chain ID, and the `sourceAddress` is set to an empty byte array.
| Field | Type | Size |
| -------------: | ---------: | -------: |
| `codecID` | `uint16` | 2 bytes |
| `typeID` | `uint32` | 4 bytes |
| `validationID` | `[32]byte` | 32 bytes |
| `nonce` | `uint64` | 8 bytes |
| `weight` | `uint64` | 8 bytes |
| | | 54 bytes |
- `codecID` is the codec version used to serialize the payload, and is hardcoded to `0x0000`
- `typeID` is the payload type identifier and is `0x00000003` for this message
- `validationID` identifies the validator for the message
- `nonce` is a strictly increasing number that denotes the latest validator weight update and provides replay protection for this transaction
- `weight` is the new `weight` of the validator
### New P-Chain Transaction Types
Both before and after this ACP, to create a Subnet, a `CreateSubnetTx` must be issued on the P-Chain. This transaction includes an `Owner` field which defines the key that today can be used to authorize any validator set additions (`AddSubnetValidatorTx`) or removals (`RemoveSubnetValidatorTx`).
To be considered a permissionless network, or Avalanche Layer 1:
- This `Owner` key must no longer have the ability to modify the validator set.
- New transaction types must support modification of the validator set via Warp messages.
The following new transaction types are introduced on the P-Chain to support this functionality:
- `ConvertSubnetToL1Tx`
- `RegisterL1ValidatorTx`
- `SetL1ValidatorWeightTx`
- `DisableL1ValidatorTx`
- `IncreaseL1ValidatorBalanceTx`
#### `ConvertSubnetToL1Tx`
To convert a Subnet into an L1, a `ConvertSubnetToL1Tx` must be issued to set the `(chainID, address)` pair that will manage the L1's validator set. The `Owner` key defined in `CreateSubnetTx` must provide a signature to authorize this conversion.
The `ConvertSubnetToL1Tx` specification is:
```go
type PChainOwner struct {
// The threshold number of `Addresses` that must provide a signature in order for
// the `PChainOwner` to be considered valid.
Threshold uint32 `json:"threshold"`
// The 20-byte addresses that are allowed to sign to authenticate a `PChainOwner`.
// Note: It is required for:
// - len(Addresses) == 0 if `Threshold` is 0.
// - len(Addresses) >= `Threshold`
// - The values in Addresses to be sorted in ascending order.
Addresses []ids.ShortID `json:"addresses"`
}
type L1Validator struct {
// NodeID of this validator
NodeID []byte `json:"nodeID"`
// Weight of this validator used when sampling
Weight uint64 `json:"weight"`
// Initial balance for this validator
Balance uint64 `json:"balance"`
// [Signer] is the BLS public key and proof-of-possession for this validator.
// Note: We do not enforce that the BLS key is unique across all validators.
// This means that validators can share a key if they so choose.
// However, a NodeID + L1 does uniquely map to a BLS key
Signer signer.ProofOfPossession `json:"signer"`
// Leftover $AVAX from the [Balance] will be issued to this
// owner once it is removed from the validator set.
RemainingBalanceOwner PChainOwner `json:"remainingBalanceOwner"`
// The only owner allowed to disable this validator on the P-Chain.
DisableOwner PChainOwner `json:"disableOwner"`
}
type ConvertSubnetToL1Tx struct {
// Metadata, inputs and outputs
BaseTx
// ID of the Subnet to transform
// Restrictions:
// - Must not be the Primary Network ID
Subnet ids.ID `json:"subnetID"`
// BlockchainID where the validator manager lives
ChainID ids.ID `json:"chainID"`
// Address of the validator manager
Address []byte `json:"address"`
// Initial continuous-fee-paying validators for the L1
Validators []L1Validator `json:"validators"`
// Authorizes this conversion
SubnetAuth verify.Verifiable `json:"subnetAuthorization"`
}
```
After this transaction is accepted, `CreateChainTx` and `AddSubnetValidatorTx` are disabled on the Subnet. The only action that the `Owner` key is able to take is removing Subnet validators with `RemoveSubnetValidatorTx` that had been added using `AddSubnetValidatorTx`. Unless removed by the `Owner` key, any Subnet validators added previously with an `AddSubnetValidatorTx` will continue to validate the Subnet until their [`End`](https://github.com/ava-labs/avalanchego/blob/a1721541754f8ee23502b456af86fea8c766352a/vms/platformvm/txs/validator.go#L27) time is reached. Once all Subnet validators added with `AddSubnetValidatorTx` are no longer in the validator set, the `Owner` key is powerless. `RegisterL1ValidatorTx` and `SetL1ValidatorWeightTx` must be used to manage the L1's validator set.
The `validationID` for validators added through `ConvertSubnetToL1Tx` is defined as the SHA256 hash of the 36 bytes resulting from concatenating the 32 byte `subnetID` with the 4 byte `validatorIndex` (index in the `Validators` array within the transaction).
Once this transaction is accepted, the P-Chain must be willing sign a `SubnetToL1ConversionMessage` with a `conversionID` corresponding to `ConversionData` populated with the values from this transaction.
#### `RegisterL1ValidatorTx`
After a `ConvertSubnetToL1Tx` has been accepted, new validators can only be added by using a `RegisterL1ValidatorTx`. The specification of this transaction is:
```go
type RegisterL1ValidatorTx struct {
// Metadata, inputs and outputs
BaseTx
// Balance <= sum($AVAX inputs) - sum($AVAX outputs) - TxFee.
Balance uint64 `json:"balance"`
// [Signer] is a BLS signature proving ownership of the BLS public key specified
// below in `Message` for this validator.
// Note: We do not enforce that the BLS key is unique across all validators.
// This means that validators can share a key if they so choose.
// However, a NodeID + L1 does uniquely map to a BLS key
Signer [96]byte `json:"signer"`
// A RegisterL1ValidatorMessage payload
Message warp.Message `json:"message"`
}
```
The `validationID` of validators added via `RegisterL1ValidatorTx` is defined as the SHA256 hash of the `Payload` of the `AddressedCall` in `Message`.
When a `RegisterL1ValidatorTx` is accepted on the P-Chain, the validator is added to the L1's validator set. A `minNonce` field corresponding to the `validationID` will be stored on addition to the validator set (initially set to `0`). This field will be used when validating the `SetL1ValidatorWeightTx` defined below.
This `validationID` will be used for replay protection. Used `validationID`s will be stored on the P-Chain. If a `RegisterL1ValidatorTx`'s `validationID` has already been used, the transaction will be considered invalid. To prevent storing an unbounded number of `validationID`s, the `expiry` of the `RegisterL1ValidatorMessage` is required to be no more than 24 hours in the future of the time the transaction is issued on the P-Chain. Any `validationIDs` corresponding to an expired timestamp can be flushed from the P-Chain's state.
L1s are responsible for defining the procedure on how to retrieve the above information from prospective validators.
An EVM-compatible L1 may choose to implement this step like so:
- Use the number of tokens the user has staked into a smart contract on the L1 to determine the weight of their validator
- Require the user to submit an on-chain transaction with their validator information
- Generate the Warp message
For a `RegisterL1ValidatorTx` to be valid, `Signer` must be a valid proof-of-possession of the `blsPublicKey` defined in the `RegisterL1ValidatorMessage` contained in the transaction.
After a `RegisterL1ValidatorTx` is accepted, the P-Chain must be willing to sign an `L1ValidatorRegistrationMessage` for the given `validationID` with `registered` set to `true`. This remains the case until the time at which the validator is removed from the validator set using a `SetL1ValidatorWeightTx`, as described below.
When it is known that a given `validationID` _is not and never will be_ registered, the P-Chain must be willing to sign an `L1ValidatorRegistrationMessage` for the `validationID` with `registered` set to `false`. This could be the case if the `expiry` time of the message has passed prior to the message being delivered in a `RegisterL1ValidatorTx`, or if the validator was successfully registered and then later removed. This enables the P-Chain to prove to validator managers that a validator has been removed or never added. The P-Chain must refuse to sign any `L1ValidatorRegistrationMessage` where the `validationID` does not correspond to an active validator and the `expiry` is in the future.
#### `SetL1ValidatorWeightTx`
`SetL1ValidatorWeightTx` is used to modify the voting weight of a validator. The specification of this transaction is:
```go
type SetL1ValidatorWeightTx struct {
// Metadata, inputs and outputs
BaseTx
// An L1ValidatorWeightMessage payload
Message warp.Message `json:"message"`
}
```
Applications of this transaction could include:
- Increase the voting weight of a validator if a delegation is made on the L1
- Increase the voting weight of a validator if the stake amount is increased (by staking rewards for example)
- Decrease the voting weight of a misbehaving validator
- Remove an inactive validator
The validation criteria for `L1ValidatorWeightMessage` is:
- `nonce >= minNonce`. Note that `nonce` is not required to be incremented by `1` with each successive validator weight update.
- When `minNonce == MaxUint64`, `nonce` must be `MaxUint64` and `weight` must be `0`. This prevents L1s from being unable to remove `nodeID` in a subsequent transaction.
- If `weight == 0`, the validator being removed must not be the last one in the set. If all validators are removed, there are no valid Warp messages that can be produced to register new validators through `RegisterL1ValidatorMessage`. With no validators, block production will halt and the L1 is unrecoverable. This validation criteria serves as a guardrail against this situation. A future ACP can remove this guardrail as users get more familiar with the new L1 mechanics and tooling matures to fork an L1.
When `weight != 0`, the weight of the validator is updated to `weight` and `minNonce` is updated to `nonce + 1`.
When `weight == 0`, the validator is removed from the validator set. All state related to the validator, including the `minNonce` and `validationID`, are reaped from the P-Chain state. Tracking these post-removal is not required since `validationID` can never be re-initialized due to the replay protection provided by `expiry` in `RegisterL1ValidatorTx`. Any unspent $AVAX in the validator's `Balance` will be issued in a single UTXO to the `RemainingBalanceOwner` for this validator. Recall that `RemainingBalanceOwner` is specified when the validator is first added to the L1's validator set (in either `ConvertSubnetToL1Tx` or `RegisterL1ValidatorTx`).
Note: There is no explicit `EndTime` for L1 validators added in a `ConvertSubnetToL1Tx` or `RegisterL1ValidatorTx`. The only time when L1 validators are removed from the L1's validator set is through this transaction when `weight == 0`.
#### `DisableL1ValidatorTx`
L1 validators can use `DisableL1ValidatorTx` to mark their validator as inactive. The specification of this transaction is:
```go
type DisableL1ValidatorTx struct {
// Metadata, inputs and outputs
BaseTx
// ID corresponding to the validator
ValidationID ids.ID `json:"validationID"`
// Authorizes this validator to be disabled
DisableAuth verify.Verifiable `json:"disableAuthorization"`
}
```
The `DisableOwner` specified for this validator must sign the transaction. Any unspent $AVAX in the validator's `Balance` will be issued in a single UTXO to the `RemainingBalanceOwner` for this validator. Recall that both `DisableOwner` and `RemainingBalanceOwner` are specified when the validator is first added to the L1's validator set (in either `ConvertSubnetToL1Tx` or `RegisterL1ValidatorTx`).
For full removal from an L1's validator set, a `SetL1ValidatorWeightTx` must be issued with weight `0`. To do so, a Warp message is required from the L1's validator manager. However, to support the ability to claim the unspent `Balance` for a validator without authorization is critical for failed L1s.
Note that this does not modify an L1's total staking weight. This transaction marks the validator as inactive, but does not remove it from the L1's validator set. Inactive validators can re-activate at any time by increasing their balance with an `IncreaseL1ValidatorBalanceTx`.
L1 creators should be aware that there is no notion of `MinStakeDuration` that is enforced by the P-Chain. It is expected that L1s who choose to enforce a `MinStakeDuration` will lock the validator's Stake for the L1's desired `MinStakeDuration`.
#### `IncreaseL1ValidatorBalanceTx`
L1 validators are required to maintain a non-zero balance used to pay the continuous fee on the P-Chain in order to be considered active. The `IncreaseL1ValidatorBalanceTx` can be used by anybody to add additional $AVAX to the `Balance` to a validator. The specification of this transaction is:
```go
type IncreaseL1ValidatorBalanceTx struct {
// Metadata, inputs and outputs
BaseTx
// ID corresponding to the validator
ValidationID ids.ID `json:"validationID"`
// Balance <= sum($AVAX inputs) - sum($AVAX outputs) - TxFee
Balance uint64 `json:"balance"`
}
```
If the validator corresponding to `ValidationID` is currently inactive (`Balance` was exhausted or `DisableL1ValidatorTx` was issued), this transaction will move them back to the active validator set.
Note: The $AVAX added to `Balance` can be claimed at any time by the validator using `DisableL1ValidatorTx`.
### Bootstrapping L1 Nodes
Bootstrapping a node/validator is the process of securely recreating the latest state of the blockchain locally. At the end of this process, the local state of a node/validator must be in sync with the local state of other virtuous nodes/validators. The node/validator can then verify new incoming transactions and reach consensus with other nodes/validators.
To bootstrap a node/validator, a few critical questions must be answered: How does one discover peers in the network? How does one determine that a discovered peer is honestly participating in the network?
For standalone networks like the Avalanche Primary Network, this is done by connecting to a hardcoded [set](https://github.com/ava-labs/avalanchego/blob/master/genesis/bootstrappers.json) of trusted bootstrappers to then discover new peers. Ethereum calls their set [bootnodes](https://ethereum.org/developers/docs/nodes-and-clients/bootnodes).
Since L1 validators are not required to be Primary Network validators, a list of validator IPs to connect to (the functional bootstrappers of the L1) cannot be provided by simply connecting to the Primary Network validators. However, the Primary Network can enable nodes tracking an L1 to seamlessly connect to the validators by tracking and gossiping L1 validator IPs. L1s will not need to operate and maintain a set of bootstrappers and can rely on the Primary Network for peer discovery.
### Sidebar: L1 Sovereignty
After this ACP is activated, the P-Chain will no longer support staking of any assets other than $AVAX for the Primary Network. The P-Chain will not support the distribution of staking rewards for L1s. All staking-related operations for L1 validation must be managed by the L1's validator manager. The P-Chain simply requires a continuous fee per validator. If an L1 would like to manage their validator's balances on the P-Chain, it can cover the cost for all L1 validators by posting the $AVAX balance on the P-Chain. L1s can implement any mechanism they want to pay the continuous fee charged by the P-Chain for its participants.
The L1 has full ownership over its validator set, not the P-Chain. There are no restrictions on what requirements an L1 can have for validators to join. Any stake that is required to join the L1's validator set is not locked on the P-Chain. If a validator is removed from the L1's validator set via a `SetL1ValidatorWeightTx` with weight `0`, the stake will continue to be locked outside of the P-Chain. How each L1 handles stake associated with the validator is entirely left up to the L1 and can be treated independently to what happens on the P-Chain.
The relationship between the P-Chain and L1s provides a dynamic where L1s can use the P-Chain as an impartial judge to modify parameters (in addition to its existing role of helping to validate incoming Avalanche Warp Messages). If a validator is misbehaving, the L1 validators can collectively generate a BLS multisig to reduce the voting weight of a misbehaving validator. This operation is fully secured by the Avalanche Primary Network (225M $AVAX or $8.325B at the time of writing).
Follow-up ACPs could extend the P-Chain <-> L1 relationship to include parametrization of the 67% threshold to enable L1s to choose a different threshold based on their security model (e.g. a simple majority of 51%).
### Continuous Fee Mechanism
Every additional validator on the P-Chain adds persistent load to the Avalanche Network. When a validator transaction is issued on the P-Chain, it is charged for the computational cost of the transaction itself but is not charged for the cost of an active validator over the time they are validating on the network (which may be indefinitely). This is a common problem in blockchains, spawning many state rent proposals in the broader blockchain space to address it. The following fee mechanism takes advantage of the fact that each L1 validator uses the same amount of computation and charges each L1 validator the dynamic base fee for every discrete unit of time it is active.
To charge each L1 validator, the notion of a `Balance` is introduced. The `Balance` of a validator will be continuously charged during the time they are active to cover the cost of storing the associated validator properties (BLS key, weight, nonce) in memory and to track IPs (in addition to other services provided by the Primary Network). This `Balance` is initialized with the `RegisterL1ValidatorTx` that added them to the active validator set. `Balance` can be increased at any time using the `IncreaseL1ValidatorBalanceTx`. When this `Balance` reaches `0`, the validator will be considered "inactive" and will no longer participate in validating the L1. Inactive validators can be moved back to the active validator set at any time using the same `IncreaseL1ValidatorBalanceTx`. Once a validator is considered inactive, the P-Chain will remove these properties from memory and only retain them on disk. All messages from that validator will be considered invalid until it is revived using the `IncreaseL1ValidatorBalanceTx`. L1s can reduce the amount of inactive weight by removing inactive validators with the `SetL1ValidatorWeightTx` (`Weight` = 0).
Since each L1 validator is charged the same amount at each point in time, tracking the fees for the entire validator set is straight-forward. The accumulated dynamic base fee for the entire network is tracked in a single uint. This accumulated value should be equal to the fee charged if a validator was active from the time the accumulator was instantiated. The validator set is maintained in a priority queue. A pseudocode implementation of the continuous fee mechanism is provided below.
```python
# Pseudocode
class ValidatorQueue:
def __init__(self, fee_getter):
self.acc = 0
self.queue = PriorityQueue()
self.fee_getter = fee_getter
# At each time period, increment the accumulator and
# pop all validators from the top of the queue that
# ran out of funds.
# Note: The amount of work done in a single block
# should be bounded to prevent a large number of
# validator operations from happening at the same
# time.
def time_elapse(self, t):
self.acc = self.acc + self.fee_getter(t)
while True:
vdr = self.queue.peek()
if vdr.balance < self.acc:
self.queue.pop()
continue
return
# Validator was added
def validator_enter(self, vdr):
vdr.balance = vdr.balance + self.acc
self.queue.add(vdr)
# Validator was removed
def validator_remove(self, vdrNodeID):
vdr = find_and_remove(self.queue, vdrNodeID)
vdr.balance = vdr.balance - self.acc
vdr.refund() # Refund [vdr.balance] to [RemainingBalanceOwner]
self.queue.remove()
# Validator's balance was topped up
def validator_increase(self, vdrNodeID, balance):
vdr = find_and_remove(self.queue, vdrNodeID)
vdr.balance = vdr.balance + balance
self.queue.add(vdr)
```
#### Fee Algorithm
[ACP-103](https://github.com/avalanche-foundation/ACPs/blob/main/ACPs/103-dynamic-fees/README.md) proposes a dynamic fee mechanism for transactions on the P-Chain. This mechanism is repurposed with minor modifications for the active L1 validator continuous fee.
At activation, the number of excess active L1 validators $x$ is set to `0`.
The fee rate per second for an active L1 validator is:
$$M \cdot \exp\left(\frac{x}{K}\right)$$
Where:
- $M$ is the minimum price for an active L1 validator
- $\exp\left(x\right)$ is an approximation of $e^x$ following the EIP-4844 specification
```python
# Approximates factor * e ** (numerator / denominator) using Taylor expansion
def fake_exponential(factor: int, numerator: int, denominator: int) -> int:
i = 1
output = 0
numerator_accum = factor * denominator
while numerator_accum > 0:
output += numerator_accum
numerator_accum = (numerator_accum * numerator) // (denominator * i)
i += 1
return output // denominator
```
- $K$ is a constant to control the rate of change for the L1 validator price
After every second, $x$ will be updated:
$$x = \max(x + (V - T), 0)$$
Where:
- $V$ is the number of active L1 validators
- $T$ is the target number of active L1 validators
Whenever $x$ increases by $K$, the price per active L1 validator increases by a factor of `~2.7`. If the price per active L1 validator gets too expensive, some active L1 validators will exit the active validator set, decreasing $x$, dropping the price. The price per active L1 validator constantly adjusts to make sure that, on average, the P-Chain has no more than $T$ active L1 validators.
#### Block Processing
Before processing the transactions inside a block, all validators that no longer have a sufficient (non-zero) balance are deactivated.
After processing the transactions inside a block, all validators that do not have a sufficient balance for the next second are deactivated.
##### Block Timestamp Validity Change
To ensure that validators are charged accurately, blocks are only considered valid if advancing the chain times would not cause a validator to have a negative balance.
This upholds the expectation that the number of L1 validators remains constant between blocks.
The block building protocol is modified to account for this change by first checking if the wall clock time removes any validator due to a lack of funds. If the wall clock time does not remove any L1 validators, the wall clock time is used to build the block. If it does, the time at which the first validator gets removed is used.
##### Fee Calculation
The total validator fee assessed in $\Delta t$ is:
```python
# Calculate the fee to charge over Δt
def cost_over_time(V:int, T:int, x:int, Δt: int) -> int:
cost = 0
for _ in range(Δt):
x = max(x + V - T, 0)
cost += fake_exponential(M, x, K)
return cost
```
#### Parameters
The parameters at activation are:
| Parameter | Definition | Value |
| --------- | ------------------------------------------- | ------------- |
| $T$ | target number of validators | 10_000 |
| $C$ | capacity number of validators | 20_000 |
| $M$ | minimum fee rate | 512 nAVAX/s |
| $K$ | constant to control the rate of fee changes | 1_246_488_515 |
An $M$ of 512 nAVAX/s equates to ~1.33 AVAX/month to run an L1 validator, so long as the total number of continuous-fee-paying L1 validators stays at or below $T$.
$K$ was chosen to set the maximum fee doubling rate to ~24 hours. This is in the extreme case that the network has $C$ validators for prolonged periods of time; if the network has $T$+1 validators for example, the fee rate would double every ~27 years.
A future ACP can adjust the parameters to increase $T$, reduce $M$, and/or modify $K$.
#### User Experience
L1 validators are continuously charged a fee, albeit a small one. This poses a challenge for L1 validators: How do they maintain the balance over time?
Node clients should expose an API to track how much balance is remaining in the validator's account. This will provide a way for L1 validators to track how quickly it is going down and top-up when needed. A nice byproduct of the above design is the balance in the validator's account is claimable. This means users can top-up as much $AVAX as they want and rest-assured knowing they can always retrieve it if there is an excessive amount.
The expectation is that most users will not interact with node clients or track when or how much they need to top-up their validator account. Wallet providers will abstract away most of this process. For users who desire more convenience, L1-as-a-Service providers will abstract away all of this process.
## Backwards Compatibility
This new design for Subnets proposes a large rework to all L1-related mechanics. Rollout should be done on a going-forward basis to not cause any service disruption for live Subnets. All current Subnet validators will be able to continue validating both the Primary Network and whatever Subnets they are validating.
Any state execution changes must be coordinated through a mandatory upgrade. Implementors must take care to continue to verify the existing ruleset until the upgrade is activated. After activation, nodes should verify the new ruleset. Implementors must take care to only verify the presence of 2000 $AVAX prior to activation.
### Deactivated Transactions
- P-Chain
- `TransformSubnetTx`
After this ACP is activated, Elastic Subnets will be disabled. `TransformSubnetTx` will not be accepted post-activation. As there are no Mainnet Elastic Subnets, there should be no production impact with this deactivation.
### New Transactions
- P-Chain
- `ConvertSubnetToL1Tx`
- `RegisterL1ValidatorTx`
- `SetL1ValidatorWeightTx`
- `DisableL1ValidatorTx`
- `IncreaseL1ValidatorBalanceTx`
## Reference Implementation
ACP-77 was implemented and will be merged into AvalancheGo behind the `Etna` upgrade flag. The full body of work can be found tagged with the `acp77` label [here](https://github.com/ava-labs/avalanchego/issues?q=sort%3Aupdated-desc+label%3Aacp77).
Since Etna is not yet activated, all new transactions introduced in ACP-77 will be rejected by AvalancheGo. If any modifications are made to ACP-77 as part of the ACP process, the implementation must be updated prior to activation.
## Security Considerations
This ACP introduces Avalanche Layer 1s, a new network type that costs significantly less than Avalanche Subnets. This can lead to a large increase in the number of networks and, by extension, the number of validators. Each additional validator adds consistent RAM usage to the P-Chain. However, this should be appropriately metered by the continuous fee mechanism outlined above.
With the sovereignty L1s have from the P-Chain, L1 staking tokens are not locked on the P-Chain. This poses a security consideration for L1 validators: Malicious chains can choose to remove validators at will and take any funds that the validator has locked on the L1. The P-Chain only provides the guarantee that L1 validators can retrieve the remaining $AVAX Balance for their validator via a `DisableL1ValidatorTx`. Any assets on the L1 is entirely under the purview of the L1. The onus is on L1 validators to vet the L1's security for any assets transferred onto the L1.
With a long window of expiry (24 hours) for the Warp message in `RegisterL1ValidatorTx`, spam of validator registration could lead to high memory pressure on the P-Chain. A future ACP can reduce the window of expiry if 24 hours proves to be a problem.
NodeIDs can be added to an L1's validator set involuntarily. However, it is important to note that any stake/rewards are _not_ at risk. For a node operator who was added to a validator set involuntarily, they would only need to generate a new NodeID via key rotation as there is no lock-up of any stake to create a NodeID. This is an explicit tradeoff for easier on-boarding of NodeIDs. This mirrors the Primary Network validators guarantee of no stake/rewards at risk.
The continuous fee mechanism outlined above does not apply to inactive L1 validators since they are not stored in memory. However, inactive L1 validators are persisted on disk which can lead to persistent P-Chain state growth. A future ACP can introduce a mechanism to decrease the rate of P-Chain state growth or provide a state expiry path to reduce the amount of P-Chain state.
## Acknowledgements
Special thanks to [@StephenButtolph](https://github.com/StephenButtolph), [@aaronbuchwald](https://github.com/aaronbuchwald), and [@patrick-ogrady](https://github.com/patrick-ogrady) for their feedback on these ideas. Thank you to the broader Ava Labs Platform Engineering Group for their feedback on this ACP prior to publication.
## Copyright
Copyright and related rights waived via [CC0](https://creativecommons.org/publicdomain/zero/1.0/).
# ACP-83: Dynamic Multidimensional Fees (/docs/acps/83-dynamic-multidimensional-fees)
---
title: "ACP-83: Dynamic Multidimensional Fees"
description: "Details for Avalanche Community Proposal 83: Dynamic Multidimensional Fees"
edit_url: https://github.com/avalanche-foundation/ACPs/edit/main/ACPs/83-dynamic-multidimensional-fees/README.md
---
| ACP | 83 |
| :--- | :--- |
| **Title** | Dynamic multidimensional fees for P-chain and X-chain |
| **Author(s)** | Alberto Benegiamo ([@abi87](https://github.com/abi87)) |
| **Status** | Stale |
| **Track** | Standards |
| **Superseded-By** | [ACP-103](https://github.com/avalanche-foundation/ACPs/blob/main/ACPs/103-dynamic-fees/README.md) |
## Abstract
Introduce a dynamic and multidimensional fees scheme for the P-chain and X-chain.
Dynamic fees helps to preserve the stability of the chain as it provides a feedback mechanism that increases the cost of resources when the network operates above its target utilization.
Multidimensional fees ensures that high demand for orthogonal resources does not drive up the price of underutilized resources. For example, networks provide and consume orthogonal resources including, but not limited to, bandwidth, chain state, read/write throughput, and CPU. By independently metering each resource, they can be granularly priced and stay closer to optimal resource utilization.
## Motivation
The P-Chain and X-Chain currently have fixed fees and in some cases those fees are fixed to zero.
This makes transaction issuance predictable, but does not provide feedback mechanism to preserve chain stability under high load. In contrast, the C-Chain, which has the highest and most regular load among the chains on the Primary Network, already supports dynamic fees. This ACP proposes to introduce a similar dynamic fee mechanism for the P-Chain and X-Chain to further improve the Primary Network's stability and resilience under load.
However, unlike the C-Chain, we propose a multidimensional fee scheme with an exponential update rule for each fee dimension. The [HyperSDK](https://github.com/ava-labs/hypersdk) already utilizes a multidimensional fee scheme with optional priority fees and its efficiency is backed by [academic research](https://arxiv.org/abs/2208.07919).
Finally, we split the fee into two parts: a `base fee` and a `priority fee`. The `base fee` is calculated by the network each block to accurately price each resource at a given point in time. Whatever amount greater than the base fee is burnt is treated as the `priority fee` to prioritize faster transaction inclusion.
## Specification
We introduce the multidimensional scheme first and then how to apply the dynamic fee update rule for each fee dimension. Finally we list the new block verification rules, valid once the new fee scheme activates.
### Multidimensional scheme components
We define four fee dimensions, `Bandwidth`, `Reads`, `Writes`, `Compute`, to describe transactions complexity. In more details:
- `Bandwidth` measures the transaction size in bytes, as encoded by the AvalancheGo codec. Byte length is a proxy for the network resources needed to disseminate the transaction.
- `Reads` measures the number of DB reads needed to verify the transactions. DB reads include UTXOs reads and any other state quantity relevant for the specific transaction.
- `Writes` measures the number of DB writes following the transaction verification. DB writes include UTXOs generated as outputs of the transactions and any other state quantity relevant for the specific transaction.
- `Compute` measures the number of signatures to be verified, including UTXOs ones and those related to authorization of specific operations.
For each fee dimension $i$, we define:
- *fee rate* $r_i$ as the price, denominated in AVAX, to be paid for a transaction with complexity $u_i$ along the fee dimension $i$.
- *base fee* as the minimal fee needed to accept a transaction. Base fee is given be the formula
$$base \ fee = \sum_{i=0}^3 r_i \times u_i$$
- *priority fee* as an optional fee paid on top of the base fee to speed up the transaction inclusion in a block.
### Dynamic scheme components
Fee rates are updated in time, to allow a fee increase when network is getting congested. Each new block is a potential source of congestion, as its transactions carry complexity that each validator must process to verify and eventually accept the block. The more complexity carries a block, and the more rapidly blocks are produced, the higher the congestion.
We seek a scheme that rapidly increases the fees when blocks complexity goes above a defined threshold and that equally rapidly decreases the fees once complexity goes down (because blocks carry less/simpler transactions, or because they are produced more slowly). We define the desired threshold as a *target complexity rate* $T$: we would want to process every second a block whose complexity is $T$. Any complexity more than that causes some congestion that we want to penalize via fees.
In order to update fees rates we track, per each block and each fee dimension, a parameter called cumulative excess complexity. Fee rates applied to a block will be defined in terms of cumulative excess complexity as we show in the following.
Suppose that a block $B_t$ is the current chain tip. $B_t$ has the following features:
- $t$ is its timestamp.
- $\Delta C_t$ is the cumulative excess complexity along fee dimension $i$.
Say a new block $B_{t + \Delta T}$ is built on top of $B$, with the following features:
- $t + \Delta T$ is its timestamp
- $C_{t + \Delta T}$ is its complexity along fee dimension $i$.
Then the fee rate $r_{t + \Delta T}$ applied for the block $B_{t + \Delta T}$ along dimension $i$ will be:
$$ r_{t + \Delta T} = r^{min} \times e^{\frac{max(0, \Delta C_t - T \times \Delta T)}{Denom}} $$
where
- $r^{min}$ is the minimal fee rate along fee dimension $i$
- $T$ is the target complexity rate along fee dimension $i$
- $Denom$ is a normalization constant for the fee dimension $i$
Moreover, once the block $B_{t + \Delta T}$ is accepted, the cumulative excess complexity is updated as follows:
$$\Delta C_{t + \Delta T} = max\large(0, \Delta C_{t} - T \times \Delta T\large) + C_{t + \Delta T}$$
The fee rate update formula guarantees that fee rates increase if incoming blocks are complex (large $C_{t + \Delta T}$) and if blocks are emitted rapidly (small $\Delta T$). Symmetrically, fee rates decrease to the minimum if incoming blocks are less complex and if blocks are produced less frequently.
The update formula has a few paramenters to be tuned, independently, for each fee dimension. We defer discussion about tuning to the [implementation section](#tuning-the-update-formula).
## Block verification rules
Upon activation of the dynamic multidimensional fees scheme we modify block processing as follows:
- **Bound block complexity**. For each fee dimension $i$, we define a *maximal block complexity* $Max$. A block is only valid if the block complexity $C$ is less than the maximum block complexity: $C \leq Max$.
- **Verify transaction fee**. When verifying each transaction in a block, we confirm that it can cover its own base fee. Note that both base fee and optional priority fees are burned.
## User Experience
### How will the wallets estimate the fees?
AvalancheGo nodes will provide new APIs exposing the current and expected fee rates, as they are likely to change block by block. Wallets can then use the fees rates to select UTXOs to pay the transaction fees. Moreover, the AvalancheGo implementation proposed above offers a `fees.Calculator` struct that can be reused by wallets and downstream projects to evaluate calculate fees.
### How will wallets be able to re-issue Txs at a higher fee?
Wallets should be able to simply re-issue the transaction since current AvalancheGo implementation drops mempool transactions whose fee rate is lower than current one. More specifically, a transaction may be valid the moment it enters the mempool and it won’t be re-verified as long as it stays in there. However, as soon as the transaction is selected to be included in the next block, it is re-verified against the latest preferred tip. If fees are not enough by this time, the transaction is dropped and the wallet can simply re-issue it at a higher fee, or wait for the fee rate to go down. Note that priority fees offer some buffer space against an increase in the fee rate. A transaction paying just the base fee will be evicted from the mempool in the face of a fee rate increase, while a transaction paying some extra priority fee may have enough buffer room to stay valid after some amount of fee increase.
### How does priority fees guarantee a faster block inclusion?
AvalancheGo mempool will be restructured to order transactions by priority fees. Transactions paying priority fees will be selected for block inclusion first, without violating any spend dependency.
## Backwards Compatibility
Modifying the fee scheme for P-Chain and X-Chain requires a mandatory upgrade for activation. Moreover, wallets must be modified to properly handle the new fee scheme once activated.
## Reference Implementation
The implementation is split across multiple PRs:
- P-Chain work is tracked in this issue: [https://github.com/ava-labs/avalanchego/issues/2707](https://github.com/ava-labs/avalanchego/issues/2707)
- X-Chain work is tracked in this issue: [https://github.com/ava-labs/avalanchego/issues/2708](https://github.com/ava-labs/avalanchego/issues/2708)
A very important implementation step is tuning the update formula parameters for each chain and each fee dimension. We show here the principles we followed for tuning and a simulation based on historical data.
### Tuning the update formula
The basic idea is to measure the complexity of blocks already accepted and derive the parameters from it. You can find the historical data in [this repo](https://github.com/abi87/complexities).
To simplify the exposition I am purposefully ignoring chain specifics (like P-chain proposal blocks). We can account for chain specifics while processing the historical data. Here are the principles:
- **Target block complexity rate $T$**: calculate the distribution of block complexity and pick a high enough quantile.
- **Max block complexity $Max$**: this is probably the trickiest parameter to set.
Historically we had [pretty big transactions](https://subnets.avax.network/p-chain/tx/27pjHPRCvd3zaoQUYMesqtkVfZ188uP93zetNSqk3kSH1WjED1) (more than $1.000$ referenced utxos). Setting a max block complexity so high that these big transactions are allowed is akin to setting no complexity cap.
On the other side, we still want to allow, even encourage, UTXO consolidation, so we may want to allow transactions [like this](https://subnets.avax.network/p-chain/tx/2LxyHzbi2AGJ4GAcHXth6pj5DwVLWeVmog2SAfh4WrqSBdENhV).
A principled way to set max block complexity may be the following:
- calculate the target block complexity rate (see previous point)
- calculate the median time elapsed among consecutive blocks
- The product of these two quantities should gives us something like a target block complexity.
- Set the max block complexity to say $\times 50$ the target value.
- **Normalization coefficient $Denom$**: I suggest we size it as follows:
- Find the largest historical peak, i.e. the sequence of consecutive blocks which contained the most complexity in the shortest period of time
- Tune $Denom$ so that it would cause a $\times 10000$ increase in the fee rate for such a peak. This increase would push fees from the milliAVAX we normally pay under stable network condition up to tens of AVAX.
- **Minimal fee rates $r^{min}$**: we could size them so that transactions fees do not change very much with respect to the currently fixed values.
We simulate below how the update formula would behave on an peak period from Avalanche mainnet.
 />
/>
 />
/>
 ### Features
* **Chain Throughput:** Retrieve detailed metrics on gas consumption, Transactions Per Second (TPS), and gas prices, including rolling windows of data for granular analysis.
* **Cumulative Metrics:** Access cumulative data on addresses, contracts, deployers, and transaction counts, providing insights into network growth over time.
* **Staking Information:** Obtain staking-related data, including the number of validators and delegators, along with their respective weights, across different subnets.
* **Blockchains and Subnets:** Get information about supported blockchains, including EVM Chain IDs, blockchain IDs, and subnet associations, facilitating multi-chain analytics.
* **Composite Queries:** Perform advanced queries by combining different metric types and conditions, enabling detailed and customizable data retrieval.
The Metrics API is designed to provide developers with powerful tools to analyze and monitor on-chain activity across Avalanche’s primary network, Avalanche L1s, and other supported EVM chains. Below is an overview of the key features available:
### Chain Throughput Metrics
* **Gas Consumption**
### Features
* **Chain Throughput:** Retrieve detailed metrics on gas consumption, Transactions Per Second (TPS), and gas prices, including rolling windows of data for granular analysis.
* **Cumulative Metrics:** Access cumulative data on addresses, contracts, deployers, and transaction counts, providing insights into network growth over time.
* **Staking Information:** Obtain staking-related data, including the number of validators and delegators, along with their respective weights, across different subnets.
* **Blockchains and Subnets:** Get information about supported blockchains, including EVM Chain IDs, blockchain IDs, and subnet associations, facilitating multi-chain analytics.
* **Composite Queries:** Perform advanced queries by combining different metric types and conditions, enabling detailed and customizable data retrieval.
The Metrics API is designed to provide developers with powerful tools to analyze and monitor on-chain activity across Avalanche’s primary network, Avalanche L1s, and other supported EVM chains. Below is an overview of the key features available:
### Chain Throughput Metrics
* **Gas Consumption**  * **Transactions Per Second (TPS)**
  * **Gas Prices**
  ### Cumulative Metrics
* **Address Growth**
### Cumulative Metrics
* **Address Growth**  * **Contract Deployment**
  * **Transaction Count**
  * **Staking Weights**
  ### Rolling Window Analytics
* **Short-Term and Long-Term Metrics:** Perform rolling window analysis on various metrics like gas used, TPS, and gas prices, allowing for both short-term and long-term trend analysis.
* **Customizable Time Frames:** Choose from different time intervals (hourly, daily, monthly) to suit your specific analytical needs.
### Blockchain and L1 Information
* **Chain and L1 Mapping:** Get detailed information about EVM chains and their associated L1s, including chain IDs, blockchain IDs, and subnet IDs, facilitating cross-chain analytics.
### Advanced Composite Queries
* **Custom Metrics Combinations**: Combine multiple metrics and apply logical operators to perform sophisticated queries, enabling deep insights and tailored analytics.
* **Paginated Results:** Handle large datasets efficiently with paginated responses, ensuring seamless data retrieval in your applications.
The Metrics API equips developers with the tools needed to build robust analytics, monitoring, and reporting solutions, leveraging the full power of multi-chain data across the Avalanche ecosystem and beyond.
# Rate Limits (/docs/api-reference/metrics-api/rate-limits)
---
title: Rate Limits
description: Rate Limits for the Metrics API
icon: Clock
---
# Rate Limits
Rate limiting is managed through a weighted scoring system, known as Compute Units (CUs). Each API request consumes a specified number of CUs, determined by the complexity of the request. This system is designed to accommodate basic requests while efficiently handling more computationally intensive operations.
## Rate Limit Tiers
The maximum CUs (rate-limiting score) for a user depends on their subscription level and is delineated in the following table:
| Subscription Level | Per Minute Limit (CUs) | Per Day Limit (CUs) |
| :----------------- | :--------------------- | :------------------ |
| Free | 8,000 | 1,200,000 |
> We are working on new subscription tiers with higher rate limits to support even greater request volumes.
## Rate Limit Categories
The CUs for each category are defined in the following table:
| Weight | CU Value |
| :----- | :------- |
| Free | 1 |
| Small | 20 |
| Medium | 100 |
| Large | 500 |
| XL | 1000 |
| XXL | 3000 |
## Rate Limits for Metrics Endpoints
The CUs for each route are defined in the table below:
| Endpoint | Method | Weight | CU Value |
| :---------------------------------------------------------- | :----- | :----- | :------- |
| `/v2/health-check` | GET | Free | 1 |
| `/v2/chains` | GET | Free | 1 |
| `/v2/chains/{chainId}` | GET | Free | 1 |
| `/v2/chains/{chainId}/metrics/{metric}` | GET | Medium | 100 |
| `/v2/chains/{chainId}/teleporterMetrics/{metric}` | GET | Medium | 100 |
| `/v2/chains/{chainId}/rollingWindowMetrics/{metric}` | GET | Medium | 100 |
| `/v2/networks/{network}/metrics/{metric}` | GET | Medium | 100 |
| `/v2/chains/{chainId}/contracts/{address}/nfts:listHolders` | GET | Large | 500 |
| `/v2/chains/{chainId}/contracts/{address}/balances` | GET | XL | 1000 |
| `/v2/chains/43114/btcb/bridged:getAddresses` | GET | Large | 500 |
| `/v2/subnets/{subnetId}/validators:getAddresses` | GET | Large | 500 |
| `/v2/lookingGlass/compositeQuery` | POST | XXL | 3000 |
### Rolling Window Analytics
* **Short-Term and Long-Term Metrics:** Perform rolling window analysis on various metrics like gas used, TPS, and gas prices, allowing for both short-term and long-term trend analysis.
* **Customizable Time Frames:** Choose from different time intervals (hourly, daily, monthly) to suit your specific analytical needs.
### Blockchain and L1 Information
* **Chain and L1 Mapping:** Get detailed information about EVM chains and their associated L1s, including chain IDs, blockchain IDs, and subnet IDs, facilitating cross-chain analytics.
### Advanced Composite Queries
* **Custom Metrics Combinations**: Combine multiple metrics and apply logical operators to perform sophisticated queries, enabling deep insights and tailored analytics.
* **Paginated Results:** Handle large datasets efficiently with paginated responses, ensuring seamless data retrieval in your applications.
The Metrics API equips developers with the tools needed to build robust analytics, monitoring, and reporting solutions, leveraging the full power of multi-chain data across the Avalanche ecosystem and beyond.
# Rate Limits (/docs/api-reference/metrics-api/rate-limits)
---
title: Rate Limits
description: Rate Limits for the Metrics API
icon: Clock
---
# Rate Limits
Rate limiting is managed through a weighted scoring system, known as Compute Units (CUs). Each API request consumes a specified number of CUs, determined by the complexity of the request. This system is designed to accommodate basic requests while efficiently handling more computationally intensive operations.
## Rate Limit Tiers
The maximum CUs (rate-limiting score) for a user depends on their subscription level and is delineated in the following table:
| Subscription Level | Per Minute Limit (CUs) | Per Day Limit (CUs) |
| :----------------- | :--------------------- | :------------------ |
| Free | 8,000 | 1,200,000 |
> We are working on new subscription tiers with higher rate limits to support even greater request volumes.
## Rate Limit Categories
The CUs for each category are defined in the following table:
| Weight | CU Value |
| :----- | :------- |
| Free | 1 |
| Small | 20 |
| Medium | 100 |
| Large | 500 |
| XL | 1000 |
| XXL | 3000 |
## Rate Limits for Metrics Endpoints
The CUs for each route are defined in the table below:
| Endpoint | Method | Weight | CU Value |
| :---------------------------------------------------------- | :----- | :----- | :------- |
| `/v2/health-check` | GET | Free | 1 |
| `/v2/chains` | GET | Free | 1 |
| `/v2/chains/{chainId}` | GET | Free | 1 |
| `/v2/chains/{chainId}/metrics/{metric}` | GET | Medium | 100 |
| `/v2/chains/{chainId}/teleporterMetrics/{metric}` | GET | Medium | 100 |
| `/v2/chains/{chainId}/rollingWindowMetrics/{metric}` | GET | Medium | 100 |
| `/v2/networks/{network}/metrics/{metric}` | GET | Medium | 100 |
| `/v2/chains/{chainId}/contracts/{address}/nfts:listHolders` | GET | Large | 500 |
| `/v2/chains/{chainId}/contracts/{address}/balances` | GET | XL | 1000 |
| `/v2/chains/43114/btcb/bridged:getAddresses` | GET | Large | 500 |
| `/v2/subnets/{subnetId}/validators:getAddresses` | GET | Large | 500 |
| `/v2/lookingGlass/compositeQuery` | POST | XXL | 3000 |
 ### Key Features:
* **Real-time notifications:** Receive immediate updates on specified on-chain activities without polling.
* **Customizable:** Specify the desired event type to listen for, customizing notifications based on your individual requirements.
* **Secure:** Employ shared secrets and signature-based verification to ensure that notifications originate from a trusted source.
* **Broad Coverage:**
* **C-chain:** Mainnet and testnet, covering smart contract events, NFT transfers, and wallet-to-wallet transactions.
* **Platform Chain (P and X chains):** Address and validator events, staking activities, and other platform-level transactions.
By supporting both the C-chain and the Platform Chain, you can monitor an even wider range of Avalanche activities.
### Use cases
* **NFT marketplace transactions**: Get alerts for NFT minting, transfers, auctions, bids, sales, and other interactions within NFT marketplaces.
* **Wallet notifications**: Receive alerts when an address performs actions such as sending, receiving, swapping, or burning assets.
* **DeFi activities**: Receive notifications for various DeFi activities such as liquidity provisioning, yield farming, borrowing, lending, and liquidations.
* **Staking rewards:** Get real-time notifications when a validator stakes, receives delegation, or earns staking rewards on the P-Chain, enabling seamless monitoring of validator earnings and participation.
## APIs for continuous polling vs. Webhooks for events data
The following example uses the address activity webhook topic to illustrate the difference between polling an API for wallet event data versus subscribing to a webhook topic to receive wallet events.
### Key Features:
* **Real-time notifications:** Receive immediate updates on specified on-chain activities without polling.
* **Customizable:** Specify the desired event type to listen for, customizing notifications based on your individual requirements.
* **Secure:** Employ shared secrets and signature-based verification to ensure that notifications originate from a trusted source.
* **Broad Coverage:**
* **C-chain:** Mainnet and testnet, covering smart contract events, NFT transfers, and wallet-to-wallet transactions.
* **Platform Chain (P and X chains):** Address and validator events, staking activities, and other platform-level transactions.
By supporting both the C-chain and the Platform Chain, you can monitor an even wider range of Avalanche activities.
### Use cases
* **NFT marketplace transactions**: Get alerts for NFT minting, transfers, auctions, bids, sales, and other interactions within NFT marketplaces.
* **Wallet notifications**: Receive alerts when an address performs actions such as sending, receiving, swapping, or burning assets.
* **DeFi activities**: Receive notifications for various DeFi activities such as liquidity provisioning, yield farming, borrowing, lending, and liquidations.
* **Staking rewards:** Get real-time notifications when a validator stakes, receives delegation, or earns staking rewards on the P-Chain, enabling seamless monitoring of validator earnings and participation.
## APIs for continuous polling vs. Webhooks for events data
The following example uses the address activity webhook topic to illustrate the difference between polling an API for wallet event data versus subscribing to a webhook topic to receive wallet events.
 ### Continous polling
Continuous polling is a method where your application repeatedly sends requests to an API at fixed intervals to check for new data or events. Think of it like checking your mailbox every five minutes to see if new mail has arrived, whether or not anything is there.
* You want to track new transactions for a specific wallet.
* Your application calls an API every few seconds (e.g., every 5 seconds) with a query like, “Are there any new transactions for this wallet since my last check?”
* The API responds with either new transaction data or a confirmation that nothing has changed.
**Downsides of continuous polling**
* **Inefficiency:** Your app makes requests even when no new transactions occur, wasting computational resources, bandwidth, and potentially incurring higher API costs.
For example, if no transactions happen for an hour, your app still sends hundreds of unnecessary requests.
* **Delayed updates:**
Since polling happens at set intervals, there’s a potential delay in detecting events. If a transaction occurs just after a poll, your app won’t know until the next check—up to 5 seconds later in our example.
This lag can be critical for time-sensitive applications, like trading or notifications.
* **Scalability challenges:** Monitoring one wallet might be manageable, but if you’re tracking dozens or hundreds of wallets, the number of requests multiplies quickly.
### Webhook subscription
Webhooks are an event-driven alternative where your application subscribes to specific events, and the Avalanche service notifies you instantly when those events occur. It’s like signing up for a delivery alert—when the package (event) arrives, you get a text message right away, instead of checking the tracking site repeatedly.
* Your app registers a webhook specifying an endpoint (e.g., `https://your-app.com/webhooks/transactions`) and the event type (e.g., `address_activity`).
* When a new transaction occurs we send a POST request to your endpoint with the transaction details.
* Your app receives the data only when something happens, with no need to ask repeatedly.
**Benefits of Avalanche webhooks**
* **Real-Time updates:** Notifications arrive the moment a transaction is processed, eliminating delays inherent in polling. This is ideal for applications needing immediate responses, like alerting users or triggering automated actions.
* **Efficiency:** Your app doesn’t waste resources making requests when there’s no new data. Data flows only when events occur. This reduces server load, bandwidth usage, and API call quotas.
* **Scalability:** You can subscribe to events for multiple wallets or event types (e.g., transactions, smart contract calls) without increasing the number of requests your app makes. We handle the event detection and delivery, so your app scales effortlessly as monitoring needs grow.
## Event payload structure
The Event structure always begins with the following parameters:
```json theme={null}
{
"webhookId": "6d1bd383-aa8d-47b5-b793-da6d8a115fde",
"eventType": "address_activity",
"messageId": "8e4e7284-852a-478b-b425-27631c8d22d2",
"event": {
}
}
```
**Parameters:**
* `webhookId`: Unique identifier for the webhook in your account.
* `eventType`: The event that caused the webhook to be triggered. In the future, there will be multiple types of events, for the time being only the address\_activity event is supported. The address\_activity event gets triggered whenever the specified addresses participate in a token or AVAX transaction.
* `messageId`: Unique identifier per event sent.
* `event`: Event payload. It contains details about the transaction, logs, and traces. By default logs and internal transactions are not included, if you want to include them use `"includeLogs": true`, and `"includeInternalTxs": true`.
### Address Activity webhook
The address activity webhook allows you to track any interaction with an address (any address). Here is an example of this type of event:
```json theme={null}
{
"webhookId": "263942d1-74a4-4416-aeb4-948b9b9bb7cc",
"eventType": "address_activity",
"messageId": "94df1881-5d93-49d1-a1bd-607830608de2",
"event": {
"transaction": {
"blockHash": "0xbd093536009f7dd785e9a5151d80069a93cc322f8b2df63d373865af4f6ee5be",
"blockNumber": "44568834",
"from": "0xf73166f0c75a3DF444fAbdFDC7e5EE4a73fA51C7",
"gas": "651108",
"gasPrice": "31466275484",
"maxFeePerGas": "31466275484",
"maxPriorityFeePerGas": "31466275484",
"txHash": "0xf6a791920652e87ccc91d2f1b20c1505a94452b88f359acdeb5a6fa8205638c4",
"txStatus": "1",
"input": "0xb80c2f090000000000000000000000000000000000000000000000000000000000000000000000000000000000000000eeeeeeeeeeeeeeeeeeeeeeeeeeeeeeeeeeeeeeee000000000000000000000000b97ef9ef8734c71904d8002f8b6bc66dd9c48a6e000000000000000000000000000000000000000000000000006ca0c737b131f2000000000000000000000000000000000000000000000000000000000011554e000000000000000000000000000000000000000000000000000000006627dadc0000000000000000000000000000000000000000000000000000000000000120000000000000000000000000000000000000000000000000000000000000016000000000000000000000000000000000000000000000000000000000000004600000000000000000000000000000000000000000000000000000000000000001000000000000000000000000000000000000000000000000006ca0c737b131f2000000000000000000000000000000000000000000000000000000000000000100000000000000000000000000000000000000000000000000000000000000200000000000000000000000000000000000000000000000000000000000000001000000000000000000000000000000000000000000000000000000000000002000000000000000000000000000000000000000000000000000000000000000a000000000000000000000000000000000000000000000000000000000000000e000000000000000000000000000000000000000000000000000000000000001200000000000000000000000000000000000000000000000000000000000000160000000000000000000000000b31f66aa3c1e785363f0875a1b74e27b85fd66c70000000000000000000000000000000000000000000000000000000000000001000000000000000000000000be882fb094143b59dc5335d32cecb711570ebdd40000000000000000000000000000000000000000000000000000000000000001000000000000000000000000be882fb094143b59dc5335d32cecb711570ebdd400000000000000000000000000000000000000000000000000000000000000010000000000000000000027100e663593657b064e1bae76d28625df5d0ebd44210000000000000000000000000000000000000000000000000000000000000001000000000000000000000000000000000000000000000000000000000000002000000000000000000000000000000000000000000000000000000000000000c0000000000000000000000000000000000000000000000000000000000000000000000000000000000000000000000000000000000000000000000000000000400000000000000000000000000000000000000000000000000000000000000060000000000000000000000000b31f66aa3c1e785363f0875a1b74e27b85fd66c7000000000000000000000000b97ef9ef8734c71904d8002f8b6bc66dd9c48a6e0000000000000000000000000000000000000000000000000000000000000bb80000000000000000000000000000000000000000000000000000000000000000",
"nonce": "4",
"to": "0x1dac23e41fc8ce857e86fd8c1ae5b6121c67d96d",
"transactionIndex": 0,
"value": "30576074978046450",
"type": 0,
"chainId": "43114",
"receiptCumulativeGasUsed": "212125",
"receiptGasUsed": "212125",
"receiptEffectiveGasPrice": "31466275484",
"receiptRoot": "0xf355b81f3e76392e1b4926429d6abf8ec24601cc3d36d0916de3113aa80dd674",
"erc20Transfers": [
{
"transactionHash": "0xf6a791920652e87ccc91d2f1b20c1505a94452b88f359acdeb5a6fa8205638c4",
"type": "ERC20",
"from": "0x1daC23e41Fc8ce857E86fD8C1AE5b6121C67D96d",
"to": "0xbe882fb094143B59Dc5335D32cEcB711570EbDD4",
"value": "30576074978046450",
"blockTimestamp": 1713884373,
"logIndex": 2,
"erc20Token": {
"address": "0xB31f66AA3C1e785363F0875A1B74E27b85FD66c7",
"name": "Wrapped AVAX",
"symbol": "WAVAX",
"decimals": 18,
"valueWithDecimals": "0.030576074978046448"
}
},
{
"transactionHash": "0xf6a791920652e87ccc91d2f1b20c1505a94452b88f359acdeb5a6fa8205638c4",
"type": "ERC20",
"from": "0x0E663593657B064e1baE76d28625Df5D0eBd4421",
"to": "0xf73166f0c75a3DF444fAbdFDC7e5EE4a73fA51C7",
"value": "1195737",
"blockTimestamp": 1713884373,
"logIndex": 3,
"erc20Token": {
"address": "0xB97EF9Ef8734C71904D8002F8b6Bc66Dd9c48a6E",
"name": "USD Coin",
"symbol": "USDC",
"decimals": 6,
"valueWithDecimals": "1.195737"
}
},
{
"transactionHash": "0xf6a791920652e87ccc91d2f1b20c1505a94452b88f359acdeb5a6fa8205638c4",
"type": "ERC20",
"from": "0xbe882fb094143B59Dc5335D32cEcB711570EbDD4",
"to": "0x0E663593657B064e1baE76d28625Df5D0eBd4421",
"value": "30576074978046450",
"blockTimestamp": 1713884373,
"logIndex": 4,
"erc20Token": {
"address": "0xB31f66AA3C1e785363F0875A1B74E27b85FD66c7",
"name": "Wrapped AVAX",
"symbol": "WAVAX",
"decimals": 18,
"valueWithDecimals": "0.030576074978046448"
}
}
],
"erc721Transfers": [],
"erc1155Transfers": [],
"internalTransactions": [
{
"from": "0xf73166f0c75a3DF444fAbdFDC7e5EE4a73fA51C7",
"to": "0x1daC23e41Fc8ce857E86fD8C1AE5b6121C67D96d",
"internalTxType": "CALL",
"value": "30576074978046450",
"gasUsed": "212125",
"gasLimit": "651108",
"transactionHash": "0xf6a791920652e87ccc91d2f1b20c1505a94452b88f359acdeb5a6fa8205638c4"
},
{
"from": "0x1daC23e41Fc8ce857E86fD8C1AE5b6121C67D96d",
"to": "0xF2781Bb34B6f6Bb9a6B5349b24de91487E653119",
"internalTxType": "DELEGATECALL",
"value": "30576074978046450",
"gasUsed": "176417",
"gasLimit": "605825",
"transactionHash": "0xf6a791920652e87ccc91d2f1b20c1505a94452b88f359acdeb5a6fa8205638c4"
},
{
"from": "0x1daC23e41Fc8ce857E86fD8C1AE5b6121C67D96d",
"to": "0xB97EF9Ef8734C71904D8002F8b6Bc66Dd9c48a6E",
"internalTxType": "STATICCALL",
"value": "0",
"gasUsed": "9750",
"gasLimit": "585767",
"transactionHash": "0xf6a791920652e87ccc91d2f1b20c1505a94452b88f359acdeb5a6fa8205638c4"
},
{
"from": "0xB97EF9Ef8734C71904D8002F8b6Bc66Dd9c48a6E",
"to": "0x30DFE0469803BcE76F8F62aC24b18d33D3d6FfE6",
"internalTxType": "DELEGATECALL",
"value": "0",
"gasUsed": "2553",
"gasLimit": "569571",
"transactionHash": "0xf6a791920652e87ccc91d2f1b20c1505a94452b88f359acdeb5a6fa8205638c4"
},
{
"from": "0x1daC23e41Fc8ce857E86fD8C1AE5b6121C67D96d",
"to": "0xB31f66AA3C1e785363F0875A1B74E27b85FD66c7",
"internalTxType": "CALL",
"value": "30576074978046450",
"gasUsed": "23878",
"gasLimit": "566542",
"transactionHash": "0xf6a791920652e87ccc91d2f1b20c1505a94452b88f359acdeb5a6fa8205638c4"
},
{
"from": "0x1daC23e41Fc8ce857E86fD8C1AE5b6121C67D96d",
"to": "0xB31f66AA3C1e785363F0875A1B74E27b85FD66c7",
"internalTxType": "CALL",
"value": "0",
"gasUsed": "25116",
"gasLimit": "540114",
"transactionHash": "0xf6a791920652e87ccc91d2f1b20c1505a94452b88f359acdeb5a6fa8205638c4"
},
{
"from": "0x1daC23e41Fc8ce857E86fD8C1AE5b6121C67D96d",
"to": "0xbe882fb094143B59Dc5335D32cEcB711570EbDD4",
"internalTxType": "CALL",
"value": "0",
"gasUsed": "81496",
"gasLimit": "511279",
"transactionHash": "0xf6a791920652e87ccc91d2f1b20c1505a94452b88f359acdeb5a6fa8205638c4"
},
{
"from": "0xbe882fb094143B59Dc5335D32cEcB711570EbDD4",
"to": "0xB31f66AA3C1e785363F0875A1B74E27b85FD66c7",
"internalTxType": "STATICCALL",
"value": "0",
"gasUsed": "491",
"gasLimit": "501085",
"transactionHash": "0xf6a791920652e87ccc91d2f1b20c1505a94452b88f359acdeb5a6fa8205638c4"
},
{
"from": "0xbe882fb094143B59Dc5335D32cEcB711570EbDD4",
"to": "0x0E663593657B064e1baE76d28625Df5D0eBd4421",
"internalTxType": "CALL",
"value": "0",
"gasUsed": "74900",
"gasLimit": "497032",
"transactionHash": "0xf6a791920652e87ccc91d2f1b20c1505a94452b88f359acdeb5a6fa8205638c4"
},
{
"from": "0x0E663593657B064e1baE76d28625Df5D0eBd4421",
"to": "0xB97EF9Ef8734C71904D8002F8b6Bc66Dd9c48a6E",
"internalTxType": "CALL",
"value": "0",
"gasUsed": "32063",
"gasLimit": "463431",
"transactionHash": "0xf6a791920652e87ccc91d2f1b20c1505a94452b88f359acdeb5a6fa8205638c4"
},
{
"from": "0xB97EF9Ef8734C71904D8002F8b6Bc66Dd9c48a6E",
"to": "0x30DFE0469803BcE76F8F62aC24b18d33D3d6FfE6",
"internalTxType": "DELEGATECALL",
"value": "0",
"gasUsed": "31363",
"gasLimit": "455542",
"transactionHash": "0xf6a791920652e87ccc91d2f1b20c1505a94452b88f359acdeb5a6fa8205638c4"
},
{
"from": "0x0E663593657B064e1baE76d28625Df5D0eBd4421",
"to": "0xB31f66AA3C1e785363F0875A1B74E27b85FD66c7",
"internalTxType": "STATICCALL",
"value": "0",
"gasUsed": "2491",
"gasLimit": "430998",
"transactionHash": "0xf6a791920652e87ccc91d2f1b20c1505a94452b88f359acdeb5a6fa8205638c4"
},
{
"from": "0x0E663593657B064e1baE76d28625Df5D0eBd4421",
"to": "0xbe882fb094143B59Dc5335D32cEcB711570EbDD4",
"internalTxType": "CALL",
"value": "0",
"gasUsed": "7591",
"gasLimit": "427775",
"transactionHash": "0xf6a791920652e87ccc91d2f1b20c1505a94452b88f359acdeb5a6fa8205638c4"
},
{
"from": "0xbe882fb094143B59Dc5335D32cEcB711570EbDD4",
"to": "0xB31f66AA3C1e785363F0875A1B74E27b85FD66c7",
"internalTxType": "CALL",
"value": "0",
"gasUsed": "6016",
"gasLimit": "419746",
"transactionHash": "0xf6a791920652e87ccc91d2f1b20c1505a94452b88f359acdeb5a6fa8205638c4"
},
{
"from": "0x0E663593657B064e1baE76d28625Df5D0eBd4421",
"to": "0xB31f66AA3C1e785363F0875A1B74E27b85FD66c7",
"internalTxType": "STATICCALL",
"value": "0",
"gasUsed": "491",
"gasLimit": "419670",
"transactionHash": "0xf6a791920652e87ccc91d2f1b20c1505a94452b88f359acdeb5a6fa8205638c4"
},
{
"from": "0x1daC23e41Fc8ce857E86fD8C1AE5b6121C67D96d",
"to": "0xB97EF9Ef8734C71904D8002F8b6Bc66Dd9c48a6E",
"internalTxType": "STATICCALL",
"value": "0",
"gasUsed": "3250",
"gasLimit": "430493",
"transactionHash": "0xf6a791920652e87ccc91d2f1b20c1505a94452b88f359acdeb5a6fa8205638c4"
},
{
"from": "0xB97EF9Ef8734C71904D8002F8b6Bc66Dd9c48a6E",
"to": "0x30DFE0469803BcE76F8F62aC24b18d33D3d6FfE6",
"internalTxType": "DELEGATECALL",
"value": "0",
"gasUsed": "2553",
"gasLimit": "423121",
"transactionHash": "0xf6a791920652e87ccc91d2f1b20c1505a94452b88f359acdeb5a6fa8205638c4"
},
{
"from": "0x1daC23e41Fc8ce857E86fD8C1AE5b6121C67D96d",
"to": "0xB97EF9Ef8734C71904D8002F8b6Bc66Dd9c48a6E",
"internalTxType": "STATICCALL",
"value": "0",
"gasUsed": "1250",
"gasLimit": "426766",
"transactionHash": "0xf6a791920652e87ccc91d2f1b20c1505a94452b88f359acdeb5a6fa8205638c4"
},
{
"from": "0xB97EF9Ef8734C71904D8002F8b6Bc66Dd9c48a6E",
"to": "0x30DFE0469803BcE76F8F62aC24b18d33D3d6FfE6",
"internalTxType": "DELEGATECALL",
"value": "0",
"gasUsed": "553",
"gasLimit": "419453",
"transactionHash": "0xf6a791920652e87ccc91d2f1b20c1505a94452b88f359acdeb5a6fa8205638c4"
}
],
"blockTimestamp": 1713884373
}
}
}
```
# Rate Limits (/docs/api-reference/webhook-api/rate-limits)
---
title: Rate Limits
description: Rate Limits for the Webhooks API
icon: Clock
---
Rate limiting is managed through a weighted scoring system, known as Compute Units (CUs). Each API request consumes a specified number of CUs, determined by the complexity of the request. This system is designed to accommodate basic requests while efficiently handling more computationally intensive operations.
## Rate Limit Tiers
The maximum CUs (rate-limiting score) for a user depends on their subscription level and is delineated in the following table:
| Subscription Level | Per Minute Limit (CUs) | Per Day Limit (CUs) |
| :----------------- | :--------------------- | :------------------ |
| Unauthenticated | 6,000 | 1,200,000 |
| Free | 8,000 | 2,000,000 |
| Base | 10,000 | 3,750,000 |
| Growth | 14,000 | 11,200,000 |
| Pro | 20,000 | 25,000,000 |
To update your subscription level use the [AvaCloud Portal](https://app.avacloud.io/)
### Continous polling
Continuous polling is a method where your application repeatedly sends requests to an API at fixed intervals to check for new data or events. Think of it like checking your mailbox every five minutes to see if new mail has arrived, whether or not anything is there.
* You want to track new transactions for a specific wallet.
* Your application calls an API every few seconds (e.g., every 5 seconds) with a query like, “Are there any new transactions for this wallet since my last check?”
* The API responds with either new transaction data or a confirmation that nothing has changed.
**Downsides of continuous polling**
* **Inefficiency:** Your app makes requests even when no new transactions occur, wasting computational resources, bandwidth, and potentially incurring higher API costs.
For example, if no transactions happen for an hour, your app still sends hundreds of unnecessary requests.
* **Delayed updates:**
Since polling happens at set intervals, there’s a potential delay in detecting events. If a transaction occurs just after a poll, your app won’t know until the next check—up to 5 seconds later in our example.
This lag can be critical for time-sensitive applications, like trading or notifications.
* **Scalability challenges:** Monitoring one wallet might be manageable, but if you’re tracking dozens or hundreds of wallets, the number of requests multiplies quickly.
### Webhook subscription
Webhooks are an event-driven alternative where your application subscribes to specific events, and the Avalanche service notifies you instantly when those events occur. It’s like signing up for a delivery alert—when the package (event) arrives, you get a text message right away, instead of checking the tracking site repeatedly.
* Your app registers a webhook specifying an endpoint (e.g., `https://your-app.com/webhooks/transactions`) and the event type (e.g., `address_activity`).
* When a new transaction occurs we send a POST request to your endpoint with the transaction details.
* Your app receives the data only when something happens, with no need to ask repeatedly.
**Benefits of Avalanche webhooks**
* **Real-Time updates:** Notifications arrive the moment a transaction is processed, eliminating delays inherent in polling. This is ideal for applications needing immediate responses, like alerting users or triggering automated actions.
* **Efficiency:** Your app doesn’t waste resources making requests when there’s no new data. Data flows only when events occur. This reduces server load, bandwidth usage, and API call quotas.
* **Scalability:** You can subscribe to events for multiple wallets or event types (e.g., transactions, smart contract calls) without increasing the number of requests your app makes. We handle the event detection and delivery, so your app scales effortlessly as monitoring needs grow.
## Event payload structure
The Event structure always begins with the following parameters:
```json theme={null}
{
"webhookId": "6d1bd383-aa8d-47b5-b793-da6d8a115fde",
"eventType": "address_activity",
"messageId": "8e4e7284-852a-478b-b425-27631c8d22d2",
"event": {
}
}
```
**Parameters:**
* `webhookId`: Unique identifier for the webhook in your account.
* `eventType`: The event that caused the webhook to be triggered. In the future, there will be multiple types of events, for the time being only the address\_activity event is supported. The address\_activity event gets triggered whenever the specified addresses participate in a token or AVAX transaction.
* `messageId`: Unique identifier per event sent.
* `event`: Event payload. It contains details about the transaction, logs, and traces. By default logs and internal transactions are not included, if you want to include them use `"includeLogs": true`, and `"includeInternalTxs": true`.
### Address Activity webhook
The address activity webhook allows you to track any interaction with an address (any address). Here is an example of this type of event:
```json theme={null}
{
"webhookId": "263942d1-74a4-4416-aeb4-948b9b9bb7cc",
"eventType": "address_activity",
"messageId": "94df1881-5d93-49d1-a1bd-607830608de2",
"event": {
"transaction": {
"blockHash": "0xbd093536009f7dd785e9a5151d80069a93cc322f8b2df63d373865af4f6ee5be",
"blockNumber": "44568834",
"from": "0xf73166f0c75a3DF444fAbdFDC7e5EE4a73fA51C7",
"gas": "651108",
"gasPrice": "31466275484",
"maxFeePerGas": "31466275484",
"maxPriorityFeePerGas": "31466275484",
"txHash": "0xf6a791920652e87ccc91d2f1b20c1505a94452b88f359acdeb5a6fa8205638c4",
"txStatus": "1",
"input": "0xb80c2f090000000000000000000000000000000000000000000000000000000000000000000000000000000000000000eeeeeeeeeeeeeeeeeeeeeeeeeeeeeeeeeeeeeeee000000000000000000000000b97ef9ef8734c71904d8002f8b6bc66dd9c48a6e000000000000000000000000000000000000000000000000006ca0c737b131f2000000000000000000000000000000000000000000000000000000000011554e000000000000000000000000000000000000000000000000000000006627dadc0000000000000000000000000000000000000000000000000000000000000120000000000000000000000000000000000000000000000000000000000000016000000000000000000000000000000000000000000000000000000000000004600000000000000000000000000000000000000000000000000000000000000001000000000000000000000000000000000000000000000000006ca0c737b131f2000000000000000000000000000000000000000000000000000000000000000100000000000000000000000000000000000000000000000000000000000000200000000000000000000000000000000000000000000000000000000000000001000000000000000000000000000000000000000000000000000000000000002000000000000000000000000000000000000000000000000000000000000000a000000000000000000000000000000000000000000000000000000000000000e000000000000000000000000000000000000000000000000000000000000001200000000000000000000000000000000000000000000000000000000000000160000000000000000000000000b31f66aa3c1e785363f0875a1b74e27b85fd66c70000000000000000000000000000000000000000000000000000000000000001000000000000000000000000be882fb094143b59dc5335d32cecb711570ebdd40000000000000000000000000000000000000000000000000000000000000001000000000000000000000000be882fb094143b59dc5335d32cecb711570ebdd400000000000000000000000000000000000000000000000000000000000000010000000000000000000027100e663593657b064e1bae76d28625df5d0ebd44210000000000000000000000000000000000000000000000000000000000000001000000000000000000000000000000000000000000000000000000000000002000000000000000000000000000000000000000000000000000000000000000c0000000000000000000000000000000000000000000000000000000000000000000000000000000000000000000000000000000000000000000000000000000400000000000000000000000000000000000000000000000000000000000000060000000000000000000000000b31f66aa3c1e785363f0875a1b74e27b85fd66c7000000000000000000000000b97ef9ef8734c71904d8002f8b6bc66dd9c48a6e0000000000000000000000000000000000000000000000000000000000000bb80000000000000000000000000000000000000000000000000000000000000000",
"nonce": "4",
"to": "0x1dac23e41fc8ce857e86fd8c1ae5b6121c67d96d",
"transactionIndex": 0,
"value": "30576074978046450",
"type": 0,
"chainId": "43114",
"receiptCumulativeGasUsed": "212125",
"receiptGasUsed": "212125",
"receiptEffectiveGasPrice": "31466275484",
"receiptRoot": "0xf355b81f3e76392e1b4926429d6abf8ec24601cc3d36d0916de3113aa80dd674",
"erc20Transfers": [
{
"transactionHash": "0xf6a791920652e87ccc91d2f1b20c1505a94452b88f359acdeb5a6fa8205638c4",
"type": "ERC20",
"from": "0x1daC23e41Fc8ce857E86fD8C1AE5b6121C67D96d",
"to": "0xbe882fb094143B59Dc5335D32cEcB711570EbDD4",
"value": "30576074978046450",
"blockTimestamp": 1713884373,
"logIndex": 2,
"erc20Token": {
"address": "0xB31f66AA3C1e785363F0875A1B74E27b85FD66c7",
"name": "Wrapped AVAX",
"symbol": "WAVAX",
"decimals": 18,
"valueWithDecimals": "0.030576074978046448"
}
},
{
"transactionHash": "0xf6a791920652e87ccc91d2f1b20c1505a94452b88f359acdeb5a6fa8205638c4",
"type": "ERC20",
"from": "0x0E663593657B064e1baE76d28625Df5D0eBd4421",
"to": "0xf73166f0c75a3DF444fAbdFDC7e5EE4a73fA51C7",
"value": "1195737",
"blockTimestamp": 1713884373,
"logIndex": 3,
"erc20Token": {
"address": "0xB97EF9Ef8734C71904D8002F8b6Bc66Dd9c48a6E",
"name": "USD Coin",
"symbol": "USDC",
"decimals": 6,
"valueWithDecimals": "1.195737"
}
},
{
"transactionHash": "0xf6a791920652e87ccc91d2f1b20c1505a94452b88f359acdeb5a6fa8205638c4",
"type": "ERC20",
"from": "0xbe882fb094143B59Dc5335D32cEcB711570EbDD4",
"to": "0x0E663593657B064e1baE76d28625Df5D0eBd4421",
"value": "30576074978046450",
"blockTimestamp": 1713884373,
"logIndex": 4,
"erc20Token": {
"address": "0xB31f66AA3C1e785363F0875A1B74E27b85FD66c7",
"name": "Wrapped AVAX",
"symbol": "WAVAX",
"decimals": 18,
"valueWithDecimals": "0.030576074978046448"
}
}
],
"erc721Transfers": [],
"erc1155Transfers": [],
"internalTransactions": [
{
"from": "0xf73166f0c75a3DF444fAbdFDC7e5EE4a73fA51C7",
"to": "0x1daC23e41Fc8ce857E86fD8C1AE5b6121C67D96d",
"internalTxType": "CALL",
"value": "30576074978046450",
"gasUsed": "212125",
"gasLimit": "651108",
"transactionHash": "0xf6a791920652e87ccc91d2f1b20c1505a94452b88f359acdeb5a6fa8205638c4"
},
{
"from": "0x1daC23e41Fc8ce857E86fD8C1AE5b6121C67D96d",
"to": "0xF2781Bb34B6f6Bb9a6B5349b24de91487E653119",
"internalTxType": "DELEGATECALL",
"value": "30576074978046450",
"gasUsed": "176417",
"gasLimit": "605825",
"transactionHash": "0xf6a791920652e87ccc91d2f1b20c1505a94452b88f359acdeb5a6fa8205638c4"
},
{
"from": "0x1daC23e41Fc8ce857E86fD8C1AE5b6121C67D96d",
"to": "0xB97EF9Ef8734C71904D8002F8b6Bc66Dd9c48a6E",
"internalTxType": "STATICCALL",
"value": "0",
"gasUsed": "9750",
"gasLimit": "585767",
"transactionHash": "0xf6a791920652e87ccc91d2f1b20c1505a94452b88f359acdeb5a6fa8205638c4"
},
{
"from": "0xB97EF9Ef8734C71904D8002F8b6Bc66Dd9c48a6E",
"to": "0x30DFE0469803BcE76F8F62aC24b18d33D3d6FfE6",
"internalTxType": "DELEGATECALL",
"value": "0",
"gasUsed": "2553",
"gasLimit": "569571",
"transactionHash": "0xf6a791920652e87ccc91d2f1b20c1505a94452b88f359acdeb5a6fa8205638c4"
},
{
"from": "0x1daC23e41Fc8ce857E86fD8C1AE5b6121C67D96d",
"to": "0xB31f66AA3C1e785363F0875A1B74E27b85FD66c7",
"internalTxType": "CALL",
"value": "30576074978046450",
"gasUsed": "23878",
"gasLimit": "566542",
"transactionHash": "0xf6a791920652e87ccc91d2f1b20c1505a94452b88f359acdeb5a6fa8205638c4"
},
{
"from": "0x1daC23e41Fc8ce857E86fD8C1AE5b6121C67D96d",
"to": "0xB31f66AA3C1e785363F0875A1B74E27b85FD66c7",
"internalTxType": "CALL",
"value": "0",
"gasUsed": "25116",
"gasLimit": "540114",
"transactionHash": "0xf6a791920652e87ccc91d2f1b20c1505a94452b88f359acdeb5a6fa8205638c4"
},
{
"from": "0x1daC23e41Fc8ce857E86fD8C1AE5b6121C67D96d",
"to": "0xbe882fb094143B59Dc5335D32cEcB711570EbDD4",
"internalTxType": "CALL",
"value": "0",
"gasUsed": "81496",
"gasLimit": "511279",
"transactionHash": "0xf6a791920652e87ccc91d2f1b20c1505a94452b88f359acdeb5a6fa8205638c4"
},
{
"from": "0xbe882fb094143B59Dc5335D32cEcB711570EbDD4",
"to": "0xB31f66AA3C1e785363F0875A1B74E27b85FD66c7",
"internalTxType": "STATICCALL",
"value": "0",
"gasUsed": "491",
"gasLimit": "501085",
"transactionHash": "0xf6a791920652e87ccc91d2f1b20c1505a94452b88f359acdeb5a6fa8205638c4"
},
{
"from": "0xbe882fb094143B59Dc5335D32cEcB711570EbDD4",
"to": "0x0E663593657B064e1baE76d28625Df5D0eBd4421",
"internalTxType": "CALL",
"value": "0",
"gasUsed": "74900",
"gasLimit": "497032",
"transactionHash": "0xf6a791920652e87ccc91d2f1b20c1505a94452b88f359acdeb5a6fa8205638c4"
},
{
"from": "0x0E663593657B064e1baE76d28625Df5D0eBd4421",
"to": "0xB97EF9Ef8734C71904D8002F8b6Bc66Dd9c48a6E",
"internalTxType": "CALL",
"value": "0",
"gasUsed": "32063",
"gasLimit": "463431",
"transactionHash": "0xf6a791920652e87ccc91d2f1b20c1505a94452b88f359acdeb5a6fa8205638c4"
},
{
"from": "0xB97EF9Ef8734C71904D8002F8b6Bc66Dd9c48a6E",
"to": "0x30DFE0469803BcE76F8F62aC24b18d33D3d6FfE6",
"internalTxType": "DELEGATECALL",
"value": "0",
"gasUsed": "31363",
"gasLimit": "455542",
"transactionHash": "0xf6a791920652e87ccc91d2f1b20c1505a94452b88f359acdeb5a6fa8205638c4"
},
{
"from": "0x0E663593657B064e1baE76d28625Df5D0eBd4421",
"to": "0xB31f66AA3C1e785363F0875A1B74E27b85FD66c7",
"internalTxType": "STATICCALL",
"value": "0",
"gasUsed": "2491",
"gasLimit": "430998",
"transactionHash": "0xf6a791920652e87ccc91d2f1b20c1505a94452b88f359acdeb5a6fa8205638c4"
},
{
"from": "0x0E663593657B064e1baE76d28625Df5D0eBd4421",
"to": "0xbe882fb094143B59Dc5335D32cEcB711570EbDD4",
"internalTxType": "CALL",
"value": "0",
"gasUsed": "7591",
"gasLimit": "427775",
"transactionHash": "0xf6a791920652e87ccc91d2f1b20c1505a94452b88f359acdeb5a6fa8205638c4"
},
{
"from": "0xbe882fb094143B59Dc5335D32cEcB711570EbDD4",
"to": "0xB31f66AA3C1e785363F0875A1B74E27b85FD66c7",
"internalTxType": "CALL",
"value": "0",
"gasUsed": "6016",
"gasLimit": "419746",
"transactionHash": "0xf6a791920652e87ccc91d2f1b20c1505a94452b88f359acdeb5a6fa8205638c4"
},
{
"from": "0x0E663593657B064e1baE76d28625Df5D0eBd4421",
"to": "0xB31f66AA3C1e785363F0875A1B74E27b85FD66c7",
"internalTxType": "STATICCALL",
"value": "0",
"gasUsed": "491",
"gasLimit": "419670",
"transactionHash": "0xf6a791920652e87ccc91d2f1b20c1505a94452b88f359acdeb5a6fa8205638c4"
},
{
"from": "0x1daC23e41Fc8ce857E86fD8C1AE5b6121C67D96d",
"to": "0xB97EF9Ef8734C71904D8002F8b6Bc66Dd9c48a6E",
"internalTxType": "STATICCALL",
"value": "0",
"gasUsed": "3250",
"gasLimit": "430493",
"transactionHash": "0xf6a791920652e87ccc91d2f1b20c1505a94452b88f359acdeb5a6fa8205638c4"
},
{
"from": "0xB97EF9Ef8734C71904D8002F8b6Bc66Dd9c48a6E",
"to": "0x30DFE0469803BcE76F8F62aC24b18d33D3d6FfE6",
"internalTxType": "DELEGATECALL",
"value": "0",
"gasUsed": "2553",
"gasLimit": "423121",
"transactionHash": "0xf6a791920652e87ccc91d2f1b20c1505a94452b88f359acdeb5a6fa8205638c4"
},
{
"from": "0x1daC23e41Fc8ce857E86fD8C1AE5b6121C67D96d",
"to": "0xB97EF9Ef8734C71904D8002F8b6Bc66Dd9c48a6E",
"internalTxType": "STATICCALL",
"value": "0",
"gasUsed": "1250",
"gasLimit": "426766",
"transactionHash": "0xf6a791920652e87ccc91d2f1b20c1505a94452b88f359acdeb5a6fa8205638c4"
},
{
"from": "0xB97EF9Ef8734C71904D8002F8b6Bc66Dd9c48a6E",
"to": "0x30DFE0469803BcE76F8F62aC24b18d33D3d6FfE6",
"internalTxType": "DELEGATECALL",
"value": "0",
"gasUsed": "553",
"gasLimit": "419453",
"transactionHash": "0xf6a791920652e87ccc91d2f1b20c1505a94452b88f359acdeb5a6fa8205638c4"
}
],
"blockTimestamp": 1713884373
}
}
}
```
# Rate Limits (/docs/api-reference/webhook-api/rate-limits)
---
title: Rate Limits
description: Rate Limits for the Webhooks API
icon: Clock
---
Rate limiting is managed through a weighted scoring system, known as Compute Units (CUs). Each API request consumes a specified number of CUs, determined by the complexity of the request. This system is designed to accommodate basic requests while efficiently handling more computationally intensive operations.
## Rate Limit Tiers
The maximum CUs (rate-limiting score) for a user depends on their subscription level and is delineated in the following table:
| Subscription Level | Per Minute Limit (CUs) | Per Day Limit (CUs) |
| :----------------- | :--------------------- | :------------------ |
| Unauthenticated | 6,000 | 1,200,000 |
| Free | 8,000 | 2,000,000 |
| Base | 10,000 | 3,750,000 |
| Growth | 14,000 | 11,200,000 |
| Pro | 20,000 | 25,000,000 |
To update your subscription level use the [AvaCloud Portal](https://app.avacloud.io/)
 * **Attempt 1:** We send the message expecting a respose with `200` status code. If we do not receive a `200` status code within **10 seconds**, the attempt is considered failed. During this window, any non-`2xx` responses are ignored.
* **Attempt 2:** Occurs **10 seconds** after the first attempt, with another 10-second timeout and the same rule for ignoring non-`2xx` responses.
* **Retry Queue After Two Failed Attempts**
If both initial attempts fail, the message enters a **retry queue** with progressively longer intervals between attempts. Each retry attempt still has a 10-second timeout, and non-`2xx` responses are ignored during this window.
The retry schedule is as follows:
| Attempt | Interval |
| ------- | -------- |
| 3 | 1 min |
| 4 | 5 min |
| 5 | 10 min |
| 6 | 30 min |
| 7 | 2 hours |
| 8 | 6 hours |
| 9 | 12 hours |
| 10 | 24 hours |
**Total Retry Duration:** Up to approximately 44.8 hours (2,688 minutes) if all retries are exhausted.
**Interval Timing:** Each retry interval starts 10 seconds after the previous attempt is deemed failed. For example, if attempt 2 fails at t=20 seconds, attempt 3 will start at t=80 seconds (20s + 1 minute interval + 10s).
* **Attempt 1:** We send the message expecting a respose with `200` status code. If we do not receive a `200` status code within **10 seconds**, the attempt is considered failed. During this window, any non-`2xx` responses are ignored.
* **Attempt 2:** Occurs **10 seconds** after the first attempt, with another 10-second timeout and the same rule for ignoring non-`2xx` responses.
* **Retry Queue After Two Failed Attempts**
If both initial attempts fail, the message enters a **retry queue** with progressively longer intervals between attempts. Each retry attempt still has a 10-second timeout, and non-`2xx` responses are ignored during this window.
The retry schedule is as follows:
| Attempt | Interval |
| ------- | -------- |
| 3 | 1 min |
| 4 | 5 min |
| 5 | 10 min |
| 6 | 30 min |
| 7 | 2 hours |
| 8 | 6 hours |
| 9 | 12 hours |
| 10 | 24 hours |
**Total Retry Duration:** Up to approximately 44.8 hours (2,688 minutes) if all retries are exhausted.
**Interval Timing:** Each retry interval starts 10 seconds after the previous attempt is deemed failed. For example, if attempt 2 fails at t=20 seconds, attempt 3 will start at t=80 seconds (20s + 1 minute interval + 10s).
 **WebSockets**
* The app connects to the Avalanche RPC API over WSS to receive raw log data.
* It must decode logs, manage connection state, and store data locally.
* On disconnection, it must re-sync via an external Data API or using standard `eth_*` RPC calls (e.g., `eth_getLogs`, `eth_getBlockByNumber`).
**WebSockets**
* The app connects to the Avalanche RPC API over WSS to receive raw log data.
* It must decode logs, manage connection state, and store data locally.
* On disconnection, it must re-sync via an external Data API or using standard `eth_*` RPC calls (e.g., `eth_getLogs`, `eth_getBlockByNumber`).
 Developers generally have two options to fetch this data:
1. **Using RPC methods to index blockchain data on their own**
2. **Leveraging an indexer provider like the Data API**
While both methods aim to achieve the same goal, the Data API offers a more efficient, scalable, and developer-friendly solution. This article delves into why using the Data API is better than relying on traditional RPC (Remote Procedure Call) methods.
### What Are RPC methods and their challenges?
Remote Procedure Call (RPC) methods allow developers to interact directly with blockchain nodes. One of their key advantages is that they are standardized and universally understood by blockchain developers across different platforms. With RPC, you can perform tasks such as querying data, submitting transactions, and interacting with smart contracts. These methods are typically low-level and synchronous, meaning they require a deep understanding of the blockchain’s architecture and specific command structures.
You can refer to the [official documentation](https://ethereum.org/en/developers/docs/apis/json-rpc/) to gain a more comprehensive understanding of the JSON-RPC API.
Here’s an example using the `eth_getBalance` method to retrieve the native balance of a wallet:
```bash
curl --location 'https://api.avax.network/ext/bc/C/rpc' \
--header 'Content-Type: application/json' \
--data '{"method":"eth_getBalance","params":["0x8ae323046633A07FB162043f28Cea39FFc23B50A", "latest"],"id":1,"jsonrpc":"2.0"}'
```
This call returns the following response:
```json
{
"jsonrpc": "2.0",
"id": 1,
"result": "0x284476254bc5d594"
}
```
The balance in this wallet is 2.9016 AVAX. However, despite the wallet holding multiple tokens such as USDC, the `eth_getBalance` method only returns the AVAX amount and it does so in Wei and in hexadecimal format. This is not particularly human-readable, adding to the challenge for developers who need to manually convert the balance to a more understandable format.
#### No direct RPC methods to retrieve token balances
Despite their utility, RPC methods come with significant limitations when it comes to retrieving detailed token and transaction data. Currently, RPC methods do not provide direct solutions for the following:
* **Listing all tokens held by a wallet**: There is no RPC method that provides a complete list of ERC-20 tokens owned by a wallet.
* **Retrieving all transactions for a wallet**: : There is no direct method for fetching all transactions associated with a wallet.
* **Getting ERC-20/721/1155 token balances**: The `eth_getBalance` method only returns the balance of the wallet’s native token (such as AVAX on Avalanche) and cannot be used to retrieve ERC-20/721/1155 token balances.
To achieve these tasks using RPC methods alone, you would need to:
* **Query every block for transaction logs**: Scan the entire blockchain, which is resource-intensive and impractical.
* **Parse transaction logs**: Identify and extract ERC-20 token transfer events from each transaction.
* **Aggregate data**: Collect and process this data to compute balances and transaction histories.
#### Manual blockchain indexing is difficult and costly
Using RPC methods to fetch token balances involves an arduous process:
1. You must connect to a node and subscribe to new block events.
2. For each block, parse every transaction to identify ERC-20 token transfers involving the user's address.
3. Extract contract addresses and other relevant data from the parsed transactions.
4. Compute balances by processing transfer events.
5. Store the processed data in a database for quick retrieval and aggregation.
#### Why this is difficult:
* **Resource-Intensive**: Requires significant computational power and storage to process and store blockchain data.
* **Time-consuming**: Processing millions of blocks and transactions can take an enormous amount of time.
* **Complexity**: Handling edge cases like contract upgrades, proxy contracts, and non-standard implementations adds layers of complexity.
* **Maintenance**: Keeping the indexed data up-to-date necessitates continuous synchronization with new blocks being added to the blockchain.
* **High Costs**: Associated with servers, databases, and network bandwidth.
### The Data API Advantage
The Data API provides a streamlined, efficient, and scalable solution for fetching token balances. Here's why it's the best choice:
With a single API call, you can retrieve all ERC-20 token balances for a user's address:
```javascript
avalancheSDK.data.evm.balances.listErc20Balances({
address: "0xYourAddress",
});
```
Sample Response:
```json
{
"erc20TokenBalances": [
{
"ercType": "ERC-20",
"chainId": "43114",
"address": "0xB97EF9Ef8734C71904D8002F8b6Bc66Dd9c48a6E",
"name": "USD Coin",
"symbol": "USDC",
"decimals": 6,
"price": {
"value": 1.0,
"currencyCode": "usd"
},
"balance": "15000000",
"balanceValue": {
"currencyCode": "usd",
"value": 9.6
},
"logoUri": "https://images.ctfassets.net/gcj8jwzm6086/e50058c1-2296-4e7e-91ea-83eb03db95ee/8db2a492ce64564c96de87c05a3756fd/43114-0xB97EF9Ef8734C71904D8002F8b6Bc66Dd9c48a6E.png"
}
// Additional tokens...
]
}
```
As you can see with a single call the API returns an array of token balances for all the wallet tokens, including:
* **Token metadata**: Contract address, name, symbol, decimals.
* **Balance information**: Token balance in both hexadecimal and decimal formats, Also retrieves balances of native assets like ETH or AVAX.
* **Price data**: Current value in USD or other supported currencies, saving you the effort of integrating another API.
* **Visual assets**: Token logo URI for better user interface integration.
If you’re building a wallet, DeFi app, or any application that requires displaying balances, transaction history, or smart contract interactions, relying solely on RPC methods can be challenging. Just as there’s no direct RPC method to retrieve token balances, there’s also no simple way to fetch all transactions associated with a wallet, especially for ERC-20, ERC-721, or ERC-1155 token transfers.
However, by using the Data API, you can retrieve all token transfers for a given wallet **with a single API call**, making the process much more efficient. This approach simplifies tracking and displaying wallet activity without the need to manually scan the entire blockchain.
Below are two examples that demonstrate the power of the Data API: in the first, it returns all ERC transfers, including ERC-20, ERC-721, and ERC-1155 tokens, and in the second, it shows all internal transactions, such as when one contract interacts with another.
Developers generally have two options to fetch this data:
1. **Using RPC methods to index blockchain data on their own**
2. **Leveraging an indexer provider like the Data API**
While both methods aim to achieve the same goal, the Data API offers a more efficient, scalable, and developer-friendly solution. This article delves into why using the Data API is better than relying on traditional RPC (Remote Procedure Call) methods.
### What Are RPC methods and their challenges?
Remote Procedure Call (RPC) methods allow developers to interact directly with blockchain nodes. One of their key advantages is that they are standardized and universally understood by blockchain developers across different platforms. With RPC, you can perform tasks such as querying data, submitting transactions, and interacting with smart contracts. These methods are typically low-level and synchronous, meaning they require a deep understanding of the blockchain’s architecture and specific command structures.
You can refer to the [official documentation](https://ethereum.org/en/developers/docs/apis/json-rpc/) to gain a more comprehensive understanding of the JSON-RPC API.
Here’s an example using the `eth_getBalance` method to retrieve the native balance of a wallet:
```bash
curl --location 'https://api.avax.network/ext/bc/C/rpc' \
--header 'Content-Type: application/json' \
--data '{"method":"eth_getBalance","params":["0x8ae323046633A07FB162043f28Cea39FFc23B50A", "latest"],"id":1,"jsonrpc":"2.0"}'
```
This call returns the following response:
```json
{
"jsonrpc": "2.0",
"id": 1,
"result": "0x284476254bc5d594"
}
```
The balance in this wallet is 2.9016 AVAX. However, despite the wallet holding multiple tokens such as USDC, the `eth_getBalance` method only returns the AVAX amount and it does so in Wei and in hexadecimal format. This is not particularly human-readable, adding to the challenge for developers who need to manually convert the balance to a more understandable format.
#### No direct RPC methods to retrieve token balances
Despite their utility, RPC methods come with significant limitations when it comes to retrieving detailed token and transaction data. Currently, RPC methods do not provide direct solutions for the following:
* **Listing all tokens held by a wallet**: There is no RPC method that provides a complete list of ERC-20 tokens owned by a wallet.
* **Retrieving all transactions for a wallet**: : There is no direct method for fetching all transactions associated with a wallet.
* **Getting ERC-20/721/1155 token balances**: The `eth_getBalance` method only returns the balance of the wallet’s native token (such as AVAX on Avalanche) and cannot be used to retrieve ERC-20/721/1155 token balances.
To achieve these tasks using RPC methods alone, you would need to:
* **Query every block for transaction logs**: Scan the entire blockchain, which is resource-intensive and impractical.
* **Parse transaction logs**: Identify and extract ERC-20 token transfer events from each transaction.
* **Aggregate data**: Collect and process this data to compute balances and transaction histories.
#### Manual blockchain indexing is difficult and costly
Using RPC methods to fetch token balances involves an arduous process:
1. You must connect to a node and subscribe to new block events.
2. For each block, parse every transaction to identify ERC-20 token transfers involving the user's address.
3. Extract contract addresses and other relevant data from the parsed transactions.
4. Compute balances by processing transfer events.
5. Store the processed data in a database for quick retrieval and aggregation.
#### Why this is difficult:
* **Resource-Intensive**: Requires significant computational power and storage to process and store blockchain data.
* **Time-consuming**: Processing millions of blocks and transactions can take an enormous amount of time.
* **Complexity**: Handling edge cases like contract upgrades, proxy contracts, and non-standard implementations adds layers of complexity.
* **Maintenance**: Keeping the indexed data up-to-date necessitates continuous synchronization with new blocks being added to the blockchain.
* **High Costs**: Associated with servers, databases, and network bandwidth.
### The Data API Advantage
The Data API provides a streamlined, efficient, and scalable solution for fetching token balances. Here's why it's the best choice:
With a single API call, you can retrieve all ERC-20 token balances for a user's address:
```javascript
avalancheSDK.data.evm.balances.listErc20Balances({
address: "0xYourAddress",
});
```
Sample Response:
```json
{
"erc20TokenBalances": [
{
"ercType": "ERC-20",
"chainId": "43114",
"address": "0xB97EF9Ef8734C71904D8002F8b6Bc66Dd9c48a6E",
"name": "USD Coin",
"symbol": "USDC",
"decimals": 6,
"price": {
"value": 1.0,
"currencyCode": "usd"
},
"balance": "15000000",
"balanceValue": {
"currencyCode": "usd",
"value": 9.6
},
"logoUri": "https://images.ctfassets.net/gcj8jwzm6086/e50058c1-2296-4e7e-91ea-83eb03db95ee/8db2a492ce64564c96de87c05a3756fd/43114-0xB97EF9Ef8734C71904D8002F8b6Bc66Dd9c48a6E.png"
}
// Additional tokens...
]
}
```
As you can see with a single call the API returns an array of token balances for all the wallet tokens, including:
* **Token metadata**: Contract address, name, symbol, decimals.
* **Balance information**: Token balance in both hexadecimal and decimal formats, Also retrieves balances of native assets like ETH or AVAX.
* **Price data**: Current value in USD or other supported currencies, saving you the effort of integrating another API.
* **Visual assets**: Token logo URI for better user interface integration.
If you’re building a wallet, DeFi app, or any application that requires displaying balances, transaction history, or smart contract interactions, relying solely on RPC methods can be challenging. Just as there’s no direct RPC method to retrieve token balances, there’s also no simple way to fetch all transactions associated with a wallet, especially for ERC-20, ERC-721, or ERC-1155 token transfers.
However, by using the Data API, you can retrieve all token transfers for a given wallet **with a single API call**, making the process much more efficient. This approach simplifies tracking and displaying wallet activity without the need to manually scan the entire blockchain.
Below are two examples that demonstrate the power of the Data API: in the first, it returns all ERC transfers, including ERC-20, ERC-721, and ERC-1155 tokens, and in the second, it shows all internal transactions, such as when one contract interacts with another.
 The [Data API](/docs/api-reference/data-api), along with the [Metrics API](/docs/api-reference/metrics-api), are the engines behind the [Avalanche Explorer](https://subnets.avax.network/stats/) and the [Core wallet](https://core.app/en/). They are used to display transactions, logs, balances, NFTs, and more. The data and visualizations presented are all powered by these APIs, offering real-time and historical insights that are essential for building sophisticated, data-driven blockchain products.
### Features
* **Extensive L1 Support**: Gain access to data from over 100+ L1s across both mainnet and testnet. If an L1 is listed on the [Avalanche Explorer](https://subnets.avax.network/), you can query its data using the Data API.
* **Transactions and UTXOs**: easily retrieve details related to transactions, UTXOs, and token transfers from Avalanche EVMs, Ethereum, and Avalanche's Primary Network - the P-Chain, X-Chain and C-Chain.
* **Blocks**: retrieve latest blocks and block details
* **Balances**: fetch balances of native, ERC-20, ERC-721, and ERC-1155 tokens along with relevant metadata.
* **Tokens**: augment your user experience with asset details.
* **Staking**: get staking related data for active and historical validations.
### Supported Chains
Avalanche’s architecture supports a diverse ecosystem of interconnected L1 blockchains, each operating independently while retaining the ability to seamlessly communicate with other L1s within the network. Central to this architecture is the Primary Network—Avalanche’s foundational network layer, which all validators are required to validate prior to [ACP-77](/docs/acps/77-reinventing-subnets). The Primary Network runs three essential blockchains:
* The Contract Chain (C-Chain)
* The Platform Chain (P-Chain)
* The Exchange Chain (X-Chain)
However, with the implementation of [ACP-77](/docs/acps/77-reinventing-subnets), this requirement will change. Subnet Validators will be able to operate independently of the Primary Network, allowing for more flexible and affordable Subnet creation and management.
The **Data API** supports a wide range of L1 blockchains (**over 100**) across both **mainnet** and **testnet**, including popular ones like Beam, DFK, Lamina1, Dexalot, Shrapnel, and Pulsar. In fact, every L1 you see on the [Avalanche Explorer](https://explorer.avax.network/) can be queried through the Data API. This list is continually expanding as we keep adding more L1s. For a full list of supported chains, visit [List chains](/docs/api-reference/data-api/evm-chains/list-chains).
#### The Contract Chain (C-Chain)
The C-Chain is an implementation of the Ethereum Virtual Machine (EVM). The primary network endpoints only provide information related to C-Chain atomic memory balances and import/export transactions. For additional data, please reference the [EVM APIs](/docs/rpcs/c-chain/rpc).
#### The Platform Chain (P-Chain)
The P-Chain is responsible for all validator and L1-level operations. The P-Chain supports the creation of new blockchains and L1s, the addition of validators to L1s, staking operations, and other platform-level operations.
#### The Exchange Chain (X-Chain)
The X-Chain is responsible for operations on digital smart assets known as Avalanche Native Tokens. A smart asset is a representation of a real-world resource (for example, equity, or a bond) with sets of rules that govern its behavior, like "can’t be traded until tomorrow." The X-Chain supports the creation and trade of Avalanche Native Tokens.
| Feature | Description |
| :--------------- | :--------------------------------------------------------------------------------------------------------------------------------------------------------------------------------------------------------------------------------------------------------------------------------------------------------------------------------------------------------------------------------------- |
| **Chains** | Utilize this endpoint to retrieve the Primary Network chains that an address has transaction history associated with. |
| **Blocks** | Blocks are the container for transactions executed on the Primary Network. Retrieve the latest blocks, a specific block by height or hash, or a list of blocks proposed by a specified NodeID on Primary Network chains. |
| **Vertices** | Prior to Avalanche Cortina (v1.10.0), the X-Chain functioned as a DAG with vertices rather than blocks. These endpoints allow developers to retrieve historical data related to that period of chain history. Retrieve the latest vertices, a specific vertex, or a list of vertices at a specific height from the X-Chain. |
| **Transactions** | Transactions are a user's primary form of interaction with a chain and provide details around their on-chain activity, including staking-related behavior. Retrieve a list of the latest transactions, a specific transaction, a list of active staking transactions for a specified address, or a list of transactions associated with a provided asset id from Primary Network chains. |
| **UTXOs** | UTXOs are fundamental elements that denote the funds a user has available. Get a list of UTXOs for provided addresses from the Primary Network chains. |
| **Balances** | User balances are an essential function of the blockchain. Retrieve balances related to the X and P-Chains, as well as atomic memory balances for the C-Chain. |
| **Rewards** | Staking is the process where users lock up their tokens to support a blockchain network and, in return, receive rewards. It is an essential part of proof-of-stake (PoS) consensus mechanisms used by many blockchain networks, including Avalanche. Using the Data API, you can easily access pending and historical rewards associated with a set of addresses. |
| **Assets** | Get asset details corresponding to the given asset id on the X-Chain. |
#### EVM
The C-Chain is an instance of the Coreth Virtual Machine, and many Avalanche L1s are instances of the *Subnet-EVM*, which is a Virtual Machine (VM) that defines the L1 Contract Chains. *Subnet-EVM* is a simplified version of *Coreth VM* (C-Chain).
| Feature | Description |
| :--------------- | :------------------------------------------------------------------------------------------------------------------------------------------------------------------------------------------------------------------------------------------------------------------------------------------------------------ |
| **Chains** | There are a number of chains supported by the Data API. These endpoints can be used to understand which chains are included/indexed as part of the API and retrieve information related to a specific chain. |
| **Blocks** | Blocks are the container for transactions executed within the EVM. Retrieve the latest blocks or a specific block by height or hash. |
| **Transactions** | Transactions are a user's primary form of interaction with a chain and provide details around their on-chain activity. These endpoints can be used to retrieve information related to specific transaction details, internal transactions, contract deployments, specific token standard transfers, and more! |
| **Balances** | User balances are an essential function of the blockchain. Easily retrieve native token, collectible, and fungible token balances related to an EVM chain with these endpoints. |
#### Operations
The Operations API allows users to easily access their on-chain history by creating transaction exports returned in a CSV format. This API supports EVMs as well as non-EVM Primary Network chains.
# Rate Limits (/docs/api-reference/data-api/rate-limits)
---
title: Rate Limits
description: Rate Limits for the Data API
icon: Clock
---
Rate limiting is managed through a weighted scoring system, known as Compute Units (CUs). Each API request consumes a specified number of CUs, determined by the complexity of the request. This system is designed to accommodate basic requests while efficiently handling more computationally intensive operations.
## Rate Limit Tiers
The maximum CUs (rate-limiting score) for a user depends on their subscription level and is delineated in the following table:
| Subscription Level | Per Minute Limit (CUs) | Per Day Limit (CUs) |
| :----------------- | :--------------------- | :------------------ |
| Unauthenticated | 6,000 | 1,200,000 |
| Free | 8,000 | 2,000,000 |
| Base | 10,000 | 3,750,000 |
| Growth | 14,000 | 11,200,000 |
| Pro | 20,000 | 25,000,000 |
To update your subscription level use the [AvaCloud Portal](https://app.avacloud.io/)
The [Data API](/docs/api-reference/data-api), along with the [Metrics API](/docs/api-reference/metrics-api), are the engines behind the [Avalanche Explorer](https://subnets.avax.network/stats/) and the [Core wallet](https://core.app/en/). They are used to display transactions, logs, balances, NFTs, and more. The data and visualizations presented are all powered by these APIs, offering real-time and historical insights that are essential for building sophisticated, data-driven blockchain products.
### Features
* **Extensive L1 Support**: Gain access to data from over 100+ L1s across both mainnet and testnet. If an L1 is listed on the [Avalanche Explorer](https://subnets.avax.network/), you can query its data using the Data API.
* **Transactions and UTXOs**: easily retrieve details related to transactions, UTXOs, and token transfers from Avalanche EVMs, Ethereum, and Avalanche's Primary Network - the P-Chain, X-Chain and C-Chain.
* **Blocks**: retrieve latest blocks and block details
* **Balances**: fetch balances of native, ERC-20, ERC-721, and ERC-1155 tokens along with relevant metadata.
* **Tokens**: augment your user experience with asset details.
* **Staking**: get staking related data for active and historical validations.
### Supported Chains
Avalanche’s architecture supports a diverse ecosystem of interconnected L1 blockchains, each operating independently while retaining the ability to seamlessly communicate with other L1s within the network. Central to this architecture is the Primary Network—Avalanche’s foundational network layer, which all validators are required to validate prior to [ACP-77](/docs/acps/77-reinventing-subnets). The Primary Network runs three essential blockchains:
* The Contract Chain (C-Chain)
* The Platform Chain (P-Chain)
* The Exchange Chain (X-Chain)
However, with the implementation of [ACP-77](/docs/acps/77-reinventing-subnets), this requirement will change. Subnet Validators will be able to operate independently of the Primary Network, allowing for more flexible and affordable Subnet creation and management.
The **Data API** supports a wide range of L1 blockchains (**over 100**) across both **mainnet** and **testnet**, including popular ones like Beam, DFK, Lamina1, Dexalot, Shrapnel, and Pulsar. In fact, every L1 you see on the [Avalanche Explorer](https://explorer.avax.network/) can be queried through the Data API. This list is continually expanding as we keep adding more L1s. For a full list of supported chains, visit [List chains](/docs/api-reference/data-api/evm-chains/list-chains).
#### The Contract Chain (C-Chain)
The C-Chain is an implementation of the Ethereum Virtual Machine (EVM). The primary network endpoints only provide information related to C-Chain atomic memory balances and import/export transactions. For additional data, please reference the [EVM APIs](/docs/rpcs/c-chain/rpc).
#### The Platform Chain (P-Chain)
The P-Chain is responsible for all validator and L1-level operations. The P-Chain supports the creation of new blockchains and L1s, the addition of validators to L1s, staking operations, and other platform-level operations.
#### The Exchange Chain (X-Chain)
The X-Chain is responsible for operations on digital smart assets known as Avalanche Native Tokens. A smart asset is a representation of a real-world resource (for example, equity, or a bond) with sets of rules that govern its behavior, like "can’t be traded until tomorrow." The X-Chain supports the creation and trade of Avalanche Native Tokens.
| Feature | Description |
| :--------------- | :--------------------------------------------------------------------------------------------------------------------------------------------------------------------------------------------------------------------------------------------------------------------------------------------------------------------------------------------------------------------------------------- |
| **Chains** | Utilize this endpoint to retrieve the Primary Network chains that an address has transaction history associated with. |
| **Blocks** | Blocks are the container for transactions executed on the Primary Network. Retrieve the latest blocks, a specific block by height or hash, or a list of blocks proposed by a specified NodeID on Primary Network chains. |
| **Vertices** | Prior to Avalanche Cortina (v1.10.0), the X-Chain functioned as a DAG with vertices rather than blocks. These endpoints allow developers to retrieve historical data related to that period of chain history. Retrieve the latest vertices, a specific vertex, or a list of vertices at a specific height from the X-Chain. |
| **Transactions** | Transactions are a user's primary form of interaction with a chain and provide details around their on-chain activity, including staking-related behavior. Retrieve a list of the latest transactions, a specific transaction, a list of active staking transactions for a specified address, or a list of transactions associated with a provided asset id from Primary Network chains. |
| **UTXOs** | UTXOs are fundamental elements that denote the funds a user has available. Get a list of UTXOs for provided addresses from the Primary Network chains. |
| **Balances** | User balances are an essential function of the blockchain. Retrieve balances related to the X and P-Chains, as well as atomic memory balances for the C-Chain. |
| **Rewards** | Staking is the process where users lock up their tokens to support a blockchain network and, in return, receive rewards. It is an essential part of proof-of-stake (PoS) consensus mechanisms used by many blockchain networks, including Avalanche. Using the Data API, you can easily access pending and historical rewards associated with a set of addresses. |
| **Assets** | Get asset details corresponding to the given asset id on the X-Chain. |
#### EVM
The C-Chain is an instance of the Coreth Virtual Machine, and many Avalanche L1s are instances of the *Subnet-EVM*, which is a Virtual Machine (VM) that defines the L1 Contract Chains. *Subnet-EVM* is a simplified version of *Coreth VM* (C-Chain).
| Feature | Description |
| :--------------- | :------------------------------------------------------------------------------------------------------------------------------------------------------------------------------------------------------------------------------------------------------------------------------------------------------------ |
| **Chains** | There are a number of chains supported by the Data API. These endpoints can be used to understand which chains are included/indexed as part of the API and retrieve information related to a specific chain. |
| **Blocks** | Blocks are the container for transactions executed within the EVM. Retrieve the latest blocks or a specific block by height or hash. |
| **Transactions** | Transactions are a user's primary form of interaction with a chain and provide details around their on-chain activity. These endpoints can be used to retrieve information related to specific transaction details, internal transactions, contract deployments, specific token standard transfers, and more! |
| **Balances** | User balances are an essential function of the blockchain. Easily retrieve native token, collectible, and fungible token balances related to an EVM chain with these endpoints. |
#### Operations
The Operations API allows users to easily access their on-chain history by creating transaction exports returned in a CSV format. This API supports EVMs as well as non-EVM Primary Network chains.
# Rate Limits (/docs/api-reference/data-api/rate-limits)
---
title: Rate Limits
description: Rate Limits for the Data API
icon: Clock
---
Rate limiting is managed through a weighted scoring system, known as Compute Units (CUs). Each API request consumes a specified number of CUs, determined by the complexity of the request. This system is designed to accommodate basic requests while efficiently handling more computationally intensive operations.
## Rate Limit Tiers
The maximum CUs (rate-limiting score) for a user depends on their subscription level and is delineated in the following table:
| Subscription Level | Per Minute Limit (CUs) | Per Day Limit (CUs) |
| :----------------- | :--------------------- | :------------------ |
| Unauthenticated | 6,000 | 1,200,000 |
| Free | 8,000 | 2,000,000 |
| Base | 10,000 | 3,750,000 |
| Growth | 14,000 | 11,200,000 |
| Pro | 20,000 | 25,000,000 |
To update your subscription level use the [AvaCloud Portal](https://app.avacloud.io/)